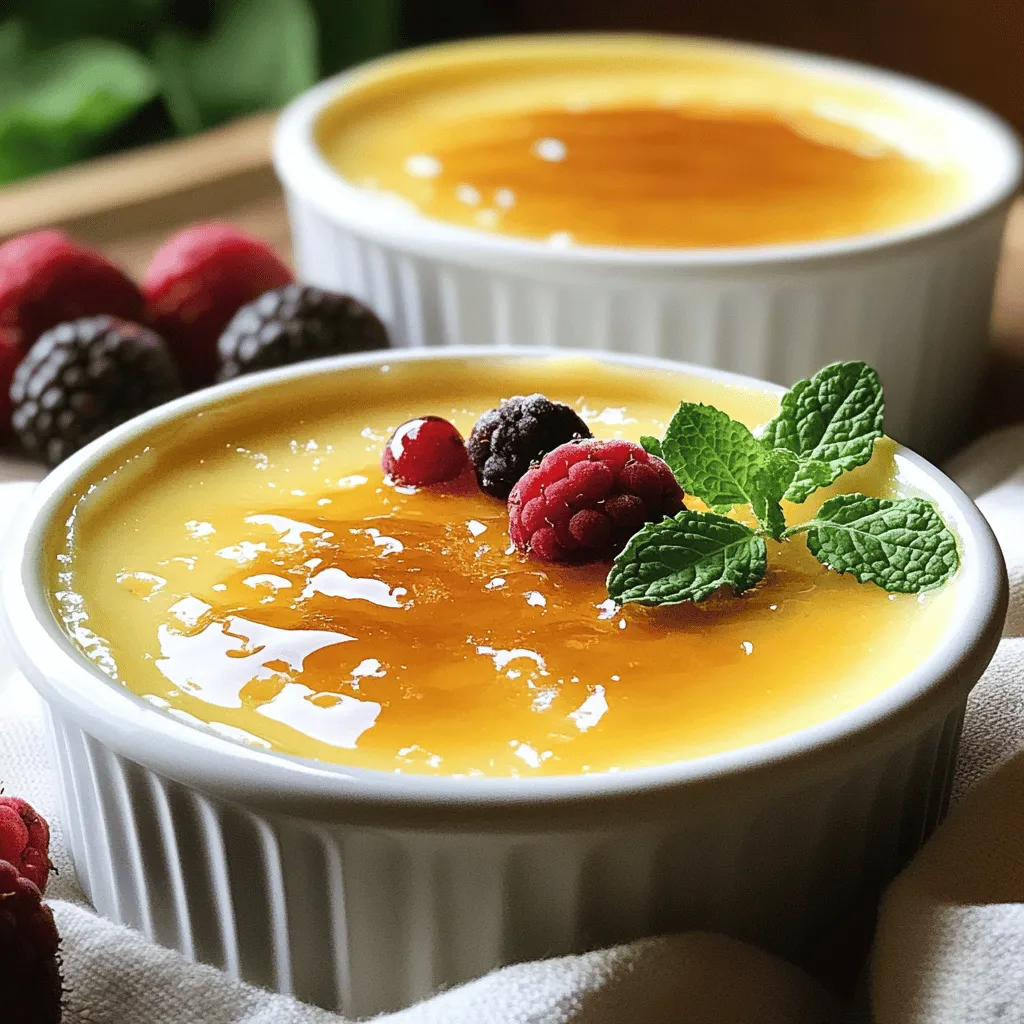
Are you ready to impress your friends with a classic dessert? Vanilla Bean Crème Brûlée is a sweet treat that’s creamy, rich, and has a crunchy top. In this blog post, I will guide you through each step to make this delightful dish. From picking quality ingredients to mastering the perfect caramel crust, you’ll learn how to create a restaurant-style dessert right at home. Let’s dive into this delicious recipe!
Ingredients
Complete List of Ingredients
– 2 cups heavy cream
– 1 vanilla bean (or 2 teaspoons vanilla extract)
– 5 large egg yolks
– 1/2 cup granulated sugar (plus extra for topping)
– A pinch of salt
– Fresh berries or mint for garnish (optional)
Ingredient Substitutions
If you can’t find a vanilla bean, you can use vanilla extract. Use two teaspoons to match the flavor. You can swap heavy cream with half-and-half for a lighter version.
You can also use coconut cream for a dairy-free option. However, this may change the taste.
Importance of Quality Ingredients
Using good ingredients makes a big difference in taste. Fresh heavy cream adds richness. A real vanilla bean gives a deep, sweet flavor. It has tiny seeds that create a lovely look in your dessert.
Low-quality cream or artificial vanilla can ruin this dish. When you invest in quality, you get a dessert that wows. Every bite should feel like a special treat. This dessert is simple but can impress anyone.
Step-by-Step Instructions
Preparing the Vanilla Bean Mixture
Start by preheating your oven to 325°F (160°C). In a medium saucepan, pour in 2 cups of heavy cream. Now, take your vanilla bean, slice it open, and scrape the seeds into the cream. If you don’t have a vanilla bean, you can use 2 teaspoons of vanilla extract instead. Heat the cream gently until it’s just below boiling. Stir it often to mix the flavors well. Once it’s hot, remove it from the heat and set it aside.
Whisking the Egg Yolks
In a mixing bowl, add 5 large egg yolks, 1/2 cup of granulated sugar, and a pinch of salt. Whisk these together until the mixture turns pale and a bit thick. This step is crucial because it helps create a rich texture in your crème brûlée. After whisking, slowly pour the warm cream mixture into the egg yolk mix. Make sure to whisk continuously as you pour. This step keeps the yolks from cooking too fast.
Baking in a Water Bath
Next, strain your mixture through a fine-mesh sieve into a large measuring cup or bowl. This helps remove any solids and gives you a silky custard. Now, carefully pour the custard into ramekins, filling them about three-quarters full. Place the ramekins in a baking dish. Fill the dish with hot water until it reaches halfway up the sides of the ramekins. This water bath helps cook the custard evenly. Bake in the oven for about 30-35 minutes. The edges should be set, but the centers should still jiggle a little. After baking, let them cool for 30 minutes at room temperature. Then, refrigerate for at least 2 hours or overnight to set.
Tips & Tricks
Achieving the Perfect Texture
To get the best texture, focus on the custard. Keep your cream warm but not boiling. When you mix it with the egg yolks, do it slowly. This step helps prevent the yolks from cooking too fast. Strain your mixture to remove lumps. This ensures a smooth and silky dessert.
How to Caramelize Sugar Properly
Caramelizing sugar gives the crème brûlée its signature crust. Start by sprinkling a thin layer of sugar on top. Use a kitchen torch for even heat. Move the flame in small circles over the sugar until it melts. If you don’t have a torch, broil it in the oven. Watch closely, so it does not burn. The goal is a golden brown color.
Common Mistakes to Avoid
Many people overbake crème brûlée. Check for slight jiggle in the center. This means it’s not fully set yet. Another mistake is adding too much sugar on top. A thin layer works best for caramelizing. Lastly, don’t skip straining the mixture. It helps remove any curdled bits, giving you a perfect dessert.

Variations
Flavor Enhancements
You can add new flavors to your crème brûlée. For a chocolate twist, stir in cocoa powder. Use 2 tablespoons of cocoa with the cream. This gives a rich taste. Citrus flavors also work well. Add lemon or orange zest to the cream for a refreshing touch. Start with 1 teaspoon of zest. This brightens the dish and adds a fun zing.
Dairy-Free or Alternative Ingredient Options
Want a dairy-free version? You can use coconut cream instead of heavy cream. This makes it rich and creamy. Almond milk or oat milk can also work. Just remember, they have less fat. You may need to adjust the sugar to balance the taste. Use 1/4 cup of sugar with almond milk for sweetness.
Serving Suggestions and Pairings
Crème brûlée is great on its own, but you can make it even better. Fresh berries like strawberries or raspberries add color and flavor. Mint leaves give a nice pop too. Serve it with a cup of coffee or herbal tea for a cozy touch. If you want a snack, pair it with a buttery cookie. This adds a fun crunch to each bite.
Storage Info
How to Store Leftovers
After enjoying your Vanilla Bean Crème Brûlée, you may have some left. To keep it fresh, cover each ramekin with plastic wrap. This helps prevent drying and keeps the flavor strong. Store them in the fridge for up to three days. Avoid adding sugar on top until you’re ready to serve. This ensures the perfect crunchy layer.
Freezing Crème Brûlée
Freezing crème brûlée is not the best choice. The texture can change when thawed. If you need to freeze it, do so before adding the sugar topping. Wrap each ramekin tightly in plastic wrap and then aluminum foil. You can freeze them for up to two months. When ready to eat, thaw them in the fridge overnight.
Best Practices for Reheating
To reheat your crème brûlée, take it out of the fridge. Let it sit at room temperature for about 30 minutes. This helps the custard warm up evenly. Then, sprinkle sugar on top and caramelize it as usual with a kitchen torch or broiler. Avoid using the microwave; it can ruin the smooth texture. Enjoy your delicious dessert!
FAQs
Can I make Vanilla Bean Crème Brûlée in advance?
Yes, you can! You can make the custard up to two days ahead. Just follow the recipe until you chill the ramekins. Keep them in the fridge covered with plastic wrap. This way, the flavors deepen, and they are ready when you want to serve them.
What can I use if I don’t have a kitchen torch?
If you don’t have a kitchen torch, use your oven’s broiler. Just sprinkle sugar on top of the custard. Place it under the broiler for about one to two minutes. Watch closely to avoid burning the sugar. This method will give you that nice, crispy top.
How long will the custard last in the fridge?
The custard will stay fresh for about three to four days in the fridge. Make sure to cover the ramekins with plastic wrap to keep them from absorbing smells. If you see any liquid on top, just gently dab it with a paper towel before serving.
Can I use vanilla extract instead of a vanilla bean?
Yes, you can! If you use vanilla extract, add two teaspoons to the cream mixture. It will still taste great, but the vanilla bean adds a special touch. The tiny seeds give a lovely look and extra flavor.
Can I flavor the crème brûlée with something other than vanilla?
Of course! You can add flavors like citrus zest, chocolate, or coffee. Just mix them in while heating the cream. Experimenting with flavors makes it fun and unique.
Is crème brûlée hard to make?
Not at all! It may seem fancy, but it’s quite simple. Just follow the steps carefully. Once you know how to make it, you can impress anyone with this classic dessert!
What should I do if my custard doesn’t set?
If your custard doesn’t set, it may need more time in the oven. Remember, the center should be slightly jiggly when you take it out. If it’s runny after chilling, you might need to bake it longer next time.
Can I double the recipe?
Yes! You can double the recipe easily. Just make sure you have enough ramekins. You may need to adjust the baking time. Keep an eye on them while they cook.
What is the best way to serve crème brûlée?
Serve crème brûlée in the ramekins. Add a few fresh berries or mint for color. This makes the dish look beautiful and adds a fresh taste. Your guests will love it!
This blog post covered how to make perfect vanilla bean crème brûlée. We discussed essential ingredients, their importance, and substitutions. I shared step-by-step directions and tips to avoid common mistakes. You learned about variations to suit your taste and how to store leftovers.
Remember, great desserts start with quality ingredients. Enjoy making this sweet treat, and don’t hesitate to experiment! Let your creativity shine in your kitchen.