If you're craving a dessert that feels fancy but is easy to make, Vanilla Bean Crème Brûlée is perfect for you. I’ll guide you through the creamy goodness of this treat, from the best ingredients to common mistakes. You'll find tips to achieve the perfect texture and learn about fun variations. Get ready to impress your friends and family with your own homemade crème brûlée delight!
Why I Love This Recipe
- Indulgent Flavor: The combination of rich heavy cream and vanilla creates a luxurious custard that melts in your mouth.
- Simple Technique: With just a few steps, you can master the art of making crème brûlée and impress your guests.
- Customizable Toppings: You can easily add your favorite fruits or flavored sugar to create variations that suit your taste.
- Perfect for Any Occasion: Whether it's a fancy dinner or a casual gathering, this dessert adds a touch of elegance to any meal.
Ingredients
Required Ingredients for Vanilla Bean Crème Brûlée
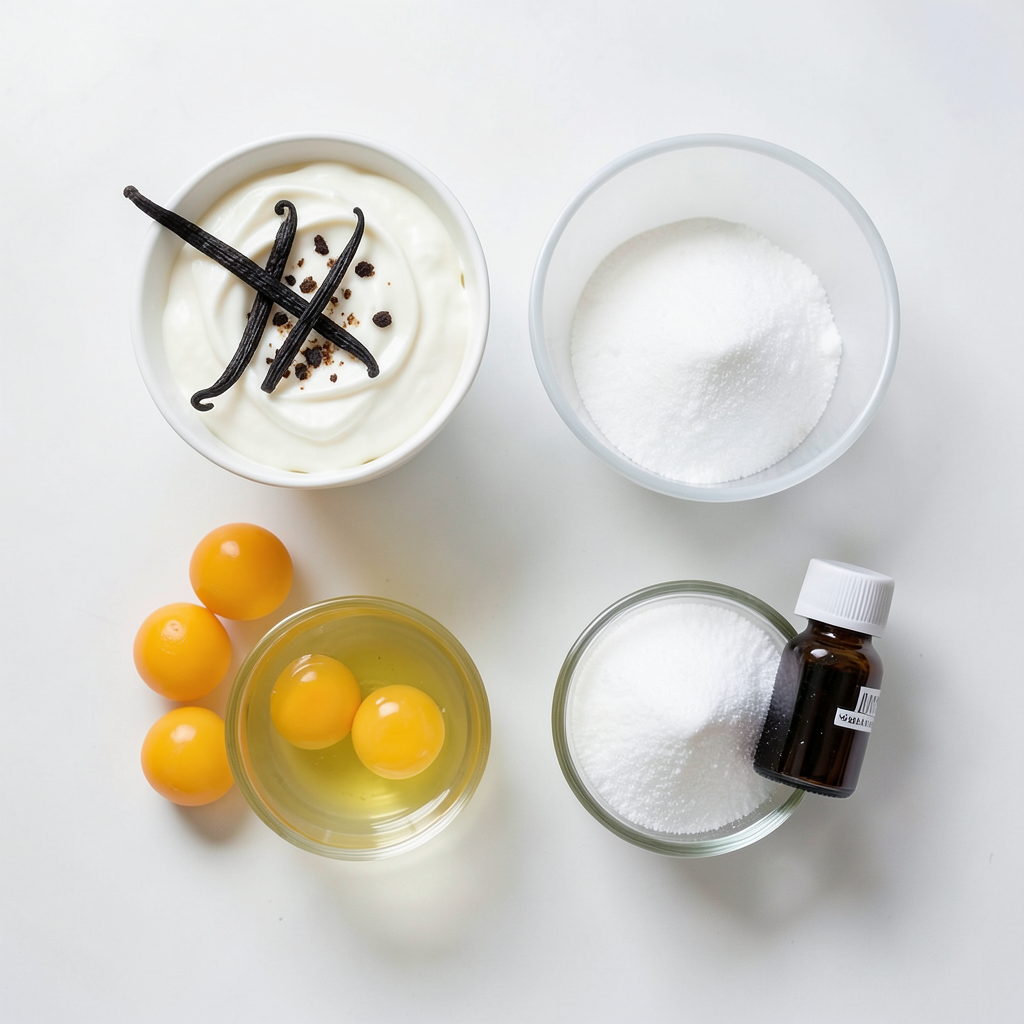
For a rich and creamy vanilla bean crème brûlée, you need:
- 2 cups heavy cream
- 1 vanilla bean, split and seeds scraped
- 5 large egg yolks
- 1/2 cup granulated sugar, plus extra for caramelizing
- 1 teaspoon pure vanilla extract
- Pinch of salt
These ingredients create a smooth and silky custard. The heavy cream gives it a rich texture, while the vanilla bean adds deep flavor. The egg yolks help set the custard, making it creamy.
Optional Garnishes and Serving Suggestions
You can enhance your crème brûlée with simple garnishes. Consider adding:
- Fresh berries (like raspberries or strawberries)
- Mint leaves
- A light dusting of cocoa powder
Serve the crème brûlée in elegant ramekins. The added color from berries makes it look more festive. Mint leaves provide a fresh touch.
Tips for Choosing Quality Ingredients
Choosing the right ingredients makes a big difference. Here are some tips:
- Heavy cream: Look for high-fat content for the best texture.
- Vanilla bean: Choose plump, fragrant beans for rich flavor.
- Eggs: Use fresh, high-quality eggs for the best custard.
Always check expiration dates on dairy products. Fresh ingredients lead to the best results in your crème brûlée.
Step-by-Step Instructions
Preparing the Vanilla Infused Cream
Start by preheating your oven to 325°F (160°C). In a medium saucepan, combine 2 cups of heavy cream, 1 split vanilla bean, and its seeds. Heat the mixture over medium heat until it just starts to simmer. Remove it from the heat and let it steep for 15 minutes. This step allows the cream to absorb all the rich vanilla flavor.
Mixing the Egg Yolks and Sugars
While the cream infuses, grab a mixing bowl. Whisk together 5 large egg yolks, 1/2 cup granulated sugar, 1 teaspoon of pure vanilla extract, and a pinch of salt. Mix until everything is well combined and slightly frothy. This will create a lovely base for your custard.
Baking the Crème Brûlée in a Water Bath
After 15 minutes, remove the vanilla bean from the cream. Gradually pour the warm cream into the egg mixture. Whisk continuously to avoid curdling. Strain this mixture through a fine sieve into another bowl to remove any lumps. Next, divide this custard evenly among six ramekins. Place the ramekins in a baking dish. Pour hot water into the baking dish until it reaches halfway up the sides of the ramekins. This water bath helps cook the custard evenly. Bake for 25-30 minutes. The edges should set, but the center should still jiggle. Once done, take the ramekins out and let them cool. Chill them in the fridge for at least 4 hours or overnight. When ready to serve, sprinkle a thin layer of sugar on top. Use a kitchen torch to caramelize the sugar until it's golden and bubbly. Let it cool for a minute, and then enjoy your delightful treat!
Tips & Tricks
Achieving the Perfect Texture and Flavor
To make crème brûlée creamy, use heavy cream. It creates a rich texture. When heating the cream, don’t let it boil. Simmer it gently. This step helps the vanilla flavor mix well. After you whisk the egg yolks, make sure they are light and frothy. This will make the custard smooth. Strain the mixture before baking to remove lumps. This keeps your dessert silky.
Common Mistakes to Avoid
Avoid overcooking the custard. If the center is too firm, it won’t be creamy. Keep an eye on the time while baking. Also, if you skip the water bath, the heat may be too harsh. This can cause cracks. Don’t rush the cooling step. Chilling it for at least four hours is key. This lets the flavor develop and texture set.
Recommended Tools for Best Results
Use a kitchen torch for the best caramelized sugar. It gives a nice, crunchy layer on top. If you don’t have a torch, a broiler can work too. Just watch it closely. Use ramekins that are oven safe. They should hold the custard well. A fine sieve is great for straining the mixture. It ensures a smooth finish. Finally, use a baking dish for the water bath. It helps cook the custard evenly.
Pro Tips
- Chill Properly: Ensure you refrigerate the crème brûlée for at least 4 hours to achieve the perfect creamy texture.
- Use a Fine Sieve: Straining the custard mixture through a fine sieve will help eliminate any lumps, resulting in a smooth final product.
- Perfect Caramelization: When caramelizing the sugar, keep the torch moving to avoid burning and achieve an even golden layer.
- Flavor Variations: Experiment with different flavorings, such as orange zest or espresso, for a unique twist on the classic recipe.
Variations
Flavored Crème Brûlée Ideas (e.g., Chocolate, Coffee)
You can easily change up your crème brûlée. For a chocolate version, add melted chocolate to the cream before mixing. Use dark or milk chocolate for different tastes. For coffee flavor, steep coffee beans in the cream. This adds a rich and bold taste that coffee lovers will enjoy.
Vegan Alternatives
Want a vegan treat? Use coconut cream instead of heavy cream. You can replace egg yolks with silken tofu or a mix of cornstarch and almond milk. The texture will still be smooth and creamy. Sweeten it with maple syrup or agave nectar for a nice twist.
Mini Crème Brûlée Cups
Mini crème brûlée cups are fun and perfect for parties. Use small ramekins or shot glasses. This way, each guest gets their own serving. The cooking time may be shorter, so check them after 20 minutes. These little treats look cute and are great for sharing.
Storage Info
How to Store Leftover Crème Brûlée
You can store leftover crème brûlée in the fridge. Place the ramekins in an airtight container. Cover them tightly with plastic wrap to keep them fresh. This method helps preserve the creamy texture and rich flavor. It is best to eat them within two days for the best taste.
Best Practices for Reheating
Reheat crème brûlée gently. Do not use the microwave as it may change the texture. Instead, place the ramekins in a warm water bath. Heat them in an oven set to 200°F (93°C) for about 10 minutes. This method warms them evenly without cooking them further.
Shelf Life and Freezing Tips
Crème brûlée tastes best fresh, but it can last in the fridge for about three days. Freezing is not recommended, as it affects the texture. If you must freeze it, wrap it well and store it for up to one month. Thaw it in the fridge overnight before reheating.
FAQs
How do you know when crème brûlée is done?
You can tell when crème brûlée is done by checking the edges. The edges should be firm, while the center remains slightly jiggly. It will firm up as it cools. If the center is too set, it may be overcooked. Always watch the time closely, as baking times can vary.
Can I use a different type of cream?
Yes, you can use different creams. Half-and-half or light cream will work, but the texture may change. Heavy cream gives the best rich and creamy results. If you want a lighter version, go for whole milk. Just keep in mind that it may not be as silky.
What is the best way to caramelize sugar on top?
The best way to caramelize sugar is with a kitchen torch. Sprinkle an even layer of sugar on top of the chilled crème brûlée. Then, gently heat the sugar with the torch until it melts and turns golden brown. If you don’t have a torch, you can use the broiler in your oven. Just watch closely to avoid burning!
You learned how to make vanilla bean crème brûlée step by step. We covered key ingredients, from basics to optional extras. I shared tips to avoid common mistakes and achieve perfect flavor. You also discovered fun variations, storage tips, and answers to frequent questions. Now, you can impress anyone with this classic dessert. Enjoy your cooking and make it your own! With practice, you'll master crème brûlée and wow your guests.