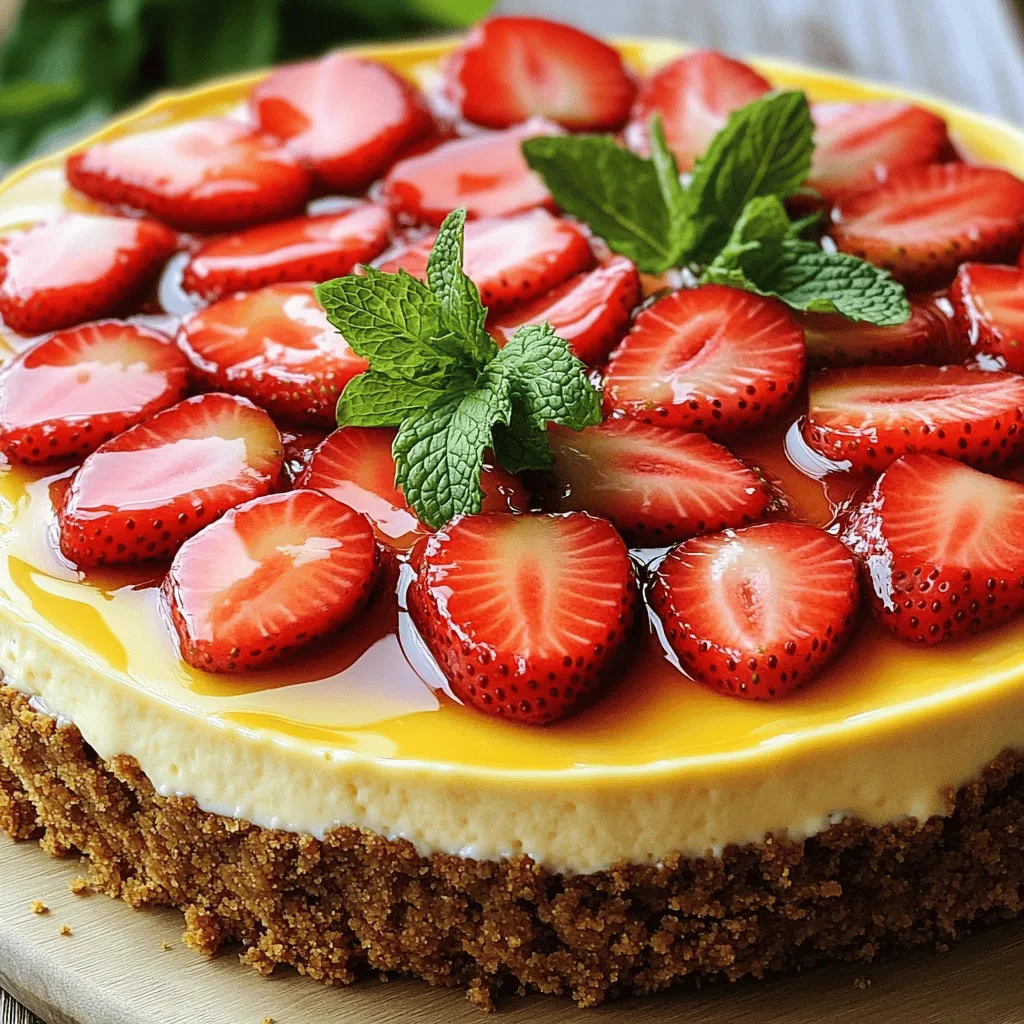
Are you ready to impress your friends and family with a scrumptious Strawberry Cheesecake? This easy and tasty recipe is perfect for any occasion. With a buttery graham cracker crust, creamy filling, and fresh strawberries on top, you can’t go wrong. I’ll walk you through every step, from gathering ingredients to topping your masterpiece. Let’s dive into this delightful dessert that’s bound to make mouths water!
Ingredients
Crust Ingredients
– 1 ½ cups graham cracker crumbs
– ½ cup unsalted butter, melted
– 2 tablespoons sugar
Filling Ingredients
– 16 oz cream cheese, softened
– 1 cup powdered sugar
– 2 teaspoons vanilla extract
– 3 large eggs
– 1 cup sour cream
– 1 tablespoon lemon juice
Topping Ingredients
– 2 cups fresh strawberries, hulled and sliced
– 1 tablespoon sugar
– 1 tablespoon lemon juice
To create the perfect strawberry cheesecake, start with the crust. You need graham cracker crumbs, unsalted butter, and sugar. Mix them well, then press the mixture into a springform pan. This blend gives your cheesecake a sweet, crunchy base.
For the filling, you will need cream cheese, powdered sugar, vanilla extract, eggs, sour cream, and lemon juice. Make sure your cream cheese is soft. This helps mix it easily. Beat the cream cheese before adding the sugar and other ingredients. This step is key for a creamy texture.
For the topping, fresh strawberries are a must. You’ll slice them and mix them with sugar and lemon juice. This brings out their natural sweetness. Let them sit for a bit to create a lovely syrup.
Step-by-Step Instructions
Preparing the Crust
– Preheat the oven to 325°F (160°C).
– In a bowl, combine 1 ½ cups graham cracker crumbs, ½ cup melted unsalted butter, and 2 tablespoons sugar. Mix until the crumbs look like wet sand.
– Press this mixture into the bottom of a 9-inch springform pan. Bake for 10 minutes, then remove and let it cool.
Making the Filling
– In a large bowl, beat 16 oz of softened cream cheese with an electric mixer. Keep mixing until it is smooth.
– Gradually add 1 cup of powdered sugar, mixing until blended.
– Now, slowly mix in 2 teaspoons vanilla extract, 3 large eggs (one at a time), 1 cup of sour cream, and 1 tablespoon lemon juice. Beat on low. Don’t overmix!
Baking and Cooling
– Pour the filling over the cooled crust. Smooth the top with a spatula.
– Bake the cheesecake for 55 to 60 minutes. The edges should be set, but the center may jiggle a bit.
– After baking, turn off the oven. Leave the cheesecake inside with the door slightly open for 1 hour to cool down slowly.
– After that, let it cool to room temperature. Refrigerate for at least 4 hours or overnight before enjoying it.
Tips & Tricks
Perfecting the Cheesecake Texture
– Use room temperature ingredients for a smoother blend.
– Avoid overmixing to prevent cracks.
When making cheesecake, texture is key. If you want a smooth result, make sure your cream cheese is at room temperature. Cold cream cheese won’t blend well and can lead to lumps. I always take it out of the fridge an hour before I start. Mix it slowly, and don’t rush. Overmixing adds air, which can cause cracks when baking. Keep your mixer on low and blend just until combined.
Serving Suggestions
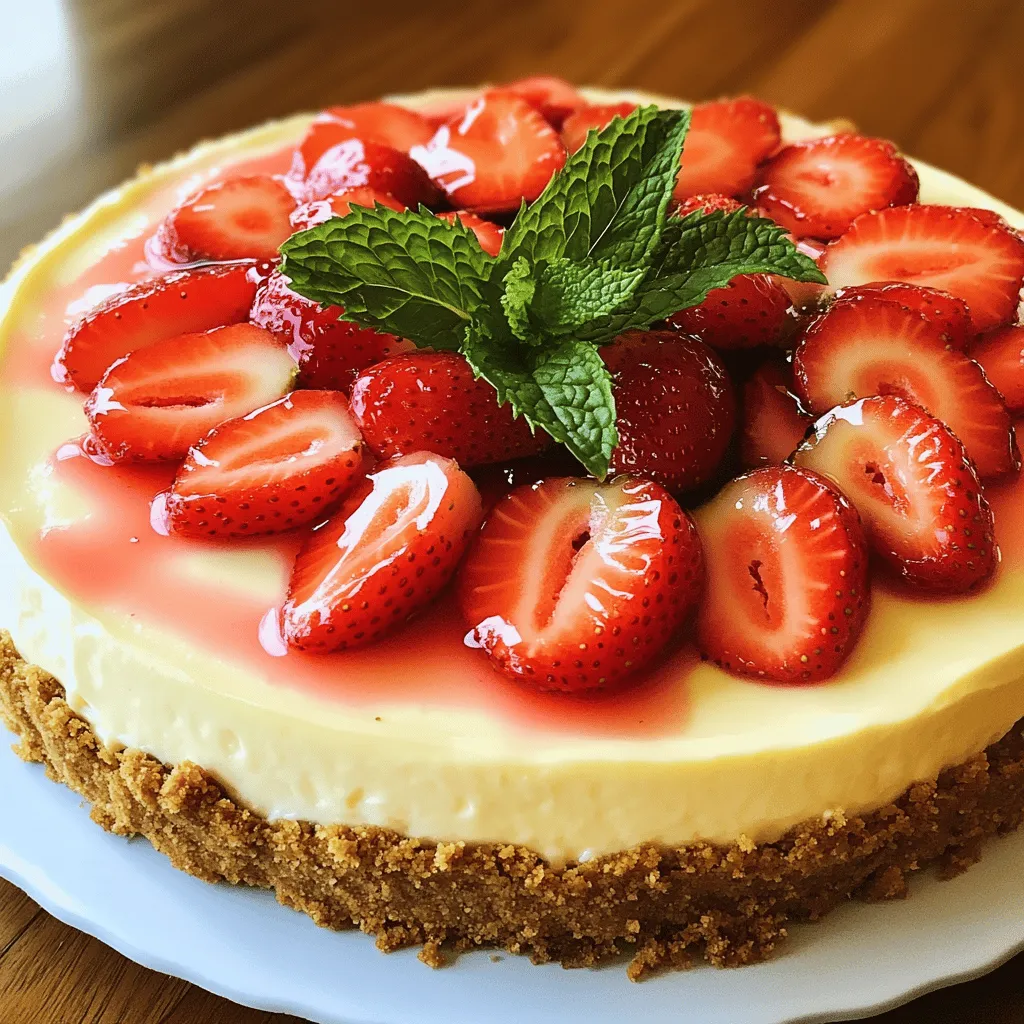
– Garnish with mint leaves and strawberry syrup.
– Serve slices on individual plates for presentation.
Presentation makes a big difference. I love to add fresh mint leaves on top for a pop of color. Drizzle some strawberry syrup around each slice for a nice touch. This simple step makes your cheesecake look more inviting. When serving, place each slice on individual plates. It adds a personal touch and makes it feel special.
Common Mistakes to Avoid
– Not letting the cheesecake cool gradually.
– Skipping the refrigeration step.
Cooling is crucial. After baking, let your cheesecake cool in the oven with the door slightly open. This helps prevent cracks. If you rush it, your cheesecake might crack. Also, refrigeration is a must. It helps set the flavors and gives the cheesecake its perfect texture. If you skip this step, you’ll end up with a cheesecake that isn’t as rich or creamy.
Variations
No-Bake Strawberry Cheesecake
You can make a quick no-bake version. This makes it easy and fast. Here’s how:
– Ingredients:
– 1 ½ cups graham cracker crumbs
– ½ cup unsalted butter, melted
– 2 cups cream cheese, softened
– 1 cup powdered sugar
– 1 cup whipped cream
– 2 cups fresh strawberries, hulled and sliced
– Instructions:
1. Mix graham cracker crumbs and melted butter in a bowl.
2. Press the mix into a springform pan.
3. In another bowl, beat cream cheese and powdered sugar until smooth.
4. Fold in the whipped cream gently.
5. Spread the mixture over the crust.
6. Top with fresh strawberries.
7. Chill for at least 4 hours before serving.
You can also try crusts made of Oreos or nuts for a twist.
Vegan Strawberry Cheesecake
If you want a vegan option, it’s easy to swap out some ingredients.
– Substitutions:
– Use cashew cream or silken tofu instead of cream cheese.
– Replace sour cream with coconut milk.
– Make sure to blend the cashew cream or tofu until smooth.
This will give you a creamy filling that everyone can enjoy.
Gluten-Free Options
For those who need gluten-free, you can still enjoy this delight.
– Crust:
– Use gluten-free graham crackers for the crust.
– You can also use almond flour mixed with butter as a base.
– Tips:
– Always check labels to ensure all ingredients are gluten-free.
– Be careful with toppings and any mix-ins.
These variations let you enjoy strawberry cheesecake in many ways. Try them and find your favorite!
Storage Information
How to Store Leftovers
After enjoying your cheesecake, store leftovers in the refrigerator. Use an airtight container to keep it fresh. This method helps maintain the taste and texture. For the best flavor, eat your cheesecake within 3-4 days.
Freezing Strawberry Cheesecake
You can freeze strawberry cheesecake for later enjoyment. To do this, wrap the cheesecake tightly in plastic wrap. Then, place it in a freezer-safe container. It can last up to three months in the freezer. When you’re ready to eat it, thaw it in the fridge overnight. This method keeps the cheesecake creamy and tasty.
Signs of Spoilage
Watch for changes to know if your cheesecake is still good. If the texture becomes grainy or if it smells off, it’s best to toss it. Cheesecake can last up to a week in the fridge. Always trust your senses when checking for spoilage.
FAQs
How do I know when the cheesecake is done?
To check if your cheesecake is done, look for a slight jiggle in the center. The edges should be set, but the middle will still be soft. Turn off the oven and leave it inside for an hour. This helps it finish cooking slowly. Cooling it gradually prevents cracks.
Can I use frozen strawberries for the topping?
Yes, you can use frozen strawberries! They work well, but they may lose some firmness. Fresh strawberries taste brighter and look nicer. If you use frozen ones, let them thaw first. Then, drain excess liquid before adding them to your cheesecake.
What can I substitute for cream cheese?
If you can’t use cream cheese, here are some good options:
– Greek yogurt for a creamy texture
– Silken tofu for a vegan choice
– Ricotta cheese for a lighter flavor
These substitutes change the taste and texture a bit, but they still work great.
Can I make this cheesecake ahead of time?
Absolutely! You can prepare it a day or two in advance. Once it cools, cover it and refrigerate. Just make sure to add the strawberry topping right before serving. This keeps the strawberries fresh and flavorful.
What’s the best way to cut cheesecake?
To cut your cheesecake neatly, use a sharp knife. Dip the knife in hot water and wipe it dry. Cut through the cheesecake, and repeat for each slice. This helps create clean edges. You can also use a piece of dental floss for a fun twist!
This cheesecake recipe combines simple ingredients for a delightful treat. We covered how to make the crust, filling, and toppings, along with essential tips to avoid common mistakes. Remember, letting the cheesecake cool gradually is key. Whether making a classic or trying a no-bake version, you can enjoy your delicious creation! Store leftovers properly, and always check for spoilage. I hope you feel inspired to bake and share this tasty dessert with others!