If you’re looking to add a splash of color to your dessert table, you’re in the right place! This Rainbow Unicorn Fudge is not just eye-catching; it’s also easy to make. I’ll guide you through the fun process of creating this colorful treat that’s perfect for any occasion. With simple ingredients and vibrant layers, you’ll impress family and friends. Let’s dive into the magical world of fudge!
Why I Love This Recipe
- Vibrant Colors: This fudge is visually stunning with all the bright, fun colors that remind you of rainbows and unicorns.
- Easy to Make: The recipe requires minimal effort and time, making it perfect for even novice bakers.
- Customizable: You can change the colors and toppings to suit any occasion or theme, making it versatile.
- Fun for All Ages: This whimsical treat is enjoyed by both kids and adults, bringing joy to any gathering.
Ingredients
List of Ingredients
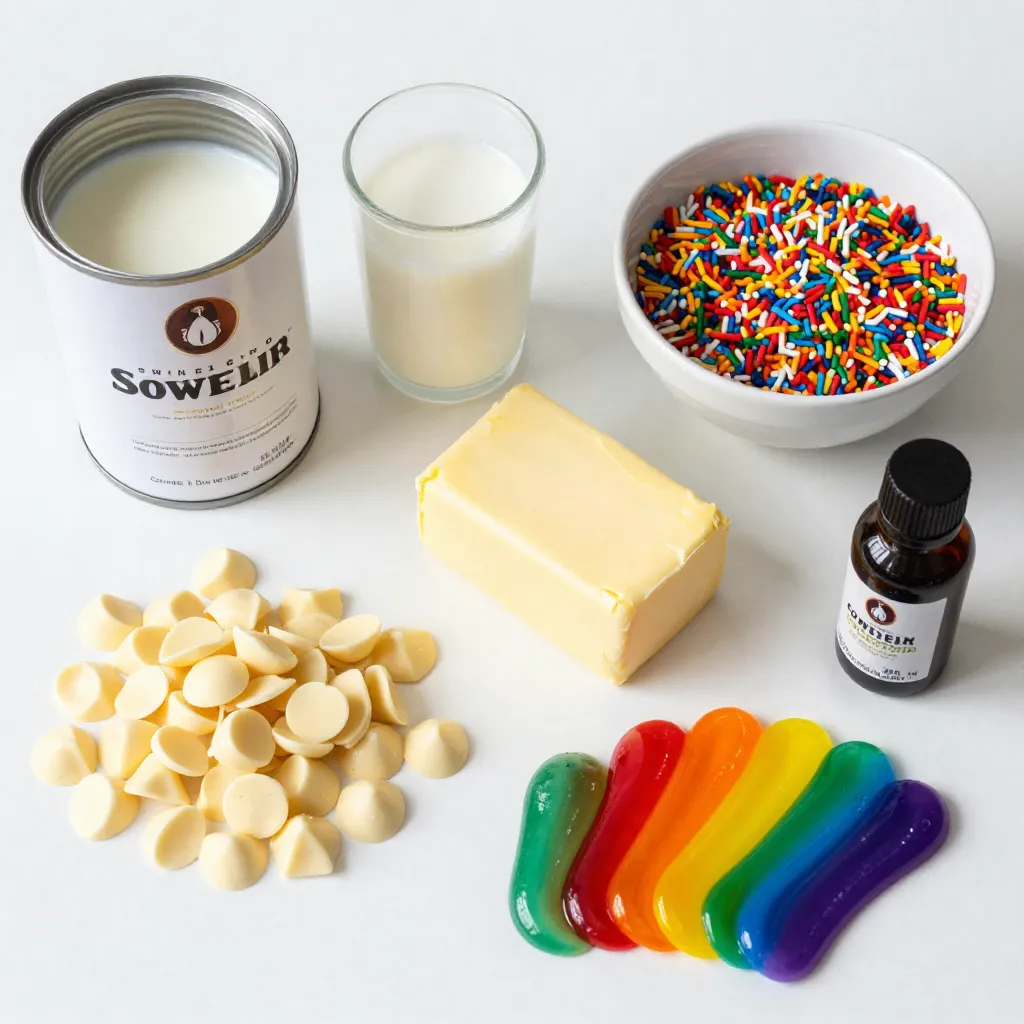
To make Rainbow Unicorn Fudge, you need these fun ingredients:
– 2 cups white chocolate chips
– 1 can sweetened condensed milk (14 oz)
– ½ cup unsalted butter
– ½ teaspoon vanilla extract
– Gel food coloring (red, orange, yellow, green, blue, purple)
– ¼ cup rainbow sprinkles
Measurement Tips
When measuring, use dry measuring cups for the chocolate chips. Use a liquid measuring cup for the sweetened condensed milk. Be precise with your butter. Too much or too little can change the fudge’s texture. A kitchen scale is helpful for accuracy. If you don’t have one, ensure your butter is at room temperature for easier mixing.
Substitute Options
You can swap white chocolate chips for dark chocolate chips if you prefer a richer taste. If you want a dairy-free option, use coconut milk and dairy-free chocolate chips. For a nut-free version, check that your ingredients do not contain nuts. You can also use natural food coloring if you want a more organic approach. Just remember that the colors may not be as bright.
Step-by-Step Instructions
Preparation of Baking Pan
First, grab an 8-inch square baking pan. Line it with parchment paper. Leave some paper hanging over the sides. This helps you lift the fudge out later. Make sure the paper is smooth and snug against the pan. This step is key for a clean finish.
Melting the Fudge Mixture
Next, let’s make the fudge mix. In a medium saucepan, add two cups of white chocolate chips. Pour in a can of sweetened condensed milk, about 14 ounces. Add half a cup of unsalted butter too. Heat this on low. Stir the mix often until it is melted and smooth. Remove it from heat and stir in half a teaspoon of vanilla extract. This gives the fudge a nice flavor.
Coloring the Fudge
Now comes the fun part—coloring the fudge! Divide the melted fudge into five equal bowls. Add gel food coloring to each bowl. Use red, orange, yellow, green, blue, and purple. Mix well until the colors look bright. Each bowl should shine with its own hue. You are ready to layer these colors in the pan!
Layering and Swirling
Techniques for Layering Colors
Layering colors in your Rainbow Unicorn Fudge is fun and easy. Start with a clean pan lined with parchment paper. This helps with removal later. Take your melted fudge mixture and divide it into five bowls. Each bowl will hold a different color. Use gel food coloring for bright and bold hues. Add a few drops to each bowl and stir well.
When layering, spoon one color into the pan. Spread it evenly with a spatula. Make sure it covers the bottom completely. Then, add the next color on top. Repeat this process until all colors are layered. Each layer should be smooth and flat.
Creating the Swirl Effect
After all colors are in the pan, it’s time to create a swirl effect. Take a toothpick or a skewer. Gently drag it through the fudge from top to bottom and side to side. Be careful not to mix the colors too much. You want to see the separate colors while creating a beautiful marbled look.
Swirling adds a unique touch to your fudge. It makes each piece look special. Have fun with this step!
Adding Extra Fun with Sprinkles
Sprinkles make everything better, right? Once you finish swirling, it’s time to add the rainbow sprinkles. Sprinkle them generously on top of the fudge. This not only adds color but also some crunch.
Make sure to add the sprinkles before the fudge sets. This way, they stick well. You can even serve the fudge with a small jar of extra sprinkles on the side. This adds a playful vibe and invites everyone to join in on the fun.
Pro Tips
- Color Consistency: Use gel food coloring for brighter, more vibrant colors that won’t alter the texture of your fudge.
- Layering Technique: Make sure each layer is evenly spread before adding the next to achieve a beautiful, defined rainbow effect.
- Swirling Effect: When swirling, be gentle to avoid muddying the colors; a light hand will keep the layers distinct.
- Storage Tips: Keep the fudge in an airtight container in the fridge to maintain its freshness and prevent it from becoming too soft.
Tips & Tricks for Perfect Fudge
Achieving the Right Consistency
To get the best fudge, you need a smooth mix. Melt the white chocolate, sweetened condensed milk, and butter over low heat. Stir often to keep it from burning. If it feels too thick, add a splash of milk. If it’s too thin, cook it a bit longer. It should be creamy and hold its shape.
How to Cut Fudge Neatly
Cutting fudge can be tricky. Use a sharp knife for clean edges. First, chill the fudge for at least two hours. This makes it firm and easier to slice. To cut, lift the fudge out using the parchment paper. Wipe the knife with a damp cloth after each cut. This helps keep the pieces neat and tidy.
Best Practices for Melting Chocolate
Melting chocolate needs care. Always use low heat. You can use a double boiler or a microwave. If using a microwave, heat in short bursts of 20 seconds. Stir after each burst to avoid burning. Once melted, be quick to mix in the other ingredients before it cools. This keeps the fudge smooth and delicious.
Variations of Rainbow Unicorn Fudge
Flavor Variations
You can mix up the flavors of your Rainbow Unicorn Fudge. Instead of just vanilla, try adding different extracts. Almond extract adds a sweet, nutty taste. Peppermint extract gives a fresh, cool flavor. You can also fold in bits of your favorite candies for extra crunch. Think mini marshmallows or crushed cookies.
Seasonal Themes
Rainbow Unicorn Fudge fits any season. For spring, use pastel colors and flavors like lemon or lavender. In summer, bright fruit flavors like strawberry or mango work well. For fall, consider pumpkin spice or apple cinnamon. In winter, you can create a festive fudge by adding holiday spices like nutmeg and using red and green colors.
Gluten-Free Adjustments
Making this fudge gluten-free is easy. All the main ingredients are naturally gluten-free. Just be sure your sprinkles are gluten-free. Always check labels when buying ingredients. You can also swap out the butter for coconut oil for a dairy-free version. This way, everyone can enjoy this colorful treat!
Storage Info and Serving Suggestions
How to Store Fudge
To keep your Rainbow Unicorn Fudge fresh, store it in an airtight container. Use parchment paper to separate layers if stacking. This method prevents sticking and keeps the fudge soft. Keep it in a cool, dry place. Avoid direct sunlight, which can change the fudge’s texture and color.
Best Serving Practices
Serve the fudge on a colorful platter for a fun look. I like to add a small jar of extra sprinkles next to it. This makes it interactive and lively. Cut the fudge into small squares for easy grabbing. Kids love this treat at parties, and it’s a hit with adults too!
Shelf Life of Rainbow Fudge
Rainbow Unicorn Fudge lasts about one week when stored properly. If you want it to last longer, you can freeze it. Wrap each square tightly in plastic wrap, then place them in a freezer bag. This way, you can enjoy the fudge for up to three months! Just thaw it in the fridge before serving.
FAQs
Can I use chocolate instead of white chocolate?
Yes, you can use chocolate. This will change the color. The fudge will look darker. It will taste rich and sweet. However, the vibrant colors won’t show as well. White chocolate gives a bright look. It also helps colors pop. If you want a fun twist, try both!
How long does this fudge last?
Rainbow Unicorn Fudge lasts about one week. Store it in an airtight container. Keep it in a cool, dry place. If you see any signs of melting, eat it fast! For best taste, enjoy it fresh. The colors might fade over time.
Can I freeze Rainbow Unicorn Fudge?
Yes, you can freeze the fudge. Cut it into squares first. Wrap each piece tightly in plastic wrap. Then, place them in a freezer bag. This helps keep the taste and texture. When ready to eat, thaw in the fridge. Enjoy your sweet treat again!
In this blog post, I shared how to make Rainbow Unicorn Fudge. We covered the ingredients, tips for measurement, and great substitutes. You learned step-by-step instructions, from preparing your pan to swirling in colors. I shared techniques for layering and adding fun sprinkles. We discussed tips for perfect texture and clean cuts. You explored flavor variations and storage tips to keep your fudge fresh. Enjoy making this colorful treat! It’s fun, easy, and sure to impress everyon