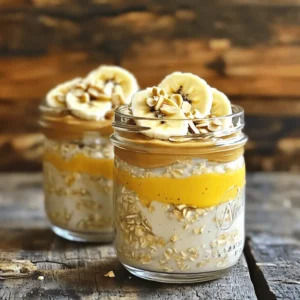
Latest & Greatest
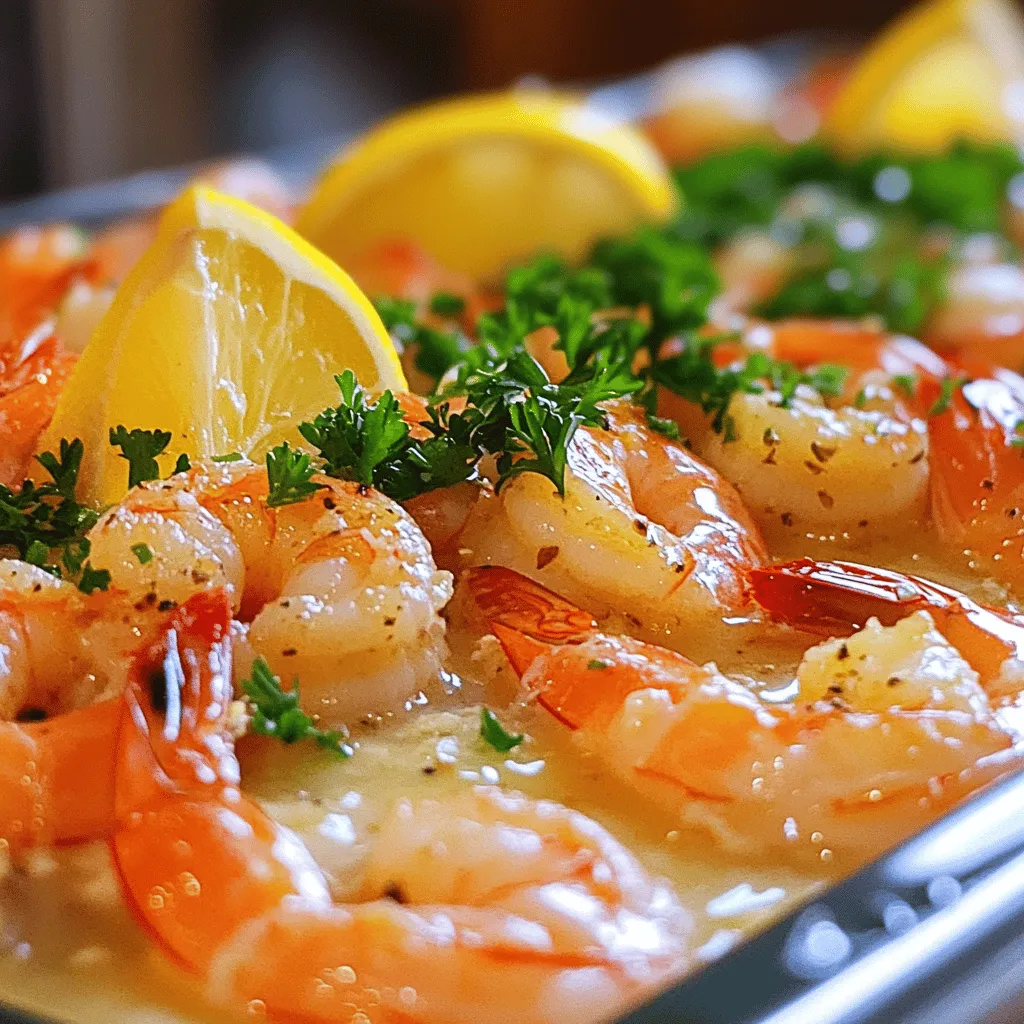
Flavorful 5-Ingredient Garlic Butter Shrimp Recipe
Craving a quick, delicious meal? You’re in luck! My 5-Ingredient Garlic Butter Shrimp Recipe is simple yet bursting with flavor.
Read more…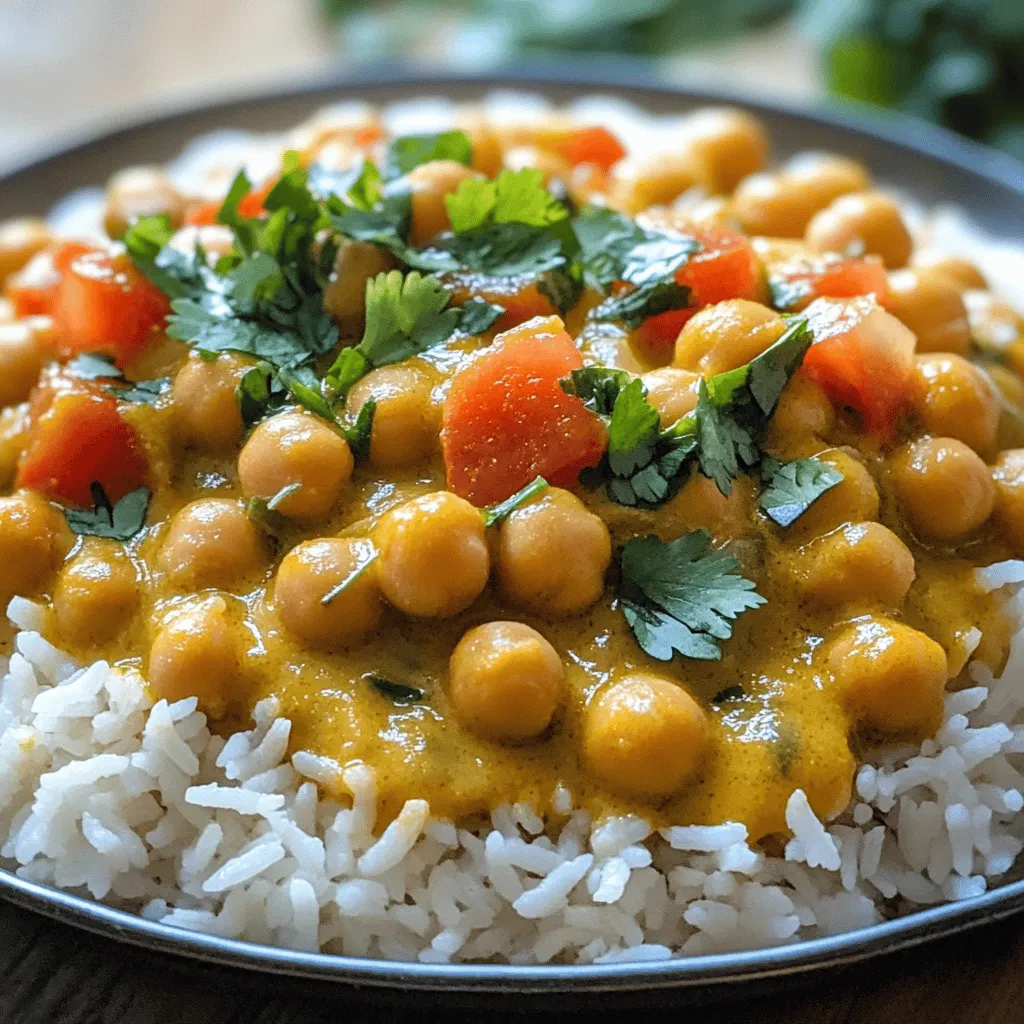
Vegan Chickpea Curry Flavorful and Easy Meal Idea
Are you ready to spice up your dinner routine? This Vegan Chickpea Curry is not just flavorful; it’s also simple
Read more…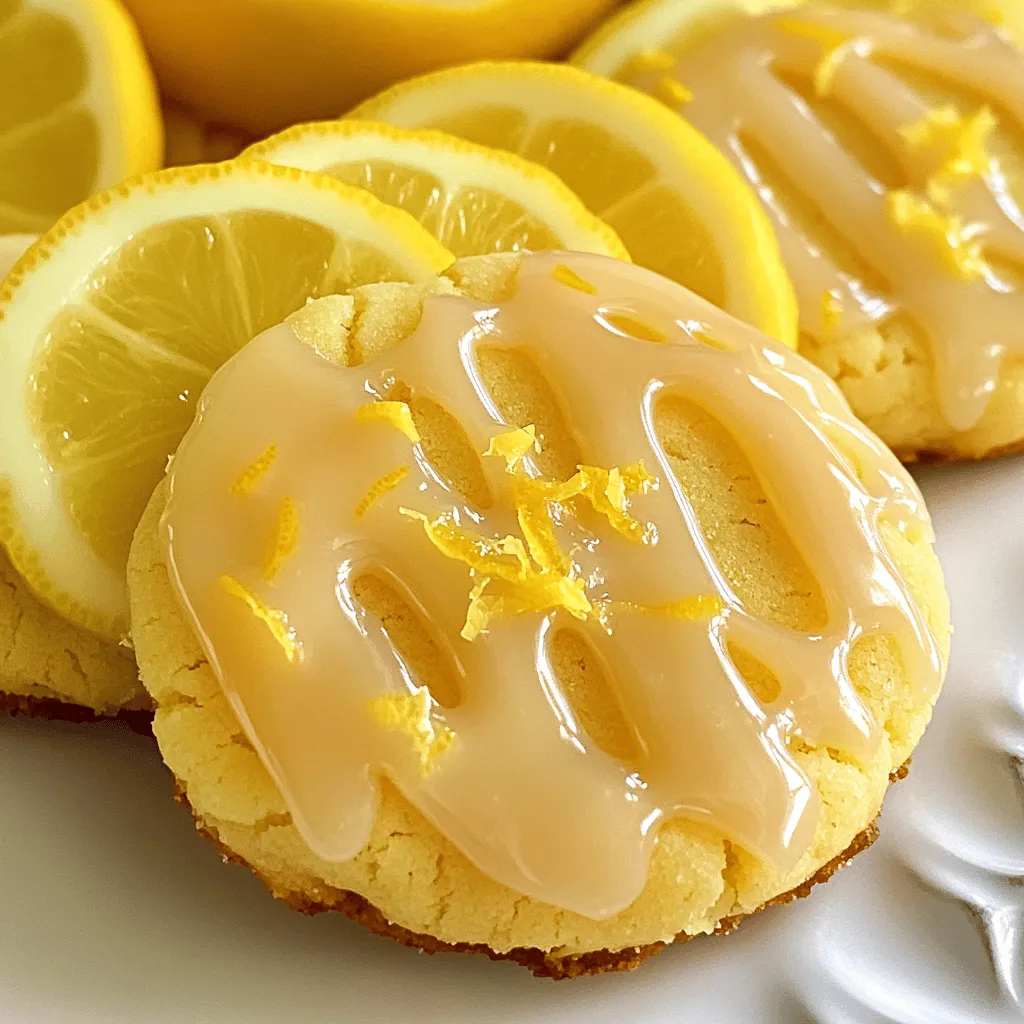
Glazed Lemon Sugar Cookies Delightful and Simple Treat
If you’re craving a sweet treat that’s simple yet bursting with flavor, look no further! These Glazed Lemon Sugar Cookies
Read more…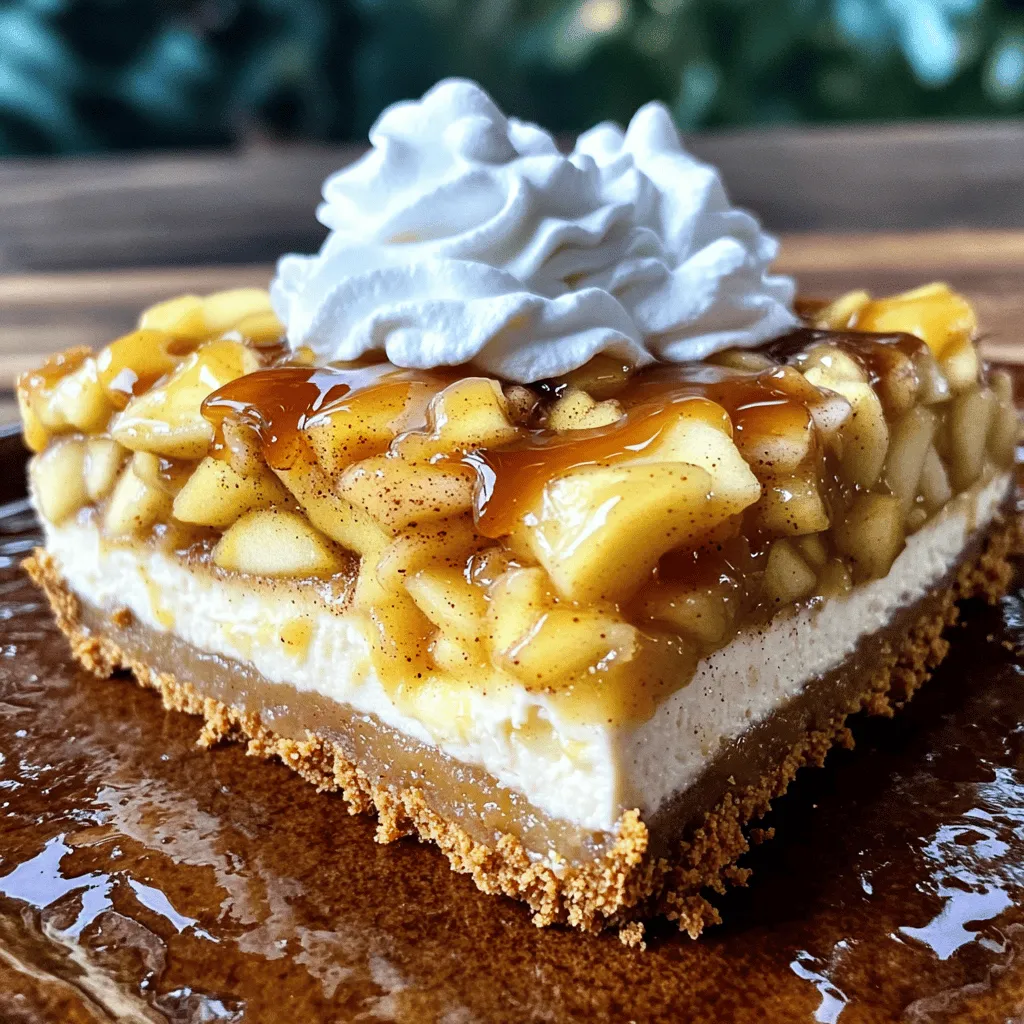
Apple Pie Stuffed Cheesecake Irresistible Desserts
If you love desserts that combine flavors, you’re in for a treat! My Apple Pie Stuffed Cheesecake takes two classics
Read more…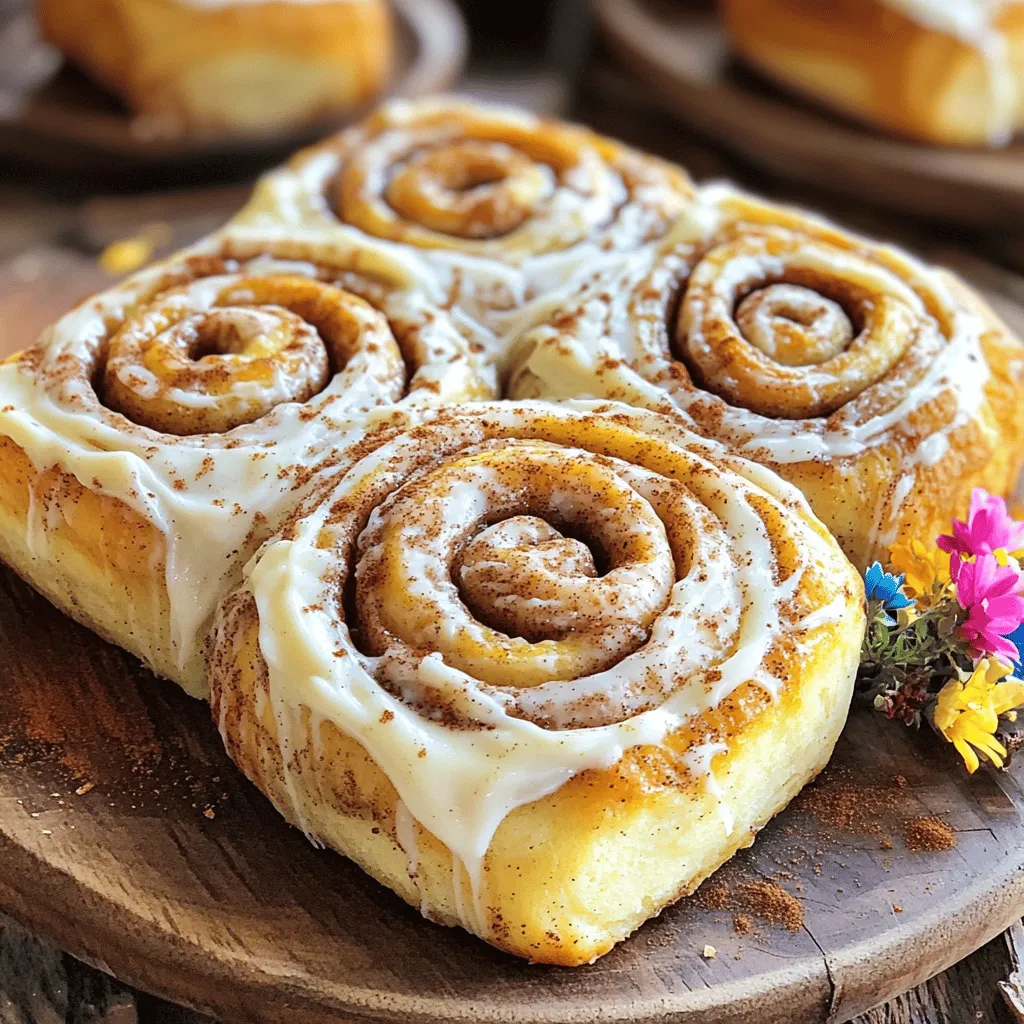
Best Homemade Cinnamon Rolls Flavorful and Easy Recipe
Are you ready to make the best homemade cinnamon rolls? This easy recipe combines warm, fluffy dough with a sweet
Read more…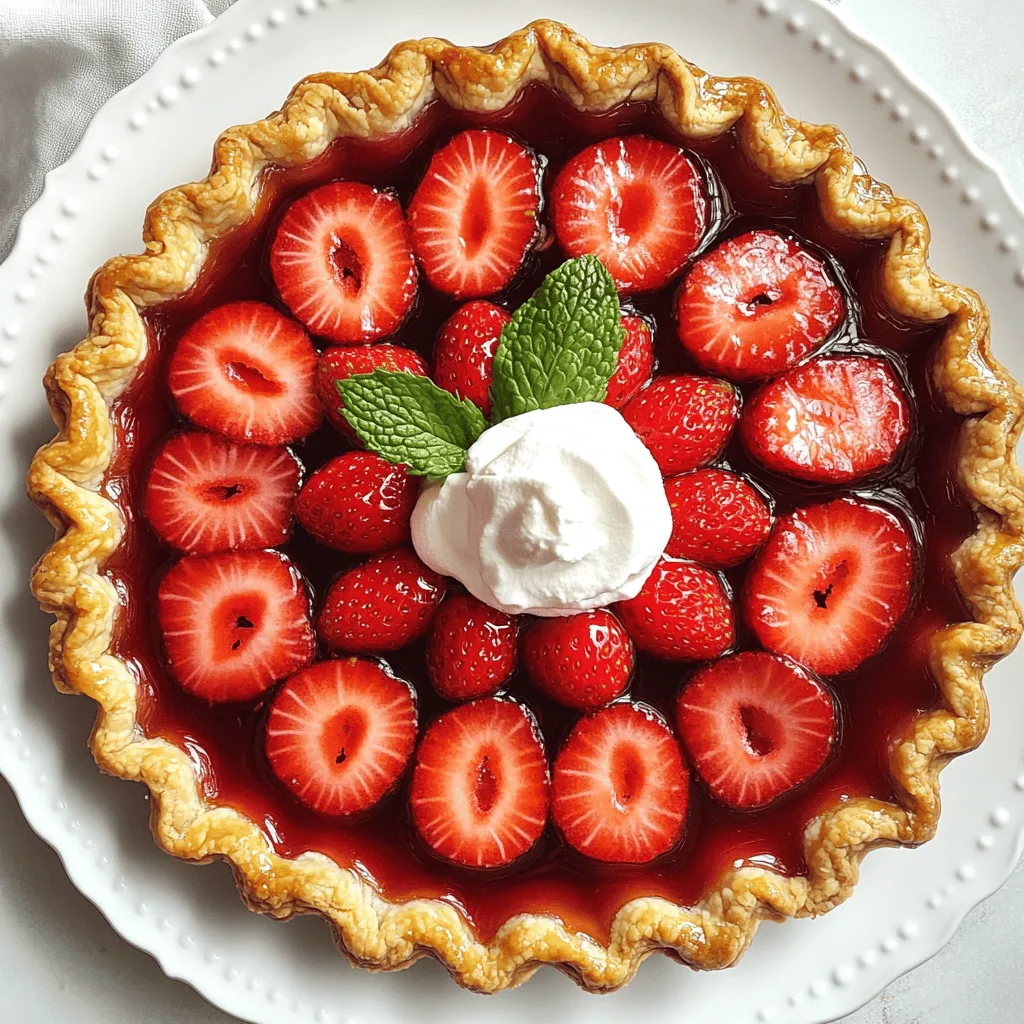
Best Strawberry Pie Delightful and Easy Recipe Guide
Are you ready to impress your friends and family with the best strawberry pie? This delightful and easy recipe guide
Read more…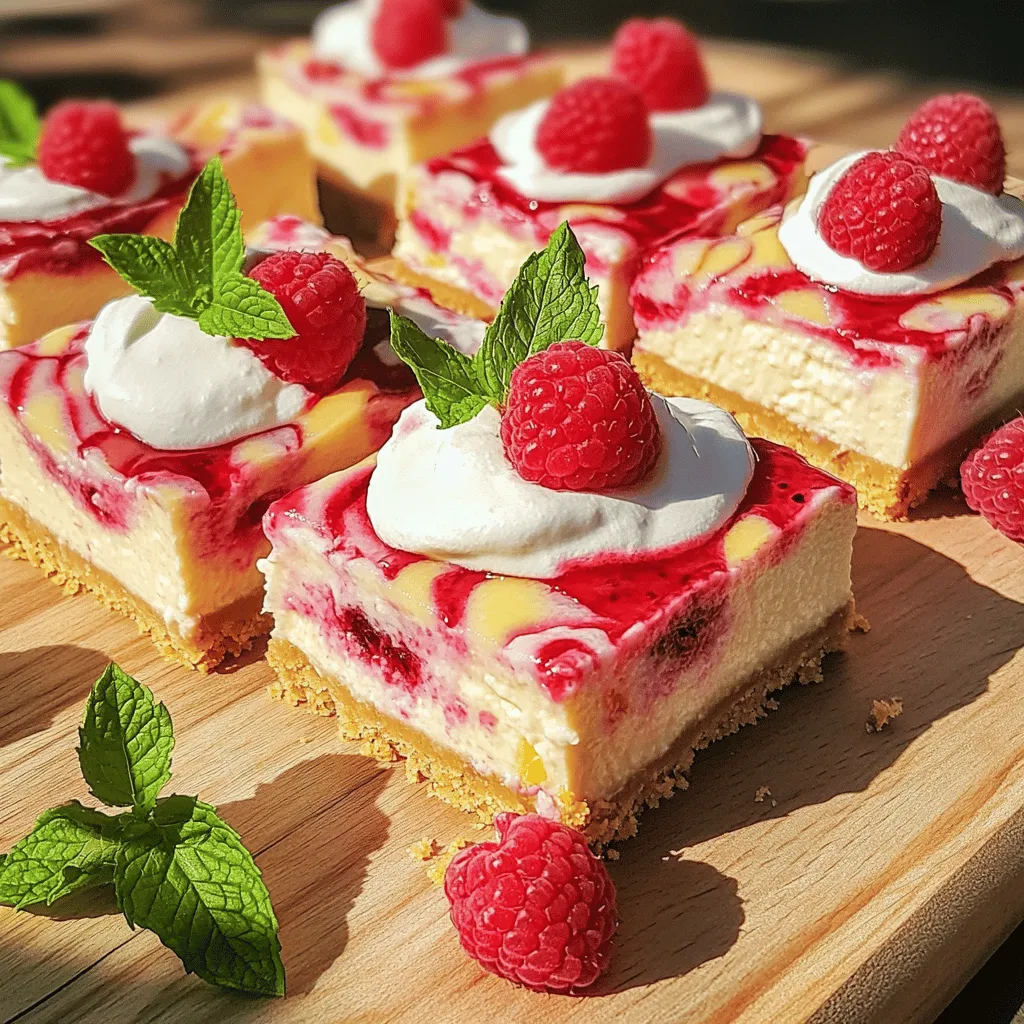
Raspberry Lemon Cheesecake Bars Easy and Creamy Treat
Craving a sweet and tangy treat? You’ll love these easy Raspberry Lemon Cheesecake Bars! This recipe combines creamy cheese with
Read more…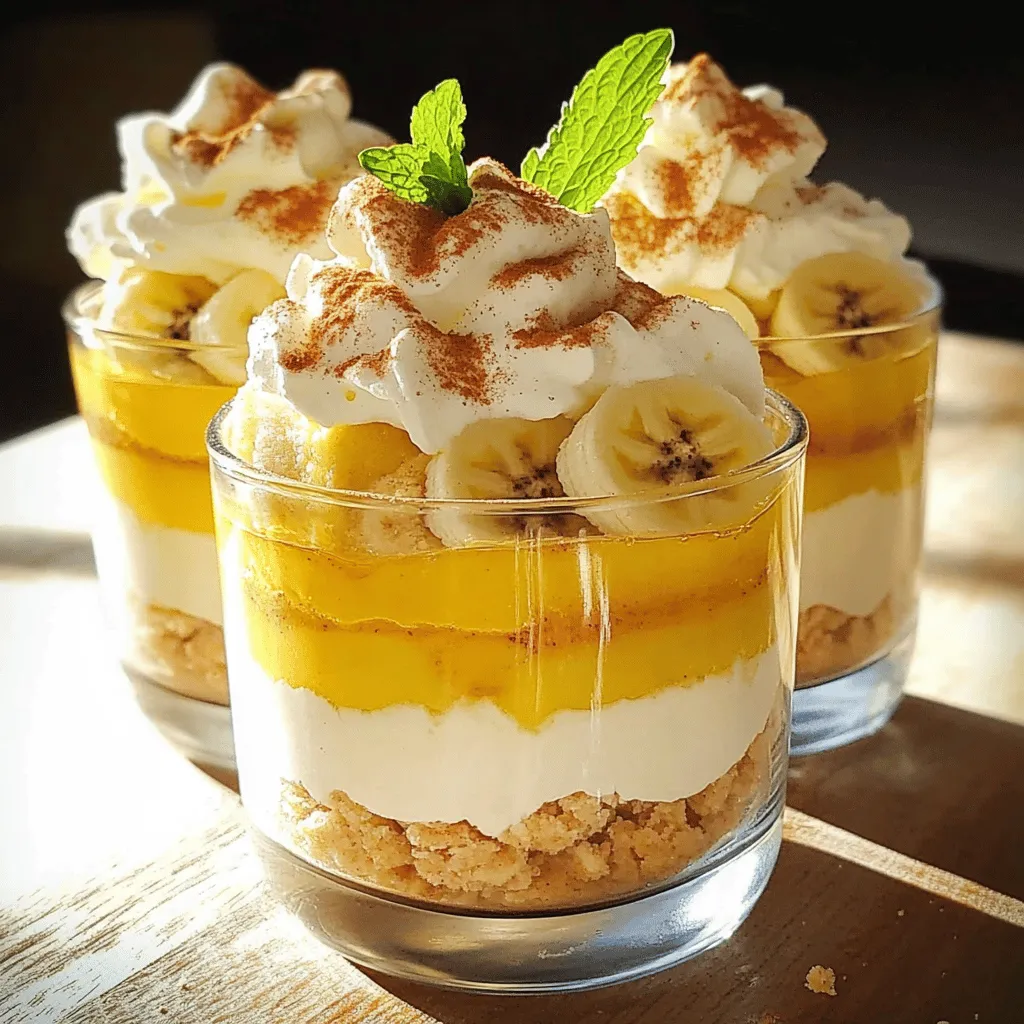
Best Banana Pudding Rich and Creamy Delight Recipe
Are you ready to indulge in the best banana pudding you’ve ever tasted? This rich and creamy delight is perfect
Read more…browse recipes
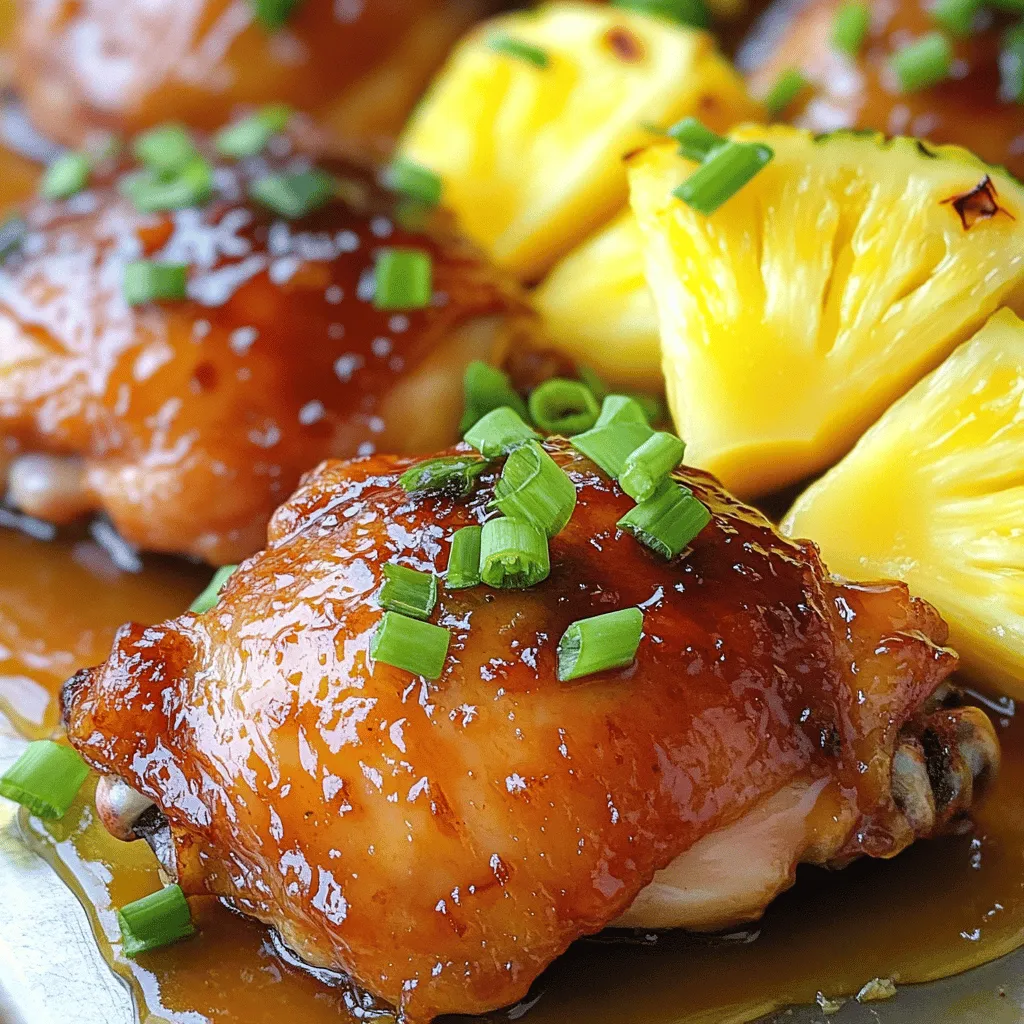
Baked Huli Huli Chicken Tasty and Flavorful Dish
Looking for a tasty and flavorful twist on dinner? Baked Huli Huli Chicken brings the sweet and savory taste of Hawaii right to your…
My Latest Desserts
-
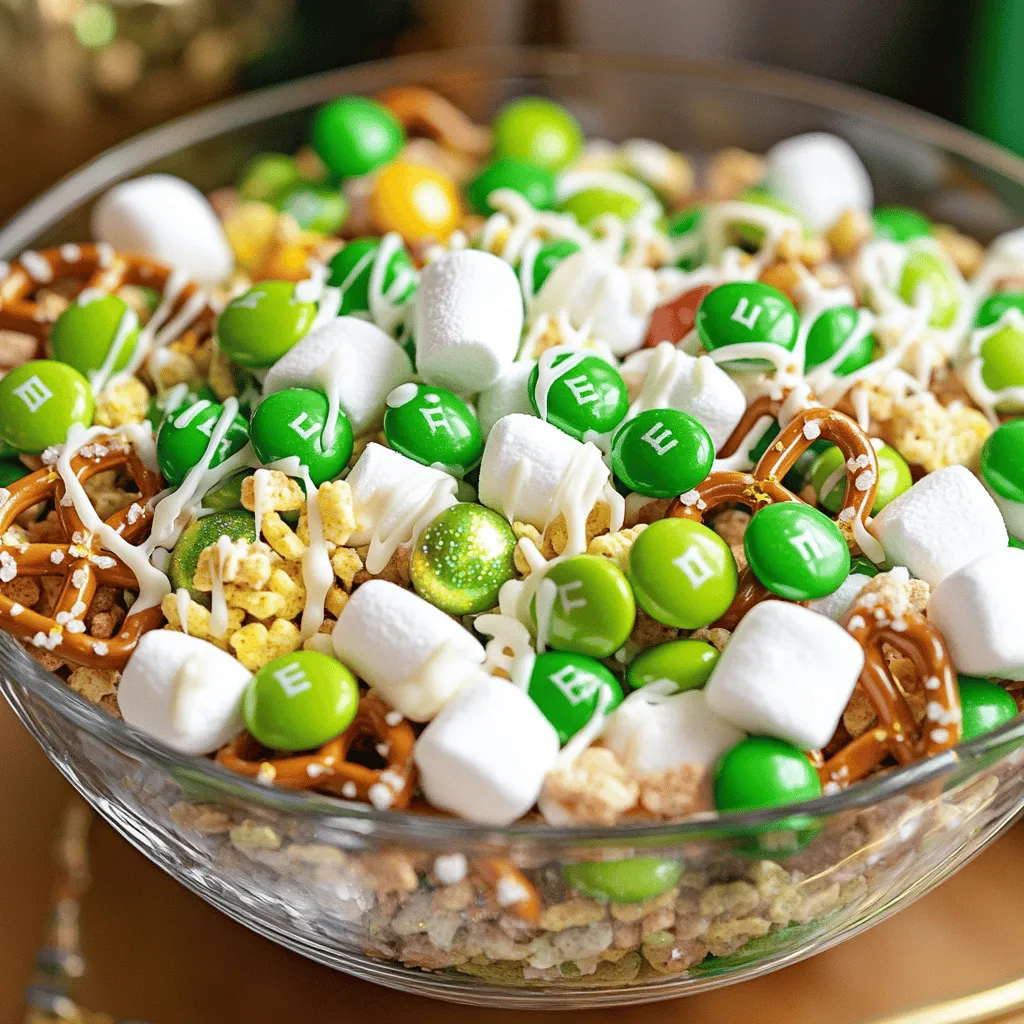
Lucky Charms St. Patrick Snack Mix Festive Treat
Get ready to sprinkle some magic into your snack time with my Lucky Charms St. Patrick Snack Mix! This festive Read Full Recipe -
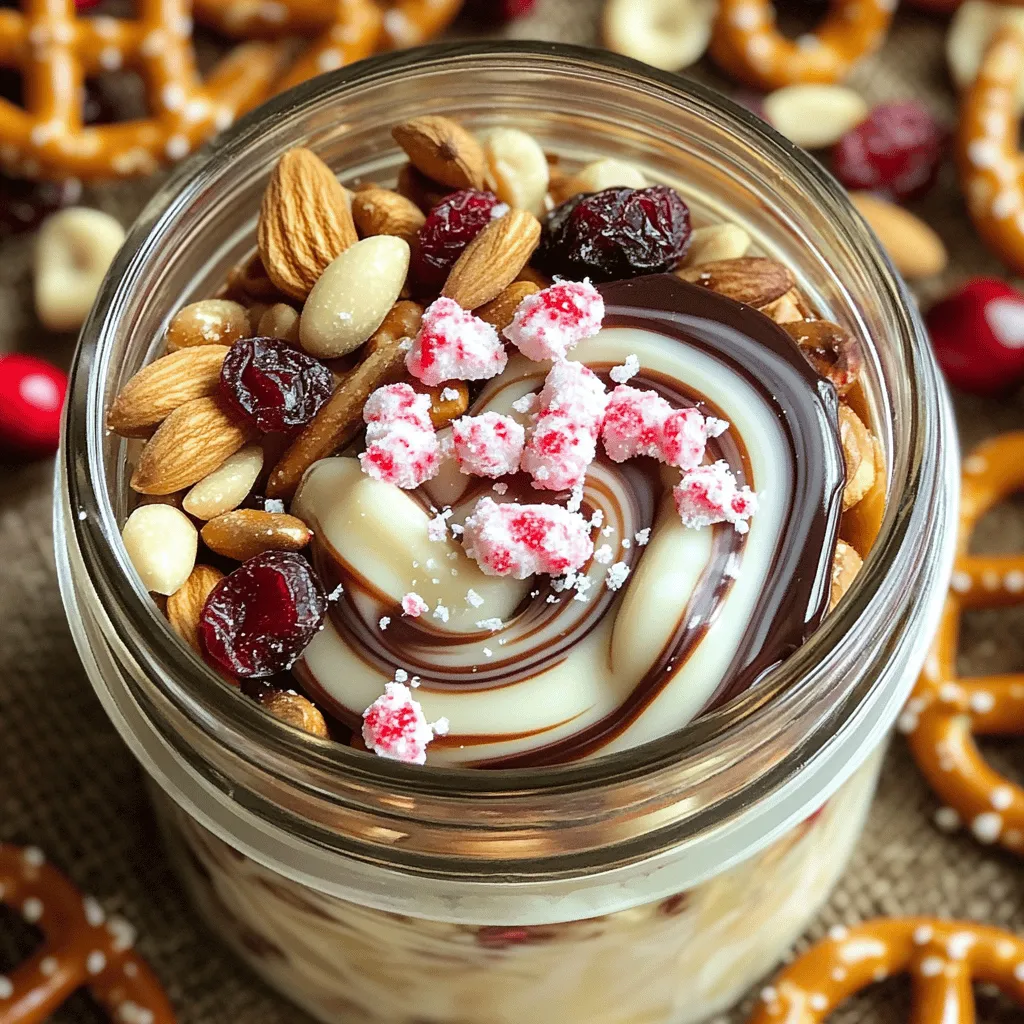
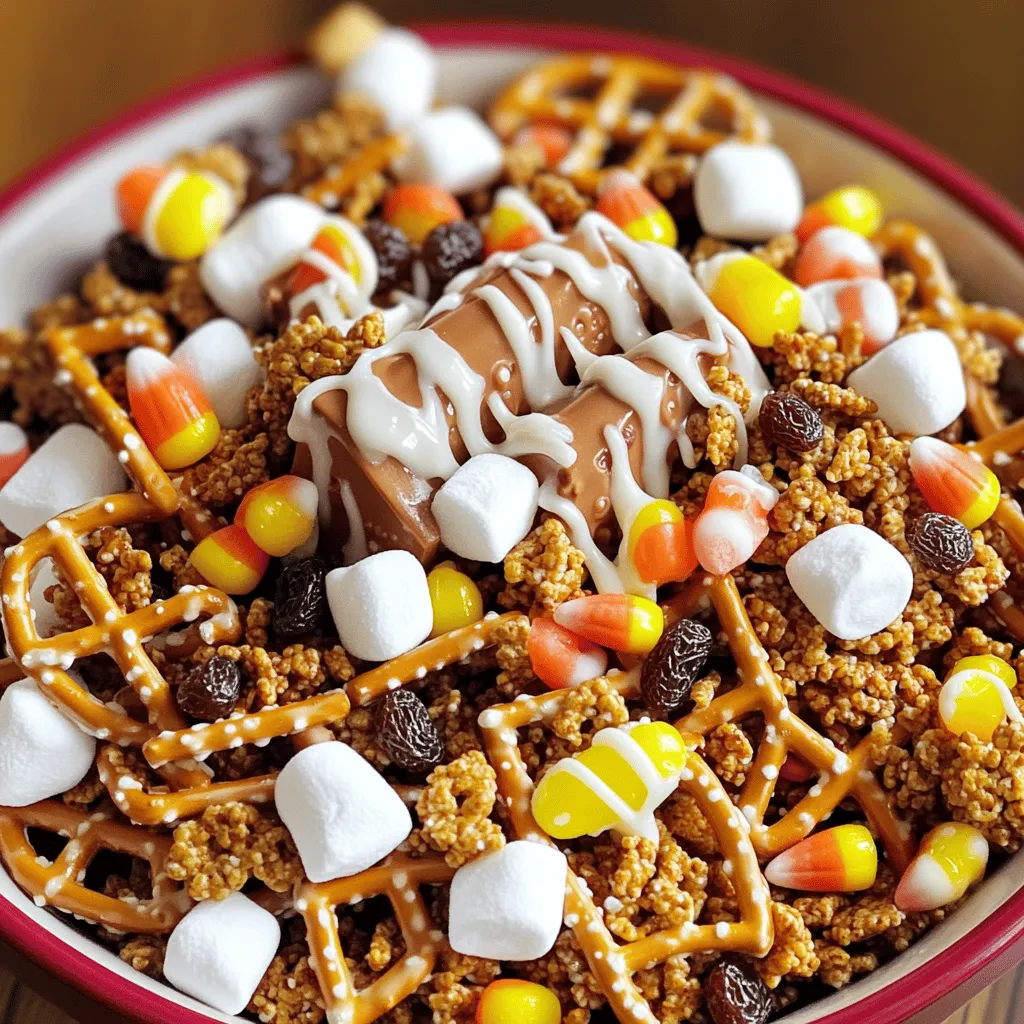
Peppermint Bark Trail Mix Festive and Tasty Treat
Get ready to elevate your holiday snacking with Peppermint Bark Trail Mix! This treat combines the rich taste of dark Read Full Recipe -
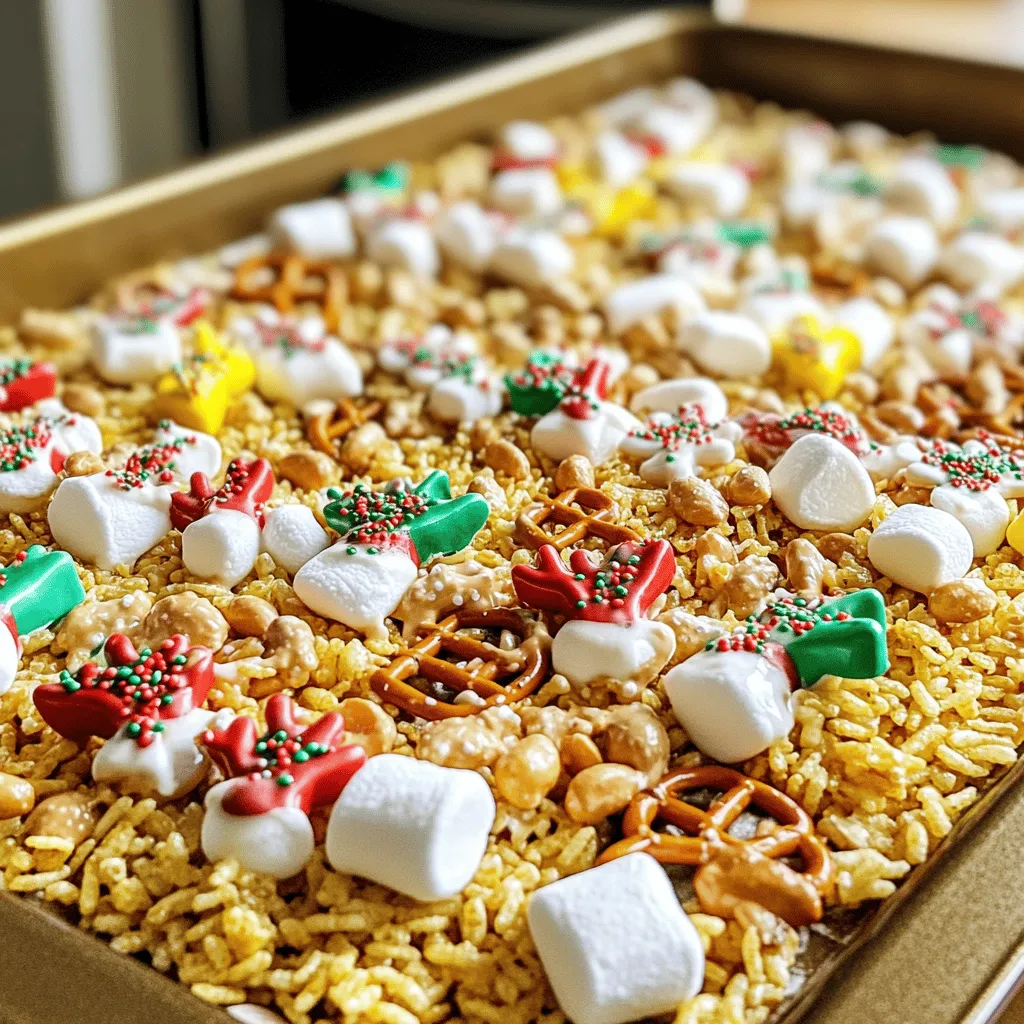
Reindeer Chow Christmas Snack Mix Festive Delight
Get ready to spread holiday cheer with my Reindeer Chow Christmas Snack Mix! This fun and easy treat combines sweet Read Full Recipe -
Gingerbread House Snack Mix Festive Holiday Treat
Are you ready to add some holiday cheer to your snack time? This Gingerbread House Snack Mix is the perfect Read Full Recipe -
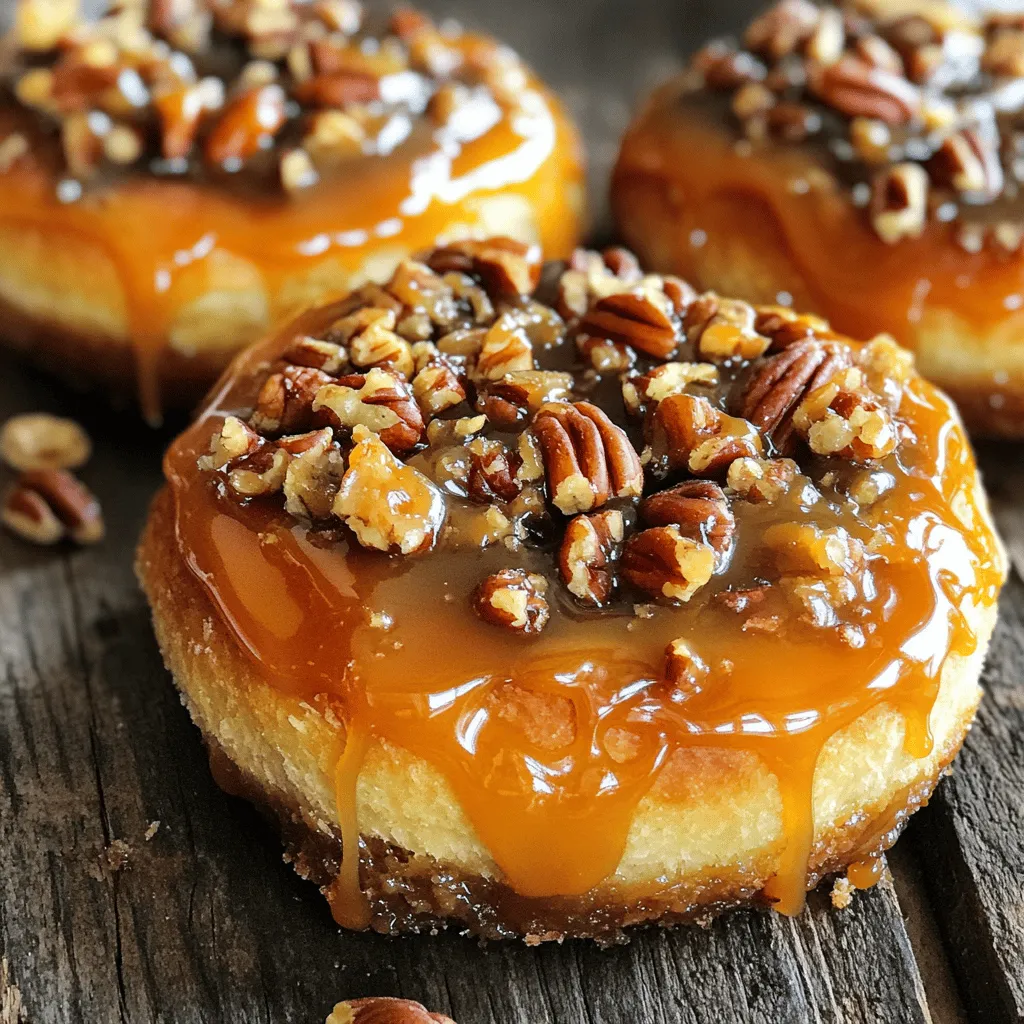
Caramel Pecan Sticky Buns Sweet and Gooey Treat
Are you ready to treat yourself to the ultimate indulgence? Caramel Pecan Sticky Buns are sweet, gooey, and packed with Read Full Recipe -
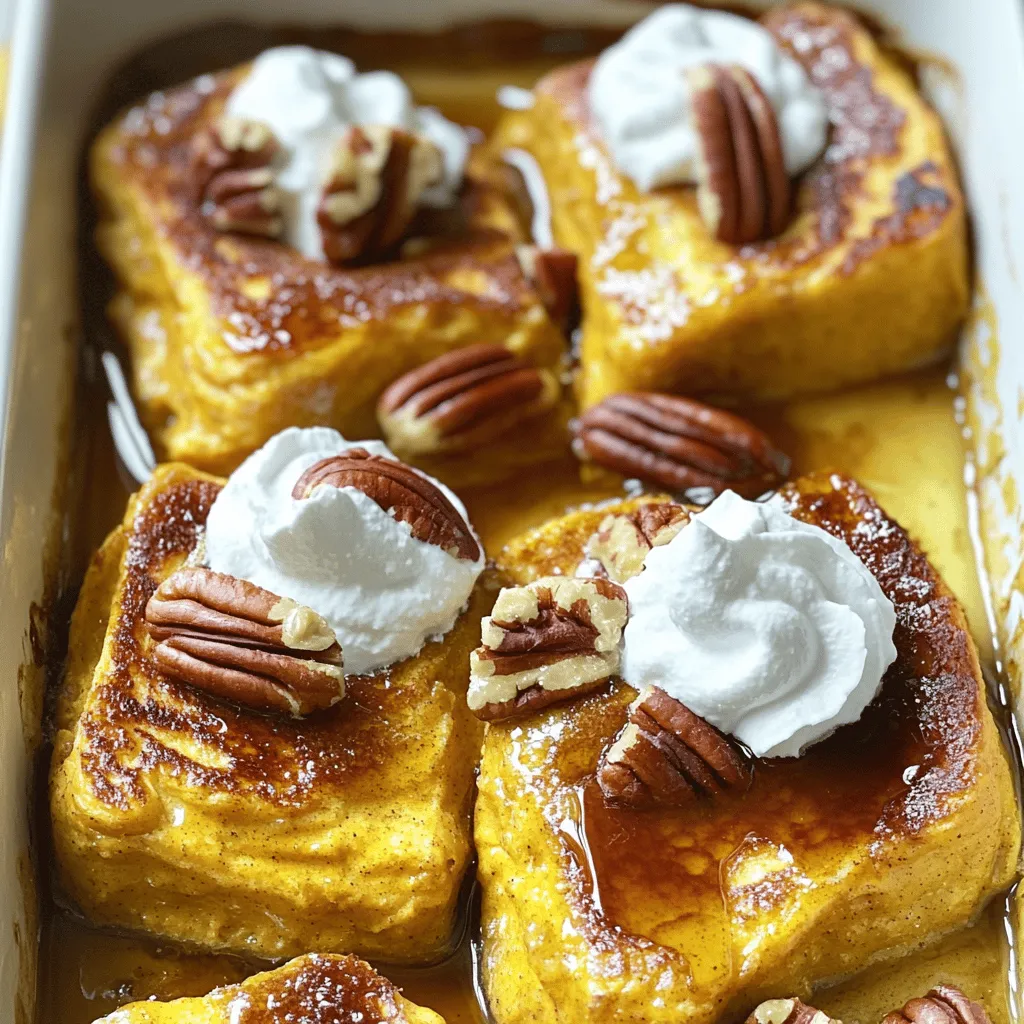
Pumpkin Spice French Toast Casserole Easy and Tasty
Looking for a cozy fall breakfast that’s easy and delicious? You’ll love my Pumpkin Spice French Toast Casserole! This dish Read Full Recipe -
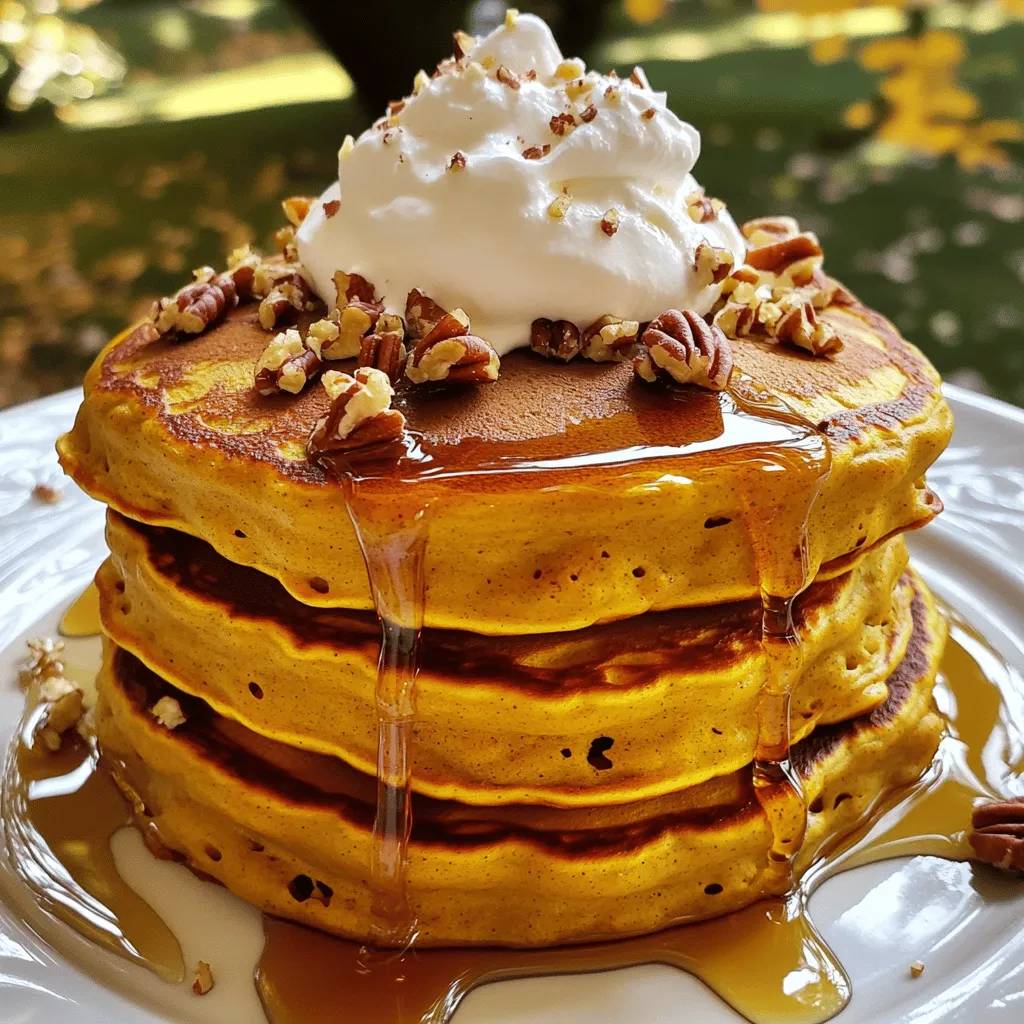
Fluffy Pumpkin Pancakes Perfectly Delicious Breakfast
Start your morning with a treat you won’t forget: fluffy pumpkin pancakes! They bring fall flavors to your breakfast table Read Full Recipe -
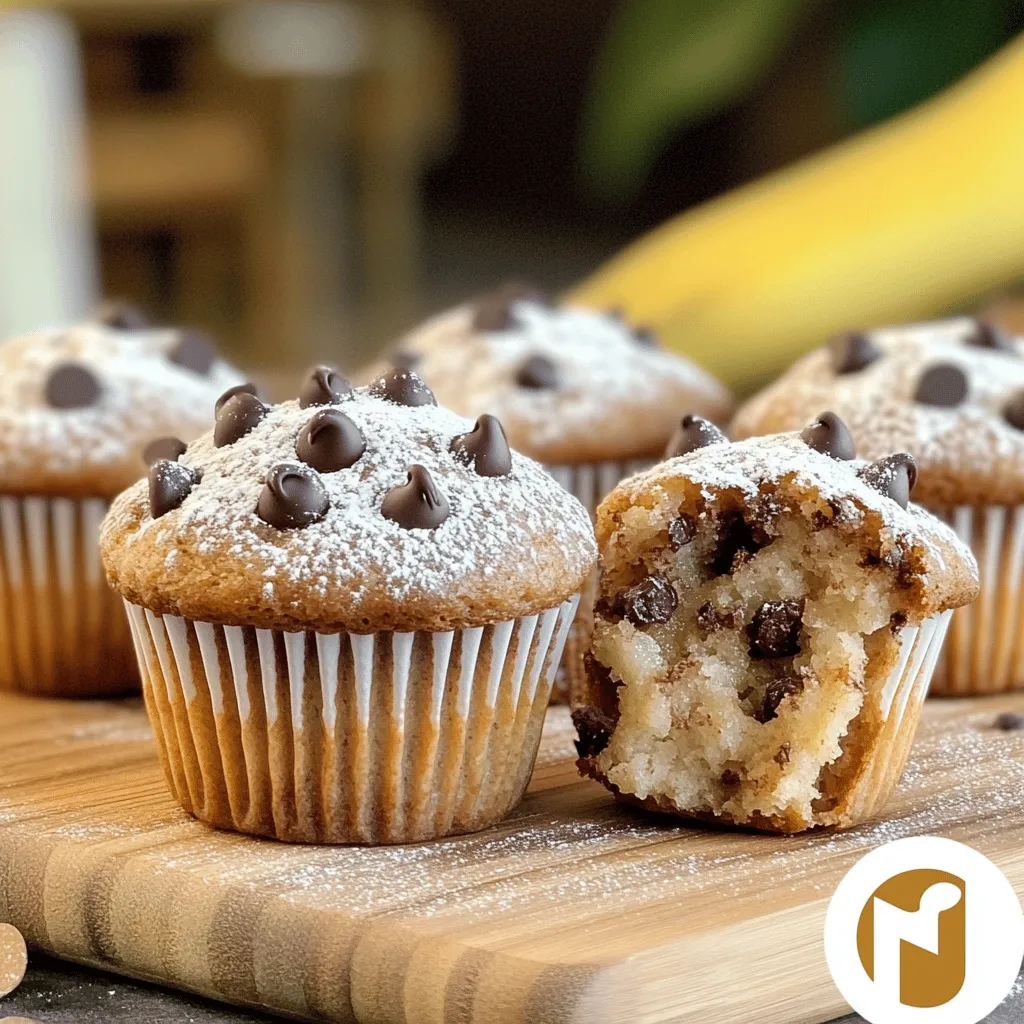
Brown Butter Banana Chocolate Chip Muffins Delight
Are you craving a warm, cozy treat? Look no further than these Brown Butter Banana Chocolate Chip Muffins! This recipe Read Full Recipe -
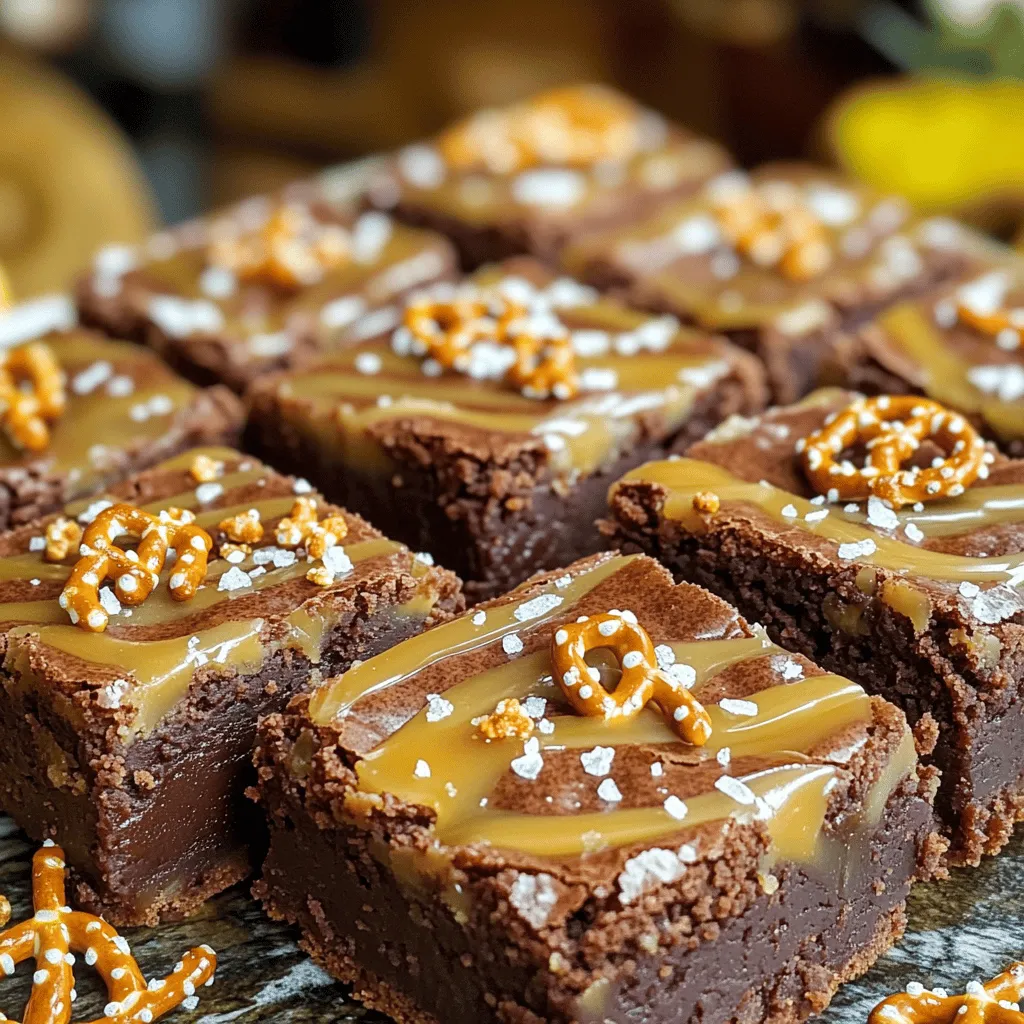
Chewy Salted Caramel Pretzel Brownies Delightful Treat
Are you ready to indulge in a treat that combines sweet, salty, and chewy goodness? These Chewy Salted Caramel Pretzel Read Full Recipe -
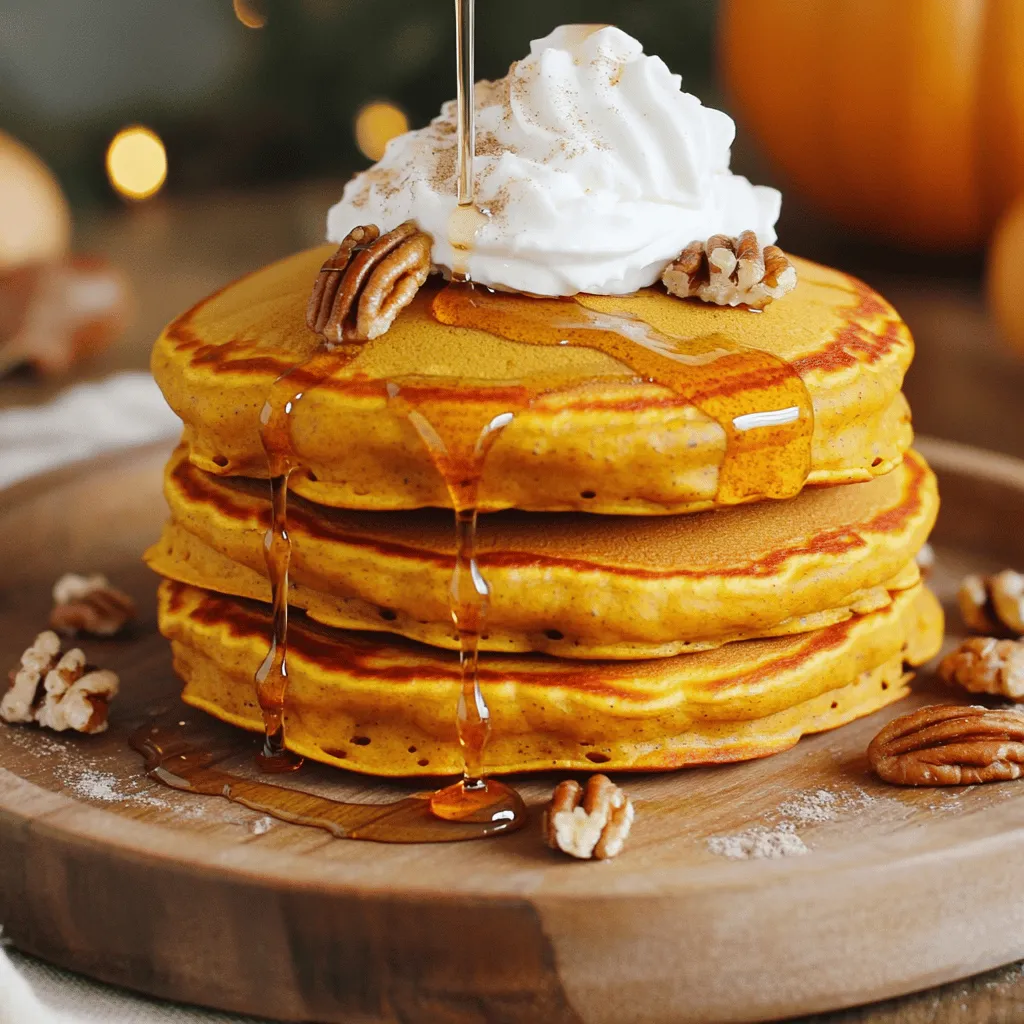
Fluffy Pumpkin Pancakes Easy and Delicious Recipe
Looking to spice up your breakfast with something special? You’re in for a treat! These fluffy pumpkin pancakes are not Read Full Recipe
My Latest Recipes

hey,
i’m !
I’m so happy you’re here!
I love creating dishes that bring joy to the table. I hope they bring the same joy to yours. Let’s enjoy this flavorful journey together.
![To make these tasty energy balls, you need a few key ingredients. Here’s what you’ll need: - 1 cup rolled oats - 1/2 cup almond butter (or peanut butter) - 1/2 cup canned pumpkin puree - 1/4 cup honey or maple syrup - 1 tablespoon pumpkin spice blend (or a mix of cinnamon, nutmeg, and ginger) - 1/4 teaspoon salt - 1/2 cup ground flaxseed - 1/2 cup chocolate chips or dried cranberries (optional) - 1/4 cup chopped nuts (walnuts or pecans) These ingredients work together to create a delicious and nutritious snack. The oats give you fiber, while the pumpkin adds moisture and flavor. Almond butter provides healthy fats, making these energy balls filling. You can make these energy balls your own by adding extras. Here are some fun options: - Chia seeds for added fiber - Coconut flakes for a tropical twist - Protein powder for an extra boost - Dried fruits like raisins or apricots Mix and match these add-ins to suit your taste. The best part is that you can switch them up each time you make a batch! If you have dietary needs, don’t worry! You can easily swap out some ingredients. Here are a few simple substitutions: - Use sunflower seed butter instead of almond butter for nut-free options. - Maple syrup can replace honey for a vegan recipe. - Rolled oats can be substituted with gluten-free oats if needed. These swaps help you enjoy pumpkin spice energy balls no matter your diet. Just keep the ratios similar so that the texture stays right. For the full recipe, check out the instructions. Enjoy making these easy and tasty treats! To start, gather your ingredients for pumpkin spice energy balls. You need rolled oats, almond butter, pumpkin puree, honey, pumpkin spice, salt, ground flaxseed, chocolate chips (or dried cranberries), and nuts. In a large bowl, combine the rolled oats, almond butter, pumpkin puree, honey, pumpkin spice, and salt. Mix well. You want a smooth blend. Next, add ground flaxseed, chocolate chips, and nuts. Stir until everything is well mixed. Now, it's time to shape the mixture into balls. Use your hands to form small balls, about 1 inch in size. If the mixture feels sticky, dampen your hands with a little water. This will help you roll the balls more easily. Place each ball on a baking sheet lined with parchment paper. Keep them evenly spaced so they don't stick together. After forming the balls, put the baking sheet in the fridge. Let them chill for about 30 minutes. This helps the energy balls firm up. Once chilled, transfer them to an airtight container. You can enjoy them right away, or store them in the fridge for up to a week. They make a great snack anytime! For the full recipe, check out the details above. To stop your mixture from being too sticky, wet your hands. A little water helps you shape the balls easily. If the mix is still sticky, chill it for a bit in the fridge before rolling. This makes it firmer and easier to work with. You can boost the taste of your energy balls in simple ways. Consider adding a splash of vanilla extract for a rich flavor. You can also try mixing in dried fruits like raisins or apricots for a sweet touch. If you love crunch, add chopped nuts or seeds. These extras can really change the taste! Want a healthier snack? Swap out honey for mashed bananas to cut sugar. You can also replace almond butter with unsweetened applesauce for fewer calories. If you are looking to add protein, mix in a scoop of your favorite protein powder. Each change keeps it tasty while making it better for you. Check out the Full Recipe for more ideas! {{image_2}} Pumpkin spice energy balls offer a great mix of nutrients. They are packed with fiber, protein, and healthy fats. The oats and flaxseed provide energy and help digestion. Almond butter adds protein and good fats. Plus, pumpkin puree is low in calories and high in vitamins. These energy balls also make a good snack for busy days. Each energy ball has about 90 calories. This makes them a smart choice for a snack. If you eat two, you get around 180 calories. It’s easy to enjoy these without feeling guilty. You can keep your portions in check while enjoying their tasty flavor. - Rolled oats: Good for heart health and digestion. - Almond butter: Boosts energy and keeps you full longer. - Pumpkin puree: Rich in vitamins A and C, and low in calories. - Flaxseed: Contains omega-3 fats and fiber, great for the heart. - Honey or maple syrup: Natural sweeteners that provide quick energy. These ingredients combine to make a healthful and tasty treat. You can find the full recipe [here] and enjoy making these delicious energy balls at home. You can boost your energy balls by adding protein powder. This makes them ideal for workouts. Just mix in one scoop of your favorite protein powder into the main mix. It blends well with the other ingredients. You still get that great pumpkin flavor. The result is a filling snack that helps with muscle recovery. If you want a quick treat, skip the chilling step. You can enjoy them right after rolling! For flavor twists, try adding a splash of vanilla or almond extract. You can also swap pumpkin spice for chai spice. Each option gives a new taste to your energy balls. Feel free to use dried fruits or seeds for a fun crunch. These energy balls are great for every season. For Halloween, add some chocolate chips for a spooky touch. During Christmas, try a hint of peppermint extract. You can even add some festive sprinkles on top. For spring, mix in some lemon zest for a fresh twist. Each season brings a new flavor, making these energy balls fun all year round. For the full recipe, check out the earlier section. Pumpkin Spice Energy Balls stay fresh for up to one week in the fridge. Store them in an airtight container. If you keep them at room temperature, they may last only a few days. Always check for any signs of spoilage, like an off smell or changed texture. Yes, you can freeze Pumpkin Spice Energy Balls! Place them in a single layer on a baking sheet. Freeze them for about an hour, then transfer to an airtight container. They can last for up to three months in the freezer. Just thaw them in the fridge overnight before eating. Pumpkin spice offers several health benefits. It often contains cinnamon, ginger, and nutmeg. These spices can help with digestion and reduce inflammation. Cinnamon may also help control blood sugar. Plus, pumpkin puree is high in fiber and vitamins. It supports your immune system and keeps your skin healthy. Absolutely! You can use peanut butter, cashew butter, or sunflower seed butter. Each nut butter adds a unique flavor and texture. Just make sure the consistency is similar to almond butter. This ensures the energy balls hold their shape well. For those with nut allergies, sunflower seed butter is a great choice. In this blog post, we explored how to make delicious Pumpkin Spice Energy Balls. We discussed key ingredients and options to customize your recipe. I shared simple steps for mixing, shaping, and storing these treats. You also learned tips for flavor and how to avoid stickiness. We covered nutritional benefits and possible variations to try. Remember, these energy balls are easy to make and fun to enjoy. Experiment with flavors, and make them your own. Enjoy your healthy snack any time of the year!](https://soyumrecipes.com/wp-content/uploads/2025/07/7da246e4-eb6a-460d-92b2-4dba7d940863-300x300.webp)


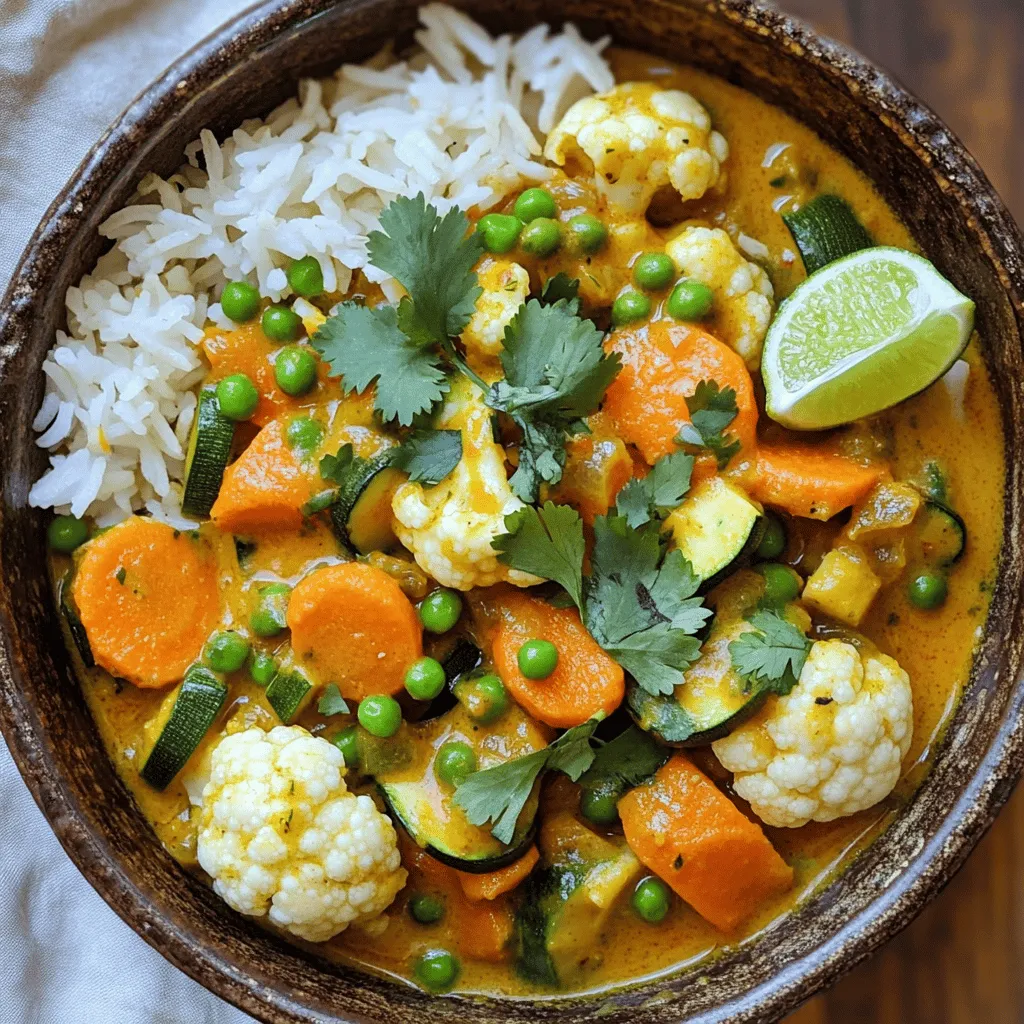
Easy Vegetable Curry Quick and Flavorful Recipe
Craving a quick, tasty meal? You’re in the right place! This Easy Vegetable Curry recipe is simple to make and packed with flavor. I’ll…