

Latest & Greatest
Satisfying One-Pan Garlic Chicken and Asparagus Dish
Ready for an easy dinner that packs flavor? This One-Pan Garlic Chicken and Asparagus dish is simple and satisfying. With
Read more…
Cheesy Broccoli Rice Casserole Comforting Family Dish
If you’re looking for a dish that brings the whole family together, you’ve found it! This Cheesy Broccoli Rice Casserole
Read more…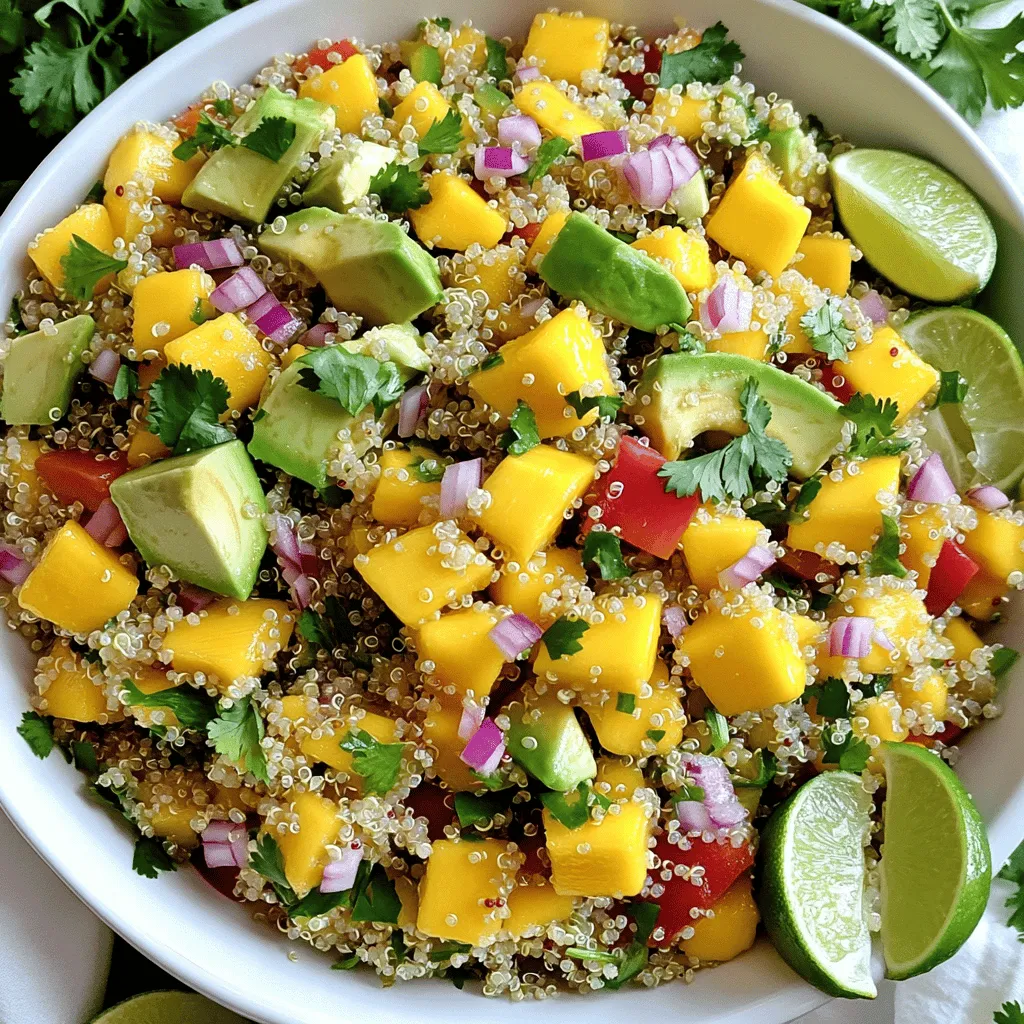
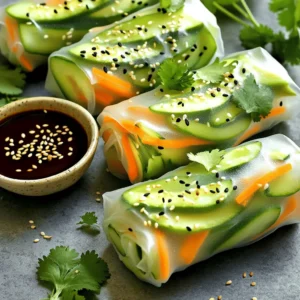
Mango Avocado Quinoa Salad Fresh and Flavorful Mix
Dive into the vibrant world of flavors with my Mango Avocado Quinoa Salad! This fresh mix combines sweet mango, creamy
Read more…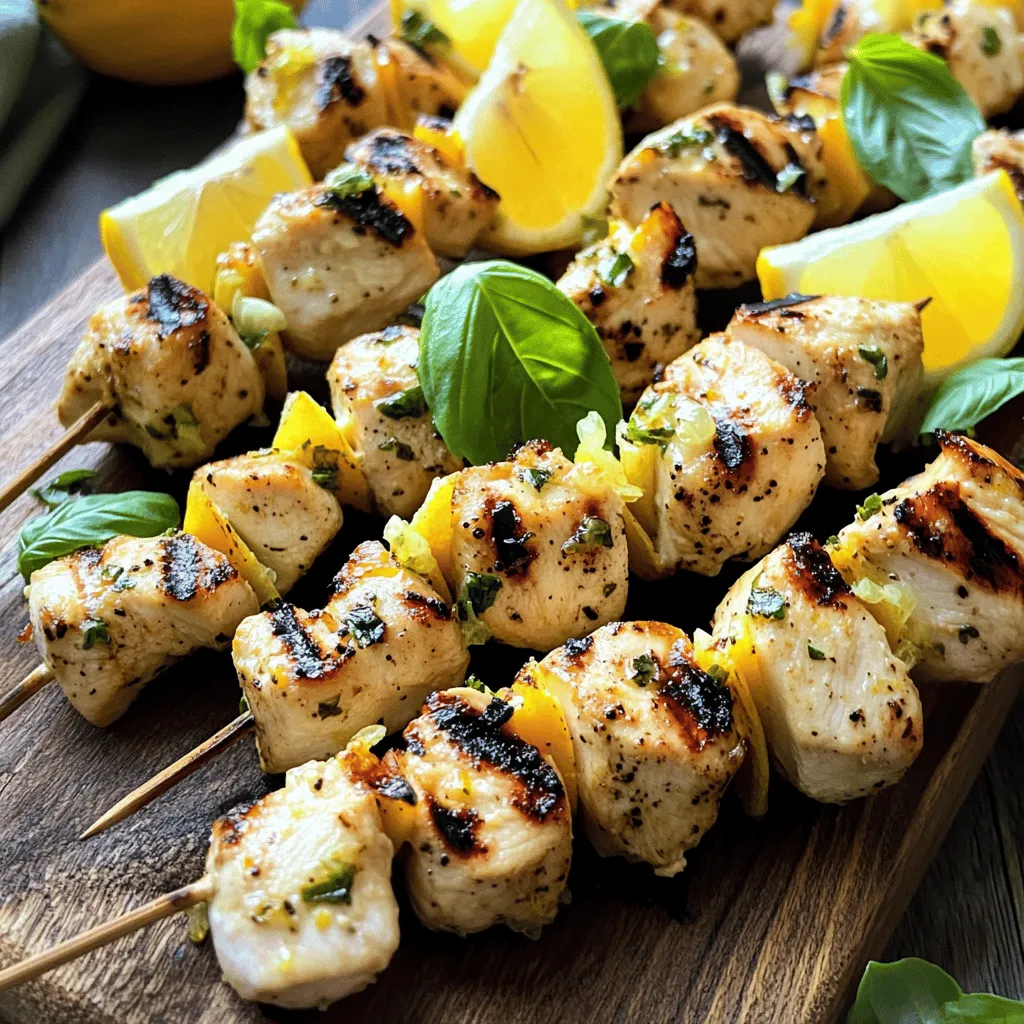
Lemon Basil Chicken Skewers Flavorful and Easy Meal
Are you ready for a dinner that’s both easy and packed with flavor? Lemon Basil Chicken Skewers bring together simple
Read more…
Easy Chicken Enchiladas Simple and Tasty Recipe
If you’re craving a quick and tasty meal, look no further! My Easy Chicken Enchiladas recipe is simple to follow
Read more…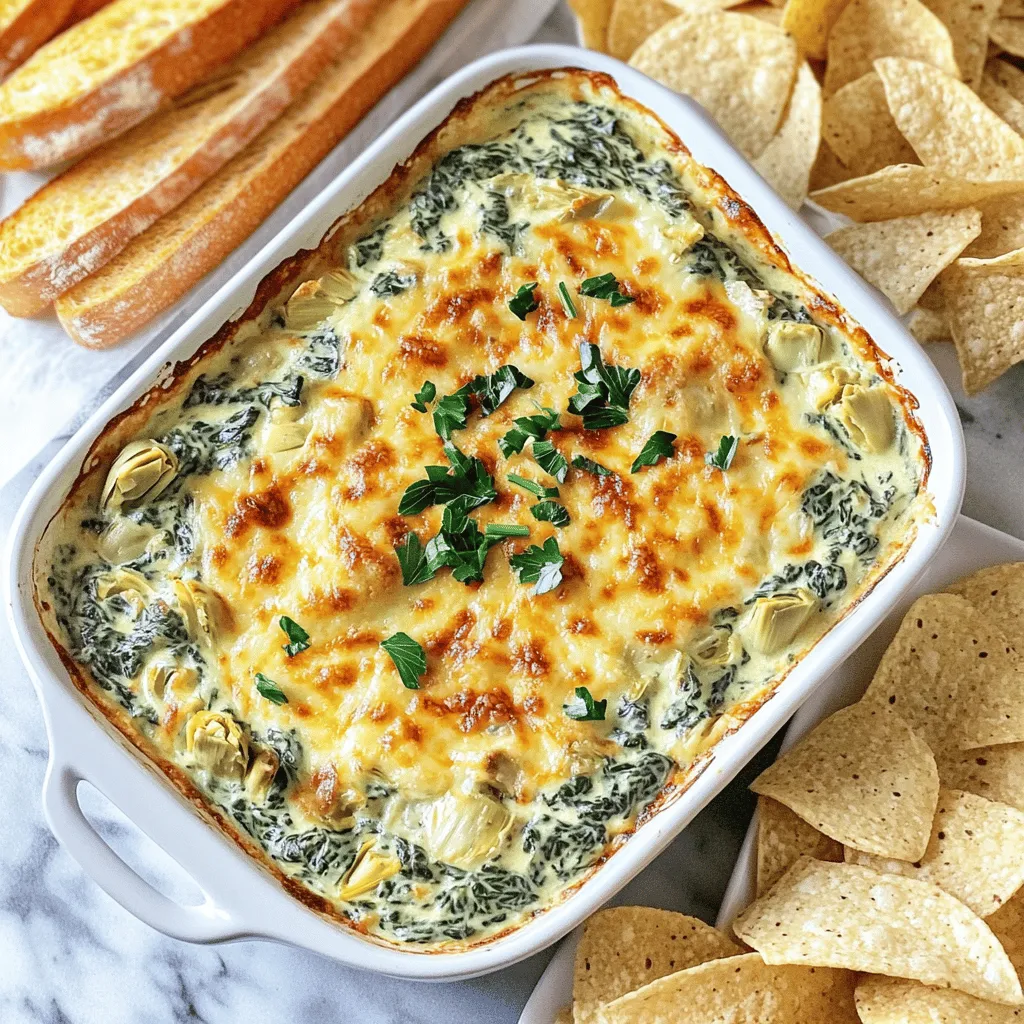
Creamy Spinach Artichoke Dip Savory and Satisfying
Looking for a dip that’s both creamy and packed with flavor? You’ve come to the right place! My Creamy Spinach
Read more…
Savory Breakfast Muffins Tasty and Easy Recipe
Looking for a delicious start to your day? You’re in the right place! Savory breakfast muffins are quick to make
Read more…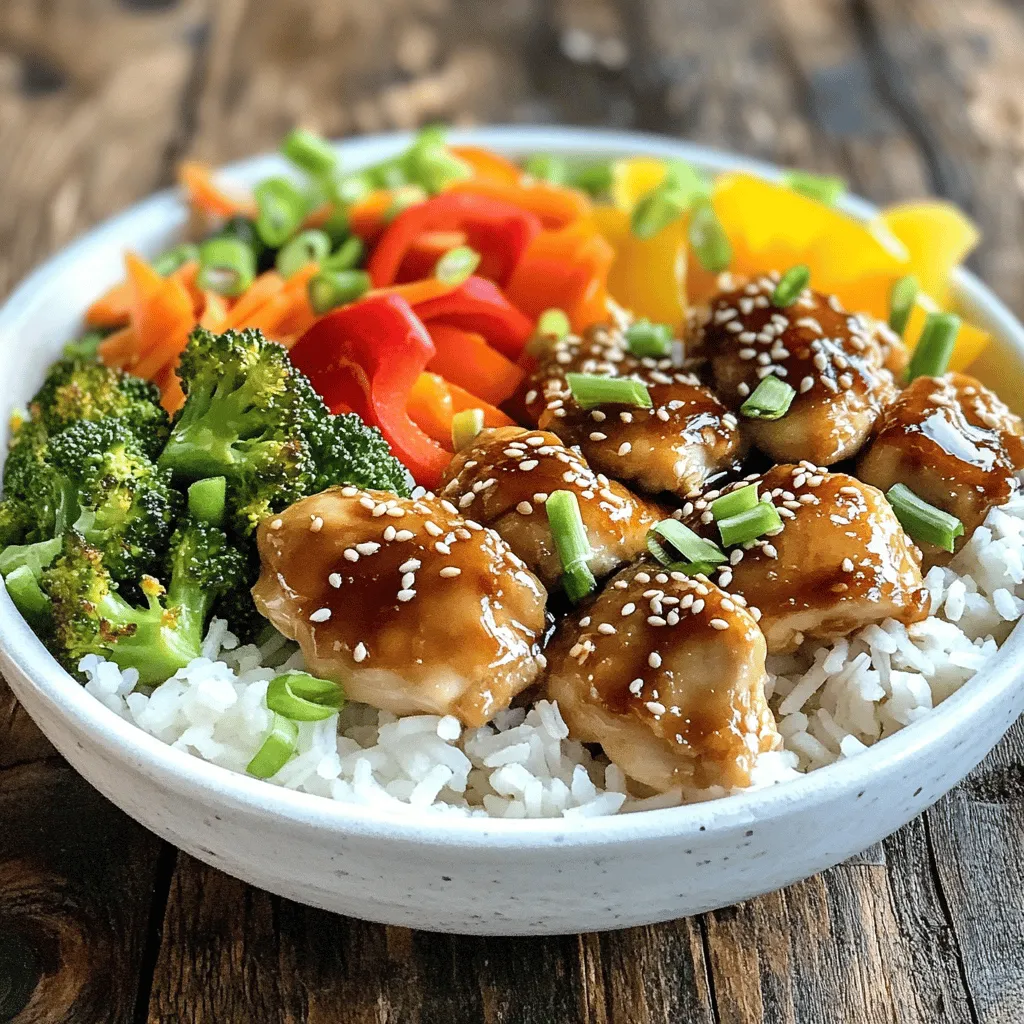
Teriyaki Chicken Bowls Flavorful and Easy Recipe
Are you ready to create a delicious Teriyaki Chicken Bowl that’s both easy and packed with flavor? You’ll love this
Read more…browse recipes


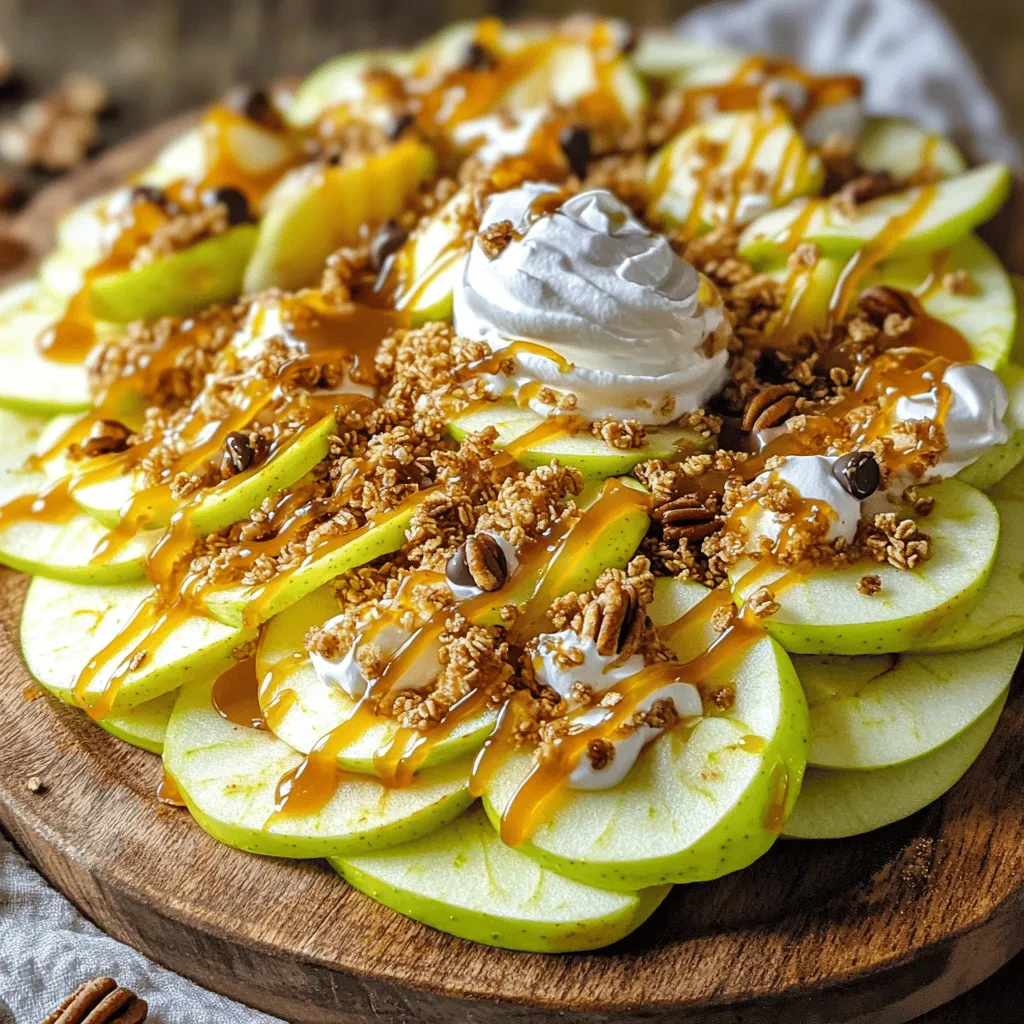
Caramel Apple Nachos Delightful and Simple Dessert
Are you ready for a fun twist on a classic treat? Caramel Apple Nachos are both delightful and super simple to make! With fresh…
My Latest Desserts
-

Cherry Almond Overnight French Toast Easy Morning Dish
Looking for a quick and delicious breakfast? Cherry Almond Overnight French Toast could be your new favorite dish! This easy Read Full Recipe -

Cherry Chocolate Chip Scones Delightful and Easy Recipe
Are you ready to bake something sweet and delightful? My Cherry Chocolate Chip Scones are the perfect treat for breakfast Read Full Recipe -

Cherry Lemon Yogurt Cake Simple and Tasty Treat
If you’re craving a delicious treat that’s both simple to make and bursting with flavor, look no further than this Read Full Recipe -

Cherry Almond Crumble Muffins Delightful and Easy Recipe
Ready to bake something special? These Cherry Almond Crumble Muffins are simple and delicious! With juicy cherries and a crunchy Read Full Recipe -
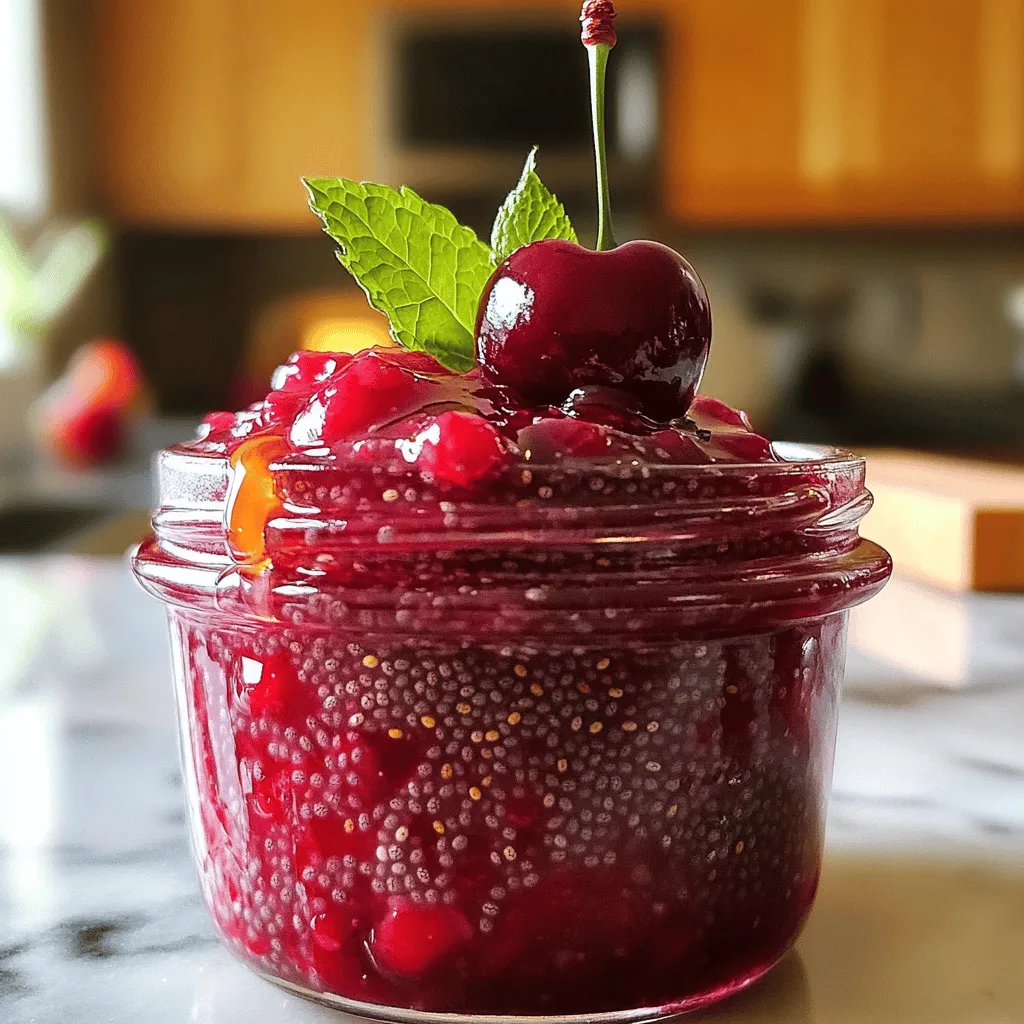
Cherry Chia Jam Simple and Nutritious Recipe
If you love delicious and healthy spreads, you need to try this Cherry Chia Jam! It’s easy, quick, and full Read Full Recipe -

Pumpkin Spice Energy Balls Tasty and Nutrient-Rich
Are you ready to fuel your day with a tasty treat? Pumpkin Spice Energy Balls are not just delicious; they’re Read Full Recipe -

S’mores Dessert Nachos Tasty and Fun Treat Idea
Get ready for a treat like no other with my S’mores Dessert Nachos! This fun dessert combines crispy tortillas, melty Read Full Recipe -
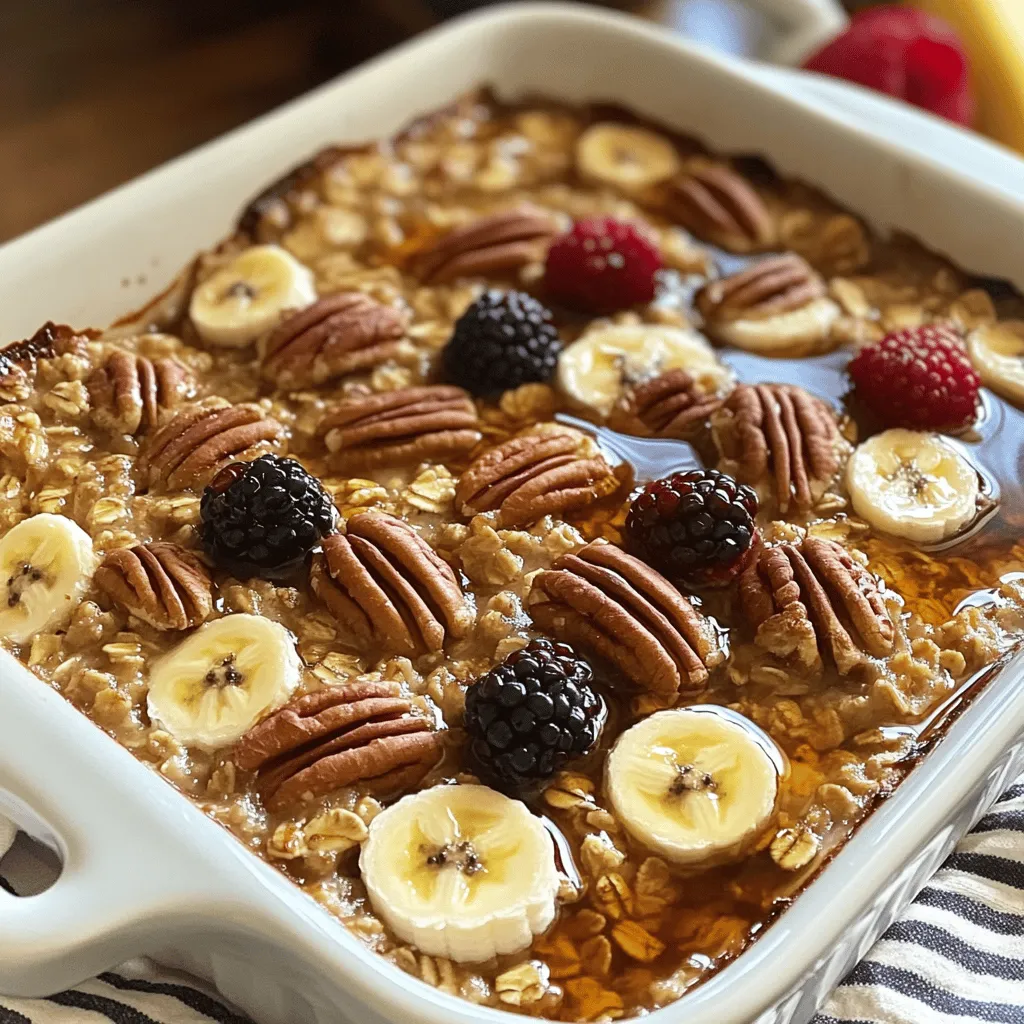
Maple Pecan Baked Oatmeal Tasty Morning Delight
Are you ready for a sweet start to your day? Maple Pecan Baked Oatmeal is a tasty treat that combines Read Full Recipe -
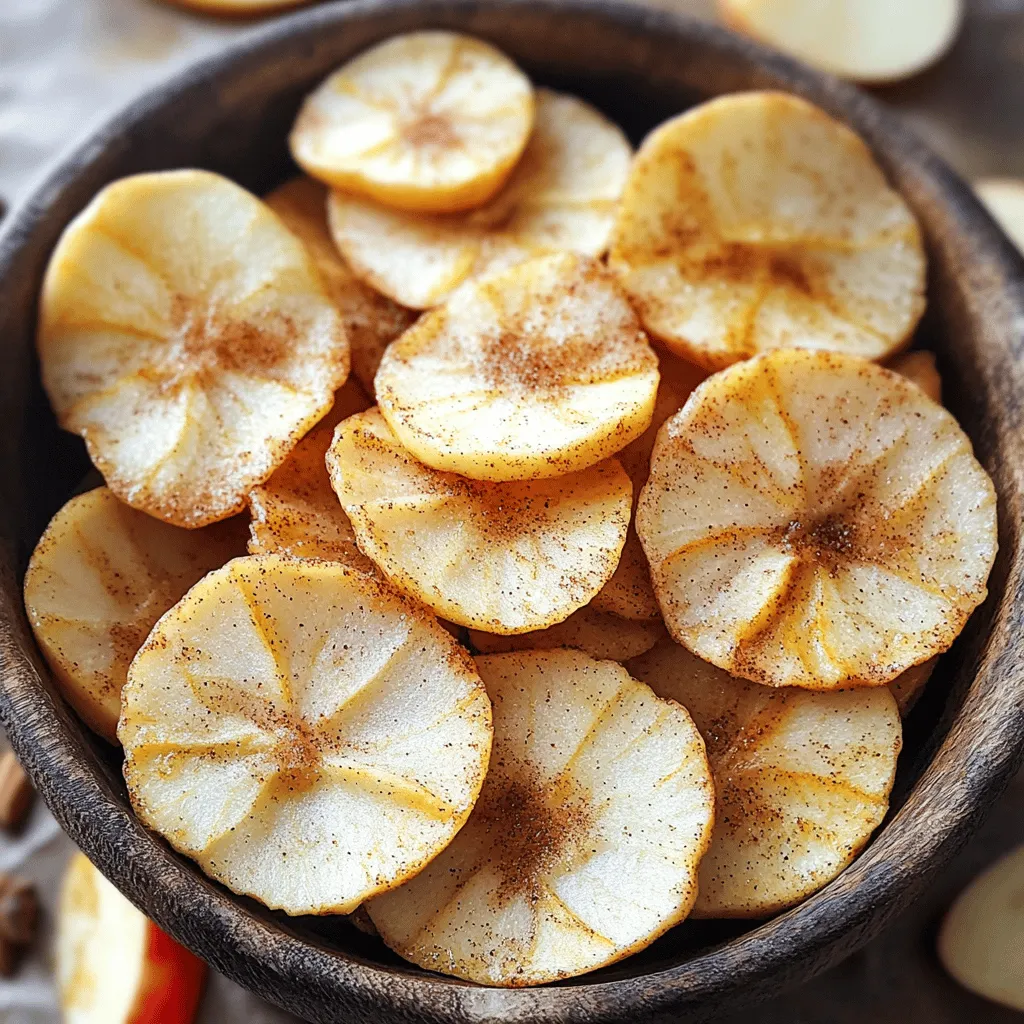
Baked Cinnamon Apple Chips Healthy Snack Delight
If you crave a tasty snack that satisfies both your sweet tooth and health goals, look no further! Baked Cinnamon Read Full Recipe -

No-Bake Peach Yogurt Bars Tasty and Easy Treat
Looking for a sweet, easy treat? You’ll love these No-Bake Peach Yogurt Bars! They combine creamy yogurt and juicy peaches Read Full Recipe
My Latest Recipes

hey,
i’m !
I’m so happy you’re here!
I love creating dishes that bring joy to the table. I hope they bring the same joy to yours. Let’s enjoy this flavorful journey together.
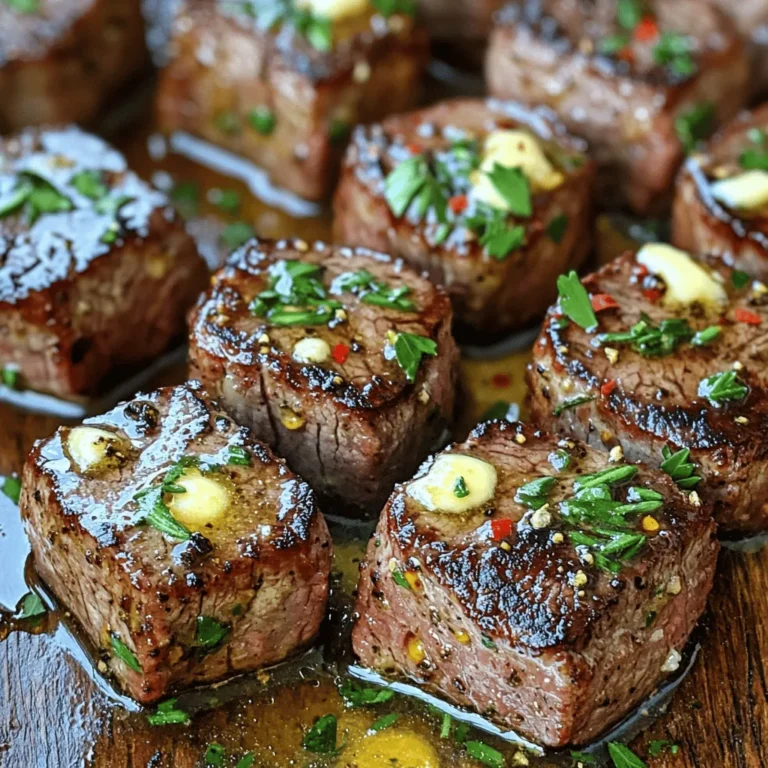
. First, fill a large pot with water and add a pinch of salt. Bring the water to a rolling boil. Once boiling, add 8 oz of rigatoni pasta. Cook it for about 8-10 minutes, or until it is al dente. This means the pasta should be firm but not hard. After cooking, drain the pasta in a colander and set it aside. Now, take 1 lb of steak tips, either sirloin or ribeye, and place them in a bowl. Generously season the steak tips with salt, freshly ground black pepper, and 1 teaspoon of garlic powder. This will add a great flavor to the meat. Mix the seasonings well to ensure each piece is coated evenly. In a large skillet, melt 2 tablespoons of butter over medium-high heat. Once the butter is hot and bubbly, add the seasoned steak tips in a single layer. Sear them for about 3-4 minutes on each side. You want them to turn a nice brown color and reach your desired doneness. Once cooked, remove the steak from the skillet and keep it warm on a plate covered with foil. In the same skillet, lower the heat to medium. Add the remaining 2 tablespoons of butter. Once it melts, add 4 cloves of minced garlic and 1 teaspoon of fresh thyme leaves. Sauté for about 1-2 minutes until the garlic smells nice and fragrant. Next, pour in 1 cup of heavy cream and stir to mix it well with the garlic butter. Gradually add in 1 cup of shredded mozzarella cheese and ½ cup of grated Parmesan cheese. Stir continuously until the cheese melts and the sauce becomes smooth and creamy. Now, it’s time to mix it all together. Add the drained rigatoni to the skillet and toss it gently in the creamy sauce. Then, return the warm steak tips back into the skillet and mix everything together until well combined. For serving, transfer the delicious mixture to plates or a large serving dish. You can garnish it with freshly chopped parsley for a nice touch. Enjoy your comforting and cheesy Garlic Butter Steak Tips with Cheesy Rigatoni! For the full recipe, check out the link provided. For steak tips, I love using sirloin or ribeye. These cuts are tender and full of flavor. Sirloin is lean but juicy. Ribeye has more fat, adding rich taste. Both work well when cut into bite-sized pieces. Choose steak that has a nice red color. Look for marbling, which means fat within the meat. This adds flavor and keeps the steak moist. To avoid overcooked steak, use a meat thermometer. Aim for 130°F for medium-rare and 140°F for medium. Sear the steak for 3-4 minutes on each side. This gives you a nice crust. Remove the steak from heat just before it reaches your target temperature. The meat will continue to cook while it rests. Let it sit for a few minutes before serving. This keeps the juices in. You can enhance the flavors of your steak tips in many ways. Try adding smoked paprika for a smoky taste. Rosemary works well too, adding a fresh, earthy note. You can also mix in some crushed red pepper for a bit of heat. Fresh herbs like parsley or thyme can brighten the dish. Remember, simple ingredients can make a big impact on flavor. For the full recipe, check out the detailed instructions. {{image_2}} You can use many types of pasta. While rigatoni is great, consider penne, fusilli, or even farfalle. Each shape holds sauce differently, adding unique textures. Short pasta works well for this dish. Long pasta can also be fun, but it’s trickier to mix with steak. Choose what you like best! If you want to change the protein, chicken or tofu are awesome options. For chicken, use boneless thighs or breasts, cut into bite-sized pieces. Cook them just like the steak tips for juicy bites. Tofu is great for a veggie twist. Press it to remove extra water. Then, cut it into cubes, season, and cook until golden. Making a meatless version is easy! Swap the steak for mushrooms. Portobello or cremini mushrooms offer a hearty bite. Sauté them until soft and golden. You can also add your favorite vegetables, like zucchini or bell peppers. Just remember to cook them well to bring out their flavors. This way, you get a rich, tasty meal without meat! Explore these variations to make the recipe fit your taste! If you want the full details and steps, check the Full Recipe. To keep your Garlic Butter Steak Tips with Cheesy Rigatoni fresh, store them in an airtight container. Make sure the dish cools down first. Place it in the fridge within two hours after cooking. Leftovers can last up to three days. Label the container with the date. This helps you track freshness. When it’s time to enjoy your leftovers, reheating is key. You can use the microwave or the stove. For the microwave, heat in short bursts. Stir often to avoid hot spots. If using the stove, add a splash of cream or water. This keeps the sauce creamy. Heat on low, stirring gently until warm. To freeze, let the dish cool completely. Then, transfer it to a freezer-safe container. Leave some space at the top, as food expands when frozen. Wrap it tightly with plastic wrap, then cover with a lid. It can stay in the freezer for up to three months. To defrost, move it to the fridge overnight before reheating. This keeps the texture nice and tasty. Yes, you can prep this dish in advance. Cook the rigatoni and steak tips first. Store them separately in the fridge. You can mix them with the garlic butter sauce just before serving. This keeps the pasta and steak fresh and tasty. You can pair this dish with a simple salad. A fresh green salad with a light vinaigrette works great. Steamed vegetables like broccoli or green beans are also good choices. Breadsticks or garlic bread add a nice touch too. This recipe is not spicy. It has a rich garlic flavor with no heat. If you want some spice, add red pepper flakes. You can also serve hot sauce on the side for those who like it spicy. For the full recipe, you can find it [here](https://example.com/full-recipe). In this post, we explored how to make Garlic Butter Steak Tips and Cheesy Rigatoni. You learned about the key ingredients, step-by-step cooking methods, and tips to perfect your dish. Remember to choose the right steak and avoid overcooking for the best flavor. You can also make this meal with different pasta or protein options. Enjoy experimenting with these recipes, and don’t forget to share your results with friends and family! Your cooking journey starts now.](https://soyumrecipes.com/wp-content/uploads/2025/05/d7df9734-6280-4441-80fd-2180c3ac4c89-300x300.webp)

![- 2 large apples (any variety, such as Fuji or Honeycrisp) - 1 teaspoon ground cinnamon - 1 tablespoon coconut sugar (or brown sugar) - A pinch of salt Baked cinnamon apple chips provide a healthy snack option. Each serving contains about 100 calories. They deliver 0.5 grams of protein, 25 grams of carbs, and 2 grams of fiber. The sugars from the apples and coconut sugar make them sweet but still healthy. When you choose apples, you get fiber and vitamins. The cinnamon adds flavor and may help with blood sugar control. Coconut sugar has a lower glycemic index than white sugar, making it a better choice for many. These chips are a great snack for kids and adults alike. They are crunchy, sweet, and full of flavor. Check out the Full Recipe for more details on making these tasty treats. 1. Preheat your oven to 200°F (90°C). Line two baking sheets with parchment paper. 2. Rinse and dry your apples. Cut them into thin slices, about 1/8 inch thick. A sharp knife or mandoline helps with even slices. 3. In a small bowl, mix together 1 teaspoon of ground cinnamon, 1 tablespoon of coconut sugar, and a pinch of salt. This blend adds flavor to your chips. 4. Place the apple slices in a large bowl. Sprinkle the cinnamon mixture evenly over them. Toss gently to coat each slice. 5. Arrange the apple slices in a single layer on your baking sheets. Make sure they do not overlap. 6. Bake in the preheated oven for about 2 hours. This time may vary based on slice thickness. Flip the slices halfway through to ensure even crispness. 7. Once the apple slices are golden brown and crisp, remove them from the oven. Let them cool completely on the baking sheets. 8. Store your baked cinnamon apple chips in an airtight container. This way, you can enjoy a crunchy snack anytime! For the complete recipe, check out [Full Recipe]. To get that perfect crisp, pay close attention to how you slice the apples. Aim for about 1/8 inch thick slices. If they are too thick, they won't crisp up well. Thin slices allow for even baking, leading to that delightful crunch. Another key step is flipping the apple slices halfway through baking. This ensures both sides get the same heat and helps them become evenly crispy. Feel free to get creative with flavors! You can add different spices like nutmeg or ginger to change the taste. If you want a sweeter kick, try using honey or maple syrup instead of sugar. Each option gives your baked cinnamon apple chips a unique twist, making snack time more fun. Presentation plays a big role in how we enjoy our food. Serve your apple chips in a rustic bowl and sprinkle a bit of extra cinnamon on top. This simple touch makes the dish look appealing. Pair them with almond butter for dipping. The creamy texture of the almond butter complements the crispness of the apple chips perfectly. For more ideas, check out the Full Recipe! {{image_2}} For baked cinnamon apple chips, the type of apple matters. You want crisp apples that hold up well during baking. My favorites are Fuji and Honeycrisp. Both offer a nice balance of sweet and tart. - Fuji Apples: These are sweet and juicy. They create a lovely flavor when baked. - Honeycrisp Apples: They have a crunchy texture and a refreshing taste. They make the chips extra tasty. Other good choices include Granny Smith for a tart kick or Pink Lady for a unique flavor. Each apple brings its own twist to your chips. While coconut sugar is great, you can try other sweeteners too. Honey or maple syrup can add a different taste. Just remember to adjust the amount. - Honey: This adds a floral note. It can make the chips a bit stickier. - Maple Syrup: This gives a warm, rich flavor. You may want to use less than coconut sugar. By playing with sweeteners, you can find the flavor that fits your taste buds best. Spices can elevate your baked apple chips. While cinnamon is classic, you can add nutmeg or ginger for a twist. - Nutmeg: This spice adds warmth and depth. Just a pinch can go a long way. - Ginger: It brings a zing that pairs well with apples. You can even create a pumpkin spice version. Mix cinnamon, nutmeg, ginger, and a touch of allspice for a seasonal treat. This makes your apple chips more exciting and fun! To keep your baked cinnamon apple chips crispy, store them in an airtight container. This keeps moisture out, which can make them soft. You can use a glass jar or a plastic container with a good seal. For the best flavor and texture, enjoy your apple chips within one week. If you keep them in a cool, dry place, they will last longer. If your apple chips lose their crunch, don’t worry! You can easily restore their crispness. To recrisp them, use an oven. Preheat it to 200°F (90°C) and bake the chips for about 10 minutes. Check them often to avoid burning. You can also use a microwave. Place a few chips on a microwave-safe plate. Heat them for 20 seconds. Check if they are crispy. If not, heat for another 10 seconds. These methods will help you enjoy your tasty snack again! Baked apple chips can last about one week. Store them in an airtight container. This keeps them fresh and crunchy. If stored well, they can remain tasty for days. Yes, you can use other fruits! Pears, mangoes, and bananas work well. Just remember to adjust the baking time. Each fruit has its own moisture level. If your apple chips aren't crisp, try these tips. First, ensure the slices are thin. Thicker slices take longer to bake. Second, increase the baking time slightly. Flip them halfway for better results. Baked apple chips are a healthy snack. They are low in calories and high in fiber. You get the sweetness of apples without added fats. Plus, you control the sugar level with your choice of sweetener. You can freeze baked apple chips, but they may lose some crispness. Place them in a freezer-safe bag. When ready, thaw them at room temperature. A quick re-bake can help restore some crunch. Baked apple chips are simple and fun to make. You need just a few ingredients and easy steps. Start with your apples, spice them, and bake until crisp. Remember to slice evenly for the best texture. You can also change flavors with different spices or sweeteners. These chips are not only tasty but a healthy snack option. Store them well to keep that crunch. Now you have all the tools to enjoy this delightful treat. Get baking and explore your own variations!](https://soyumrecipes.com/wp-content/uploads/2025/07/33dc01a6-ecfa-43a3-b125-861b4c817e5e-300x300.webp)
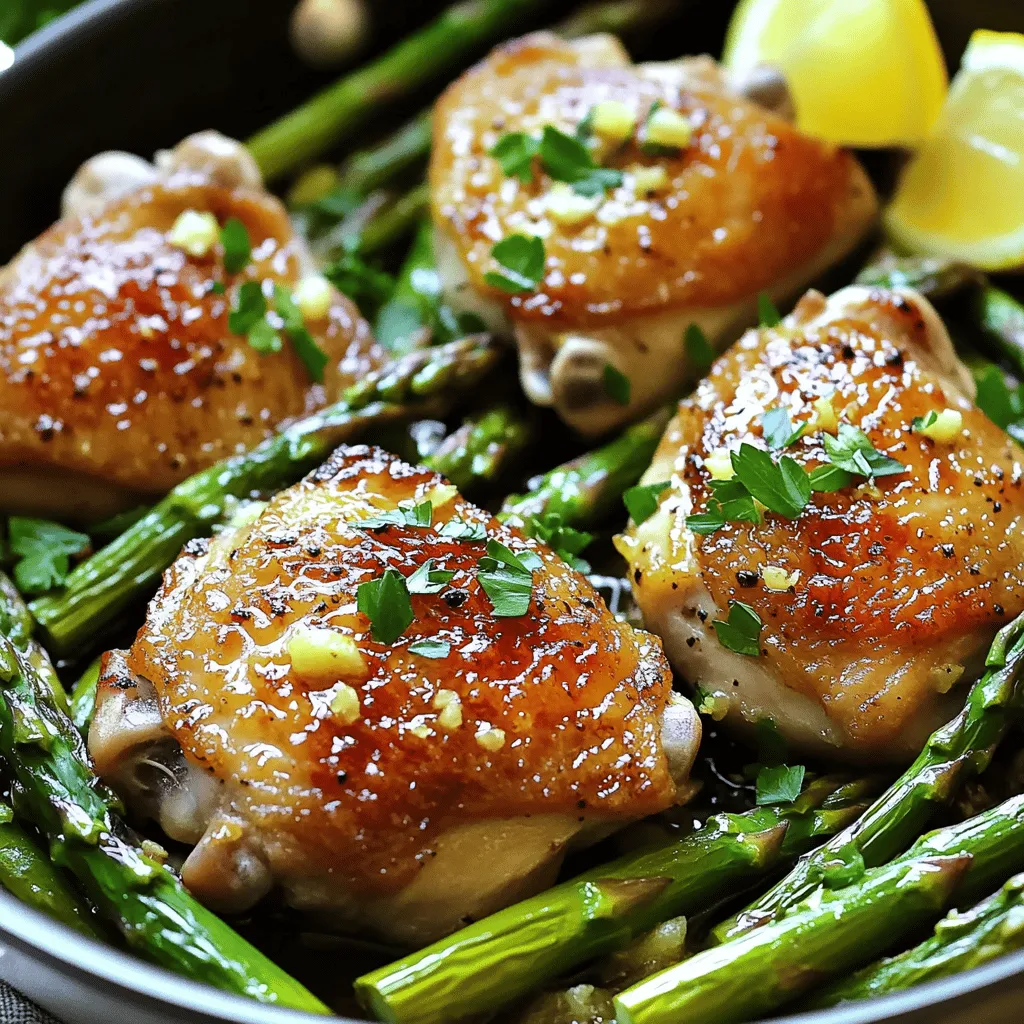
![- 4 chicken thighs, skinless and boneless - 1/2 cup soy sauce (low sodium) - 1/4 cup honey - 2 tablespoons rice vinegar - 2 tablespoons freshly grated ginger - 2 cloves garlic, minced - 1 tablespoon sesame oil - 1 tablespoon cornstarch mixed with 2 tablespoons water (for thickening) - 1/4 cup sliced green onions (for garnish) - Sesame seeds (for garnish) This dish shines with its juicy chicken and rich teriyaki flavor. Using chicken thighs keeps the meat tender. I prefer low-sodium soy sauce to control the saltiness. Honey gives the dish a sweet twist. Rice vinegar adds a nice tang. Fresh ginger brings warmth, and garlic adds depth. The sesame oil adds a nutty aroma. Cornstarch thickens the sauce for a glossy finish. For garnishing, I love fresh green onions and sesame seeds. They add color and texture. This combination creates a delightful and flavorful meal. Check out the Full Recipe for all the details! 1. Preheat your oven to 400°F (200°C). This step is key for even cooking. 2. Prepare a baking dish by lightly greasing it. This helps the chicken not stick. 3. In a medium bowl, whisk together the teriyaki sauce ingredients. Combine 1/2 cup soy sauce, 1/4 cup honey, 2 tablespoons rice vinegar, 2 tablespoons grated ginger, 2 minced garlic cloves, and 1 tablespoon sesame oil. Mix until it’s smooth and well blended. 1. Place the chicken thighs in your baking dish. Pour the teriyaki sauce over the chicken. Make sure each piece is coated. 2. Cover the baking dish with aluminum foil. This keeps moisture in while baking. 3. Bake the chicken for 25 minutes. This ensures the chicken cooks through. 4. Remove the foil and bake for another 15 minutes. This step lets the sauce caramelize and adds flavor. 5. While the chicken finishes, take the remaining sauce and pour it into a saucepan. Heat it over medium heat until it simmers. 6. Stir in the cornstarch mixture and cook for 2-3 minutes. This will thicken the sauce nicely. 1. Once the chicken is done, take it out of the oven. Let it rest for a few minutes before slicing. 2. Drizzle the thickened sauce over the chicken. This adds extra flavor. 3. Garnish with sliced green onions and sesame seeds for a nice touch. Enjoy your delicious meal! For more details, check out the Full Recipe for Baked Teriyaki Chicken. To bake chicken perfectly, set your oven to 400°F. This temperature cooks the chicken evenly. Use skinless, boneless chicken thighs for the best results. They stay juicy and tender. Place the chicken in a baking dish and cover it with foil. This helps trap moisture while baking. After 25 minutes, remove the foil. Let the sauce caramelize for 15 more minutes. This adds flavor and color. For juiciness, marinate the chicken in the teriyaki sauce. I recommend letting it soak for at least 30 minutes. If you have time, marinate overnight in the fridge. This gives the chicken a deep flavor. Always use fresh ingredients for the best taste. Grate fresh ginger and mince fresh garlic. These add a vibrant flavor to the sauce. If you like some heat, add a pinch of red pepper flakes or sriracha. This gives the dish an exciting kick. You can also try adding pineapple juice for a sweet twist. Plating is key to making your dish appealing. Slice the chicken after it rests. This helps keep the juices inside. Arrange the pieces on a clean plate. Drizzle the thickened teriyaki sauce over the top. Sprinkle green onions and sesame seeds for a nice touch. For side dishes, steamed rice or stir-fried veggies work well. They complement the flavors of the teriyaki chicken. Enjoy this savory baked teriyaki chicken, and don't forget to check the Full Recipe for full details! {{image_2}} You can change some ingredients in the teriyaki sauce. If you want a different sweet taste, try maple syrup or agave syrup. Both can add a nice twist. If you do not have chicken thighs, you can use chicken breasts or even tofu for a vegetarian option. Each protein brings its own flavor and texture. Adding pineapple can give your dish a bright, tropical taste. Just chop some fresh pineapple and mix it in with the chicken before baking. If you like spicy food, add a bit of sriracha or chili flakes to the sauce. This will give your teriyaki chicken a nice kick! For gluten-free diets, use tamari instead of soy sauce. It has the same flavor but is safe for those avoiding gluten. If you are on a low-carb diet, skip the honey and use a sugar-free sweetener instead. This keeps the dish tasty without the extra carbs. Explore these variations to find your perfect baked teriyaki chicken! For the full recipe, check out the details above. After enjoying your baked teriyaki chicken, store leftovers safely. First, let the chicken cool down. Then, place it in an airtight container. Refrigerate within two hours of cooking. The chicken stays fresh for up to three days. To keep it flavorful, try to separate the chicken from the sauce. This way, it won't get too soggy. If you want to save some for later, freezing is a great option. Wrap the cooled chicken tightly in plastic wrap or aluminum foil. Then, place it in a freezer-safe bag. Remove as much air as possible. This helps prevent freezer burn. You can freeze baked teriyaki chicken for up to three months. When you're ready to eat it, move it to the fridge overnight to thaw. Reheating your chicken properly keeps it moist and tasty. The best method is to use the oven. Preheat the oven to 350°F (175°C). Place the chicken in a baking dish and cover it with foil. Heat for about 15-20 minutes. You can also add a splash of water or sauce to help keep it juicy. If you’re in a hurry, you can use the microwave. Just cover it and heat in short bursts, checking often to avoid drying it out. Enjoy your meal again! To ensure your chicken is safe to eat, check its internal temperature. Use a meat thermometer to measure the thickest part of the chicken. The safe cooking temperature for chicken is 165°F (75°C). This ensures the meat is juicy and safe. When cooking baked teriyaki chicken, follow these steps: - Preheat your oven to 400°F (200°C). - Bake covered for 25 minutes, then uncovered for 15 minutes. - Check the temperature after baking to confirm doneness. Yes, you can easily swap chicken for other meats. Here are some options: - Pork: Use pork tenderloin or chops for a different flavor. - Beef: Thin strips of beef work well in teriyaki sauce. - Tofu: Firm tofu is a great vegetarian option. Just ensure it is pressed to remove excess water. Adjust cooking times based on the meat you choose. Pair your baked teriyaki chicken with many tasty side dishes. Here are some ideas: - Steamed rice: White or brown rice absorbs the teriyaki sauce well. - Vegetables: Broccoli, green beans, or stir-fried veggies add color and nutrition. - Salad: A fresh salad with a light dressing complements the rich flavors. These sides create a balanced and delicious meal. For the full recipe, visit the [Full Recipe]. In this post, we covered how to make flavorful teriyaki chicken. We explored key ingredients like chicken thighs, soy sauce, and honey. I provided simple steps for preparation and cooking, along with tips for juiciness. We discussed variations and substitutions to suit different tastes, plus storage and reheating advice. Teriyaki chicken is easy to make and delicious. Try it yourself to impress your friends and family. You’ll enjoy the flavors and the joy of cooking!](https://soyumrecipes.com/wp-content/uploads/2025/06/e9dc27bf-221d-417c-8369-5e0ca43392b6-300x300.webp)
Mini Pineapple Upside Down Cheesecakes Delightful Treat
Are you ready to indulge in a sweet treat that’s both fun and delicious? Mini Pineapple Upside Down Cheesecakes combine creamy cheesecake with the…