
Latest & Greatest
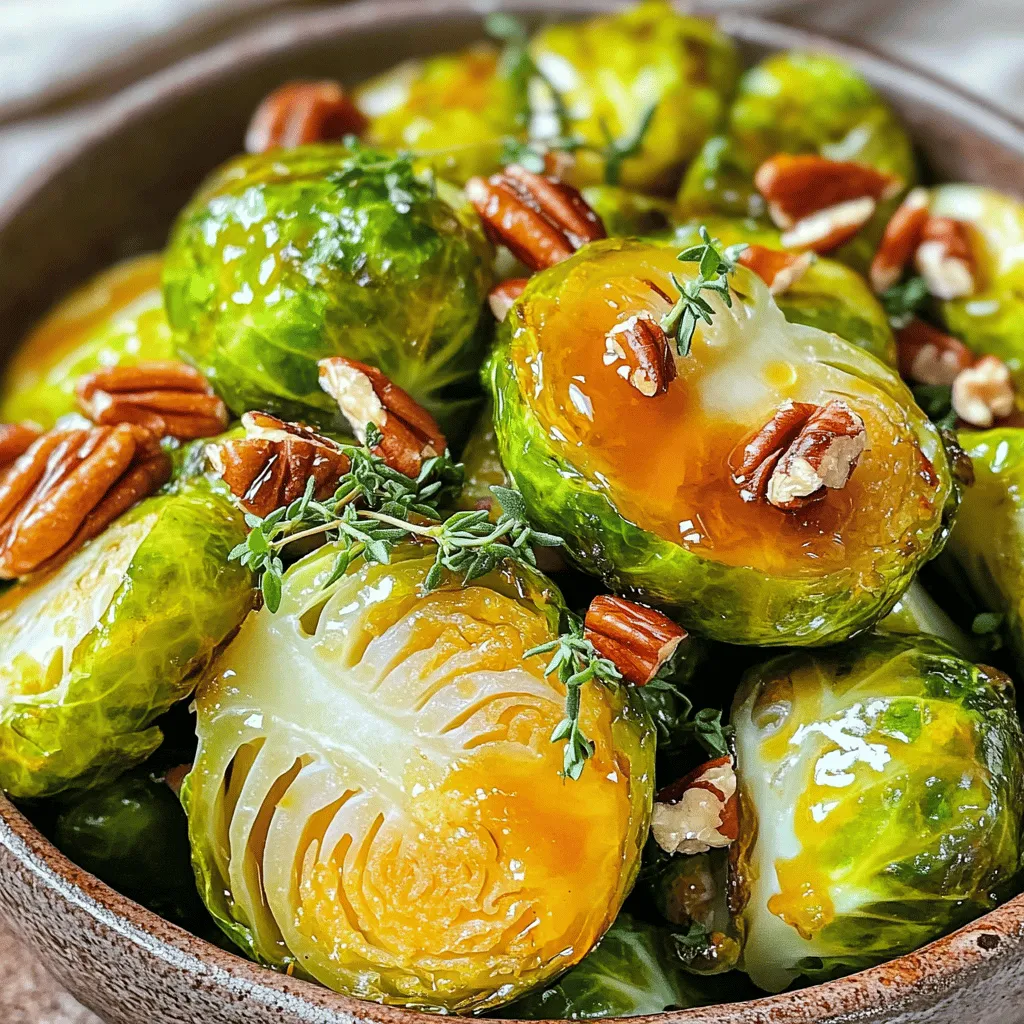
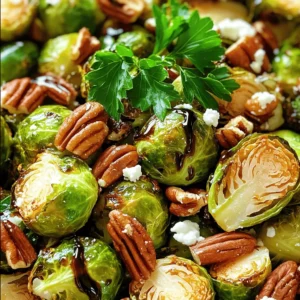
Maple Glazed Brussels Sprouts Flavorful and Easy Recipe
If you’re searching for a fun and tasty way to enjoy Brussels sprouts, you’ve landed in the right place! My
Read more…
Banana Oatmeal Pancakes Perfectly Fluffy Recipe
Looking for a delicious and healthy breakfast option? Try my Banana Oatmeal Pancakes! They are perfectly fluffy and easy to
Read more…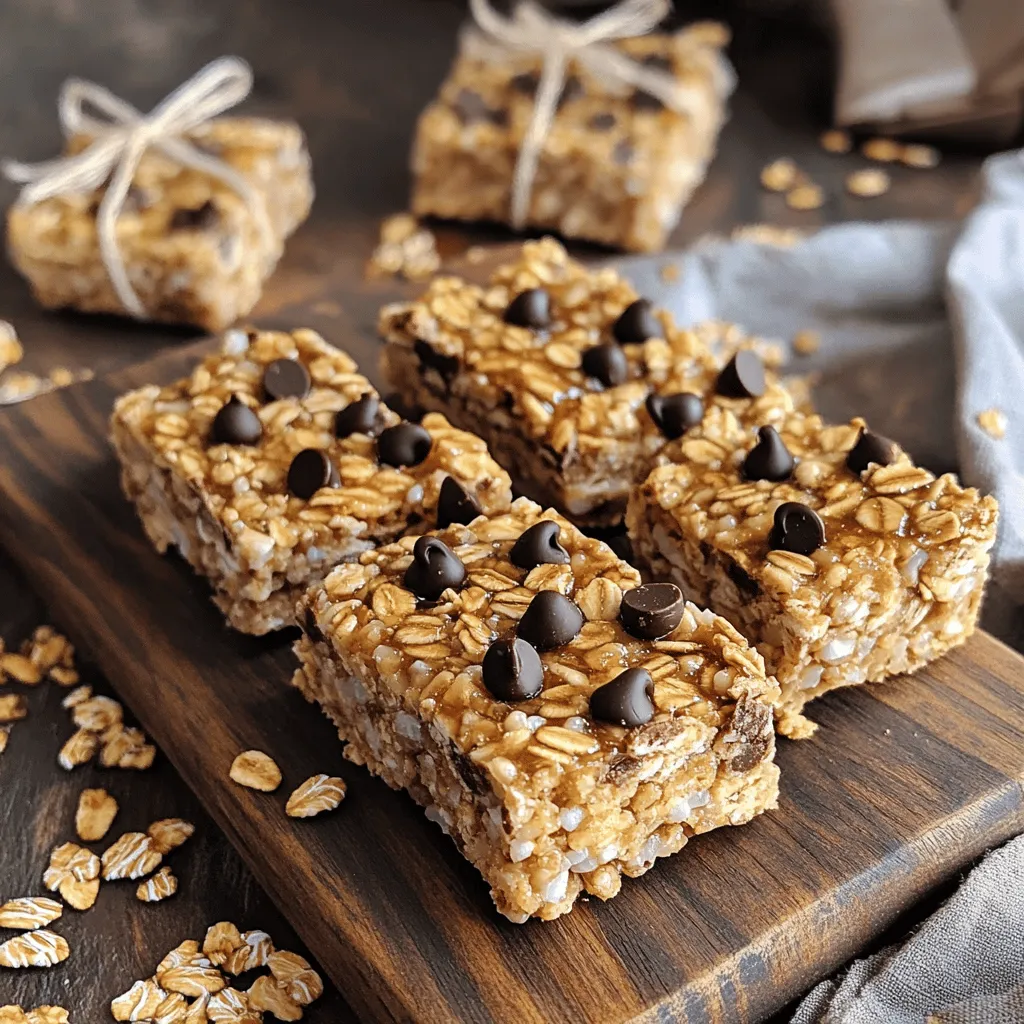
Nut-Free Granola Bars Easy and Healthy Snack Recipe
Are you looking for a delicious snack that everyone can enjoy? My nut-free granola bars are the perfect answer! Packed
Read more…
Savory Eggplant Parmesan Bites Easy and Tasty Snack
Are you craving a tasty snack that packs a punch? Let me introduce you to my savory Eggplant Parmesan Bites!
Read more…
Crispy Chickpea Salad Fresh and Flavorful Delight
Are you ready to whip up a delicious dish? This Crispy Chickpea Salad is a fresh and flavor-packed delight. With
Read more…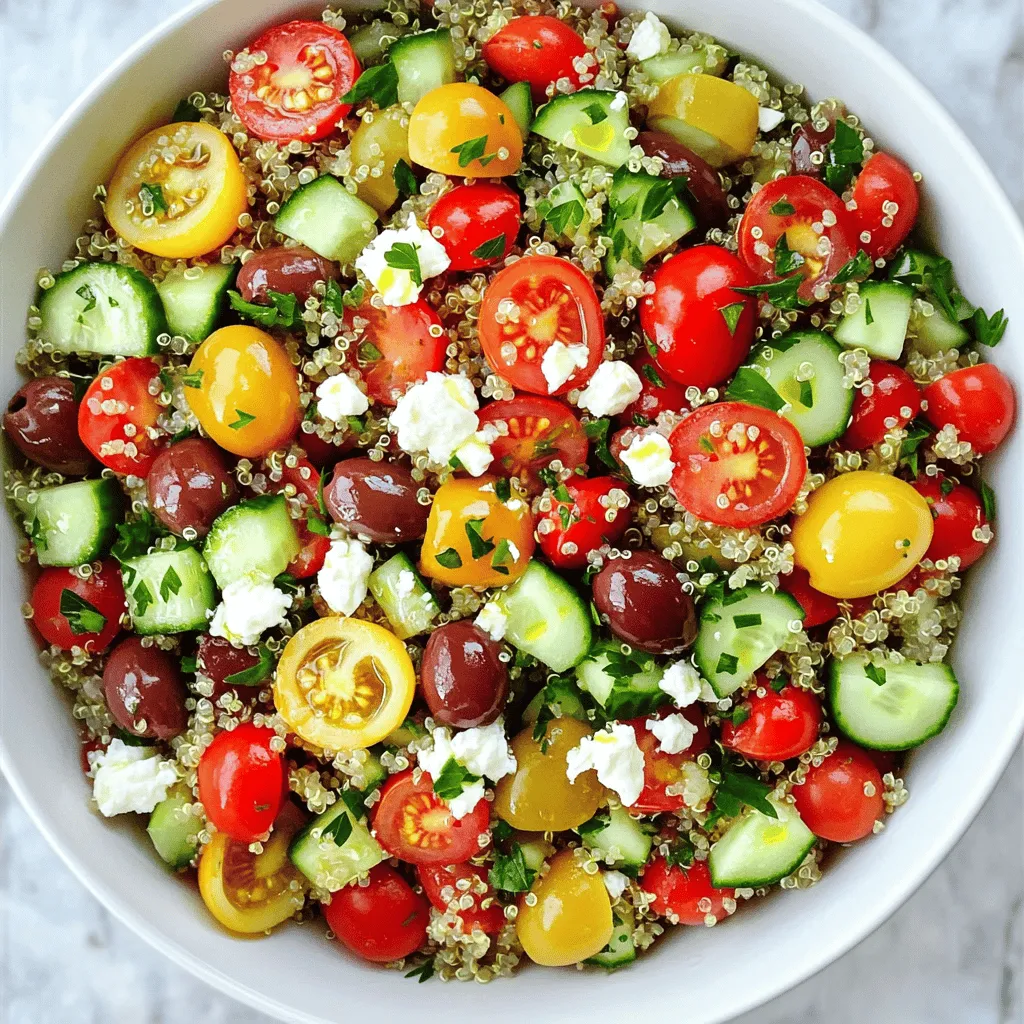
Mediterranean Quinoa Salad Fresh and Flavorful Dish
If you’re craving a vibrant, fresh dish that bursts with flavor, then this Mediterranean Quinoa Salad is for you. You
Read more…
Chocolate Avocado Mousse Creamy Rich Delight
Are you ready to enjoy a dessert that’s both rich and healthy? Chocolate Avocado Mousse is a creamy delight that
Read more…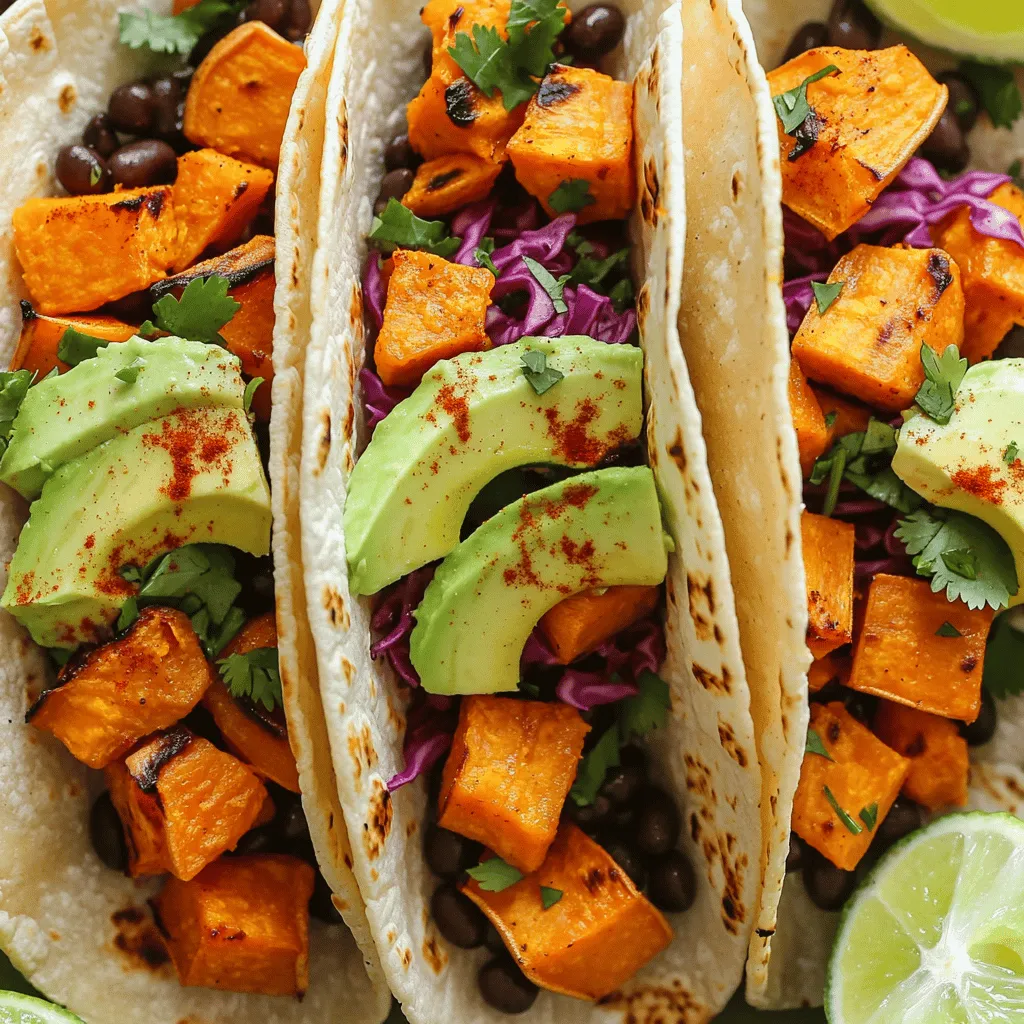
Sweet Potato Black Bean Tacos Flavorful Vegan Meal
If you’re craving a tasty, healthy meal, look no further! Sweet Potato Black Bean Tacos are a simple yet flavorful
Read more…browse recipes


![- 2 cups cooked jasmine rice (preferably day-old) - 2 large eggs - 1 cup mixed vegetables (carrots, peas, corn) - 3 tablespoons soy sauce - 2 tablespoons vegetable oil - 3 green onions, chopped - 1 teaspoon sesame oil - Salt and pepper to taste You can try different rice types for this dish. Brown rice adds more fiber. Basmati rice can bring a nice aroma. If you need an egg alternative, try tofu or chickpea flour. For veggies, feel free to swap in bell peppers or broccoli. Both add color and nutrients. These changes keep the meal exciting and tasty. Just remember to adjust cooking times if you switch ingredients. Explore these options to find your favorite mix! To make egg fried rice, start with jasmine rice. Use day-old rice if you can. It is drier and helps the rice stay separate during cooking. If you need fresh rice, cook it, then spread it on a tray to cool. This will help reduce moisture. Next, let's scramble the eggs. Crack two large eggs into a bowl. Beat them well with a fork. Heat a skillet over medium heat and add a little oil. Pour in the eggs and stir with a spatula. Cook until they are firm and no longer runny. This should take about two minutes. Remove the eggs from the skillet and set them aside. Now, let’s cook the fried rice. First, heat one tablespoon of vegetable oil in the same skillet over medium-high heat. Add your mixed vegetables. Stir-fry them for about three to four minutes. You want them tender but still bright in color. After that, add the cooked jasmine rice. Break up any clumps as you stir-fry for about five minutes. This will heat the rice evenly. Once hot, it’s time for the flavor. Pour in three tablespoons of soy sauce and one teaspoon of sesame oil. Mix well to coat all the rice. Next, add the scrambled eggs back into the skillet. Toss in three chopped green onions, too. Stir everything together to combine. Season with salt and pepper to taste. Stir-fry for another one to two minutes. This allows the flavors to blend nicely. For the final touch, check the flavor. Adjust seasoning if needed. You can add more salt or soy sauce based on your taste. This step is key to a delicious dish. Serve your egg fried rice hot. For a nice presentation, use individual bowls. Garnish with extra green onions and a drizzle of sesame oil from the [Full Recipe]. Enjoy! To make great egg fried rice, start with day-old rice. Fresh rice has too much moisture. This moisture makes it sticky. Day-old rice is dry and fluffy. It gives the best texture. Cook your rice in advance and chill it. When you fry it, use high heat. This helps to keep the rice from clumping. Stir quickly so the rice heats evenly. You can boost the flavor of your fried rice easily. Add sauces like oyster sauce or chili sauce. These sauces add depth. Use them to make your dish shine. When you add extra ingredients, timing matters. Put in the sauces when the rice is hot. This allows the flavors to soak in well. You can also add spices like garlic powder for more taste. Watch out for overcooking the eggs. Cook them just until firm. If you cook them too long, they become rubbery. This ruins the dish's texture. Another mistake is using too little oil. Oil helps to keep the rice from sticking. It also adds flavor. Use at least two tablespoons to coat everything nicely. For the complete recipe, check the Full Recipe section. {{image_2}} You can easily make egg fried rice vegetarian or vegan. For a vegetarian version, use tofu instead of eggs. Tofu adds protein and a nice texture. Just cube it and fry until golden before mixing it back with the rice. To enhance flavor and nutrition, add more vegetables. Try bell peppers, broccoli, or snap peas. This makes your dish colorful and tasty. If you want to add meat, chicken, shrimp, or beef work great. For chicken, use bite-sized pieces. Cook them first, then add the rice. Shrimp cooks quickly, so add it just before the rice. When cooking beef, slice it thinly. Cook it until just brown before mixing everything. Adjust cooking times based on the protein to keep it juicy and tender. Different regions have unique takes on egg fried rice. For a Thai-style dish, add some garlic and a squeeze of lime. Use fish sauce instead of soy sauce for a different flavor. Chinese-style egg fried rice can be made with a splash of oyster sauce. Toss in some bean sprouts for extra crunch. Try these regional styles to explore new tastes. For a complete guide, check out the Full Recipe. To keep your egg fried rice fresh, store it in the fridge. Here are some best practices: - Cool it down: Let the rice cool for about 30 minutes before storing. - Use airtight containers: Glass or plastic containers work well. They keep moisture in and odors out. - Divide into portions: Store in smaller containers for easy access during the week. Reheating your egg fried rice properly helps it taste great. Here are some tips: - Microwave method: Place rice in a microwave-safe bowl. Add a splash of water to keep it moist. Cover with a lid or a damp paper towel. Heat in 30-second bursts, stirring in between. - Stovetop method: Heat a skillet over medium heat. Add a little oil. Add the rice and stir often. Cook until heated through, about 5-7 minutes. Both methods work, but the stovetop keeps the texture best. Enjoy your meal! For the full recipe, check out the Quick & Easy Egg Fried Rice. Day-old rice is best for fried rice because of its texture. Freshly cooked rice has more moisture. This can make it mushy. Day-old rice dries out a bit. It helps the grains stay separate. This prevents clumping when you cook it. Yes, you can make this recipe without soy sauce. If you want a gluten-free option, try tamari. Coconut aminos is another great choice. You can also use a mix of broth and spices to add flavor. Just adjust the salt to taste. To add heat, try adding chili flakes or hot sauce. You can also mix in diced jalapeños or sriracha. Start with a little and taste as you go. You can always add more spice later! You can personalize your egg fried rice easily. Add your favorite vegetables like bell peppers or broccoli. For protein, consider chicken, shrimp, or tofu. You can also switch up the sauces. Try adding garlic or ginger for extra flavor. Feel free to experiment! For the full recipe, check out the section above. Egg fried rice is simple and fun to make. You need basic ingredients like day-old rice, eggs, and veggies. Follow the steps for perfect cooking. Remember, day-old rice gives the best texture, and timing matters. Think about adding vegetables or proteins for variety. Customize it to match your taste. With proper storage, leftovers can stay fresh too. Enjoy your tasty dish anytime. Now, gather your ingredients and start cooking your egg fried rice!](https://soyumrecipes.com/wp-content/uploads/2025/06/02cf6636-edf3-4a02-8682-45d47681b874.webp)
Easy Egg Fried Rice Flavorful and Quick Meal Prep
Looking for a quick and tasty meal? My Easy Egg Fried Rice recipe is your solution. With just a few simple ingredients, you can…
My Latest Desserts
-

Fluffy Pumpkin Pancakes Perfectly Delicious Breakfast
Start your morning with a treat you won’t forget: fluffy pumpkin pancakes! They bring fall flavors to your breakfast table Read Full Recipe -

Brown Butter Banana Chocolate Chip Muffins Delight
Are you craving a warm, cozy treat? Look no further than these Brown Butter Banana Chocolate Chip Muffins! This recipe Read Full Recipe -

Chewy Salted Caramel Pretzel Brownies Delightful Treat
Are you ready to indulge in a treat that combines sweet, salty, and chewy goodness? These Chewy Salted Caramel Pretzel Read Full Recipe -

Fluffy Pumpkin Pancakes Easy and Delicious Recipe
Looking to spice up your breakfast with something special? You’re in for a treat! These fluffy pumpkin pancakes are not Read Full Recipe -

Brown Butter Banana Chocolate Chip Muffins Delight
Welcome to the delicious world of Brown Butter Banana Chocolate Chip Muffins! You’re about to discover a simple recipe that Read Full Recipe -
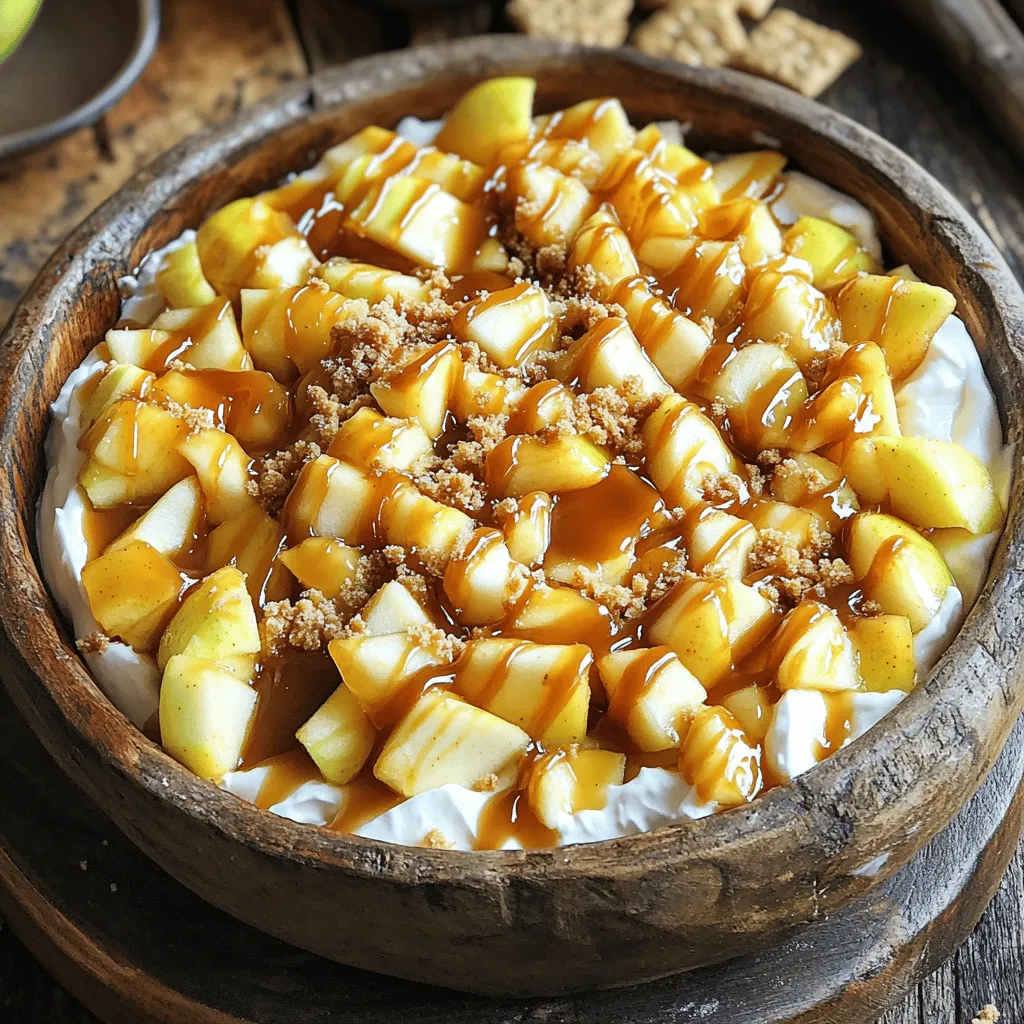
Caramel Apple Pie Dip Delightfully Sweet Treat
Get ready to dive into a sweet treat that’s perfect for any occasion: Caramel Apple Pie Dip! If you love Read Full Recipe -

Chewy Salted Caramel Pretzel Brownies Delight
Get ready to indulge in a sweet and salty treat that you won’t forget! My Chewy Salted Caramel Pretzel Brownies Read Full Recipe -

Cherry Almond Overnight French Toast Easy Morning Dish
Looking for a quick and delicious breakfast? Cherry Almond Overnight French Toast could be your new favorite dish! This easy Read Full Recipe -

Cherry Chocolate Chip Scones Delightful and Easy Recipe
Are you ready to bake something sweet and delightful? My Cherry Chocolate Chip Scones are the perfect treat for breakfast Read Full Recipe -

Cherry Lemon Yogurt Cake Simple and Tasty Treat
If you’re craving a delicious treat that’s both simple to make and bursting with flavor, look no further than this Read Full Recipe
My Latest Recipes

hey,
i’m !
I’m so happy you’re here!
I love creating dishes that bring joy to the table. I hope they bring the same joy to yours. Let’s enjoy this flavorful journey together.
![- 1 cup sushi rice - 1 1/4 cups water - 1 tablespoon rice vinegar - 1 teaspoon sugar - 1/2 teaspoon salt - 8 oz sushi-grade tuna, diced - 2 tablespoons mayonnaise (preferably Kewpie or a Japanese mayo) - 1 tablespoon sriracha sauce (adjust to taste) - 1 green onion, finely chopped - 1 avocado, sliced - 1 small cucumber, julienned - 1 sheet of nori, cut into strips - Sesame seeds for garnish - Soy sauce for serving - Pickled ginger (optional) To make a great spicy tuna sushi bowl, you need fresh ingredients. Sushi rice is the base. It sticks well and has the right texture. For the star of the dish, use sushi-grade tuna. This type of tuna is safe to eat raw and is fresh. Look for bright color and firm texture. When choosing tuna, ask your fishmonger. They can help you find the best quality. You want tuna that has been handled properly and kept cold. If you can't find sushi rice, you can use jasmine rice. It won't be the same, but it works well. For mayonnaise, Greek yogurt is a good swap. It adds creaminess without extra fat. If you need gluten-free options, look for tamari instead of soy sauce. It has a similar taste and is safe for gluten-free diets. Start by rinsing the sushi rice. This step is key to getting rid of excess starch. Rinse it under cold water until the water runs clear. Next, combine the rinsed rice with water in a medium saucepan. Bring it to a boil, then cover and lower the heat. Cook the rice for 18-20 minutes until all the water is absorbed. After cooking, let the rice sit covered for 10 minutes. This resting time allows the rice to steam and become fluffy. For the perfect sushi rice, you need to mix rice vinegar, sugar, and salt. In a small bowl, combine one tablespoon of rice vinegar, one teaspoon of sugar, and half a teaspoon of salt. Stir until the mixture dissolves completely. After the rice cools slightly, fluff it gently with a fork. Carefully fold in the vinegar mixture. Let the rice cool to room temperature for the best texture. For the spicy tuna, combine eight ounces of diced sushi-grade tuna with mayonnaise and sriracha. Use two tablespoons of mayonnaise—preferably Kewpie for the best flavor—and one tablespoon of sriracha. Mix everything well until combined. If you like more heat, feel free to add more sriracha. Remember, you can always adjust the spice level to suit your taste. Now it’s time to build your bowls! Start by dividing the seasoned sushi rice among your bowls. Then, top each bowl with a generous portion of spicy tuna. Add sliced avocado and julienned cucumber for color and crunch. For a beautiful presentation, sprinkle sesame seeds over the top and add strips of nori. Serve your bowls with soy sauce and pickled ginger on the side for extra flavor. For the complete recipe, check the [Full Recipe]. To cook sushi rice perfectly, start by rinsing it. Rinse the rice under cold water until the water runs clear. This removes excess starch. Next, combine the rinsed rice and water in a saucepan. Bring it to a boil, then cover and reduce the heat. Cook for about 18-20 minutes. Once done, let it sit covered for 10 minutes. This step ensures the rice becomes fluffy. If you have leftover rice, store it in an airtight container. It can stay fresh in the fridge for about three days. To reheat, add a little water and microwave it covered. This method helps the rice regain its texture. To modify the heat in your spicy tuna, adjust the sriracha. If you want less spice, use less sriracha or add more mayonnaise. You can also add other ingredients for texture. Finely chopped cucumber or crunchy tempura bits can add a great bite. Try adding avocado for creaminess or some sesame oil for extra flavor. Garnishing is key to making your bowl look great. Use sesame seeds to add crunch and a nutty flavor. Sprinkle them on just before serving. For nori, cut it into strips and place it over the top. This adds a touch of elegance and flavor. When serving, use clear bowls. This allows the colorful layers to show. Arrange the rice, spicy tuna, and veggies neatly. A beautiful presentation makes your meal more inviting. For fun, add pickled ginger on the side for a fresh contrast. For the full recipe, check out the details above. Enjoy crafting your spicy tuna sushi bowl! {{image_2}} You can make your spicy tuna sushi bowl with different proteins. If you want a change, try salmon. It has a rich flavor that pairs well with the other ingredients. For a plant-based option, you can use tofu. Tofu absorbs flavors well, making it a great substitute. Just marinate it in a mix of soy sauce and sriracha. For a vegan bowl, skip the tuna and mayo. Instead, use avocado and seaweed. You can also add chickpeas for protein. This keeps your dish colorful and healthy. Toppings can add a lot of fun to your sushi bowl. Try adding radish for crunch or edamame for protein. Both will give your bowl a fresh twist. You might also enjoy using spicy mayo as a topping. It brings heat and creaminess that ties the dish together. For sauces, explore unique options. A drizzle of ponzu sauce can add a tangy flavor. You could also try a sesame dressing for a nutty taste. These sauces enhance the dish and make every bite exciting. Feel free to mix and match toppings and sauces. This allows you to create a bowl that suits your taste. For the full recipe, check out the [Full Recipe]. To store leftovers, keep sushi rice and spicy tuna separate. Place sushi rice in an airtight container. It stays fresh for up to three days in the fridge. For the spicy tuna, use a different airtight container. It will last for about two days. Make sure the tuna is cold before sealing the container. This helps keep it fresh. If you want to freeze the rice, you can do that too. Spread the cooled rice on a baking sheet. Freeze it for about an hour. Then, transfer it to a freezer bag. This way, it stays good for about a month. To reheat sushi rice, add a little water to it. Place it in the microwave for about 20 seconds. Stir it, then heat for another 20 seconds. This helps the rice regain its moisture. When storing raw fish, always be careful. Keep it in the coldest part of your fridge. Use it within two days for the best taste. If it smells off or looks different, throw it away. Safety first! You want to use sushi-grade tuna for sushi bowls. This type is fresh, high quality, and safe to eat raw. Look for bright red or deep pink flesh. The fish should smell fresh, not fishy. When you buy your tuna, ask for a cut that is firm, moist, and free from any dark spots. This ensures the best flavor and texture for your spicy tuna. Yes, you can make spicy tuna ahead of time. Just mix the tuna, mayonnaise, and sriracha a few hours before serving. Store it in an airtight container in the fridge. This allows flavors to meld together. However, add green onions right before serving to keep them fresh. If you prepare it too far in advance, the tuna may lose its texture and flavor. This recipe can be gluten-free with a few swaps. Use gluten-free soy sauce instead of regular soy sauce. Check the mayonnaise label, as some brands may contain gluten. For the rice, all sushi rice is gluten-free. Just ensure your other ingredients, like toppings, are also gluten-free to keep the entire dish safe for those with gluten sensitivities. You can easily make sushi rice on the stovetop. Start by rinsing 1 cup of sushi rice under cold water until the water runs clear. Then, combine it with 1 1/4 cups of water in a saucepan. Bring it to a boil over high heat. Once it boils, cover the pot and reduce the heat to low. Cook for 18 to 20 minutes until the water is absorbed. Remove it from heat and let it sit covered for 10 minutes to steam. Fluff it with a fork before serving. If you want a mayo substitute, try Greek yogurt for a healthier option. It adds creaminess but has less fat. You can also use avocado for a richer flavor. If you follow a vegan diet, look for plant-based mayonnaise. This gives you the same creamy texture without any animal products. Adjust the sriracha in the mix to match your taste preference. For the full recipe, check the details above. In this article, we explored how to make delicious sushi bowls. We covered essential ingredients, like sushi rice and fresh tuna. You learned about common substitutions for dietary needs and found step-by-step instructions for preparation. We also shared tips for perfect rice and ways to customize your spicy tuna mix. Use these insights to create your own tasty sushi bowls at home. Enjoy the process and impress others with your skills! Your culinary journey starts here.](https://soyumrecipes.com/wp-content/uploads/2025/07/bd7f6238-ce2e-4149-ad71-0bc14ff115aa-300x300.webp)


Boston Cream Bars Irresistible and Easy Delight
If you crave a sweet treat that’s simple yet impressive, look no further! Boston Cream Bars deliver all the classic flavors of the beloved…