Latest & Greatest

No-Bake Peanut Butter Chocolate Balls Simple Treat
Are you ready for a simple treat that satisfies your sweet tooth and takes minutes to make? No-Bake Peanut Butter
Read more…
Caramel Apple Pecan Cheesecake Bars Delightful Treat
Sink your teeth into the rich, creamy delight of Caramel Apple Pecan Cheesecake Bars! This dessert combines the sweetness of
Read more…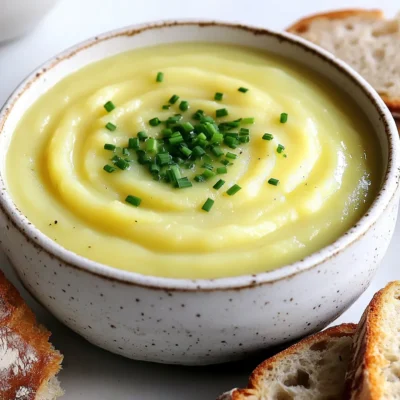
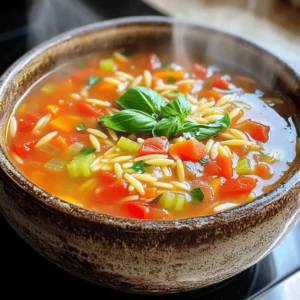
Slow Cooker Potato Leek Soup Comforting and Simple Recipe
Looking for a simple and comforting dish? Look no further! This Slow Cooker Potato Leek Soup is both easy to
Read more…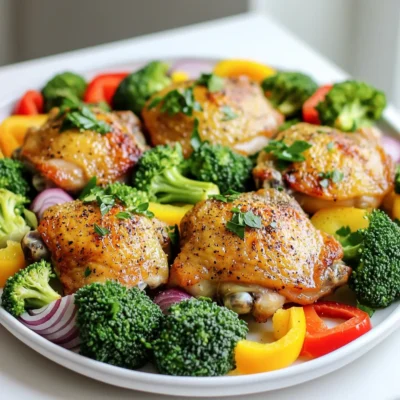
Sheet Pan Lemon Pepper Chicken Veggies Delight
Looking for a quick and tasty dinner? You’ll love my Sheet Pan Lemon Pepper Chicken Veggies Delight! This dish is
Read more…
Pumpkin Spice Milkshake Flavorful Fall Treat Recipe
Fall is here, and it’s the perfect time for a delicious Pumpkin Spice Milkshake! This easy recipe combines creamy vanilla
Read more…
Air Fryer Coconut Shrimp Crispy and Flavorful Treat
Are you ready to impress your taste buds? My Air Fryer Coconut Shrimp recipe is crispy, flavorful, and super easy
Read more…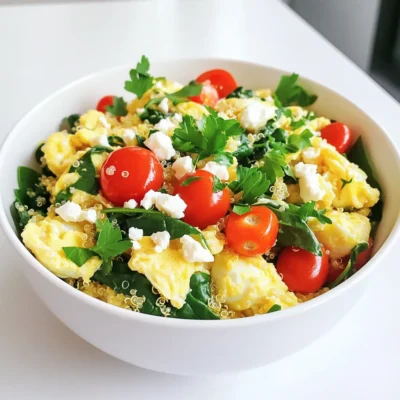
High Protein Egg White Scramble Bowls for Nutrition
Looking for a quick and healthy meal? High protein egg white scramble bowls are your perfect answer! Packed with lean
Read more…
Heavenly Apple Cinnamon Pop Tarts Easy Recipe Guide
Are you ready to elevate your snack game? In this easy recipe guide for Heavenly Apple Cinnamon Pop Tarts, you’ll
Read more…browse recipes

![To make this fun dish, you'll need these key ingredients: - 2 cups cooked chicken, shredded - 1 can (10.5 oz) cream of chicken soup - 1 cup sour cream - 1 cup shredded cheddar cheese (plus extra for topping) - 1 cup frozen mixed vegetables (peas, carrots, and corn) - 1 teaspoon garlic powder - 1 teaspoon onion powder - 1/2 teaspoon black pepper - 1 package (32 oz) frozen tater tots - 1/2 cup green onions, chopped (for garnish) Each ingredient plays a big role in making this casserole creamy and tasty. The chicken provides protein. The cream of chicken soup adds richness. Sour cream gives it a nice tang. Tater tots bring that crispy texture we all love. You can add more fun flavors if you want. Here are a few ideas: - Cooked bacon bits for extra crunch and taste - Diced bell peppers for a pop of color and flavor - Chopped jalapeños for a spicy kick - Dried herbs like thyme or oregano for added depth These optional ingredients can change your casserole's taste and style. Feel free to mix and match based on what your family enjoys. Sometimes, you might not have every ingredient on hand. Here are some easy swaps: - Use rotisserie chicken instead of cooked chicken for quick prep - Swap Greek yogurt for sour cream to lighten it up - Try cream of mushroom soup if you want a different flavor - Use frozen broccoli or spinach instead of mixed veggies These substitutions keep your casserole tasty while allowing you to use what you have at home. Don't hesitate to experiment! You can find the full recipe for Cheesy Chicken Tater Tot Casserole in the link provided. Start by preheating your oven to 375°F (190°C). In a large bowl, mix the shredded chicken, cream of chicken soup, and sour cream. Add in 1 cup of shredded cheddar cheese, frozen mixed vegetables, garlic powder, onion powder, and black pepper. Stir everything until it blends well. This mixture forms the heart of the casserole. Next, take a greased 9x13 inch casserole dish. Spread the chicken mixture evenly across the bottom. Then, grab your frozen tater tots. Layer them on top of the chicken mixture in a single row. Make sure they cover the chicken completely. For extra flavor, sprinkle additional cheddar cheese over the tater tots. This will create a nice cheesy crust. Now it’s time to bake! Place the casserole in your preheated oven. Bake for 35-40 minutes. You'll know it’s done when the tater tots turn golden brown and crispy. The cheese should be bubbly and melted. After baking, take it out and let it cool for about 5 minutes. Just before serving, garnish with chopped green onions for a fresh touch. Enjoy your delicious meal! For the complete recipe, check out the Full Recipe. To keep your tater tots crispy, start by baking them directly from the freezer. Avoid thawing them first. Place them in a single layer on top of the chicken mix. This helps them cook evenly. Bake at the right temperature, which is 375°F (190°C). If you want extra crunch, add a sprinkle of oil over the tots before baking. Cheddar cheese is a great choice for this dish. It melts well and gives a nice flavor. You can also try pepper jack for a spicy kick. Mozzarella adds a stretchy texture. Mixing different cheeses can boost your casserole's taste. For a gourmet twist, consider adding some Parmesan on top. This adds a rich layer of flavor. Using the right tools makes cooking easier. A large mixing bowl is key for combining your ingredients. A 9x13 inch casserole dish works best for baking. A spatula helps spread the mixture evenly. Keep a measuring cup handy for precise portions. Lastly, have a sharp knife ready to chop your green onions. These tools will make your cooking process smooth and enjoyable. For the full recipe, check out the details above! {{image_2}} You can easily change up the flavors by adding different vegetables. Try using broccoli, bell peppers, or even spinach. These veggies add color and nutrients. Just remember to chop them small so they cook well. Mix them in with the chicken and sauce. This way, every bite has a tasty crunch. If you like heat, add some hot sauce to the mix. A few dashes will give your casserole a nice kick. You can also use spicy cheese or jalapeños for extra spice. Just balance the heat with the creamy sauce. This will keep the flavors rich and not too overpowering. For a healthier option, swap out the cream of chicken soup for a lighter version. You can also use Greek yogurt instead of sour cream. For the chicken, grilled or baked chicken works great. Add more veggies to replace some of the tater tots. This keeps your meal tasty while cutting down on fat and calories. For the full recipe, click here: [Full Recipe]. To store leftover casserole, let it cool first. Once cool, cover it tightly with plastic wrap. You can also use an airtight container. This keeps the casserole fresh for 3 to 4 days in the fridge. Make sure to label your container with the date. This way, you won't forget when you made it! When you're ready to enjoy the leftovers, preheat your oven to 350°F (175°C). Place the casserole in an oven-safe dish. Cover it with foil to keep it moist. Heat for about 20-25 minutes. If you want a crispier top, remove the foil for the last 5 minutes. You can also reheat portions in the microwave. Just heat in 30-second bursts until warm. If you want to freeze the casserole, prepare it fully but do not bake it. Wrap it tightly in plastic wrap and then in aluminum foil. This helps prevent freezer burn. You can freeze it for up to 3 months. When you're ready to cook, thaw it overnight in the fridge. Bake as directed in the full recipe. Enjoy a quick and tasty meal anytime! Yes, you can use fresh chicken. Just make sure to cook it first. I recommend boiling or baking the chicken until it's fully cooked. Shred it into bite-sized pieces before mixing it with the other ingredients. This step ensures your casserole is safe to eat and tastes great. You can serve a simple salad or some steamed veggies. A fresh green salad adds a nice crunch and balances the rich flavors. You might also enjoy breadsticks or garlic bread on the side. These choices make a perfect meal for family gatherings or weeknight dinners. The casserole will stay fresh in the fridge for about 3 to 4 days. Just make sure to store it in an airtight container. When you're ready to eat, you can simply reheat it in the oven or microwave. This makes it a great option for meal prep or leftovers. For the full recipe, check out the details above! Cheesy Chicken Tater Tot Casserole is a fun and tasty dish. We explored the main and optional ingredients, plus easy substitutions. You learned the step-by-step way to prepare it, layer it, and bake it perfectly. I shared tips to keep your tater tots crispy and the best cheeses to use. You can also try variations and know how to store leftovers. This dish is simple and full of flavor. I hope you enjoy making it as much as I do.](https://soyumrecipes.com/wp-content/uploads/2025/06/92f3b068-7451-409e-9bc2-2e6532eef81e.webp)
Cheesy Chicken Tater Tot Casserole Easy Family Meal
Looking for a quick and tasty meal the whole family will love? This Cheesy Chicken Tater Tot Casserole combines tender chicken, crispy tater tots,…
My Latest Desserts

Strawberry Lemonade Cupcakes Fresh and Flavorful Treat
Craving a sweet, tangy treat? Dive into the world of Strawberry Lemonade Cupcakes! These delightful cupcakes blend fresh strawberries and Read Full Recipe-
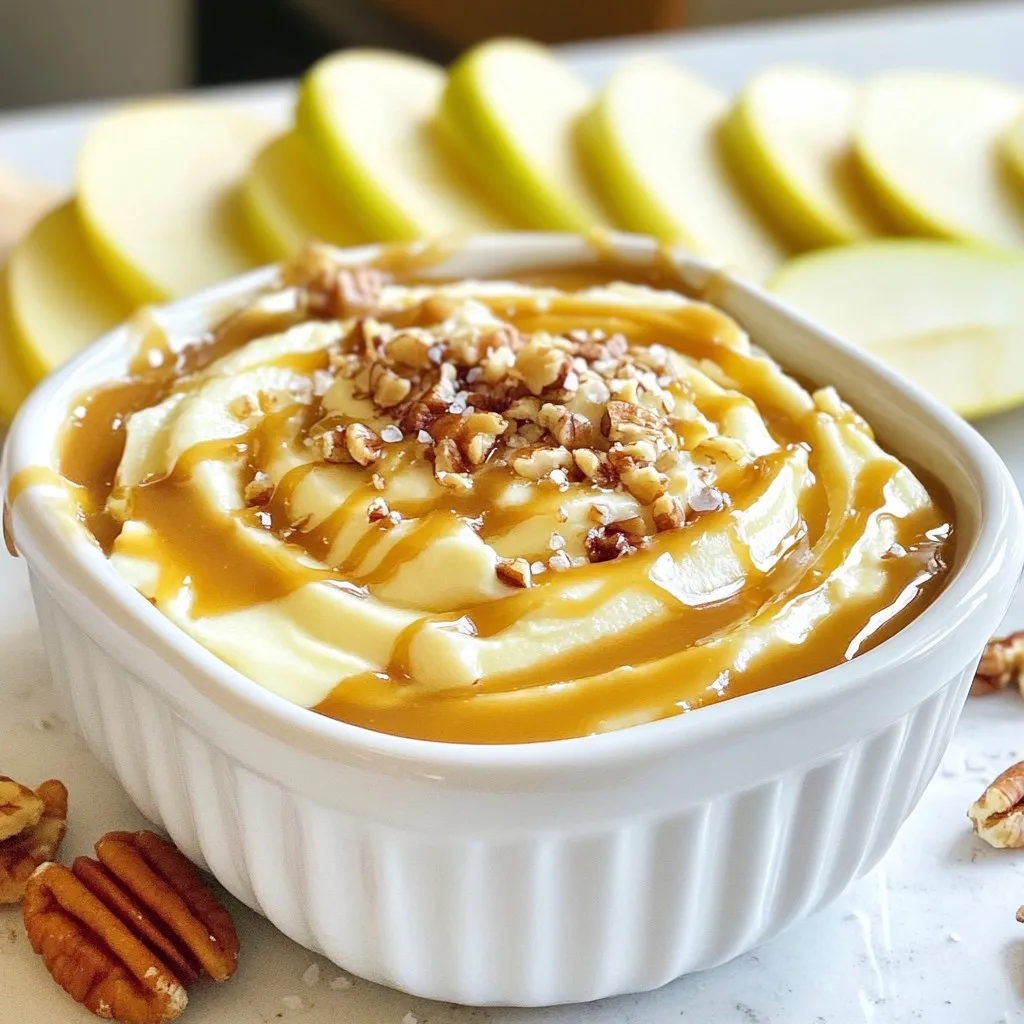
Salted Caramel Apple Dip Creamy and Delicious Treat
If you’re looking for a tasty treat that combines sweet and salty, you’re in for a delight! This Salted Caramel Read Full Recipe -
No-Bake Oreo Cheesecake Cups Delightful Easy Treat
Craving a sweet, creamy treat that’s easy to make? These No-Bake Oreo Cheesecake Cups are perfect for you! With just Read Full Recipe -
Key Lime Pie Bars Simple and Tangy Dessert Treat
Are you ready to enjoy a treat that’s both simple and zesty? Key Lime Pie Bars combine the tart zing Read Full Recipe -
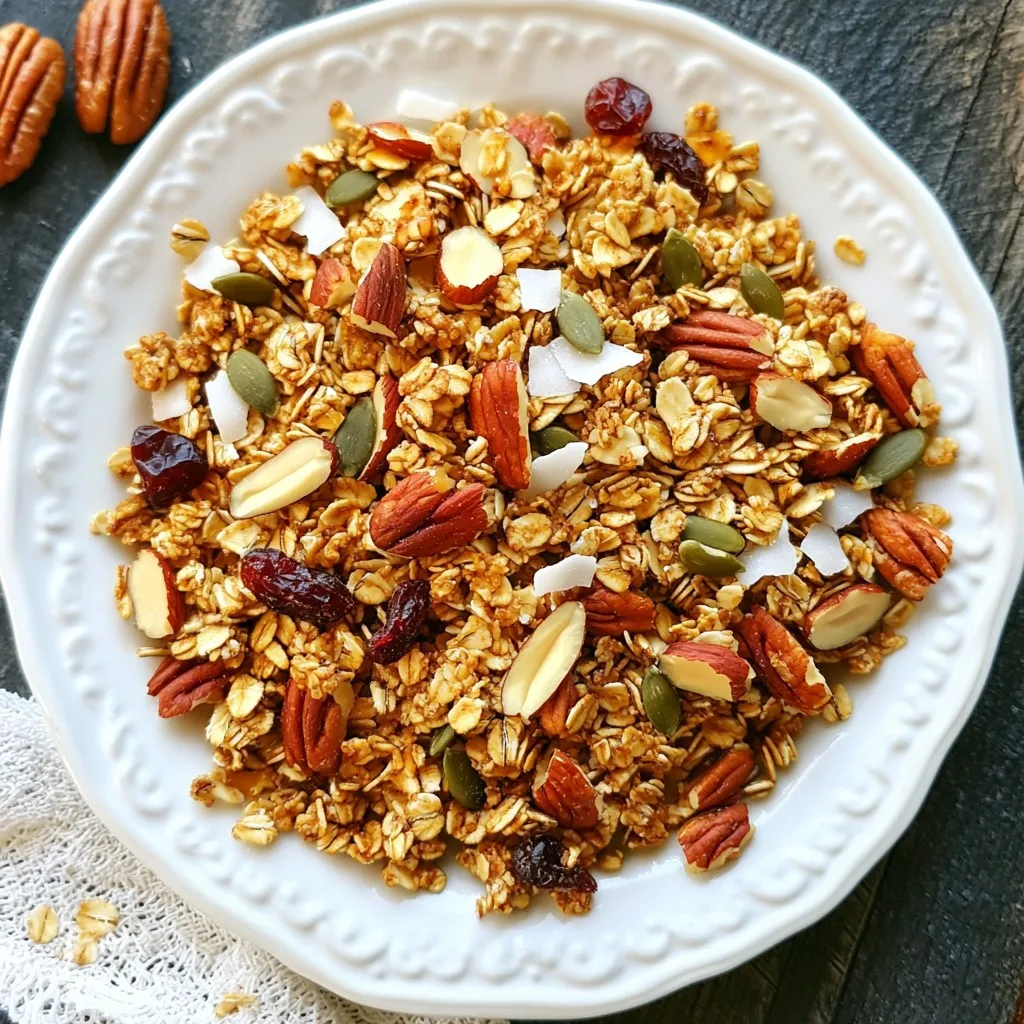
Maple Pecan Granola Crunchy and Nutritious Snack
Looking for a tasty and healthy snack? You’ve found it! My Maple Pecan Granola is crunchy, packed with flavor, and Read Full Recipe -
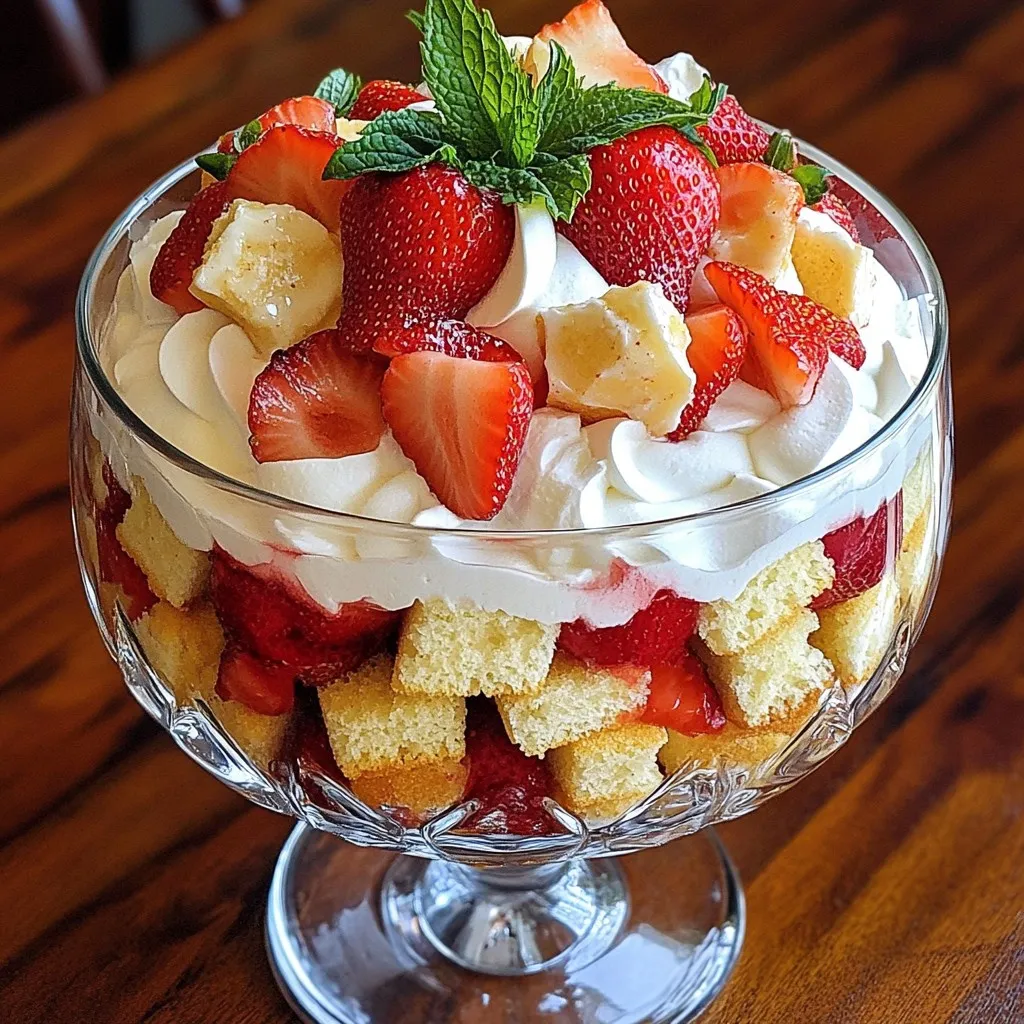
Strawberry Shortcake Trifle Delightful and Simple Treat
Get ready to impress your family and friends with a Strawberry Shortcake Trifle that’s both delightful and simple. This layered Read Full Recipe


My Latest Drinks
-
Spiced Apple Cider Punch Festive and Flavorful Drink
Warm up your gatherings with my Spiced Apple Cider Punch! This festive drink bursts with cozy flavors, perfect for chilly Read Full Recipe -
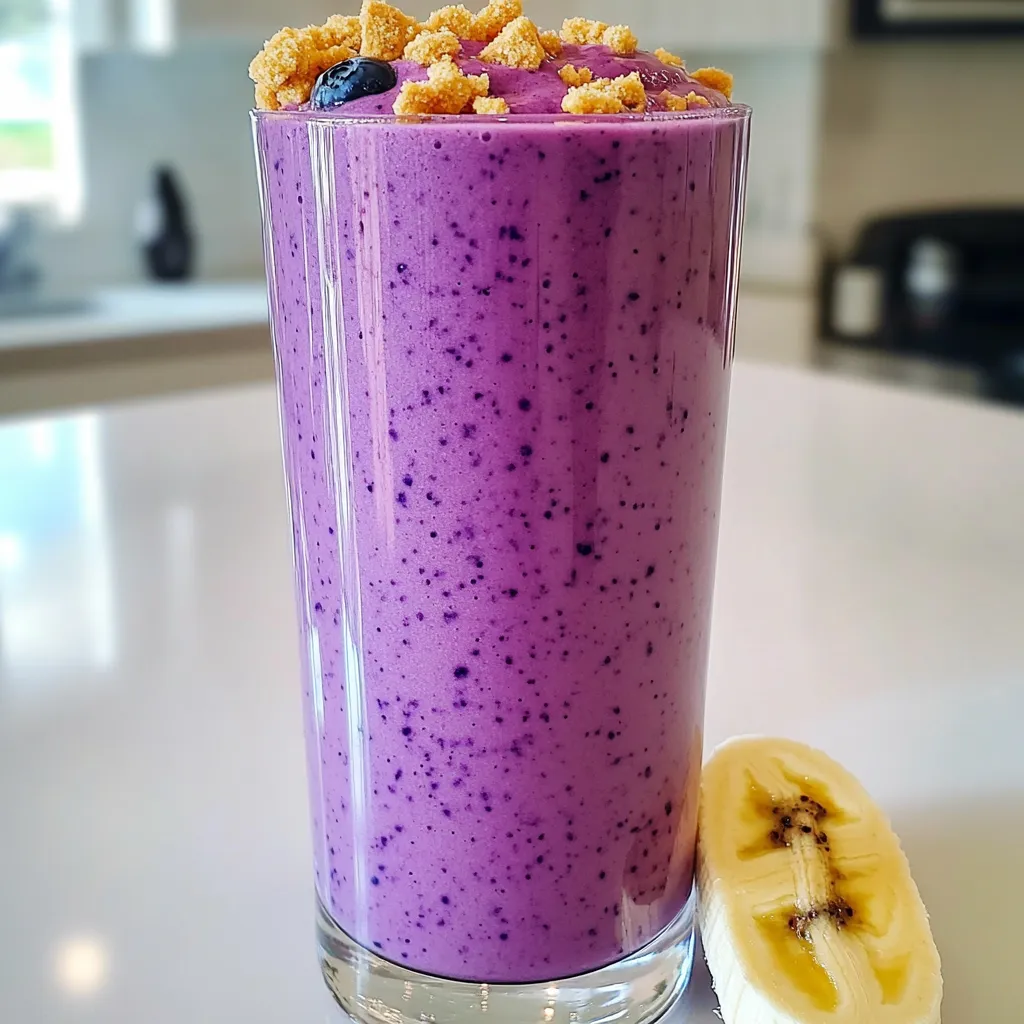
Blueberry Cheesecake Smoothie Protein Delight
Are you ready to treat yourself to a delicious and healthy drink? The Blueberry Cheesecake Smoothie Protein Delight packs all Read Full Recipe -
Warm Cranberry Ginger Mocktail Spritzer Recipe Delight
Welcome to my cozy kitchen! Today, I’m excited to share a delightful warm cranberry ginger mocktail spritzer that brightens up Read Full Recipe -
Spiced Apple Cider Chai Bold and Flavorful Drink Recipe
Looking for a cozy drink this season? Try my Spiced Apple Cider Chai! This bold, flavorful beverage combines warm apple Read Full Recipe -
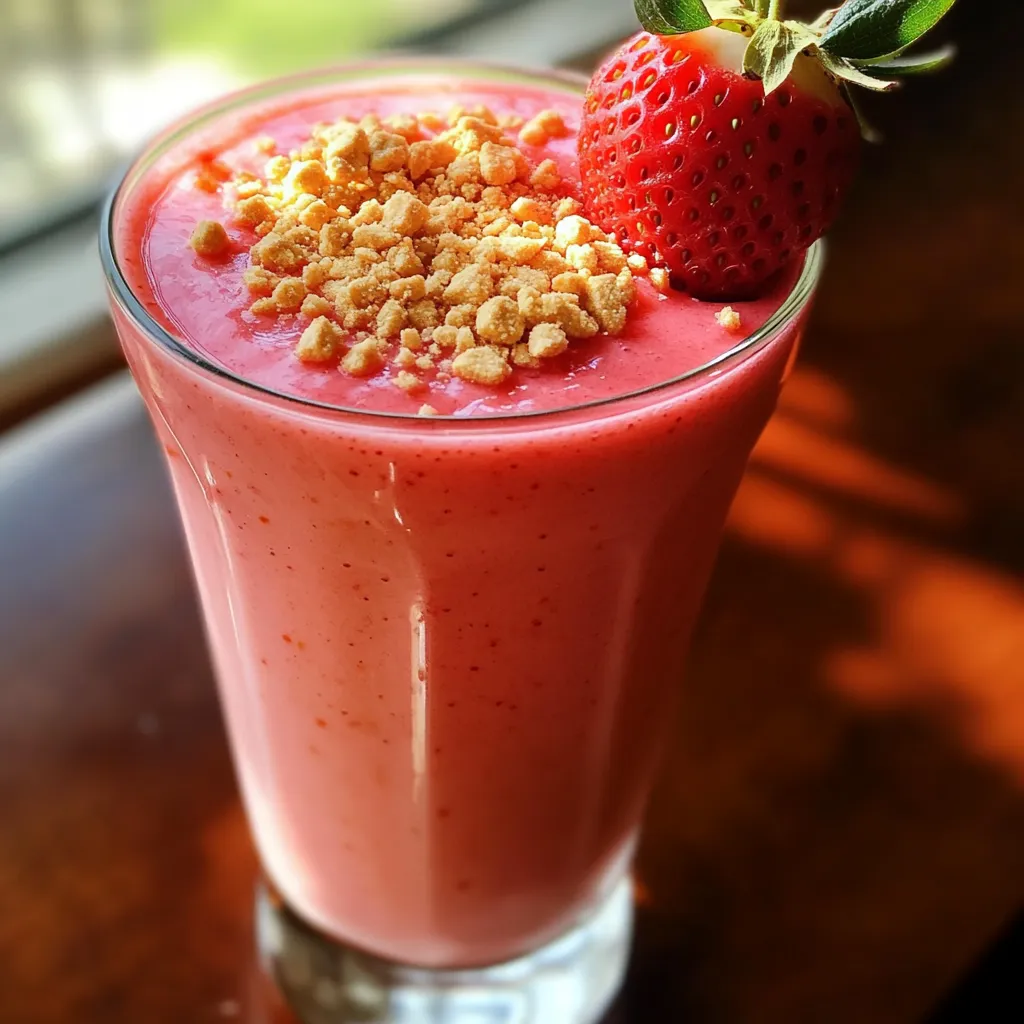
Strawberry Cheesecake Smoothie Tasty and Easy Recipe
Are you ready for a treat that’s both tasty and easy? This Strawberry Cheesecake Smoothie blends the rich flavors of Read Full Recipe -
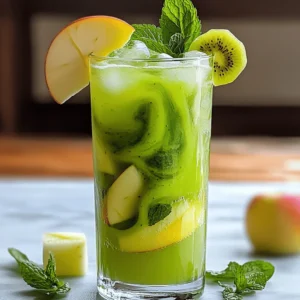
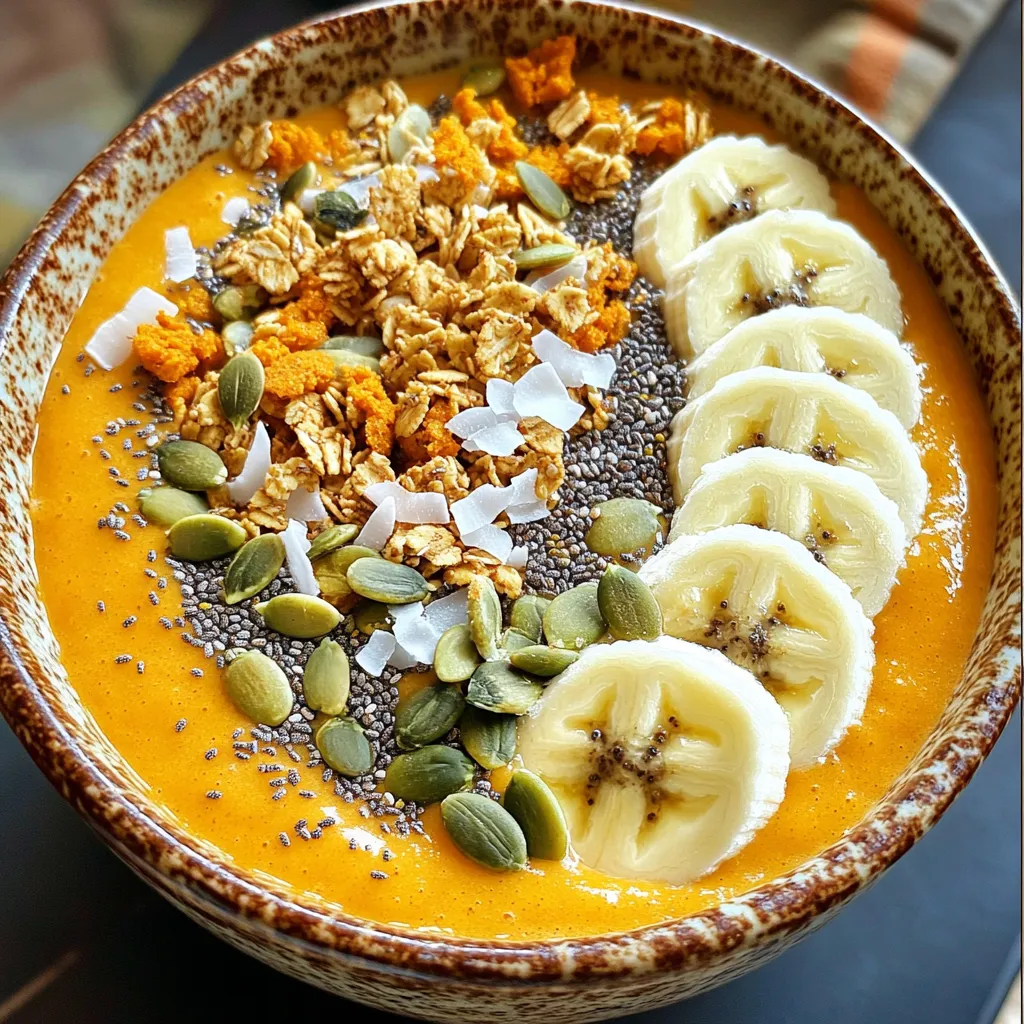
Pumpkin Spice Smoothie Bowl Protein Packed Delight
Are you ready to dive into the cozy world of pumpkin spice? This Pumpkin Spice Smoothie Bowl is not only Read Full Recipe


hey,
i’m !
I’m so happy you’re here!
I love creating dishes that bring joy to the table. I hope they bring the same joy to yours. Let’s enjoy this flavorful journey together.

![- 1 cup couscous - 1 ½ cups vegetable broth - 1 tablespoon olive oil - 1 tablespoon lemon zest - ¼ cup fresh parsley, chopped - ¼ cup fresh mint, chopped - Optional: ½ cup cherry tomatoes, halved - Optional: Feta cheese, crumbled - 2 tablespoons lemon juice - 1 teaspoon garlic powder - Salt and pepper to taste When I make lemon herb couscous, I start with the main ingredients. Couscous is light and fluffy. I use vegetable broth to give it a rich flavor. Olive oil adds a nice touch, and lemon zest brightens up the dish. Next, I chop fresh parsley and mint. These herbs bring a pop of freshness. If you want, add cherry tomatoes for color and sweetness. Feta cheese is great if you like a salty kick. For seasoning, I squeeze in fresh lemon juice. Garlic powder adds depth, and salt and pepper round it out. This simple mix creates a tasty side that pairs well with many meals. Check the [Full Recipe] for detailed steps on how to prepare it! 1. In a medium saucepan, bring the vegetable broth to a boil over medium heat. 2. Once boiling, add the couscous and olive oil. Stir quickly to mix them well. 1. Remove the pan from heat. Cover it and let it sit for about 5 minutes. 2. After 5 minutes, use a fork to fluff the couscous. This helps separate the grains. 1. Next, mix in the lemon zest, lemon juice, and herbs until everything is evenly combined. 2. Finally, season with salt and pepper to taste. If you want, gently fold in the cherry tomatoes. This Lemon Herb Couscous is quick and easy. You can enjoy it warm or at room temperature. If you like, top it with crumbled feta cheese for added flavor. For the full recipe, check out the Full Recipe section. How to avoid mushy couscous To keep couscous fluffy, use the right water-to-couscous ratio. For every cup of couscous, use 1.5 cups of broth. Boil the broth first, then mix in the couscous quickly. Cover it and let it sit. This method helps the grains absorb moisture without turning mushy. Best ways to flavor couscous Enhancing couscous flavor is simple. Use vegetable broth instead of water for depth. Add fresh herbs like parsley and mint for brightness. You can also mix in lemon zest and juice for a zesty kick. Garlic powder gives an extra layer of flavor. Pairing with proteins or salads Lemon herb couscous pairs well with grilled chicken or fish. It also complements roasted vegetables nicely. For a light meal, serve it with a fresh salad. Adding chickpeas can boost protein and make it a complete dish. Presentation ideas for a beautiful dish Serve couscous in a wide bowl to show off its texture. Top with colorful cherry tomatoes and crumbled feta. A sprinkle of fresh herbs adds a pop of green. This makes the dish look and taste fresh. How to store leftovers Store leftover couscous in an airtight container. Place it in the fridge for up to three days. If you want to freeze it, let it cool first. Then, place it in a freezer-safe bag. Reheating instructions To reheat, add a splash of water or broth to the couscous. Microwave it covered for one to two minutes. Stir halfway through to ensure even heating. This keeps it moist and fluffy. Enjoy your delicious lemon herb couscous again! {{image_2}} You can easily change the herbs in this recipe. Try basil or dill for a fresh twist. If you want more color and nutrition, add chopped bell peppers or spinach. These swaps keep the dish exciting and full of flavor. Want a bit more crunch? Add nuts or seeds like almonds or sunflower seeds. They add texture and healthy fats. If you love warm spices, sprinkle in cumin or paprika. These spices deepen the flavor and make the dish more complex. This recipe works for many diets. To make it vegan, skip the feta cheese or use a plant-based option. For gluten-free needs, swap couscous for quinoa or rice. Adjusting these ingredients allows everyone to enjoy this tasty meal. Check out the [Full Recipe] for more details. Each serving of Lemon Herb Couscous is about 1 cup. This recipe makes four servings. Each serving contains around 180 calories. The macronutrient breakdown is as follows: - Carbohydrates: 36g - Protein: 5g - Fat: 4g Couscous offers many nutrients. It is rich in carbohydrates, which give you energy. It also contains protein, which is good for muscle repair. The herbs add vitamins and minerals. Parsley helps with digestion and has antioxidants. Mint can help soothe your stomach and freshen your breath. Lemon juice adds vitamin C, boosting your immune system. Together, these ingredients create a healthy dish. Lemon Herb Couscous fits many diets. It is vegetarian and can be vegan if you skip cheese. This dish is low in fat and offers a good source of carbs. It is not low-carb, so it may not suit strict low-carb diets. However, it aligns well with Mediterranean diets, which focus on fresh ingredients and healthy fats. You can adapt it easily for your needs. For a gluten-free option, try using gluten-free couscous or quinoa instead. How long does couscous take to cook? Couscous cooks very quickly. It usually takes about 5 minutes. First, boil the broth, then add the couscous. After covering it, let it sit. In five minutes, it’s ready! Can I make Lemon Herb Couscous ahead of time? Yes, you can make it ahead! It keeps well in the fridge for a few days. Just store it in a sealed container. When you’re ready, reheat it or serve it cold. Can I use water instead of broth? You can use water, but broth adds more flavor. The broth makes the couscous taste richer and better. If you have broth, use it for a tastier dish. What are the best herbs for couscous? Fresh herbs are best for couscous. I love using parsley and mint. You can also try basil or dill. They all bring a fresh taste to the dish. What’s the best way to store Lemon Herb Couscous? Store it in an airtight container in the fridge. This keeps it fresh. Make sure it cools down first before sealing it. Can you freeze couscous? Yes, you can freeze couscous! Use a freezer-safe container. It lasts up to three months. Just thaw it in the fridge before reheating. This blog post covered how to make Lemon Herb Couscous with simple steps. We reviewed key ingredients, cooking tips, serving ideas, and variations to enhance your dish. Remember, couscous is easy to customize. You can swap herbs or add extra veggies. These variations keep your meals fresh and fun. Enjoy making this light and tasty dish!](https://soyumrecipes.com/wp-content/uploads/2025/07/9c80dd36-2ba7-4796-afef-ce1db6d3d023-300x300.webp)
![- Chicken thighs (boneless and skinless) - Freshly squeezed orange juice - Soy sauce and honey For this dish, I love using chicken thighs. They stay juicy and tender. The freshly squeezed orange juice brings a bright flavor. I recommend only using fresh juice for the best taste. Soy sauce and honey join forces for a sweet and salty base that makes every bite delightful. - All-purpose flour - Eggs and panko breadcrumbs Coating the chicken is key for a crispy texture. I use all-purpose flour to help the egg stick. Then, I dip the chicken in beaten eggs, which adds moisture. Finally, panko breadcrumbs give that extra crunch. They make the chicken even more enjoyable. - Garlic and ginger - Cornstarch for thickening - Sesame oil and red pepper flakes The sauce is where the magic happens. I start with minced garlic and grated ginger for depth and warmth. Cornstarch helps to thicken the sauce. This gives it that sticky texture we all crave. I add sesame oil for a nutty flavor and red pepper flakes for a hint of heat. You can adjust the spice level based on your taste. For the complete recipe, check the [Full Recipe]. To make the Sticky Orange Chicken, first, you need to prep the chicken. Start by cutting the chicken thighs into bite-sized pieces. Next, set up a breading station. Use three bowls: one for flour, one for beaten eggs, and one for panko breadcrumbs. First, coat the chicken in flour. Then, dip each piece in the egg. Finally, roll the chicken in panko. This gives it a nice crunch. For an even coating, make sure each piece is fully covered. Shake off any excess flour before dipping into the egg. This helps the breadcrumbs stick better. If you want extra crunch, you can double dip the chicken in eggs and panko. Now, it’s time to fry the chicken. Heat vegetable oil in a large pan over medium-high heat. You want enough oil to cover the bottom of the pan. Once the oil is hot, add the chicken in batches. Fry each batch for about 5 to 7 minutes. Look for a golden brown color. The chicken should be cooked all the way through. Use a meat thermometer if you have one; the internal temperature should reach 165°F. Once the chicken is done, remove it from the pan. Place it on paper towels to drain the excess oil. This keeps it crispy. While the chicken cools, let’s make the sauce. In a separate bowl, combine the orange juice, soy sauce, honey, minced garlic, grated ginger, cornstarch, sesame oil, and red pepper flakes. Whisk until everything mixes well. This step is key for a smooth sauce. To ensure a smooth mixture, add the cornstarch last. This prevents clumps. If you find lumps, whisk harder or use a blender for a quick fix. Pour the sauce into the same pan you used for the chicken. Heat it over medium heat. Stir it constantly until it thickens, which takes about 3 to 5 minutes. You’ll know it’s ready when it coats the back of a spoon. Once thickened, add the fried chicken back to the pan. Toss the chicken gently in the sauce. Make sure every piece is coated well. Cook for another 2 minutes to heat everything through. For a beautiful presentation, serve the Sticky Orange Chicken over steamed rice. You can also add stir-fried vegetables for color and crunch. Drizzle extra sauce over the top. Garnish with sliced green onions and a sprinkle of sesame seeds. For a fun touch, add orange slices on the side. This adds a burst of color and flavor. Enjoy your tasty creation! To make your chicken crispy, follow these steps: - Coat Well: Make sure you coat the chicken in flour first. This helps the egg and breadcrumbs stick better. - Heat the Oil: Use enough oil in the pan and let it get hot. This step is key for crispiness. - Fry in Batches: Cook the chicken in small batches. This prevents overcrowding, helping them fry evenly. If you like spice, adjust the red pepper flakes. Start with a little. You can always add more later if you want extra heat. Want to boost the citrus taste? Add more orange juice or zest. This step brightens the dish and makes it more flavorful. You can also try adding lime juice for a twist. Feeling adventurous? Experiment with spices like garlic powder or paprika. Each one adds a unique flavor that can change your dish. For a nice finish, use sliced green onions and sesame seeds on top. These add color and crunch to your meal. When serving, place the Sticky Orange Chicken over steamed rice. This pairs well and soaks up the sauce. You can also serve it with stir-fried vegetables for a complete meal. For extra flair, drizzle some sauce over the top and add orange slices. This makes your dish look even more appealing. {{image_2}} You can make Sticky Orange Chicken a bit healthier. Try baking instead of frying. This cuts down on oil. Bake the coated chicken pieces at 400°F for about 20 minutes. Flip them halfway for even cooking. You can also swap soy sauce for coconut aminos. This makes it gluten-free and lower in sodium. Instead of honey, use maple syrup for a different sweet taste. To change the flavor, try adding different fruit juices. Pineapple or mango juice can give a fun twist. You can mix orange juice with these juices for depth. Incorporating more vegetables is another great idea. Bell peppers, broccoli, and snap peas add color and nutrition. Toss them in with the chicken when you cook the sauce. If you need gluten-free options, use gluten-free flour for coating. Make sure your soy sauce is labeled gluten-free, too. For a low-sodium version, choose low-sodium soy sauce. You can also reduce the amount of soy sauce in the recipe. This way, you keep the flavor while cutting back on salt. For more ideas, be sure to check the full recipe! To store leftovers, let the Sticky Orange Chicken cool first. Place it in an airtight container. This keeps it fresh and tasty. You can store it in the fridge for up to three days. When reheating, I recommend using the stove. Heat a pan over medium heat and add a splash of water. This helps keep the chicken moist. Stir it often until it's heated through. Yes, you can freeze Sticky Orange Chicken! Just make sure it’s fully cooled before freezing. Use a freezer-safe container or a heavy-duty freezer bag. It will last up to three months. When you're ready to enjoy it again, move it to the fridge overnight to thaw. To reheat, place the chicken in a pan over low heat. Stir it often to ensure it warms evenly. This way, your chicken stays juicy and flavorful. It takes about 15 minutes to prep and 30 minutes to cook. So, you can have this dish ready in just 45 minutes. This includes time for coating the chicken, frying it, and making the sauce. Yes, you can use chicken breasts. They are leaner and cook faster. However, chicken thighs stay moist and have more flavor. If you like juicy chicken, stick with thighs. You can serve this dish with steamed rice or fried rice. Stir-fried veggies also make a great side. For a fresh touch, add a salad. Orange slices add color and flavor too! Yes, you can make it ahead. Cook the chicken and sauce, then store them separately in the fridge. Reheat when you are ready to eat. This keeps the chicken crispy. The best way to reheat is in a pan on low heat. Add a splash of water to keep it moist. Stir gently to warm it through without losing crispiness. You can also use an oven for even heating. Check out the [Full Recipe](#) for detailed steps and tips on making this tasty dish! You learned how to make Sticky Orange Chicken with easy steps. We covered ingredients, coating, frying, and sauce making. Tips for cooking and serving make your dish shine. Remember, you can adjust the flavors to suit your taste. Explore variations for healthier and dietary needs, and store leftovers properly. With these insights, you can create a dish that brings joy to your table. Enjoy cooking and experimenting with flavors!](https://soyumrecipes.com/wp-content/uploads/2025/07/738485b5-e575-4d88-9e54-8cb66a8a1b36-300x300.webp)

Coconut Curry Chicken Flavorful and Simple Recipe
If you’re craving a dish that’s bursting with flavor yet simple to make, you’ll love this Coconut Curry Chicken recipe. With just a handful…