


Latest & Greatest

Chili Lime Grilled Corn Zesty Flavor for Summer Fun
Ready to turn your summer barbecues into flavor-packed feasts? Chili Lime Grilled Corn is the perfect addition to your outdoor
Read more…
Rainbow Fruit Skewers Vibrant and Fun Party Treat
Looking for a fun and colorful treat for your next party? Rainbow fruit skewers are the answer! They’re easy to
Read more…
Lemon Raspberry Muffins Fresh and Flavorful Treat
Get ready to brighten your mornings with my fresh and flavorful Lemon Raspberry Muffins! Combining zesty lemon and juicy raspberries,
Read more…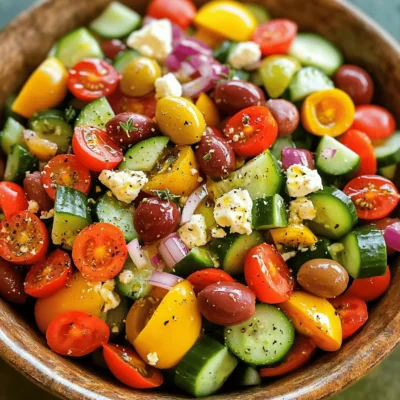
Easy Greek Salad Fresh and Flavorful Delight
Are you looking for a fresh and tasty dish that shines with flavor? My Easy Greek Salad is not just
Read more…
Garlic Butter Steak Bites Flavorful Dinner Recipe
If you crave a quick and tasty dinner, look no further! Garlic Butter Steak Bites are your answer. This simple
Read more…
Crispy Chickpea Salad Flavorful and Healthy Meal
Get ready to dive into a refreshing and satisfying dish with my Crispy Chickpea Salad! This recipe isn’t just packed
Read more…
Mango Coconut Popsicles Refreshing Summer Treat
Do you crave a cool treat to beat the summer heat? Look no further! These Mango Coconut Popsicles are not
Read more…
Raspberry White Chocolate Muffins Delightful and Easy
Are you ready to make a treat that’s as easy as it is delicious? Raspberry white chocolate muffins are the
Read more…browse recipes


![To make cheesy garlic butter linguine, you need a few key items. Here is the list: - 8 oz linguine pasta - 4 tablespoons unsalted butter - 4 cloves garlic, minced - 1 cup heavy cream - 1 cup grated Parmesan cheese - 1 cup shredded mozzarella cheese - 1 teaspoon red pepper flakes (optional) - Salt and pepper to taste - Fresh parsley, chopped (for garnish) Each ingredient plays a big role in the dish. The linguine pasta gives you a great base. You want it to be cooked just right, so it holds the sauce well. Butter and garlic create a rich, savory flavor that makes your mouth water. Cream adds a nice smoothness, while the cheeses provide that cheesy goodness we all love. Parmesan brings a nutty flavor, and mozzarella adds creaminess. If you like a bit of heat, the red pepper flakes are a fun touch. Finally, fresh parsley adds color and a hint of freshness. For the full recipe, check out the steps to craft this delightful meal. Boiling the Water and Cooking Time Start by filling a large pot with water. Add a generous pinch of salt. Bring the water to a boil over high heat. Once boiling, add 8 oz of linguine pasta. Cook for about 8-10 minutes. You want it to be al dente, which means it should still have a slight bite. Stir occasionally to prevent sticking. Draining and Reserving Pasta Water When the pasta is ready, carefully drain it in a colander. Remember to save about 1/2 cup of the pasta water. This water is starchy and helps the sauce stick to the pasta later. Melting Butter and Cooking Garlic In a large skillet, melt 4 tablespoons of unsalted butter over medium heat. Once melted, add 4 cloves of minced garlic. Stir it around for about 1-2 minutes. You want the garlic to become fragrant, not burnt. Keep an eye on it! Adding Cream and Mixing in Cheeses Next, pour in 1 cup of heavy cream. Stir this mixture gently for about 2-3 minutes. Then, add 1 cup of grated Parmesan cheese and 1 cup of shredded mozzarella cheese. Keep stirring until the cheeses melt and the sauce becomes creamy. Tossing Linguine with Sauce Now, add your drained linguine to the skillet. Toss everything together. Make sure the pasta gets coated with the sauce. It should look rich and cheesy. Adjusting Consistency with Pasta Water If the sauce seems too thick, add a bit of the reserved pasta water. This will help loosen it up and keep it silky. Just add a little at a time until you reach your desired consistency. For the full recipe, check out the details above! To make your cheesy garlic butter linguine pop, try using different garlic types. You can use fresh garlic for a strong taste. For a milder flavor, consider roasted garlic. You could even add garlic powder for a quick fix. Spice lovers can boost the heat by adding more red pepper flakes or a dash of cayenne pepper. For cheeses, I recommend mixing Parmesan and mozzarella. This blend gives a nice balance of sharpness and creaminess. You can also try adding a bit of fontina or gouda for extra depth. Always use freshly grated cheese for the best melt and flavor. To avoid overcooked pasta, cook your linguine just until it's al dente. This means it should be firm to the bite. Keep an eye on the clock while cooking. Start checking a minute or two before the package time ends. For a creamy sauce, it’s key to heat your heavy cream gently. If it simmers too long, it may separate. Stir the sauce continuously as you add the cheese. If it gets too thick, add a little reserved pasta water. This helps achieve the perfect consistency. By following these tips, you’ll create a dish that everyone will love. For the complete recipe, check out the [Full Recipe]. Enjoy the cooking adventure! {{image_2}} Gluten-free Pasta Options You can use gluten-free linguine to make this dish. Many brands offer great options. Look for pasta made from brown rice or chickpeas. These choices hold up well and taste great. Dairy-free Alternatives for Cream and Cheese If you want a dairy-free version, try coconut cream in place of heavy cream. Nutritional yeast adds a cheesy flavor without dairy. You can also use vegan cheese for a creamy texture. Adding Vegetables or Proteins You can boost this dish by adding veggies. Spinach, cherry tomatoes, or broccoli work well. If you like protein, add cooked chicken, shrimp, or tofu. This adds flavor and makes it more filling. Flavor Infusions with Herbs and Spices For extra flavor, think about adding herbs like basil, oregano, or thyme. A squeeze of lemon juice brightens the dish. You can also use spices like smoked paprika or cayenne for heat. These small changes make a big difference. Feel free to mix and match to find your favorite version of Cheesy Garlic Butter Linguine. For the full recipe, check out the recipe card above! To keep your cheesy garlic butter linguine fresh, follow these steps. First, let the dish cool down to room temperature. Then, place it in an airtight container. This helps keep the flavors intact. You can refrigerate it for up to three days. If you want to store it longer, try freezing it. Just make sure to use a freezer-safe container. It’s best to freeze individual portions. This way, you can easily reheat just what you need. When reheating, use a skillet for the best results. Add a splash of water or cream to help it heat evenly. Stir often to avoid burning. You can also use a microwave. If you do, cover the dish loosely with a microwave-safe lid. Heat it in short bursts, stirring in between. How long does cheesy garlic butter linguine last in the fridge? It can stay good for about three days. After that, the taste and texture may change. Always check for freshness before eating. Look for signs of spoilage. If the pasta smells off or has a strange color, it’s best to throw it away. Mold is also a clear sign that the dish is no longer safe to eat. Always trust your senses to keep your meals safe. Can I make this dish ahead of time? Yes, you can make Cheesy Garlic Butter Linguine ahead of time. Prepare the pasta and sauce separately. Store them in airtight containers. When you're ready to eat, just reheat them together. Add a splash of pasta water to loosen the sauce. What can I serve with Cheesy Garlic Butter Linguine? This dish pairs well with many sides. You can serve it with a fresh green salad. Garlic bread also makes a great side. For protein, grilled chicken or shrimp complements the flavors nicely. Is it possible to make this recipe vegan? Absolutely! You can easily make this dish vegan. Use vegan butter and cream instead of dairy. For cheese, try a plant-based cheese blend. The flavors will still be rich and satisfying. Check out the Full Recipe for more details! You now have all the tools to make Cheesy Garlic Butter Linguine. We've covered the key ingredients, cooking steps, and helpful tips to boost flavor. You learned about variations and how to store your dish properly. In closing, this recipe offers a simple way to enjoy a flavorful meal. Experiment with different ingredients and techniques to make it your own. Enjoy creating your cheesy garlic delight!](https://soyumrecipes.com/wp-content/uploads/2025/05/fa75bb33-e796-462a-aa50-c999fbf9b0e8.webp)
Cheesy Garlic Butter Linguine Flavorful Dinner Recipe
If you crave a dish that bursts with flavor, you’ll love Cheesy Garlic Butter Linguine. This easy recipe fills your kitchen with a delicious…
My Latest Desserts
-
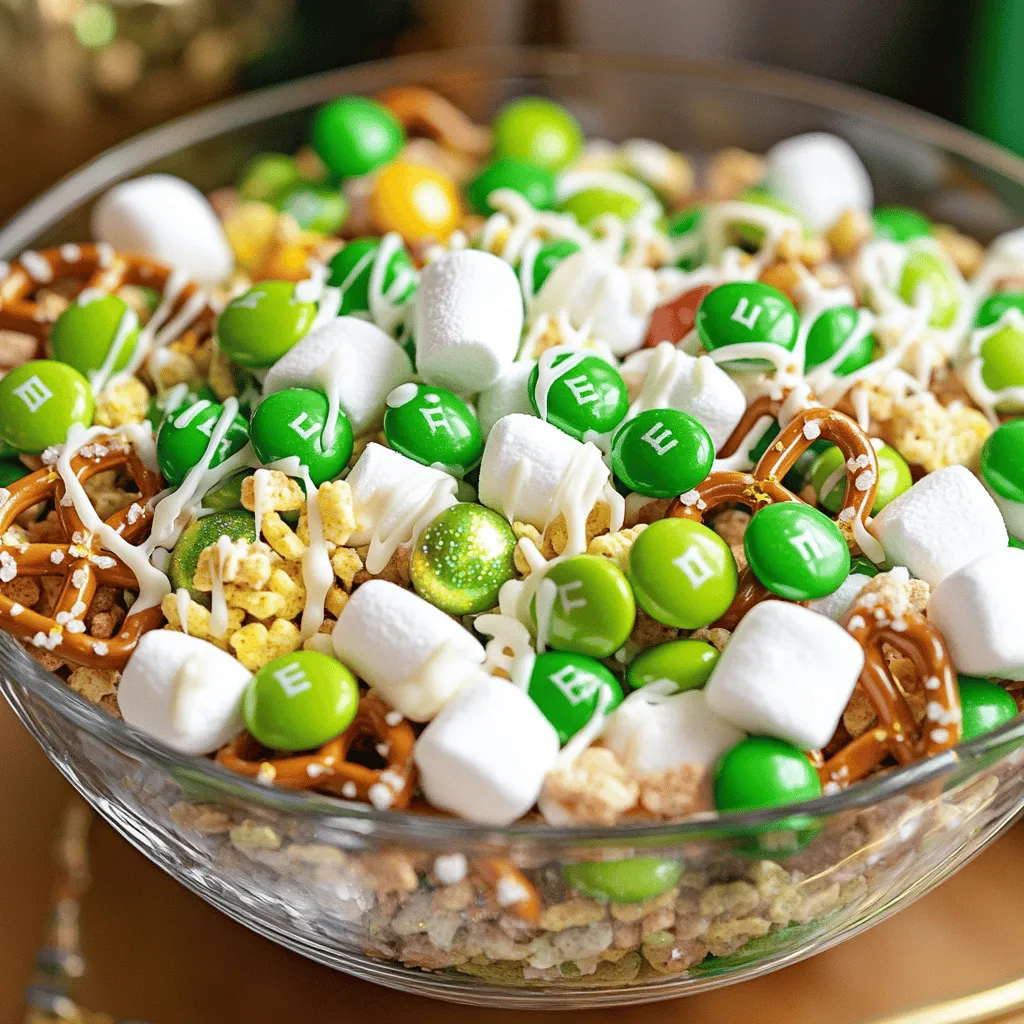
Lucky Charms St. Patrick Snack Mix Festive Treat
Get ready to sprinkle some magic into your snack time with my Lucky Charms St. Patrick Snack Mix! This festive Read Full Recipe -
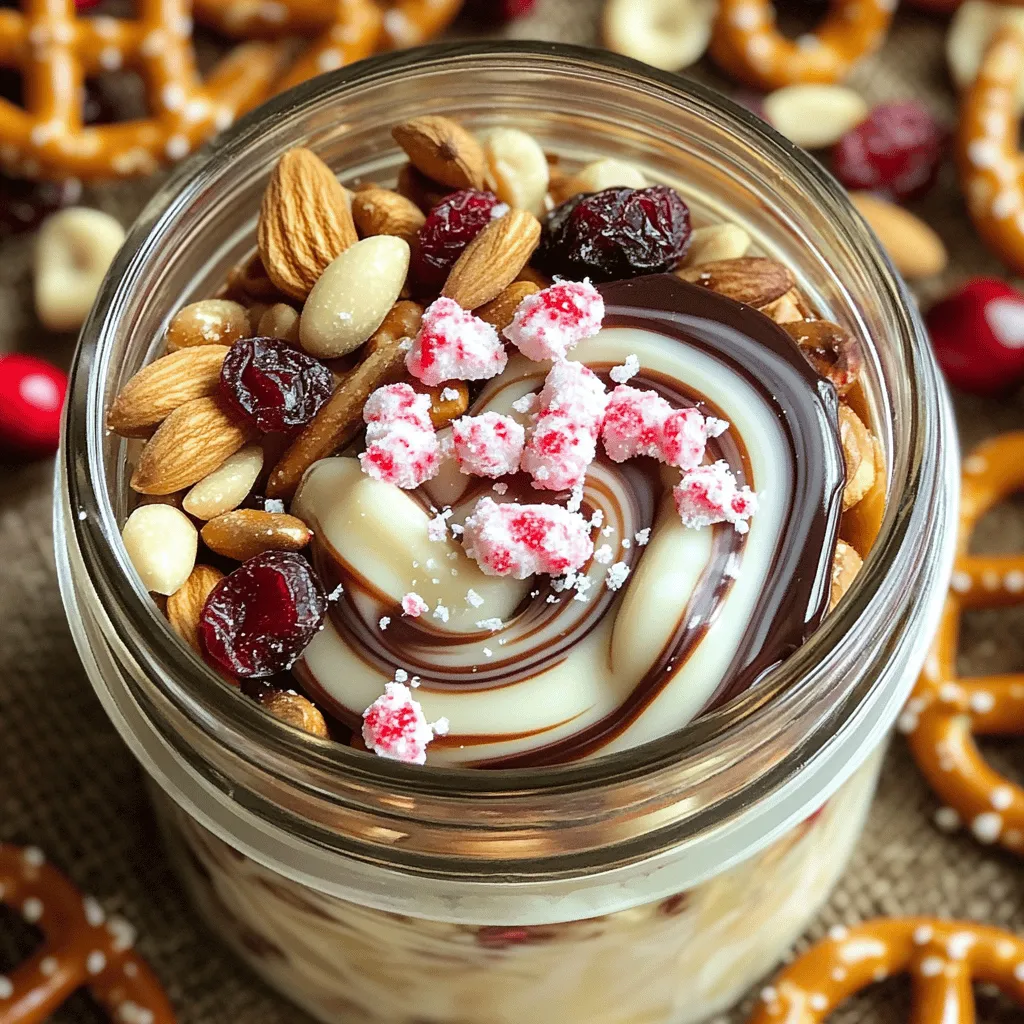
Peppermint Bark Trail Mix Festive and Tasty Treat
Get ready to elevate your holiday snacking with Peppermint Bark Trail Mix! This treat combines the rich taste of dark Read Full Recipe -
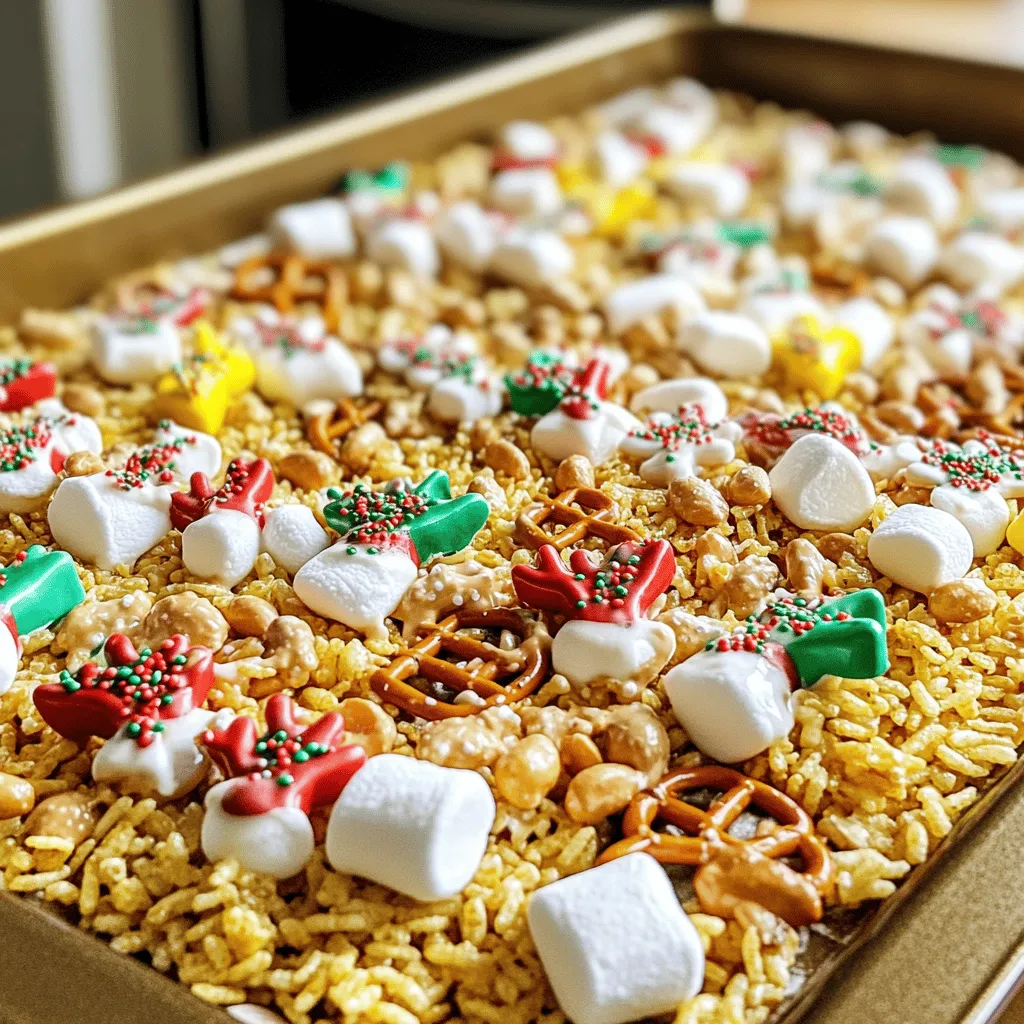
Reindeer Chow Christmas Snack Mix Festive Delight
Get ready to spread holiday cheer with my Reindeer Chow Christmas Snack Mix! This fun and easy treat combines sweet Read Full Recipe -

Gingerbread House Snack Mix Festive Holiday Treat
Are you ready to add some holiday cheer to your snack time? This Gingerbread House Snack Mix is the perfect Read Full Recipe -

Caramel Pecan Sticky Buns Sweet and Gooey Treat
Are you ready to treat yourself to the ultimate indulgence? Caramel Pecan Sticky Buns are sweet, gooey, and packed with Read Full Recipe -
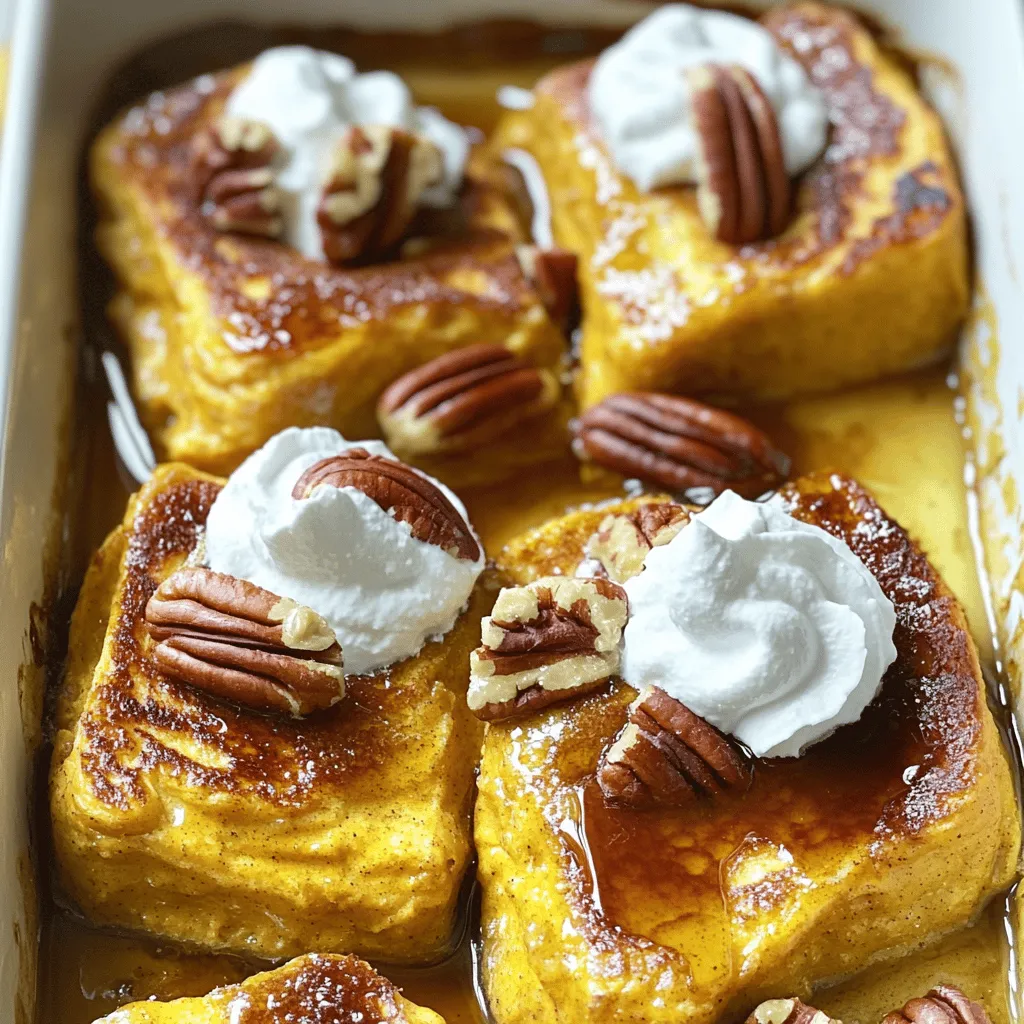
Pumpkin Spice French Toast Casserole Easy and Tasty
Looking for a cozy fall breakfast that’s easy and delicious? You’ll love my Pumpkin Spice French Toast Casserole! This dish Read Full Recipe -
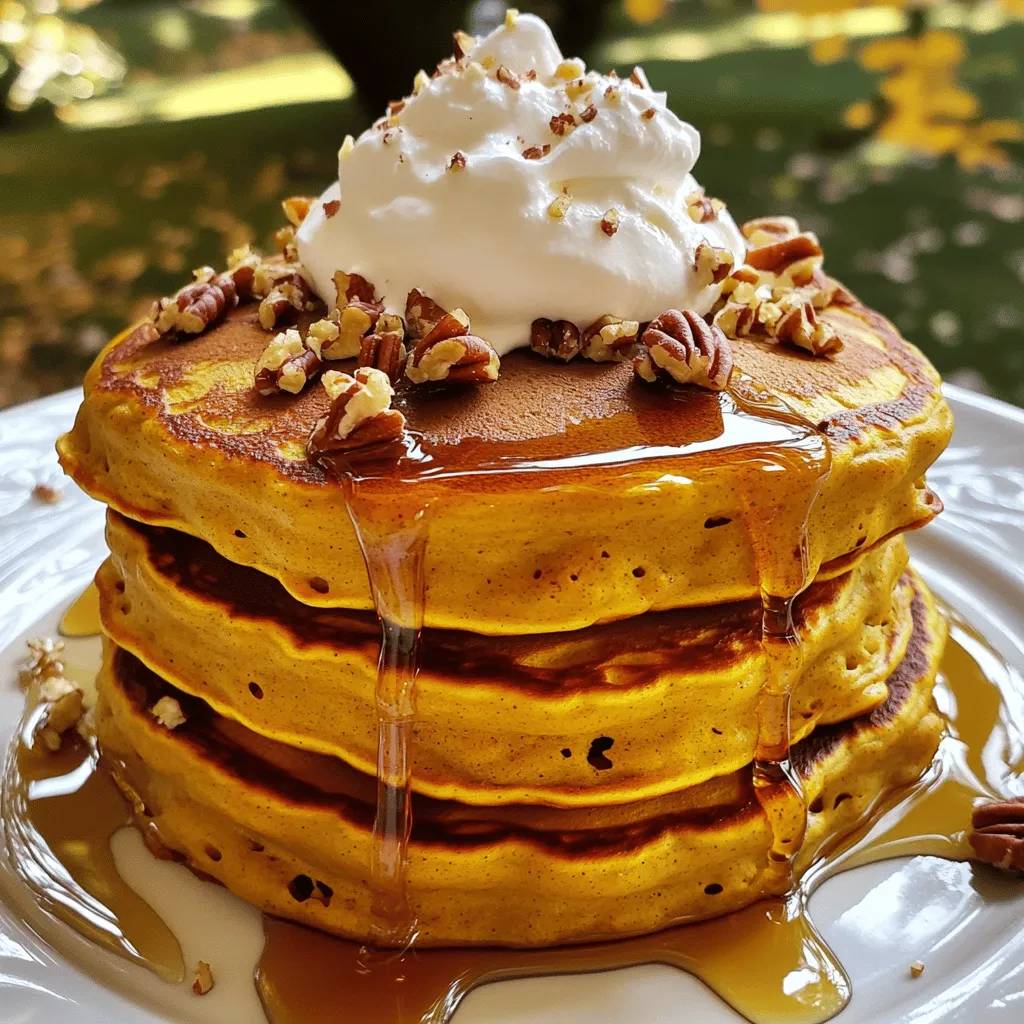
Fluffy Pumpkin Pancakes Perfectly Delicious Breakfast
Start your morning with a treat you won’t forget: fluffy pumpkin pancakes! They bring fall flavors to your breakfast table Read Full Recipe -
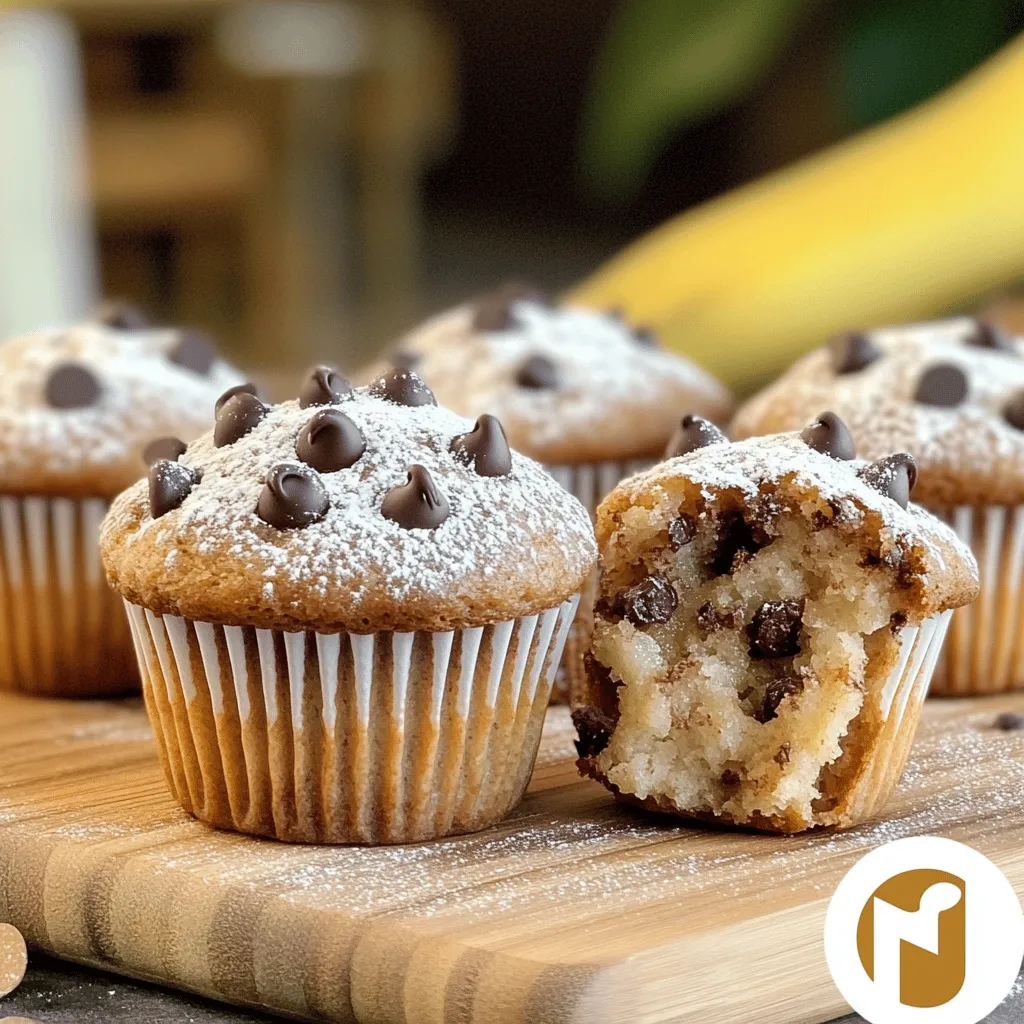
Brown Butter Banana Chocolate Chip Muffins Delight
Are you craving a warm, cozy treat? Look no further than these Brown Butter Banana Chocolate Chip Muffins! This recipe Read Full Recipe -

Chewy Salted Caramel Pretzel Brownies Delightful Treat
Are you ready to indulge in a treat that combines sweet, salty, and chewy goodness? These Chewy Salted Caramel Pretzel Read Full Recipe -

Fluffy Pumpkin Pancakes Easy and Delicious Recipe
Looking to spice up your breakfast with something special? You’re in for a treat! These fluffy pumpkin pancakes are not Read Full Recipe
My Latest Recipes

hey,
i’m !
I’m so happy you’re here!
I love creating dishes that bring joy to the table. I hope they bring the same joy to yours. Let’s enjoy this flavorful journey together.

![- 3 large ripe tomatoes, sliced - 8 oz fresh mozzarella cheese, sliced - 1 cup fresh basil leaves - 2 tablespoons extra virgin olive oil - 1 tablespoon balsamic glaze - Salt and freshly cracked black pepper to taste Choosing the best tomatoes for taste and ripeness Select tomatoes that are bright in color and firm. They should have a sweet smell. Look for tomatoes that feel heavy for their size. Heirloom tomatoes are a great choice for added flavor. Selecting high-quality mozzarella Use fresh mozzarella for the best taste. It should feel soft and moist. Taste it before using to ensure it has a rich and creamy flavor. If you can, find mozzarella packed in water. Importance of fresh basil in the flavor profile Fresh basil adds a unique, aromatic flavor to your salad. Look for vibrant green leaves without brown spots. The leaves should feel soft and fragrant. Avoid dried basil, as it won't give the same fresh taste. For the full recipe, check out the Caprese Delight Salad section. 1. Start by washing the tomatoes and basil leaves. Use cold water to clean them well. 2. Pat the tomatoes and basil dry with a kitchen towel. This step helps keep the salad crisp. 3. Next, grab a large serving platter. This is where you will arrange your salad layers. 1. Begin layering the salad. Place a slice of tomato on the platter. 2. Add a slice of fresh mozzarella on top of the tomato. 3. Repeat this process, alternating between tomato and mozzarella slices. 4. Tuck fresh basil leaves in between the layers. This adds flavor and color. 1. Drizzle extra virgin olive oil over the salad. This enhances the taste. 2. Add a drizzle of balsamic glaze for a touch of sweetness. 3. Season your salad with salt and freshly cracked black pepper. This brings out all the flavors. 4. Let the salad sit for about five minutes. This helps the flavors blend together. For the full recipe, check out the Caprese Delight Salad section above! To make your Caprese salad look amazing, serve it on a lovely platter. This adds a nice touch. Alternate layers of tomatoes and mozzarella for a colorful display. Tuck fresh basil leaves in between the layers for a pop of green. For a final touch, sprinkle chopped basil on top and add whole leaves as decoration. You can make your salad even better by adding extra ingredients. Try slices of avocado for creaminess or add a handful of arugula for a peppery bite. For the balsamic glaze, experiment with different types. A sweet fig balsamic can bring a unique flavor, while a spicy chili balsamic adds a kick. Caprese salad pairs well with many dishes. Serve it alongside grilled chicken or fish for a complete meal. It also works great with crusty bread for a light lunch. This salad is perfect for picnics, outdoor gatherings, or as a starter for dinner parties. It’s fresh and vibrant, making it ideal for warm days. For the full recipe, check here: [Full Recipe]. {{image_2}} You can switch out mozzarella for other cheeses. Burrata adds creaminess. Goat cheese brings a tangy taste. Mixing cheeses creates fun flavors. Try pairing mozzarella with burrata for a rich bite. Each cheese adds its own charm to the salad. Heirloom tomatoes make a colorful choice. They come in many shades and shapes. Their unique flavors can surprise you! You can also swap herbs. Oregano can add a new twist. Fresh mint or parsley can work too, depending on your taste. Caprese salad varies across Italy. In Naples, they use sweet San Marzano tomatoes. In Sicily, you might find caprese with capers and olives. Each region has local ingredients that change the dish. Explore these styles to find your favorite twist! To keep leftover Caprese Salad fresh, store it in an airtight container. This helps prevent drying out. If you have leftover ingredients, keep them separate. Store the tomatoes, mozzarella, and basil apart. This way, each stays fresh longer. For the best taste, eat the salad within two days. Ripe tomatoes can last about three days in the fridge. Fresh mozzarella lasts about a week, but it’s best within a few days. Basil leaves lose flavor quickly. Try to use them within two days for the best taste. If you have leftover mozzarella, toss it into pasta or a sandwich. Leftover tomatoes can enhance soups or sauces. What is the origin of Caprese Salad? Caprese Salad comes from Italy, specifically the island of Capri. It features fresh ingredients. The bright colors represent the Italian flag: red, white, and green. This dish first gained fame in the 1920s. It is simple but full of flavor. How long can you prepare the salad in advance? You can prepare the salad up to 30 minutes in advance. This gives flavors time to blend. However, it's best to serve it fresh. If you wait too long, the tomatoes may get soggy. Keep the basil leaves fresh until serving. Can I use store-bought balsamic glaze? Yes, you can use store-bought balsamic glaze. It saves time and adds sweetness. Just drizzle it over the salad before serving. If you prefer, you can make your own glaze at home. Homemade glaze offers a richer flavor. What’s the best mozzarella type for Caprese Salad? Fresh mozzarella is the best choice for Caprese Salad. It has a soft texture and mild taste. Look for mozzarella packed in water. This type stays fresh and creamy. Burrata is another tasty option if you want something richer. Is Caprese Salad suitable for vegetarians? Yes, Caprese Salad is perfect for vegetarians. It contains no meat or animal byproducts. The main ingredients are tomatoes, mozzarella, and basil. This dish is healthy and full of nutrients. Gluten-free considerations for the salad Caprese Salad is naturally gluten-free. All the ingredients are safe for a gluten-free diet. Enjoy it without worry if you are gluten intolerant. Just be sure to check any dressings you add for gluten. Caprese Salad is fresh and simple. It combines ripe tomatoes, mozzarella, basil, olive oil, and balsamic glaze. We discussed tips for choosing the best ingredients and how to layer them for style. Adding extra flavors or swapping ingredients makes it unique. Store leftovers carefully to keep them fresh. Enjoy this salad for any meal or gathering. I hope you feel inspired to make your own Caprese Salad now. It's easy, healthy, and delicious.](https://soyumrecipes.com/wp-content/uploads/2025/05/9aef66f9-c51a-4fc6-bf97-1ed998c5baf7-300x300.webp)
![- 1 cup Biscoff spread - 1 cup cream cheese (softened) - 1 cup whipped topping (like Cool Whip) - 1/4 cup powdered sugar - 1 teaspoon vanilla extract - A pinch of salt - Crushed Biscoff cookies for garnish - Fresh fruit and graham crackers for dipping Biscoff Fluff Dip combines the sweet, spiced flavor of Biscoff spread with cream cheese and whipped topping. This dip is thick, creamy, and so easy to make. You only need six main ingredients to whip it up in no time! The Biscoff spread is the star here. It gives the dip its rich flavor. The cream cheese makes it smooth and creamy. The whipped topping adds lightness, making it fluffy. The powdered sugar sweetens the dip just right. A touch of vanilla and a pinch of salt enhance all the flavors. For a fun twist, you can add garnishes. Crushed Biscoff cookies on top add crunch. Fresh fruit and graham crackers make great dippers. This dip is perfect for parties or just a sweet treat at home. To make it, check out the Full Recipe. You'll love how simple and delicious it is! - Step 1: Mix cream cheese and Biscoff spread until smooth. Start by softening the cream cheese. This will make mixing easy. In a large bowl, add the cream cheese and Biscoff spread. Use a hand mixer or whisk to blend them until the mix is creamy and smooth. - Step 2: Incorporate powdered sugar and salt. Next, slowly add the powdered sugar and a pinch of salt. Continue to mix until everything is well blended. This step adds sweetness and depth to your dip. - Step 3: Fold in whipped topping gently. Now, take your whipped topping and fold it into the mix. Use a spatula to combine slowly. You want it fluffy, so be careful not to deflate it. - Step 4: Add vanilla extract and combine. Add the vanilla extract to the mixture. Stir gently just until it is combined. This will enhance the flavor of your dip. - Step 5: Transfer to serving bowl and garnish. Next, scoop the fluff dip into a serving bowl. Smooth the top with a spatula. If you want, sprinkle crushed Biscoff cookies on top for a nice touch. - Step 6: Serve with dippers. Finally, serve your Biscoff Fluff Dip with your favorite dippers. Graham crackers, fresh fruit, or more Biscoff cookies work well. Enjoy this sweet treat with friends and family! For the full recipe, check out the [Full Recipe]. To get the smoothest dip, start with room-temperature cream cheese. Place it on the counter for about 30 minutes. If you're short on time, cut it into small cubes. This helps it soften faster. When mixing, use a hand mixer on low speed. This helps blend the Biscoff spread and cream cheese well. Avoid over-mixing, as it can make the dip too runny. Just blend until it’s creamy. Next, gently fold in the whipped topping. Use a spatula, and be careful not to deflate the mix. You want it light and fluffy. For dippers, graham crackers are a classic choice. Fresh fruit like apple slices or strawberries also works great. You can even use pretzels for a salty twist. For a fun touch, serve the dip in a cute bowl. You can sprinkle crushed Biscoff cookies on top for crunch and style. Arrange your dippers around the bowl for a beautiful spread. If you're feeling adventurous, try different serving platters. A wooden board or a tiered tray can make your snack look impressive! For the full recipe, check out the details above. Enjoy making your Biscoff Fluff Dip! {{image_2}} You can easily change up the flavor of your Biscoff Fluff Dip. Adding flavored extracts can give it a new twist. Try using almond or lemon extract for a fresh taste. Just add a teaspoon when mixing the dip. You can also mix in chocolate or caramel. This will add a rich layer to the dip. Just fold in a few tablespoons of chocolate chips or caramel sauce. This makes the dip even more exciting! If you need gluten-free options, use different dippers. Fresh fruit like apples or strawberries works great. You can also use gluten-free graham crackers. They pair well with the dip and keep your snack safe. For vegan options, swap the cream cheese and whipped topping. Use vegan cream cheese and coconut whipped cream instead. These changes keep the dip creamy and delicious without dairy. Enjoy your dip, no matter your diet! To keep your Biscoff Fluff Dip fresh, store it in the fridge. Use an airtight container. This helps prevent it from absorbing other smells. It’s best to consume it within three days for the best taste. If you need to save it longer, you can freeze it. To do this, place it in a freezer-safe container. Leave some space at the top to allow for expansion. When you want to enjoy it again, thaw it in the fridge overnight. Avoid microwaving it as it may change the texture. In the fridge, Biscoff Fluff Dip lasts about three to five days. After that, it may lose its taste and texture. You can tell the dip has gone bad if it smells sour or looks different. If you see mold, throw it away immediately. Always check before serving to ensure it's still good. Biscoff Fluff Dip is a rich and creamy treat. It combines Biscoff spread with cream cheese and whipped topping. The result is a fluffy dip that tastes sweet and slightly spiced. You'll enjoy its smooth texture and sweet flavor. Each bite melts in your mouth, making it hard to resist. Pair it with graham crackers or fruit for a delightful combo. Yes, you can use regular cream cheese. However, it may change the dip's texture. Regular cream cheese tends to be thicker and richer. This may make the dip denser and less fluffy. If you prefer a lighter dip, stick with reduced-fat cream cheese. It keeps the fluffiness and taste you want. You can prepare this dip a day in advance. Just follow the recipe steps and store it in the fridge. Make sure to cover it well to keep it fresh. Before serving, give it a gentle stir to restore the fluffiness. This way, you can enjoy the dip without any stress on the day of your event. Biscoff Fluff Dip is easy to make and full of flavor. We mixed key ingredients like Biscoff spread and cream cheese. Then, we learned how to create the perfect texture and serve it with fun dippers. I shared tips for mixing it up with flavors and dietary changes, plus storage advice. This dip is great for parties or a treat at home. Enjoy it fresh, share it with friends, and feel free to get creative!](https://soyumrecipes.com/wp-content/uploads/2025/05/e0b879c6-64dd-4bef-901b-74089de2db50-300x300.webp)

Zucchini Chocolate Chip Cookies Chewy and Delicious Treat
Are you ready to enjoy a delightful treat that combines health and indulgence? These Zucchini Chocolate Chip Cookies are not just chewy and delicious;…