Latest & Greatest

browse recipes

- 1 lb ground turkey - 1 cup orzo pasta - 1 medium onion, diced - 2 cloves garlic, minced - 1 bell pepper, diced (any color) - 1 zucchini, diced - 1 teaspoon dried oregano - 1 teaspoon paprika - Salt and pepper to taste - 1 can (14.5 oz) diced tomatoes (with juices) - 2 cups chicken broth - ½ cup feta cheese, crumbled (optional) - Fresh basil or parsley for garnish Ground turkey is a lean protein that cooks up nicely. It keeps the dish light but filling. Orzo adds a fun twist. It cooks quickly and soaks up flavors, making it perfect for this skillet dish. Fresh vegetables like onion, garlic, bell pepper, and zucchini add taste and color. They mix well with the turkey and orzo. Seasonings like dried oregano and paprika give this meal a warm flavor. I like to add salt and pepper to taste for the best outcome. You can also enhance the dish with optional additions. Diced tomatoes add a nice touch. Chicken broth makes the orzo creamy and rich. For a special treat, sprinkle crumbled feta cheese on top. Fresh herbs like basil or parsley can finish the dish with a burst of color and flavor. {{ingredient_image_1}} 1. Start by heating two tablespoons of olive oil in a large skillet over medium heat. 2. Once hot, add one diced onion. Sauté it for about 3 to 4 minutes until it becomes soft and translucent. 3. Next, add two cloves of minced garlic and one diced bell pepper to the skillet. Cook for another 2 to 3 minutes. You want the bell pepper to soften a bit. 1. Now, increase the heat to medium-high. Add one pound of ground turkey to the skillet. 2. Cook the turkey for about 5 to 6 minutes. Use a spoon to break it up as it browns. 3. Once the turkey is browned, stir in one diced zucchini, one teaspoon of dried oregano, one teaspoon of paprika, and salt and pepper to taste. Cook for another 2 minutes. This softens the zucchini and blends the flavors. 1. It’s time to add one cup of orzo and one can of diced tomatoes (with juices) to the skillet. 2. Pour in two cups of chicken broth and stir everything together. 3. Bring the mixture to a boil, then reduce the heat to simmer. Cover the skillet and let it cook for 12 to 15 minutes. Stir occasionally to prevent sticking. 4. Once the orzo is tender and has absorbed most of the liquid, remove it from the heat. Let it sit covered for 2 to 3 minutes. 5. Fluff the dish with a fork before serving. If you like, top it with crumbled feta cheese and fresh herbs. Enjoy your hearty meal! To prevent orzo from sticking, follow these tips: - Use enough liquid: Always add the correct amount of chicken broth. This keeps the orzo moist. - Stir often: Mix the orzo with a spoon every few minutes. This helps it cook evenly. When browning turkey, ensure even cooking by doing this: - Break it apart: Use a wooden spoon to break the turkey into small pieces. This allows it to cook faster. - Don’t overcrowd the pan: If needed, cook in batches. This helps the turkey brown better. To boost the flavor of your dish, consider these spices: - Crushed red pepper flakes: Adds a nice kick. - Italian seasoning: Great for a herb-filled taste. - Garlic powder: Extra garlicky goodness if you love garlic. A squeeze of lemon at the end brightens the dish. Just add a little juice before serving. This adds a fresh pop of flavor that balances the richness of the turkey. For serving, you have fun options: - Rustic style: Serve directly in the skillet. This looks inviting and casual. - Individual bowls: Portion into bowls and add garnishes. Fresh basil or parsley adds color and flavor. A sprinkle of feta on top makes it look fancy. Pro Tips Use Lean Turkey: Opt for lean ground turkey for a healthier dish, but be mindful not to overcook it to prevent dryness. Add Extra Vegetables: Feel free to include additional vegetables like spinach or mushrooms for more flavor and nutrition. Customize the Cheese: Experiment with different cheeses like goat cheese or mozzarella for varied taste profiles. Make it Spicy: For a kick, add red pepper flakes or diced jalapeños to the skillet while cooking the turkey. {{image_2}} You can easily swap the ground turkey for other meats. Ground chicken works well for a lighter taste. Ground beef adds a rich flavor, and it's a great option. For those who prefer a plant-based diet, try using plant-based ground meat. It mimics the texture of meat and absorbs flavors well. Changing up the veggies can create new flavors. Add spinach or kale for a healthy twist. Mushrooms can give a deep umami taste. Carrots or peas add sweetness and color. Think about the seasons too. In spring, use asparagus and peas. In fall, try butternut squash or kale. If you need a gluten-free option, look for gluten-free orzo. There are many brands that make it from rice or corn. You can also skip the cheese or use dairy-free feta for a dairy-free dish. This way, everyone can enjoy the meal without worry. To store leftovers, place the ground turkey orzo skillet in an airtight container. Cool it to room temperature before sealing. This helps keep it fresh. You can refrigerate it for up to three days. If you want to enjoy it later, make sure to reheat it well before eating. To freeze your dish, allow it to cool completely. Then, transfer it to a freezer-safe container. Make sure to leave some space at the top, as it will expand. You can freeze it for up to three months. When you're ready to eat, thaw it overnight in your fridge. Reheat it in a skillet on medium heat, stirring until hot. You can make this dish ahead of time for easy meals. Cook it as usual, then let it cool. Store it in individual portions for quick lunches or dinners. Pair it with a fresh salad or steamed veggies for a complete meal. You can also serve it with crusty bread for a cozy touch. Yes, you can make this dish ahead of time. It stores well in the fridge. To store, let it cool down first. Then place it in an airtight container. It will last for up to three days. When you are ready to eat, reheat it on the stove. Add a splash of chicken broth to keep it moist. You can also microwave it, stirring every minute until hot. No, traditional orzo is not gluten-free. It is made from wheat. However, you can find gluten-free orzo made from rice or corn. Many stores sell these types. They cook similarly, so you can use them in this recipe. Just check the package for cooking times. To add spice, try adding red pepper flakes. Start with a pinch and taste. You can also add diced jalapeños for a fresh kick. If you like hot sauce, drizzle some on top before serving. These ideas will bring heat and flavor to your orzo skillet. This blog post covers a simple and tasty ground turkey orzo dish. You learned about the key ingredients, step-by-step cooking, useful tips, and variations. This dish is easy to customize and perfect for any meal. Remember to store leftovers properly to enjoy later. Feel free to experiment with spices and vegetables to make it your own. Enjoy cooking and sharing this flavorful recipe!

Ground Turkey Orzo Skillet Easy and Hearty Meal

Looking for an easy and hearty meal that packs a punch? This Ground Turkey Orzo Skillet is your answer! With just a few simple…

My Latest Desserts

My Latest Drinks

hey,

i’m !

I’m so happy you’re here!

I love creating dishes that bring joy to the table. I hope they bring the same joy to yours. Let’s enjoy this flavorful journey together.

Creamy Spinach Artichoke Dip Flavorful and Easy Recipe

Are you ready to elevate your snack game? This Creamy Spinach Artichoke Dip is not just flavorful; it’s also easy to make! Whether you’re…
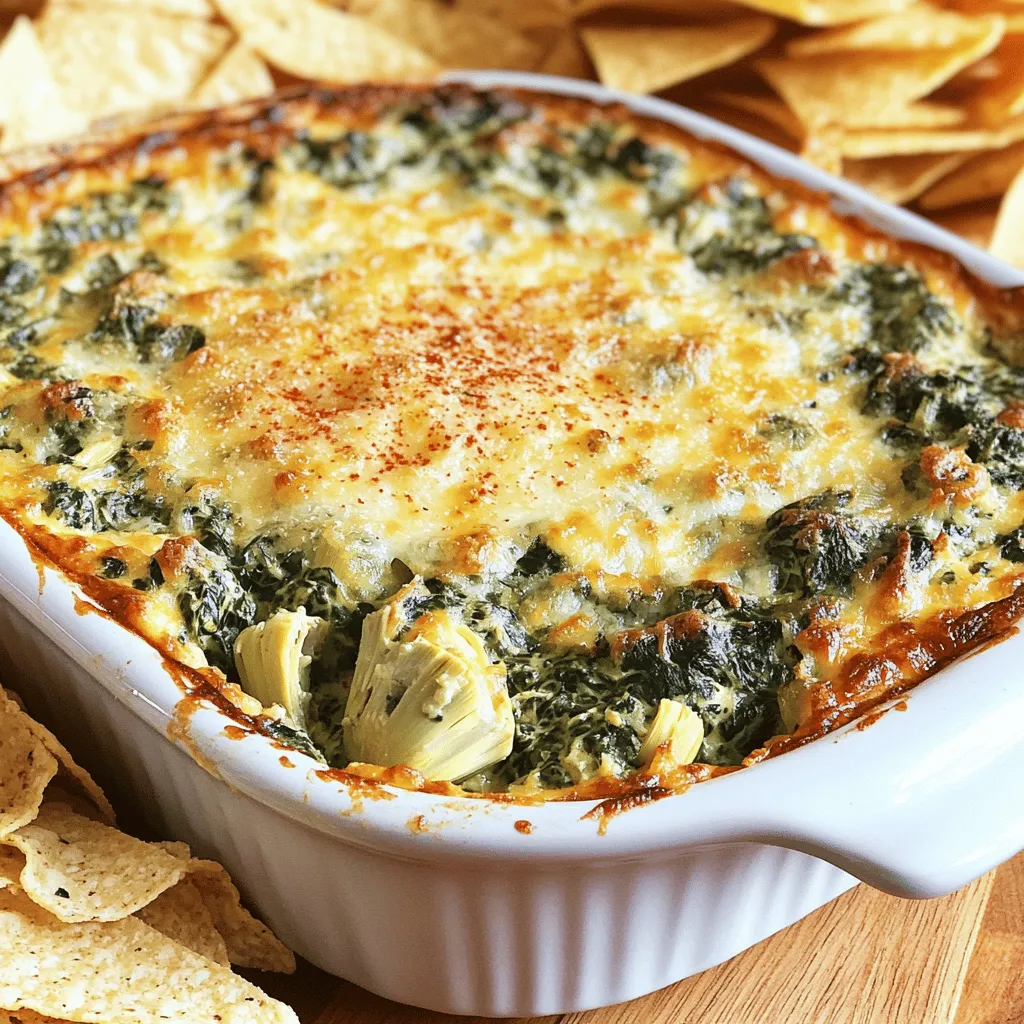
To make this creamy spinach artichoke dip, you will need: - 1 cup fresh spinach, chopped - 1 cup canned artichoke hearts, drained and chopped - 1 cup cream cheese, softened - 1/2 cup sour cream - 1/2 cup mayonnaise - 1 cup shredded mozzarella cheese - 1/2 cup grated Parmesan cheese - 2 cloves garlic, minced - 1/2 teaspoon onion powder - 1/2 teaspoon crushed red pepper flakes (optional) - Salt and pepper to taste - Tortilla chips or sliced baguette for serving Measuring ingredients correctly helps your dip taste great. Use dry measuring cups for solids and liquid measuring cups for liquids. If you do not have fresh spinach, you can use frozen spinach. Just make sure to thaw and drain it well before using. For a lighter dip, you can swap sour cream with Greek yogurt. You can also replace mayonnaise with a low-fat version if you prefer. Using fresh ingredients can enhance the flavor of your dip. Fresh spinach adds a vibrant taste and color. Canned artichoke hearts save time and are easy to find. They still offer great flavor and texture. When using fresh items, remember they may change cooking times slightly. Fresh garlic gives a stronger taste compared to jarred garlic. Both options work but fresh is often best for flavor. To start, preheat your oven to 375°F (190°C). This step helps the dip cook evenly. In a large bowl, mix the softened cream cheese, sour cream, and mayonnaise together. Stir until the mix is smooth and creamy. Next, add in the chopped spinach and artichoke hearts. Don’t forget to include the minced garlic, shredded mozzarella, and grated Parmesan cheese. These ingredients bring great flavor! Season the mix with onion powder and crushed red pepper flakes if you like a little heat. Add salt and pepper to taste. Make sure to combine everything well. You want all those delicious flavors to mingle. Once mixed, transfer the dip to a baking dish, spreading it out evenly. Now it’s time to bake! Place the dip in your preheated oven and let it cook for about 25-30 minutes. Keep an eye on it. You want the dip to be bubbly and have a golden top. This gives it that perfect finish you see at parties. Once it’s done baking, carefully remove it from the oven. Let it cool for a few minutes. This step makes it easier to serve and eat. When serving, I love to keep it simple yet elegant. Serve the warm dip in the baking dish or transfer it to a pretty bowl. Garnish it with a sprinkle of extra Parmesan and a few crushed red pepper flakes for color. It looks great! Pair the dip with crispy tortilla chips or slices of toasted baguette. These options are perfect for dipping. Enjoy this creamy spinach artichoke dip at your next gathering or as a tasty snack. For the full recipe, check out the details above. To make your dip extra creamy, use full-fat cream cheese. This gives a rich base. You can also mix in some heavy cream if you want more creaminess. Another tip is to blend the cream cheese well before adding other ingredients. This makes it smoother. You can adjust the flavors based on your taste. If you like garlic, add more minced garlic. For a spicy kick, toss in some jalapeños or more crushed red pepper flakes. For a tangy twist, add a squeeze of fresh lemon juice. Don’t forget to taste as you go. One common mistake is overbaking the dip. Watch it closely to avoid burning the top. Another error is not mixing well. If the cheeses and veggies are not mixed right, you may get uneven flavors. Lastly, skip the salt until the end. This helps you control the taste better. For the full recipe, check out the details above. {{image_2}} You can add jalapeños for a spicy kick. Chop 1-2 fresh jalapeños and mix them into the dip. This gives a nice heat that pairs well with the creamy texture. You can adjust the number of jalapeños based on your spice preference. For milder heat, remove the seeds. This spicy twist makes a great party dip. To make a vegan version, swap dairy for plant-based options. Use vegan cream cheese instead of regular cream cheese. You can also use cashew cream for a rich texture. Replace sour cream and mayonnaise with dairy-free yogurt. This way, you keep the creamy taste while being plant-based. Everyone can enjoy this tasty dip! Cheese adds depth to the dip. You can mix different cheeses for added flavor. Try using sharp cheddar or pepper jack cheese to change the taste. If you want a smoky flavor, add some smoked gouda. Feel free to experiment and find your favorite combo. Each cheese brings its own unique twist to the dish. For the full recipe, check out the Cheesy Spinach Artichoke Delight! Store any leftover dip in an airtight container. This keeps it fresh. Place it in the fridge. It will last for about three to four days. Make sure to cool it down first before sealing. If you have more than you can eat, consider freezing part of it. To reheat, use an oven or microwave. If using an oven, preheat to 350°F (175°C). Transfer the dip to a baking dish. Cover it with foil to keep moisture in. Heat for about 15-20 minutes or until warm. If using the microwave, heat in short bursts. Stir in between to avoid hot spots. You can freeze the dip for later use. Place it in a freezer-safe container. Make sure to leave space at the top. The dip expands when frozen. It can last up to three months in the freezer. To use it, thaw overnight in the fridge before reheating. For the best taste, eat it within a month after thawing. You can find the full recipe for creamy spinach artichoke dip at the beginning of the article. You can serve creamy spinach artichoke dip with many tasty options. Tortilla chips are a classic choice. They add a nice crunch. Sliced baguette works well too. You can toast the slices for extra flavor. Fresh veggies like carrots or celery are great for dipping. You can even use crackers for a fun twist. Pair it with a nice drink, and you’re all set! Yes, you can make creamy spinach artichoke dip ahead of time. Just prepare the dip and place it in a baking dish. Cover it well and store it in the fridge. This way, you can enjoy it later. When you are ready, just bake it. This makes it perfect for parties or gatherings. To reheat spinach artichoke dip, preheat your oven to 350°F (175°C). Place the dip in the oven for about 15-20 minutes. You want it to be hot and bubbly. If you are in a hurry, you can use the microwave. Heat it in 30-second bursts, stirring in between. Keep an eye on it so it doesn’t get too hot. Enjoy it warm for the best taste! We discussed every detail of making creamy spinach artichoke dip. You learned about essential ingredients, how to prepare them, and baking tips for the perfect dip. I shared ideas for variations and how to store leftovers. Remember, creativity and careful prep can elevate your dish. Use my tips to avoid common mistakes and make your dip a hit every time. Enjoy sharing this tasty treat at your next gathering!