


Latest & Greatest

Salted Caramel Cheesecake Cookies Easy and Tasty Treat
If your sweet tooth craves something special, you need to try salted caramel cheesecake cookies. These treats blend rich cream
Read more…
Ingredient Peanut Butter Chocolate Fudge Delightful Treat
If you love chocolate and peanut butter, you’re in for a treat! This peanut butter chocolate fudge is simple to
Read more…
Butternut Squash Sage Risotto Creamy Comfort Dish
If you crave a cozy, creamy dish, look no further than Butternut Squash Sage Risotto. This dish blends sweet butternut
Read more…
Spicy Honey Sriracha Meatballs Irresistible Flavor Boost
Looking to spice up your meal? These Spicy Honey Sriracha Meatballs pack a punch of flavor that will leave your
Read more…
Cilantro Lime Steak Bowls Flavorful and Easy Meal
Are you looking for a tasty and easy meal to spice up your dinner? Look no further! These Cilantro Lime
Read more…
Savory Honey Garlic Chicken Mac and Cheese Recipe
Ready to excite your taste buds? This Savory Honey Garlic Chicken Mac and Cheese recipe combines tender chicken, creamy cheese,
Read more…
Marry Me Tortellini Simple and Flavorful Delight
Are you ready to impress your loved ones with a pasta dish that could spark romance? Marry Me Tortellini is
Read more…
Minute Chickpea Curry Quick and Flavorful Recipe
If you’re in a rush but crave a tasty meal, you need this Minute Chickpea Curry recipe. It’s quick, easy,
Read more…browse recipes


. To make your hand pies a hit, you must avoid soggy bottoms. A few simple tricks can help. First, make sure your filling isn't too wet. Use cornstarch to thicken it, as it absorbs extra moisture. Let the apple filling rest for about 10 minutes. This step allows the flavors to blend and helps with moisture control. Next, consider the pie crust. Pre-baking the crust for a minute or two in the air fryer can give you that extra crispiness. This technique helps create a barrier against moisture from the filling. Spices are another fun area to explore. While cinnamon is classic, don't be afraid to experiment. Try adding nutmeg or allspice for a warm twist. You could even use ginger for a zesty kick. Personalizing the flavor can make your hand pies unique! Pairing your hand pies with the right sides can elevate your dessert. A scoop of vanilla ice cream goes perfectly with warm hand pies. You can also serve them with a drizzle of caramel sauce. The sweetness complements the tart apples well. For leftover hand pies, store them in an airtight container. They can last for about three days in the fridge. To keep them fresh, place parchment paper between layers to avoid sticking. If you want to enjoy them later, freezing is a great option. Simply wrap each pie in plastic wrap and store them in a freezer bag. They can last up to three months. To reheat, use your air fryer at 350°F for about 5-8 minutes. This method keeps them crispy! For the full recipe, check out the detailed instructions. {{image_2}} You can mix up your apple hand pies with different fillings. For a fruity twist, try berries or peaches. - Berries: Use blueberries, raspberries, or strawberries. These fruits add a nice tartness. - Peaches: Fresh or canned peaches bring a juicy sweetness. If you want to get creative, consider savory fillings. Adding cheese or meat can change the game. - Cheese: Try a mix of cream cheese and herbs. This gives a rich flavor. - Meat: Cooked chicken or ham can make a fun hand pie. Making your hand pies fit different diets is easy. You can find options for gluten-free and vegan diets. - Gluten-Free: Use gluten-free pie crusts. Many brands offer great taste and texture. - Vegan: Substitute the egg wash with almond milk or a mix of flour and water. Use coconut oil instead of butter for the filling. These adjustments keep the deliciousness while meeting dietary needs. For more details, check the Full Recipe. To keep your air fryer apple hand pies fresh, store them in an airtight container. They can stay good in the fridge for up to three days. If you want them to last longer, freezing is a great option. To freeze, place the hand pies on a baking sheet and freeze them until solid. Then, transfer them to a freezer bag. They can last for up to three months in the freezer. For reheating, the air fryer is your best friend. It keeps the hand pies crispy. Set your air fryer to 350°F (175°C) and heat for about 5-7 minutes. You can also use the oven. Preheat it to the same temperature and bake for about 10 minutes. To keep them crispy, avoid using the microwave, as it makes them soggy. Enjoy your delicious hand pies warm! You can choose between homemade or refrigerated pie crust. Homemade crust gives you full control over texture and flavor. You can adjust the thickness and add spices. However, it takes more time. Refrigerated crust is quick and easy. It still provides a nice flaky texture. You can find it at most grocery stores. Both options work well, so pick what suits your time and skill level. Yes, you can use frozen apples. Thaw them first to avoid a soggy filling. Drain any extra liquid after thawing. This helps keep the hand pies crisp. You can add a bit more cornstarch if the filling is too wet. This will help thicken the mixture. Just remember to mix well before filling your crusts. Look for a golden brown color on the pies. This shows they are cooked through. The edges should also be crispy. If you notice any puffing, that’s a good sign too! You can also use a toothpick. Insert it into a pie to check if it's hot inside. If it comes out clean, they are ready. Enjoy your warm, crispy hand pies! You learned how to make tasty air fryer apple hand pies from scratch. We covered key ingredients like apples and spices, and explored crust options. You got step-by-step instructions on filling, assembling, and cooking. We also shared tips to perfect your pies and ideas for variations. Finally, we discussed storage and reheating methods to keep your hand pies fresh. Now, you can impress everyone with your delicious homemade treats! Enjoy every bite and share your creations with friends and family.](https://soyumrecipes.com/wp-content/uploads/2025/07/e5efb682-d938-46bc-9f52-ebe9ea464e70.webp)
Air Fryer Apple Hand Pies Irresistible Dessert Recipe
Are you ready for a treat that’s easy to make and hard to resist? In this blog post, I’m sharing my favorite recipe: Air…
My Latest Desserts

Strawberry Lemonade Cupcakes Fresh and Flavorful Treat
Craving a sweet, tangy treat? Dive into the world of Strawberry Lemonade Cupcakes! These delightful cupcakes blend fresh strawberries and Read Full Recipe-
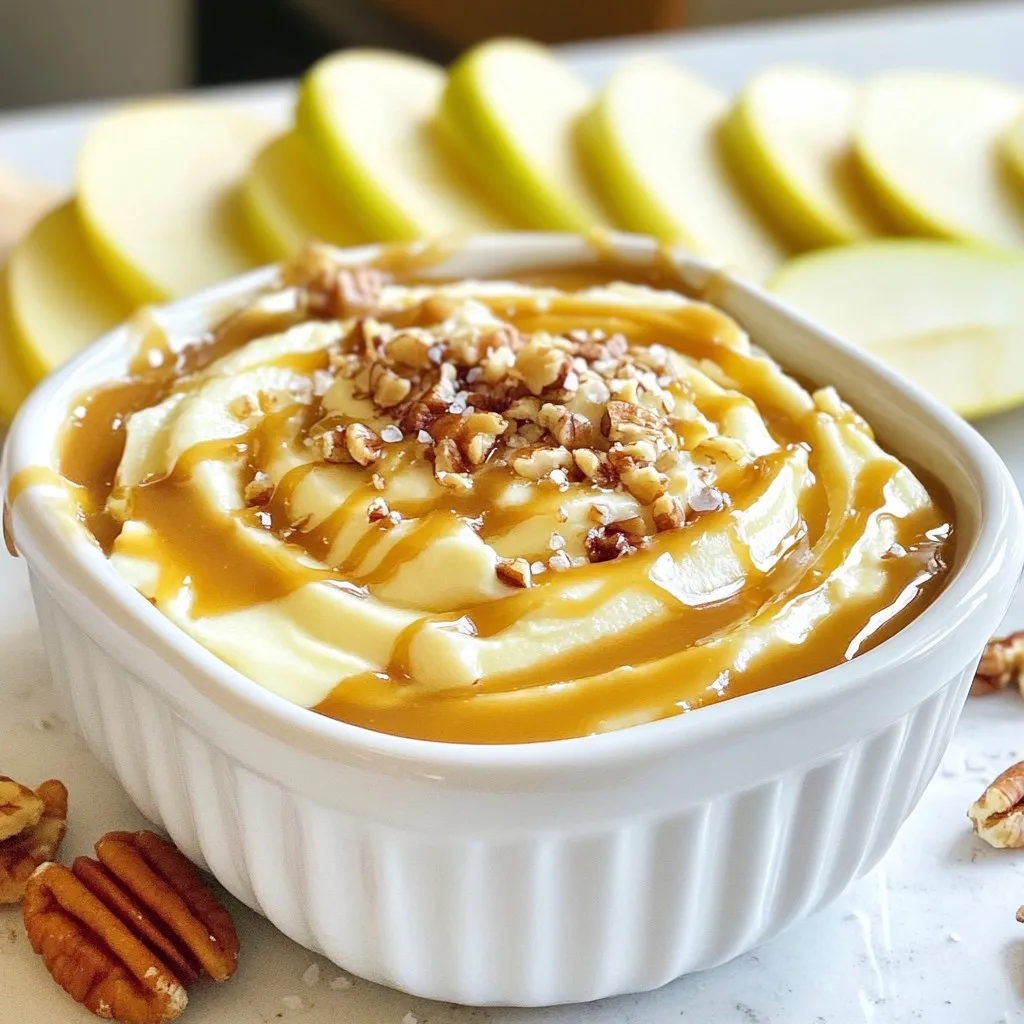
Salted Caramel Apple Dip Creamy and Delicious Treat
If you’re looking for a tasty treat that combines sweet and salty, you’re in for a delight! This Salted Caramel Read Full Recipe -
No-Bake Oreo Cheesecake Cups Delightful Easy Treat
Craving a sweet, creamy treat that’s easy to make? These No-Bake Oreo Cheesecake Cups are perfect for you! With just Read Full Recipe -
Key Lime Pie Bars Simple and Tangy Dessert Treat
Are you ready to enjoy a treat that’s both simple and zesty? Key Lime Pie Bars combine the tart zing Read Full Recipe -
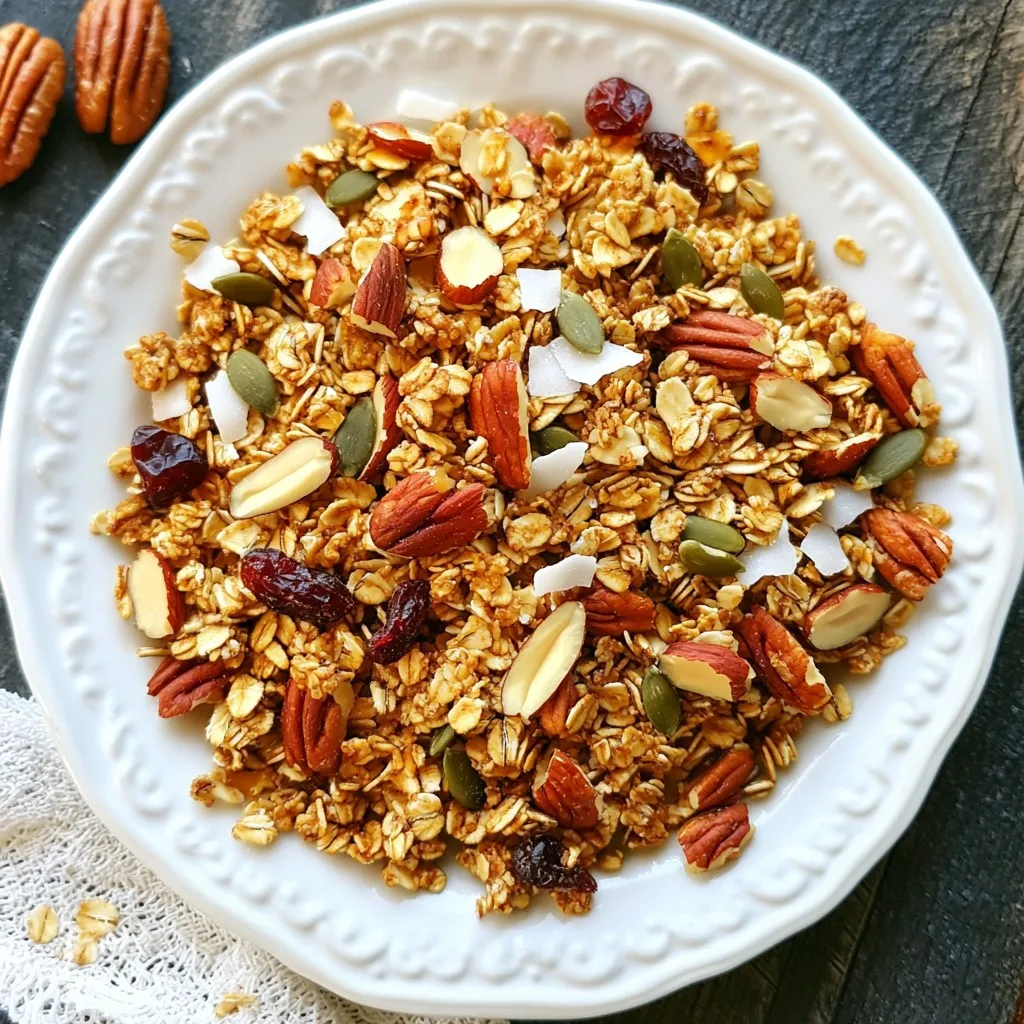
Maple Pecan Granola Crunchy and Nutritious Snack
Looking for a tasty and healthy snack? You’ve found it! My Maple Pecan Granola is crunchy, packed with flavor, and Read Full Recipe -
Strawberry Shortcake Trifle Delightful and Simple Treat
Get ready to impress your family and friends with a Strawberry Shortcake Trifle that’s both delightful and simple. This layered Read Full Recipe


My Latest Drinks
-
Spiced Apple Cider Punch Festive and Flavorful Drink
Warm up your gatherings with my Spiced Apple Cider Punch! This festive drink bursts with cozy flavors, perfect for chilly Read Full Recipe -
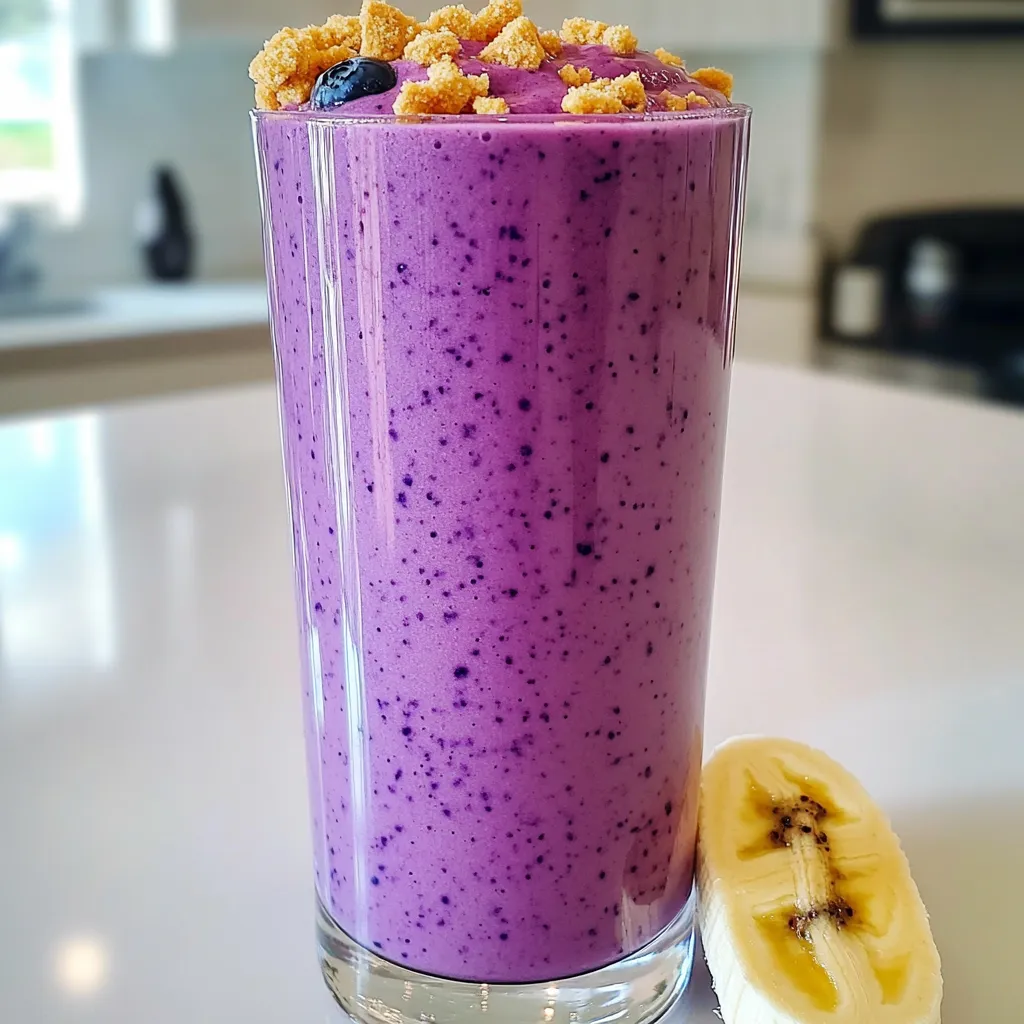
Blueberry Cheesecake Smoothie Protein Delight
Are you ready to treat yourself to a delicious and healthy drink? The Blueberry Cheesecake Smoothie Protein Delight packs all Read Full Recipe -
Warm Cranberry Ginger Mocktail Spritzer Recipe Delight
Welcome to my cozy kitchen! Today, I’m excited to share a delightful warm cranberry ginger mocktail spritzer that brightens up Read Full Recipe -
Spiced Apple Cider Chai Bold and Flavorful Drink Recipe
Looking for a cozy drink this season? Try my Spiced Apple Cider Chai! This bold, flavorful beverage combines warm apple Read Full Recipe -
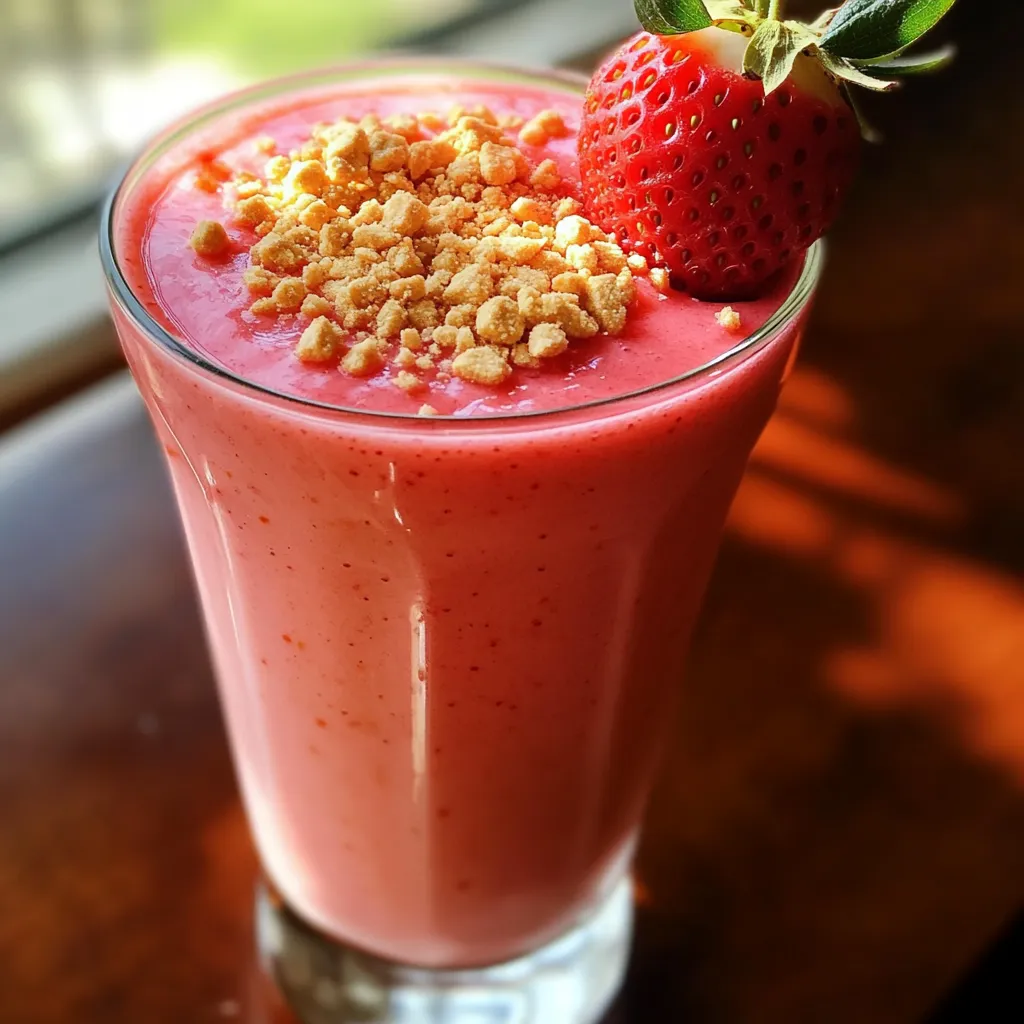
Strawberry Cheesecake Smoothie Tasty and Easy Recipe
Are you ready for a treat that’s both tasty and easy? This Strawberry Cheesecake Smoothie blends the rich flavors of Read Full Recipe -
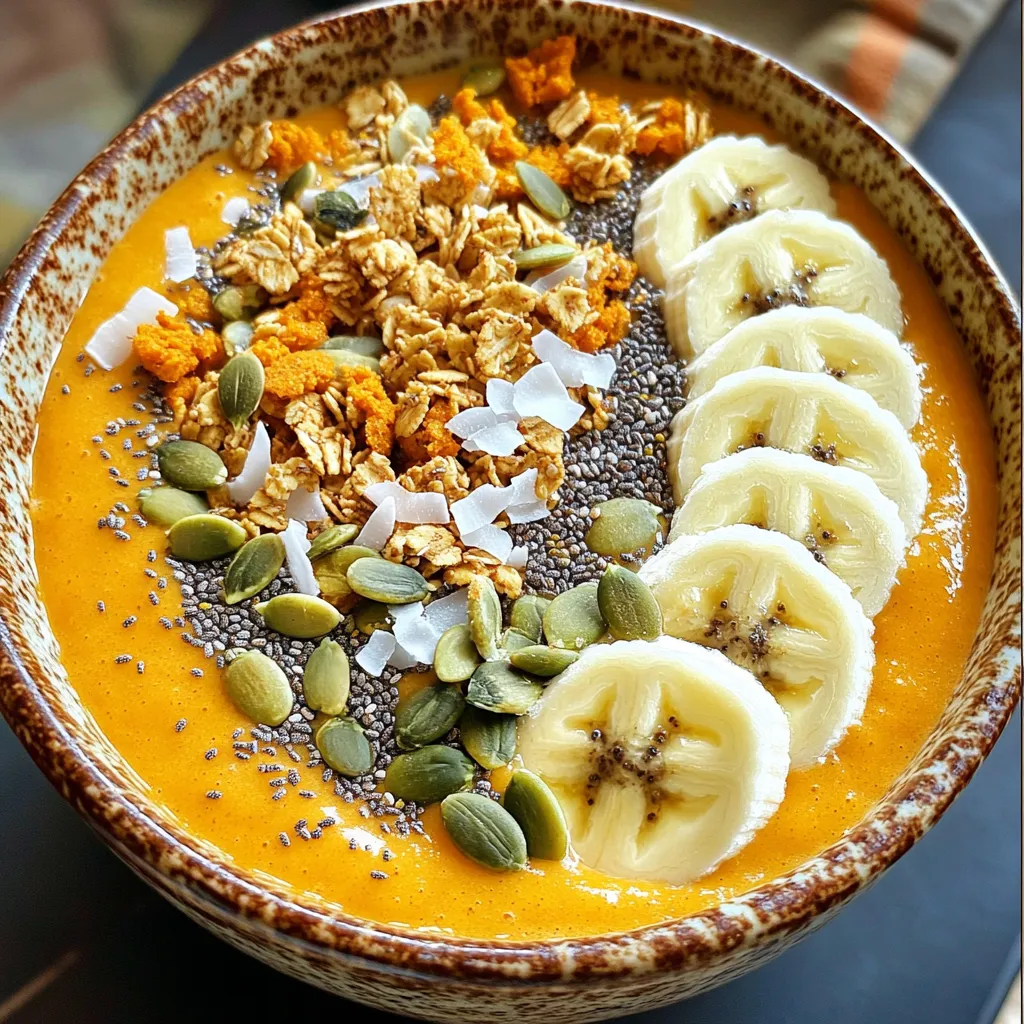
Pumpkin Spice Smoothie Bowl Protein Packed Delight
Are you ready to dive into the cozy world of pumpkin spice? This Pumpkin Spice Smoothie Bowl is not only Read Full Recipe


hey,
i’m !
I’m so happy you’re here!
I love creating dishes that bring joy to the table. I hope they bring the same joy to yours. Let’s enjoy this flavorful journey together.


![For a tasty Caprese Pasta Salad, you need the following ingredients: - 8 oz of rotini or fusilli pasta - 1 pint cherry tomatoes, halved - 1 cup fresh mozzarella balls (bocconcini), halved - 1 cup fresh basil leaves, roughly chopped - 3 tablespoons extra virgin olive oil - 2 tablespoons balsamic glaze - 1 clove garlic, minced - Salt and pepper to taste - Optional: 1/4 cup pine nuts, toasted These ingredients combine to create a bright and fresh dish. If you don’t have something on hand, there are easy swaps. - Pasta: You can use penne or farfalle instead of rotini or fusilli. - Mozzarella: Try using feta cheese for a different flavor. - Basil: Fresh parsley or arugula can work if you run out of basil. - Olive oil: Any good quality oil can replace olive oil. - Balsamic glaze: You can mix balsamic vinegar with a bit of honey as a substitute. Feel free to get creative with these options. Choosing fresh ingredients is key to a great salad. Here are my tips: - Tomatoes: Look for bright red, firm tomatoes. They should smell sweet and fresh. - Basil: Select basil with vibrant green leaves. Avoid any that look brown or wilted. - Mozzarella: Choose mozzarella that is soft and moist. If possible, buy it from a deli. - Garlic: Look for firm bulbs without any soft spots. Fresh garlic gives the best flavor. Using the best ingredients will make your Caprese Pasta Salad shine! To make Caprese Pasta Salad, start by boiling water. Use a large pot and add salt. When the water boils, add 8 oz of rotini or fusilli pasta. Cook it until it is al dente, which usually takes about 8 to 10 minutes. Drain the pasta and rinse it under cold water. This stops the cooking and keeps the pasta firm. Next, grab a large bowl. Combine the cooled pasta, 1 pint of halved cherry tomatoes, and 1 cup of fresh mozzarella balls. Add 1 cup of roughly chopped basil leaves for a burst of flavor. In a smaller bowl, whisk together 3 tablespoons of extra virgin olive oil, 2 tablespoons of balsamic glaze, and 1 clove of minced garlic. Season with salt and pepper to taste. Drizzle this dressing over the pasta mixture. Toss everything gently to coat the ingredients well. If you like a bit of crunch, sprinkle on 1/4 cup of toasted pine nuts. Let the salad sit for at least 15 minutes. This resting time allows the flavors to blend perfectly. To help you along, consider watching a quick video. A visual guide can show you how to cook the pasta and mix the salad. Look for videos that highlight each step. They can make the process feel easier and more fun. Seeing someone else do it can inspire your own cooking. One common mistake is overcooking the pasta. Make sure to check it often. Overcooked pasta turns mushy and ruins the salad's texture. Also, don't skip rinsing the pasta. This keeps it from sticking together. Lastly, let the salad sit before serving. This step is key for flavor. Skipping it can lead to a bland dish. Remember these tips, and you'll create a fresh and flavorful salad. For the complete recipe, check the [Full Recipe]. To make a great dressing, start with quality olive oil. Use extra virgin olive oil for the best flavor. Mix it with balsamic glaze for a sweet touch. Add minced garlic for a nice kick. Whisk these together until blended. Taste it and adjust salt and pepper as needed. This step ensures your salad shines. Caprese pasta salad works well as a side dish. It pairs nicely with grilled chicken or fish. Serve it at picnics or barbecues for a fresh option. You can also add toasted pine nuts for crunch. Garnish with extra basil leaves for color and style. This makes your dish look even more inviting. Store any leftovers in an airtight container. Keep it in the fridge for up to three days. If the salad seems dry, add a little dressing before serving. Avoid freezing the salad, as it can change the texture. Enjoy your Caprese pasta salad again without worry! {{image_2}} This Caprese Pasta Salad is easy to make vegetarian or vegan. To keep it vegetarian, use fresh mozzarella. For vegan options, swap mozzarella with avocado or a nut-based cheese. Both choices give a creamy texture. You can also add more veggies, like bell peppers or zucchini. They add crunch and color. If you need a gluten-free salad, use gluten-free pasta. Many brands offer great options now. Look for pasta made from rice, quinoa, or chickpeas. These gluten-free choices taste good and hold up well. They will mix nicely with the other ingredients. Enjoy the same great flavors without the gluten! Feel free to get creative with your Caprese Pasta Salad. Add extra ingredients for new flavors. Here are some ideas: - Protein: Toss in grilled chicken or shrimp for added protein. - Nuts: Sprinkle in walnuts or almonds for crunch. - Seasoning: Try adding crushed red pepper for a kick. - Fruits: Fresh fruit, like strawberries or peaches, can add sweetness. These additions can make your salad unique. Experiment and find your favorite combination. Check out the Full Recipe for more details! To keep your Caprese pasta salad fresh, use an airtight container. Place the salad in the container after it cools. This helps lock in flavors and prevent drying. If you have extra dressing, store it separately. This keeps the pasta from getting soggy. When stored correctly, your Caprese pasta salad lasts about three days in the fridge. Check for any signs of spoilage, like a bad smell or off-color ingredients. If you see any, it’s best to toss the salad. To enjoy the best taste, eat it within the first two days. Freezing Caprese pasta salad is not the best choice. The tomatoes and mozzarella can lose their texture. If you must freeze it, leave out the tomatoes and cheese. Store the pasta with the dressing in a freezer-safe bag. Use it within one month for the best flavor. When ready to eat, thaw it in the fridge overnight and add fresh tomatoes and mozzarella before serving. You can find the full recipe for Caprese Pasta Salad here. The best pasta for Caprese Pasta Salad is rotini or fusilli. These shapes hold the dressing and mix well with the other ingredients. Their curves and twists capture the flavors, making each bite delicious. You can use other shapes too, like penne or farfalle. Just make sure to cook it al dente for the best texture. Yes, you can make Caprese Pasta Salad ahead of time. It tastes great when chilled, allowing the flavors to blend. I suggest preparing it a few hours before serving. Just keep it in the fridge. If you make it too early, the tomatoes may get soggy. Add the dressing closer to serving time to keep it fresh. Caprese Pasta Salad pairs well with many dishes. Here are some ideas: - Grilled chicken or shrimp for added protein. - Garlic bread to complement the flavors. - A light white wine, like Pinot Grigio, enhances the meal. - Fresh fruits like watermelon or berries add a sweet touch. These pairings make your meal more exciting and balanced. For the full recipe, check out the Caprese Pasta Salad section above! We explored the key ingredients for Caprese Pasta Salad, focusing on fresh produce and substitutions. We walked through step-by-step cooking methods and highlighted common mistakes. I shared tips to perfect your dressing and how to store leftovers. We also discussed various dietary options and storage guidelines. In conclusion, with these insights, you can create a tasty salad. Enjoy experimenting and making it your own.](https://soyumrecipes.com/wp-content/uploads/2025/06/73b67b30-145b-4eb5-b8f5-6b6fcbc85134-300x300.webp)
Buffalo Chicken Stuffed Spaghetti Squash Delight
Are you ready to spice up your dinner routine? Buffalo Chicken Stuffed Spaghetti Squash Delight is here to make mealtime exciting! This dish combines…