
Latest & Greatest

Rainbow Fruit Skewers Vibrant and Fun Party Treat
Looking for a fun and colorful treat for your next party? Rainbow fruit skewers are the answer! They’re easy to
Read more…
Lemon Raspberry Muffins Fresh and Flavorful Treat
Get ready to brighten your mornings with my fresh and flavorful Lemon Raspberry Muffins! Combining zesty lemon and juicy raspberries,
Read more…
Easy Greek Salad Fresh and Flavorful Delight
Are you looking for a fresh and tasty dish that shines with flavor? My Easy Greek Salad is not just
Read more…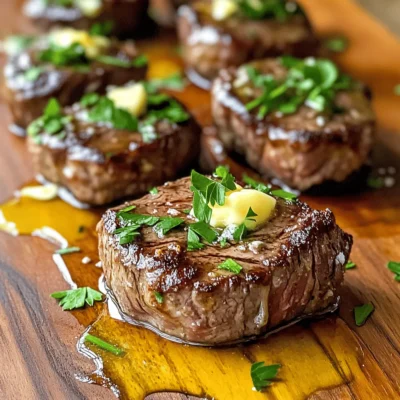
Garlic Butter Steak Bites Flavorful Dinner Recipe
If you crave a quick and tasty dinner, look no further! Garlic Butter Steak Bites are your answer. This simple
Read more…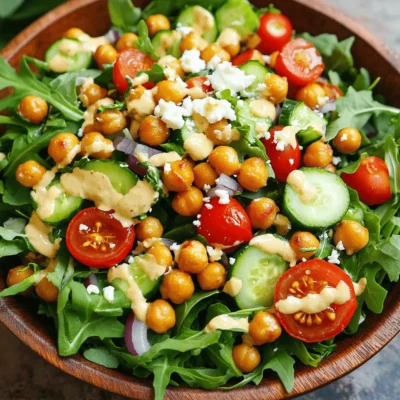
Crispy Chickpea Salad Flavorful and Healthy Meal
Get ready to dive into a refreshing and satisfying dish with my Crispy Chickpea Salad! This recipe isn’t just packed
Read more…
Mango Coconut Popsicles Refreshing Summer Treat
Do you crave a cool treat to beat the summer heat? Look no further! These Mango Coconut Popsicles are not
Read more…
Raspberry White Chocolate Muffins Delightful and Easy
Are you ready to make a treat that’s as easy as it is delicious? Raspberry white chocolate muffins are the
Read more…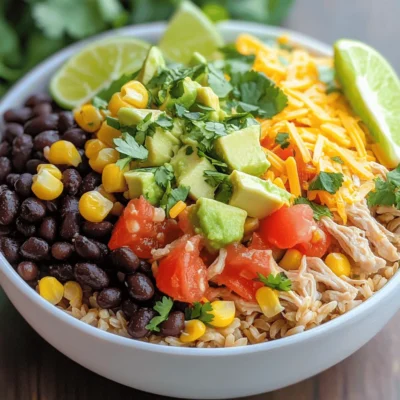
Easy Chicken Burrito Bowls Quick and Tasty Meal
Craving a quick and tasty meal that impresses? Easy Chicken Burrito Bowls fit the bill! With fresh ingredients and bold
Read more…browse recipes


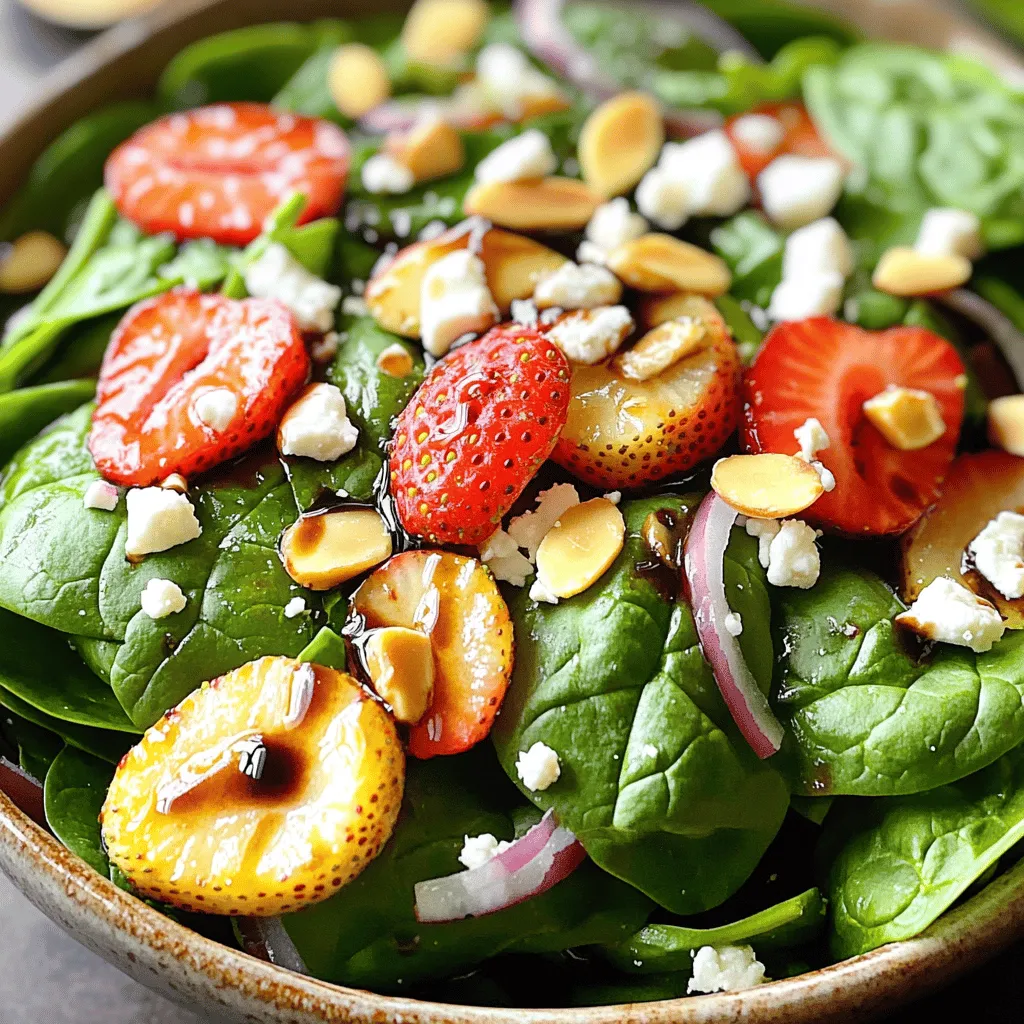
Strawberry Spinach Salad Fresh and Flavorful Dish
Looking for a fresh salad recipe that bursts with flavor? Let me introduce you to the delightful Strawberry Spinach Salad. With vibrant greens, juicy…
My Latest Desserts
-

Caramel Pecan Sticky Buns Sweet and Gooey Treat
Are you ready to treat yourself to the ultimate indulgence? Caramel Pecan Sticky Buns are sweet, gooey, and packed with Read Full Recipe -

Pumpkin Spice French Toast Casserole Easy and Tasty
Looking for a cozy fall breakfast that’s easy and delicious? You’ll love my Pumpkin Spice French Toast Casserole! This dish Read Full Recipe -

Fluffy Pumpkin Pancakes Perfectly Delicious Breakfast
Start your morning with a treat you won’t forget: fluffy pumpkin pancakes! They bring fall flavors to your breakfast table Read Full Recipe -

Brown Butter Banana Chocolate Chip Muffins Delight
Are you craving a warm, cozy treat? Look no further than these Brown Butter Banana Chocolate Chip Muffins! This recipe Read Full Recipe -

Chewy Salted Caramel Pretzel Brownies Delightful Treat
Are you ready to indulge in a treat that combines sweet, salty, and chewy goodness? These Chewy Salted Caramel Pretzel Read Full Recipe -

Fluffy Pumpkin Pancakes Easy and Delicious Recipe
Looking to spice up your breakfast with something special? You’re in for a treat! These fluffy pumpkin pancakes are not Read Full Recipe -

Brown Butter Banana Chocolate Chip Muffins Delight
Welcome to the delicious world of Brown Butter Banana Chocolate Chip Muffins! You’re about to discover a simple recipe that Read Full Recipe -
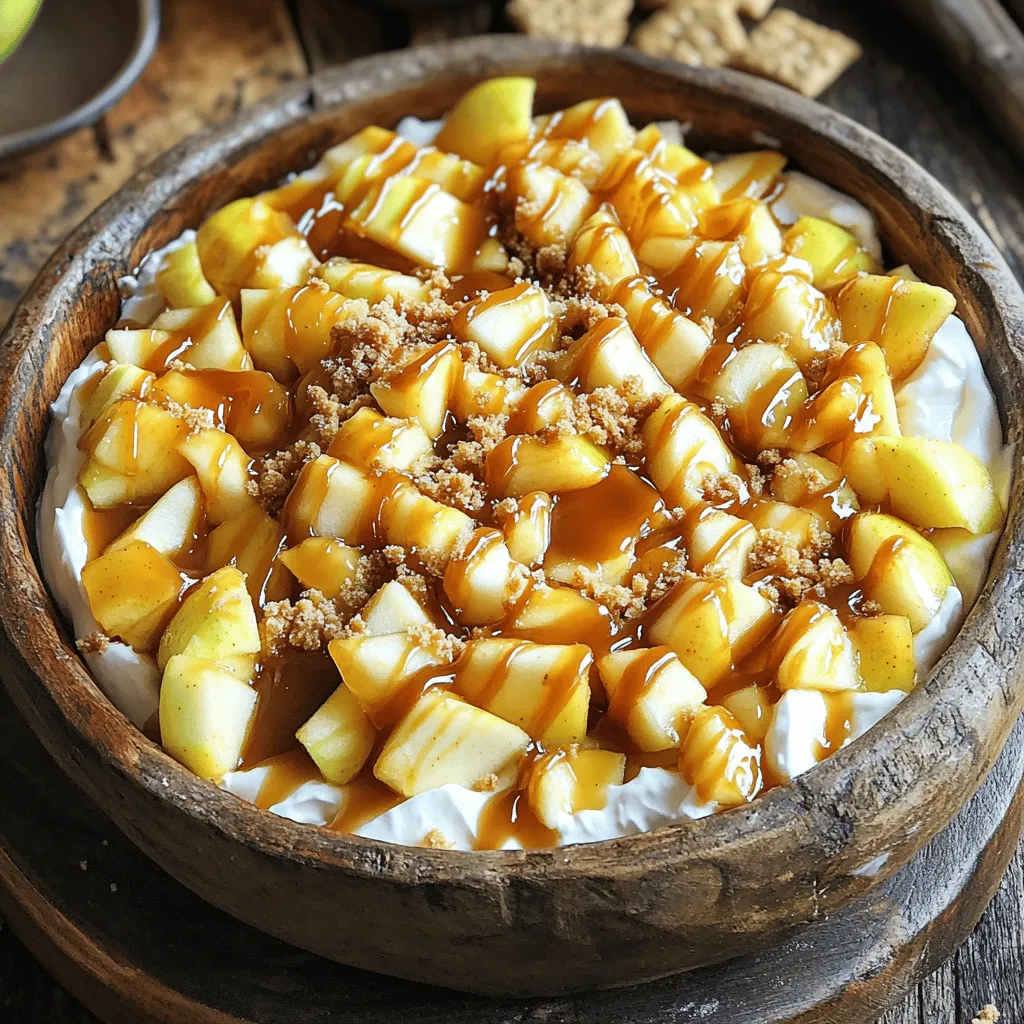
Caramel Apple Pie Dip Delightfully Sweet Treat
Get ready to dive into a sweet treat that’s perfect for any occasion: Caramel Apple Pie Dip! If you love Read Full Recipe -

Chewy Salted Caramel Pretzel Brownies Delight
Get ready to indulge in a sweet and salty treat that you won’t forget! My Chewy Salted Caramel Pretzel Brownies Read Full Recipe -

Cherry Almond Overnight French Toast Easy Morning Dish
Looking for a quick and delicious breakfast? Cherry Almond Overnight French Toast could be your new favorite dish! This easy Read Full Recipe
My Latest Recipes

hey,
i’m !
I’m so happy you’re here!
I love creating dishes that bring joy to the table. I hope they bring the same joy to yours. Let’s enjoy this flavorful journey together.
![To make honey garlic shrimp tacos, gather these key items: - 1 lb shrimp, peeled and deveined - 2 tablespoons honey - 3 cloves garlic, minced - 1 tablespoon soy sauce (or tamari for gluten-free) - 1 tablespoon lime juice - 1 tablespoon vegetable oil - 1 teaspoon chili powder - Salt and pepper to taste - 8 small corn tortillas - 1 cup cabbage, shredded (red or green) - ½ avocado, sliced - Fresh cilantro for garnish - Lime wedges for serving These ingredients create a sweet and savory flavor. The shrimp pairs well with the crunchy cabbage and creamy avocado. I recommend using large or medium shrimp for these tacos. You can choose: - Gulf shrimp - Argentinian shrimp - Black tiger shrimp These types of shrimp have great taste and texture. Always pick shrimp that look fresh and plump. Frozen shrimp works too; just thaw it before cooking. Feel free to add your favorite toppings. Here are some ideas: - Diced tomatoes - Sliced jalapeños - Sour cream or Greek yogurt - Sliced radishes - Cotija cheese These garnishes can boost flavor and make the tacos even more fun to eat. Explore different toppings to find your favorite mix. Check out the Full Recipe for more detailed steps on making these tasty tacos! Start by mixing the marinade. In a bowl, combine honey, minced garlic, soy sauce, lime juice, and chili powder. Stir well until it blends smoothly. This mix will bring sweetness and depth to your shrimp. Next, add your shrimp to the marinade. Make sure each piece gets a good coat. Let them sit for 15 to 20 minutes. This step lets the flavors soak into the shrimp, making them more tasty. Heat vegetable oil in a large skillet over medium-high heat. Once the oil is hot, add the marinated shrimp. Cook them for about 2 to 3 minutes on each side. You want them pink, opaque, and slightly caramelized. While the shrimp cook, warm the corn tortillas in a separate skillet. Cook them on low heat for about 30 seconds on each side. Now it’s time to build your tacos. Place a generous amount of shredded cabbage on each warm tortilla. Add the cooked shrimp on top. Then, add avocado slices and sprinkle fresh cilantro for a bright finish. Serve your tacos right away with lime wedges on the side for extra flavor. For the complete recipe, check [Full Recipe]. For shrimp tacos, I always go for fresh or frozen shrimp. Look for shrimp that are large or jumbo-sized. They hold up well in tacos. If you can, choose shrimp that are wild-caught. Farmed shrimp can have a different taste. When buying, check for a slight sea smell. This means they are fresh. If using frozen shrimp, thaw them in the fridge overnight. This keeps them firm and juicy. Cooking shrimp is fast and easy. I heat my skillet over medium-high heat. When the pan is hot, I add vegetable oil. This helps create a nice sear on the shrimp. I cook them for about 2-3 minutes on each side. They should turn pink and opaque. Do not overcook them; this can make them tough. A little caramelization adds great flavor. Always season with salt and pepper at the end for best taste. To amp up the flavor, I use a mix of spices. Chili powder adds warmth, while lime juice gives a fresh zing. You can also use paprika for a smoky flavor. If you like heat, add cayenne pepper or diced jalapeños. Fresh cilantro on top adds a burst of freshness. Pair these with a squeeze of lime for a perfect finish. Feel free to experiment with spices to suit your taste. For the full recipe, check out the Honey Garlic Shrimp Tacos 🦐 section. {{image_2}} You can switch the shrimp for other seafood. Try scallops or fish. White fish like tilapia works well. Just remember to adjust cooking time. Scallops take about 2-3 minutes per side. Fish may cook a bit faster. Choose seafood that you enjoy. Each option gives a new twist to the dish. If you prefer not to eat seafood, you can make a veggie version. Use tofu or tempeh for protein. Marinate them the same way as shrimp. You can also try mushrooms. Portobello or shiitake mushrooms add great flavor. Serve with the same toppings, like cabbage and avocado. Feel free to explore various taco styles. You can use flour tortillas instead of corn. For a crunchy twist, try taco shells. You can also go for a lettuce wrap for a low-carb option. Each style gives a different taste and texture. Mix it up based on your mood or diet! For the full recipe, check out the Honey Garlic Shrimp Tacos! Store leftover shrimp in an airtight container. Place it in the fridge. Use it within two days for the best taste. Ensure the shrimp is cooled before storage. If you want to save it longer, consider freezing. Frozen shrimp can last up to three months. Just remember to thaw it safely in the fridge before reheating. To keep your corn tortillas fresh, wrap them in foil or plastic wrap. Store them in a cool, dry place. If you have opened a package, use them within a week. You can also refrigerate them to extend their life. For long-term storage, freeze the tortillas. Place parchment paper between each tortilla to prevent sticking. When it’s time to eat, reheat the shrimp in a skillet. Heat it over medium heat for about three to four minutes. Add a splash of water to keep it moist. For the tortillas, warm them in a dry skillet for 30 seconds on each side. This way, they stay soft and pliable. Enjoy your tacos as if they were fresh! For the full recipe, check out the recipe section. To add spice, use fresh chili peppers or hot sauce. You can also increase the chili powder in the marinade. Start with small amounts and taste as you go. This lets you find the perfect heat level for your tacos. For extra flavor, consider adding diced jalapeños or a sprinkle of cayenne pepper. Yes, you can prepare the shrimp ahead of time. Marinate the shrimp and store them in the fridge. They can stay fresh for up to 24 hours. When you’re ready, just cook them as directed in the Full Recipe. This saves time and makes your meal prep easier. Great sides include black beans, corn salad, or a fresh guacamole. You can also serve with a light coleslaw for added crunch. If you want something warm, try cilantro-lime rice. These sides complement the shrimp's sweet and savory flavors well. Yes, you can freeze the shrimp, but not the assembled tacos. Wrap cooked shrimp in plastic and place in an airtight container. They can stay frozen for up to three months. When you're ready to eat, thaw the shrimp and warm them up before serving. Try a refreshing drink like limeade or a light beer. A crisp white wine also pairs nicely. For something non-alcoholic, sparkling water with lime is a great choice. These drinks balance the sweetness of the honey garlic shrimp perfectly. In this blog post, we explored how to make Honey Garlic Shrimp Tacos. We covered key ingredients, cooking steps, and tips for great flavor. Remember to pick fresh shrimp and marinate them well. You can also try different fillings or switch to vegetarian options. Don’t forget to store any leftovers properly for later. With these ideas, you can enjoy tasty tacos anytime. Keep experimenting and have fun while you cook!](https://soyumrecipes.com/wp-content/uploads/2025/05/b60785dc-5de5-4d2c-a61a-2110b780b605-300x300.webp)
![- 4 salmon fillets - 1 cup teriyaki sauce (store-bought or homemade) - 1 tablespoon sesame oil - 2 cups broccoli florets - 1 cup snap peas - 1 red bell pepper, sliced - 2 green onions, chopped - 1 tablespoon sesame seeds - Cooked jasmine rice (for serving) When I cook this dish, I love using fresh ingredients. They make the meal taste amazing. Salmon fillets are the star, providing a rich flavor. Teriyaki sauce gives a sweet and savory touch. Sesame oil adds a nice nuttiness that ties everything together. For the veggies, I choose broccoli florets, snap peas, and red bell pepper. They add color and crunch. Green onions and sesame seeds are perfect garnishes, bringing a pop of taste. - Alternatives for Salmon: If you want to switch things up, you can use chicken or tofu. Both options will soak up the teriyaki sauce well. - Homemade vs. Store-Bought Teriyaki Sauce: I often use store-bought sauce for ease. But, homemade sauce is fun to make and can taste fresher. Just mix soy sauce, honey, garlic, and ginger. - Other Vegetable Options: Feel free to swap in your favorite veggies. Zucchini, carrots, or bell pepper can work great. The key is to use what you love. For the full recipe, check out [Full Recipe]. Enjoy making this dish! First, preheat your oven to 400°F (200°C). This temperature cooks the salmon perfectly. While the oven heats, grab a large rimmed baking sheet. Line it with parchment paper. This makes cleanup a breeze and keeps food from sticking. Now, let’s get to the fun part! Take the salmon fillets and place them on one side of the baking sheet. In a bowl, mix the teriyaki sauce with sesame oil. Brush this sauce on each salmon fillet. Make sure to coat them well for great flavor. Next, let’s prepare the veggies. In another bowl, toss the broccoli, snap peas, and sliced red bell pepper. Use the remaining teriyaki sauce to coat the vegetables evenly. Once mixed, spread the veggies on the baking sheet next to the salmon. Make sure they are not crowded. This helps them cook evenly. It’s time to bake! Slide the baking sheet into your preheated oven. Bake for about 12 to 15 minutes. The salmon is done when it flakes easily with a fork. The vegetables should be tender but still crisp. Keep an eye on your meal as it cooks. You want to see that beautiful caramelization on the salmon. When it looks ready, carefully take the sheet pan out of the oven. Let it rest for a few minutes. Drizzle the reserved teriyaki sauce over everything for added flavor. For the final touch, sprinkle chopped green onions and sesame seeds on top. This adds a nice crunch and a pop of color. Enjoy your colorful and tasty sheet pan teriyaki salmon! For the complete recipe, check out the Full Recipe link above. - Ensuring Moist Salmon To keep your salmon moist, avoid overcooking. Bake at 400°F for 12-15 minutes. The salmon should flake easily when done. Brush it with teriyaki sauce before baking to seal in flavor and moisture. - Keeping Vegetables Crisp For crisp vegetables, spread them evenly on the baking sheet. Don't overcrowd them. Baking at high heat helps keep their texture. Check for doneness; they should be tender but still have a crunch. - Pairing with Jasmine Rice Serve your teriyaki salmon over a bed of jasmine rice. The rice absorbs the sauce and adds a nice base to the dish. Cook the rice according to package instructions for the best results. - Garnishing Ideas Garnish with chopped green onions and sesame seeds. This adds color and a fresh touch. You can also add a slice of lime for a zesty kick. - Adding Spices For extra flavor, consider adding spices such as garlic powder or ginger. A pinch of red pepper flakes can add a nice heat. Mix them into the teriyaki sauce for an easy boost. - Using Fresh Herbs Fresh herbs like cilantro or basil can brighten the dish. Chop and sprinkle them on top just before serving. This adds freshness and elevates the overall flavor. For the Full Recipe, check out the detailed steps and ingredients. {{image_2}} You can easily swap salmon for chicken. Use chicken breasts or thighs. The cooking time may change. Bake chicken for about 20-25 minutes. Check if it reaches 165°F (75°C) for safety. For vegan options, use tofu instead of salmon. Firm tofu works best. Press it to remove extra water, then marinate it in teriyaki sauce. Bake the tofu for about 20 minutes. This gives you a delicious, plant-based meal. Want some heat? Add red pepper flakes to your teriyaki sauce. You can also mix in fresh ginger for an extra kick. This sweet and spicy twist makes the dish exciting. If you want more sauce ideas, try hoisin or sweet chili sauce. These can add depth to your meal. You can also make a garlic-soy sauce blend for a savory option. In spring, use asparagus and snap peas. These bright vegetables add color and flavor. They cook quickly and pair well with teriyaki. In fall, consider adding butternut squash and Brussels sprouts. These heartier vegetables bring warmth to your dish. Just chop them into bite-sized pieces and bake as usual. For the Full Recipe, check the main article. To store your leftover teriyaki salmon, use airtight containers. Glass or plastic containers work well. Make sure they are clean and dry before adding food. Cool the dish to room temperature before sealing. Place the salmon and vegetables in the container together for best flavor. - Recommended Containers: Glass or BPA-free plastic containers. - Best Practices for Refrigeration: Store in the fridge for up to three days. You can reheat your salmon in the oven or microwave. Each method has its perks. The oven keeps the salmon moist and adds a little crispness. The microwave is quicker but may make the salmon soggy. - Oven vs. Microwave Reheating: Preheat the oven to 350°F (175°C). Place salmon on a baking sheet. Heat for about 10 minutes. For the microwave, place salmon in a microwave-safe dish. Heat for 1-2 minutes, checking often. - Tips for Maintaining Texture: Cover the salmon with a damp paper towel in the microwave to keep it moist. If you want to save some salmon for later, freezing works great. This dish freezes well if you store it properly. - How to Freeze the Dish: Allow the salmon and veggies to cool completely. Then, wrap them tightly in plastic wrap or place them in freezer bags. Squeeze out as much air as possible. Label the bags with the date. - Thawing and Cooking Tips: To thaw, place the bag in the fridge overnight. For cooking, reheat from frozen in the oven at 350°F (175°C) for 20-25 minutes, or until warmed through. For the full recipe, check the details above! Bake teriyaki salmon for 12-15 minutes at 400°F (200°C). The salmon is done when it flakes easily with a fork. Timing may vary based on thickness. Always check the center for doneness. This quick cooking makes it easy to enjoy a delicious meal on busy nights. Yes, you can use frozen salmon. Just adjust your cooking time. Bake it for about 15-20 minutes instead of 12-15 minutes. If possible, thaw the salmon in the fridge overnight for best results. If you're in a hurry, you can cook it from frozen. Just remember to check if it’s fully cooked before serving. Pair teriyaki salmon with jasmine rice for a complete meal. The rice soaks up the delicious sauce. You can also serve it with steamed vegetables, like broccoli and snap peas. A light salad or pickled veggies also works well. These sides add color and nutrition to your plate. This blog post covered how to make delicious teriyaki salmon with fresh veggies. You learned about essential ingredients, including salmon, teriyaki sauce, and different vegetables. I shared step-by-step baking instructions to ensure perfect results. You also found tips for enhancing flavor and storing leftovers. In conclusion, making teriyaki salmon is simple and rewarding. With easy swaps and variations, anyone can enjoy this tasty dish. Let your creativity shine in the kitchen!](https://soyumrecipes.com/wp-content/uploads/2025/07/70966695-aebb-463a-a906-2e7ae5f0c3d3-300x300.webp)

Roasted Garlic Parmesan Broccoli Simple Flavor Boost
Are you ready to transform your vegetables into a tasty masterpiece? Roasted Garlic Parmesan Broccoli is a simple dish that packs a flavorful punch.…
![- 1 large head of broccoli, cut into florets - 4 cloves of garlic, minced - 3 tablespoons olive oil - 1 teaspoon lemon juice - 1/2 cup grated Parmesan cheese - 1/2 teaspoon red pepper flakes (optional) - Salt and pepper to taste - Fresh parsley, chopped (for garnish) Roasted Garlic Parmesan Broccoli is both tasty and healthy. A serving has about 150 calories. It has 10 grams of fat, 6 grams of carbs, and 6 grams of protein. Broccoli is full of vitamins. It helps boost your immune system and is good for your heart. Garlic adds flavor and may lower blood pressure. Using fresh ingredients makes this dish even better. The garlic gives a rich taste, while the Parmesan adds creaminess. This dish is not only delicious but also a smart choice for your meals. For the full recipe, check out [Full Recipe]. 1. Preheat your oven to 425°F (220°C). This high heat helps make the broccoli crisp. 2. Prepare the broccoli by cutting a large head into florets. You want bite-sized pieces. 3. Mince four cloves of garlic. This adds a strong, tasty flavor. 4. Mix the broccoli and garlic in a large bowl. Add three tablespoons of olive oil, one teaspoon of lemon juice, and salt and pepper to taste. Toss well until the broccoli is coated. 1. Arrange the broccoli on a baking sheet. Spread it out in a single layer. This helps it roast evenly. 2. Roast in the oven for 15-20 minutes. You should see the edges crisp and the broccoli tender. Keep an eye on it to avoid burning. 1. Add the Parmesan cheese right after removing the baking sheet from the oven. Use half a cup of grated cheese. 2. Return it to the oven for another 2-3 minutes. You want the cheese to melt and turn golden. 3. Garnish with fresh parsley before serving. This adds color and a fresh taste. For the full recipe, check the earlier sections for precise measurements and tips. To get crispy broccoli, use a hot oven. Set it to 425°F (220°C). Spread the florets evenly on the baking sheet. Don’t crowd them; give them space to breathe. This helps them roast well and become crispy. Keep an eye on the time. Roasting should take about 15-20 minutes. Watch for browning at the edges. This shows they are done. Overcooking can make them mushy, so check often. Want to kick up the flavor? Try adding smoked paprika or garlic powder. Both add depth without too much fuss. If you prefer heat, mix in more red pepper flakes. For a milder taste, skip the flakes and focus on lemon zest. A squeeze of fresh lemon juice can brighten the dish, too. You can even add a pinch of herbs like thyme or oregano for extra flavor. Make your dish look as good as it tastes. Use a large white plate or bowl to serve. The bright green broccoli pops against the white background. Arrange the broccoli in a circular pattern for a nice look. Sprinkle a bit of extra Parmesan on top for flair. To elevate the dish, serve it with grilled chicken or fish. A side of rice or quinoa pairs well too. This makes it a complete meal that looks great on any table. {{image_2}} To make this dish vegan, skip the Parmesan cheese. Instead, try nutritional yeast. It gives a cheesy taste without dairy. If you want more creaminess, use cashew cheese. It blends well and adds richness. You can swap broccoli for other veggies like cauliflower or Brussels sprouts. Just cut them to similar sizes. For extra crunch, add nuts or seeds. Almonds or sunflower seeds work great here. They add texture and flavor. If you want a quicker method, sauté the broccoli on the stovetop. Heat olive oil in a pan and cook for about 5-7 minutes. Stir often until tender. You can also grill the broccoli for a smoky flavor. Just toss it on the grill for about 10 minutes. Enjoy the outdoors and the tasty result! To keep Roasted Garlic Parmesan Broccoli fresh, store leftovers right away. Let it cool to room temperature first. Place it in an airtight container. This helps keep moisture in and prevents drying out. Glass or plastic containers work well. Make sure they seal tightly. When you want to eat leftovers, reheating is key. The oven is the best method. Preheat your oven to 350°F (175°C). Place the broccoli on a baking sheet. Heat for about 10 minutes. This helps keep the texture nice. You can also use the microwave. Just heat for 1-2 minutes. Stir halfway to avoid hot spots. Can you freeze Roasted Garlic Parmesan Broccoli? Yes, you can! To freeze, first cool the broccoli completely. Place it in freezer bags, removing as much air as possible. Seal well and label them. When you want to eat it, thaw in the fridge overnight. To reheat, use the oven for the best taste. Enjoy your flavorful dish later! For the complete recipe, check the Full Recipe. How long to roast broccoli for best results? Roast broccoli at 425°F (220°C) for 15-20 minutes. This timing gives it a tender bite and crispy edges. Keep an eye on it. Broccoli can go from perfect to overcooked fast. Can I use frozen broccoli instead of fresh? Yes, you can use frozen broccoli. Just remember, frozen broccoli cooks faster. Adjust your roasting time to about 10-15 minutes. Make sure to thaw it first, so it cooks evenly. Is broccoli healthy to eat every day? Broccoli is very healthy. It is low in calories and packed with vitamins. Eating it daily can support your immune system and provide fiber. What are the benefits of garlic in cooking? Garlic is more than just tasty. It has health benefits too! Garlic can boost your immune system and lower blood pressure. Plus, it adds depth to many dishes, making them more flavorful. What to serve with Roasted Garlic Parmesan Broccoli? This dish pairs well with chicken, fish, or pasta. You can also serve it with grains like quinoa or rice. The flavors complement many proteins. Can children enjoy this dish as well? Absolutely! Kids usually love cheesy foods. The roasted garlic gives a mild flavor that works well for young taste buds. It’s a great way to get them to eat their veggies! Roasting garlic Parmesan broccoli is easy and tasty. You've learned about the main ingredients, like fresh broccoli and garlic, and how to prepare and roast them. We covered tips to get perfect crispiness and ways to enhance flavors. You can even swap ingredients or try different cooking methods. Remember, this dish is not only delicious but also packed with health benefits. Enjoy it fresh or store leftovers for another meal. Try it with your favorite foods, and share it with family. Happy cooking!](https://soyumrecipes.com/wp-content/uploads/2025/06/13623940-8d1c-46c5-8ce1-f540d093ddc1.webp)
