

Latest & Greatest

Sriracha Honey Chicken Wings Flavorful and Crispy Delight
If you’re craving a tasty twist on chicken wings, look no further! My Sriracha Honey Chicken Wings recipe delivers a
Read more…
Savory Garlic Parmesan Chicken Quick and Easy Recipe
Are you ready to savor a meal that will make your taste buds dance? My Savory Garlic Parmesan Chicken is
Read more…
Cheesy Beef Burrito Bake Tasty and Simple Recipe
Looking for an easy dinner that packs a flavor punch? You’ve found it! This Cheesy Beef Burrito Bake is tasty
Read more…
Maple Pecan Roasted Brussels Sprouts Delightful Dish
Looking for a tasty side dish that impresses? Maple Pecan Roasted Brussels Sprouts are your answer. They combine the sweet
Read more…
Sesame Ginger Cucumber Salad Refreshing and Easy Dish
Looking for a light and tasty dish? My Sesame Ginger Cucumber Salad is both refreshing and easy to make! This
Read more…
Savory Seven Layer Salad Tasty and Colorful Dish
Looking for a dish that’s both tasty and colorful? Try my Savory Seven Layer Salad! This vibrant meal bursts with
Read more…
Philly Cheesesteak Quesadillas Tasty and Simple Recipe
If you’re craving a meal that mixes classic flavors with a modern twist, you’re in the right place! Today, we’ll
Read more…
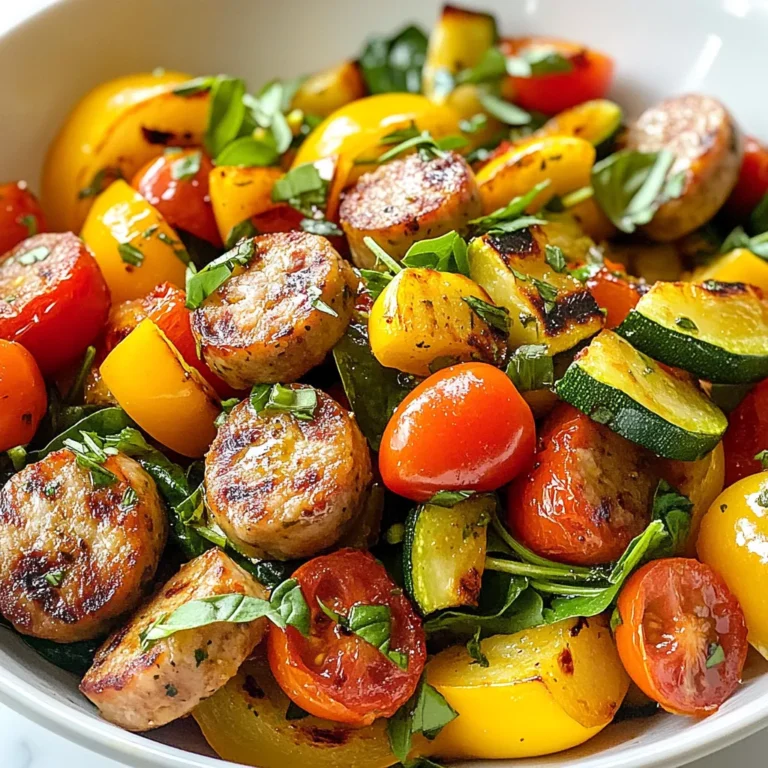
Sheet Pan Teriyaki Chicken & Veggies Savory Delight
If you’re craving a simple yet delicious dinner, look no further! Our Sheet Pan Teriyaki Chicken & Veggies is a
Read more…browse recipes

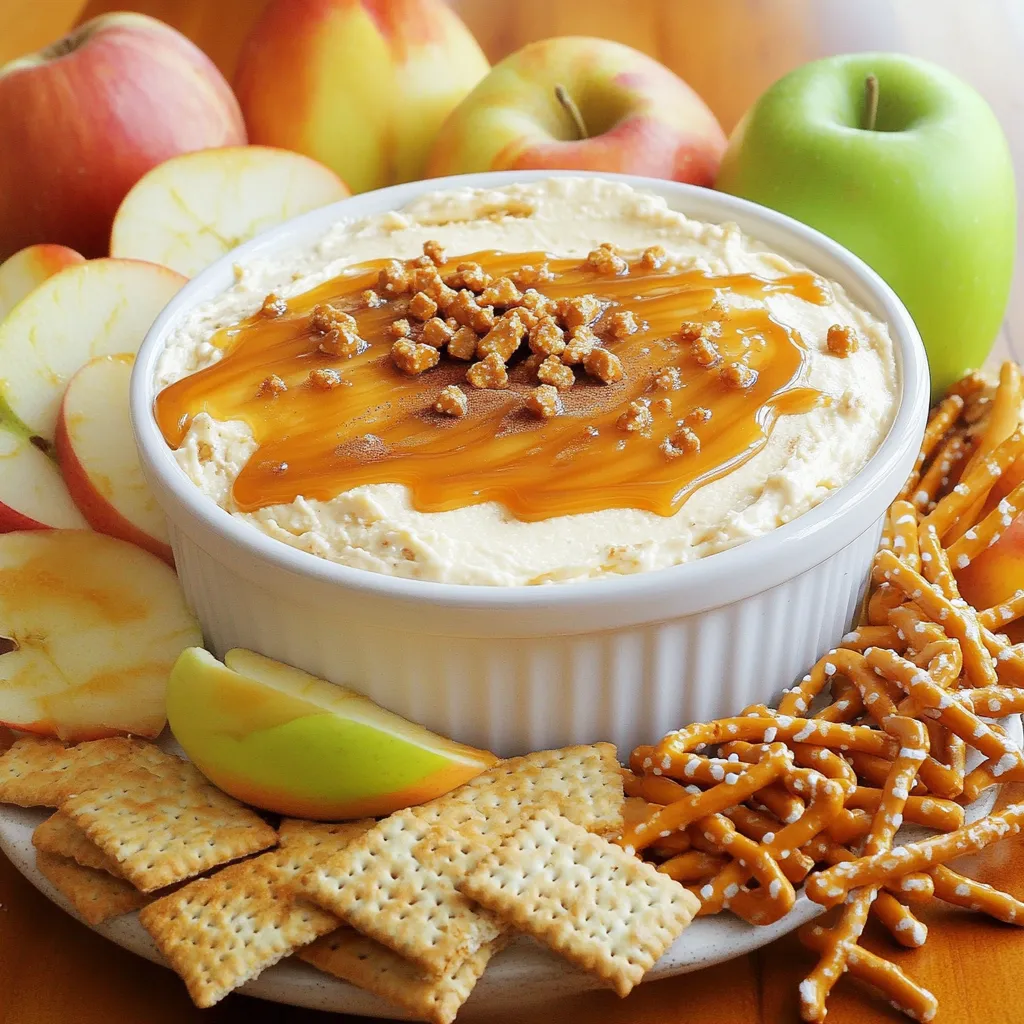
Caramel Apple Cheesecake Dip Sweet and Simple Treat
Craving a tasty treat that’s both sweet and simple? Look no further! This Caramel Apple Cheesecake Dip combines creamy goodness with crunchy apples for…
My Latest Desserts

Strawberry Lemonade Cupcakes Fresh and Flavorful Treat
Craving a sweet, tangy treat? Dive into the world of Strawberry Lemonade Cupcakes! These delightful cupcakes blend fresh strawberries and Read Full Recipe-
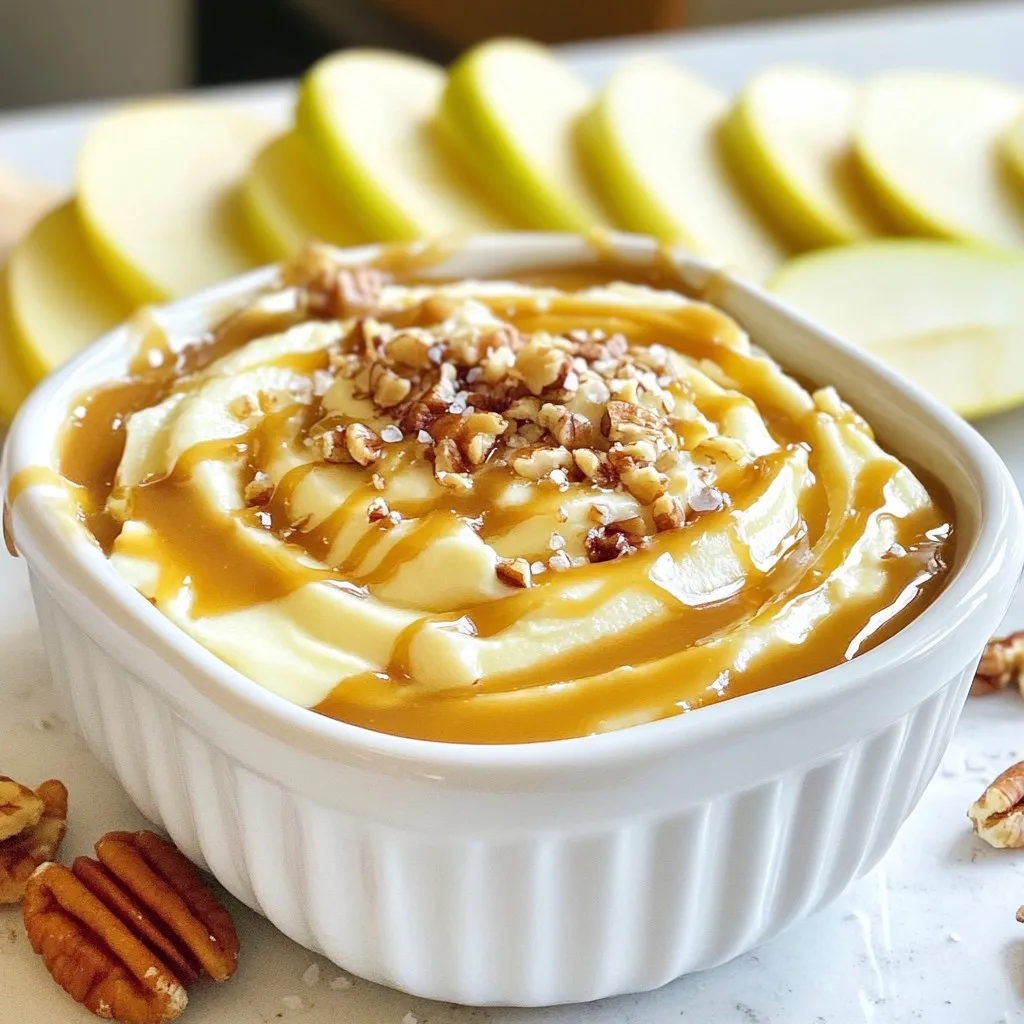
Salted Caramel Apple Dip Creamy and Delicious Treat
If you’re looking for a tasty treat that combines sweet and salty, you’re in for a delight! This Salted Caramel Read Full Recipe -
No-Bake Oreo Cheesecake Cups Delightful Easy Treat
Craving a sweet, creamy treat that’s easy to make? These No-Bake Oreo Cheesecake Cups are perfect for you! With just Read Full Recipe -
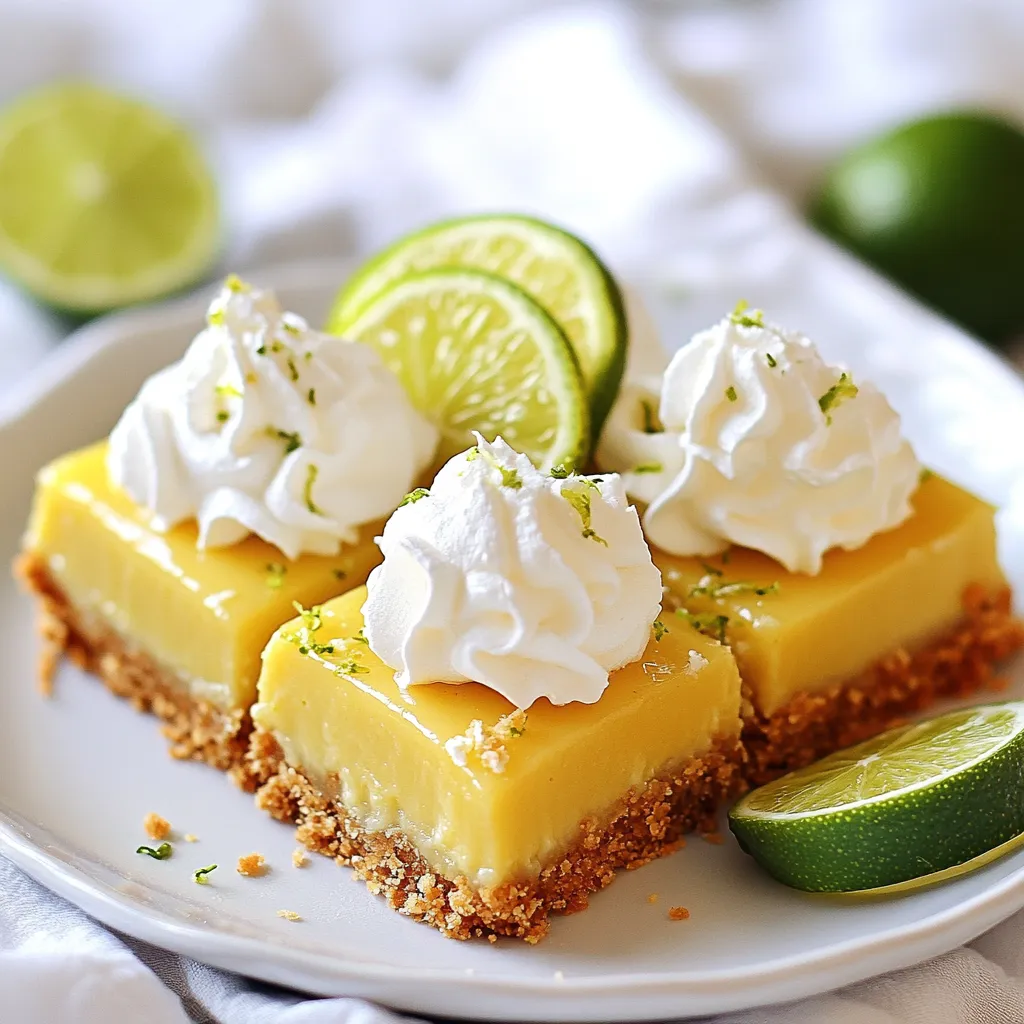
Key Lime Pie Bars Simple and Tangy Dessert Treat
Are you ready to enjoy a treat that’s both simple and zesty? Key Lime Pie Bars combine the tart zing Read Full Recipe -
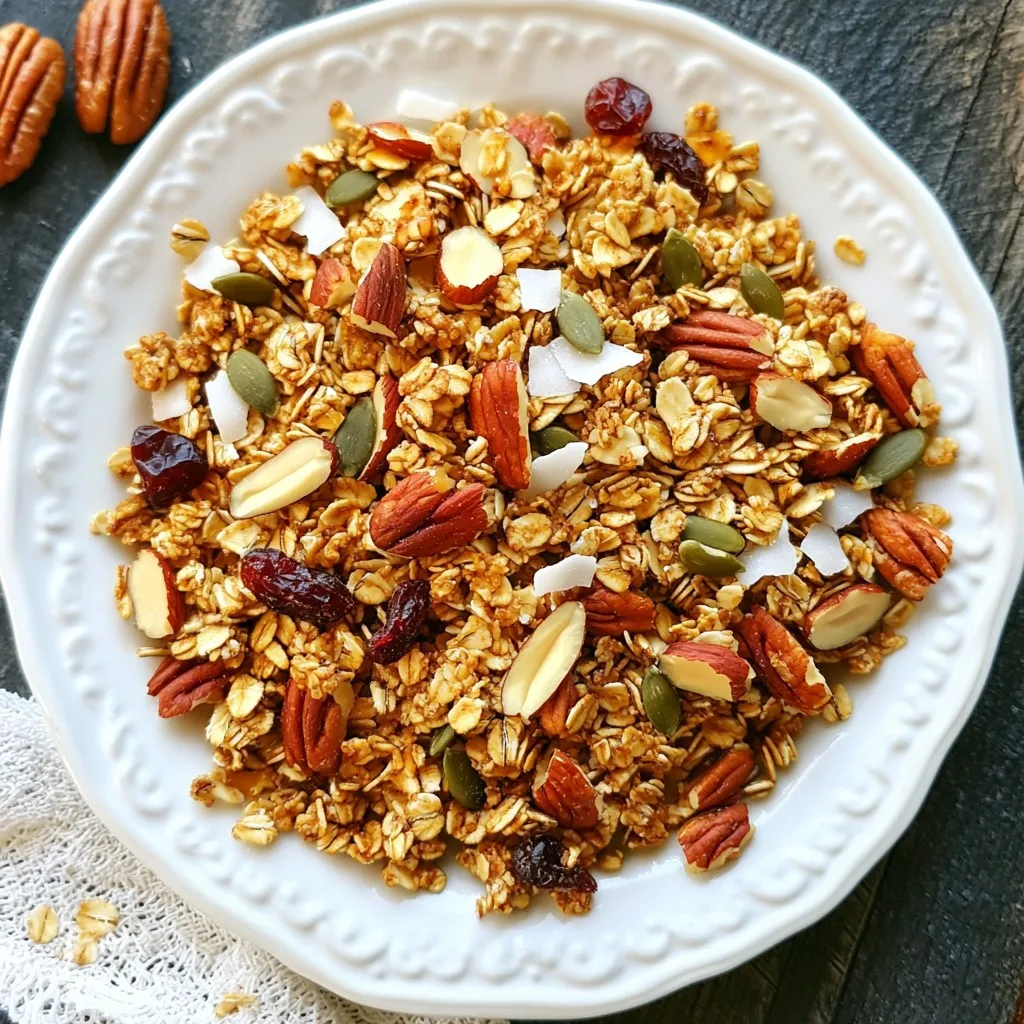
Maple Pecan Granola Crunchy and Nutritious Snack
Looking for a tasty and healthy snack? You’ve found it! My Maple Pecan Granola is crunchy, packed with flavor, and Read Full Recipe -
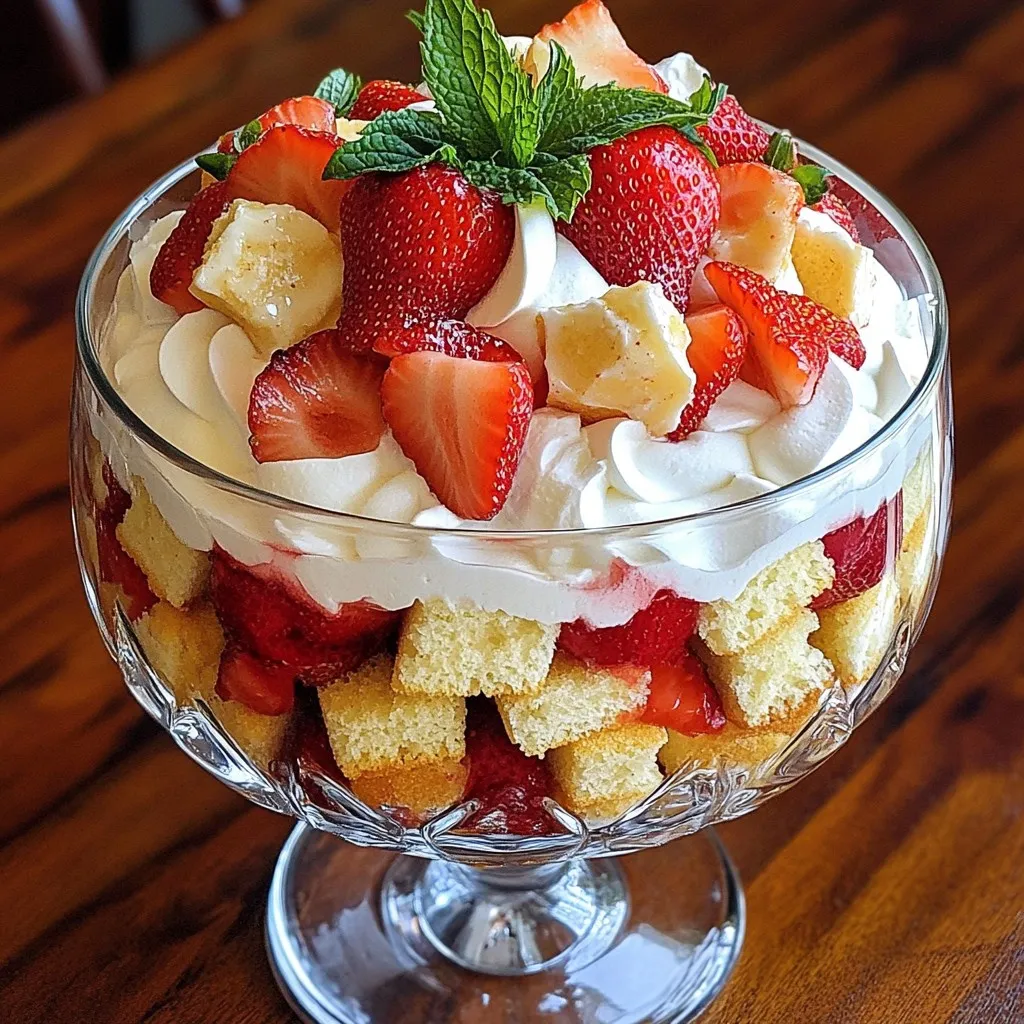
Strawberry Shortcake Trifle Delightful and Simple Treat
Get ready to impress your family and friends with a Strawberry Shortcake Trifle that’s both delightful and simple. This layered Read Full Recipe


My Latest Drinks
-
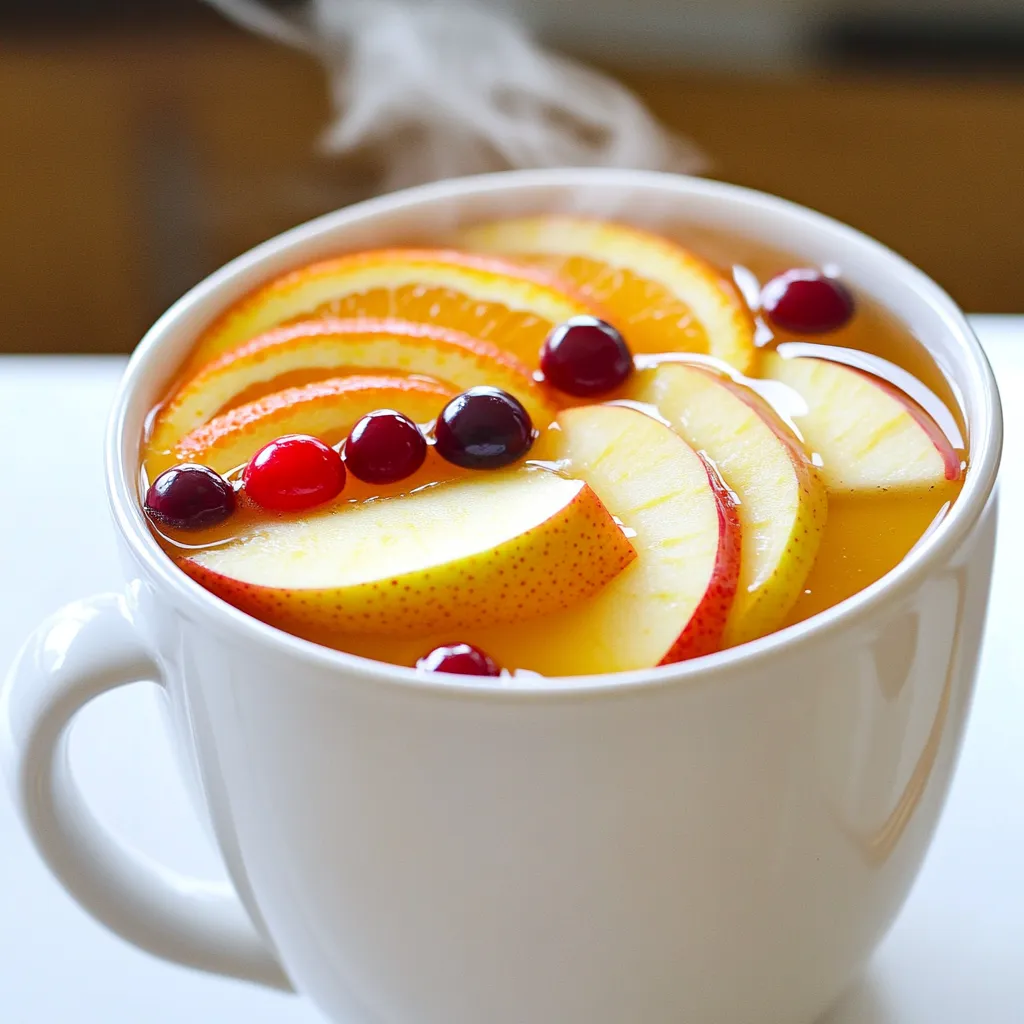
Spiced Apple Cider Punch Festive and Flavorful Drink
Warm up your gatherings with my Spiced Apple Cider Punch! This festive drink bursts with cozy flavors, perfect for chilly Read Full Recipe -
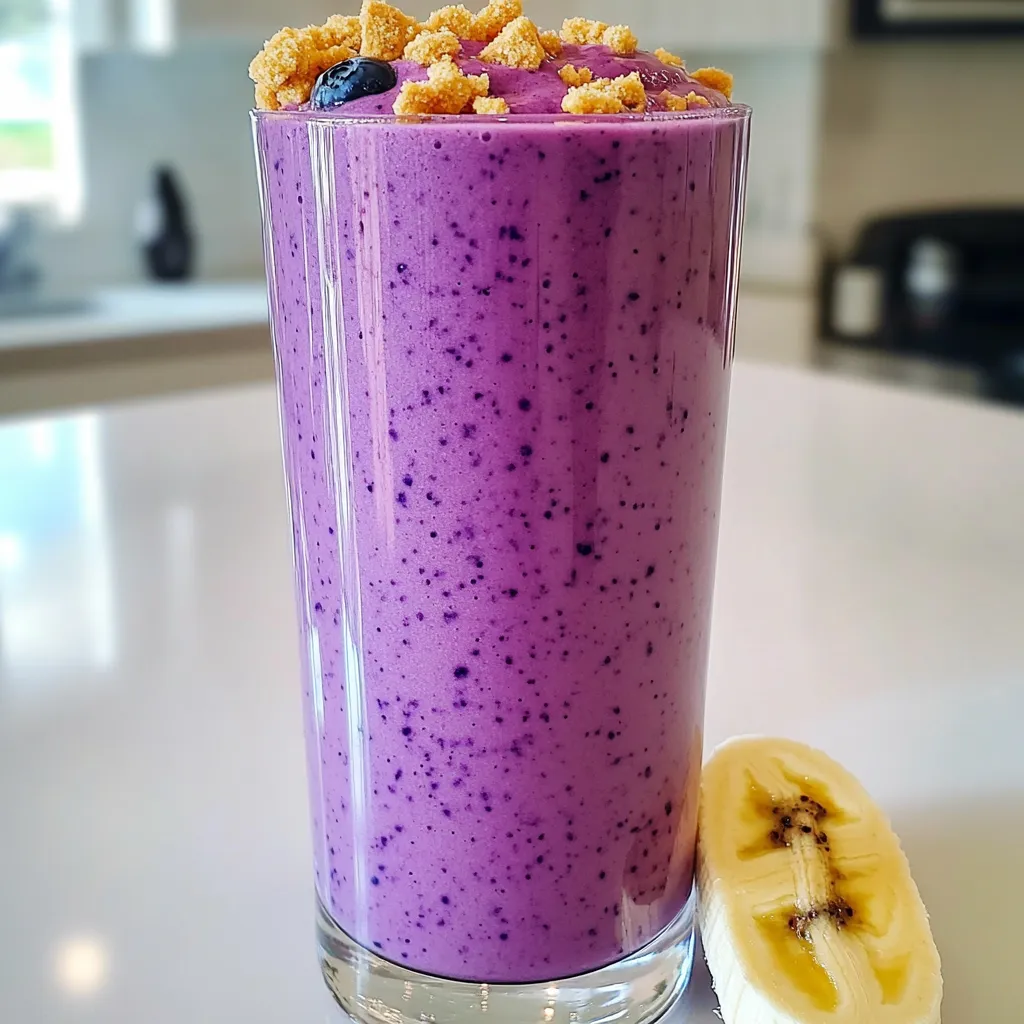
Blueberry Cheesecake Smoothie Protein Delight
Are you ready to treat yourself to a delicious and healthy drink? The Blueberry Cheesecake Smoothie Protein Delight packs all Read Full Recipe -
Warm Cranberry Ginger Mocktail Spritzer Recipe Delight
Welcome to my cozy kitchen! Today, I’m excited to share a delightful warm cranberry ginger mocktail spritzer that brightens up Read Full Recipe -
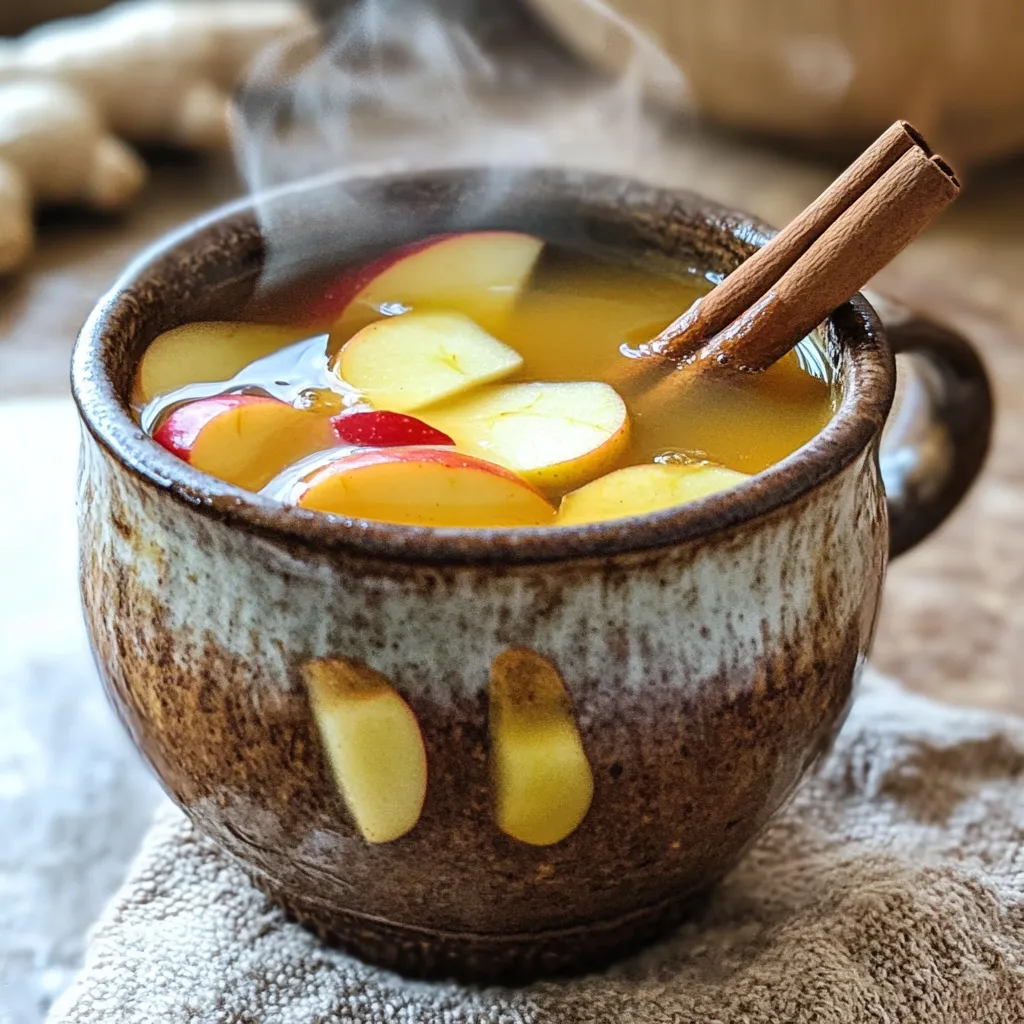
Spiced Apple Cider Chai Bold and Flavorful Drink Recipe
Looking for a cozy drink this season? Try my Spiced Apple Cider Chai! This bold, flavorful beverage combines warm apple Read Full Recipe -
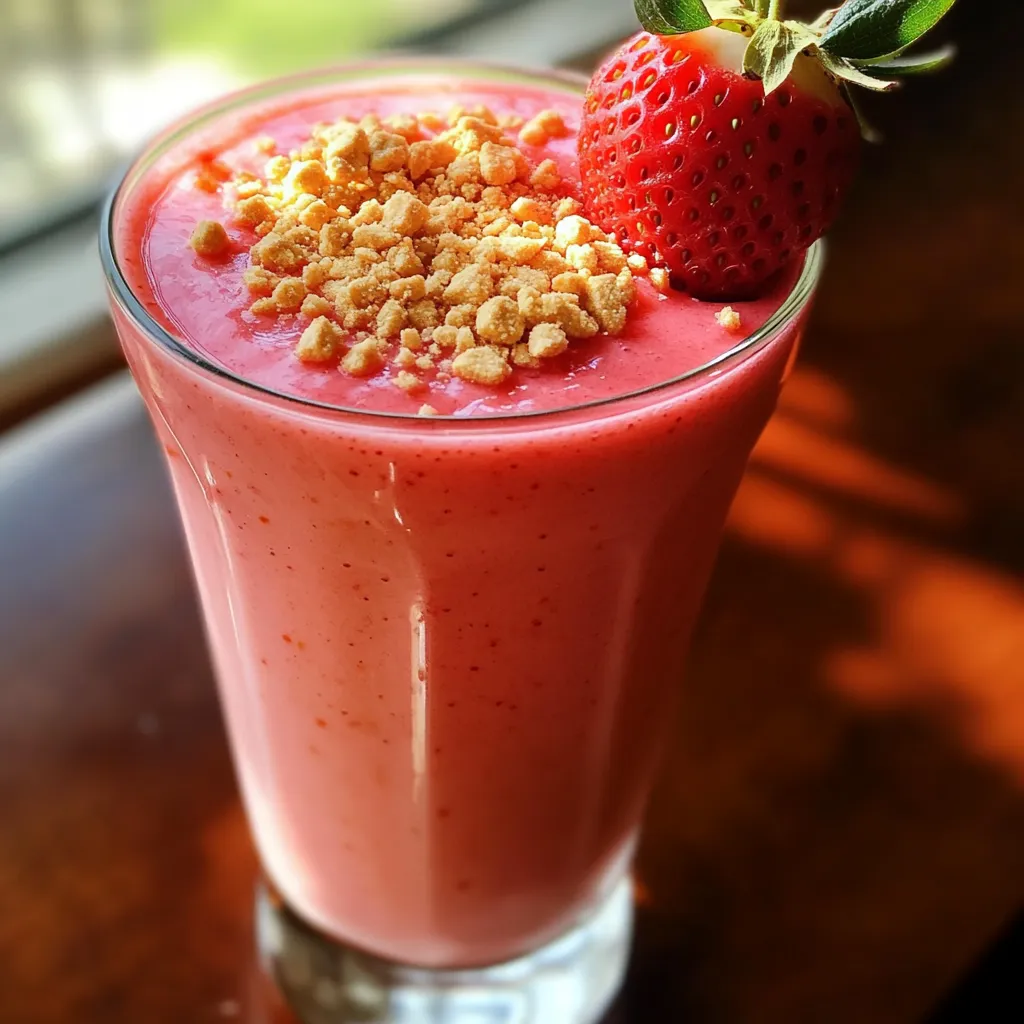
Strawberry Cheesecake Smoothie Tasty and Easy Recipe
Are you ready for a treat that’s both tasty and easy? This Strawberry Cheesecake Smoothie blends the rich flavors of Read Full Recipe -
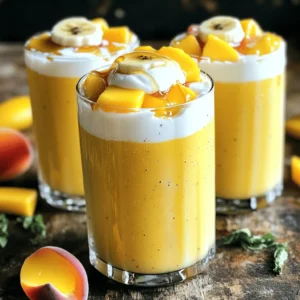
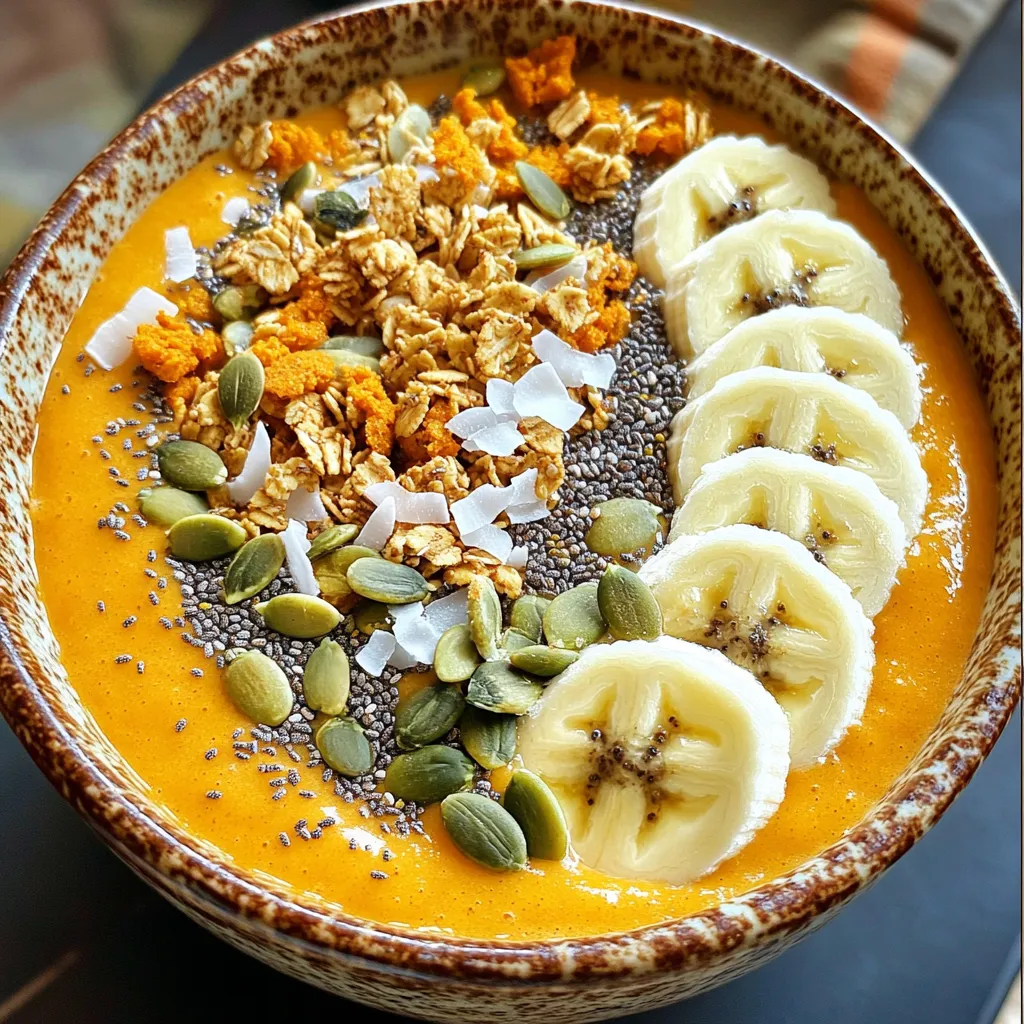
Pumpkin Spice Smoothie Bowl Protein Packed Delight
Are you ready to dive into the cozy world of pumpkin spice? This Pumpkin Spice Smoothie Bowl is not only Read Full Recipe


hey,
i’m !
I’m so happy you’re here!
I love creating dishes that bring joy to the table. I hope they bring the same joy to yours. Let’s enjoy this flavorful journey together.


![To make Buffalo Cauliflower Bites, gather these simple ingredients: - 1 head of cauliflower, cut into bite-sized florets - 1 cup all-purpose flour - 1 teaspoon garlic powder - 1 teaspoon onion powder - 1 teaspoon smoked paprika - 1 teaspoon salt - 1 cup milk (or plant-based milk) - ½ cup hot sauce (such as Frank's RedHot) - 2 tablespoons butter, melted - Optional: celery sticks and blue cheese dressing for serving Each ingredient plays a key role in building flavor and texture. The cauliflower provides a sturdy base. The flour and milk create a nice batter that coats the florets. The spices add depth, while the hot sauce gives that classic Buffalo kick. When choosing cauliflower, look for heads that are firm and heavy. The florets should be tightly packed. Avoid any that show signs of browning or wilting. Fresh cauliflower will have bright green leaves. Those leaves can help you identify a recently picked head. If you need alternatives, there are good options available. For the flour, you can use gluten-free flour if you prefer. It works well without changing the taste much. For the milk, almond, soy, or oat milk can replace dairy milk. Each option will still give you a delicious result. If you want to skip the butter, you can use olive oil instead. These substitutions make Buffalo Cauliflower Bites easy for everyone to enjoy. For the full recipe, check out [Full Recipe]. Start by preheating your oven to 450°F (230°C). This high heat helps get the cauliflower crispy. Line a baking sheet with parchment paper or spray it lightly with cooking spray. The parchment paper makes cleanup easy and helps prevent sticking. In a big bowl, mix together the flour, garlic powder, onion powder, smoked paprika, and salt. These spices add great flavor. Gradually pour in the milk, whisking as you go. Keep whisking until the batter is smooth and slightly thick. This coating is what makes the cauliflower crunchy. Dip each cauliflower floret into the batter. Make sure every piece is well-covered. Place the coated florets on the baking sheet. Space them out so they don’t touch. Bake for 20 to 25 minutes. Halfway through, flip them over to ensure they cook evenly. The goal is to achieve a golden and crispy finish. After the first bake, drizzle the buffalo sauce over the cooked florets and toss gently. Return them to the oven for another 10 minutes. This sets the sauce and gives an extra layer of flavor. Enjoy your Buffalo Cauliflower Bites with some celery sticks and blue cheese dressing. For the full recipe, refer to the complete instructions. To get your Buffalo Cauliflower Bites crispy, start with dry florets. Rinse the cauliflower and dry it well with a towel. When you coat the florets, make sure they are fully covered in batter. This helps lock in moisture and gives a nice crunch. Also, use a hot oven. Preheating to 450°F (230°C) is key. Flipping the cauliflower is an important step. Halfway through baking, carefully turn each floret. Use tongs to prevent breaking. This ensures even cooking and browning. When coating, dip each piece fully into the batter. Shake off excess batter before placing it on the baking sheet. This prevents soggy spots. Timing is crucial for the best flavor. After the first bake, take the cauliflower out and drizzle the sauce. Toss it gently to coat. Then, return it to the oven for another 10 minutes. This step helps the sauce stick and develops a deeper flavor. Keep an eye on your bites to avoid burning. Enjoy your crispy, spicy snack! For the full recipe, check the details above. {{image_2}} You can easily make Buffalo cauliflower bites vegan. Just swap the milk with plant-based milk. Options like almond or soy milk work great. For the butter, use vegan butter or olive oil. Both give you that rich flavor without dairy. The rest of the recipe stays the same. This way, everyone can enjoy these tasty treats. If you need gluten-free bites, replace all-purpose flour with gluten-free flour. Almond flour or chickpea flour are excellent choices. They provide a nice texture and taste. Make sure your hot sauce is also gluten-free. Some brands may add gluten, so check the label. This method keeps the bites crispy and delicious. You can play with flavors in Buffalo cauliflower bites. Try different hot sauces to find your favorite. Sriracha adds a sweet kick, while chipotle sauce gives a smoky taste. You can also mix in spices. Adding cumin or chili powder can change the flavor profile. For something fun, toss in ranch seasoning or taco seasoning. Each variation offers a new twist on this classic snack. Want to try the full experience? Check out the Full Recipe for all the details! After you enjoy your Buffalo Cauliflower Bites, store any leftovers in an airtight container. Let them cool first, then seal the container. This keeps them fresh for about 3 days in the fridge. If you want to enjoy them later, freezing is a great option. To reheat, use your oven for the best crispiness. Preheat the oven to 350°F (175°C). Spread the bites on a baking sheet and bake for about 10-15 minutes. Flip them halfway through to heat evenly. You can also microwave them, but they might lose some crunch. For longer storage, freeze the bites before you coat them in sauce. Place cooled, cooked cauliflower on a baking sheet. Freeze until solid, then transfer to a freezer bag. They can last up to 3 months. When ready to eat, bake them straight from the freezer. Add the sauce and bake as usual. Enjoy the full recipe for step-by-step details! Yes, you can make Buffalo Cauliflower Bites in an air fryer. Air fryers cook with hot air, making the bites crispy. To do this, coat your cauliflower as in the recipe. Preheat the air fryer to 400°F (200°C). Place the cauliflower in a single layer in the basket. Cook for about 15-20 minutes, shaking halfway through. Check for crispiness and adjust time if needed. Buffalo Cauliflower Bites pair well with many sides. Here are some great options: - Celery sticks - Carrot sticks - Blue cheese dressing - Ranch dressing - A light green salad - Pita chips or tortilla chips These sides complement the spicy flavor and add freshness to your meal. The spice level of Buffalo Cauliflower Bites depends on the hot sauce you use. A standard choice like Frank's RedHot gives a nice kick but isn't too hot. If you like it spicier, add more hot sauce or use a hotter brand. If you prefer less heat, try mixing the hot sauce with a bit of honey or BBQ sauce. This balances the spice while keeping the flavor. We explored how to make Buffalo Cauliflower Bites step by step. I shared tips on selecting fresh cauliflower and ways to make the dish gluten-free or dairy-free. Baking techniques help get the perfect crunch. You can also try fun flavor variations and different serving ideas. Remember, these bites store well and can be reheated or frozen for later. Enjoy this tasty snack any time, knowing you’ve made a healthy choice!](https://soyumrecipes.com/wp-content/uploads/2025/06/ac4721ad-03e9-4974-a99b-a63bcfd209a2-300x300.webp)
Creamy Tomato Parmesan Chicken One Pot Delight
Are you ready to cook up an easy and tasty meal? My Creamy Tomato Parmesan Chicken One Pot Delight is the perfect dish for…