

Latest & Greatest

Rainbow Veggie Pinwheels Eye-Catching Party Snack
Looking for a fun and healthy party snack? Try Rainbow Veggie Pinwheels! These colorful bites are not just easy to
Read more…
Garlic Herb Roasted Chicken Thighs Simple and Tasty
Are you ready for a delicious meal that’s both simple and satisfying? Garlic Herb Roasted Chicken Thighs are a tasty
Read more…
Mango Avocado Salsa Flavorful Freshness in a Bowl
Craving a burst of flavor that’s both fresh and easy to make? Look no further! This Mango Avocado Salsa combines
Read more…
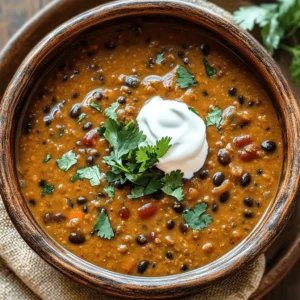
Spicy Black Bean Tacos Flavorful and Quick Meal
Looking for a quick meal that’s bursting with flavor? You’ve come to the right place! My Spicy Black Bean Tacos
Read more…
Stuffed Sweet Potatoes Flavorful and Easy Recipe
Are you ready to create a warm and tasty dish that will impress everyone? Stuffed sweet potatoes are not only
Read more…
Creamy Cauliflower Mac and Cheese Rich Comfort Dish
If you’re craving comfort food that feels rich yet healthy, I have the ideal dish for you: Creamy Cauliflower Mac
Read more…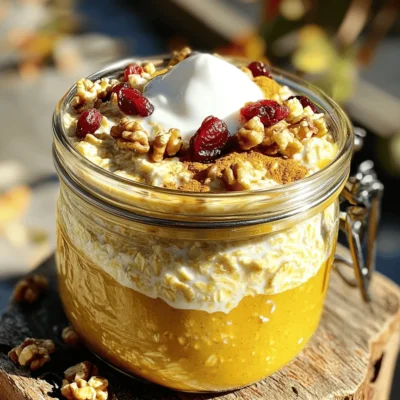
Pumpkin Spice Overnight Oats Easy and Delicious Recipe
Craving a cozy fall breakfast? You’ll love these Pumpkin Spice Overnight Oats! This easy, delicious recipe combines creamy oats with
Read more…
Honey Garlic Glazed Salmon Flavorful Meal for Dinner
Are you ready to impress at dinner time? Honey Garlic Glazed Salmon is a tasty dish packed with flavor! With
Read more…browse recipes


![- 1 lb boneless, skinless chicken breasts - 4 cups chicken broth - 2 cups water - 2 cups egg noodles - 1 cup carrots, diced - 1 cup celery, diced - 1 small onion, finely chopped - 4 cloves garlic, minced - 1 teaspoon dried thyme - 1 teaspoon dried parsley - Salt and pepper to taste - Juice of 1 lemon - Fresh parsley for garnish The key to making a great Instant Pot Chicken Noodle Soup lies in using fresh, quality ingredients. The chicken forms the base of this soup. I use boneless, skinless chicken breasts for ease and tenderness. The broth brings rich flavor, while the water balances it. Next, I add the vegetables. Carrots, celery, onion, and garlic create a lovely aroma and depth of taste. Dicing them ensures they cook evenly. Herbs and seasoning are essential for that warm, cozy flavor. Dried thyme and parsley add earthiness. A splash of lemon juice brightens everything. Lastly, fresh parsley gives a nice touch when serving. Using these ingredients will make a comforting soup that warms the heart. Check out the Full Recipe for detailed steps and times to enjoy this dish. 1. Set your Instant Pot to the Sauté function. 2. Heat 2 tablespoons of olive oil for about 1 minute. 3. Add 1 small chopped onion, 4 minced garlic cloves, 1 cup diced carrots, and 1 cup diced celery. 4. Sauté for 3-4 minutes until the veggies soften. 1. Place 1 lb of boneless, skinless chicken breasts into the pot. 2. Pour in 4 cups of chicken broth and 2 cups of water. 3. Stir in 1 teaspoon dried thyme, 1 teaspoon dried parsley, salt, and pepper to taste. 4. Close the lid and set the valve to sealing. 5. Select the Manual or Pressure Cook function and set the timer for 10 minutes. 1. Once the timer goes off, let the pressure release naturally for 5 minutes. 2. Carefully switch the vent to release any remaining pressure. 3. Open the lid and take out the chicken breasts. 4. Shred the chicken with two forks and return it to the soup. 5. Stir in 2 cups of egg noodles and let them cook in the hot soup for 5-7 minutes. 6. Add the juice of 1 lemon and adjust seasoning if needed. 7. Serve hot, garnished with fresh parsley! For the complete recipe, check out the [Full Recipe]. When you cook chicken in the Instant Pot, timing is key. Start by adding your chicken breasts whole. This keeps them juicy. Cook for just 10 minutes under high pressure. After cooking, let the pot rest for about 5 minutes. This helps keep the chicken tender and moist. Then, carefully release any remaining pressure. To boost the taste, try adding herbs like rosemary or basil. A few sprigs of fresh thyme can also work wonders. You can brighten the soup by adding a splash of lemon juice right before serving. This small step makes a big difference in flavor. Serve your soup with warm, crusty bread or a fresh salad. A side of buttery crackers also pairs well. For a nice touch, garnish each bowl with fresh parsley. This adds color and freshness to the dish. You can also sprinkle some black pepper for extra flavor. Enjoy your cozy bowl of soup! {{image_2}} You can easily change the noodles you use. Try whole wheat, gluten-free, or even rice noodles. Each type brings a new taste and texture. You can also swap out vegetables. If you don’t like carrots, use peas or corn. If you have other veggies, toss them in too! To make the soup gluten-free, choose gluten-free noodles. Check the labels to be sure. For a dairy-free option, skip any cream or cheese. The soup will still taste great. You can add coconut milk for creaminess if you want. Cooking in bulk is smart. Make a big batch and freeze some for later. You can store it in single portions for easy meals. Just let the soup cool before putting it in containers. This helps keep it fresh. To keep your soup fresh, store it in an airtight container. Let it cool first. Refrigerate leftovers within two hours of cooking. This keeps harmful bacteria away. If you want to freeze it, ensure the soup is cool. Use freezer-safe containers or bags. Leave some space at the top for expansion. This helps prevent spills. To reheat in the Instant Pot, add the soup back in. Use the Sauté function on low heat. Stir often until the soup is hot. For stovetop reheating, pour the soup into a pot. Heat it over medium heat. Stir regularly to avoid sticking. This method works well and warms the soup evenly. In the fridge, your soup lasts about 3 to 4 days. Always check for signs of spoilage. Look for off smells, changes in color, or mold. If any of these appear, throw the soup away. If you freeze the soup, it lasts about 2 to 3 months. Thaw it in the fridge before reheating for best results. To make Instant Pot Chicken Noodle Soup, follow these steps: - Set the Instant Pot to Sauté and add olive oil. - Sauté chopped onion, garlic, carrots, and celery for about 4 minutes. - Add 1 lb boneless, skinless chicken breasts, 4 cups chicken broth, and 2 cups water. - Stir in 1 teaspoon dried thyme, 1 teaspoon dried parsley, salt, and pepper. - Close the lid, seal the valve, and cook on High Pressure for 10 minutes. - Let the pressure release naturally for 5 minutes, then vent any remaining pressure. - Remove the chicken, shred it, and return it to the soup. - Stir in 2 cups egg noodles and let them cook in the hot soup for 5-7 minutes. - Finish with lemon juice and adjust seasoning as needed. This recipe is simple and quick, perfect for any day. For a detailed guide, check the Full Recipe. Yes, you can use frozen chicken. Just add an extra 5-7 minutes to the cooking time. Make sure to increase the liquid by a cup to help with cooking. The soup will still taste great, and you’ll have a warm meal ready in no time. Yes, this soup is excellent for meal prep. You can cook a large batch and store it in the fridge. It lasts for about 3-4 days. For longer storage, freeze portions in airtight containers. When you're ready, just reheat and enjoy! Chicken noodle soup pairs well with many sides. Here are some ideas: - A slice of crusty bread or a warm baguette. - A fresh green salad with light dressing. - Crackers for a crunchy texture. - Grilled cheese sandwiches for a fun twist. These sides add variety and enhance your meal! This blog post shows how to make a tasty Instant Pot Chicken Noodle Soup. We covered key ingredients, easy steps, and smart tips. You can customize the recipe with different vegetables or noodles to fit your taste. Remember to store any leftovers right and reheat them well. This soup is filling and great for meal prep. Enjoy the warmth and comfort it brings. You now have a simple recipe to share with friends. Happy cooking!](https://soyumrecipes.com/wp-content/uploads/2025/06/d78f8b84-2864-47ad-99e3-f489bca28aab.webp)
Instant Pot Chicken Noodle Soup Simple and Quick
When you need a warm, comforting meal fast, Instant Pot Chicken Noodle Soup is your answer. With just a few key ingredients and simple…
My Latest Desserts
-

Caramel Pecan Sticky Buns Sweet and Gooey Treat
Are you ready to treat yourself to the ultimate indulgence? Caramel Pecan Sticky Buns are sweet, gooey, and packed with Read Full Recipe -

Pumpkin Spice French Toast Casserole Easy and Tasty
Looking for a cozy fall breakfast that’s easy and delicious? You’ll love my Pumpkin Spice French Toast Casserole! This dish Read Full Recipe -

Fluffy Pumpkin Pancakes Perfectly Delicious Breakfast
Start your morning with a treat you won’t forget: fluffy pumpkin pancakes! They bring fall flavors to your breakfast table Read Full Recipe -
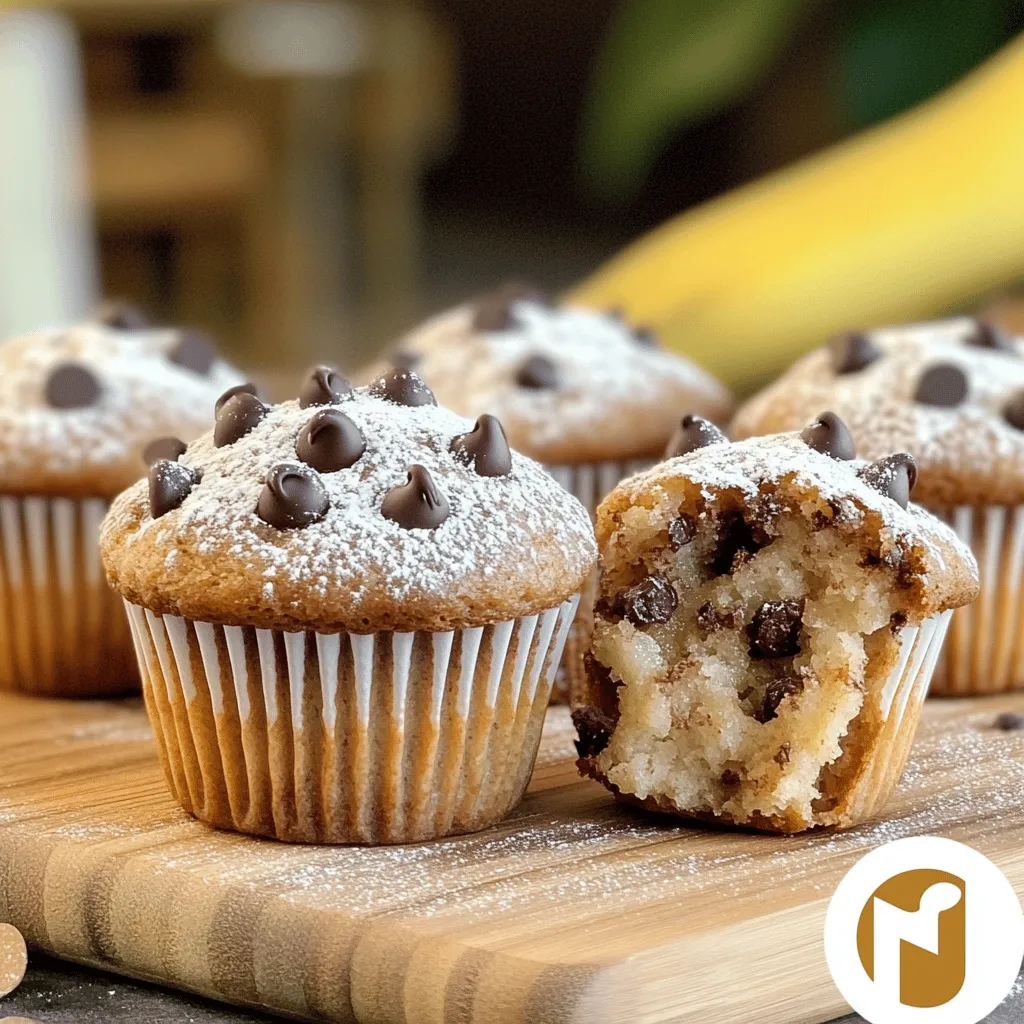
Brown Butter Banana Chocolate Chip Muffins Delight
Are you craving a warm, cozy treat? Look no further than these Brown Butter Banana Chocolate Chip Muffins! This recipe Read Full Recipe -

Chewy Salted Caramel Pretzel Brownies Delightful Treat
Are you ready to indulge in a treat that combines sweet, salty, and chewy goodness? These Chewy Salted Caramel Pretzel Read Full Recipe -

Fluffy Pumpkin Pancakes Easy and Delicious Recipe
Looking to spice up your breakfast with something special? You’re in for a treat! These fluffy pumpkin pancakes are not Read Full Recipe -

Brown Butter Banana Chocolate Chip Muffins Delight
Welcome to the delicious world of Brown Butter Banana Chocolate Chip Muffins! You’re about to discover a simple recipe that Read Full Recipe -
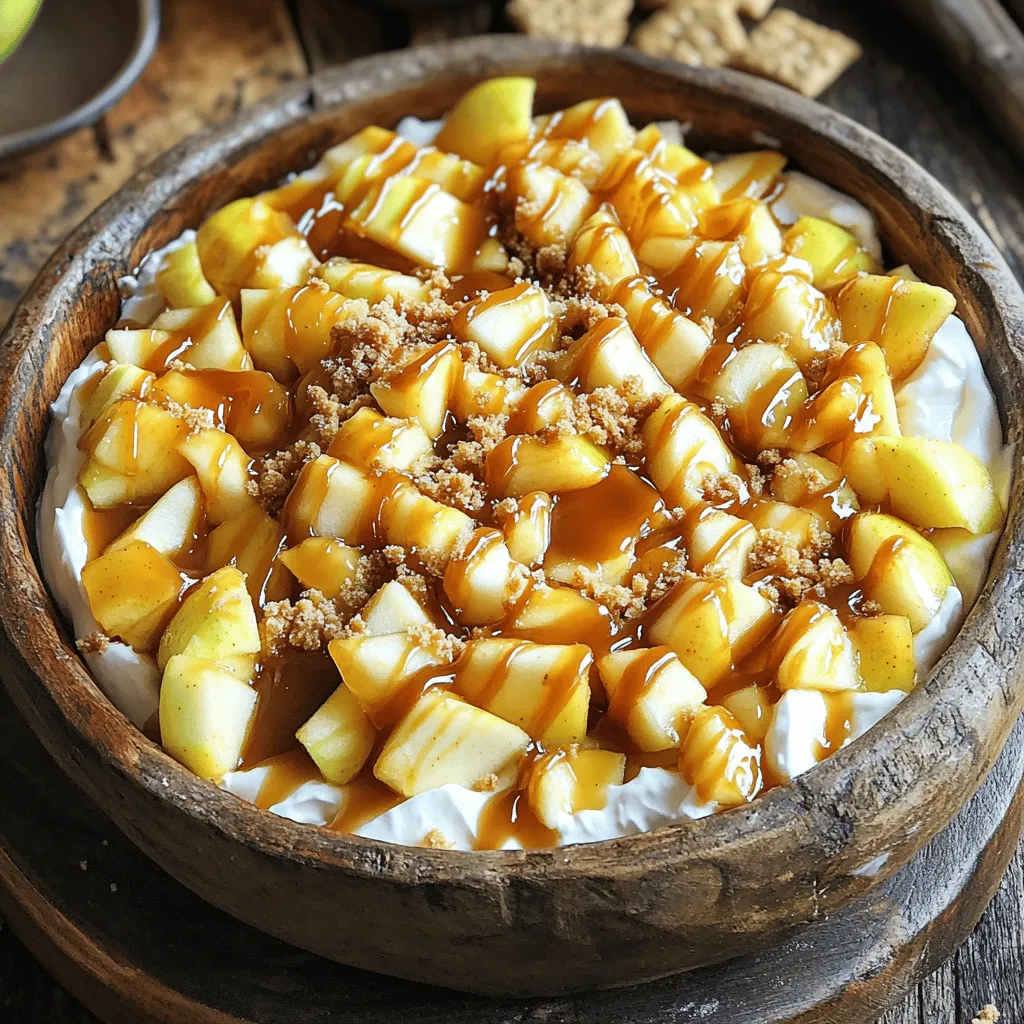
Caramel Apple Pie Dip Delightfully Sweet Treat
Get ready to dive into a sweet treat that’s perfect for any occasion: Caramel Apple Pie Dip! If you love Read Full Recipe -
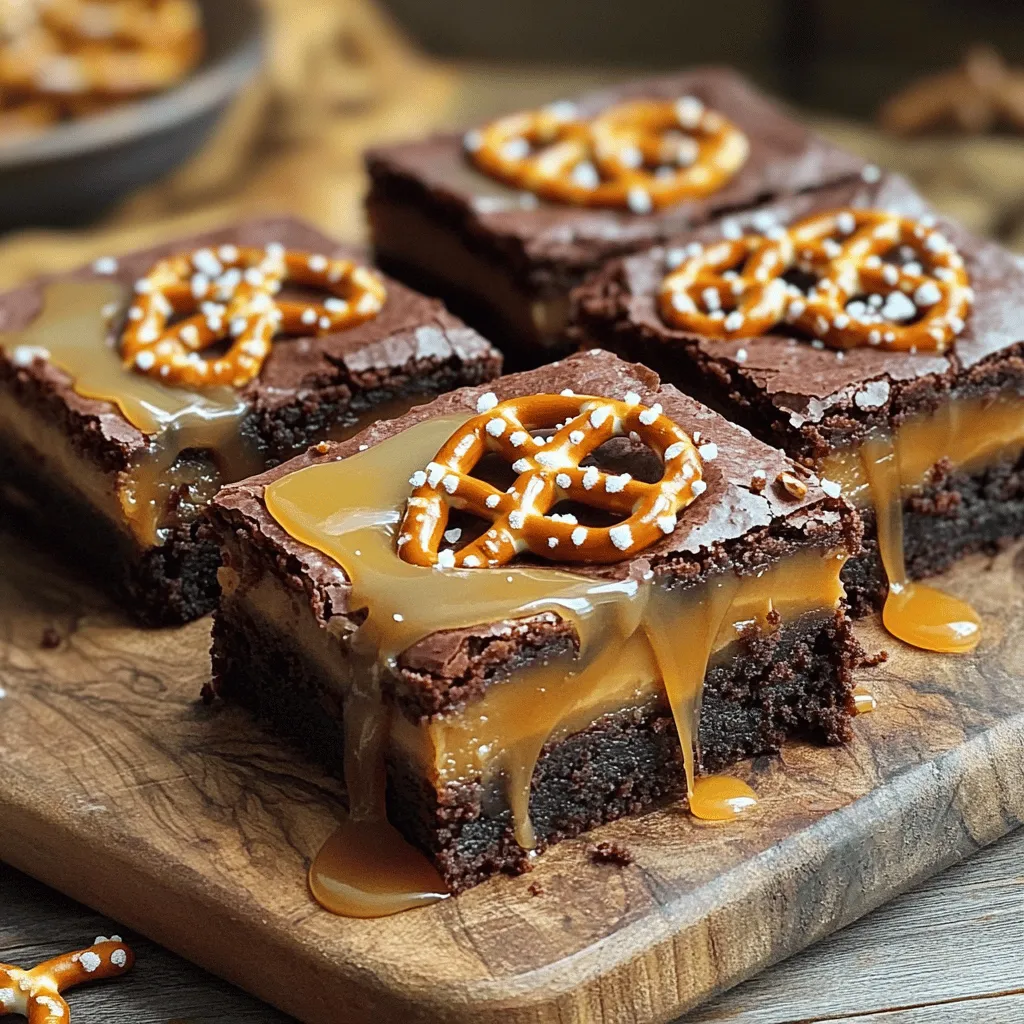
Chewy Salted Caramel Pretzel Brownies Delight
Get ready to indulge in a sweet and salty treat that you won’t forget! My Chewy Salted Caramel Pretzel Brownies Read Full Recipe -

Cherry Almond Overnight French Toast Easy Morning Dish
Looking for a quick and delicious breakfast? Cherry Almond Overnight French Toast could be your new favorite dish! This easy Read Full Recipe
My Latest Recipes

hey,
i’m !
I’m so happy you’re here!
I love creating dishes that bring joy to the table. I hope they bring the same joy to yours. Let’s enjoy this flavorful journey together.

. To make the best cheesecake, start with room temperature ingredients. This helps create a smooth and creamy filling. Cold ingredients can lead to lumps. When mixing the batter, be careful not to overmix. Just mix until everything is combined. Overmixing can make the cheesecake dense. When making meringue, clean your mixing bowl first. Any grease can stop the egg whites from whipping properly. Make sure the bowl is dry as well. While mixing, add sugar slowly. This helps the meringue become stable and fluffy. If you add it too fast, the meringue may not hold its shape. To make your cheesecake look lovely, garnish it with lemon slices or fresh berries. This adds color and makes it more appealing. Always serve the cheesecake chilled. This brings out all the flavors and gives you the best taste experience. Enjoy your slice of joy! {{image_2}} You can make your cheesecake even more exciting by adding flavor infusions. Try mixing in other citrus zests, like lime or orange. This adds a fresh twist to the lemon flavor. You can also add a hint of almond or coconut extract. Just a little will enhance the taste and give your cheesecake a unique touch. While meringue is classic, you can switch it up with different toppings. Whipped cream is a light option that pairs well with lemon. It adds a soft texture and a creamy taste. You can also top with seasonal fruits like berries or kiwi. This not only looks beautiful but adds natural sweetness and color to your dessert. For those needing gluten-free options, you can still enjoy this treat. Substitute regular graham crackers with gluten-free ones. They work just as well in the crust. You might also explore almond flour as an alternative for the crust. Almond flour gives a nice nutty flavor that complements the cheesecake beautifully. These variations let you customize your Triple Lemon Meringue Cheesecake. You can create a dessert that fits your tastes and dietary needs. For the complete recipe, check out the [Full Recipe]. Store your Triple Lemon Meringue Cheesecake in the fridge. Keep it in an airtight container to keep it fresh. It tastes best within 3-4 days. You can enjoy the bright lemon flavor and creamy texture for a few days after making it. Want to save some for later? You can freeze portions of the cheesecake. Wrap each piece tightly in plastic wrap. This helps keep the cheesecake from getting freezer burn. Be sure to label it with the date, so you know when you made it! When you’re ready to enjoy your frozen cheesecake, thaw it in the refrigerator overnight. This way, it will be nice and cool when you serve it. Remember, do not refreeze after thawing. This will keep the texture and flavor just right. Triple Lemon Meringue Cheesecake is a sweet dessert. It mixes creamy cheesecake, tangy lemon curd, and fluffy meringue. Each layer brings a burst of lemon flavor. The cheesecake has a smooth texture, while the meringue is light and airy. Lemon curd adds a tart twist that balances the sweetness. This dessert is a treat for lemon lovers! Yes, you can make this cheesecake a day ahead. This helps the flavors blend well. Just cool it completely and store it in the fridge. Letting it sit overnight makes it even tastier. When ready to serve, top it with meringue for a fresh look. To keep the crust firm, bake it first. After baking, let it cool completely. This step prevents moisture from the filling from making the crust soggy. A well-baked crust holds up nicely under the creamy filling. If your meringue weeps, it may be due to overcooking. Meringue can also weep if egg whites are not whipped enough. Make sure to beat the egg whites until they form stiff peaks. This ensures a stable meringue that stands tall on your cheesecake. You now know how to make a Triple Lemon Meringue Cheesecake. We covered the ingredients, from the crust to the meringue. I shared step-by-step instructions to guide you through each stage. Plus, I included tips for perfecting your cheesecake and variations to make it your own. Enjoy crafting this delicious dessert that combines tangy lemon and sweet meringue. Remember to store any leftovers properly. Happy baking!](https://soyumrecipes.com/wp-content/uploads/2025/05/ff7c6d02-7af3-4386-a397-03dee9af4048-300x300.webp)
Chocolate Avocado Mousse Creamy Rich Delight
Are you ready to enjoy a dessert that’s both rich and healthy? Chocolate Avocado Mousse is a creamy delight that will satisfy your sweet…
![To make the best chocolate avocado mousse, you need simple and fresh ingredients. Here’s what you will need: - Ripe avocados - Cocoa powder - Sweeteners (maple syrup or honey) - Almond milk (or any milk of choice) - Vanilla extract - Salt - Optional toppings: Whipped coconut cream, chocolate shavings, fresh berries Using ripe avocados is key. They provide a creamy base and healthy fats. Cocoa powder adds rich chocolate flavor, while sweeteners balance the taste. Almond milk helps achieve the right consistency and keeps it dairy-free. Vanilla extract enhances the flavor, and a pinch of salt brings out all the tastes. For toppings, you can get creative! Whipped coconut cream adds a light touch. Chocolate shavings give extra chocolatey goodness. Fresh berries add a pop of color and freshness. Check out the Full Recipe for the complete details. Enjoy making this delicious treat! 1. Cutting and scooping avocados: Start by slicing the avocados in half. Remove the pits carefully. Use a spoon to scoop out the green flesh. Place the avocado flesh into your blender or food processor. 2. Combining ingredients in the blender: Next, add the cocoa powder, maple syrup, almond milk, vanilla extract, and a pinch of salt. Make sure you measure each ingredient for the best results. 3. Achieving the right texture: Blend the mixture on high speed. Stop occasionally to scrape down the sides. Blend until the mousse is smooth and creamy. This may take about 1-2 minutes. 4. Transferring to serving bowls: Once creamy, scoop the mousse into individual serving bowls or glasses. Make sure to divide it evenly for everyone to enjoy. 1. Refrigeration time: Cover the bowls with plastic wrap or a lid. Chill in the fridge for at least 30 minutes. This helps the flavors blend well and the mousse to set. 2. Suggestions for toppings: Before serving, feel free to add toppings. Whipped coconut cream, chocolate shavings, or fresh berries work great. They add color and extra flavor to your dessert. Enjoy your Chocolate Avocado Mousse as a creamy rich delight! For the full recipe, check the detailed instructions above. To make chocolate avocado mousse smooth, blend well. Start on low speed, then increase. This helps mix the ingredients without splattering. If you see lumps, stop the blender. Use a spatula to scrape down the sides. Blend again until creamy. This step is key for a velvety feel. Taste your mousse as you blend. If it’s not sweet enough, add more maple syrup or honey. Blend again to mix. You want the balance just right. If you prefer, try a bit of agave syrup or stevia for a different twist. Keep tasting until it matches your sweet tooth. For serving, use small bowls or clear glasses. This lets the rich color shine through. Add a dollop of whipped coconut cream on top for a nice touch. You can also sprinkle chocolate shavings or fresh berries for extra flair. Creative plating makes your dessert look gourmet, even at home. For the complete recipe, check out the [Full Recipe]. {{image_2}} You can make your chocolate avocado mousse even better with some fun flavors. Try adding different sweeteners like agave syrup. It gives a nice twist and is great for those who want a change. You can also play with spices. Adding a dash of espresso can boost the chocolate flavor. Or sprinkle in some cinnamon for warmth. Both options make the mousse special and tasty. If you follow a vegan diet, you have options too! Use maple syrup instead of honey to keep it vegan-friendly. For a gluten-free treat, this mousse works perfectly as it has no gluten ingredients. Just ensure your toppings are gluten-free. This way, everyone can enjoy the creamy delight without worry. Toppings can change the whole dish! Fresh fruits like strawberries or raspberries add a bright touch. They look great and taste amazing. You could also sprinkle some nuts or seeds on top for a crunchy bite. Think chopped almonds or sunflower seeds for texture. These choices make your mousse even more fun and enjoyable. Want to try making this mousse? Check out the Full Recipe for all the details! Chocolate avocado mousse is best fresh, but you can store it. It lasts for about three days in the fridge. To keep it fresh, use an airtight container. This prevents the mousse from drying out or absorbing other smells. Yes, you can freeze chocolate avocado mousse! It stays good in the freezer for up to two months. To freeze, put it in a freezer-safe container. Leave some space at the top for expansion. When you want to enjoy it again, take the mousse out. Place it in the fridge for several hours to thaw. After thawing, stir it gently before serving. This helps restore its creamy texture. If you need a quick fix, you can also thaw it in the microwave for a few seconds. Just be careful not to heat it too much! Chocolate avocado mousse has a rich, chocolatey flavor. The cocoa gives a deep taste, while the avocado adds a creamy touch. This mix makes it feel indulgent yet smooth. It’s like eating a chocolate cloud! The texture is velvety and thick. You won’t find any graininess here. It feels luxurious on your tongue. For a great dessert, this mousse beats many traditional options. Yes, avocado mousse is quite healthy! Avocados are full of good fats, vitamins, and fiber. They help keep your heart happy and your skin glowing. You also get vitamins like E, K, and B6. In terms of calories, one serving has about 200 calories. This can vary based on what sweeteners you use. Still, compared to other desserts, it’s a smart choice. To cut calories, swap some ingredients. You can use less maple syrup or honey. Try using a sugar substitute instead. This can drop the calorie count while keeping the taste. Another tip is to reduce your portion sizes. Serving smaller amounts still feels satisfying. Enjoy every bite without guilt! Check out the Full Recipe for more ideas on how to make this dessert fit your needs. This blog post offers a simple and tasty chocolate avocado mousse recipe. You learned about the key ingredients, like ripe avocados and cocoa powder, and how to prepare them step by step. We also shared tips for the perfect texture, sweetness adjustments, and creative presentation ideas. Don’t forget to explore variations for different flavors and dietary needs. Finally, proper storage ensures your mousse stays fresh. Enjoy making this delicious dessert knowing it’s both healthy and easy. Get ready to impress with a delightful treat that everyone will love!](https://soyumrecipes.com/wp-content/uploads/2025/05/20a6122c-f6d4-40c2-8bd9-044f5cb7556a.webp)
