
Latest & Greatest
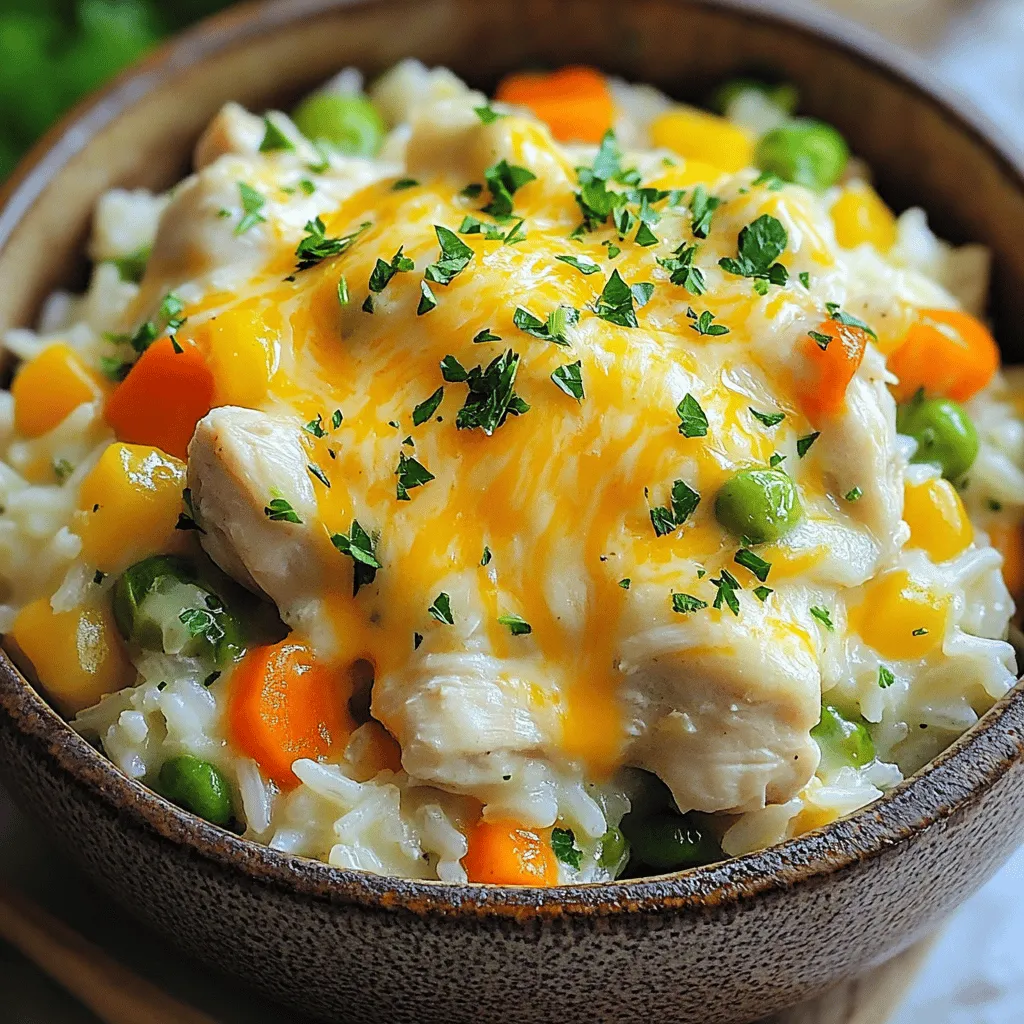
Instant Pot Chicken and Rice Casserole Delight
Looking for a quick, tasty meal? My Instant Pot Chicken and Rice Casserole Delight is the answer. This one-pot wonder
Read more…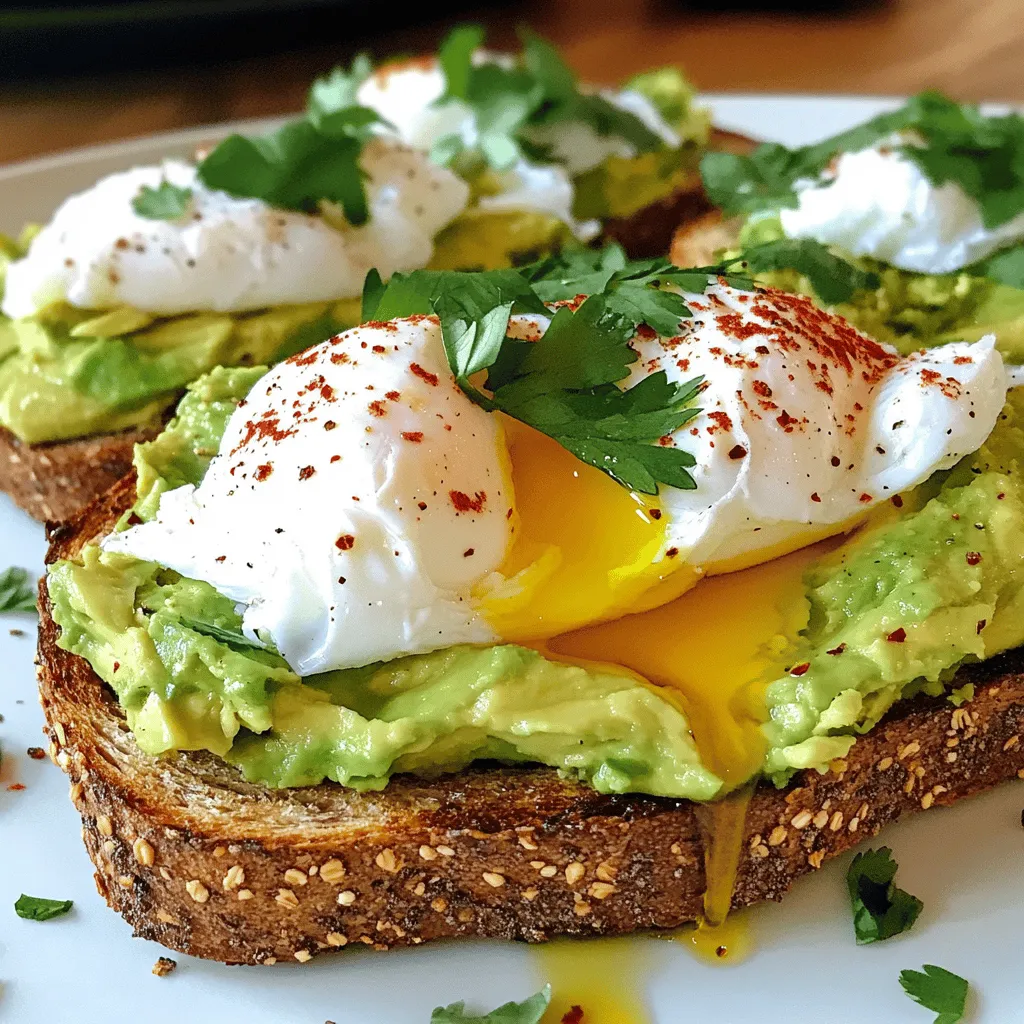
Savory Avocado Toast with Poached Egg Delight
Welcome to the world of Savory Avocado Toast with Poached Egg Delight! If you crave a tasty breakfast that’s simple
Read more…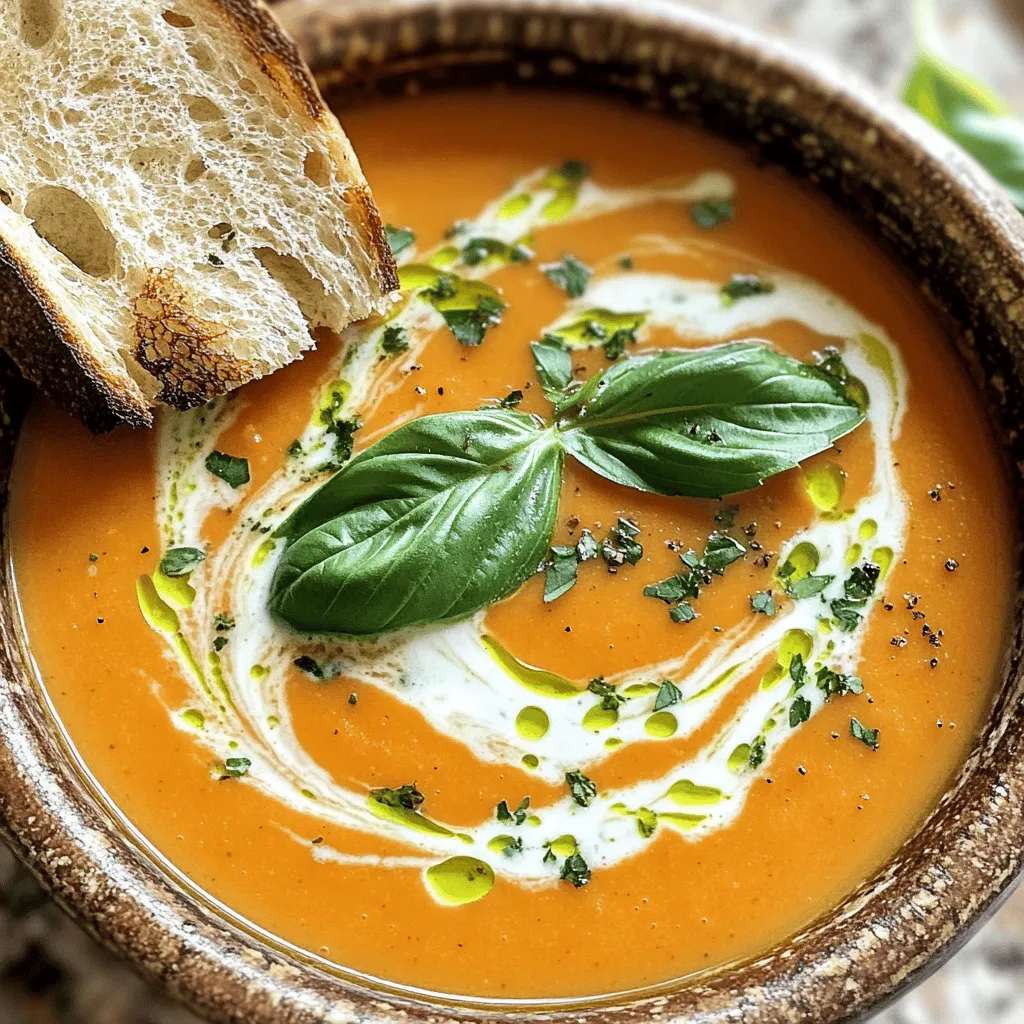
Creamy Tomato Basil Soup Flavorful and Easy Recipe
Craving a warm, comforting bowl of creamy tomato basil soup? You’re in the right place! This flavorful and easy recipe
Read more…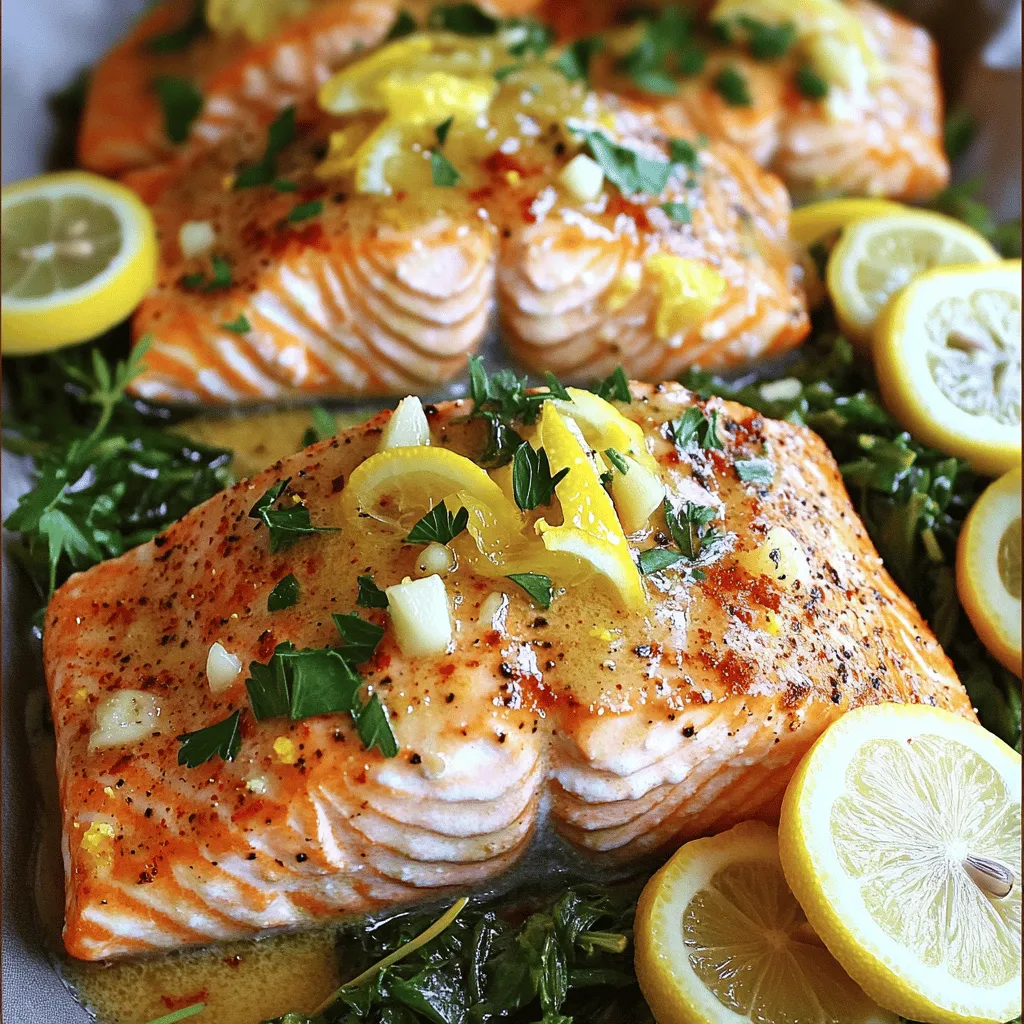
Lemon Garlic Butter Salmon Simple and Flavorful Dish
If you want a dish that shines with flavor but is easy to make, Lemon Garlic Butter Salmon is the
Read more…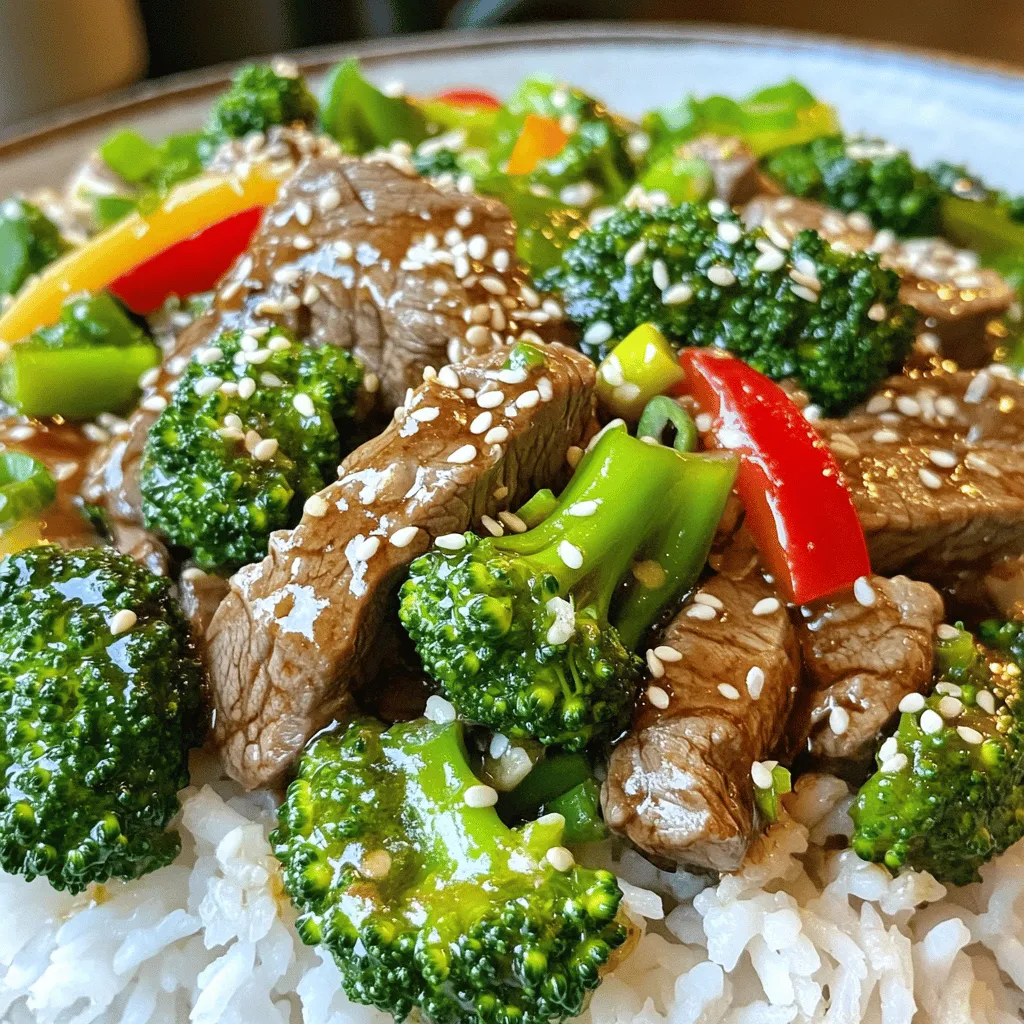
Easy Beef and Broccoli Stir-Fry Quick and Tasty Recipe
Craving a quick and tasty meal? Look no further! My Easy Beef and Broccoli Stir-Fry is your go-to recipe for
Read more…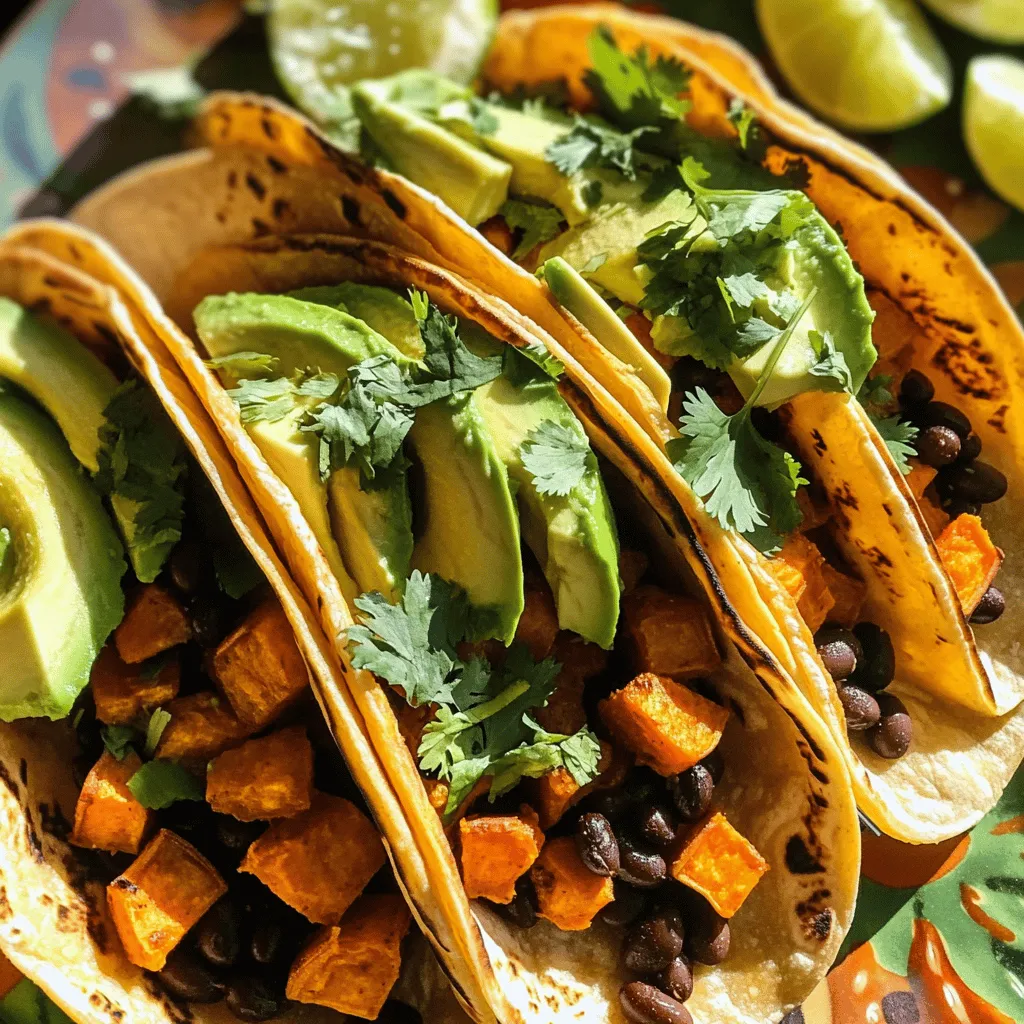
Savory Sweet Potato and Black Bean Tacos Recipe
Are you ready to spice up your dinner routine? I’m excited to share my Savory Sweet Potato and Black Bean
Read more…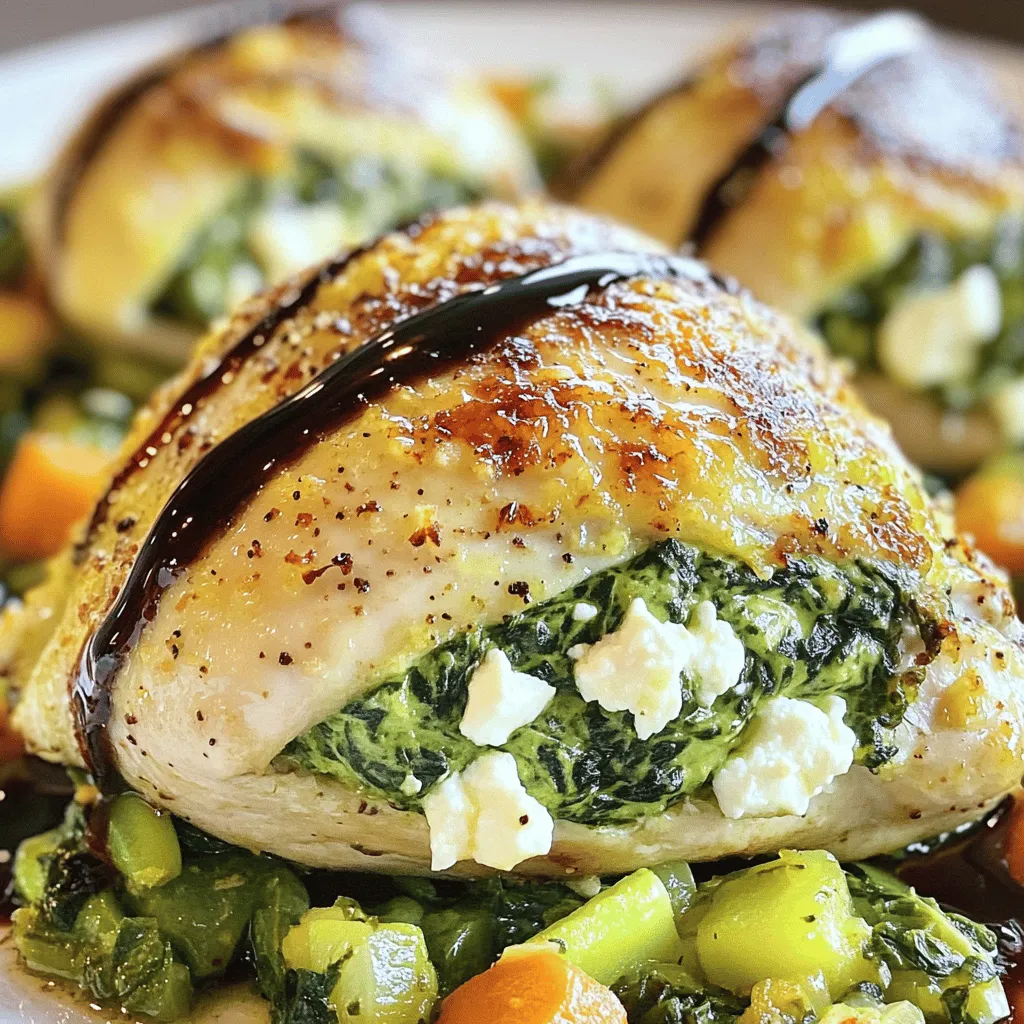
Spinach and Feta Stuffed Chicken Flavorful Weeknight Meal
Looking for a quick and tasty dinner idea? Spinach and Feta Stuffed Chicken is the answer. This flavorful weeknight meal
Read more…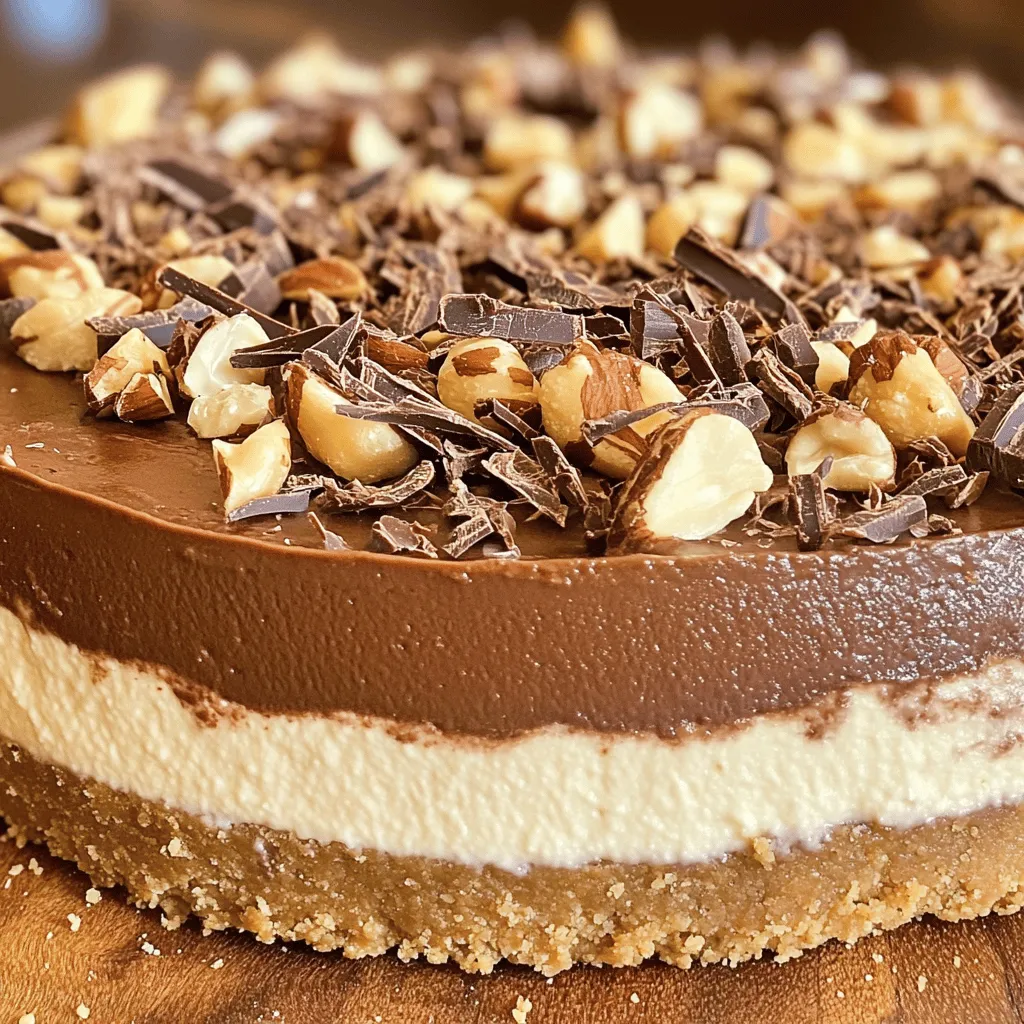
No-Bake Nutella Cheesecake Delightful and Easy Dessert
Craving something sweet and creamy that’s also easy to make? Look no further! This No-Bake Nutella Cheesecake is a true
Read more…browse recipes


![- 1 lb chicken tenders - 1 cup grated Parmesan cheese - 1 cup breadcrumbs (preferably panko) - 3 cloves garlic, minced - 1 lemon (zest and juice) - 1 teaspoon dried oregano - 1 teaspoon salt - ½ teaspoon black pepper - 2 tablespoons olive oil Gather these ingredients to create your Lemon Garlic Parmesan Chicken Tenders. The chicken tenders serve as the main star, bringing juicy texture. Grated Parmesan cheese adds a rich, nutty flavor. Breadcrumbs deliver a perfect crunch, especially if you use panko. Garlic gives this dish a delightful aroma and taste. The zest and juice of lemon brighten the flavors and add a tangy twist. Dried oregano brings an earthy note, enhancing the overall taste. For seasonings, salt and black pepper ensure each bite is well-balanced. Finally, olive oil adds moisture and helps the coating crisp up perfectly in the oven. Check out the [Full Recipe] for exact measurements and cooking instructions! 1. Preheat your oven to 400°F (200°C). This helps cook the chicken evenly. 2. Prepare the baking sheet by lining it with parchment paper. This makes cleanup easy. 1. In a large bowl, combine the grated Parmesan cheese, breadcrumbs, minced garlic, lemon zest, dried oregano, salt, and black pepper. Mix well until everything is even. 2. In a separate bowl, whisk together the olive oil and lemon juice. This adds flavor and helps the coating stick. 1. Dip each chicken tender into the lemon and olive oil mix. Make sure all sides are coated well. 2. Roll each tender in the Parmesan breadcrumb mixture. Press gently so the coating sticks. 3. Place the coated tenders on the prepared baking sheet, spaced out evenly. 4. Bake in the preheated oven for 20-25 minutes. Look for a golden brown color and check that the chicken is cooked through. 5. Once done, take the tenders out and let them rest for a few minutes. Garnish with chopped parsley before serving. Enjoy your delicious Lemon Garlic Parmesan Chicken Tenders! For the full recipe, check out the complete guide above. To get a crispy coating, use panko breadcrumbs. They give a light crunch. Make sure to coat each tender well. Press down gently to help the crumbs stick. Bake at 400°F for 20-25 minutes. This time ensures the chicken cooks fully. Check for a golden brown color on the coating. For dipping sauces, ranch and garlic mayo work great. They add a nice creamy flavor. You can also try honey mustard for a sweet twist. As for side dishes, a fresh salad pairs well. Roasted veggies also complement the chicken tenders nicely. For a fun touch, serve with lemon wedges. They add zest and freshness to each bite. You can find the full recipe for Lemon Garlic Parmesan Chicken Tenders [here](#). {{image_2}} You can make these chicken tenders even better for you. Instead of frying, bake them. Baking keeps the flavor while cutting down on fat. Just follow the full recipe for the baking steps. You can also use gluten-free breadcrumbs. This swap makes the dish safe for those with gluten issues. Look for gluten-free panko for that extra crunch. Want to change up the flavor? Try adding spices or herbs. A sprinkle of paprika gives a nice kick. You can also add fresh herbs like thyme or rosemary for extra taste. If you’re a cheese lover, substitute different cheeses. Cheddar or mozzarella can work great here. Each cheese brings its unique flavor to the dish. Experiment and find your favorite mix! After cooking, let the chicken tenders cool to room temperature. Place them in an airtight container. Store them in the fridge for up to three days. Keeping them sealed helps retain flavor and moisture. To reheat, preheat your oven to 350°F (175°C). Place the chicken tenders on a baking sheet. Heat for 10-15 minutes until warm. This method keeps the coating crispy and delicious. You can also use a microwave if you’re in a hurry. However, it might make them a bit soggy. To freeze chicken tenders, first, let them cool completely. Arrange them in a single layer on a baking sheet. Freeze for about an hour until solid. This prevents them from sticking together. Once frozen, transfer the tenders to a freezer bag. Remove all air before sealing. They can stay good in the freezer for up to three months. When you’re ready to eat them, take the chicken tenders out of the freezer. Place them in the fridge to thaw overnight. For faster thawing, you can use a microwave on the defrost setting. After thawing, reheat as directed above. Enjoy your tasty chicken tenders again! For the full recipe, check the previous section. How long to bake chicken tenders? Bake chicken tenders for 20 to 25 minutes at 400°F (200°C). Check for a golden-brown color. The chicken should also be cooked through. Can I use chicken breasts instead? Yes, you can use chicken breasts. Just cut them into strips. Adjust the cooking time as needed. How do I know when the chicken is done? Check the internal temperature with a meat thermometer. It should reach 165°F (75°C). The juices should run clear, not pink. What to serve with Lemon Garlic Parmesan Chicken Tenders? These tenders pair well with a fresh salad or roasted vegetables. You can also serve them with fries or rice. Add lemon wedges for a zesty touch. Can I prepare them ahead of time? Yes, you can prep the chicken tenders a few hours in advance. Keep them in the fridge until you are ready to bake. This helps the flavors blend. How do I make them spicier? To add heat, mix red pepper flakes into the breadcrumb mix. You can also add hot sauce to the olive oil and lemon juice mix. Caloric content per serving Each serving has about 350 calories. This may vary based on portion size and exact ingredients used. Nutritional benefits of main ingredients Chicken is a great source of protein. Parmesan cheese adds calcium. Garlic offers health benefits, including boosting the immune system. Lemon provides vitamin C, which is good for your skin. This guide covered making Lemon Garlic Parmesan Chicken Tenders. We explored the key ingredients like chicken, cheese, and breadcrumbs. I detailed preparation steps, from coating to baking and serving. You learned tips for crispy texture and pairing ideas. I also shared storage info and common FAQs. Try these easy tips and enjoy tasty meals. Cooking can be fun and rewarding!](https://soyumrecipes.com/wp-content/uploads/2025/05/b78c3b7a-c344-44d8-aeed-fe3a02e65dc3.webp)
Lemon Garlic Parmesan Chicken Tenders Delight Recipe
If you crave a tasty and easy meal, you’ve hit the jackpot! This Lemon Garlic Parmesan Chicken Tenders recipe is perfect for family dinners…
My Latest Desserts

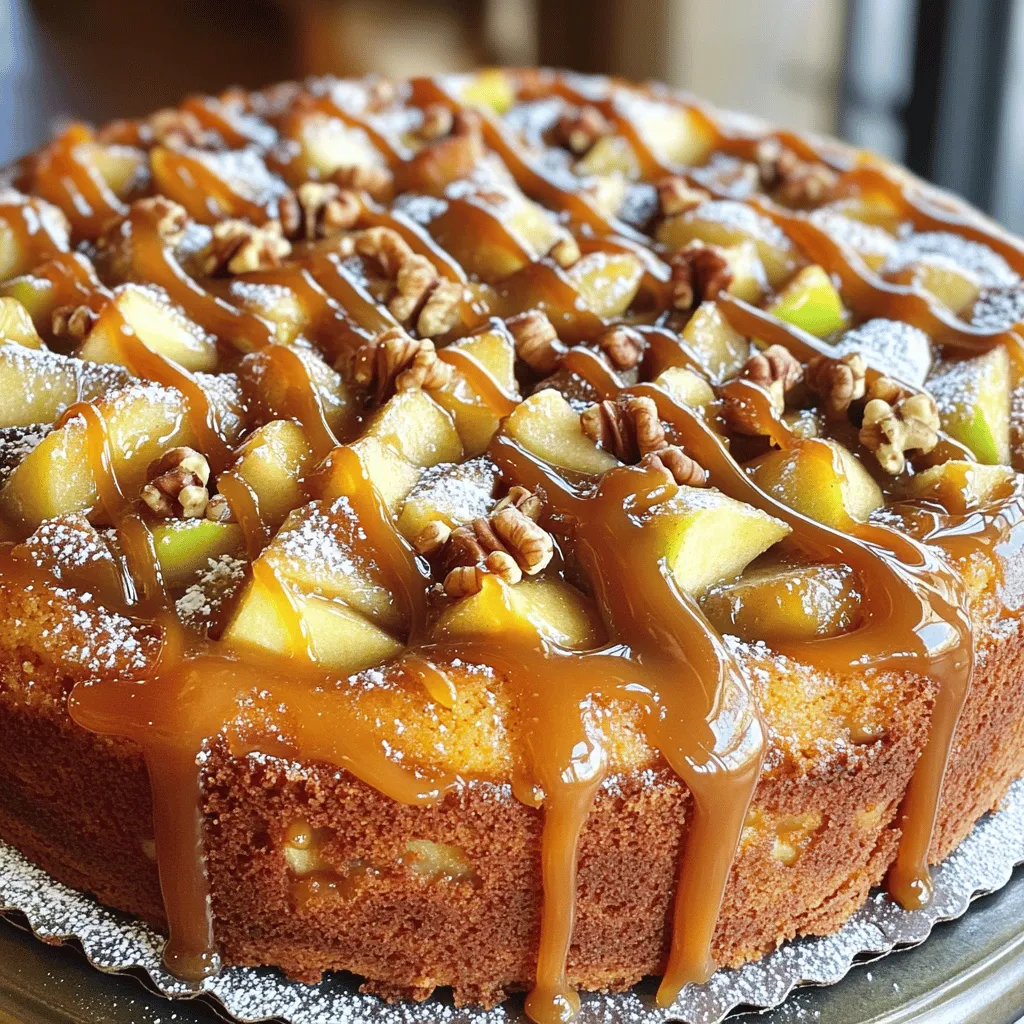
Caramel Apple Coffee Cake Scrumptious and Simple Recipe
Are you ready for a treat that combines sweet, warm apples with rich caramel? My Caramel Apple Coffee Cake is Read Full Recipe-
Bakery-Style Maple Glazed Donuts Simple and Delicious
Imagine biting into a warm, soft, maple-glazed donut just like the ones from your favorite bakery. In this post, I’ll Read Full Recipe -
Pumpkin Cream Cheese Donut Holes Irresistible Treats
Get ready to indulge in the ultimate fall treat: Pumpkin Cream Cheese Donut Holes! These bite-sized delights combine the rich Read Full Recipe -
Pumpkin Maple Pecan Granola Flavorful and Easy Recipe
Get ready to enjoy a cozy fall treat with my Pumpkin Maple Pecan Granola! Packed with rich flavor and easy Read Full Recipe -
Caramel Apple Cider Whoopie Pies Delightful Treat
Get ready to fall in love with dessert all over again! Caramel Apple Cider Whoopie Pies are a perfect blend Read Full Recipe -
No-Bake Pumpkin Chocolate Cheesecake Bars Delight
Looking for a sweet treat that’s easy to make? You’ll love these No-Bake Pumpkin Chocolate Cheesecake Bars! This dessert blends Read Full Recipe


My Latest Drinks
-
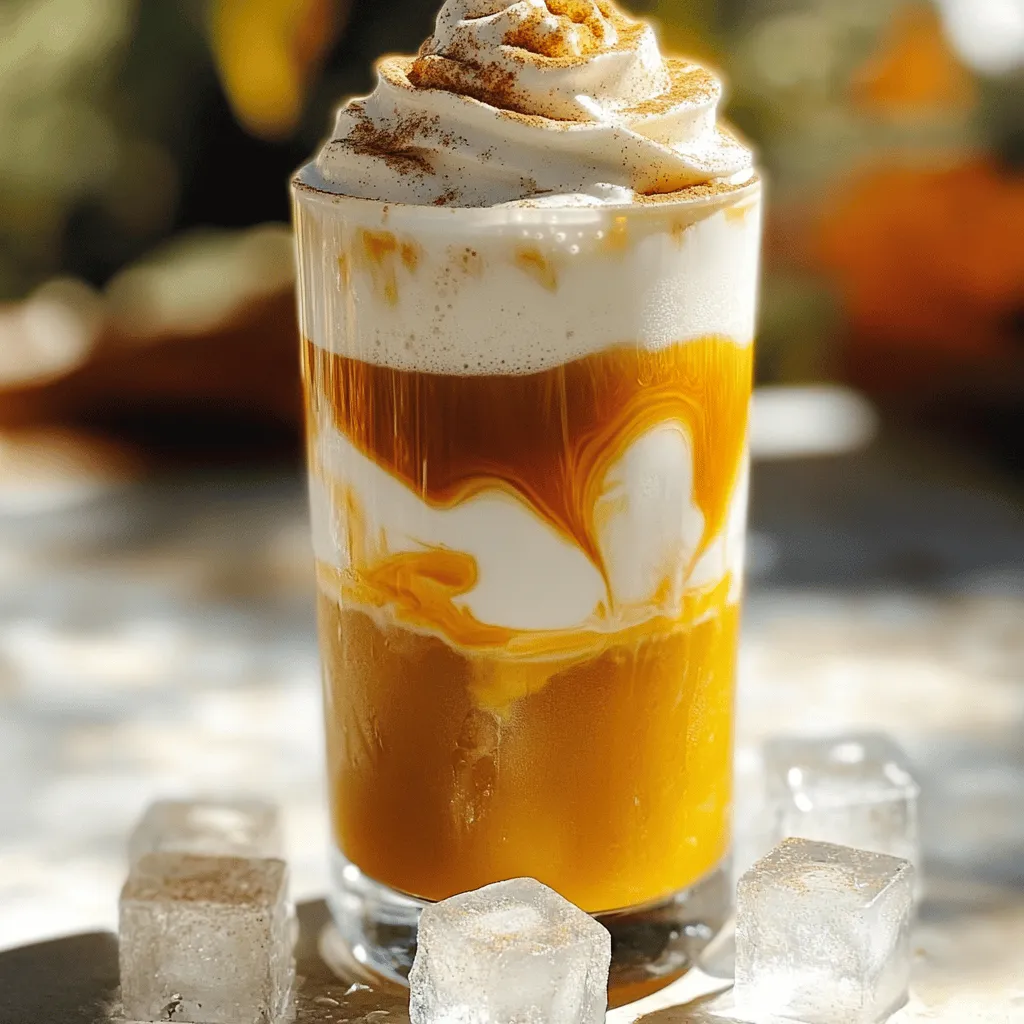
Spiced Pumpkin Lattes Slow Cooker Recipe Delight
Are you ready to warm up your chilly days with a cozy Spiced Pumpkin Latte? I’ve crafted the perfect slow Read Full Recipe -
Peanut Butter Chocolate Protein Shake Tasty Delight
Satisfy your cravings with a Peanut Butter Chocolate Protein Shake! This tasty delight is not only delicious but also healthy. Read Full Recipe -
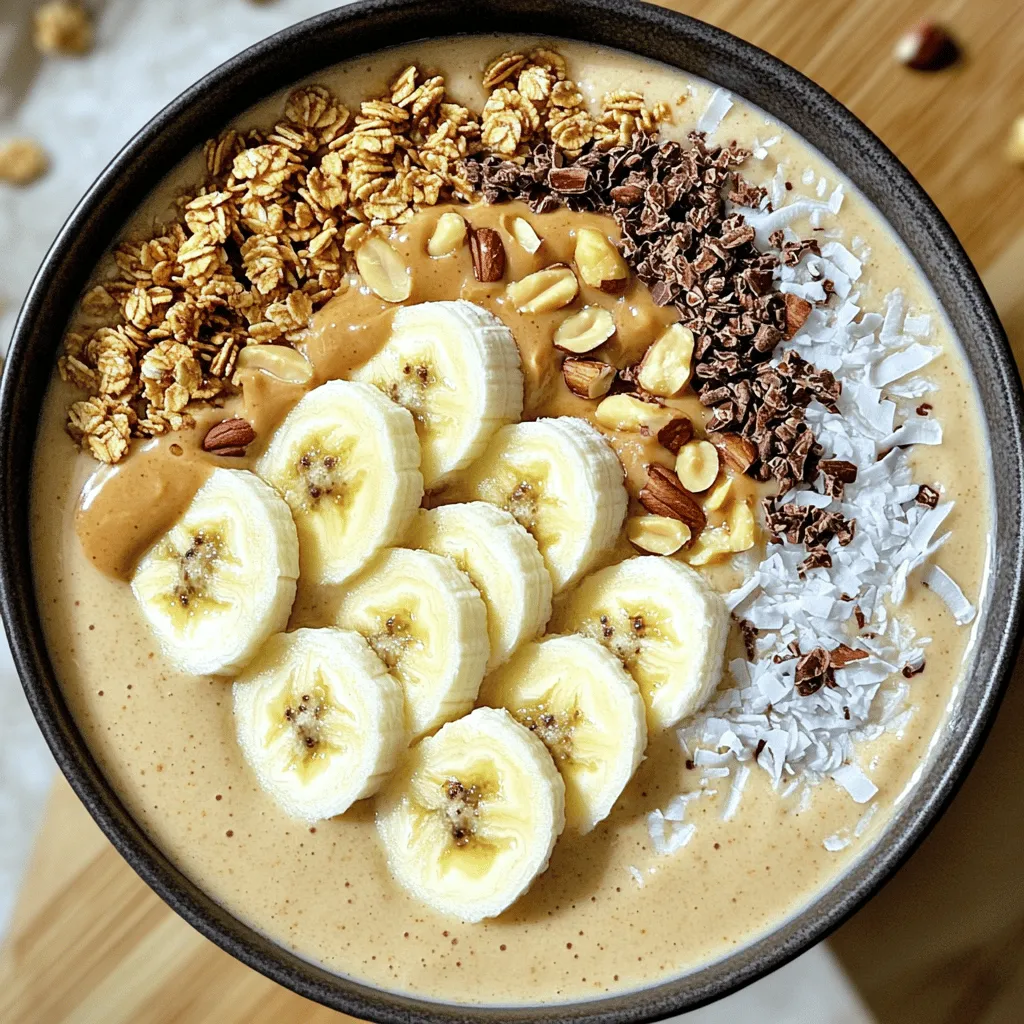
Peanut Butter Banana Smoothie Bowl Simple and Tasty
Looking for a quick, tasty treat? The Peanut Butter Banana Smoothie Bowl is your answer! Packed with ripe bananas and Read Full Recipe -
Pumpkin Cream Cold Brew Copycat Simple and Tasty Recipe
Craving a Pumpkin Cream Cold Brew but want to make it at home? You’re in the right place! I’ll show Read Full Recipe -
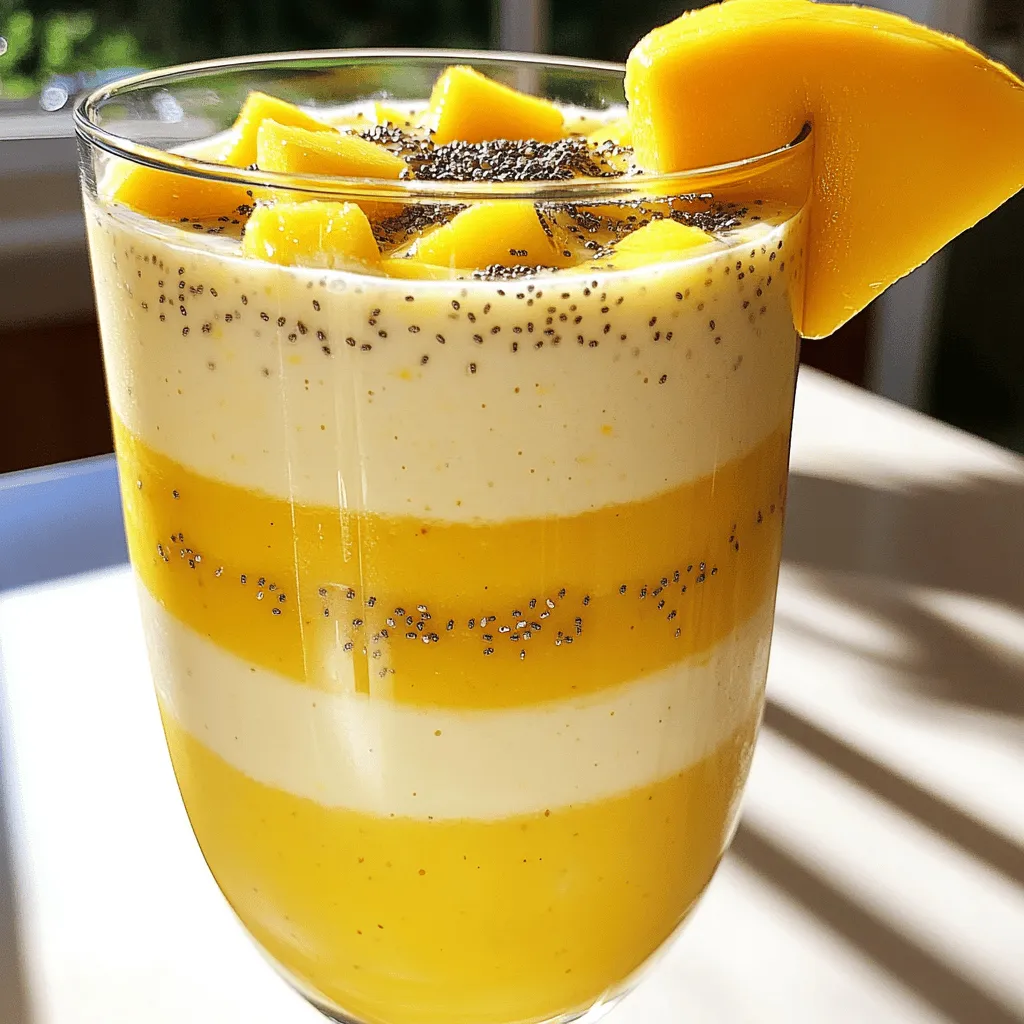
Pineapple Mango Smoothie Refreshing and Nutritious Drink
Looking for a tasty and healthy drink? A Pineapple Mango Smoothie might be just what you need! Packed with fresh Read Full Recipe -
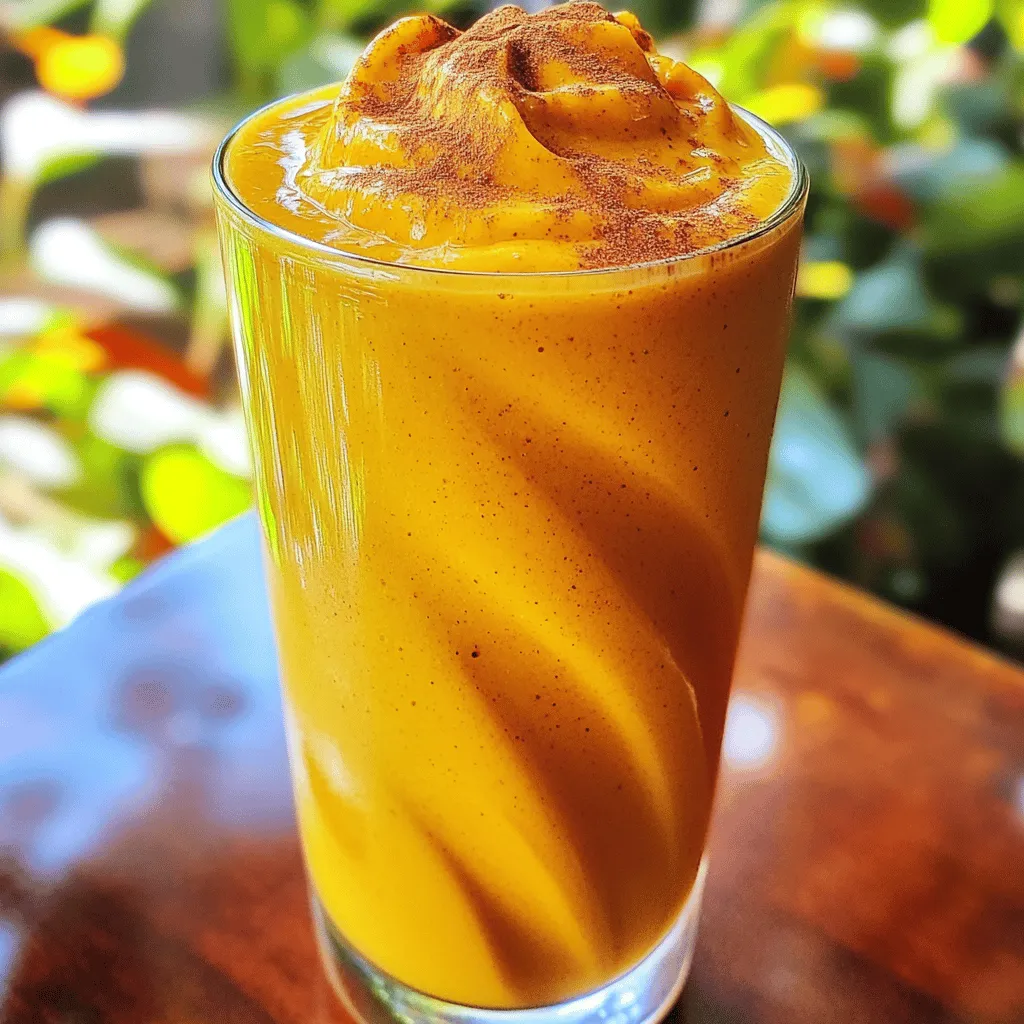
Pumpkin Spice Protein Shake Nutritional Power Boost
Are you craving a delicious way to boost your nutrition? Look no further than this Pumpkin Spice Protein Shake! Packed Read Full Recipe


hey,
i’m !
I’m so happy you’re here!
I love creating dishes that bring joy to the table. I hope they bring the same joy to yours. Let’s enjoy this flavorful journey together.


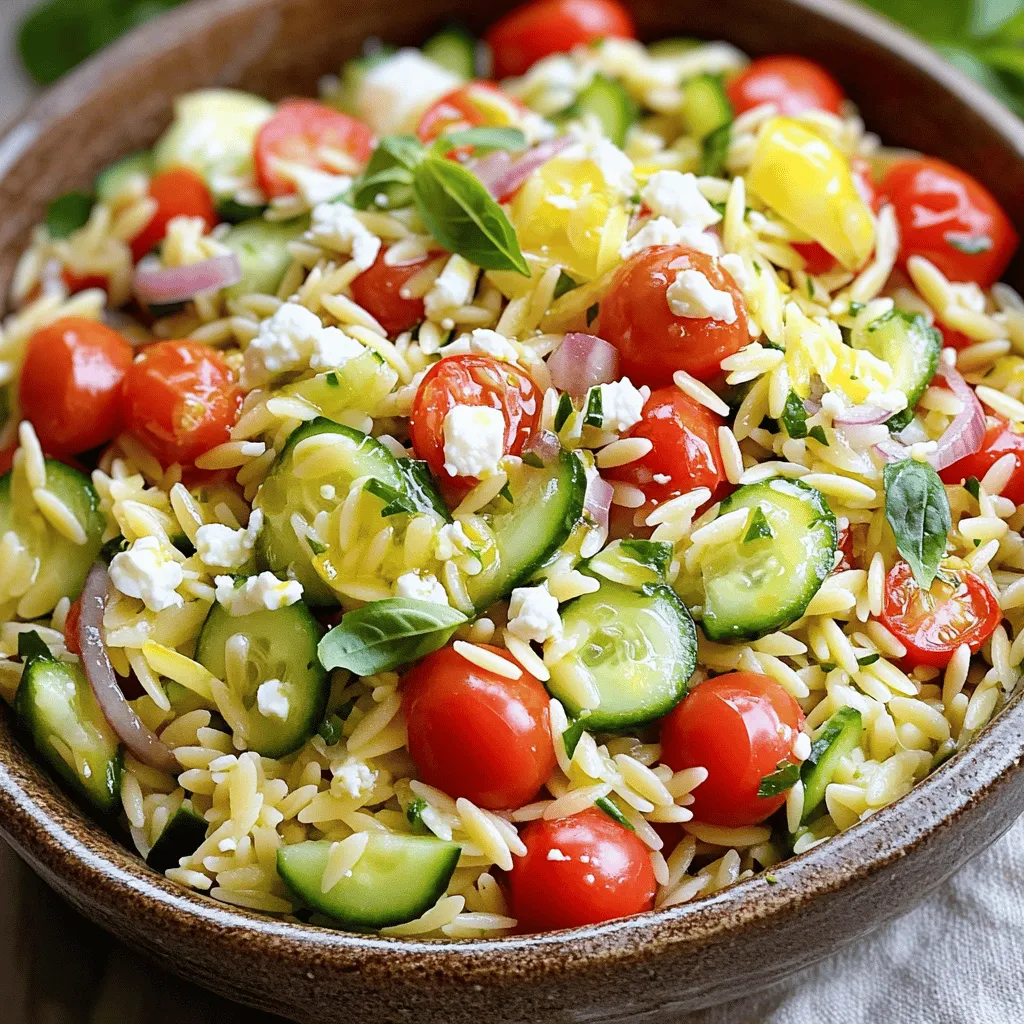
Lemon Basil Orzo Salad Fresh and Flavorful Dish
Looking for a dish that bursts with flavor and freshness? You’re in the right spot! This Lemon Basil Orzo Salad is easy to make…