


Latest & Greatest
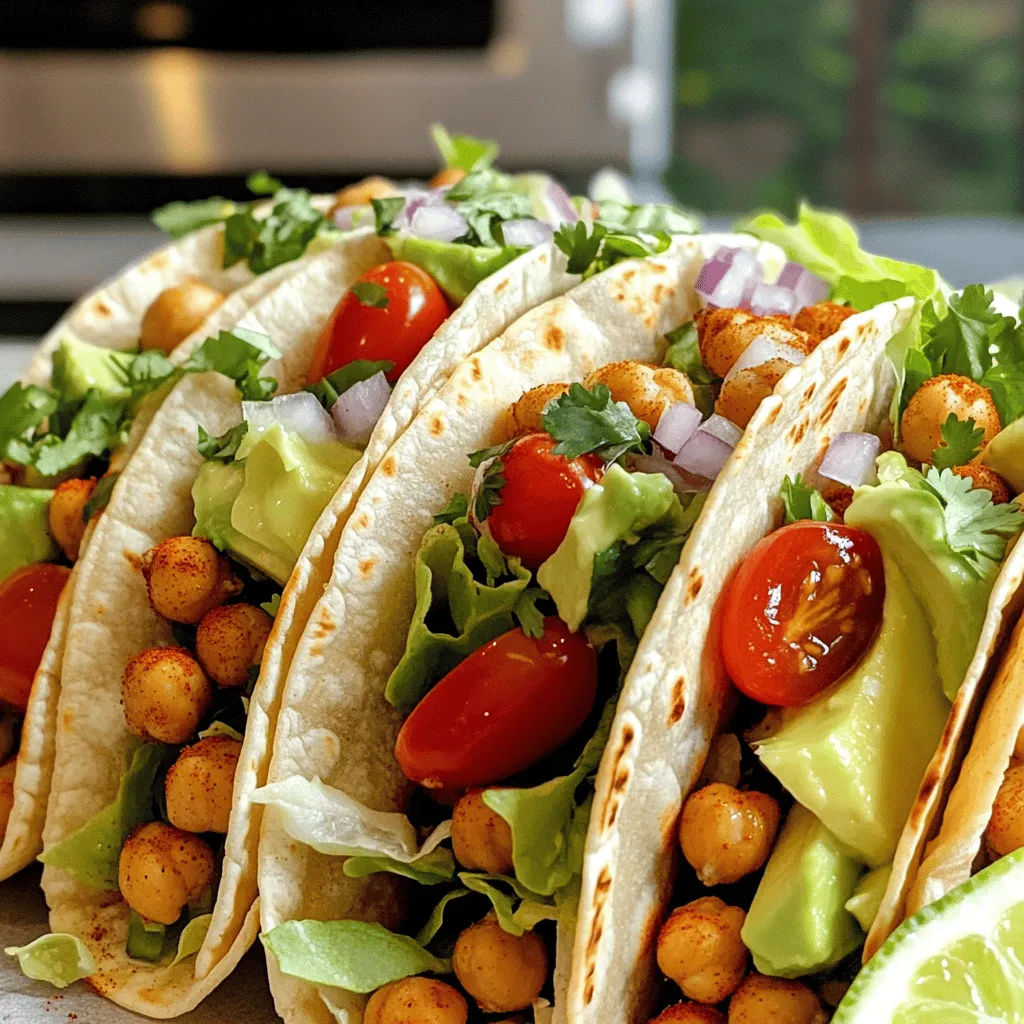
Crispy Chickpea Tacos Flavorful and Satisfying Meal
If you’re craving a meal that’s both flavorful and satisfying, look no further than crispy chickpea tacos! These easy-to-make tacos
Read more…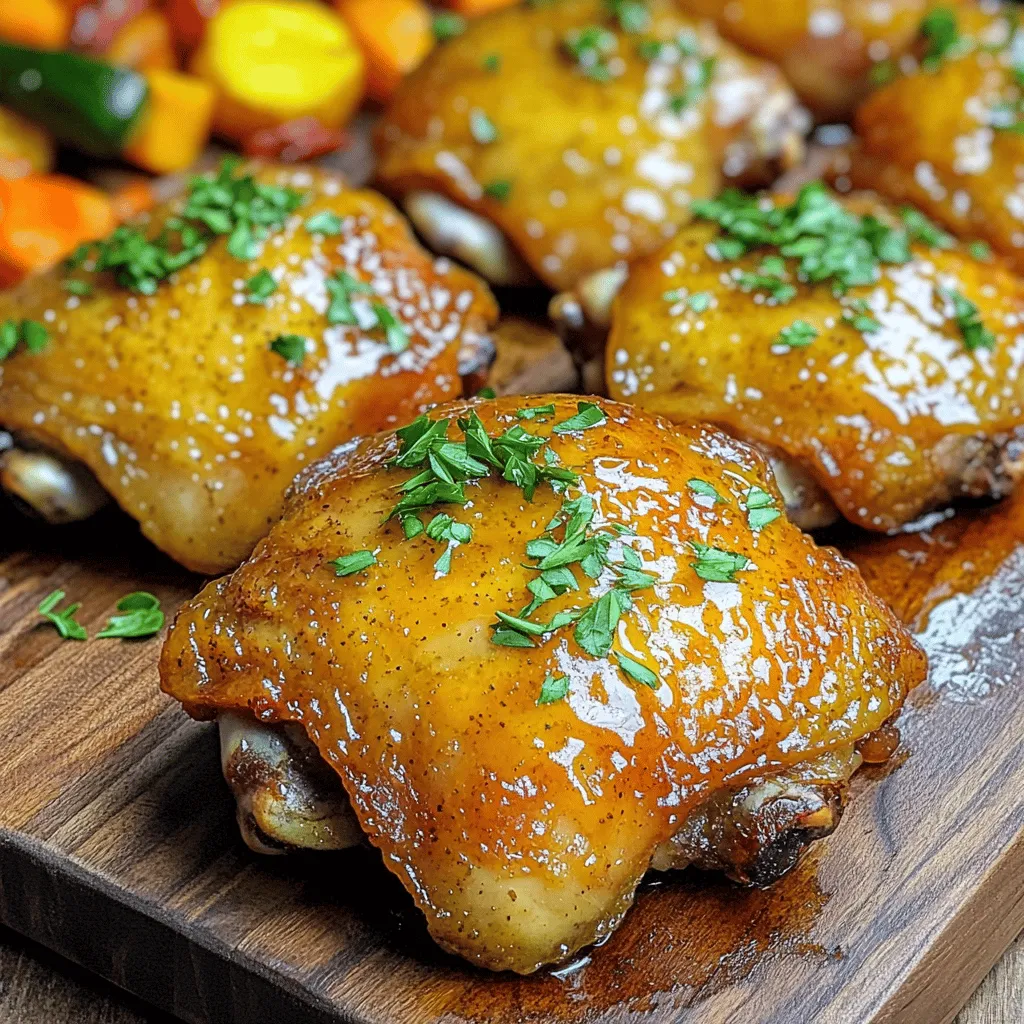
Honey Mustard Chicken Thighs Savory and Simple Dish
Are you ready to elevate your dinner game? Let me introduce you to my easy and tasty Honey Mustard Chicken
Read more…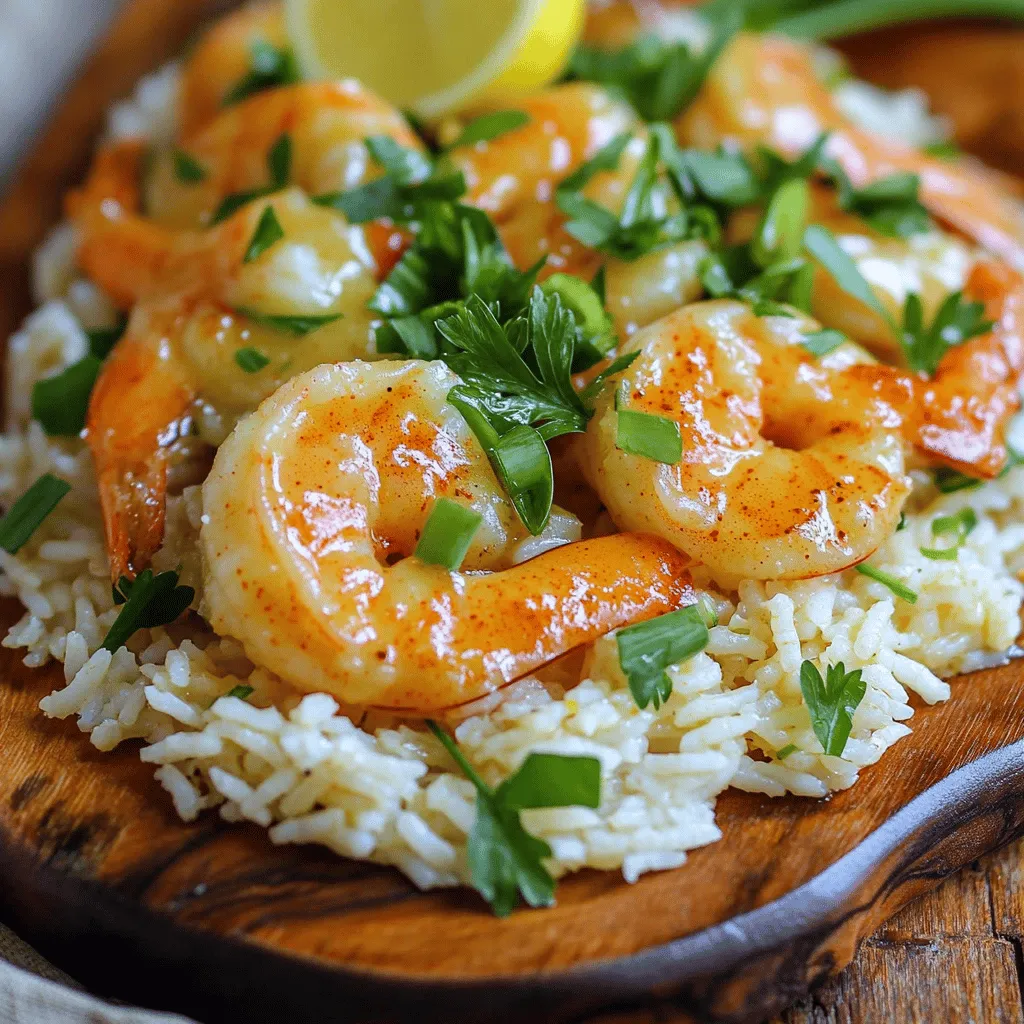
Garlic Butter Shrimp and Rice Flavorful Weeknight Meal
Craving a tasty weeknight meal? Look no further! Garlic Butter Shrimp and Rice combines tender shrimp, fluffy jasmine rice, and
Read more…
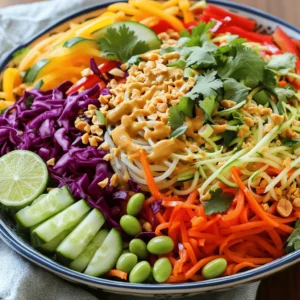
Thai Peanut Noodle Salad Flavorful and Nutritious Treat
If you crave a dish that’s packed with flavor and nutrition, look no further! Thai Peanut Noodle Salad is a
Read more…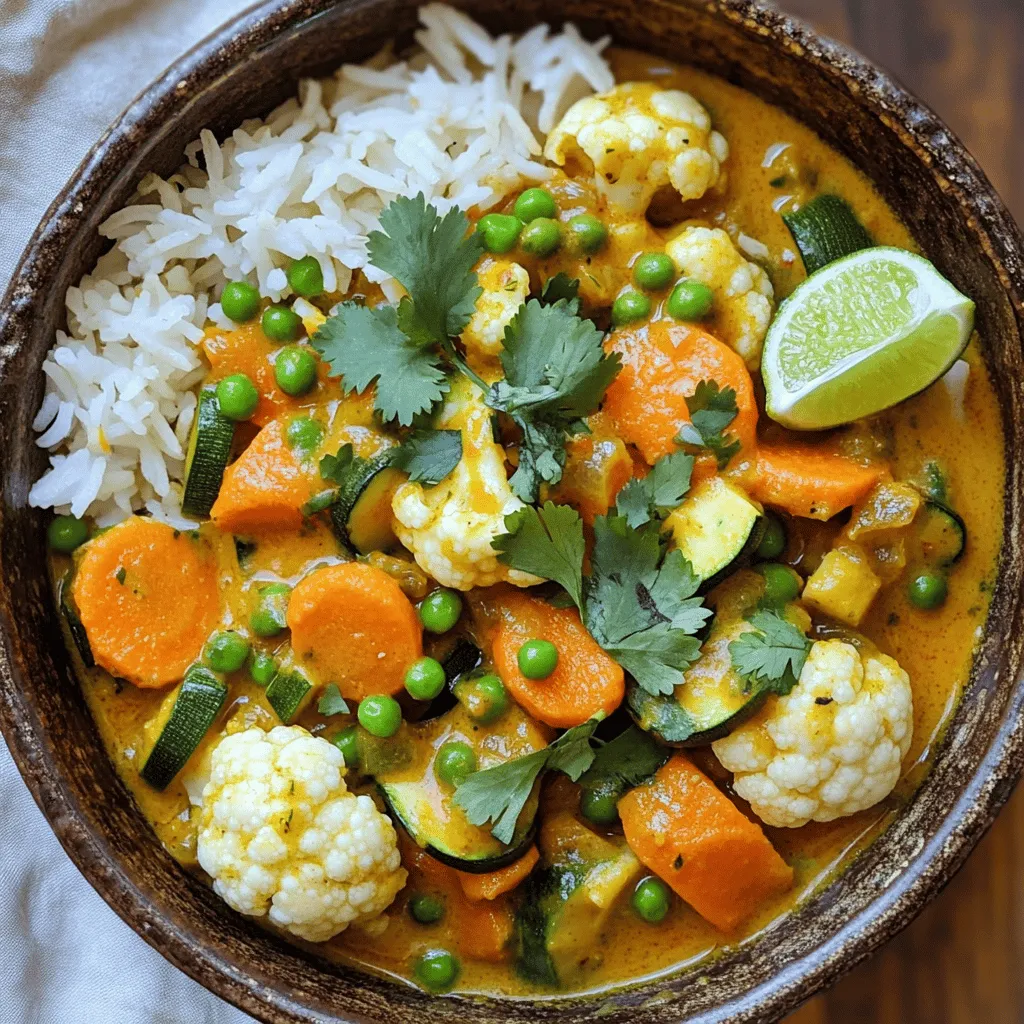
Easy Vegetable Curry Quick and Flavorful Recipe
Craving a quick, tasty meal? You’re in the right place! This Easy Vegetable Curry recipe is simple to make and
Read more…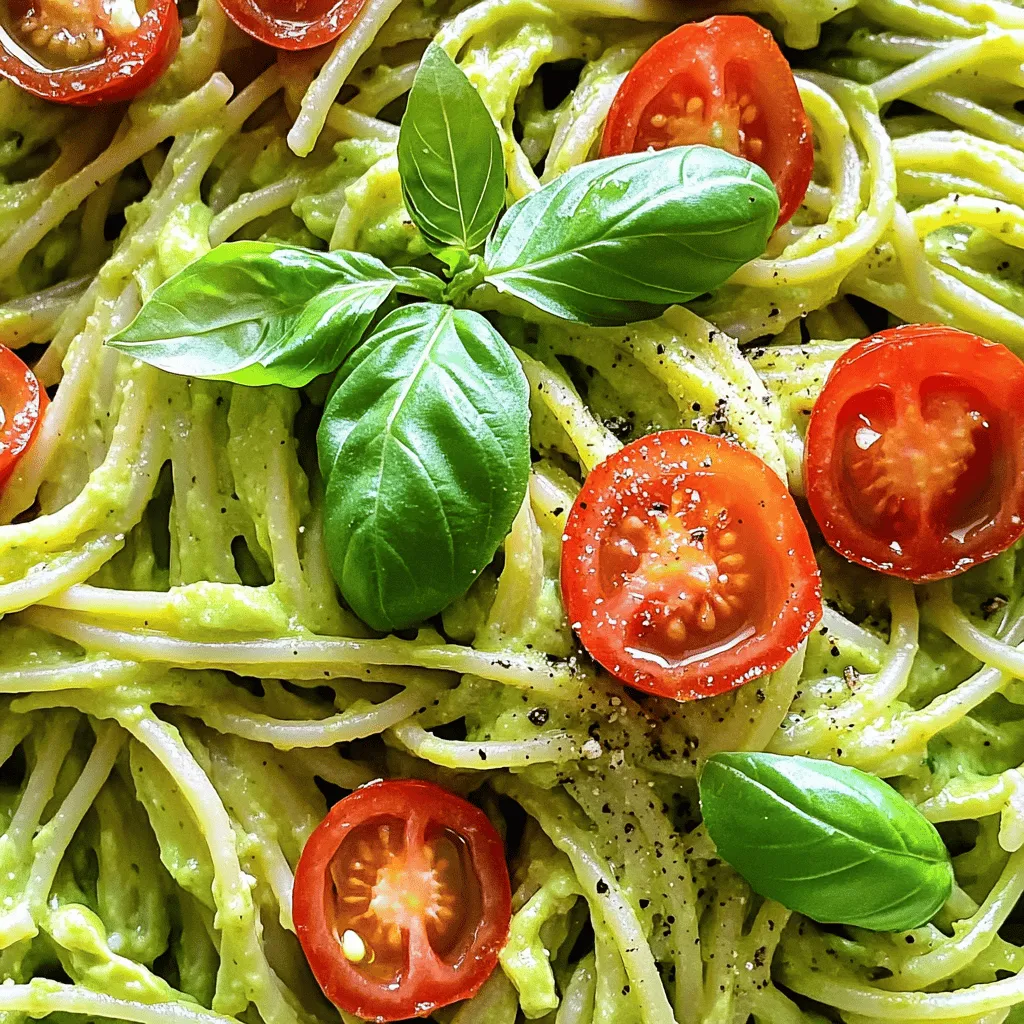
Creamy Avocado Pasta Simple and Flavorful Dish
If you’re looking for a quick, healthy meal, I have just the thing for you: creamy avocado pasta. This dish
Read more…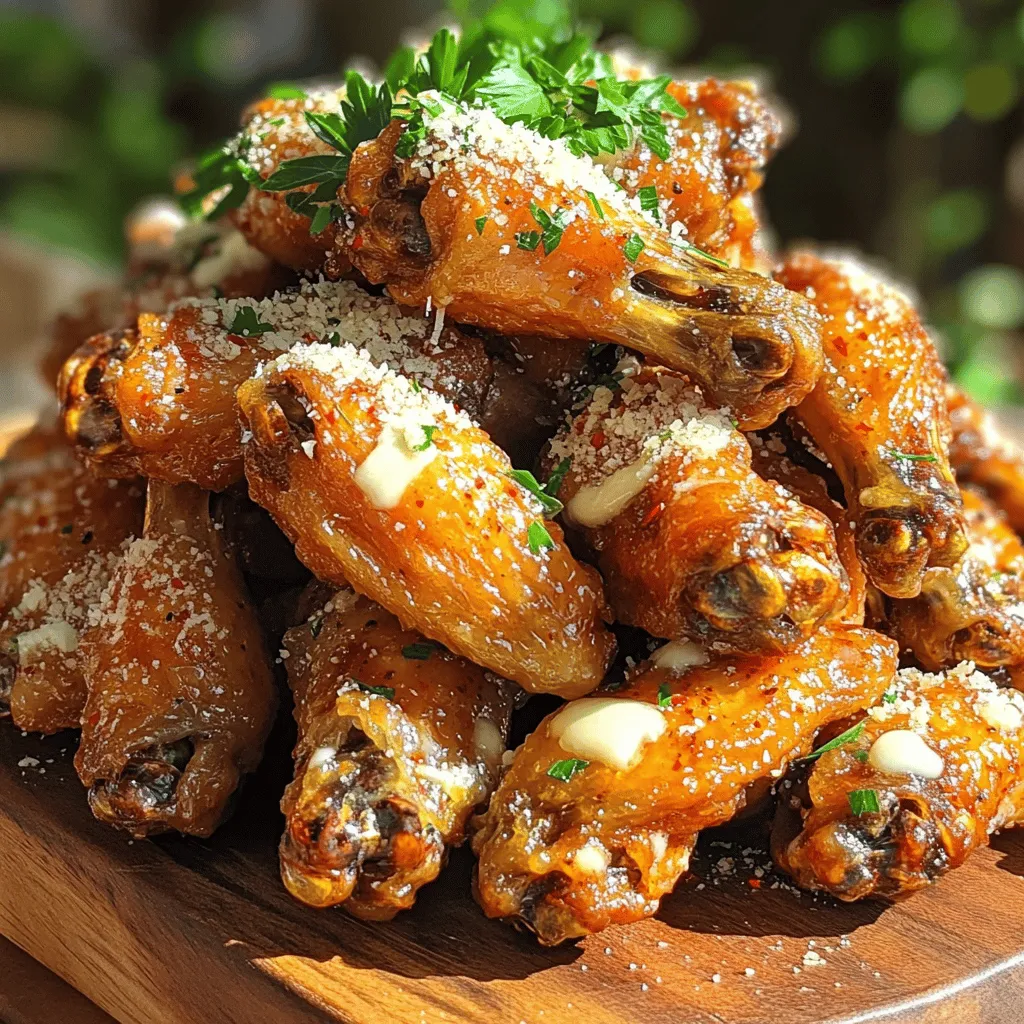
Homemade Garlic Parmesan Wings Simple and Delicious Meal
Craving a flavor-packed meal that’s easy to whip up? Look no further! Homemade Garlic Parmesan Wings are not only simple
Read more…
Spinach & Feta Stuffed Peppers Flavorful Health Boost
Looking for a delicious way to boost your health? Try my Spinach & Feta Stuffed Peppers! These vibrant, colorful peppers
Read more…browse recipes


. First, husk the corn. Remove all the green leaves and silk. This step helps the corn cook evenly. Next, clean the corn under running water. This removes any dirt or debris. Now, let's make the chili lime seasoning. In a small bowl, mix together: - 3 tablespoons olive oil - 2 tablespoons lime juice - 1 teaspoon chili powder - 1/2 teaspoon smoked paprika - 1/4 teaspoon cayenne pepper (optional) - Salt and pepper to taste Whisk these ingredients well until combined. This blend adds a zesty kick to your corn. Before grilling, preheat your grill to medium-high heat. A hot grill gives that nice char and flavor. Once ready, place the corn directly on the grill. Cook the corn for about 10 to 15 minutes. Turn it occasionally so all sides get nice and blistered. You want that beautiful golden color and a slight char. After grilling, remove the corn from the grill and let it cool for a minute. This helps you avoid burns. Now, sprinkle the grilled corn with crumbled feta cheese or cotija cheese. Add some chopped cilantro on top for freshness. For serving, place lime wedges on the side. A squeeze of lime juice adds brightness and enhances the flavors. Enjoy your chili lime grilled corn as a tasty side or snack! For the full recipe, check out the specific instructions and ingredients. To get great grill marks on your corn, you need to know the right heat. Start with medium-high heat. This allows the corn to sear quickly. Watch the corn closely to avoid overcooking. If it cooks too long, it can dry out. For a nice smoky flavor, soak the corn in water for 30 minutes before grilling. This helps steam the corn while it cooks. You can also add wood chips to your grill for extra smoke. This adds depth to the flavor. You can easily boost the flavor of your grilled corn. Try adding spices like garlic powder or cumin. Fresh herbs, like basil or parsley, can also make a difference. For a fresh twist, add jalapeños for heat. Pair your corn with grilled meats or a fresh salad. It goes great with tacos or burgers. The zesty flavors complement many summer dishes. Sometimes, corn can burn if you leave it on too long. If this happens, move it to a cooler part of the grill. You can also wrap it in foil to slow cooking. Different grills can change how your corn cooks. Gas grills heat up quickly. Charcoal grills can take longer but give a great smoky taste. Adjust your cooking time based on your grill type. Always check the corn for doneness. It should be tender but not mushy. For the full recipe, check the details above. Enjoy your grilling! {{image_2}} You can make this dish even spicier by adding jalapeños. Just chop fresh jalapeños and mix them into your chili lime seasoning. You can also try using different spices. For example, smoked paprika adds depth. Just remember, start small when adding heat! For a hearty twist, add black beans or diced avocado. Both bring a creamy texture and boost flavor. You can swap out feta for cheddar cheese. This change gives a rich, melty topping that pairs well with the lime and chili. To balance flavors, try adding honey or agave syrup. This sweetness pairs nicely with lime's tartness. You can also switch lime juice for other citrus, like orange or lemon. Each option gives a unique taste, perfect for summer corn. For the complete recipe, check out the [Full Recipe]. After you enjoy your chili lime grilled corn, store any leftovers in the fridge. Place the corn in an airtight container. It stays fresh for about three days. When you want to reheat, use the grill or stove. This keeps the flavor strong and the corn juicy. Avoid the microwave, as it can make the corn rubbery. If you want to save grilled corn for later, freezing is a great option. First, let the corn cool completely. Wrap each ear tightly in plastic wrap, then place them in a freezer bag. This helps prevent freezer burn. You can store it for up to six months. When you're ready to eat, thaw the corn in the fridge overnight. If you're in a hurry, run it under cold water. Once thawed, grill it again to warm and bring back that smoky flavor. Enjoy your zesty treat anytime! Grilling corn usually takes about 10 to 15 minutes. This time can change based on grill heat and corn size. I recommend checking the corn often. Turn it every few minutes until you see nice char marks. The goal is to cook it through while keeping it juicy. You can use frozen corn, but fresh corn tastes better. Frozen corn is convenient and saves time. It cooks faster, but it may lack the crunch of fresh corn. If you choose frozen, thaw it first and drain any excess water. This helps keep your dish from getting too wet. You can add many tasty toppings to chili lime grilled corn. Here are some favorites: - Crumbled queso fresco or cotija cheese - Chopped green onions - Diced avocado - Sliced jalapeños for a kick - Drizzle of hot sauce for extra spice These toppings enhance the flavor and make your dish more exciting. Feel free to mix and match! For the full recipe, check out the complete guide. Grilling corn is simple and fun. We covered fresh ingredients, step-by-step grilling, and tasty variations. You can adapt this dish with spices, cheese, or special toppings. Don’t forget about storage tips for leftovers, too. Enjoying your corn comes down to what flavors you love. With the right techniques, you can make every bite amazing. Keep these tips in mind, and your grilled corn will shine at any meal.](https://soyumrecipes.com/wp-content/uploads/2025/07/1328f8b7-f19b-42e1-afe9-3b60000d97e2.webp)
Chili Lime Grilled Corn Zesty Flavor for Summer Fun
Ready to turn your summer barbecues into flavor-packed feasts? Chili Lime Grilled Corn is the perfect addition to your outdoor fun. With just a…
My Latest Desserts

No-Bake Mocha Cheesecake Bars Easy and Delicious Treat
Craving a sweet treat that’s easy and packed with flavor? You’ll love my No-Bake Mocha Cheesecake Bars! These simple bars Read Full Recipe-
Fluffy Apple Pie Cinnamon Rolls Easy and Delicious Treat
Are you ready to elevate your baking game? Fluffy Apple Pie Cinnamon Rolls are a delightful way to combine the Read Full Recipe -
Caramel Pecan Chocolate Chip Blondies Delightful Treat
Are you ready to indulge in a rich, tasty treat? I present to you the ultimate dessert: Caramel Pecan Chocolate Read Full Recipe -
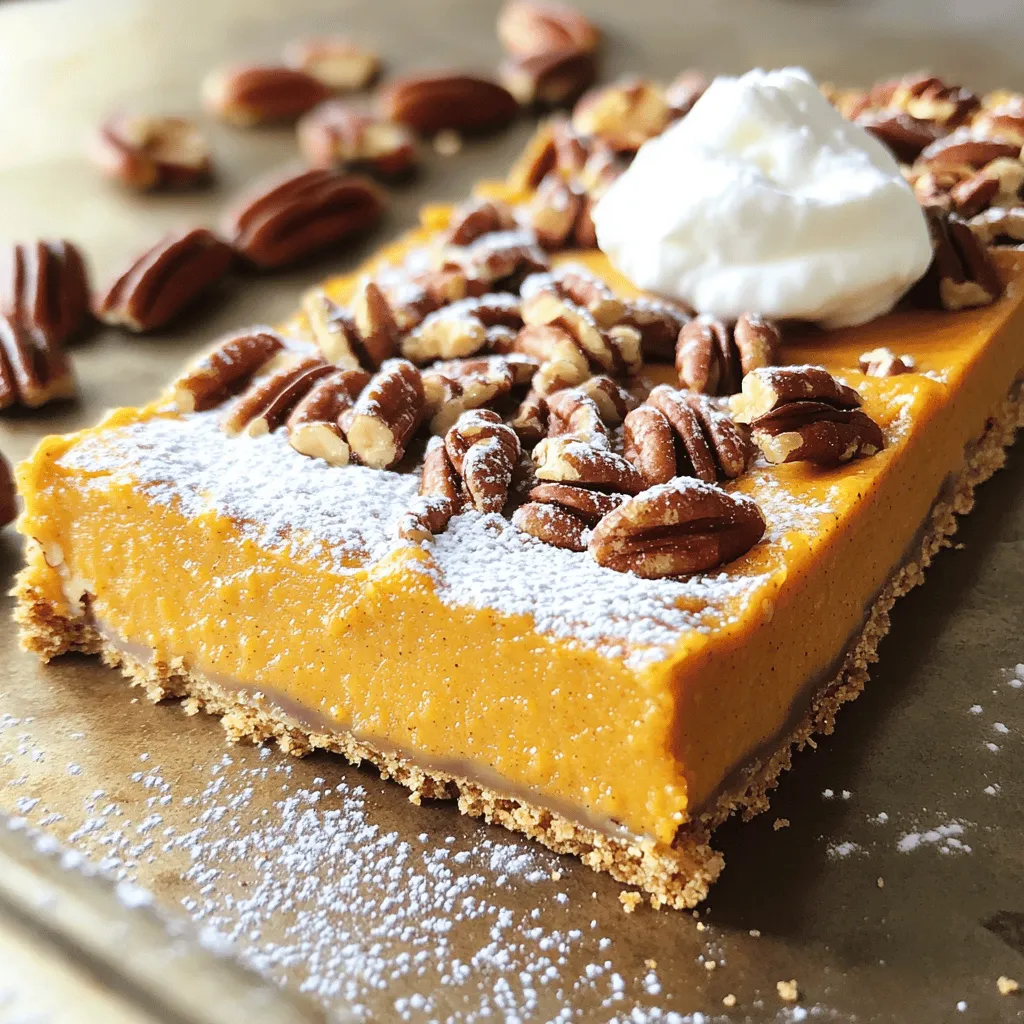
Irresistible Pumpkin Pecan Pie Bars Easy and Delicious
Looking for a sweet treat that combines two fall favorites? You’re in the right place! These Pumpkin Pecan Pie Bars Read Full Recipe -
No-Bake Chocolate Hazelnut Cheesecake Cups Delight
Love dessert but don’t want to bake? You’re in the right place! These No-Bake Chocolate Hazelnut Cheesecake Cups are easy, Read Full Recipe -
Apple Cinnamon Coffee Cake Irresistible and Tasty Recipe
Are you ready for a delicious treat that combines the warm flavors of apple and cinnamon? This Apple Cinnamon Coffee Read Full Recipe


My Latest Drinks
-
Peanut Butter Chocolate Protein Shake Tasty Delight
Satisfy your cravings with a Peanut Butter Chocolate Protein Shake! This tasty delight is not only delicious but also healthy. Read Full Recipe -
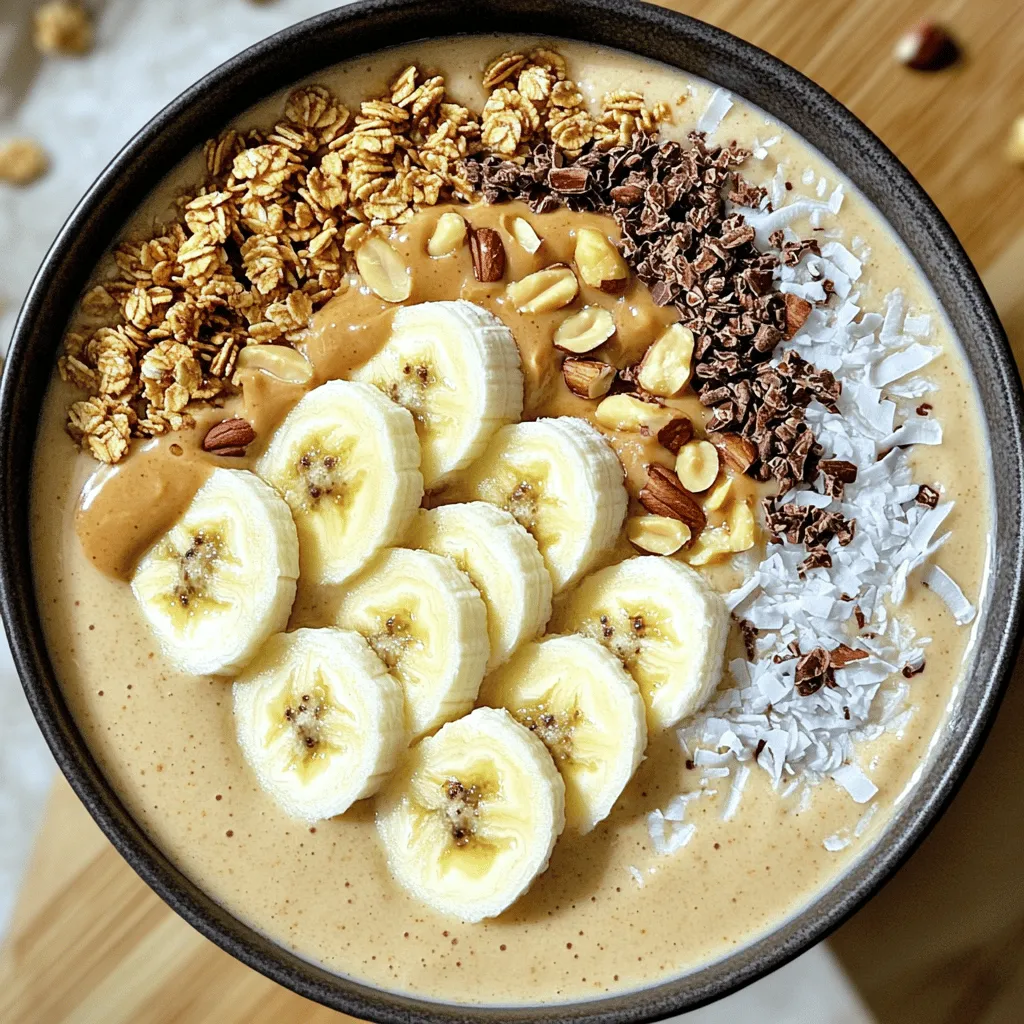
Peanut Butter Banana Smoothie Bowl Simple and Tasty
Looking for a quick, tasty treat? The Peanut Butter Banana Smoothie Bowl is your answer! Packed with ripe bananas and Read Full Recipe -
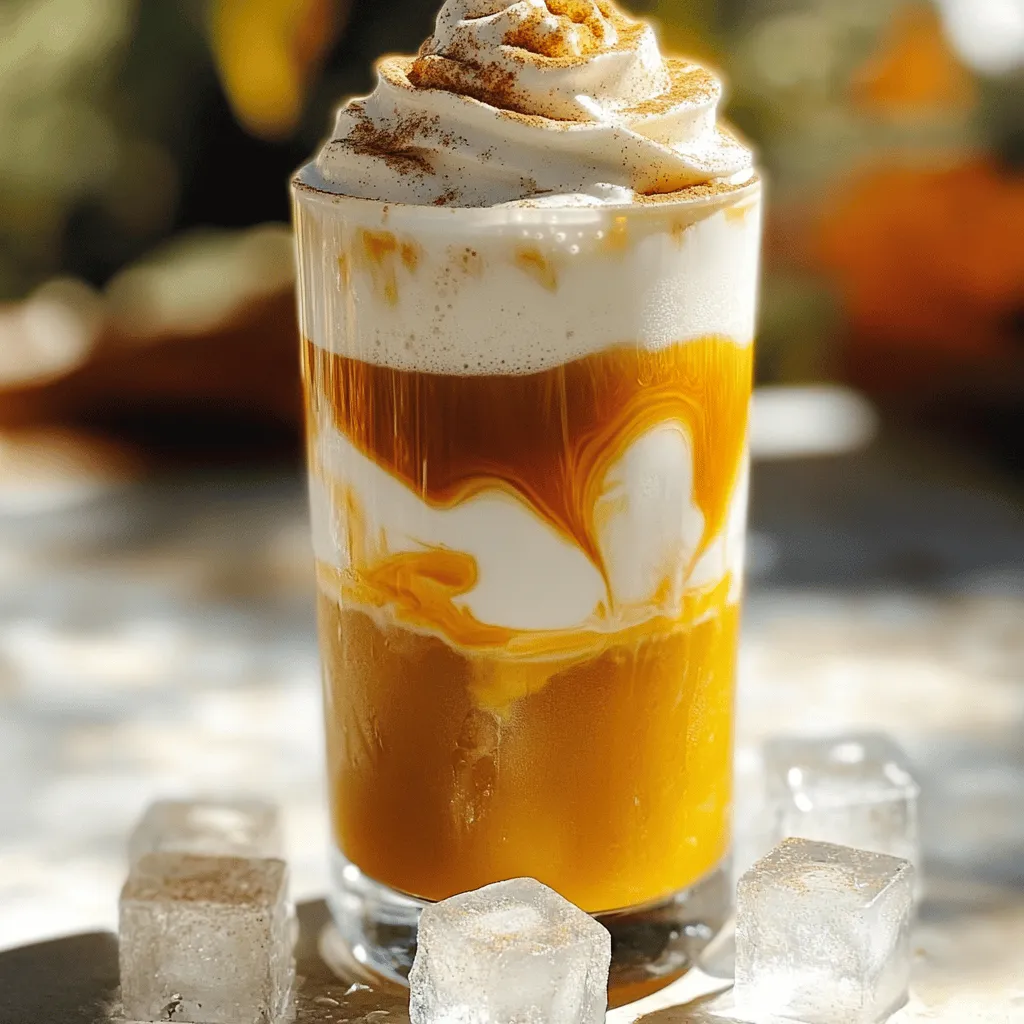
Pumpkin Cream Cold Brew Copycat Simple and Tasty Recipe
Craving a Pumpkin Cream Cold Brew but want to make it at home? You’re in the right place! I’ll show Read Full Recipe -
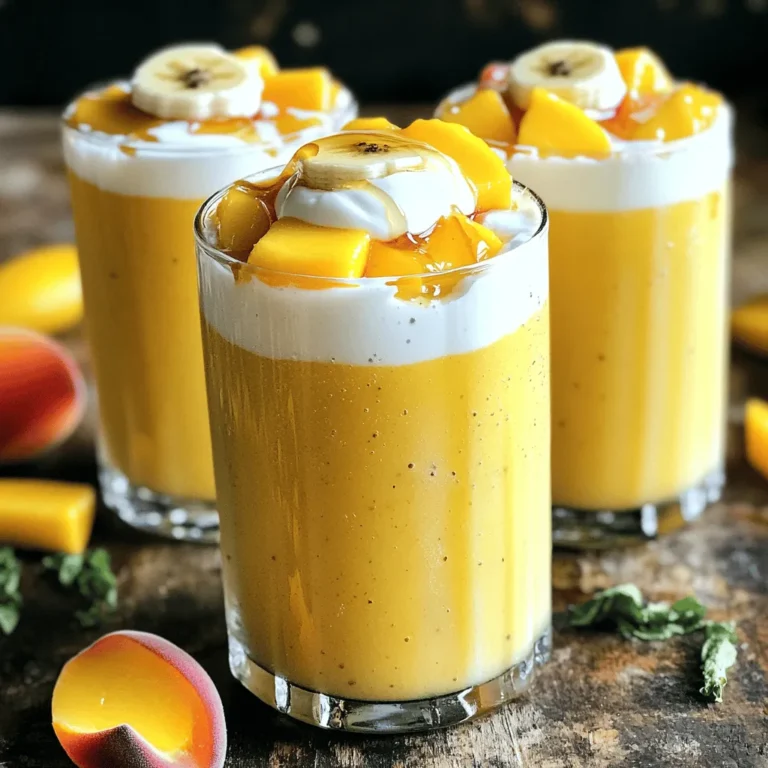
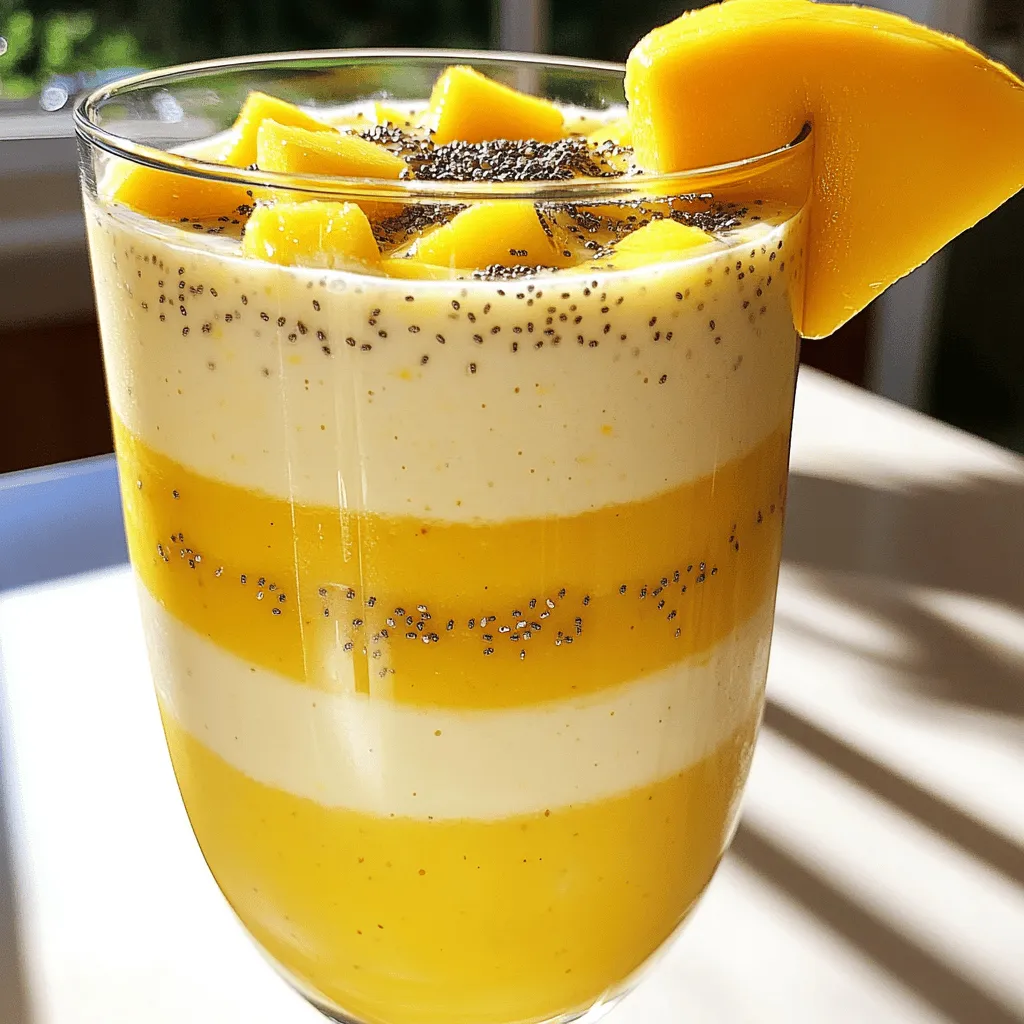
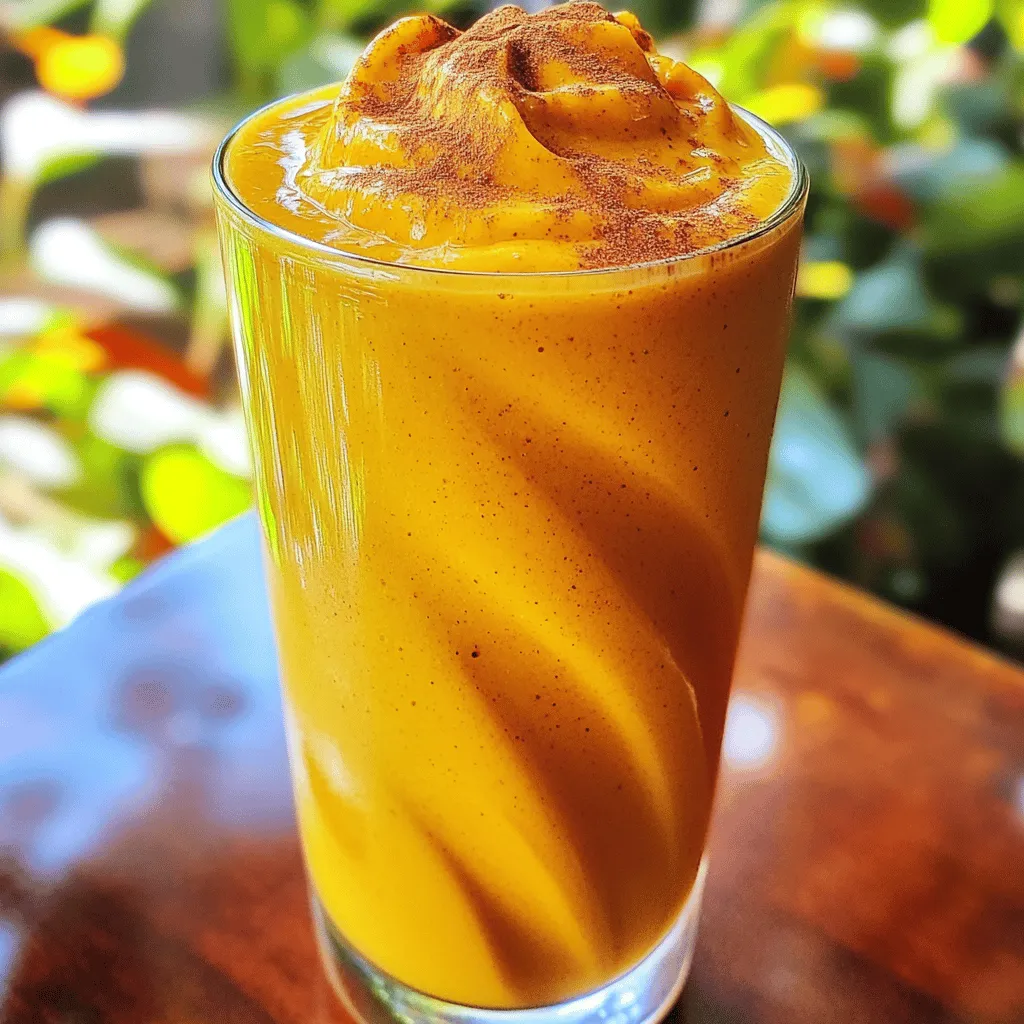
Pineapple Mango Smoothie Refreshing and Nutritious Drink
Looking for a tasty and healthy drink? A Pineapple Mango Smoothie might be just what you need! Packed with fresh Read Full Recipe -
Pumpkin Spice Protein Shake Nutritional Power Boost
Are you craving a delicious way to boost your nutrition? Look no further than this Pumpkin Spice Protein Shake! Packed Read Full Recipe -
Whipped Hot Chocolate Blissfully Creamy Delight
Craving comfort on a chilly day? Whipped hot chocolate is your answer! This blissfully creamy delight combines rich cocoa with Read Full Recipe


hey,
i’m !
I’m so happy you’re here!
I love creating dishes that bring joy to the table. I hope they bring the same joy to yours. Let’s enjoy this flavorful journey together.

. Raspberry lemonade bars are a tasty treat. We explored the key ingredients, step-by-step instructions, and helpful tips. Remember to bake the crust until golden and chill the bars for the best taste. You can also try fruit swaps for new flavors. Store extras in the fridge or freeze them for later. With these tips, your bars will impress anyone. Enjoy your baking and the delicious results!](https://soyumrecipes.com/wp-content/uploads/2025/05/6009926e-c21c-48e9-a3ff-cc433bd1b1ec-300x300.webp)

Honey Mustard Chicken Thighs Easy and Flavorful Meal
Looking for a quick and tasty dinner? Honey Mustard Chicken Thighs are the answer! This easy meal is packed with flavor and needs just…
![- 4 chicken thighs, bone-in and skin-on - 1/4 cup honey - 1/4 cup Dijon mustard - 2 tablespoons apple cider vinegar - 2 cloves garlic, minced - 1 teaspoon smoked paprika - 1 teaspoon salt - 1/2 teaspoon black pepper - 2 tablespoons olive oil - Fresh thyme sprigs for garnish You need these simple ingredients for honey mustard chicken thighs. Each item brings its own flavor. The chicken thighs give you juicy meat and crispy skin. Honey adds sweetness, while Dijon mustard provides a nice tang. Apple cider vinegar enhances the sauce's flavor. Garlic adds depth with its strong taste, and smoked paprika brings warmth. Salt and pepper season the dish just right. Olive oil helps the chicken brown beautifully. Fresh thyme adds a nice herbal note for garnish. - Additional spices for flavor - Alternative sweeteners Feel free to experiment with optional ingredients. You can add spices like cayenne for heat or rosemary for a fresh taste. If you want to adjust the sweetness, try maple syrup or agave nectar. Each choice can create a new twist on this classic dish. This flexibility makes it fun and exciting to cook. Don't forget to check the [Full Recipe] for detailed steps! - Preheat the oven to 400°F (200°C). - In a bowl, whisk together the honey, Dijon mustard, apple cider vinegar, minced garlic, smoked paprika, salt, and black pepper. Mix until it is smooth and creamy. This sauce is the star of the dish. - Pat the chicken thighs dry with paper towels. This will help them get crispy. - Heat 2 tablespoons of olive oil in an oven-safe skillet over medium-high heat. - Once the oil is hot, place the chicken thighs skin-side down in the skillet. - Sear the chicken for about 5-7 minutes. You want the skin to be golden brown and crispy. - Flip the chicken thighs over and pour the honey mustard sauce over them. Make sure they are well coated. - Transfer the skillet to your preheated oven. Bake for about 25-30 minutes. The chicken should reach an internal temperature of 165°F (74°C). - Once done, take the skillet out of the oven. Let the chicken rest for 5 minutes. This helps keep it juicy. - Drizzle some of the sauce from the skillet over the thighs before serving. - Garnish with fresh thyme sprigs for added flavor and a nice look. You can find the full recipe for this delicious dish to make it easily at home. Enjoy your meal! To get crispy skin on chicken thighs, start by drying them well with paper towels. This helps the skin brown nicely. Use medium-high heat when searing the thighs. Place them skin-side down in a hot skillet. Cook for about 5-7 minutes until the skin is golden brown. This step adds flavor and texture. Ensure your chicken is cooked thoroughly by using a meat thermometer. The internal temperature should reach 165°F (74°C). This guarantees the chicken is safe to eat. After baking, let the chicken rest for 5 minutes. This keeps the juices inside and makes the meat tender. Adjust the sweetness or tanginess of the sauce to fit your taste. If you like it sweeter, add more honey. For more tang, increase the apple cider vinegar. Taste as you mix to find the perfect balance for you. When coating the chicken, pour the sauce evenly over the thighs. Make sure each piece is well covered. This helps the flavors soak in while cooking. Use a spoon to drizzle extra sauce over the thighs when serving. It adds a nice touch and enhances the dish. For the full recipe, check out the details above. {{image_2}} You can play with the mustard type in this recipe. Dijon mustard gives a nice kick, but you can also try yellow mustard or whole grain mustard. Each type brings its own flavor. If you want a milder taste, yellow mustard works well. Whole grain mustard adds texture and depth. You might also swap chicken thighs for chicken breasts. Chicken breasts cook faster and are leaner. Just be careful not to overcook them. They can dry out more quickly than thighs. Adjust the cooking time to suit the breasts. Adding herbs and spices can make a big difference. Fresh herbs like rosemary or parsley can brighten up the dish. You can also use dried herbs such as oregano or thyme. A pinch of red pepper flakes adds heat if you like spice. You can modify the sauce for different flavors too. Try adding soy sauce for a savory twist. A splash of orange juice can give a sweet and zesty note. Experiment with what you have on hand to keep it fresh and exciting. For the full recipe, check out the details above. To store honey mustard chicken thighs, let them cool first. Place the chicken in an airtight container. This way, it stays fresh longer. You can keep it in the fridge for up to 3 days. When you want to eat it again, just reheat gently. If you have leftovers, freezing is a great option. Wrap each chicken thigh tightly in plastic wrap. Then, place them in a freezer bag. This helps to keep the flavor and moisture. You can freeze them for up to 3 months. When you're ready to enjoy, take the chicken out of the freezer. Let it thaw in the fridge overnight. To reheat, place it in a preheated oven at 350°F (175°C) for about 20-25 minutes. This will help keep it juicy and tasty. Can I use boneless chicken thighs for this recipe? Yes, you can use boneless chicken thighs. They cook faster than bone-in thighs. Watch the cooking time closely. Boneless thighs should reach 165°F (74°C) quickly. How can I tell when the chicken is fully cooked? Use a meat thermometer. Insert it into the thickest part of the thigh. It should read 165°F (74°C). The juices should run clear, not pink. What sides pair well with honey mustard chicken thighs? I love serving honey mustard chicken with: - Roasted vegetables - Garlic mashed potatoes - Steamed green beans - A fresh garden salad Can this recipe be made on the grill? Yes, grilling is a great option! Preheat your grill to medium heat. Marinate the chicken in the honey mustard sauce for at least 30 minutes. Grill for 6-8 minutes on each side until cooked through. How to adapt this recipe for an air fryer? To use an air fryer, preheat it to 375°F (190°C). Coat the chicken thighs with the sauce. Place them in the air fryer basket. Cook for about 20-25 minutes or until they reach 165°F (74°C). Enjoy the crispy skin! For the full recipe, check out the detailed cooking steps provided earlier. This recipe for honey mustard chicken thighs is simple and tasty. We covered the ingredients, preparation steps, and cooking tips that ensure success. You can vary flavors easily or store leftovers for later. Remember, cooking can be fun and creative! Whether you use chicken thighs or try new spices, enjoy making this dish. With easy steps and twists, you can impress family and friends. Happy cooking!](https://soyumrecipes.com/wp-content/uploads/2025/06/ec571894-33ea-4bd7-a92c-af58471f3fc9.webp)
