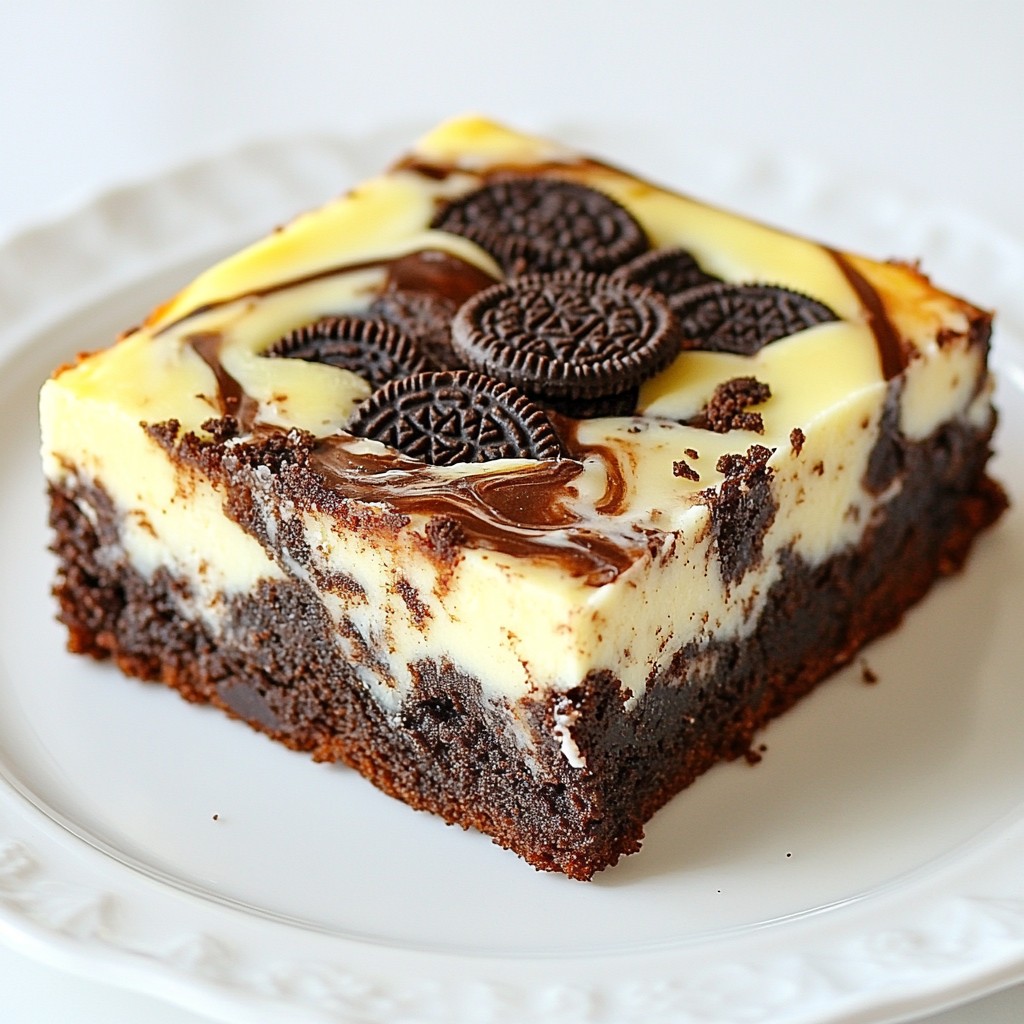
If you're craving a dessert that perfectly blends rich chocolate with creamy cheesecake, you're in for a treat! Oreo Cheesecake Brownies offer a delightful twist on classic brownies. With layers of brownie and cheesecake topped with crunchy Oreos, these treats are sure to impress. Whether you're baking for a party or simply indulging, my easy guide will help you create these irresistible brownies step by step. Let’s get started!
Why I Love This Recipe
- Decadent Flavor: The combination of rich chocolate brownies and creamy cheesecake creates a dessert that is absolutely irresistible.
- Easy to Make: This recipe is straightforward, making it perfect for both beginner and experienced bakers alike.
- Perfect for Any Occasion: Whether it's a family gathering or a party, these brownies are sure to impress and satisfy a crowd.
- Customizable: You can easily add your favorite toppings or swap out Oreos for other cookies to suit your taste.
Ingredients
Essential Ingredients for Oreo Cheesecake Brownies
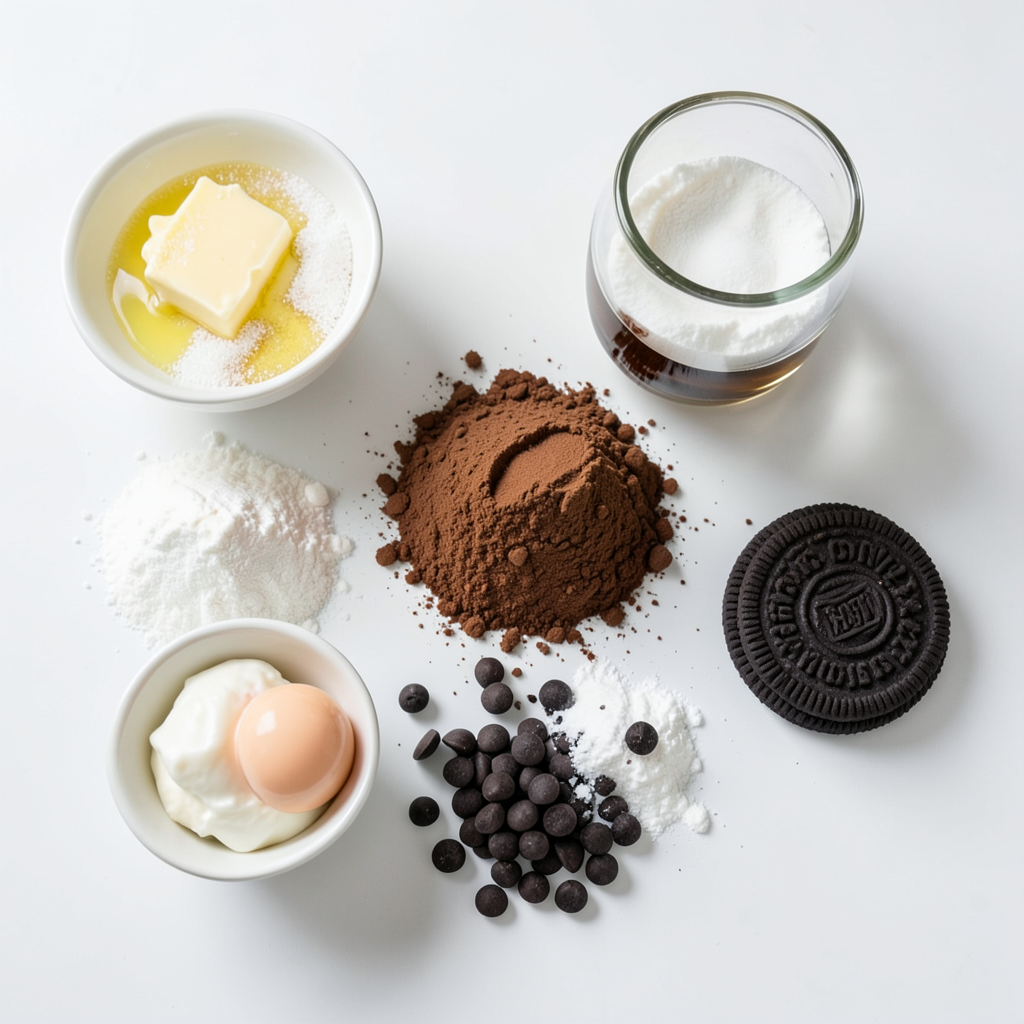
To make Oreo cheesecake brownies, gather these key ingredients:
- 1 cup unsalted butter, melted
- 2 cups granulated sugar
- 4 large eggs
- 1 teaspoon vanilla extract
- 1 cup all-purpose flour
- 1/2 cup unsweetened cocoa powder
- 1/2 teaspoon salt
- 1 cup chocolate chips (semi-sweet or dark)
- 8 oz cream cheese, softened
- 1/2 cup powdered sugar
- 1 egg
- 6 Oreo cookies, crushed (plus extra for topping)
These ingredients work together to create rich, chocolatey brownies with a creamy cheesecake layer.
Optional Ingredients for Enhanced Flavor
You can add these optional ingredients to boost flavor:
- Extra Oreo cookies for topping
- A pinch of espresso powder to enhance chocolate flavor
- A splash of almond extract for a nutty twist
These additions can make your brownies even more delightful.
Kitchen Tools Needed
Before you start, gather these kitchen tools:
- 9x13 inch baking pan
- Parchment paper
- Mixing bowls
- Electric mixer or whisk
- Measuring cups and spoons
- Rubber spatula
- Knife for swirling
Having these tools ready will help you make the process smooth and easy.
Step-by-Step Instructions
Prepping the Baking Pan
First, preheat your oven to 350°F (175°C). Grab a 9x13 inch baking pan and grease it with butter. Line the pan with parchment paper, leaving some paper hanging over the edges. This makes it easy to lift the brownies out later.
Creating the Brownie Batter
In a big bowl, mix together 1 cup of melted butter and 2 cups of granulated sugar. Blend them until smooth. Next, add 4 large eggs, one at a time. Stir well after each egg. Then, add 1 teaspoon of vanilla extract. In a separate bowl, sift together 1 cup of all-purpose flour, 1/2 cup of unsweetened cocoa powder, and 1/2 teaspoon of salt. Gradually add this dry mix to your wet mix. Stir until just combined. Finally, fold in 1 cup of chocolate chips.
Mixing the Cheesecake Layer
In another bowl, beat 8 ounces of softened cream cheese until it’s nice and smooth. Then, add 1/2 cup of powdered sugar and mix until combined. Next, add 1 egg and keep mixing until it’s creamy. Finally, fold in 6 crushed Oreo cookies. This will give your cheesecake layer a delightful Oreo flavor.
Assembling the Layers
Pour half of the brownie batter into your prepared pan. Spread it evenly. Next, scoop dollops of the cheesecake mixture over the brownie layer. Use a knife to swirl it gently, creating a marbled look. Now, pour the rest of the brownie batter on top and smooth it out. If you want, sprinkle more crushed Oreo cookies on top.
Baking to Perfection
Place the pan in your preheated oven and bake for 35 to 40 minutes. To check if they are done, insert a toothpick into the center. It should come out with a few moist crumbs but not wet batter.
Cooling and Cutting the Brownies
After baking, let the brownies cool in the pan for about 30 minutes. Use the parchment paper to lift them out. Now, cut them into squares and enjoy your Oreo cheesecake brownies!
Tips & Tricks
How to Achieve the Perfect Brownie Texture
To get the best brownie texture, follow a few simple steps. First, mix the butter and sugar well. This helps the brownies rise and stay soft. Next, add the eggs one at a time. Mix well after each egg. This adds air into the batter. Use room-temperature eggs for best results. When you mix the dry and wet ingredients, do not over-mix. Stop as soon as you see no dry flour. This keeps your brownies fudgy and moist.
Swirling Techniques for Stunning Presentation
Swirling the cheesecake layer makes your brownies look amazing. After you pour half of the brownie batter, add dollops of the cheesecake mix. Use a knife to gently swirl the two layers. Start from the center and pull outwards. Don’t overdo it; you want to see both layers. If you add extra crushed Oreos on top, it adds a nice touch. This not only looks great but adds more flavor, too!
Common Mistakes to Avoid
A few mistakes can ruin your brownies. One common issue is not greasing the pan. Always grease and line your baking pan with parchment paper. This helps with easy removal. Another mistake is baking too long. Check for doneness with a toothpick. If it comes out with moist crumbs, your brownies are ready. Lastly, let them cool in the pan for a bit. Cutting too soon can make them fall apart. Follow these tips, and you’ll make perfect Oreo cheesecake brownies!
Pro Tips
- Use Room Temperature Ingredients: Allow your cream cheese and eggs to come to room temperature before mixing. This helps create a smoother cheesecake layer that blends well with the brownie batter.
- Don’t Overmix the Batter: When combining the dry ingredients with the wet, mix just until combined. Overmixing can lead to dense brownies, so stop as soon as you see no dry flour.
- Swirl for the Perfect Marble Effect: When adding the cheesecake layer, use a knife to gently swirl it into the brownie batter. This creates a beautiful marbled look that’s also visually appealing.
- Check for Doneness: To avoid overbaking, start checking your brownies a few minutes before the suggested baking time. They should be set around the edges but still slightly soft in the center for a fudgy texture.
Variations
Different Oreo Flavors to Use
You can switch up the flavors of Oreos for fun. Try mint Oreos for a cool twist. They add freshness to the rich brownie taste. Peanut butter Oreos bring a nutty flavor that pairs well with chocolate. You can even use birthday cake Oreos for a festive touch. Each flavor adds a unique spin to your cheesecake brownies. The key is to choose what you love!
Adding Nuts or Other Mix-Ins
Adding nuts can give your brownies a nice crunch. Chopped walnuts or pecans work well with the creamy layers. You can also try adding caramel bits for extra sweetness. If you want a fun surprise, mix in chocolate chunks. These additions can enhance the texture and flavor of your brownies. Experiment with different mix-ins to find your perfect combo!
Alternative Toppings for Serving
Toppings can make your brownies even better. A drizzle of chocolate sauce adds richness. You can sprinkle crushed Oreos on top for extra crunch. Whipped cream is a great choice for a light touch. For a fruity twist, add fresh berries. Each topping offers a different taste and look. Have fun and get creative with your presentations!
Storage Info
Best Practices for Storing Brownies
To keep your Oreo cheesecake brownies fresh, store them in an airtight container. This helps maintain their moist texture. Layer parchment paper between brownies to prevent sticking. Keep them at room temperature for up to three days. If you want to store them longer, the fridge is a great option. Just remember that cold brownies may firm up a bit.
How to Freeze Oreo Cheesecake Brownies
Freezing is an excellent way to save extra brownies. Start by cutting them into squares. Wrap each square in plastic wrap tightly. Then, place them in a freezer bag. Make sure to remove as much air as possible. You can freeze them for up to three months. When ready to enjoy, simply thaw them in the fridge overnight.
Reheating Tips for Enjoying Leftovers
To warm up your brownies, use the microwave for quick results. Place a square on a plate and heat for about 10-15 seconds. This warms them up without drying them out. You can also use the oven. Set it to 350°F (175°C) and heat for about 5-10 minutes. Enjoy your warm, gooey brownies with a scoop of ice cream or whipped cream!
FAQs
Can I make Oreo Cheesecake Brownies in advance?
Yes, you can make these brownies in advance. They taste even better the next day! Bake the brownies, let them cool, and store them in an airtight container. Keep them in the fridge for up to five days. Just take them out before serving. This allows them to warm slightly and regain their rich taste.
What can I substitute for cream cheese?
If you need a substitute for cream cheese, use mascarpone or Greek yogurt. Mascarpone gives a rich flavor, while Greek yogurt adds a tangy taste. Both will work well in the cheesecake layer. You can also make a vegan version with blended silken tofu or cashew cream.
How do I know when the brownies are done baking?
To check if the brownies are done, insert a toothpick into the center. If it comes out with a few moist crumbs, they are ready. Avoid wet batter on the toothpick, as that means they need more time. The edges should look set, while the center may still look soft.
Can I make these brownies gluten-free?
Yes, you can make these brownies gluten-free! Simply substitute all-purpose flour with a 1:1 gluten-free flour blend. Ensure that your baking powder is gluten-free too. The taste and texture will still be amazing. Enjoy your delicious treat without worry!
You learned about the key ingredients and tools for creating Oreo Cheesecake Brownies. The step-by-step guide helps you master the recipe. I shared tips for the best texture and stunning looks. You can even try different Oreo flavors and add your favorite mix-ins. Store your brownies well, so they stay fresh and tasty. With all these tricks, you will make brownies everyone loves. Enjoy your baking and impress your friends and family!