Looking for a sweet treat that’s easy to make? You’ll love these No-Bake Pumpkin Chocolate Cheesecake Bars! This dessert blends creamy pumpkin with rich chocolate for a flavor burst. Plus, there’s no oven needed. Whether you’re cooking for a special event or just to enjoy at home, this recipe makes it simple. Let’s dive into the ingredients and get started on your next favorite snack!
Ingredients
Main Ingredients
To make no-bake pumpkin chocolate cheesecake bars, gather these items:
– 1 ½ cups graham cracker crumbs
– ½ cup unsalted butter, melted
– 1 cup cream cheese, softened
– 1 cup pumpkin puree
– ½ cup powdered sugar
– 1 teaspoon vanilla extract
– 1 teaspoon ground cinnamon
– ½ teaspoon ground nutmeg
– 1 cup whipped cream (store-bought or homemade)
– ½ cup dark chocolate chips, melted
– Pinch of salt
Each ingredient plays a key role in the flavor and texture of these bars. The graham cracker crumbs create a crunchy base, while cream cheese and pumpkin add creaminess and richness.
Alternatives and Substitutions
If you need alternatives, consider these options:
– For a gluten-free choice, use gluten-free graham cracker crumbs.
– Replace cream cheese with a dairy-free cream cheese for a vegan option.
– Use maple syrup instead of powdered sugar for a natural sweetener.
– Swap dark chocolate chips for milk chocolate if you prefer a sweeter taste.
These substitutions help you customize the recipe to fit your dietary needs without losing flavor.
Supplies Needed
To prepare these bars, you will need:
– An 8×8-inch baking dish
– Mixing bowls
– A spatula
– A whisk or electric mixer
– Plastic wrap
– Parchment paper
These tools make the process easier and help you create a perfect dessert. The baking dish holds the bars as they chill, while mixing bowls help blend the ingredients smoothly.
Step-by-Step Instructions
Preparation of the Crust
First, grab a medium bowl. Mix 1 ½ cups of graham cracker crumbs with ½ cup of melted unsalted butter. Stir until it all blends well. It should look like wet sand. Now, take an 8×8-inch baking dish and line it with parchment paper. Press the crumb mixture firmly into the bottom of the dish. Make sure it is even all around. Chill this crust in the fridge for 15 minutes while you prepare the filling.
Making the Cheesecake Filling
Next, take a large bowl and add 1 cup of softened cream cheese. Beat it with a mixer until it is smooth. Then, add in 1 cup of pumpkin puree, ½ cup of powdered sugar, 1 teaspoon of vanilla extract, 1 teaspoon of ground cinnamon, and ½ teaspoon of ground nutmeg. Mix everything together until it is creamy and well combined. This filling should be thick and smooth.
Now, gently fold in 1 cup of whipped cream. Do this slowly to keep the mixture light and fluffy. Keep folding until you see no streaks of whipped cream.
Assembling the Layers
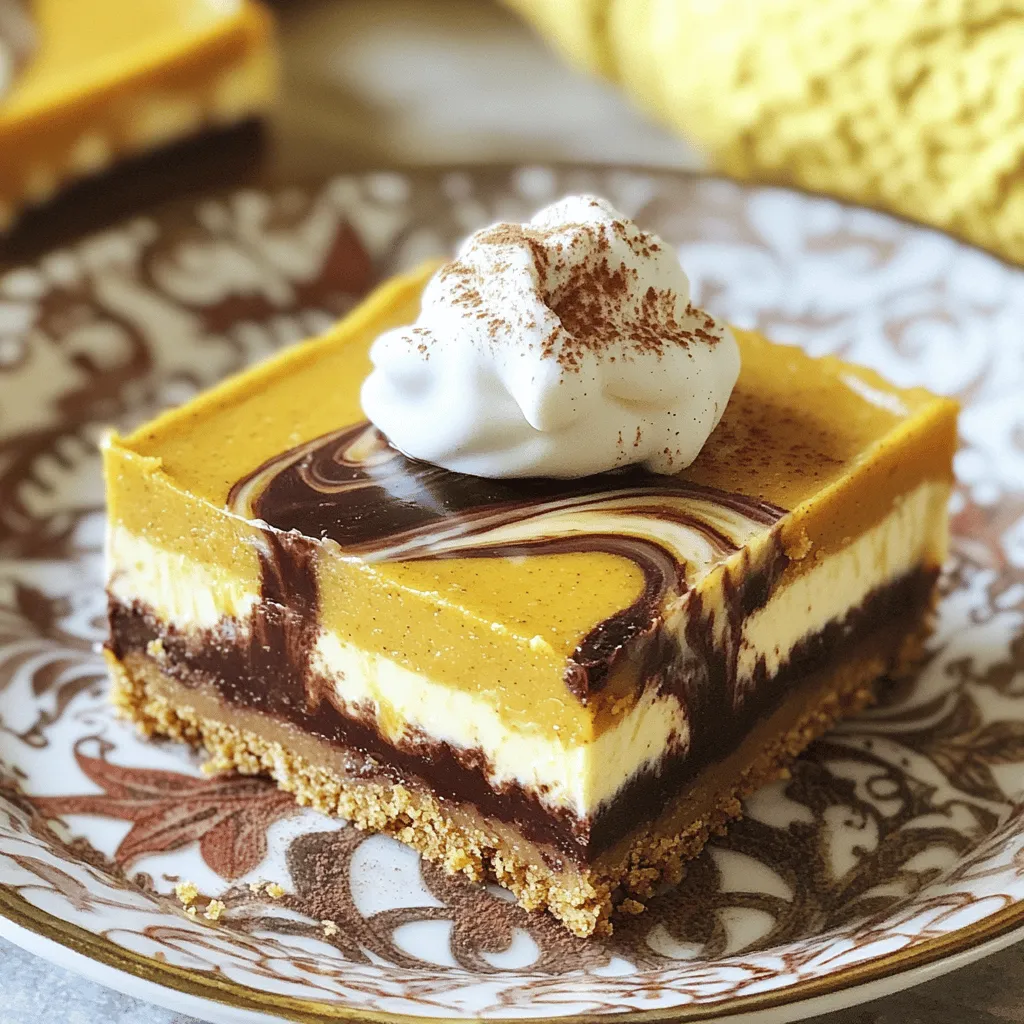
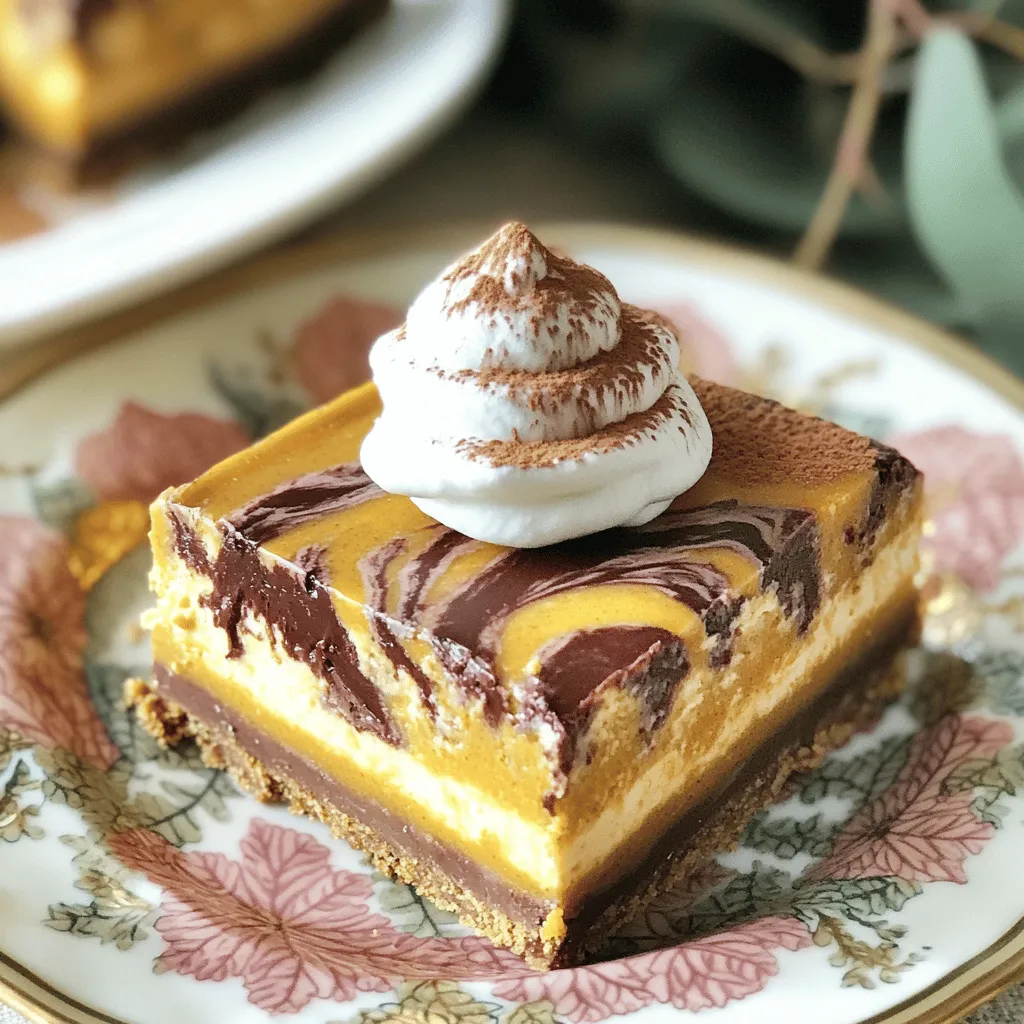
Pour the pumpkin cheesecake filling over your chilled crust. Use a spatula to spread it evenly. Tap the dish lightly on the counter. This action helps to remove any air bubbles trapped inside the cheesecake. Next, drizzle ½ cup of melted dark chocolate over the cheesecake layer. Take a toothpick or skewer and swirl the chocolate into the filling. This creates a marbled look that is both tasty and pretty.
Setting the Bars
Cover the baking dish with plastic wrap. Place it in the fridge and let it set for at least 4 hours. For the best results, let it chill overnight. This waiting time is key to ensuring your cheesecake bars set properly. When ready, lift the bars out of the dish using the parchment paper. Cut them into squares and serve chilled. Enjoy this delightful treat!
Tips & Tricks
Achieving the Perfect Texture
For a creamy and smooth cheesecake filling, start with softened cream cheese. Cold cream cheese gives lumps. Use a mixer to beat it until it’s fluffy. Then, add pumpkin puree and sugar. Mix until everything blends well. When you fold in the whipped cream, do it gently. You want to keep the air in the cream. This step helps the filling stay light and fluffy.
Serving Suggestions
To impress your guests, serve these bars on a nice plate. Add a dollop of whipped cream on top of each bar. You can sprinkle some cinnamon or nutmeg for a festive look. For a fun twist, drizzle extra melted chocolate over the bars right before serving. This adds a rich touch and makes the dessert even more special.
Troubleshooting Common Issues
Sometimes the filling does not set well. This could happen if the mixture is too warm when you pour it over the crust. Always chill the filling slightly before layering. If your bars are too soft after chilling, they might need more time in the fridge. Make sure to cover them well, so they do not dry out. If you encounter lumps in your filling, a quick mix can fix it. Just be careful not to overmix, or the whipped cream may deflate.
Variations
Flavor Additions
You can spice up these bars with warm flavors. Consider adding ginger or cloves. Both add a nice kick. Just a half teaspoon of each works great. You can also try adding a pinch of allspice for depth. If you want a sweeter touch, a dash of maple syrup blends well too.
Dietary Adjustments
Want to make these bars dairy-free or vegan? It’s easy! Use vegan cream cheese and coconut whipped cream. For the crust, swap regular butter for coconut oil. This keeps the flavor rich while being plant-based. You won’t lose any taste, and your friends will love them just the same!
Serving Size Modifications
Need to adjust how many bars you serve? You can easily cut the recipe in half or double it. If you want smaller portions, cut the bars into smaller squares. For larger gatherings, use a 9×13-inch pan instead of 8×8. This lets you make more bars quickly, so everyone gets a taste!
Storage Info
Best Practices for Storing
To keep your no-bake pumpkin chocolate cheesecake bars fresh, store them in the fridge. Use an airtight container or cover the dish with plastic wrap. This helps keep moisture out and prevents them from absorbing other food odors. Place the bars in the back of the fridge, where it’s coldest. This way, they stay firm and tasty.
Freezing Instructions
If you want to save some for later, you can freeze the bars. First, slice them into squares. Then, place each square on a baking sheet to freeze for about an hour. Once they are firm, wrap each piece in plastic wrap and put them in a freezer bag. Be sure to label the bag with the date. They will stay good for up to three months in the freezer.
Shelf Life
When stored correctly in the fridge, these cheesecake bars can last for about five days. If you freeze them, they can last up to three months. To enjoy the best taste and texture, eat them within the first month after freezing. This way, you will have a delicious treat that tastes fresh and creamy.
FAQs
Can I use fresh pumpkin instead of canned?
Yes, you can use fresh pumpkin. Just cook and puree it first. This makes a tasty option. Fresh pumpkin has a great flavor and texture. However, canned pumpkin is quick and easy. Both options work well in this recipe.
How long do these bars need to set?
These bars need at least 4 hours to set in the fridge. For the best results, leave them overnight. This helps the cheesecake firm up nicely. A longer chill time gives a better texture.
What can I substitute for whipped cream?
If you want a substitute for whipped cream, try whipped coconut cream. It adds a nice flavor. Another option is using Greek yogurt for a healthier choice. You can also use cool whip if you prefer something store-bought.
These no-bake pumpkin chocolate cheesecake bars are easy and fun to make. Start with a simple crust and creamy filling, then layer in chocolate. You can adjust ingredients for dietary needs and add flavors to change things up. For best results, follow the tips on texture and storage. With some practice, you’ll perfect these tasty bars. Enjoy sharing them at your next event or savoring them yourself!
