Get ready for a sweet treat that’s easy and fun! My No-Bake Peanut Butter Cup Cheesecake Bars are a dessert lover’s dream. This recipe combines creamy peanut butter and rich chocolate for a decadent dessert without turning on the oven. Whether you’re throwing a party or craving a snack, these bars will impress everyone. I’ll guide you through each step, ensuring a delightful experience from start to finish. Let’s dive in!
Ingredients
List of Ingredients with Measurements
– 1 ½ cups graham cracker crumbs
– ½ cup unsalted butter, melted
– 1 tablespoon sugar
– 8 oz cream cheese, softened
– ¾ cup creamy peanut butter
– ½ cup powdered sugar
– 1 cup whipped topping (like Cool Whip)
– ½ cup mini chocolate chips
– 4-5 mini peanut butter cups, chopped
Notes on Ingredient Quality
Using quality ingredients makes a big difference. For the graham crackers, choose a brand that is fresh. Stale crumbs can ruin the crust. Make sure the cream cheese is at room temperature. This helps it blend smoothly. Creamy peanut butter adds richness. Check for no added sugar or oils for a pure taste. The whipped topping should be light and fluffy. This keeps the cheesecake airy.
Substitutions for Dietary Needs
If you need a gluten-free option, use gluten-free graham crackers. For a lower sugar version, you can use a sugar substitute in the crust and filling. To make this vegan, swap cream cheese for a plant-based cream cheese. Use coconut cream in place of whipped topping. You can also find peanut butter that is nut-free for those with allergies.
Step-by-Step Instructions
Preparing the Crust
Start by gathering your ingredients. You need graham cracker crumbs, melted butter, and sugar. In a medium bowl, mix the graham cracker crumbs, melted butter, and sugar. Stir until it looks like wet sand. Press this mix firmly into the bottom of an 8×8 inch baking dish. Use the back of a measuring cup to make it even. This crust holds everything together.
Making the Peanut Butter Cheesecake Filling
Now, let’s make the filling! In a large bowl, beat the softened cream cheese and creamy peanut butter. Mix until it is smooth and creamy. Gradually add the powdered sugar while mixing. This helps sweeten your filling. Next, gently fold in the whipped topping. Make sure no white streaks remain. Finally, add the mini chocolate chips and chopped peanut butter cups. Set aside a few for later.
Assembling and Chilling the Bars
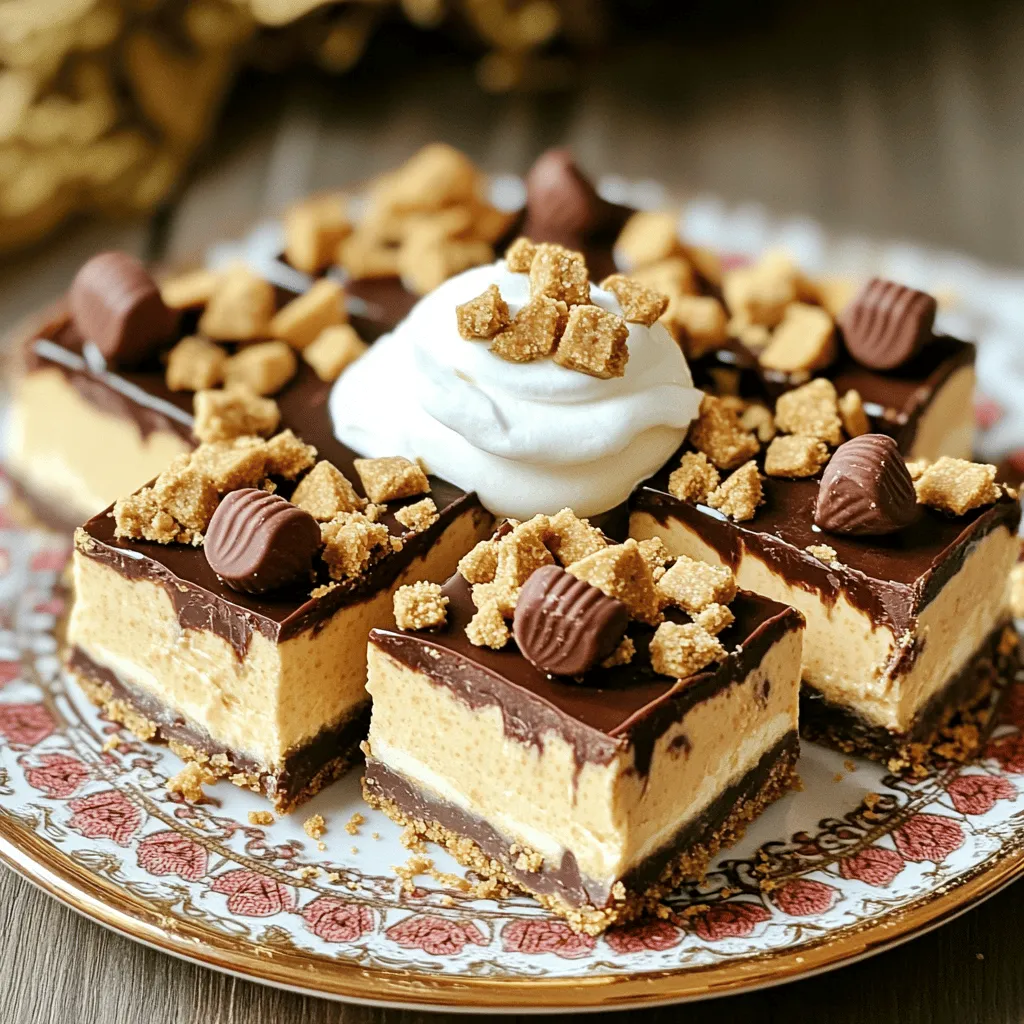
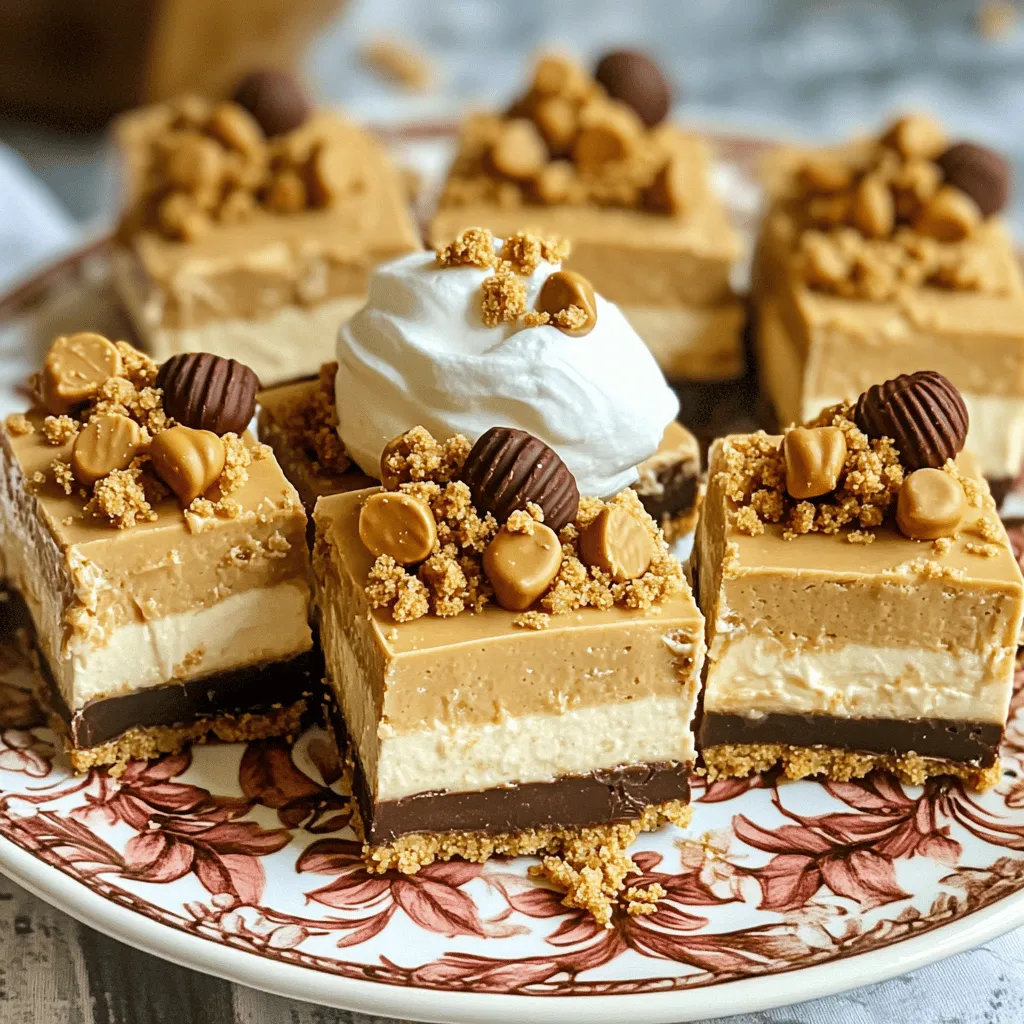
Spread the creamy peanut butter filling over the crust. Use a spatula to make it even. After that, cover the dish with plastic wrap. Chill in the fridge for at least 4 hours. This helps the bars set well. Once they are firm, cut them into squares. Top with your reserved chopped peanut butter cups. For extra flair, you can drizzle melted chocolate on top. Enjoy these tasty bars!
Tips & Tricks
Ensuring the Perfect Cheesecake Texture
To get the right texture, use softened cream cheese. Cold cream cheese makes mixing hard. Beat the cream cheese with the peanut butter until it’s smooth. This helps create a creamy filling. Gently fold in the whipped topping to keep it light. Don’t stir too hard, or you might lose the fluffiness.
How to Cut Bars Neatly
Cutting the bars can be tricky. First, chill the cheesecake for at least four hours. This makes it firm and easier to cut. Use a sharp knife for clean edges. Dip the knife in hot water, then dry it before each cut. This helps the knife glide through the bars smoothly.
Decorating and Presenting Cheesecake Bars
For a beautiful presentation, serve your cheesecake bars on a nice plate. Add a dollop of whipped topping on top. Sprinkle crushed graham crackers around them for texture. You can also drizzle melted chocolate over the bars. Finish with a few mini peanut butter cups on top. This makes each piece look special and tasty!
Variations
Healthier Alternatives (Low-Sugar, Gluten-Free)
You can make these bars healthier. To reduce sugar, use a sugar substitute. Stevia or erythritol works well. For a gluten-free option, swap graham cracker crumbs with gluten-free ones. Almond flour or coconut flour is great too. These changes keep the taste yummy while fitting dietary needs.
Flavor Add-Ins (Chocolate, Caramel)
Want to mix things up? Add some fun flavors! You can stir in chocolate syrup for extra richness. Caramel sauce also pairs well with peanut butter. Just drizzle it in the filling or on top. You can even use flavored peanut butter, like chocolate or honey. Each option adds a new twist to your bars.
Alternative Toppings and Garnishes
Toppings make your bars look great and taste even better. Try adding crushed nuts on top for crunch. You can also sprinkle cocoa powder for a chocolate kick. Fresh fruit like sliced bananas or strawberries adds a fresh touch. If you love whipped cream, a dollop on each bar makes it extra special. These simple changes can elevate your dessert!
Storage Info
Best Practices for Storing Leftovers
To keep your No-Bake Peanut Butter Cup Cheesecake Bars fresh, wrap them tightly. Use plastic wrap or place them in an airtight container. This helps avoid drying out or absorbing other fridge smells. I like to keep a layer of parchment paper between the bars and the lid. This way, they remain intact and easy to serve.
How Long They Last in the Fridge/Freezer
These cheesecake bars stay fresh in the fridge for about 5 days. If you want to keep them longer, freeze them. They can last up to 2 months in the freezer. Just make sure to wrap them well. When you are ready to eat, thaw them in the fridge overnight.
Reheating Instructions (If Applicable)
You don’t need to reheat these bars. They taste best when chilled. Enjoy them straight from the fridge. If you want a warm treat, consider warming mini peanut butter cups in the microwave for a few seconds. Then, drizzle them over the bars for a warm twist.
FAQs
Can I make these bars a day in advance?
Yes, you can make these bars a day ahead. This allows the flavors to mix well. Just store them in the fridge. Cover them tightly with plastic wrap. This keeps them fresh and tasty for when you serve them.
What can I substitute for cream cheese?
If you want a substitute for cream cheese, use Greek yogurt. It gives a similar texture and taste. You can also try silken tofu for a dairy-free option. Blend it until smooth for best results.
How do I ensure the bars set properly?
To help the bars set, chill them for at least four hours. This lets the filling firm up. Make sure you press the crust tightly into the dish. This keeps everything together when you cut the bars.
Are there vegan options for this recipe?
Yes, you can make this recipe vegan. Use dairy-free cream cheese and whipped topping. Look for a vegan butter substitute for the crust. You can also use maple syrup instead of powdered sugar for sweetness.
We covered how to make delicious peanut butter cheesecake bars. I shared key ingredients, step-by-step instructions, and helpful tips. You learned about tasty variations and storage advice, too.
These bars are perfect for any occasion, and you can easily tailor them to fit your needs. Enjoy experimenting with flavors and methods. Your baking journey is just starting, and these bars are a great way to impress others.