Craving a sweet treat that’s easy and packed with flavor? You’ll love my No-Bake Mocha Cheesecake Bars! These simple bars mix rich coffee and creamy cheesecake in a delightful way. Plus, there’s no baking required! In this post, I’ll share the key ingredients, step-by-step instructions, and clever tips to make your bars perfect every time. Let’s dive into making this delicious dessert together!
Ingredients
Key Ingredients for No-Bake Mocha Cheesecake Bars
– 1 ½ cups graham cracker crumbs
– ½ cup unsalted butter, melted
– 1 cup cream cheese, softened
– ½ cup powdered sugar
– 1 teaspoon vanilla extract
– 1 cup heavy whipping cream
– 2 tablespoons cocoa powder
– 2 tablespoons instant coffee granules
– 1 tablespoon hot water
– ½ cup semi-sweet chocolate chips, melted
The graham cracker crumbs form a tasty base for these bars. The melted butter helps the crumbs stick together. Cream cheese adds creaminess and richness. Powdered sugar sweetens the mixture. Vanilla gives a warm flavor. Heavy whipping cream makes the filling light and fluffy. Cocoa powder adds a chocolate kick, while instant coffee boosts the mocha taste. The hot water dissolves the coffee granules, making them easier to mix in. Melted chocolate on top adds a nice finish.
Common Substitutes
If you don’t have graham cracker crumbs, you can use any cookie crumbs. Try using digestive biscuits or even Oreos for a twist. Instead of cream cheese, you can use mascarpone for a creamier texture. If you want a dairy-free option, use a vegan cream cheese. For a lower-fat version, you can use light cream cheese.
Equipment Needed
You need some simple tools to make these bars. Gather these items before you start:
– Mixing bowls
– 9×9 inch pan
– Electric mixer or whisk
– Rubber spatula
– Measuring cups and spoons
– Toothpick or knife for swirling chocolate
Having everything ready makes the process smooth. Enjoy the fun of making these no-bake mocha cheesecake bars!
Step-by-Step Instructions
Preparing the Crust
To start, gather your ingredients. You need graham cracker crumbs and melted butter. In a mixing bowl, combine 1 ½ cups of graham cracker crumbs with ½ cup of melted butter. Mix them well. This mixture should hold together when pressed. Next, take a 9×9 inch pan and press the crumb mixture evenly into the bottom. Make sure it is packed tightly. This forms a sturdy base for your cheesecake bars. Chill the crust in the refrigerator for about 15 minutes. This helps it set and makes it easier to slice later.
Making the Cheesecake Filling
Now it’s time for the filling. First, dissolve 2 tablespoons of instant coffee granules in 1 tablespoon of hot water. Let it cool a bit. In a large mixing bowl, beat 1 cup of softened cream cheese with ½ cup of powdered sugar and 1 teaspoon of vanilla extract. Mix until it is smooth and creamy. In another bowl, whip 1 cup of heavy cream until stiff peaks form. This will add lightness to your filling. Gently fold the whipped cream into the cream cheese mixture. Be careful not to deflate it. Next, add in the cooled coffee and 2 tablespoons of cocoa powder. Fold this mixture gently until everything is evenly blended.
Assembling and Chilling
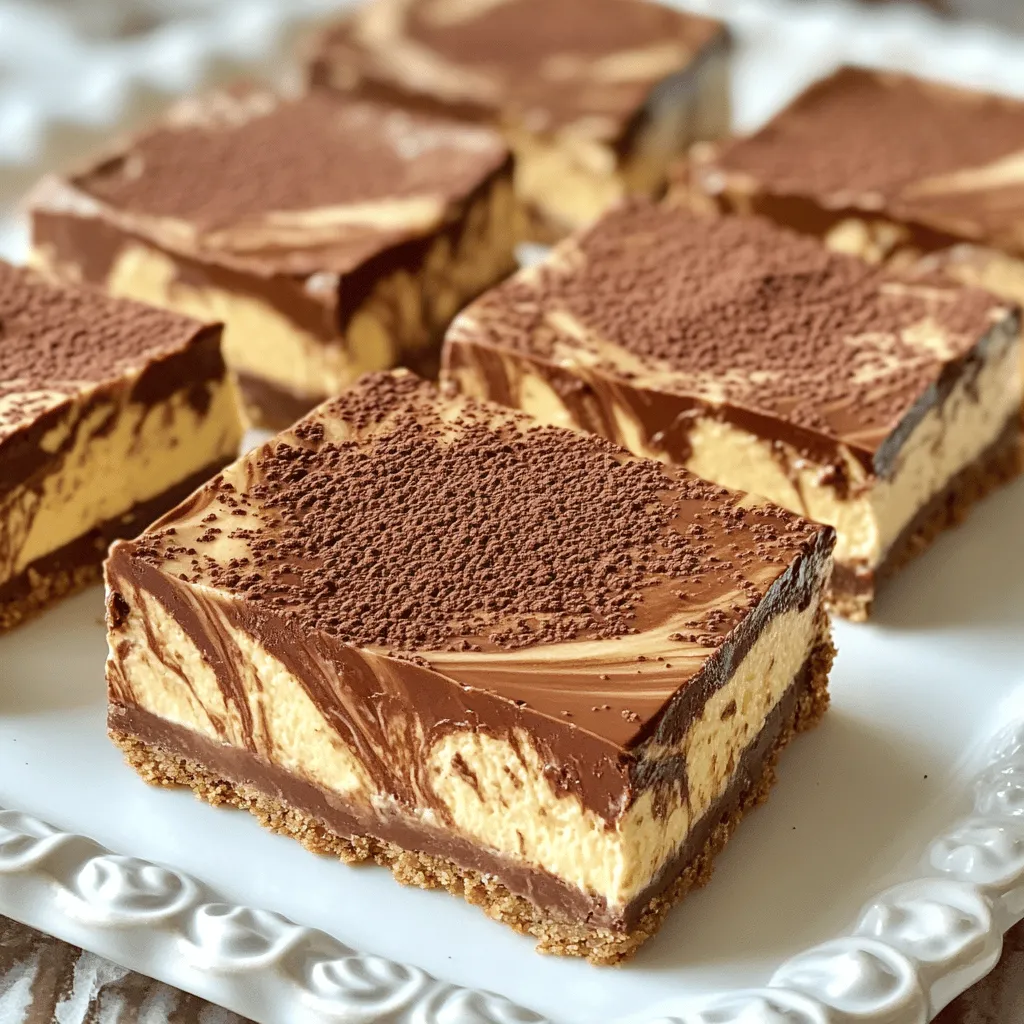
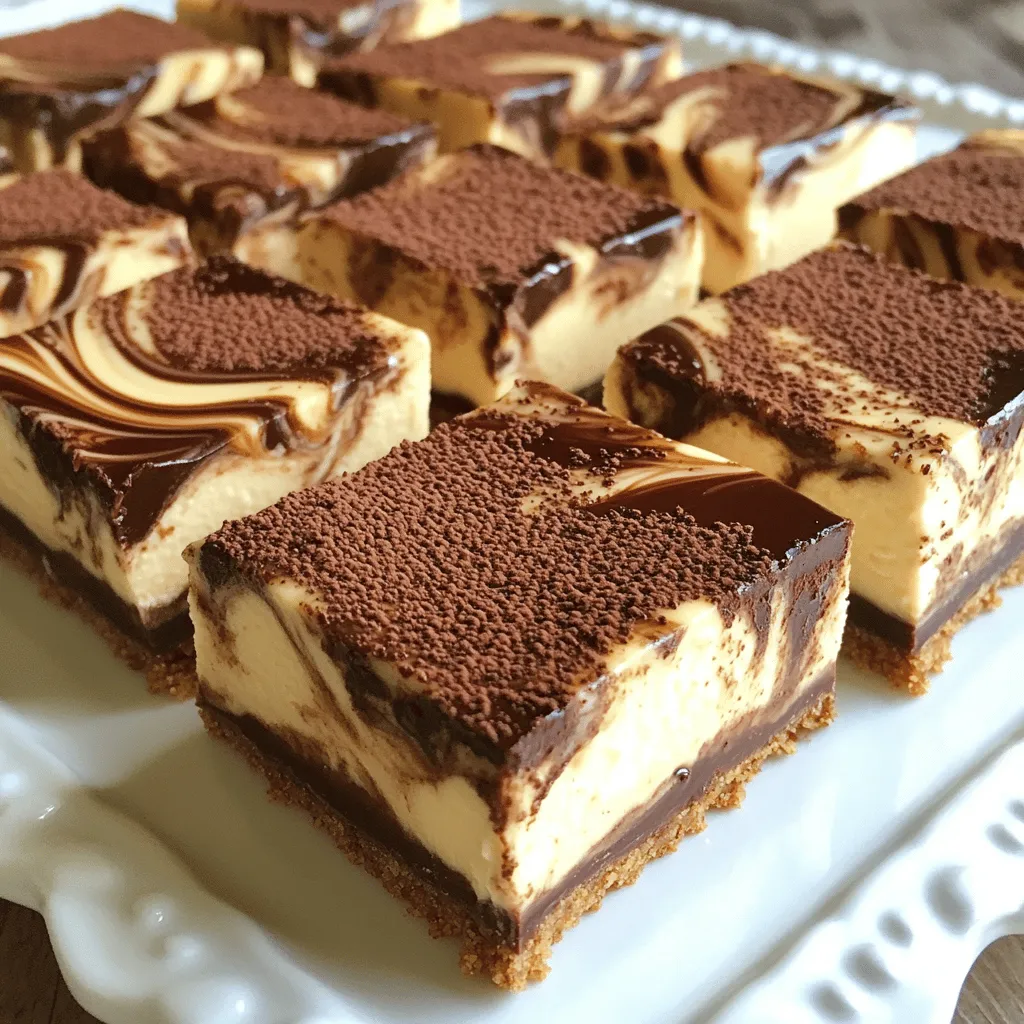
Pour the mocha cheesecake filling over your chilled crust. Use a spatula to spread it evenly. For a fun touch, drizzle ½ cup of melted chocolate over the top. Take a toothpick or knife and swirl it around to create a marbled effect. This adds a nice look and extra flavor. Place the pan back in the refrigerator. Chill the cheesecake bars for at least 4 hours. This helps them set properly. Once set, cut into bars and serve them chilled. Enjoy your delicious no-bake mocha cheesecake bars!
Tips & Tricks
Achieving the Perfect Consistency
To get the best texture for your mocha cheesecake bars, focus on your cream cheese. Make sure it is soft. This helps it blend well with the other ingredients. When you mix the whipped cream, do it gently. Fold it in carefully to keep that light and airy feel. If you overmix, your bars can become dense.
Storage Tips for Freshness
For the best taste, store your cheesecake bars in the fridge. Use an airtight container to keep them fresh. They will stay good for about five days. If you want to keep them longer, you can freeze them. Wrap each bar in plastic wrap, then place them in a freezer bag. They will last up to three months in the freezer.
Presentation Ideas
Make your bars look great with simple touches. Before serving, sprinkle cocoa powder or finely grated chocolate on top. This adds color and makes them more appealing. Serve them on a nice platter for a special touch. You can even add fresh berries or mint leaves for extra flair. These small details can make your treats stand out at any gathering.
Variations
Flavor Variations
You can change the taste of your mocha cheesecake bars easily. Try adding a pinch of cinnamon for warmth. You can use espresso powder for a bolder coffee flavor. Want some fun? Add a splash of peppermint extract for a holiday twist. If you like nuts, sprinkle some crushed hazelnuts or walnuts on top. You can even use flavored cream cheese, like chocolate or coffee, to add richness.
Alternative Crust Options
If you want a different kind of crust, swap out the graham crackers. Use crushed Oreo cookies for a chocolatey base. You can also try using almond flour for a gluten-free version. For a more tropical taste, use crushed coconut cookies. Press your choice into the pan just like with the graham cracker crust. Each option brings its own twist to the bars.
Vegan or Dairy-Free Adaptations
Making these bars vegan is easy and fun. Replace the cream cheese with a vegan cream cheese made from nuts. Instead of heavy cream, use coconut cream. It whips up nicely and adds a tropical flavor. Use maple syrup instead of powdered sugar for sweetness. Make sure your chocolate chips are dairy-free. These swaps keep the bars creamy while being plant-based.
Storage Info
How to Store No-Bake Mocha Cheesecake Bars
To keep your no-bake mocha cheesecake bars fresh, store them in the fridge. Use an airtight container or cover the dish tightly with plastic wrap. This helps prevent them from drying out or absorbing other odors. They will stay fresh for up to five days in the refrigerator. Make sure to cut the bars before storing. This makes it easier to grab a piece whenever you want a treat.
Freezing Instructions
If you want to keep your cheesecake bars longer, you can freeze them. First, cut the bars into portions. Wrap each piece tightly in plastic wrap. Then place them in a freezer-safe container. They can last for up to three months in the freezer. To enjoy, just thaw them in the fridge overnight before serving. This way, they stay soft and creamy.
Best Practices for Reheating
You don’t need to reheat these bars since they taste best cold. Just pull them out of the fridge or freezer and let them sit for a few minutes at room temperature. This helps soften them slightly. If you prefer them a bit warmer, microwave a single bar for about 10-15 seconds. Keep an eye on it so it doesn’t melt. Enjoy every creamy bite with rich mocha flavor!
FAQs
Can I use different types of chocolate?
Yes, you can use different types of chocolate. For a sweeter taste, try milk chocolate. If you want a richer flavor, go for dark chocolate. You can even mix them together. Just be sure to melt it gently to keep it smooth. This way, you can create a unique taste for your cheesecake bars.
How long do No-Bake Mocha Cheesecake Bars last?
No-Bake Mocha Cheesecake Bars last about 5 days in the fridge. Store them in an airtight container to keep them fresh. If you see any signs of spoilage, it’s best to toss them. This ensures you enjoy the best flavor and texture.
Can I make this recipe in advance?
Absolutely! You can make these cheesecake bars a day or two ahead of time. Just let them chill in the fridge until you’re ready to serve. This gives the flavors time to blend and improves the taste. Plus, it saves you time on the day of your event.
No-bake mocha cheesecake bars are easy and fun to make. We discussed key ingredients, common substitutes, and essential equipment. The step-by-step instructions guide you through the crust, filling, and assembly. I shared tips for the perfect texture and how to store your bars. You can even customize flavors or create vegan adaptations.
In the end, this dessert is simple and delightful. With practice, you’ll impress everyone with your creativity. Enjoy making these bars and share them with friends!