No-Bake Chocolate Peanut Butter Pumpkin Bars Delight

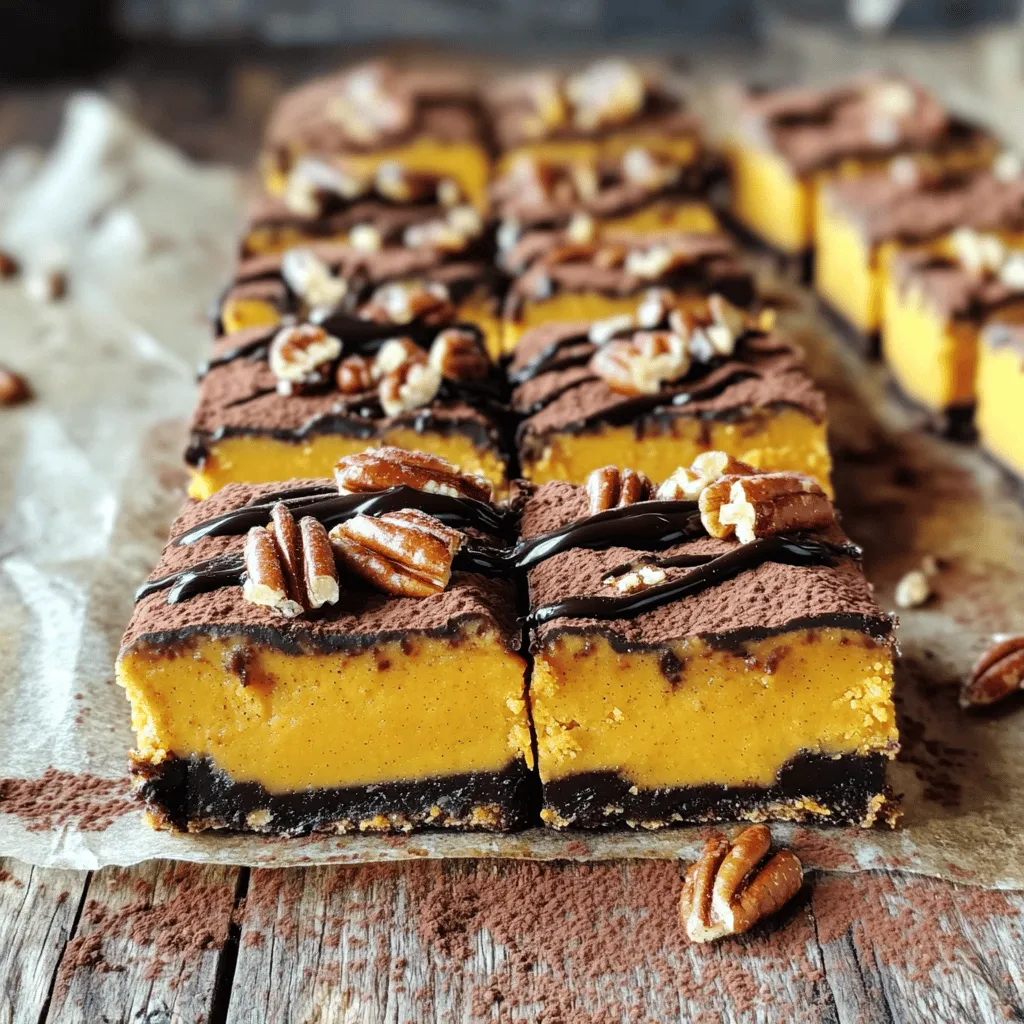
Looking for a sweet treat that requires no baking? You’ve come to the right place! My No-Bake Chocolate Peanut Butter Pumpkin Bars are easy, fast, and packed with flavor. They combine creamy peanut butter, rich chocolate, and a hint of pumpkin spice. In this article, I’ll guide you through simple steps and tasty tips to make these bars a hit. Let’s dive into this deliciously fun recipe!

Ingredients

To make No-Bake Chocolate Peanut Butter Pumpkin Bars, gather these simple ingredients:

– 1 cup almond flour

– 1/2 cup rolled oats

– 1/4 cup coconut oil, melted

– 1/3 cup maple syrup

– 1/2 cup pumpkin puree

– 1/4 cup creamy peanut butter

– 1/2 teaspoon cinnamon

– 1/4 teaspoon nutmeg

– 1/4 teaspoon vanilla extract

– 1/2 cup dark chocolate chips

– 1/2 cup chopped pecans or walnuts (optional)

These ingredients come together to create a rich and tasty treat. The almond flour and oats form a great base. Coconut oil adds healthy fat, while maple syrup gives sweetness. Pumpkin puree brings moisture and a fall flavor. Creamy peanut butter adds depth and richness.

Cinnamon and nutmeg enhance the taste, making it cozy. Vanilla extract gives a nice aroma. Dark chocolate chips provide a sweet finish, and the nuts add crunch. Each part plays a key role in making these bars a delight.

This list makes it easy to prepare your bars. You can find these items in most stores. If you want to add some fun, try different nuts or even seeds.

Step-by-Step Instructions

Preparation Steps

1. Mixing the dry ingredients

Start by taking a medium bowl. Add 1 cup of almond flour and 1/2 cup of rolled oats. Stir these ingredients well. This helps create a good base for your bars.

2. Whisking the wet ingredients

In a small bowl, combine 1/4 cup of melted coconut oil, 1/3 cup of maple syrup, and 1/4 teaspoon of vanilla extract. Whisk until all the ingredients blend smoothly. This will add sweetness and flavor.

3. Combining wet and dry mixtures

Pour the wet mixture into the dry bowl. Mix them together until a crumbly dough forms. You want it to hold together when pressed, but not be too sticky.

4. Pressing the crust into the baking dish

Grab an 8×8 inch baking dish and line it with parchment paper. Press the dough firmly into the bottom of the dish. This forms a solid crust for your bars. Make sure it’s even across the bottom.

5. Preparing the pumpkin filling

In another bowl, mix 1/2 cup of pumpkin puree with 1/4 cup of creamy peanut butter. Add 1/2 teaspoon of cinnamon and 1/4 teaspoon of nutmeg. Stir until it’s smooth and creamy. This will be the tasty filling.

6. Spreading the filling over the crust

Use a spatula to spread the pumpkin filling evenly over the crust. Make sure it covers the crust completely. This layer is key to bringing all the flavors together.

7. Melting the chocolate

In a microwave-safe bowl, add 1/2 cup of dark chocolate chips. Heat them in 30-second intervals, stirring in between. Keep going until the chocolate is smooth. Be careful not to burn it.

8. Drizzling chocolate and adding nuts

Drizzle the melted chocolate over the pumpkin layer. You can use a toothpick to swirl it if you want. If you like nuts, sprinkle 1/2 cup of chopped pecans or walnuts on top for a nice crunch.

After these steps, refrigerate the bars for at least 2 hours. Once set, cut them into squares and enjoy your delicious no-bake chocolate peanut butter pumpkin bars!

Tips & Tricks

Tips for Perfect Bars

Ensuring the crust is evenly pressed

Use a flat surface, like a measuring cup, to press the crust firmly. This helps create a solid base that won’t crumble when you cut the bars.

How to achieve a smooth pumpkin filling

Mix the pumpkin puree and peanut butter together well. Make sure to whisk until no lumps remain. This makes the filling creamy and smooth.

Melting chocolate without burning

Microwave the dark chocolate chips in 30-second bursts. Stir in between until it melts fully. This keeps the chocolate from burning and clumping.

Enhancing flavor with additional spices

Add a pinch of ginger or cloves to the pumpkin filling. This adds warmth and depth to the flavor, making the bars even tastier.

Variations

Ingredient Substitutions

You can change the flavors and textures of these bars by swapping ingredients. Here are some ideas:

Using different nut butters: You can use almond butter or cashew butter instead of peanut butter. Each nut butter gives a unique taste. Cashew butter is creamy and sweet, while almond butter adds a nutty twist.

Alternatives to coconut oil: If you don’t have coconut oil, you can use unsalted butter or even avocado oil. Both options keep the bars moist and tasty.

Gluten-free options with different flours: If you need gluten-free bars, try using oat flour or coconut flour instead of almond flour. Each flour changes the texture slightly, giving you different results.

Adding different mix-ins like raisins or chocolate chunks: You can add fun mix-ins to your bars. Try adding raisins for sweetness or chocolate chunks for extra chocolate flavor. Nuts also add crunch and flavor.

These variations let you customize the bars to your taste and dietary needs. Feel free to experiment and make them your own!

Storage Info

Best Practices for Storing

To keep your No-Bake Chocolate Peanut Butter Pumpkin Bars fresh, store them in the fridge. Place the bars in an airtight container. This helps maintain their flavor and texture. They will stay fresh for up to one week.

If you want to save some for later, freezing is a great option. Wrap each bar in plastic wrap and then place them in a freezer bag. This prevents freezer burn and keeps them tasty. You can freeze these bars for up to three months.

When it’s time to enjoy your frozen bars, defrost them in the fridge. This method helps them keep their creamy texture. Avoid microwaving, as it can make them too soft or change their taste. By following these storage tips, you can savor these delicious bars any time you want!

FAQs

Can I make these bars vegan?

Yes, you can make these bars vegan! Simply swap the honey or maple syrup for agave syrup. Use a plant-based chocolate for the drizzle.

How long do these bars last?

These bars last up to one week in the fridge. Store them in an airtight container to keep them fresh.

Can I substitute fresh pumpkin for pumpkin puree?

You can use fresh pumpkin. Just make sure to cook it until soft, then blend it until smooth.

What can I use instead of maple syrup?

You can use honey or agave syrup as a sweetener. Both will work great in this recipe.

Are there any nut-free options for this recipe?

Yes, you can use sunflower seed butter instead of peanut butter. Swap almond flour for oat flour to keep it nut-free.

You now know how to make delicious pumpkin bars. We covered the key ingredients, step-by-step instructions, and helpful tips. Remember, you can customize this recipe with your own favorite flavors. Store them correctly, and they will stay fresh for you to enjoy. With these bars, you can impress friends and family, or treat yourself. Get creative and make this recipe your own!

To make No-Bake Chocolate Peanut Butter Pumpkin Bars, gather these simple ingredients: - 1 cup almond flour - 1/2 cup rolled oats - 1/4 cup coconut oil, melted - 1/3 cup maple syrup - 1/2 cup pumpkin puree - 1/4 cup creamy peanut butter - 1/2 teaspoon cinnamon - 1/4 teaspoon nutmeg - 1/4 teaspoon vanilla extract - 1/2 cup dark chocolate chips - 1/2 cup chopped pecans or walnuts (optional) These ingredients come together to create a rich and tasty treat. The almond flour and oats form a great base. Coconut oil adds healthy fat, while maple syrup gives sweetness. Pumpkin puree brings moisture and a fall flavor. Creamy peanut butter adds depth and richness. Cinnamon and nutmeg enhance the taste, making it cozy. Vanilla extract gives a nice aroma. Dark chocolate chips provide a sweet finish, and the nuts add crunch. Each part plays a key role in making these bars a delight. This list makes it easy to prepare your bars. You can find these items in most stores. If you want to add some fun, try different nuts or even seeds. 1. Mixing the dry ingredients Start by taking a medium bowl. Add 1 cup of almond flour and 1/2 cup of rolled oats. Stir these ingredients well. This helps create a good base for your bars. 2. Whisking the wet ingredients In a small bowl, combine 1/4 cup of melted coconut oil, 1/3 cup of maple syrup, and 1/4 teaspoon of vanilla extract. Whisk until all the ingredients blend smoothly. This will add sweetness and flavor. 3. Combining wet and dry mixtures Pour the wet mixture into the dry bowl. Mix them together until a crumbly dough forms. You want it to hold together when pressed, but not be too sticky. 4. Pressing the crust into the baking dish Grab an 8x8 inch baking dish and line it with parchment paper. Press the dough firmly into the bottom of the dish. This forms a solid crust for your bars. Make sure it’s even across the bottom. 5. Preparing the pumpkin filling In another bowl, mix 1/2 cup of pumpkin puree with 1/4 cup of creamy peanut butter. Add 1/2 teaspoon of cinnamon and 1/4 teaspoon of nutmeg. Stir until it’s smooth and creamy. This will be the tasty filling. 6. Spreading the filling over the crust Use a spatula to spread the pumpkin filling evenly over the crust. Make sure it covers the crust completely. This layer is key to bringing all the flavors together. 7. Melting the chocolate In a microwave-safe bowl, add 1/2 cup of dark chocolate chips. Heat them in 30-second intervals, stirring in between. Keep going until the chocolate is smooth. Be careful not to burn it. 8. Drizzling chocolate and adding nuts Drizzle the melted chocolate over the pumpkin layer. You can use a toothpick to swirl it if you want. If you like nuts, sprinkle 1/2 cup of chopped pecans or walnuts on top for a nice crunch. After these steps, refrigerate the bars for at least 2 hours. Once set, cut them into squares and enjoy your delicious no-bake chocolate peanut butter pumpkin bars! - Ensuring the crust is evenly pressed Use a flat surface, like a measuring cup, to press the crust firmly. This helps create a solid base that won’t crumble when you cut the bars. - How to achieve a smooth pumpkin filling Mix the pumpkin puree and peanut butter together well. Make sure to whisk until no lumps remain. This makes the filling creamy and smooth. - Melting chocolate without burning Microwave the dark chocolate chips in 30-second bursts. Stir in between until it melts fully. This keeps the chocolate from burning and clumping. - Enhancing flavor with additional spices Add a pinch of ginger or cloves to the pumpkin filling. This adds warmth and depth to the flavor, making the bars even tastier. {{image_2}} You can change the flavors and textures of these bars by swapping ingredients. Here are some ideas: - Using different nut butters: You can use almond butter or cashew butter instead of peanut butter. Each nut butter gives a unique taste. Cashew butter is creamy and sweet, while almond butter adds a nutty twist. - Alternatives to coconut oil: If you don’t have coconut oil, you can use unsalted butter or even avocado oil. Both options keep the bars moist and tasty. - Gluten-free options with different flours: If you need gluten-free bars, try using oat flour or coconut flour instead of almond flour. Each flour changes the texture slightly, giving you different results. - Adding different mix-ins like raisins or chocolate chunks: You can add fun mix-ins to your bars. Try adding raisins for sweetness or chocolate chunks for extra chocolate flavor. Nuts also add crunch and flavor. These variations let you customize the bars to your taste and dietary needs. Feel free to experiment and make them your own! To keep your No-Bake Chocolate Peanut Butter Pumpkin Bars fresh, store them in the fridge. Place the bars in an airtight container. This helps maintain their flavor and texture. They will stay fresh for up to one week. If you want to save some for later, freezing is a great option. Wrap each bar in plastic wrap and then place them in a freezer bag. This prevents freezer burn and keeps them tasty. You can freeze these bars for up to three months. When it’s time to enjoy your frozen bars, defrost them in the fridge. This method helps them keep their creamy texture. Avoid microwaving, as it can make them too soft or change their taste. By following these storage tips, you can savor these delicious bars any time you want! Yes, you can make these bars vegan! Simply swap the honey or maple syrup for agave syrup. Use a plant-based chocolate for the drizzle. These bars last up to one week in the fridge. Store them in an airtight container to keep them fresh. You can use fresh pumpkin. Just make sure to cook it until soft, then blend it until smooth. You can use honey or agave syrup as a sweetener. Both will work great in this recipe. Yes, you can use sunflower seed butter instead of peanut butter. Swap almond flour for oat flour to keep it nut-free. You now know how to make delicious pumpkin bars. We covered the key ingredients, step-by-step instructions, and helpful tips. Remember, you can customize this recipe with your own favorite flavors. Store them correctly, and they will stay fresh for you to enjoy. With these bars, you can impress friends and family, or treat yourself. Get creative and make this recipe your own!

No-Bake Chocolate Peanut Butter Pumpkin Bars

Indulge in the deliciousness of No-Bake Chocolate Peanut Butter Pumpkin Bars! These easy-to-make treats blend creamy pumpkin, rich chocolate, and wholesome ingredients for a perfect fall dessert. With just a few simple steps, you can create a delightful snack that's both healthy and satisfying. Click through to discover the full recipe and impress your friends and family with this tasty creation!

Ingredients
  

1 cup almond flour

1/2 cup rolled oats

1/4 cup coconut oil, melted

1/3 cup maple syrup

1/2 cup pumpkin puree

1/4 cup creamy peanut butter

1/2 teaspoon cinnamon

1/4 teaspoon nutmeg

1/4 teaspoon vanilla extract

1/2 cup dark chocolate chips

1/2 cup chopped pecans or walnuts (optional)

Instructions
 

In a medium mixing bowl, combine the almond flour and rolled oats, mixing thoroughly.

    In a separate small bowl, whisk together the melted coconut oil, maple syrup, and vanilla extract until well combined.

      Pour the wet mixture into the dry ingredients and stir until a crumbly dough forms.

        Press the mixture firmly into the bottom of a lined 8x8 inch baking dish to create the crust.

          In another bowl, mix the pumpkin puree, peanut butter, cinnamon, and nutmeg until smooth and creamy.

            Spread the pumpkin filling over the crust evenly using a spatula.

              Melt the dark chocolate chips in a microwave-safe bowl in 30-second intervals, stirring in between until completely smooth.

                Drizzle the melted chocolate over the pumpkin layer and use a toothpick to create swirls if desired.

                  If using, sprinkle the chopped nuts on top for added crunch.

                    Refrigerate the bars for at least 2 hours or until fully set.

                      Once set, remove from the dish using the parchment paper and cut them into square bars.

                        Prep Time: 20 minutes | Total Time: 2 hours 20 minutes | Servings: 16 bars

                          - Presentation Tips: Serve chilled on a platter, dusted lightly with cocoa powder, and garnished with a sprinkle of cinnamon for a beautiful touch.

                            Leave a Comment

                            Recipe Rating