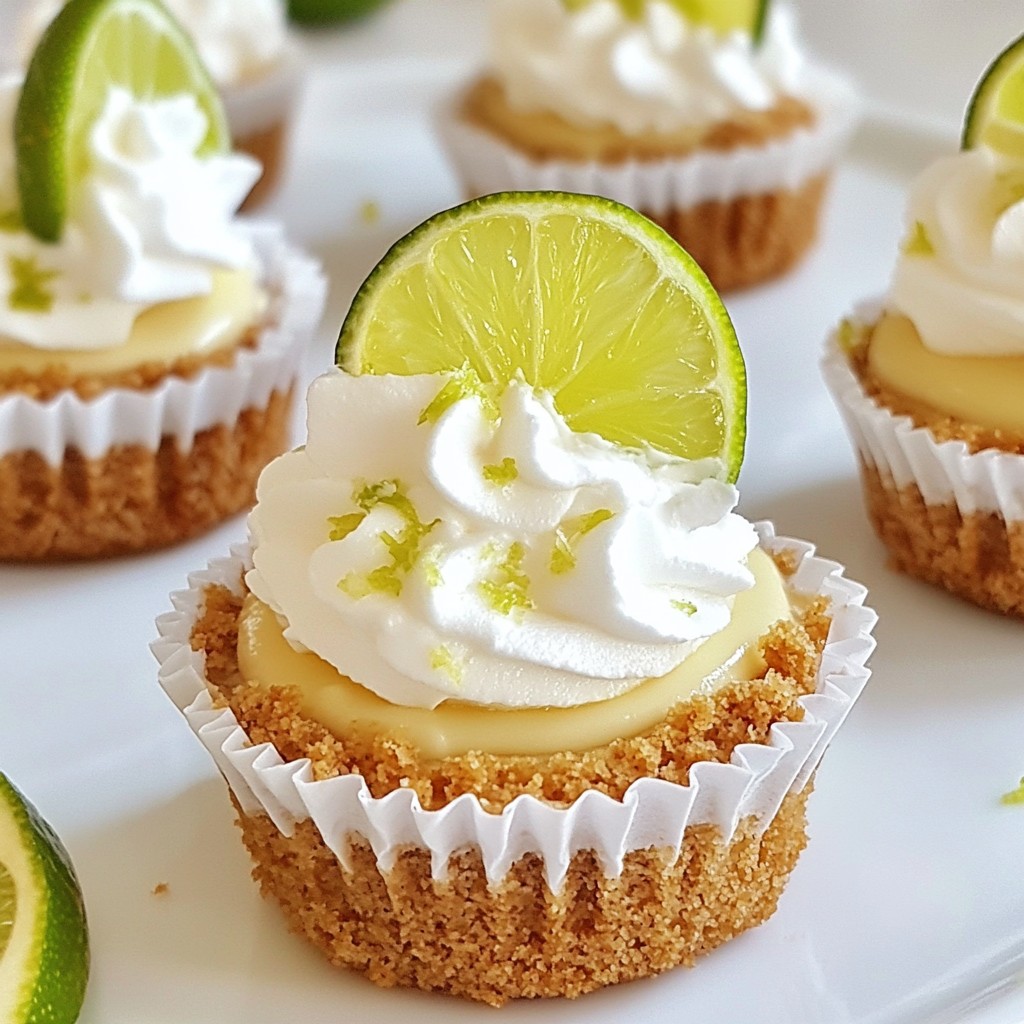
Are you ready to indulge in a sweet treat that’s both tangy and simple? These Mini Key Lime Cheesecakes are easy to make and perfect for any occasion! With a creamy filling and a zesty kick, these little desserts will wow your friends and family. In this guide, I’ll walk you through the ingredients, step-by-step instructions, and tips for perfection. Let’s dive into this delightful baking adventure!
Why I Love This Recipe
- Deliciously Tangy: The fresh key lime juice gives these cheesecakes a bright and zesty flavor that perfectly balances the sweetness of the filling.
- Perfect Portion Size: Mini cheesecakes are great for portion control, making them ideal for parties or a sweet treat without overindulging.
- Easy to Make: With simple ingredients and straightforward steps, this recipe is perfect for both novice and experienced bakers alike.
- Impressive Presentation: Topped with whipped cream and fresh lime slices, these mini cheesecakes look stunning and are sure to impress your guests.
Ingredients
Key Ingredients for Mini Key Lime Cheesecakes
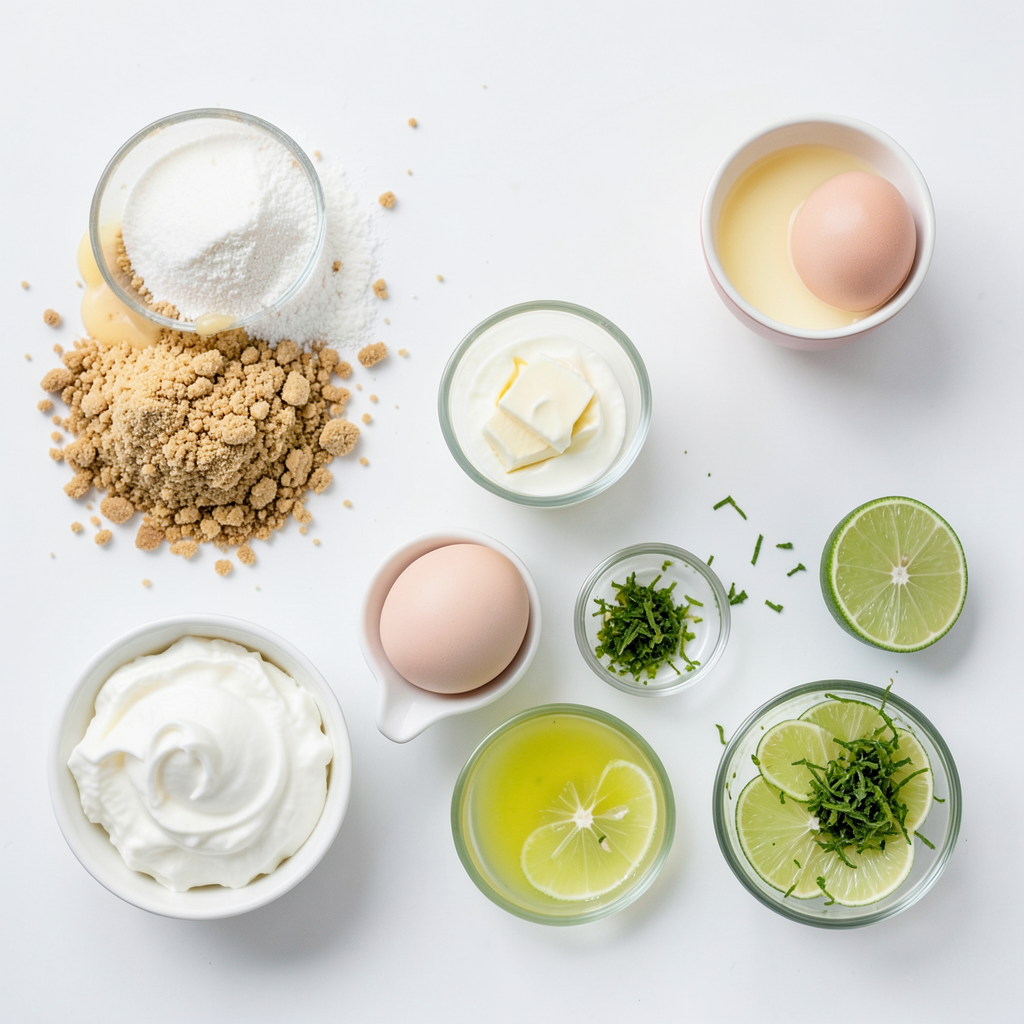
To make these tasty mini key lime cheesecakes, gather these key ingredients:
- 1 cup graham cracker crumbs
- 1/4 cup granulated sugar
- 1/2 cup unsalted butter, melted
- 16 oz cream cheese, softened
- 1 cup sweetened condensed milk
- 1/2 cup fresh key lime juice (or regular lime juice)
- 1 tablespoon lime zest
- 2 large eggs
These ingredients create a rich and creamy filling with a zesty kick. The graham cracker crust adds a nice crunch. You can feel the tang from the lime juice in each bite.
Optional Ingredients for Serving
To take your mini cheesecakes to the next level, consider these optional ingredients for serving:
- Whipped cream, for topping
- Lime slices, for garnish
Whipped cream adds a lightness that pairs well with the rich cheesecake. A slice of lime on top gives a pop of color and a bit more zest.
Substitutions and Adjustments
You can adjust the recipe to fit your taste or needs:
- Swap graham crackers for crushed cookies like Oreos for a different crust.
- Use a sugar substitute if you want a lower-calorie option.
- If you prefer a dairy-free version, look for dairy-free cream cheese.
These changes can help you customize the recipe to fit your diet or preferences without losing flavor. Experiment and have fun!
Step-by-Step Instructions
Preparation Steps Before Baking
First, we need to set the stage for our mini key lime cheesecakes. Start by preheating your oven to 325°F (163°C). This will get your oven ready for baking. In a mixing bowl, combine 1 cup of graham cracker crumbs, 1/4 cup of granulated sugar, and 1/2 cup of melted unsalted butter. Make sure to mix well until all the crumbs are coated. This mixture will be your crust. Next, line a cupcake pan with cupcake liners. Press about 1 tablespoon of the graham cracker mixture into the bottom of each liner. This forms the crust for your cheesecakes.
Baking the Crust and Filling
Now, it’s time to bake our crusts. Place the cupcake pan in the preheated oven for 5 to 7 minutes. Watch for them to turn slightly golden. Once done, remove them from the oven and let them cool a bit. Meanwhile, we will prepare the cheesecake filling. In a large mixing bowl, take 16 oz of softened cream cheese. Beat it with an electric mixer until smooth. Gradually add 1 cup of sweetened condensed milk while mixing. It should blend well. Then, stir in 1/2 cup of fresh key lime juice, 1 tablespoon of lime zest, and 2 large eggs. Mix until just combined, but avoid overmixing. Now, pour the cheesecake filling over the cooled crusts, filling each cup about 2/3 full.
Cooling and Setting Process
Next, we bake the cheesecakes. Place the pan back into the oven and bake for 15 to 20 minutes. The sides should be set, but the centers can still jiggle a bit. Once baked, turn off the oven and crack the oven door. Allow the cheesecakes to cool in the oven for 1 hour. This step helps prevent cracks. After that, take them out and let them cool to room temperature. Finally, refrigerate the mini cheesecakes for at least 3 hours, or even overnight, to fully set. When ready to serve, top each cheesecake with whipped cream and a slice of lime. Enjoy your delicious treats!
Tips & Tricks
Key Techniques for Perfect Cheesecakes
To make mini key lime cheesecakes perfect, focus on two main things: temperature and mixing.
- Room Temperature Ingredients: Always use room temperature cream cheese. It blends easily and creates a smooth filling.
- Gentle Mixing: Mix slowly when adding eggs. Overmixing can make the cheesecake dense. Just blend until everything is combined.
Common Mistakes to Avoid
Many home cooks face issues when baking cheesecakes. Here are some common mistakes:
- Skipping the Cooling Step: Letting the cheesecakes cool in the oven helps prevent cracks. Cracking happens when the temperature drops too fast.
- Not Chilling Long Enough: Cheesecakes need time to set. Aim for at least three hours in the fridge. Overnight is even better.
Presentation Ideas for Serving
Serving mini key lime cheesecakes can be fun and creative. Here are some ideas:
- Simple Garnish: Top each cheesecake with a dollop of whipped cream. A slice of lime adds a nice touch.
- Serving on a Platter: Arrange cheesecakes on a colorful platter. It makes them look inviting.
- Add Color: Use fresh mint leaves for a pop of green. This adds color and freshness to your plate.
These tips will help you create delightful mini key lime cheesecakes every time!
Pro Tips
- Use Fresh Limes: For the best flavor, always use fresh key limes or regular limes instead of bottled lime juice.
- Cool Gradually: Allow the cheesecakes to cool gradually in the oven to prevent cracking on the surface.
- Chill Overnight: For the most set and creamy texture, refrigerate the cheesecakes overnight before serving.
- Garnish Wisely: Use fresh lime slices and whipped cream to enhance the presentation and add a lovely contrast to the cheesecakes.
Variations
Flavor Twist Ideas (e.g., coconut, chocolate)
You can give your mini key lime cheesecakes a fun twist. Adding coconut gives a tropical vibe. You can mix in shredded coconut into the crust or the filling. A chocolate version is also a crowd-pleaser. Just add melted chocolate to the filling for a creamy, rich taste. Another option is to swirl in berry puree for a fruity touch. Each twist opens up new flavors and fun experiences.
Gluten-Free Alternatives
If you need a gluten-free option, switch the graham cracker crumbs. Use gluten-free cookie crumbs or almond flour instead. You can mix the crumbs with melted butter and sugar just like the original recipe. For the filling, ensure your cream cheese and condensed milk are gluten-free. This way, everyone can enjoy these tasty treats without worry.
Mini vs. Full-Sized Cheesecakes
Mini cheesecakes are perfect for parties or gatherings. They are easy to serve and enjoy. Full-sized cheesecakes take longer to bake but offer a classic dessert experience. You can use the same filling recipe for both versions. Just adjust the baking time. For a full-sized cheesecake, bake for 25-35 minutes. The key is to check that the edges are set while the center is slightly jiggly.
Storage Info
How to Store Mini Key Lime Cheesecakes
To keep your mini key lime cheesecakes fresh, place them in an airtight container. This will help maintain their creamy texture and zesty flavor. Store them in the fridge for up to five days. If you plan to serve them later, chilling is key.
Freezing Tips and Storage Duration
You can freeze these treats for longer storage. Place them in a freezer-safe container or wrap them tightly in plastic wrap. They can last up to two months in the freezer. When you’re ready to enjoy them, just thaw them in the fridge overnight. This keeps them tasty and fresh.
Reheating Instructions for Best Results
Reheating cheesecakes is not usually needed, but if you want to warm them slightly, do it carefully. Use the microwave on low power for 10 to 15 seconds. This helps maintain their texture without cooking them further. Enjoy your mini key lime cheesecakes whenever you like!
FAQs
How long do mini key lime cheesecakes last?
Mini key lime cheesecakes stay fresh for about 4-5 days in the fridge. Keep them in an airtight container. For best taste, enjoy them within the first few days. If you want to save some, you can freeze them.
Can I use regular limes instead of key limes?
Yes, you can use regular limes. Key limes have a unique flavor that is sweeter and more tart. If you choose regular limes, your cheesecakes will still taste great, but they may be a bit more sour. Adjust the sugar if you want a sweeter taste.
What can I use instead of cream cheese?
You can try using mascarpone cheese for a creamier texture. Greek yogurt is another option. It will give a tangy flavor and lower fat content. You can also use a dairy-free cream cheese if you want a vegan option. Just keep in mind that it may change the taste and texture slightly.
Mini key lime cheesecakes are fun and tasty desserts. We covered key ingredients, step-by-step baking, and helpful tips for success. You learned about flavor twists, storage tips, and answers to common questions. Now, you can impress your friends and family with these treats. Remember to avoid common mistakes and try different flavors. Your next baking adventure awaits, so enjoy making and sharing these delightful cheesecakes!