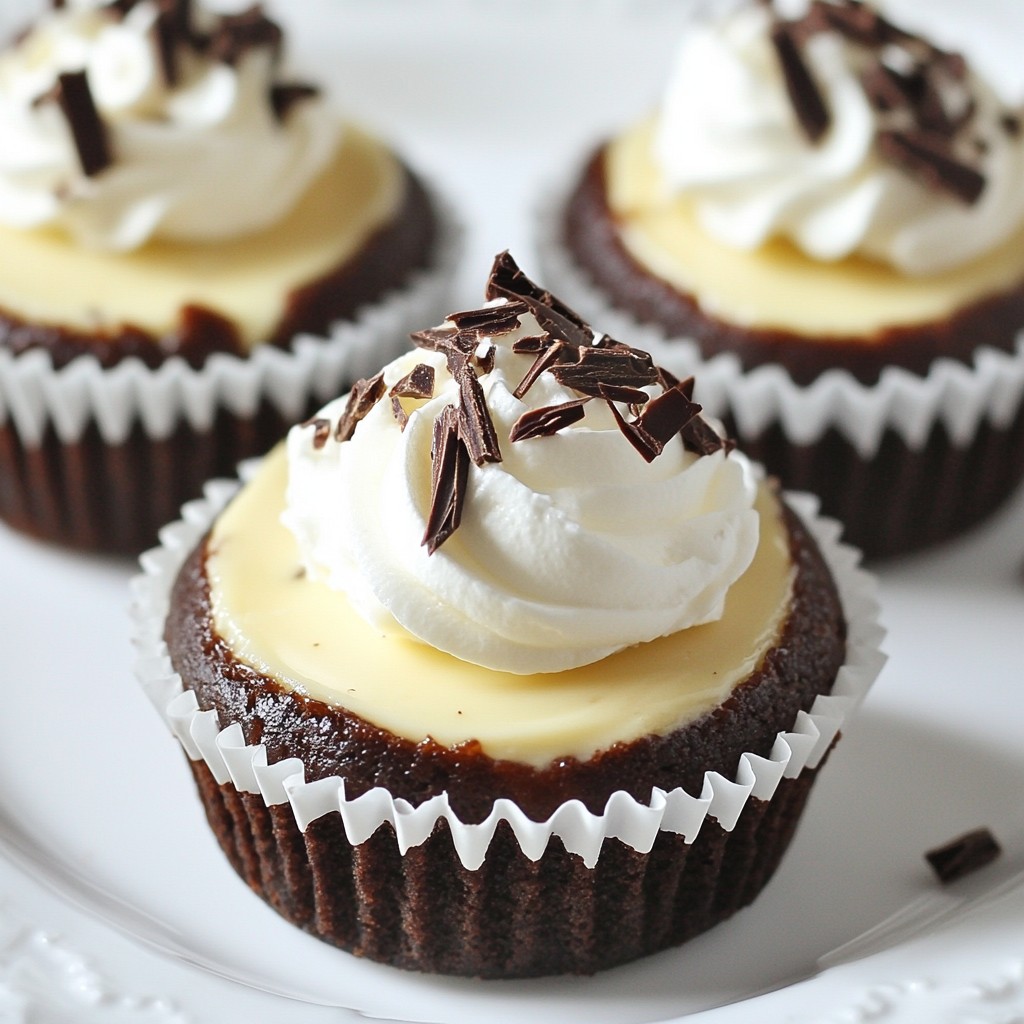
Get ready to indulge in the rich and creamy world of Mini Chocolate Cheesecakes! These bite-sized treats pack a delightful punch of chocolate flavor and are easy to whip up. With just a few simple ingredients, you can create a dessert that will impress friends and family alike. Join me as I guide you through the steps to make these heavenly mini cheesecakes, along with tips and tasty variations that will satisfy any sweet tooth!
Why I Love This Recipe
- Decadent Flavor: These mini chocolate cheesecakes are rich and creamy, delivering an indulgent chocolate experience that pleases every palate.
- Perfect Portion: Being mini-sized, they are great for portion control, making them an ideal treat for parties or gatherings.
- Easy to Make: With simple steps and straightforward ingredients, this recipe is perfect for both novice and experienced bakers.
- Customizable Toppings: You can easily elevate these cheesecakes with whipped cream and chocolate shavings, making them even more delightful.
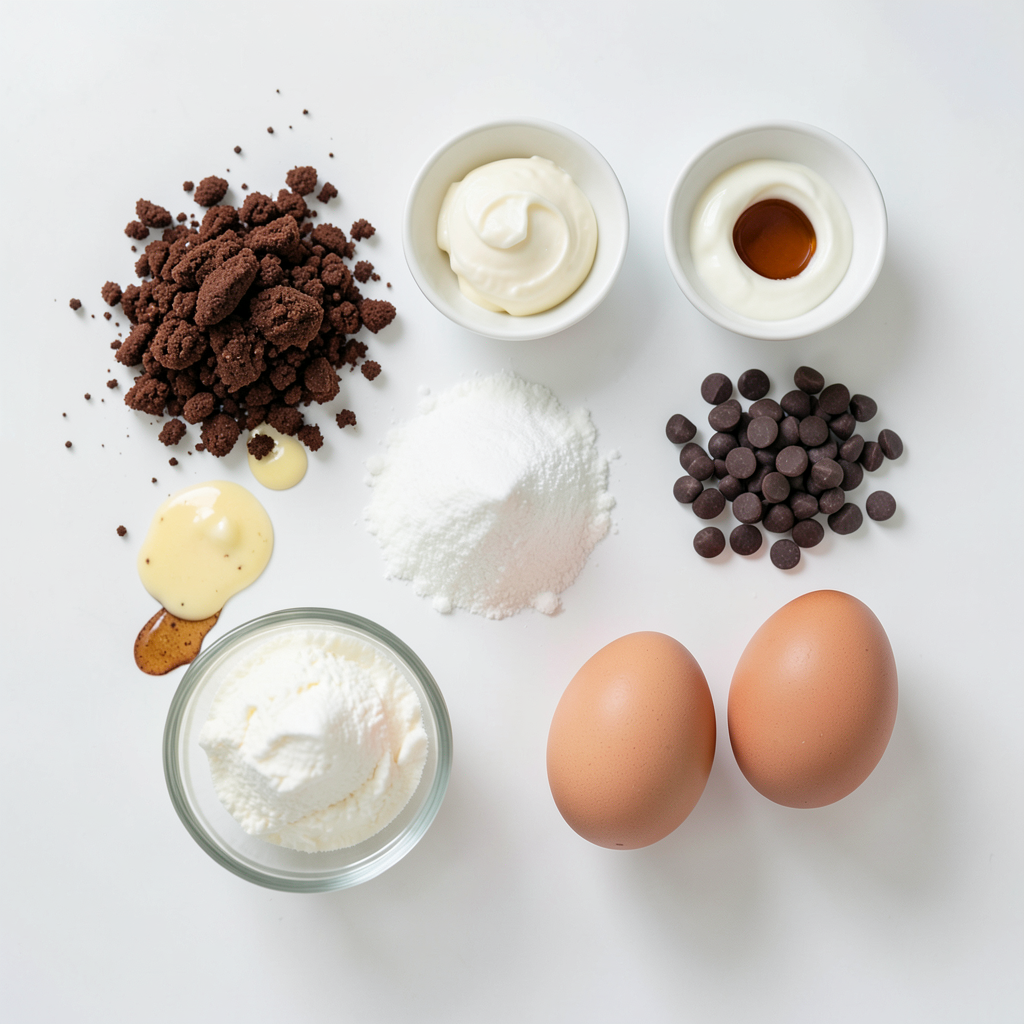
Ingredients
Main Ingredients
- 1 cup chocolate cookie crumbs (such as Oreos)
- 4 tablespoons unsalted butter, melted
- 8 oz cream cheese, softened
- 1/2 cup granulated sugar
- 1 teaspoon vanilla extract
- 1/2 cup sour cream
- 1/2 cup semi-sweet chocolate chips, melted
- 2 large eggs
To make mini chocolate cheesecakes, you need a few key ingredients. First, the chocolate cookie crumbs serve as a tasty crust. I love using Oreos because they add a rich chocolate flavor. You will also need unsalted butter to help bind the crumbs together.
Cream cheese is the star of this recipe. It gives the cheesecake its rich and creamy texture. Granulated sugar sweetens the mix, while vanilla extract adds depth to the flavor. Sour cream makes the filling extra smooth and adds a slight tang.
Melted semi-sweet chocolate chips blend into the batter for a deep chocolate taste. Lastly, eggs help set the cheesecake and give it structure. This combination of ingredients makes for a delicious treat.
Optional Toppings
- Whipped cream
- Chocolate shavings
For an extra touch, consider adding toppings. Whipped cream adds lightness and sweetness. Chocolate shavings make the dessert look fancy and appealing. You can mix and match these toppings based on your mood or occasion. Enjoy making these mini chocolate cheesecakes!
Step-by-Step Instructions
Preheat the Oven
Set your oven to 325°F (160°C). This temperature is perfect for baking mini cheesecakes. Next, prepare a 12-cup muffin tin by lining it with cupcake liners. This step makes it easy to remove the cheesecakes later.
Prepare the Crust
In a medium bowl, mix 1 cup of chocolate cookie crumbs with 4 tablespoons of melted unsalted butter. Stir until all crumbs are fully coated with butter. This mixture will form a tasty crust. Take about 1 tablespoon of the crumb mixture and press it into the bottom of each cupcake liner. Make sure it is compact and even. Bake this in your preheated oven for 10 minutes, and then let them cool.
Make the Cheesecake Filling
In a large mixing bowl, take 8 oz of softened cream cheese. Beat it with a hand mixer until it is smooth and creamy. Next, add 1/2 cup of granulated sugar and mix until fully combined. Then, mix in 1 teaspoon of vanilla extract and 1/2 cup of sour cream. Pour in 1/2 cup of melted semi-sweet chocolate chips, mixing until there are no lumps. Finally, add in 2 large eggs, one at a time, mixing on low speed. Be careful not to overmix.
Fill the Cups and Bake
Pour the cheesecake batter into the prepared crusts. Fill each liner about 3/4 full. Bake the mini cheesecakes for 18 to 20 minutes. The edges should be set, but the center should still jiggle slightly. This jiggle means they will set perfectly as they cool.
Cooling and Chilling
Once baked, take the cheesecakes out of the oven. Allow them to cool at room temperature for about 30 minutes. This step is important to avoid a sudden temperature change. After cooling, transfer them to the refrigerator. Chill for at least 2 hours, but overnight is best. This chilling time helps the flavors come together and makes them rich and creamy.
Tips & Tricks
Achieving the Perfect Texture
To get a smooth and creamy cheesecake, avoid overmixing. Mix the eggs slowly, one at a time, until just combined. Overmixing can cause air bubbles, leading to cracks.
Cooling your cheesecakes is also key. After baking, let them cool at room temperature for 30 minutes. Then, move them to the fridge. Chill them for at least two hours. This helps set the texture and flavor.
Baking Tips
Checking for doneness is simple. The edges should be set, but the center should still jiggle slightly. This means they’re just right.
For even baking, rotate the muffin tin halfway through. This helps all the cheesecakes bake uniformly.
Presentation Tips
Serving your mini cheesecakes can be fun! Use cupcake liners in bright colors for a pop.
Garnish with whipped cream on top. Add chocolate shavings for a fancy touch. You can also drizzle chocolate sauce for extra flair.
Pro Tips
- Use Room Temperature Ingredients: Make sure your cream cheese and eggs are at room temperature for a smoother batter without lumps.
- Don’t Overmix: When adding the eggs, mix just until incorporated to avoid a dense texture in your cheesecakes.
- Chill Overnight: For the best flavor and texture, chill the cheesecakes overnight. This allows them to set properly and enhances the taste.
- Customize Your Toppings: Feel free to get creative with toppings. Fresh berries, caramel sauce, or even a drizzle of peanut butter can elevate your mini cheesecakes!
Variations
Flavor Variations
You can change the flavor of your mini chocolate cheesecakes easily.
- Adding different types of chocolate: Use milk chocolate, dark chocolate, or white chocolate. Each type adds its own unique taste. Mix melted chocolate into the filling for a rich twist.
- Incorporating fruit flavors: Try adding fruit like raspberries or strawberries. Puree the fruit and mix it into the batter for a fruity surprise. You can also place a slice of fruit on top for a pretty look.
Alternative Crusts
Switching up the crust can add fun to your cheesecakes.
- Using graham crackers: If you want a classic taste, use crushed graham crackers. Mix them with butter just like the chocolate cookie crumbs.
- Gluten-free options: For gluten-free cheesecakes, use gluten-free cookies or almond flour. This keeps the crust tasty while being safe for those with gluten allergies.
Mini Cheesecake Serving Ideas
Mini cheesecakes are perfect for all kinds of gatherings.
- Individual serving suggestions: Serve them in cupcake liners for easy eating. You can even place them in small jars for a cute touch.
- Party platter ideas: Arrange the cheesecakes on a big platter. Add fun toppings like sprinkles or chocolate chips to make them stand out. This makes a great dessert for parties or special events.
Storage Info
How to Store
To keep your mini chocolate cheesecakes fresh, store them in the fridge. Place them in an airtight container. This helps prevent them from drying out or absorbing other smells. If you want to keep them longer, freezing works too. Wrap each cheesecake tightly in plastic wrap. Then, place them in a freezer-safe bag or container.
Shelf Life
In the fridge, these mini cheesecakes last about five days. Keep an eye out for signs of spoilage. Look for changes in texture or smell. If they look dry or smell off, it's best to toss them.
Reheating Instructions
If you freeze your cheesecakes, thaw them in the fridge overnight before serving. To reheat, set your oven to 300°F (150°C). Place the cheesecakes on a baking sheet for about 10 minutes. This warms them without cooking them further. Enjoy the rich and creamy delight!
FAQs
Can I use a different type of cookie for the crust?
Yes, you can use many cookies for the crust. Some great options include:
- Graham crackers
- Digestive biscuits
- Vanilla wafers
- Gluten-free cookies
Each will give a unique taste. Just ensure they are finely crushed and mixed with melted butter for the best result.
How long can I leave the mini cheesecakes out?
You should not leave the mini cheesecakes out for long. They can sit at room temperature for about 2 hours. After that, they should go back in the fridge to keep them fresh.
Can I make the batter ahead of time?
Yes, you can prepare the batter ahead of time. Mix all the ingredients and store it in the fridge for up to 24 hours. Just remember to mix it again before pouring it into the crusts.
Are mini chocolate cheesecakes suitable for special diets?
You can make these cheesecakes fit different diets. For vegan options, use plant-based cream cheese and egg replacers. For gluten-free, choose gluten-free cookies for the crust. Always check labels to ensure all ingredients meet dietary needs.
You learned how to make delicious mini chocolate cheesecakes. We covered the key ingredients, from cookie crumbs to cream cheese. I showed you step-by-step instructions, tips for texture, and storage methods. Experiment with flavors and crusts to make it your own.
Now, you can impress friends and family with these tasty treats. Follow the tips, and enjoy your baking!