Are you ready to dive into a dessert that’s both delightful and indulgent? This Chocolate Hazelnut Crepe Cake is just the treat you need! With layers of soft crepes, rich chocolate hazelnut spread, and fluffy whipped cream, this cake is sure to impress. Whether for a special occasion or a sweet treat at home, follow my easy steps to create your own masterpiece. Let's get started on this delicious journey!
Why I Love This Recipe
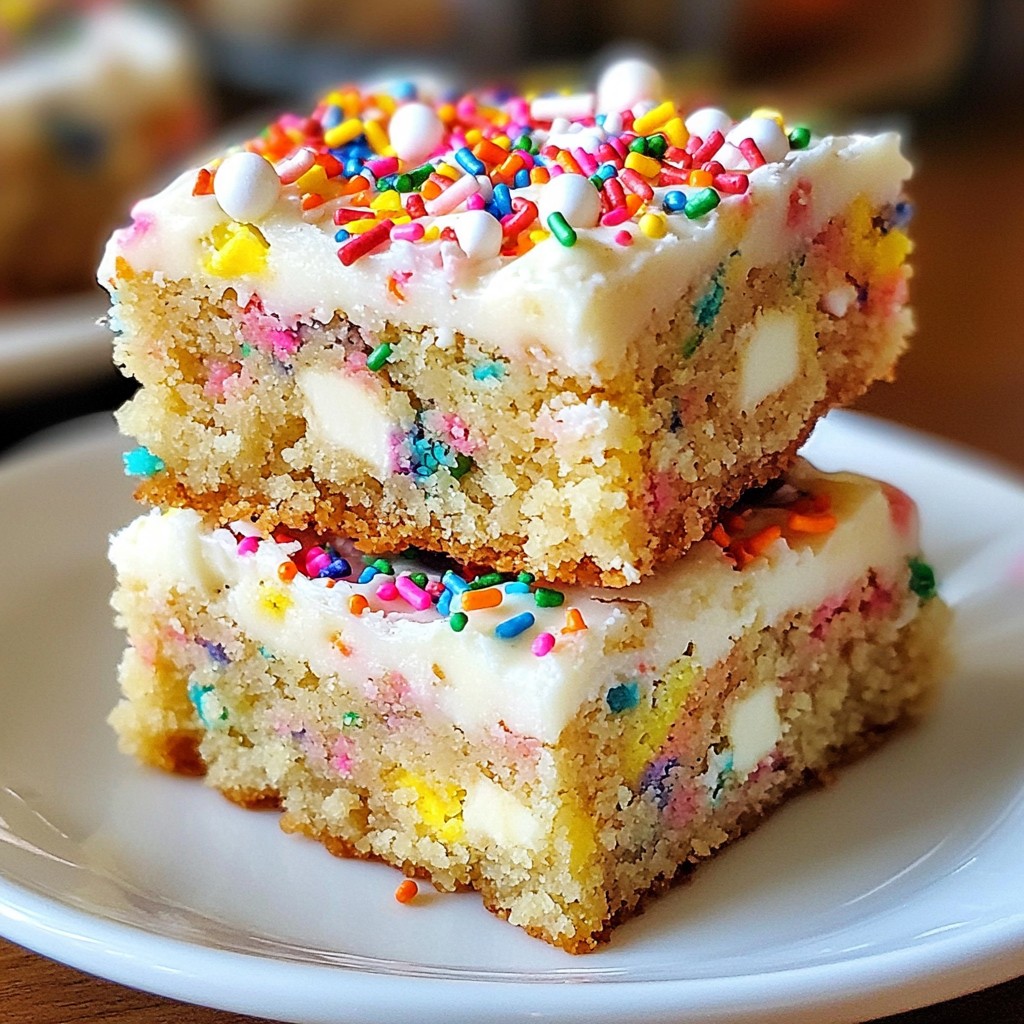
- Decadent Flavor: This crepe cake combines rich chocolate and nutty hazelnut flavors, creating a luxurious dessert that tantalizes the taste buds.
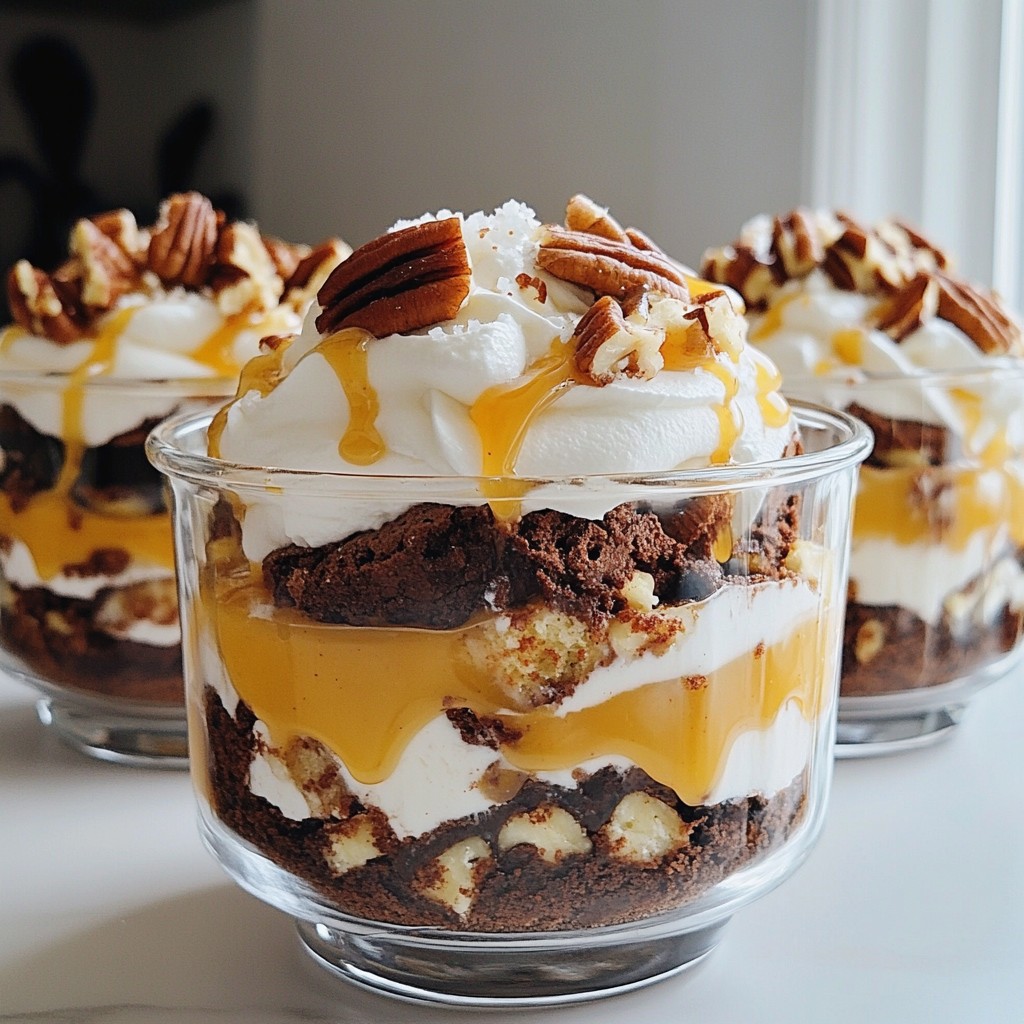
- Elegant Presentation: The layered look of the crepes and whipped cream makes this cake a stunning centerpiece for any occasion.
- Easy to Make: Despite its impressive appearance, this recipe is straightforward and perfect for both novice and experienced bakers.
- Versatile Treat: Enjoy it as a dessert at a dinner party or a sweet indulgence for a special breakfast or brunch.
Ingredients
List of Required Ingredients
- 1 ½ cups all-purpose flour
- 3 tablespoons unsweetened cocoa powder
- 3 large eggs
- 2 ½ cups milk
- 4 tablespoons melted butter, plus extra for cooking
- ¼ cup granulated sugar
- 1 teaspoon vanilla extract
- 1 cup chocolate hazelnut spread (like Nutella)
- 1 cup heavy cream
- 2 tablespoons powdered sugar
- ½ cup toasted hazelnuts, chopped for garnish
- A pinch of salt
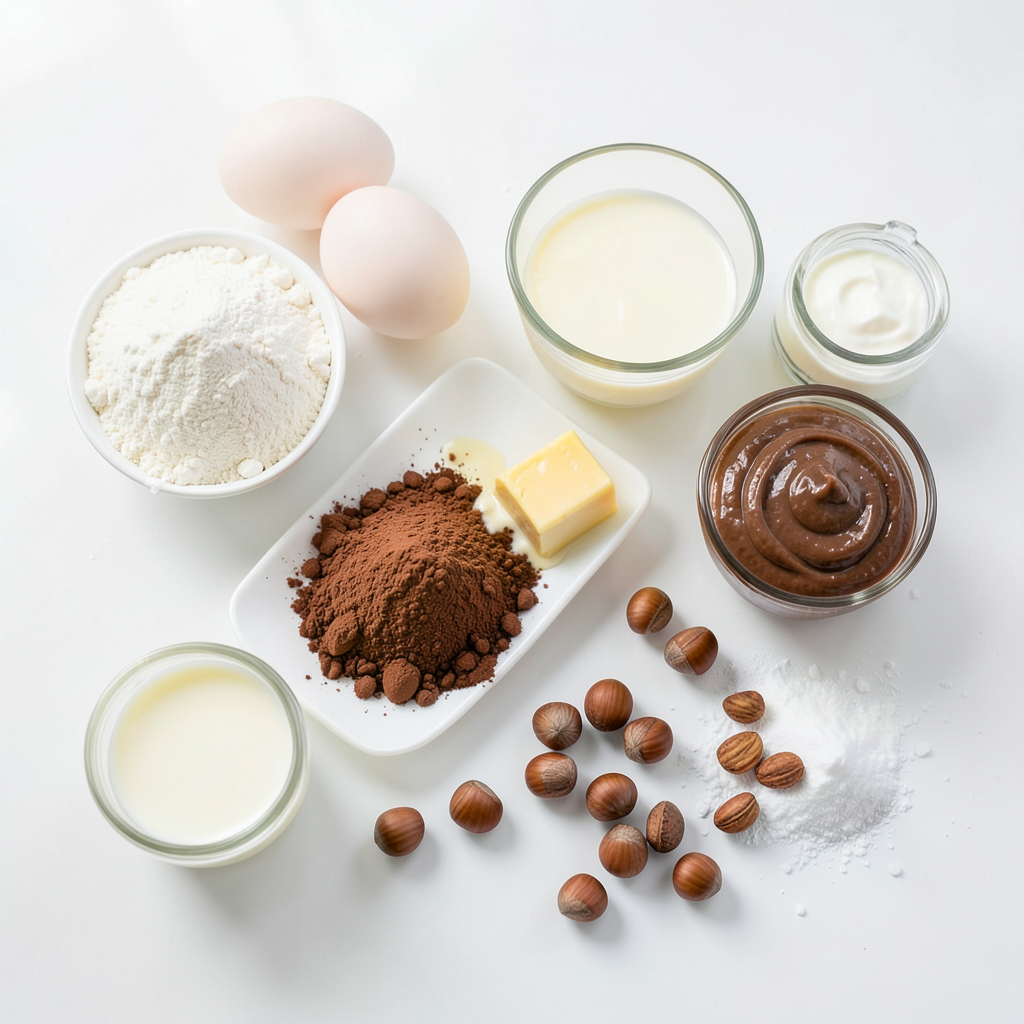
To create a perfect Chocolate Hazelnut Crepe Cake, you need simple yet key ingredients. Each one plays a vital role in building flavor and texture.
First, the flour and cocoa blend forms the base of your crepes. The eggs give them structure and richness. Milk adds moisture, creating a soft texture. Melted butter not only enriches the batter but also helps the crepes cook perfectly.
Granulated sugar sweetens the crepes slightly, while vanilla extract adds warmth. Chocolate hazelnut spread is the star ingredient, providing that rich, nutty flavor. Heavy cream and powdered sugar blend to make a fluffy whipped cream. Finally, toasted hazelnuts add crunch and a lovely finish.
Optional Ingredients for Variations
- Additional flavorings (e.g., espresso, orange zest)
- Different types of nut spreads
- Alternative dairy options
You can customize your cake using optional ingredients. Adding espresso boosts the chocolate flavor. A touch of orange zest brings a fresh note. Feel free to explore different nut spreads for unique tastes, like almond or peanut butter. For those who prefer dairy-free, try almond or oat milk in the batter.
These ingredients not only enhance your cake but also allow you to make it your own.
Step-by-Step Instructions
Making the Crepe Batter
Start by whisking together the dry ingredients in a bowl. This includes:
- 1 ½ cups all-purpose flour
- 3 tablespoons unsweetened cocoa powder
- ¼ cup granulated sugar
- A pinch of salt
Mix them well until combined. In a second bowl, combine the wet ingredients:
- 3 large eggs
- 2 ½ cups milk
- 4 tablespoons melted butter
- 1 teaspoon vanilla extract
Gradually add the wet mix to the dry mix. Whisk until the batter is smooth. Let the batter rest for about 30 minutes. This helps it thicken and improves the texture.
Cooking the Crepes
Heat a non-stick skillet or crepe pan over medium heat. Lightly grease it with melted butter. Pour about ¼ cup of the batter into the hot pan. Quickly swirl the pan to spread the batter evenly. Cook for 1-2 minutes or until the edges lift. Flip the crepe and cook for another 30 seconds. Transfer the cooked crepe to a plate. Continue this process until you use all the batter. Stack the crepes with parchment paper between them to avoid sticking.
Preparing the Whipped Cream
In a clean mixing bowl, add:
- 1 cup heavy cream
- 2 tablespoons powdered sugar
Whip the cream until soft peaks form. This means the cream holds a peak shape but is still soft and smooth. Avoid over-whipping, as it can turn grainy.
Assembling the Cake
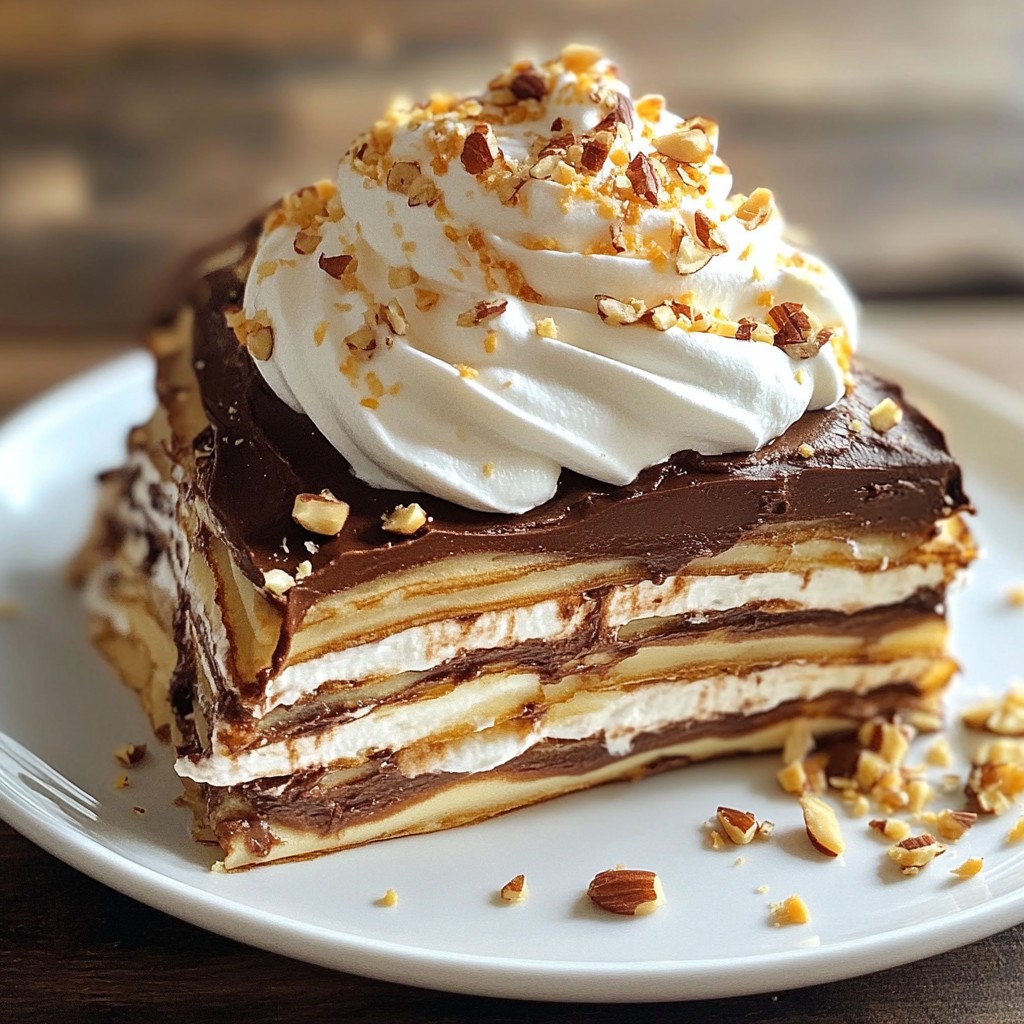
On a serving plate, place one crepe down. Spread about 2 tablespoons of chocolate hazelnut spread over it. Add a layer of whipped cream, smoothing it out. Repeat this with the remaining crepes, alternating between the hazelnut spread and whipped cream. Make sure to stack them evenly. The last crepe should sit on top.
Chilling and Serving
After assembling, refrigerate the cake for at least 1 hour. This helps it set and makes it easier to slice. Before serving, sprinkle the top with chopped toasted hazelnuts for a nice crunch and a beautiful look. Enjoy your delightful creation!
Tips & Tricks
Perfecting Crepes
If your batter is too thick, add a little milk. This helps it spread well. If it's too thin, add a bit of flour. Let the batter rest for at least 30 minutes. This step helps the gluten relax and makes cooking easier.
Common mistakes include cooking at too high a heat. This can burn the crepes. Another mistake is not greasing the pan enough. A little melted butter goes a long way. Always swirl the batter quickly to get a thin layer.
Achieving the Best Whipped Cream
To whip cream to the right consistency, chill your mixing bowl first. Use heavy cream for the best results. Start on low speed, then increase to medium. Stop when soft peaks form. Be careful not to over-whip, or it will turn into butter.
You can use flavored extracts, like vanilla or almond, for extra taste. Just a few drops can change the flavor profile. You could even add a bit of cocoa powder for a chocolate twist.
Serving Suggestions
Pair your crepe cake with coffee or a glass of milk. A rich espresso complements the chocolate well. You can also serve it with fresh berries or a scoop of ice cream for added fun.
For presentation, stack the crepes high on a beautiful plate. You can sprinkle the top with extra chopped hazelnuts. A drizzle of chocolate sauce can also make it look fancy. This cake shines on any dessert table!
Pro Tips
- Rest the Batter: Allowing the crepe batter to rest for at least 30 minutes helps the flour absorb the liquid, resulting in softer and more tender crepes.
- Keep It Thin: When pouring the batter into the pan, aim for a thin, even layer. This ensures that the crepes cook evenly and remain delicate.
- Whip to Perfection: For the whipped cream, avoid over-whipping. Stop when soft peaks form to maintain a light and airy texture.
- Chill Before Serving: Refrigerating the assembled cake allows the layers to set and makes it easier to slice, enhancing the overall presentation.
Variations
Flavored Crepes
You can easily change up the flavor of your crepes. Adding spices like cinnamon or nutmeg gives them a warm twist. You can also mix in extracts, like almond or orange, to brighten the taste. If you want to try different spreads, almond or peanut butter can be excellent choices. They add a nice depth to the cake, making it more unique.
Dietary Modifications
For those who need gluten-free options, you can switch the all-purpose flour with a gluten-free blend. Make sure to check that it has xanthan gum for good texture. If you prefer a vegan version, replace eggs with flax eggs and use plant milk. For the whipped cream, choose a coconut cream or aquafaba. These changes let everyone enjoy this cake.
Serving Style
You can serve this crepe cake in fun ways. Create individual portions by stacking smaller mini crepes. They are perfect for parties or brunch. For toppings, think beyond hazelnuts. Fresh berries, chocolate shavings, or a drizzle of caramel can add flair. These choices make your dessert not only tasty but also visually stunning.
Storage Info
How to Store Leftovers
To keep your Chocolate Hazelnut Crepe Cake fresh, wrap it well. Use plastic wrap or foil to cover the whole cake. This keeps moisture in and prevents it from drying out. If you have extra crepes or whipped cream, store them separately. This helps the crepes stay soft and the cream fluffy. You can stack crepes with parchment paper in between to avoid sticking. Refrigerate all components or the assembled cake for up to three days.
Freezing Tips
Yes, you can freeze the crepe cake! To do this, wrap it tightly in plastic wrap and then foil. This prevents freezer burn. You can also freeze individual slices if you prefer. To thaw, place the cake in the fridge overnight. This method keeps the cake moist and tasty. Avoid thawing at room temperature, as it might make the cake soggy. Enjoy your delightful dessert even after storing!
FAQs
What can I use if I don’t have a crepe pan?
If you don’t have a crepe pan, don’t worry! You can use a non-stick skillet. Just make sure it has a flat bottom. Heat it over medium heat and add a bit of melted butter. The skillet works well for cooking crepes too. You can also use a regular frying pan. It may take a bit more care to keep the crepes thin, but it works great.
How far in advance can I make the crepe cake?
You can make the crepe cake a day ahead. It stays fresh in the fridge for up to three days. Just cover it with plastic wrap to keep it moist. I like to chill it for at least one hour after assembling. This helps the layers set nicely. If you want to make it even earlier, you can store the crepes for up to two days. Just stack them with parchment paper in between.
Can I use a different type of chocolate spread?
Yes, you can use other chocolate spreads. Brands like Jif or other nut spreads work well too. Each type brings a unique taste. For example, hazelnut spreads add extra nutty flavor. If you use dark chocolate spread, the cake will taste richer. Just keep in mind, the texture may change based on the spread you choose. Enjoy experimenting!
In this blog post, we explored how to make a delicious crepe cake. We detailed the ingredients needed, from flour to chocolate hazelnut spread, and shared step-by-step instructions for making and cooking the crepes. I also included tips for perfecting your whipped cream and suggested variations to suit different tastes.
Now, you can create this delightful dessert with confidence. Whether for a special occasion or just a treat, enjoy every bite of your homemade crepe cake!