
Triple Chocolate Mousse Cake Decadent Dessert Recipe
Are you ready to indulge in a dessert that will wow your taste buds? The Triple Chocolate Mousse Cake offers
Are you ready to indulge in a dessert that will wow your taste buds? The Triple Chocolate Mousse Cake offers
![- 8 oz fettuccine or linguine pasta - 1 lb large shrimp, peeled and deveined - 2 tablespoons Cajun seasoning - 2 tablespoons olive oil - 1 medium onion, finely chopped - 3 cloves garlic, minced - 1 cup heavy cream - 1 cup chicken broth - 1 cup cherry tomatoes, halved - 1 cup grated parmesan cheese - Salt and pepper to taste - Fresh parsley, chopped for garnish You’ll need a mix of fresh and flavorful ingredients to make this creamy Cajun shrimp pasta special. The shrimp brings a nice protein boost, while the Cajun seasoning adds a warm kick. Fettuccine or linguine pasta gives a good base for the creamy sauce. - Gluten-free pasta alternatives, like rice or chickpea pasta - Dairy-free options for creamy sauce, such as coconut cream - Shrimp substitutions like chicken, tofu, or even scallops Feel free to swap out ingredients based on your needs. If you want a gluten-free meal, use rice pasta. For a dairy-free version, try coconut cream instead of heavy cream. You can easily switch shrimp for chicken or tofu if you prefer. These choices make the dish flexible for everyone. Check out the Full Recipe for more detailed steps on how to assemble these ingredients into a tasty dish! To start, bring a large pot of salted water to a boil. Add the pasta and cook according to the package instructions. Aim for al dente, which means the pasta will still have a slight bite. This usually takes about 8 to 10 minutes. Stir the pasta occasionally to prevent it from sticking. Once ready, drain the pasta in a colander and set it aside. Be sure to save 1 cup of pasta water for later. Next, let’s prepare the shrimp. In a mixing bowl, toss the peeled and deveined shrimp with Cajun seasoning. Make sure each shrimp is well coated for a burst of flavor. Heat 2 tablespoons of olive oil in a large skillet over medium-high heat. Once hot, add the shrimp to the skillet. Cook for 2-3 minutes on each side until they turn pink and opaque. This gives them a nice sear. Once cooked, transfer the shrimp to a plate and set them aside. Now it's time for the sauce. In the same skillet, add the chopped onion and minced garlic. Sauté them for about 2-3 minutes until the onion turns translucent. This step builds a great base for the sauce. Lower the heat and pour in 1 cup of chicken broth and 1 cup of heavy cream. Stir well to combine. Let it simmer gently for about 5 minutes. This thickens the sauce and brings all the flavors together. Then, stir in the halved cherry tomatoes and grated parmesan cheese. Mix until the cheese melts into the sauce. If the sauce feels too thick, add a bit of the reserved pasta water to reach your desired consistency. Finally, it’s time to bring it all together. Add the cooked pasta and shrimp back to the skillet. Gently toss everything until the pasta, shrimp, and sauce are well mixed. This way, each bite is full of flavor. Season with salt and pepper to taste. Now, your creamy Cajun shrimp pasta is ready to enjoy! For serving, divide it onto plates and garnish with fresh parsley to add a pop of color. You can check the [Full Recipe] for more details. To make a rich, creamy sauce, start with a good base. Use chicken broth and heavy cream for depth. If the sauce seems too thick, add some of the reserved pasta water. This helps adjust the consistency and keeps it silky. Taste as you go. You may want more Cajun seasoning or salt. Balance the flavors to your liking. Cooking shrimp is quick and simple. Heat the oil until it's hot, then add the shrimp. Cook for about 2-3 minutes on each side. Watch for the color change. They should turn pink and opaque. Overcooked shrimp will be tough. Remove them from the pan as soon as they are done. Plating is key to making your dish pop. Use shallow bowls for a beautiful look. Add a sprinkle of extra parmesan on top. A dash of Cajun seasoning adds color and flair. Fresh parsley not only adds taste but also brightens your dish. These little touches can impress your guests and elevate your meal. For the full recipe, check out the complete instructions above. {{image_2}} You can easily change the heat in your creamy Cajun shrimp pasta. To make it milder, use less Cajun seasoning. You can also add a touch of sugar or honey to balance the heat. For more spice, add extra Cajun seasoning or a dash of hot sauce. You can mix in some cayenne pepper too. Taste as you go to find the right heat for you. Adding vegetables is a great way to boost flavor and nutrition. You can toss in fresh spinach or kale at the end of cooking. This adds color and healthy greens. Bell peppers are another tasty option. Slice them thinly and sauté them with the onions. You could even add zucchini or mushrooms for a fun twist. Shrimp is great, but you can switch it up too. For a different flavor, try chicken. Just cut it into bite-sized pieces and cook it like the shrimp. You can also use scallops or crab for a seafood twist. If you want a meatless option, tofu works well. Just season and sauté it until it’s golden brown. Each protein brings its own taste, so have fun experimenting! For the full recipe, check here: [Full Recipe]. To store leftovers, let the pasta cool first. Place it in an airtight container. Make sure to seal it well to keep out air. Store it in the fridge for up to three days. This helps keep the flavors fresh. When reheating, use a skillet for best results. Add a splash of chicken broth or cream. This keeps the pasta moist and creamy. Heat it over medium-low heat. Stir often until warm. Avoid high heat to prevent the shrimp from becoming tough. Yes, you can freeze creamy Cajun shrimp pasta. Place it in a freezer-safe container. It can last for up to two months. When ready to eat, thaw it overnight in the fridge. Reheat it gently on the stove, adding a bit of liquid if needed. Enjoy your delicious meal later! For the full recipe, check out the detailed instructions. Yes, you can make this dish ahead of time. Cook the pasta and shrimp, but keep them separate. This helps avoid soggy pasta. You can store them in airtight containers in the fridge. When ready to eat, just heat the sauce and mix everything together. It will save you time on busy days! I love serving this pasta with a crunchy salad or garlic bread. Here are some great options: - Caesar salad for a fresh touch. - Roasted vegetables for extra flavor. - Garlic bread to soak up that creamy sauce. - A chilled white wine pairs well too, like Sauvignon Blanc. Yes, this recipe works well for meal prepping! Portion it out into containers for easy lunches. The creamy sauce holds up in the fridge for a few days. Just remember to store the sauce and pasta separately. This keeps everything fresh. Reheat in the microwave or on the stove, adding a splash of water if needed. Cajun shrimp pasta has roots in Louisiana cuisine. Cajun cooking mixes French, Spanish, and African flavors. The dish brings together the spice of Cajun seasoning and creamy pasta. It reflects the vibrant culture of the region. Over time, many chefs added their own twists, making it popular across America. You can easily add more heat to this dish. Here are some tips: - Use more Cajun seasoning when cooking shrimp. - Add a pinch of cayenne pepper for extra kick. - Drizzle hot sauce over the dish before serving. - Toss in sliced jalapeños for a fresh, spicy flavor. These options let you customize the heat to your taste! For the full recipe, check out the section above. You’ve learned how to make a delicious creamy Cajun shrimp pasta. We covered ingredients, cooking steps, and ways to customize the dish. Remember to focus on cooking shrimp perfectly and adjusting the sauce for your taste. Whether you stick to the classic recipe or experiment with veggies and proteins, your meal will shine. Enjoy your cooking journey!](https://soyumrecipes.com/wp-content/uploads/2025/05/c1ef4095-a8bd-46db-8e51-38e63d3763ad.webp)
Looking for a quick, tasty meal that packs a punch? Creamy Cajun Shrimp Pasta is your answer! This delightful dish
![To make cheesy garlic butter linguine, you need a few key items. Here is the list: - 8 oz linguine pasta - 4 tablespoons unsalted butter - 4 cloves garlic, minced - 1 cup heavy cream - 1 cup grated Parmesan cheese - 1 cup shredded mozzarella cheese - 1 teaspoon red pepper flakes (optional) - Salt and pepper to taste - Fresh parsley, chopped (for garnish) Each ingredient plays a big role in the dish. The linguine pasta gives you a great base. You want it to be cooked just right, so it holds the sauce well. Butter and garlic create a rich, savory flavor that makes your mouth water. Cream adds a nice smoothness, while the cheeses provide that cheesy goodness we all love. Parmesan brings a nutty flavor, and mozzarella adds creaminess. If you like a bit of heat, the red pepper flakes are a fun touch. Finally, fresh parsley adds color and a hint of freshness. For the full recipe, check out the steps to craft this delightful meal. Boiling the Water and Cooking Time Start by filling a large pot with water. Add a generous pinch of salt. Bring the water to a boil over high heat. Once boiling, add 8 oz of linguine pasta. Cook for about 8-10 minutes. You want it to be al dente, which means it should still have a slight bite. Stir occasionally to prevent sticking. Draining and Reserving Pasta Water When the pasta is ready, carefully drain it in a colander. Remember to save about 1/2 cup of the pasta water. This water is starchy and helps the sauce stick to the pasta later. Melting Butter and Cooking Garlic In a large skillet, melt 4 tablespoons of unsalted butter over medium heat. Once melted, add 4 cloves of minced garlic. Stir it around for about 1-2 minutes. You want the garlic to become fragrant, not burnt. Keep an eye on it! Adding Cream and Mixing in Cheeses Next, pour in 1 cup of heavy cream. Stir this mixture gently for about 2-3 minutes. Then, add 1 cup of grated Parmesan cheese and 1 cup of shredded mozzarella cheese. Keep stirring until the cheeses melt and the sauce becomes creamy. Tossing Linguine with Sauce Now, add your drained linguine to the skillet. Toss everything together. Make sure the pasta gets coated with the sauce. It should look rich and cheesy. Adjusting Consistency with Pasta Water If the sauce seems too thick, add a bit of the reserved pasta water. This will help loosen it up and keep it silky. Just add a little at a time until you reach your desired consistency. For the full recipe, check out the details above! To make your cheesy garlic butter linguine pop, try using different garlic types. You can use fresh garlic for a strong taste. For a milder flavor, consider roasted garlic. You could even add garlic powder for a quick fix. Spice lovers can boost the heat by adding more red pepper flakes or a dash of cayenne pepper. For cheeses, I recommend mixing Parmesan and mozzarella. This blend gives a nice balance of sharpness and creaminess. You can also try adding a bit of fontina or gouda for extra depth. Always use freshly grated cheese for the best melt and flavor. To avoid overcooked pasta, cook your linguine just until it's al dente. This means it should be firm to the bite. Keep an eye on the clock while cooking. Start checking a minute or two before the package time ends. For a creamy sauce, it’s key to heat your heavy cream gently. If it simmers too long, it may separate. Stir the sauce continuously as you add the cheese. If it gets too thick, add a little reserved pasta water. This helps achieve the perfect consistency. By following these tips, you’ll create a dish that everyone will love. For the complete recipe, check out the [Full Recipe]. Enjoy the cooking adventure! {{image_2}} Gluten-free Pasta Options You can use gluten-free linguine to make this dish. Many brands offer great options. Look for pasta made from brown rice or chickpeas. These choices hold up well and taste great. Dairy-free Alternatives for Cream and Cheese If you want a dairy-free version, try coconut cream in place of heavy cream. Nutritional yeast adds a cheesy flavor without dairy. You can also use vegan cheese for a creamy texture. Adding Vegetables or Proteins You can boost this dish by adding veggies. Spinach, cherry tomatoes, or broccoli work well. If you like protein, add cooked chicken, shrimp, or tofu. This adds flavor and makes it more filling. Flavor Infusions with Herbs and Spices For extra flavor, think about adding herbs like basil, oregano, or thyme. A squeeze of lemon juice brightens the dish. You can also use spices like smoked paprika or cayenne for heat. These small changes make a big difference. Feel free to mix and match to find your favorite version of Cheesy Garlic Butter Linguine. For the full recipe, check out the recipe card above! To keep your cheesy garlic butter linguine fresh, follow these steps. First, let the dish cool down to room temperature. Then, place it in an airtight container. This helps keep the flavors intact. You can refrigerate it for up to three days. If you want to store it longer, try freezing it. Just make sure to use a freezer-safe container. It’s best to freeze individual portions. This way, you can easily reheat just what you need. When reheating, use a skillet for the best results. Add a splash of water or cream to help it heat evenly. Stir often to avoid burning. You can also use a microwave. If you do, cover the dish loosely with a microwave-safe lid. Heat it in short bursts, stirring in between. How long does cheesy garlic butter linguine last in the fridge? It can stay good for about three days. After that, the taste and texture may change. Always check for freshness before eating. Look for signs of spoilage. If the pasta smells off or has a strange color, it’s best to throw it away. Mold is also a clear sign that the dish is no longer safe to eat. Always trust your senses to keep your meals safe. Can I make this dish ahead of time? Yes, you can make Cheesy Garlic Butter Linguine ahead of time. Prepare the pasta and sauce separately. Store them in airtight containers. When you're ready to eat, just reheat them together. Add a splash of pasta water to loosen the sauce. What can I serve with Cheesy Garlic Butter Linguine? This dish pairs well with many sides. You can serve it with a fresh green salad. Garlic bread also makes a great side. For protein, grilled chicken or shrimp complements the flavors nicely. Is it possible to make this recipe vegan? Absolutely! You can easily make this dish vegan. Use vegan butter and cream instead of dairy. For cheese, try a plant-based cheese blend. The flavors will still be rich and satisfying. Check out the Full Recipe for more details! You now have all the tools to make Cheesy Garlic Butter Linguine. We've covered the key ingredients, cooking steps, and helpful tips to boost flavor. You learned about variations and how to store your dish properly. In closing, this recipe offers a simple way to enjoy a flavorful meal. Experiment with different ingredients and techniques to make it your own. Enjoy creating your cheesy garlic delight!](https://soyumrecipes.com/wp-content/uploads/2025/05/fa75bb33-e796-462a-aa50-c999fbf9b0e8.webp)
If you crave a dish that bursts with flavor, you’ll love Cheesy Garlic Butter Linguine. This easy recipe fills your

Are you ready to take your snack game to the next level? My Baked Garlic Bread Dip offers a rich,
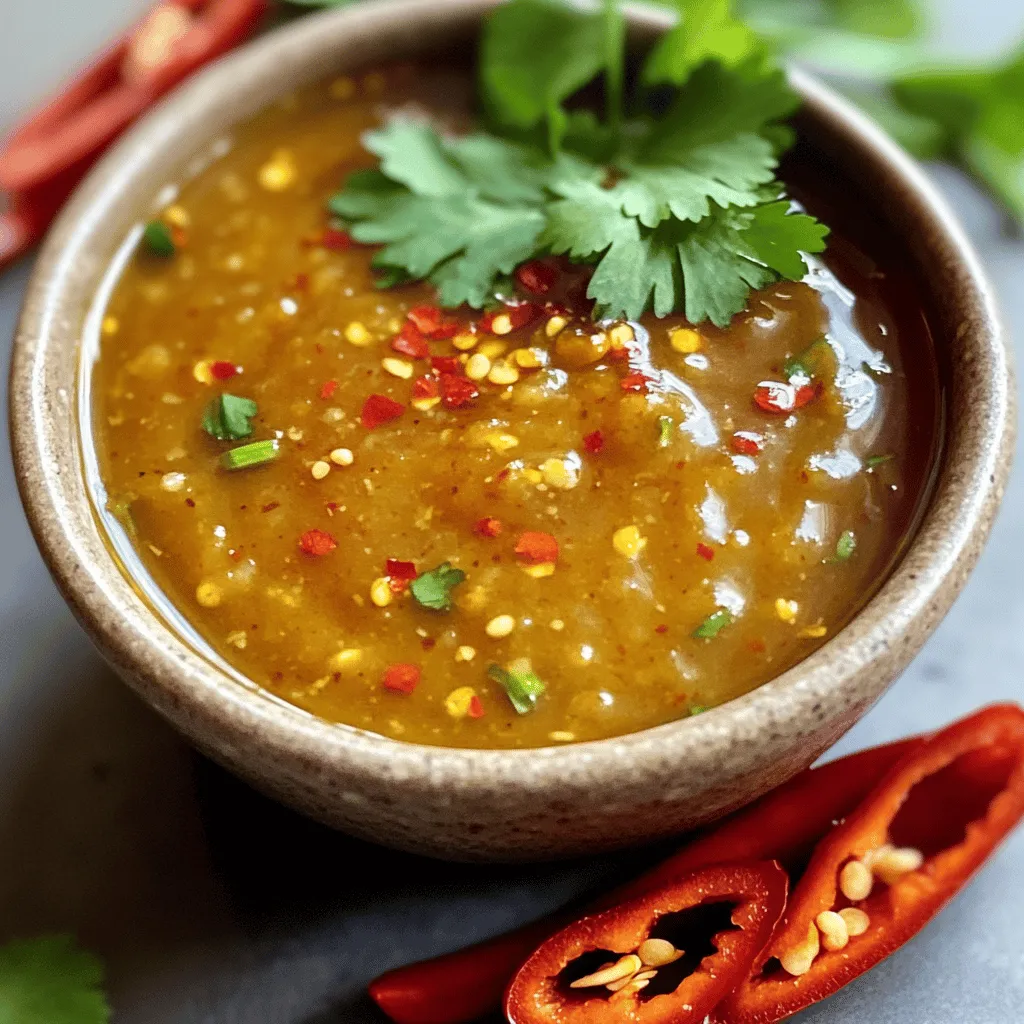
Are you ready to elevate your meals with a tasty and easy Sweet Chili Sauce? In this guide, I’ll show

Fluffy pancakes with maple syrup are a breakfast dream come true. They’re soft, light, and bursting with flavor. Imagine sinking
![To make this Coconut Curry Lentil Soup, you need: - 1 cup red lentils, rinsed - 1 can (13.5 oz) coconut milk - 4 cups vegetable broth - 1 medium onion, diced - 2 cloves garlic, minced - 1-inch ginger, grated - 1 medium carrot, diced - 1 bell pepper (any color), diced - 2 tablespoons curry powder - 1 tablespoon turmeric - 1 teaspoon cumin - 1/2 teaspoon red pepper flakes (optional, for heat) - Salt and pepper to taste - 2 tablespoons olive oil - Fresh cilantro, for garnish - Lime wedges, for serving This soup is not just tasty; it’s good for you too. A serving has about: - Calories: 250 - Protein: 10g - Carbs: 36g - Fiber: 12g - Fat: 9g - Vitamins A and C These numbers can change based on what you add or change in the recipe. You can swap some ingredients if you need to. Here are a few ideas: - Use green lentils instead of red for a firmer bite. - Coconut cream can replace coconut milk for a richer flavor. - If you don’t have vegetable broth, water works too. - Any kind of onion can fit, but yellow or sweet onion is best. - For a spicy kick, use jalapeños instead of red pepper flakes. Feel free to mix and match to find what works best for you. You can find the full recipe above to guide you through each step! To make this coconut curry lentil soup, start by gathering your ingredients. You will need red lentils, coconut milk, vegetable broth, onion, garlic, ginger, carrot, bell pepper, curry powder, turmeric, cumin, red pepper flakes, olive oil, salt, and pepper. 1. In a large pot, heat two tablespoons of olive oil over medium heat. 2. Add one diced onion, one diced carrot, and one diced bell pepper. Sauté these for about 5-7 minutes. You want the veggies to soften. 3. Next, add two minced garlic cloves and one inch of grated ginger. Cook these for 1-2 minutes until they smell great. 4. Stir in two tablespoons of curry powder, one tablespoon of turmeric, and one teaspoon of cumin. If you like heat, add half a teaspoon of red pepper flakes. Toast the spices for about one minute. 5. Now, add one cup of rinsed red lentils, four cups of vegetable broth, and one can of coconut milk. Mix everything well. 6. Bring this mixture to a boil. Then, lower the heat and let it simmer uncovered for 25-30 minutes. The lentils should be tender, and the soup will thicken. 7. Season with salt and pepper to taste. If you want a smoother soup, blend some of it. Leave some lentils whole for texture. 8. Serve hot and garnish with fresh cilantro and lime wedges for a zesty kick. - Prep Time: 10 minutes - Cook Time: 30 minutes - Total Time: 40 minutes - Use fresh spices for the best flavor. - Stir the soup occasionally to prevent sticking. - If the soup thickens too much, add more broth or water. - Let the soup sit for a few minutes before serving; it tastes even better! - For a fun twist, try adding spinach or kale for extra greens. For the complete recipe, check out the Full Recipe section. To boost flavor, use fresh spices. Fresh spices have more taste than old ones. Toast them in olive oil to wake them up. This adds a richer taste to the soup. If you want creaminess, blend half the soup. This gives you a smooth base while keeping some lentils whole. You can also add a splash of lime juice before serving. This brightens the soup and adds a fresh zing. One common mistake is not rinsing the lentils. Rinsing removes dirt and helps them cook better. Another mistake is cooking at too high a heat. This can make the lentils mushy. Stir the soup gently and keep the heat low. Lastly, don’t forget to taste as you cook. Adding salt and pepper early can lead to an overly salty soup. Always season at the end for the best flavor. If you like heat, add more red pepper flakes. Start with a little and add more until it's right for you. For less spice, skip the red pepper flakes or add a bit of sugar. Sugar can balance out the heat and make the soup taste great. If someone in your family can’t handle spice, serve lime wedges on the side. This way, they can adjust their soup as they like. For the complete recipe, check out the [Full Recipe]. {{image_2}} Coconut Curry Lentil Soup is a great dish for everyone. Since it uses no meat, it’s already vegetarian and vegan. You can enjoy all the rich flavors without any animal products. Fresh veggies add color and nutrients. Try adding spinach or kale for extra greens. You can also use vegetable broth for a hearty base. You might want more protein in your soup. Great options include chickpeas or tofu. They blend well with the lentils and add texture. If you like meat, chicken or shrimp can work too. Just cook them separately and add them at the end. This way, you keep the flavors balanced. To boost flavor, think about adding extras. A dash of lime juice brightens the soup. You can also stir in fresh herbs like basil or mint. These give a fresh twist to each bowl. For a spicy kick, add more red pepper flakes or a splash of hot sauce. This soup is your canvas, so feel free to get creative! For the complete recipe, check out the Full Recipe mentioned. Storing your Coconut Curry Lentil Soup is easy. Let the soup cool down first. Pour it into an airtight container. Make sure to leave some space at the top. This helps the soup expand when it freezes. You can keep it in the fridge for up to four days. If you want it to last longer, freezing is the way to go. To freeze your soup, use freezer-safe containers. You can also use freezer bags. Label the bags with the date. This helps you know when you made it. The soup can stay good in the freezer for about three months. When you’re ready to eat it, just thaw it in the fridge overnight. Reheating your Coconut Curry Lentil Soup is simple. You can use the stove or microwave. If using the stove, heat it in a pot over medium heat. Stir it often to make sure it warms evenly. For the microwave, use a microwave-safe bowl. Heat it in short bursts, stirring in between. Add a splash of broth or water if it seems too thick. Enjoy it warm, and don’t forget to garnish with fresh cilantro! You can find the full recipe to make this delightful soup anytime. To make Coconut Curry Lentil Soup from scratch, start by gathering your ingredients. You will need red lentils, coconut milk, vegetable broth, onion, garlic, ginger, carrot, bell pepper, curry powder, turmeric, cumin, red pepper flakes, olive oil, salt, and pepper. Heat olive oil in a large pot. Sauté diced onion, carrot, and bell pepper for about 5-7 minutes. Then add minced garlic and grated ginger, cooking for another 1-2 minutes. Stir in spices and toast them for a minute. Next, add rinsed lentils, vegetable broth, and coconut milk. Bring it to a boil, then simmer for 25-30 minutes until the lentils soften. Season with salt and pepper, and blend if you want a smoother texture. Serve it hot, garnished with cilantro and lime wedges. You can find the detailed steps in the Full Recipe. Yes, you can use different types of lentils. Each type has unique flavors and cooking times. For instance, green or brown lentils can work well but may need longer cooking times. Red lentils cook faster and break down, giving the soup a creamier texture. If you use whole lentils, adjust your cooking time to ensure they are tender. Just remember, the taste may vary slightly, but the soup will still be delicious. Coconut Curry Lentil Soup pairs well with various sides. You can serve it with crusty bread for dipping. Rice is also a great choice, as it absorbs the flavors nicely. For a fresh touch, add a simple salad with greens and a light dressing. If you want a crunchy bite, consider serving it with roasted vegetables. Each option will enhance your soup experience! Coconut curry lentil soup is easy to make and full of flavor. You can adjust spice levels and try different variations. Remember to store leftovers properly for fresh taste. With these tips, you can create a delicious meal every time. Enjoy your cooking, and don’t shy away from making this soup your own!](https://soyumrecipes.com/wp-content/uploads/2025/05/a2d118ab-08dc-4887-b1fa-fc48931864e0.webp)
Get ready to enjoy a bowl of Coconut Curry Lentil Soup—a warm, tasty delight that hits the spot. This creamy
![To make honey garlic shrimp tacos, gather these key items: - 1 lb shrimp, peeled and deveined - 2 tablespoons honey - 3 cloves garlic, minced - 1 tablespoon soy sauce (or tamari for gluten-free) - 1 tablespoon lime juice - 1 tablespoon vegetable oil - 1 teaspoon chili powder - Salt and pepper to taste - 8 small corn tortillas - 1 cup cabbage, shredded (red or green) - ½ avocado, sliced - Fresh cilantro for garnish - Lime wedges for serving These ingredients create a sweet and savory flavor. The shrimp pairs well with the crunchy cabbage and creamy avocado. I recommend using large or medium shrimp for these tacos. You can choose: - Gulf shrimp - Argentinian shrimp - Black tiger shrimp These types of shrimp have great taste and texture. Always pick shrimp that look fresh and plump. Frozen shrimp works too; just thaw it before cooking. Feel free to add your favorite toppings. Here are some ideas: - Diced tomatoes - Sliced jalapeños - Sour cream or Greek yogurt - Sliced radishes - Cotija cheese These garnishes can boost flavor and make the tacos even more fun to eat. Explore different toppings to find your favorite mix. Check out the Full Recipe for more detailed steps on making these tasty tacos! Start by mixing the marinade. In a bowl, combine honey, minced garlic, soy sauce, lime juice, and chili powder. Stir well until it blends smoothly. This mix will bring sweetness and depth to your shrimp. Next, add your shrimp to the marinade. Make sure each piece gets a good coat. Let them sit for 15 to 20 minutes. This step lets the flavors soak into the shrimp, making them more tasty. Heat vegetable oil in a large skillet over medium-high heat. Once the oil is hot, add the marinated shrimp. Cook them for about 2 to 3 minutes on each side. You want them pink, opaque, and slightly caramelized. While the shrimp cook, warm the corn tortillas in a separate skillet. Cook them on low heat for about 30 seconds on each side. Now it’s time to build your tacos. Place a generous amount of shredded cabbage on each warm tortilla. Add the cooked shrimp on top. Then, add avocado slices and sprinkle fresh cilantro for a bright finish. Serve your tacos right away with lime wedges on the side for extra flavor. For the complete recipe, check [Full Recipe]. For shrimp tacos, I always go for fresh or frozen shrimp. Look for shrimp that are large or jumbo-sized. They hold up well in tacos. If you can, choose shrimp that are wild-caught. Farmed shrimp can have a different taste. When buying, check for a slight sea smell. This means they are fresh. If using frozen shrimp, thaw them in the fridge overnight. This keeps them firm and juicy. Cooking shrimp is fast and easy. I heat my skillet over medium-high heat. When the pan is hot, I add vegetable oil. This helps create a nice sear on the shrimp. I cook them for about 2-3 minutes on each side. They should turn pink and opaque. Do not overcook them; this can make them tough. A little caramelization adds great flavor. Always season with salt and pepper at the end for best taste. To amp up the flavor, I use a mix of spices. Chili powder adds warmth, while lime juice gives a fresh zing. You can also use paprika for a smoky flavor. If you like heat, add cayenne pepper or diced jalapeños. Fresh cilantro on top adds a burst of freshness. Pair these with a squeeze of lime for a perfect finish. Feel free to experiment with spices to suit your taste. For the full recipe, check out the Honey Garlic Shrimp Tacos 🦐 section. {{image_2}} You can switch the shrimp for other seafood. Try scallops or fish. White fish like tilapia works well. Just remember to adjust cooking time. Scallops take about 2-3 minutes per side. Fish may cook a bit faster. Choose seafood that you enjoy. Each option gives a new twist to the dish. If you prefer not to eat seafood, you can make a veggie version. Use tofu or tempeh for protein. Marinate them the same way as shrimp. You can also try mushrooms. Portobello or shiitake mushrooms add great flavor. Serve with the same toppings, like cabbage and avocado. Feel free to explore various taco styles. You can use flour tortillas instead of corn. For a crunchy twist, try taco shells. You can also go for a lettuce wrap for a low-carb option. Each style gives a different taste and texture. Mix it up based on your mood or diet! For the full recipe, check out the Honey Garlic Shrimp Tacos! Store leftover shrimp in an airtight container. Place it in the fridge. Use it within two days for the best taste. Ensure the shrimp is cooled before storage. If you want to save it longer, consider freezing. Frozen shrimp can last up to three months. Just remember to thaw it safely in the fridge before reheating. To keep your corn tortillas fresh, wrap them in foil or plastic wrap. Store them in a cool, dry place. If you have opened a package, use them within a week. You can also refrigerate them to extend their life. For long-term storage, freeze the tortillas. Place parchment paper between each tortilla to prevent sticking. When it’s time to eat, reheat the shrimp in a skillet. Heat it over medium heat for about three to four minutes. Add a splash of water to keep it moist. For the tortillas, warm them in a dry skillet for 30 seconds on each side. This way, they stay soft and pliable. Enjoy your tacos as if they were fresh! For the full recipe, check out the recipe section. To add spice, use fresh chili peppers or hot sauce. You can also increase the chili powder in the marinade. Start with small amounts and taste as you go. This lets you find the perfect heat level for your tacos. For extra flavor, consider adding diced jalapeños or a sprinkle of cayenne pepper. Yes, you can prepare the shrimp ahead of time. Marinate the shrimp and store them in the fridge. They can stay fresh for up to 24 hours. When you’re ready, just cook them as directed in the Full Recipe. This saves time and makes your meal prep easier. Great sides include black beans, corn salad, or a fresh guacamole. You can also serve with a light coleslaw for added crunch. If you want something warm, try cilantro-lime rice. These sides complement the shrimp's sweet and savory flavors well. Yes, you can freeze the shrimp, but not the assembled tacos. Wrap cooked shrimp in plastic and place in an airtight container. They can stay frozen for up to three months. When you're ready to eat, thaw the shrimp and warm them up before serving. Try a refreshing drink like limeade or a light beer. A crisp white wine also pairs nicely. For something non-alcoholic, sparkling water with lime is a great choice. These drinks balance the sweetness of the honey garlic shrimp perfectly. In this blog post, we explored how to make Honey Garlic Shrimp Tacos. We covered key ingredients, cooking steps, and tips for great flavor. Remember to pick fresh shrimp and marinate them well. You can also try different fillings or switch to vegetarian options. Don’t forget to store any leftovers properly for later. With these ideas, you can enjoy tasty tacos anytime. Keep experimenting and have fun while you cook!](https://soyumrecipes.com/wp-content/uploads/2025/05/b60785dc-5de5-4d2c-a61a-2110b780b605.webp)
Craving a quick and tasty meal? Look no further! This Honey Garlic Shrimp Tacos recipe is not just easy—it’s delicious
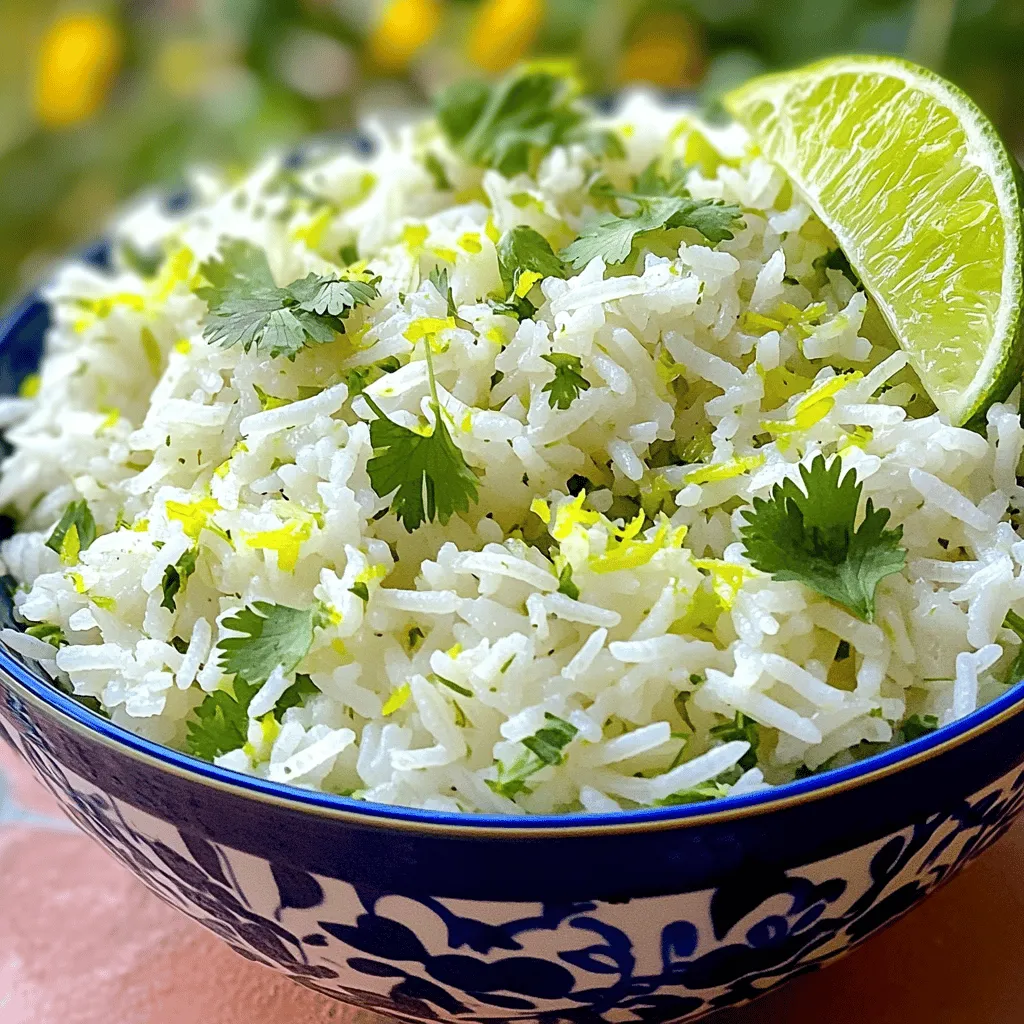
Looking to add a burst of flavor to your meals? Zesty Cilantro Lime Rice is the perfect side dish! It’s
![To make a delicious creamy spinach and artichoke dip, gather your ingredients. Here’s what you need: - 1 cup fresh spinach, chopped - 1 cup artichoke hearts, drained and chopped - 1 cup cream cheese, softened - 1/2 cup sour cream - 1/2 cup mayonnaise - 1 cup shredded mozzarella cheese - 1/4 cup grated Parmesan cheese - 2 cloves garlic, minced - 1 teaspoon lemon juice - 1/2 teaspoon red pepper flakes (optional) - Salt and pepper to taste Each ingredient brings a unique flavor and texture to the dip. The fresh spinach offers a bright taste, while artichokes add a nice depth. Cream cheese, sour cream, and mayonnaise blend together to create a rich base. The two cheeses, mozzarella and Parmesan, give that gooey, melty goodness we love in dips. Feel free to adjust the seasonings as you like. More garlic can boost the flavor, or a pinch of red pepper flakes can add heat. This dip can fit any taste! For the full recipe, you can check the details above. - Preheat oven to 350°F (175°C). - In a large bowl, combine cream cheese, sour cream, and mayonnaise. - Mix until smooth and creamy. - Fold in chopped spinach and artichokes. - Add shredded mozzarella, grated Parmesan, minced garlic, and seasonings. - Stir until everything is well blended. - Transfer the mix to a baking dish. Spread it out evenly. - Bake for 20-25 minutes, until bubbly and golden brown. - Let the dip cool for a few minutes before serving. - Serve warm with dippers like toasted baguette slices or crunchy veggies. - Garnish with extra parsley or a sprinkle of red pepper flakes. This creamy spinach and artichoke dip is an irresistible treat that brings joy to every gathering. For the full recipe and more tips, check out the [Full Recipe]. Using fresh spinach gives your dip a bright taste. Canned artichokes are great for ease. Both options work, but fresh often wins for flavor. To adjust creaminess, play with cream cheese, sour cream, and mayonnaise. More cream cheese makes it thick. Add more sour cream for a lighter dip. You can make this dip a day ahead. Just mix all the ingredients and store in the fridge. This helps the flavors blend well. When you're ready, bake it fresh. For reheating, warm it gently in the oven. Avoid the microwave to keep the texture nice. Serve this dip in a colorful bowl for a fun touch. Toasted baguette slices and tortilla chips make great dippers. Crunchy veggies like carrots and celery also work well. To finish, add a sprinkle of red pepper flakes or fresh parsley. These small touches make your dish pop. Enjoy every bite! {{image_2}} You can spice up your dip by adding jalapeños. The heat gives a nice kick. Simply chop a few and mix them in with the other ingredients. This adds flavor and warmth. You can also play with cheese types. Try adding a blend of cheeses like cheddar or cream cheese. Each cheese gives its own unique taste. Mixing them creates a rich, creamy texture that everyone will love. If you want a lighter dip, swap out some ingredients. Use low-fat cream cheese and yogurt instead of sour cream. This cuts calories without losing much flavor. You can also try using Greek yogurt for a protein boost. For vegan options, substitute cream cheese with cashew cream or tofu. You can use nutritional yeast for a cheesy flavor. These swaps keep the dip creamy and tasty while fitting a plant-based diet. Feel free to use different greens if you want. Kale or Swiss chard work great in place of spinach. They add nutrients and a different taste. You can also try using marinated artichokes instead of canned ones. They bring more flavor to the dip. Just chop them up and mix them in. Each swap adds a fun twist to your creamy spinach and artichoke dip recipe. For the full recipe, check out the section above! To keep your creamy spinach and artichoke dip fresh, store it in airtight containers. This helps prevent moisture loss and keeps the flavors intact. Allow the dip to cool completely before sealing it. Label the container with the date for easy tracking. It’s best to eat your leftovers within three to four days. You can freeze this dip for later enjoyment. First, let it cool and then transfer it to a freezer-safe container. Leave some space at the top since the dip will expand when frozen. To thaw, simply place it in the fridge overnight. When you’re ready to eat, reheat it in the oven at 350°F (175°C) until warmed through. This method helps keep the texture creamy. How long does it last in the fridge? The dip stays good for about three to four days in the fridge. After that, the quality may decline. What are the signs of spoilage? Look for any off smells, discoloration, or mold. If you notice any of these signs, it's best to toss the dip. Enjoy it fresh for the best taste! What to serve with Creamy Spinach and Artichoke Dip? You can serve this dip with many tasty options. I love using: - Toasted baguette slices - Tortilla chips - Fresh veggies like carrots and celery These choices add great crunch and flavor. Can I make this dip in advance? Yes, you can make this dip ahead of time. Just prepare it and store it in the fridge. Cover it tightly to keep it fresh. When you are ready, bake it as directed in the Full Recipe. How do I reheat the dip without drying it out? To reheat, place the dip in the oven at a low temperature. Cover it with foil to keep moisture in. Heat until warm without letting it dry out. Why is my dip too thick? If your dip is too thick, you can add a splash of milk or cream. This helps to loosen the texture. Stir well until you reach your desired creaminess. How do I fix an overly salty dip? To fix a salty dip, try adding a bit of sour cream or cream cheese. These ingredients can balance the salt. Mix it in well and taste until it’s just right. Caloric breakdown per serving Each serving of this dip has about 200 calories. This is a rough estimate and can vary based on the exact ingredients used. Dietary considerations (gluten-free, vegetarian) This dip is gluten-free and vegetarian. It’s a great option for many diets. Just check the labels on your ingredients to ensure they meet your needs. This blog post covered the easy steps to make a tasty Creamy Spinach and Artichoke Dip. You learned about the key ingredients, along with tips for perfecting the dip. I shared ways to store leftovers and offered flavor variations. Get creative with your own twists and enjoy this delicious dip at your next gathering. Remember, cooking can be fun and simple. So, gather your ingredients, and let your taste buds celebrate!](https://soyumrecipes.com/wp-content/uploads/2025/05/fb2a408f-c46a-4caa-8fae-ee202e40f4ff.webp)
Looking for a tasty appetizer that everyone will love? Look no further! This Creamy Spinach and Artichoke Dip is an
