Skip to content
DisclaimerTerms Of UseGDPR PolicyCookie Policy

So Yum Recipes

  • Home
  • Drinks
  • Appetizers
  • Dinner
  • Dessert
  • About
  • Contact
  • Privacy Policy
DisclaimerTerms Of UseGDPR PolicyCookie Policy

Chloe

- Main Ingredients: - 4 large flour tortillas - 1 cup cream cheese, softened - 1 cup shredded cheese (cheddar or mozzarella) - 1 cup diced bell peppers (red, yellow, and green) - 1/2 cup black olives, sliced - 1 cup diced cooked chicken (optional) - Seasoning and Extras: - 1 tablespoon taco seasoning - 1/4 cup fresh cilantro, chopped (optional) - Salsa for dipping These tasty tortilla roll-ups are easy to make and fun for kids. You can mix and match ingredients based on what your kids like. The cream cheese helps hold everything together and adds a nice flavor. I love using bright bell peppers, as they make the roll-ups look colorful and fun. You can also add chicken for extra protein, or skip it for a vegetarian option. With the taco seasoning, you get a burst of flavor. Fresh cilantro adds a nice touch, but you can leave it out if your kids don’t like it. Salsa makes a great dip, too! Check out the Full Recipe to see how simple it is to put these together. Enjoy getting creative in the kitchen! Start with four large flour tortillas. Set them on your counter. Use a knife to spread a thick layer of softened cream cheese on each tortilla. Cover the entire surface. This step adds creaminess and flavor. In a small bowl, mix your filling. Combine 1 cup of shredded cheese with diced bell peppers. Add sliced black olives, chicken (if you want), taco seasoning, and chopped cilantro. Stir until all the ingredients blend well. This mix gives your roll-ups a tasty crunch. Now, it’s time to roll! Take one tortilla and sprinkle the cheese mix on top. Leave about an inch from the edges. Start rolling from one side to the other. Make sure to roll tightly. Once rolled, slice the tortilla into bite-sized pieces, about 1 inch thick. Place the roll-ups on a colorful platter and serve with salsa on the side for dipping. This makes a fun and tasty snack. For the full recipe, check out the details above. Enjoy making these delicious tortilla roll-ups! Choosing the Right Tortillas Pick large flour tortillas for this recipe. They roll up easily and hold the filling well. You can also try whole wheat tortillas for a healthier option. If your kids prefer a bit of color, opt for spinach or tomato tortillas. How to Involve Kids in the Cooking Process Let your kids help with the fun parts! They can spread the cream cheese on the tortillas. Show them how to sprinkle the cheese and veggies. Kids love to mix ingredients, so let them stir the filling. This makes cooking a fun family activity. Presentation and Serving Suggestions Make the roll-ups look fun! Cut them into bite-sized pieces. Arrange them in a circle on a bright platter. You can even garnish with fresh cilantro for a pop of color. Serve with a small bowl of salsa for dipping. This adds flavor and makes it exciting for kids to eat. These tips will help you and your kids create tasty and fun tortilla roll-ups. Try the full recipe to make this dish come alive! {{image_2}} You can change up your tortilla roll-ups to keep things fun. Here are some easy ideas: - Vegetarian Options: You can swap out chicken for beans or veggies. Try black beans, corn, or spinach. These add great taste and color. Plus, they give a boost of nutrients. - Alternative Spreads: Instead of cream cheese, use hummus or mashed avocado. Hummus adds a savory flavor. Avocado gives a creamy texture. Kids will love these tasty spreads. - Different Fillings: Explore other proteins like turkey or beef. You can also use deli meats or cooked shrimp. Mixing in some cheese and veggies makes these options even better. These twists make the recipe more fun. They let kids explore new flavors. For more ideas, check the Full Recipe for Tasty Tortilla Roll-Ups. Enjoy making these together! Best Practices for Refrigeration To keep your tortilla roll-ups fresh, place them in an airtight container. This prevents them from drying out. Make sure to eat them within three days for the best taste. If you notice any sogginess, you can pat them dry with a paper towel first. Freezing Guidelines for Meal Prep You can freeze these roll-ups for easy meals later. Wrap each roll tightly in plastic wrap. Then, place the wrapped rolls in a freezer bag. They can last up to two months in the freezer. When ready to eat, just thaw them in the fridge overnight. Reheating Instructions To reheat, place the roll-ups on a microwave-safe plate. Heat on medium for about 30 seconds. Check if they are warm enough; if not, heat for an extra 15 seconds. You can also bake them in the oven at 350°F for 10 minutes for a crispy texture. Serve with salsa from the Full Recipe for a tasty snack! Can I make these ahead of time? Yes, you can make tortilla roll-ups ahead of time. Prepare them and place them in the fridge. They stay fresh for about two days. Wrap them tightly in plastic wrap. This keeps them from drying out. When ready to eat, just slice and serve! What are some healthy dips for tortilla roll-ups? Healthy dips add fun to your roll-ups. Here are a few ideas: - Greek yogurt with herbs - Hummus with lemon - Guacamole with lime - Salsa made from fresh tomatoes These dips are tasty and packed with nutrients. Kids will love them! How can I modify the recipe for picky eaters? If your kids are picky, try these tips: - Use their favorite cheese or spread. - Skip ingredients they dislike, like bell peppers. - Try different proteins like turkey or ham. - Make mini roll-ups to make them more appealing. This way, you can create a meal they'll enjoy! Tasty tortilla roll-ups are easy and fun to make. We covered the ingredients, preparation steps, and tips to make them perfect. You learned about variations for different tastes and how to store leftovers. These roll-ups can be a great snack to share or a fun meal to enjoy. Experiment with fillings and get kids involved in the kitchen. With a bit of creativity, you will have a hit on your hands! Enjoy making these tasty bites!

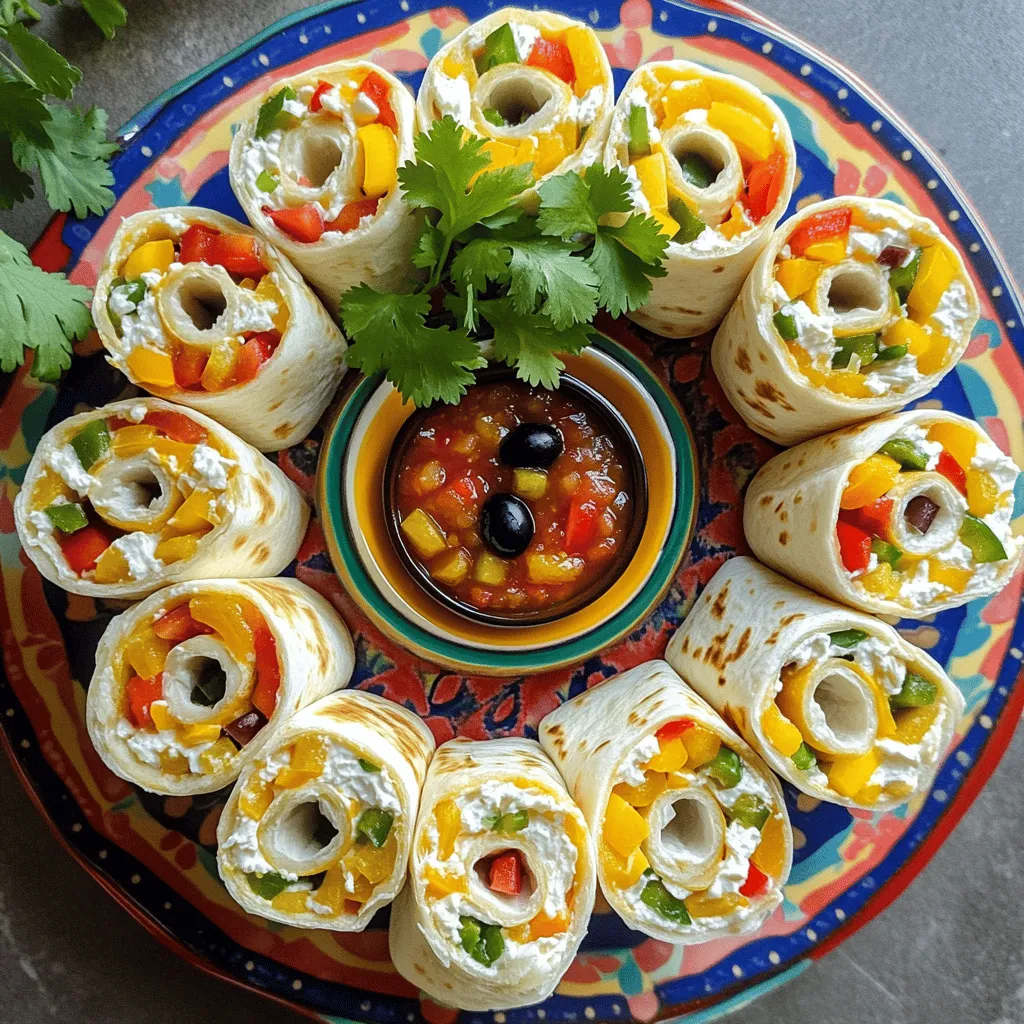
Creative Tortilla Recipes for Kids Fun and Easy Ideas

Are you ready to turn lunch into a fun adventure? With these creative tortilla recipes for kids, you can make

Here’s what you need to make Jolly Rancher Candy Apples. Gather these items for a fun treat: - 4 medium-sized apples (Granny Smith or your choice) - 1 cup granulated sugar - 1/2 cup light corn syrup - 1/4 cup water - 1/2 teaspoon vanilla extract - 10-12 Jolly Rancher candies (your favorite flavors) - Popsicle sticks or skewers - Cooking spray Using fresh apples is key. The tartness of Granny Smith apples works great with the sweet candy. You can choose any apple you love. The sugar and corn syrup will create a shiny coat that makes these apples pop. The Jolly Rancher candies give them that fun, colorful touch! Make sure you have everything ready before you start. This recipe is all about the fun of melting and dipping. You’ll see how the candy comes together quickly, and the bright colors make it a treat for the eyes, too. If you want the full recipe, check the section above. - Wash and dry the apples thoroughly. - Remove wax coating by rubbing them with a paper towel. - Insert popsicle sticks into the stem end of each apple. - Combine sugar, corn syrup, and water in a saucepan. - Heat and stir until the sugar dissolves completely. - Bring the mixture to a boil. - Monitor the temperature for hard crack stage (300°F/150°C). - Remove the pot from heat. - Stir in vanilla extract and crushed Jolly Ranchers. - Dip each apple into the hot candy mixture. - Let excess candy drip off before placing on a parchment-lined sheet. - Let the apples set at room temperature until the candy hardens. - Slice into wedges or serve whole on a festive platter. For the full recipe, check out the provided details. - Ensure apples are completely dry. Water can cause the candy to slip off. - Maintain the right temperature for candy coating. Aim for 300°F (150°C) for a hard crack. - If the candy does not stick to apples, check if they are too wet or oily. - Hard candy may crack on apples if the candy cools too fast. Dip quickly and let cool slowly. - Use a heavy-bottomed saucepan for even heat while making candy. - A candy thermometer is a must. It helps you reach the perfect temperature for candy coating. For more detailed guidance, check the Full Recipe for Jolly Rancher Candy Apples. {{image_2}} You can change the flavor of your Jolly Rancher candy apples. Try using different Jolly Rancher flavors like cherry, watermelon, or blue raspberry. Each flavor adds a unique twist to your apples. You can also mix flavors for a fun surprise. Adding toppings can make your candy apples even better. Consider adding crushed nuts, colorful sprinkles, or even mini chocolate chips. These toppings add crunch and extra sweetness. While apples are the star, you can try other fruits too. Pears, strawberries, and even bananas work well with this recipe. If you choose larger fruits, adjust the cooking time. For example, a large pear may need a bit more candy coating time. Make sure the fruit is firm, so it holds up with the candy. Want a healthier version? You can make a lower sugar option. Use sugar substitutes like honey or agave syrup. These options still taste sweet but with less sugar. You can also use natural dyes or flavorings. For example, beet juice can give a nice red color. This way, you can enjoy a treat that feels a bit better for you. To keep your candy apples fresh, store them in a cool, dry place. Avoid moisture, as it can ruin the candy coating. Place them in a single layer so they don't touch each other. If you need to stack them, use parchment paper in between. The shelf life of finished candy apples is about 3 to 5 days. After that, the candy may start to lose its crispness. Check them often and eat them while they are still tasty! Storing candy apples in a cool place is best. A pantry or a cupboard works well. Do not refrigerate them. Cold air can make the candy sticky and soft. Humidity can harm the candy coating too. If you live in a humid area, keep them in an air-tight container. This helps keep moisture out. If you have leftover candy mixture, do not throw it away! You can pour it into a silicone mold. Let it cool to make fun candies. They can be a sweet snack for later. For extra apples, you can always make more candy apples! Just prepare the apples as you did before. You can also try dipping other fruits, like strawberries or bananas, in the leftover candy mixture. They taste great and add variety! Granny Smith apples are my top choice. They offer a nice tartness that pairs well with the sweet candy coating. Other great options include Fuji and Honeycrisp apples. Both are sweet and crisp, making them fun to bite into. Look for firm apples without bruises or soft spots. This ensures a great crunch and a tasty treat. Yes, you can try sugar substitutes like stevia or erythritol. However, keep in mind that the texture may change. The candy might not harden as well, so adjust your cooking time. Always check the package for conversion ratios. Many sugar substitutes have different sweetness levels compared to regular sugar. Jolly Rancher Candy Apples stay fresh for about 3 to 5 days. Store them in a cool, dry place to keep the candy coating crisp. Avoid humidity, as it can make the candy sticky. If you want them to last longer, consider refrigerating them, but that might soften the candy exterior. Enjoy your sweet treats while they are fresh! You’ve learned how to make Jolly Rancher candy apples from start to finish. We covered the ingredients you need, step-by-step instructions for cooking, and tips for success. Remember, using dry apples and the right temperature are key for great results. You can also explore fun flavor combos and healthier options. Enjoy these tasty treats with family and friends. They’ll love your sweet creations!

Jolly Rancher Candy Apples Delightful and Fun Treat

Are you looking for a fun, tasty treat? Jolly Rancher Candy Apples are the perfect mix of sweet and sour

- 1 cup quinoa, rinsed - 2 cups vegetable broth - 1 cup cherry tomatoes, halved - 1 bell pepper, diced - 1 cup cucumber, diced - 1 cup canned chickpeas, rinsed and drained - 1 avocado, sliced - 1/4 cup fresh parsley, chopped - 2 tablespoons olive oil - 2 tablespoons lemon juice - Salt and pepper to taste - Optional seasonings: 1 teaspoon garlic powder, 1 teaspoon cumin For a healthy lunch, I focus on fresh and colorful ingredients. This recipe is all about balance. Quinoa serves as a great base, packed with protein. The vegetable broth adds flavor, making it more tasty. The cherry tomatoes give a burst of sweetness. The bell pepper adds crunch and color. Cucumbers bring a refreshing taste. Chickpeas add more protein and fiber, keeping you full. Don’t forget the avocado! It adds creaminess and healthy fats. Fresh parsley gives a pop of color and flavor. The dressing ties it all together. Olive oil and lemon juice brighten the dish. You can also add garlic powder and cumin for extra flavor. These spices give a warm, earthy taste. This recipe is flexible, so you can mix and match flavors to fit your taste. You can find the full recipe for these Colorful Quinoa Veggie Bowls 🥗 to create your meal prep lunches. - First, bring 2 cups of vegetable broth to a boil. - Next, add 1 cup of rinsed quinoa. Cover the pot and lower the heat. - Simmer for about 15 minutes until all the broth is absorbed. - Remove from heat and let it sit for 5 minutes, covered. Fluff with a fork. - While the quinoa cooks, chop 1 bell pepper and 1 cucumber. - Halve 1 cup of cherry tomatoes for a burst of flavor. - In a large bowl, combine the cooked quinoa and chopped veggies. - Add 1 cup of rinsed chickpeas for protein. - In a small bowl, whisk together 2 tablespoons of olive oil and 2 tablespoons of lemon juice. - Season with salt, pepper, and optional garlic powder and cumin. - Drizzle the dressing over the quinoa mix and toss to combine. - Divide the quinoa veggie mix into meal prep containers. - Top each bowl with sliced avocado for creaminess. - Store in the fridge for up to 4 days. Enjoy cold or warm! For the full recipe, check out the Colorful Quinoa Veggie Bowls. - Cook quinoa in bulk for multiple recipes. This saves time and ensures you have a healthy base ready for other meals. - Keep dressings separate until ready to eat. This keeps your meal fresh and crunchy. If you mix it too soon, ingredients can get soggy. - Try herbs like basil, cilantro, or dill to boost taste. You can also add spices like paprika or chili powder for a kick. - Customize based on your likes. If you love garlic, add more garlic powder. Prefer spicy? Toss in some red pepper flakes. - Aim for about one cup of quinoa per serving. This helps keep portions balanced. - Use a food scale if you count calories. Knowing your serving size helps you stay on track with your meal goals. For a full recipe, check out the Colorful Quinoa Veggie Bowls. {{image_2}} You can easily change the grains in your meal prep. Quinoa is great, but brown rice works too. Farro adds a nutty taste, while couscous cooks fast. Each grain brings its own flavor and texture. Try them all to see which you like best! Using seasonal vegetables makes your meal fresh and tasty. In spring, use asparagus or peas. Summer brings zucchini and corn. Fall is perfect for squash or sweet potatoes. In winter, try carrots and Brussels sprouts. Pick what you find at the store or farmers market! Adding protein to your meal prep boosts nutrition. Grilled chicken is a classic choice. If you want a veggie option, try tofu or tempeh. Both soak up flavors well. You can mix and match proteins based on your taste. This makes your meal exciting and filling. To keep your meals fresh, use airtight containers. Glass or BPA-free plastic work great. These containers help prevent spills and keep food safe. Label each container with the meal name and date. This way, you’ll know what you have and when to eat it. Your colorful quinoa veggie bowls last up to four days in the fridge. After that, the veggies may lose their crunch. If you want to store them longer, freeze portions. Use freezer-safe containers and leave some space for expansion. Thaw them overnight in the fridge when ready to enjoy. To warm up your quinoa bowls, microwave them for about 1-2 minutes. Stir halfway through for even heat. If you prefer, enjoy them cold, especially on warm days. They taste great straight from the fridge! For extra flavor, drizzle a bit of olive oil or fresh lemon juice before serving. For the full recipe, check the main article. Quinoa bowls can stay fresh in the fridge for up to four days. Make sure to store them in airtight containers. This helps keep the food safe and tasty. After four days, the quality may drop, and the flavors can fade. Yes, this recipe is already vegan-friendly! It uses quinoa, vegetables, and chickpeas for protein. You can add more veggies or plant-based protein if you want. Just skip any animal products, and you’re all set. Here are a few healthy lunch ideas: - Wraps with hummus and veggies - Salad with beans and avocado - Rice bowls with grilled chicken or tofu - Soup with lots of veggies These options are easy to make and great for meal prep. Yes, you can use canned vegetables. They save time and are often just as nutritious. Be sure to rinse them well to reduce sodium. Drain and add them to your bowls for a quick meal. To make larger servings, simply multiply the ingredients by the number of servings you need. If you want to serve eight, double all the ingredients. This way, you keep the same great taste and balance. Just remember to adjust cooking times if needed. For the full recipe, check out the Colorful Quinoa Veggie Bowls. In this post, we explored a simple quinoa veggie bowl recipe. You learned how to cook quinoa, prepare fresh vegetables, and mix everything in just a few steps. Meal prep tips helped ensure your bowls stay fresh and tasty. Remember, you can customize ingredients and swap grains or proteins to suit your taste. With these ideas, creating healthy meals can be easy and fun. Enjoy making your delicious, nutritious quinoa bowls!

Beginner Meal Prep Lunches Easy and Nutritious Guide

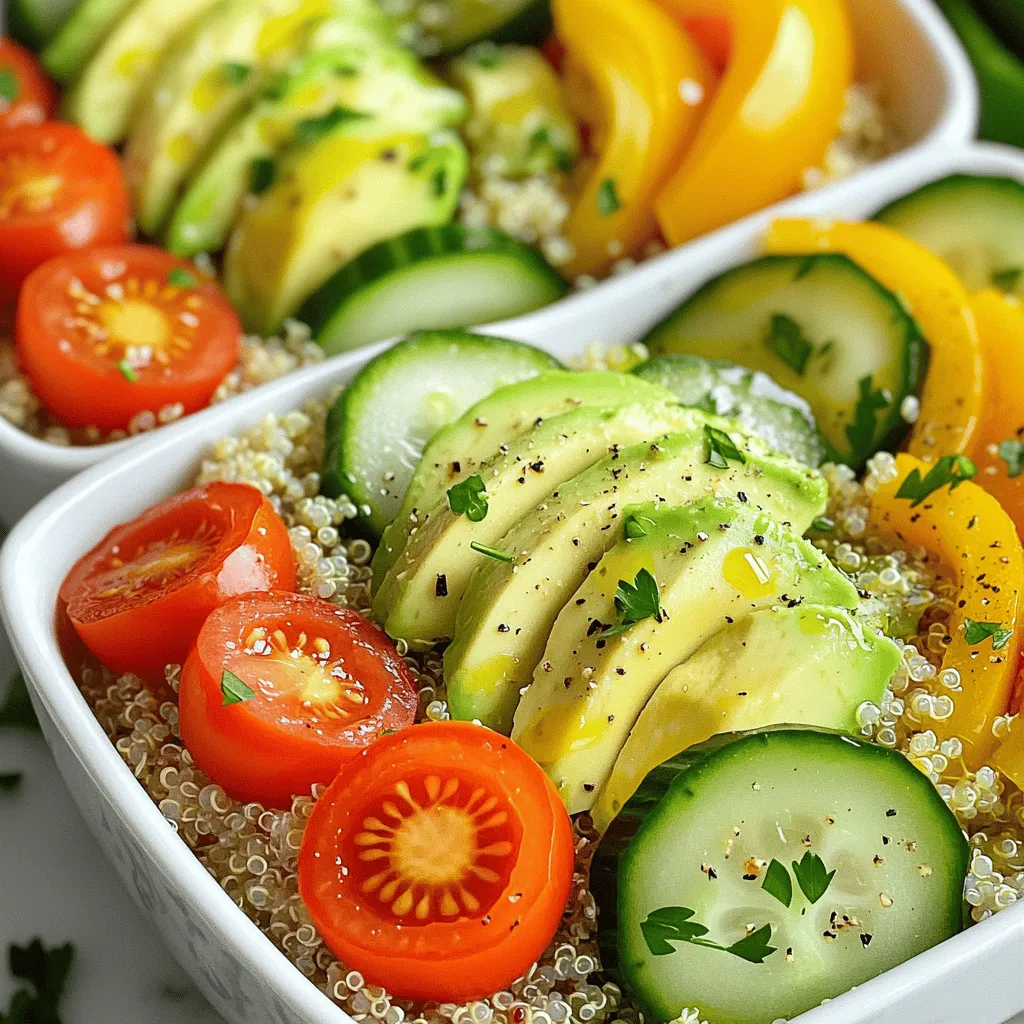
Are you new to meal prep and want tasty, easy lunches? Look no further! In this guide, I’ll show you

- 4 bone-in, skin-on chicken thighs - 1/4 cup soy sauce - 1/4 cup packed brown sugar - 1/4 cup pineapple juice The main ingredients create a tasty base for the dish. The chicken thighs stay juicy and flavorful. Soy sauce adds saltiness and depth. Brown sugar brings sweetness, while pineapple juice gives a fruity twist. - 2 tablespoons ketchup - 1 tablespoon apple cider vinegar - 1 tablespoon fresh ginger, minced - 2 cloves garlic, minced These extras make the chicken even more delicious. Ketchup adds a touch of tanginess. Apple cider vinegar brightens the flavors. Fresh ginger gives a warm spice, and garlic adds depth and aroma. - 2 green onions, sliced (for garnish) - Fresh pineapple slices (for serving) Garnishing with green onions adds color and freshness. Serving with fresh pineapple slices gives a sweet and juicy contrast. You can enjoy Baked Huli Huli Chicken with rice or salad for a full meal. Check out the Full Recipe for all the details! Start by making the marinade. In a medium bowl, whisk together these ingredients: - 1/4 cup soy sauce - 1/4 cup packed brown sugar - 1/4 cup pineapple juice - 2 tablespoons ketchup - 1 tablespoon apple cider vinegar - 1 tablespoon fresh ginger, minced - 2 cloves garlic, minced - 1 teaspoon sesame oil - 1/2 teaspoon black pepper - 1/2 teaspoon salt Whisk until everything mixes well. This marinade gives the chicken its sweet and tangy flavor. The longer you marinate, the better it tastes. Aim for at least 1 hour. If you can, let it sit overnight. This time allows the flavors to soak in deeply. Preheat your oven to 375°F (190°C). While the oven heats up, prepare your baking dish. Line it with aluminum foil for easy cleanup. Place a roasting rack inside the dish. Next, take your marinated chicken thighs from the fridge. Remove them from the marinade and place them on the rack, skin-side up. Reserve the marinade for later. Bake the chicken for about 35 to 40 minutes. It should reach an internal temperature of 165°F (75°C) and look crispy. While the chicken bakes, make the glaze. Pour the reserved marinade into a small saucepan. Bring it to a boil over medium heat. Cook for about 5 to 7 minutes until it thickens slightly. This glaze adds a nice finish. Once the chicken is done, brush the thickened glaze over the chicken thighs. Return them to the oven for an extra 5 minutes. This step caramelizes the glaze. When ready, take the chicken out and let it rest for a few minutes. Garnish with sliced green onions. Serve with fresh pineapple slices on the side for a tasty contrast. You can find the full recipe for Baked Huli Huli Chicken for more details. To get crispy skin on your chicken, use a roasting rack. This keeps the chicken elevated. It allows hot air to flow all around. Also, ensure your oven is fully preheated to 375°F (190°C). This helps the skin crisp up nicely. After baking, let the chicken rest for a few minutes. This keeps the juices inside and makes it moist. For the best flavor, marinate the chicken for at least one hour. If you can, marinate it overnight. The longer it sits, the more flavor it absorbs. If you are short on time, even 30 minutes will help. To marinate in advance, just place the chicken in a resealable bag with the marinade. Store it in the fridge until you are ready to bake. One common mistake is overcooking the chicken. Use a meat thermometer to check for doneness. The internal temperature should reach 165°F (75°C). Another mistake is not using a roasting rack. Without it, the chicken can sit in its juices, making the skin soggy. Always use a roasting rack for the best results. For the full recipe, check out the instructions above. {{image_2}} You can use different cuts of chicken for this dish. If you can’t find chicken thighs, try chicken breasts or drumsticks. Breasts cook faster, so check them at 30 minutes. Drumsticks may need an extra 5 to 10 minutes. Always ensure your chicken reaches 165°F (75°C) for safety. Want to change up the flavor? Add spices like paprika or chili powder to the marinade. You can also mix in some fresh herbs like cilantro or parsley for a fresh twist. If you prefer a vegetarian option, try using tofu or portobello mushrooms. Marinate them just like the chicken for great flavor. For side dishes, I recommend rice or steamed vegetables. A light salad with a tangy dressing goes well too. To drink, pair this dish with a fruity soda or a chilled white wine. These choices balance the sweet and savory flavors of the chicken perfectly. For the full recipe, don’t forget to check out the link! After enjoying your Baked Huli Huli Chicken, you need to store any leftovers properly. To keep it fresh, place the chicken in an airtight container. Make sure to cool it down to room temperature first. This helps avoid moisture build-up inside the container. Baked Huli Huli Chicken lasts up to four days in the fridge. If you want to keep it longer, consider freezing it. Just remember to wrap it well to prevent freezer burn. When reheating, it's key to keep the chicken moist. The best way is to use the oven. Preheat it to 350°F (175°C). Place the chicken in a baking dish and cover it with foil. This helps keep the moisture in. Heat for about 15-20 minutes or until warm. You can also freeze the chicken for up to three months. Make sure to seal it tightly in freezer bags. Thaw it in the fridge before reheating for the best texture. Leftover Huli Huli Chicken is super versatile. You can shred it for tacos or salads. It adds a sweet and savory flavor to any dish. You can also mix it into fried rice or pasta for a quick meal. Try making a Huli Huli chicken sandwich, too. Just pile the chicken on a bun with some slaw. It's a fun way to enjoy your leftovers. For the full recipe, check out the original instructions above! Huli Huli Chicken is a popular dish from Hawaii. The name "Huli Huli" means "turn, turn" in Hawaiian. This comes from the way the chicken was cooked on a grill. Traditionally, it is marinated with a mix of soy sauce, sugar, and pineapple juice. The flavors blend well, creating a sweet and savory taste. This dish often gets grilled, giving it a nice smoky flavor. You can bake Huli Huli Chicken without marinating, but it won’t taste as good. Marinating allows the chicken to soak up all the flavors. The sweet and tangy mix makes the chicken juicy and tasty. If you skip this step, the chicken may taste plain. I recommend marinating for at least an hour or overnight for the best flavor. To check if the chicken is done, use a meat thermometer. The chicken should reach an internal temperature of 165°F (75°C). Look for clear juices when you cut into the chicken. If the juices run pink, it needs more time. The skin should also look golden brown and crispy. To make Huli Huli Chicken gluten-free, swap out the soy sauce. Use gluten-free soy sauce or tamari instead. The other ingredients, like brown sugar and pineapple juice, are usually gluten-free. Check labels to be sure. This way, you can enjoy the same great taste without any gluten. Baked Huli Huli Chicken combines simple, tasty ingredients. The marinade gives it great flavor, while cooking tips help achieve crispy skin. Variations allow for different chicken cuts and side dishes. Proper storage keeps leftovers fresh and ready for new meals. Remember, marinating really boosts the taste. By following these steps, you’ll make a dish that pleases everyone. Enjoy creating your perfect Huli Huli Chicken!

Baked Huli Huli Chicken Tasty and Flavorful Dish

Looking for a tasty and flavorful twist on dinner? Baked Huli Huli Chicken brings the sweet and savory taste of

To make Panda Express Orange Chicken, gather these simple ingredients: - 1 lb (450g) boneless, skinless chicken breasts, cut into bite-sized pieces - 1 cup all-purpose flour - 2 large eggs, beaten - 1 cup cornstarch - 1 teaspoon salt - 1/2 teaspoon black pepper - 2 cups vegetable oil (for frying) - 1/2 cup orange juice (freshly squeezed preferred) - Zest of 1 orange - 1/4 cup soy sauce (low sodium) - 1/4 cup sugar - 1 tablespoon rice vinegar - 2 cloves garlic, minced - 1 teaspoon ginger, freshly grated - 1 tablespoon cornstarch mixed with 2 tablespoons cold water (for thickening) - Green onions and sesame seeds for garnish If you need alternatives, here are some ideas: - Chicken: Use tofu or shrimp for a different protein. - Soy Sauce: Try tamari for a gluten-free option. - Sugar: Honey or agave syrup work well too. - Rice Vinegar: Apple cider vinegar can replace it. - Cornstarch: Use arrowroot powder if you have it. Add some flair with these garnishes: - Sliced green onions for a fresh taste. - Toasted sesame seeds for crunch. - Fresh cilantro for a pop of color. - Orange slices for a pretty presentation. These ingredients and their substitutes will help you create a tasty and easy Orange Chicken dish. For the complete cooking process, check the Full Recipe. To start, gather your chicken and cut it into bite-sized pieces. In a medium bowl, mix 1 cup of flour, 1 teaspoon of salt, and 1/2 teaspoon of black pepper. This blend gives the chicken a nice flavor. In another bowl, place 2 large beaten eggs. Set up your breading station. First, dip each chicken piece in the flour mix. Next, coat it in the eggs. Finally, cover it with 1 cup of cornstarch. This step helps create the crispy texture we love. Now, it’s time to fry! Heat 2 cups of vegetable oil in a large skillet or wok over medium-high heat. Once the oil is hot, carefully add the chicken pieces in batches. Fry them for about 5 to 7 minutes until they turn golden brown and are cooked through. Be sure to not overcrowd the pan. After frying, remove the chicken and let it drain on paper towels. This helps keep your chicken crispy. For the orange sauce, take a separate saucepan. Combine 1/2 cup of freshly squeezed orange juice, the zest of 1 orange, 1/4 cup of low-sodium soy sauce, 1/4 cup of sugar, and 1 tablespoon of rice vinegar. Add in 2 cloves of minced garlic and 1 teaspoon of freshly grated ginger. Simmer this mix on low heat for about 5 minutes. This allows the flavors to blend well. To thicken the sauce, stir in 1 tablespoon of cornstarch mixed with 2 tablespoons of cold water. Cook for a couple of minutes until the sauce thickens slightly. Now, combine the crispy chicken with the orange sauce in a large serving bowl. Toss it well to coat the chicken evenly. For a beautiful touch, garnish with sliced green onions and sesame seeds. This makes it look as good as it tastes! To make the chicken crispy, start with dry pieces. Pat them with a paper towel. Use a three-step breading process: flour, eggs, and cornstarch. This helps create a great crunch. Make sure your oil is hot before frying. If the oil isn’t hot enough, the chicken will be soggy. Fry in small batches. This keeps the oil hot and helps with even cooking. For a tasty orange sauce, use fresh orange juice. This makes a big difference in flavor. Add orange zest for more brightness. Mix soy sauce and sugar with the juice. The sugar balances the tartness. Don't forget the garlic and ginger; they add depth. Let the sauce simmer. This helps the flavors blend well. If you want a thicker sauce, use cornstarch mixed with water. Serve your orange chicken over steamed rice. The rice soaks up the sauce nicely. You can also add stir-fried veggies for color and crunch. Green onions and sesame seeds make great garnishes. They add a nice touch of flavor. For a fun twist, serve with crispy noodles on the side. This adds a nice texture and complements the dish perfectly. For the full recipe, check out the Zesty Orange Chicken Delight. {{image_2}} You can make a baked version of orange chicken. It cuts down on oil. Here’s how: - Preheat your oven to 400°F (200°C). - Coat the chicken pieces with the same flour mix. - Instead of frying, place them on a baking sheet. - Spray the chicken lightly with cooking spray. - Bake for about 20-25 minutes until golden and crisp. This method gives you a lighter dish that's still tasty. You can easily change the flavor of your orange chicken. If you like heat, add chili flakes or hot sauce to the orange sauce. For a sweeter taste, increase the sugar or add honey. Here are some ideas: - Add 1 tablespoon of sriracha for heat. - Mix in crushed red pepper flakes for a spicy kick. - Use brown sugar instead of white for a richer flavor. Feel free to play with these flavors to match your taste! Pair your orange chicken with tasty sides to make a complete meal. Here are some great options: - Serve over steamed white or brown rice. - Try it with lo mein or fried rice for added flavor. - Add a side of stir-fried broccoli or snap peas for crunch. These sides not only enhance the dish but also add nutrition. You can find the full recipe for more details on making this dish delicious! After you enjoy your meal, store any leftovers in an airtight container. This helps keep the chicken crispy for a day or two. Place the chicken and sauce together, or keep them separate if you want better texture. If stored properly, your Orange Chicken will taste great for up to three days. For longer storage, you can freeze the leftovers. Place the chicken in a freezer-safe bag or container. Make sure to remove as much air as possible. You can freeze the orange sauce separately, too. This way, you can enjoy this tasty dish for up to three months. When it's time to eat again, reheat the chicken in the oven. Preheat the oven to 375°F (190°C) and place the chicken on a baking sheet. Bake for about 10-15 minutes, or until hot and crispy. You can also reheat the sauce on the stovetop in a small pot. Stir it well to ensure it warms evenly. If you want, you can add a splash of water or orange juice to help it blend. Panda Express Orange Chicken is made from chicken, a sweet orange sauce, and spices. The chicken is coated in a crispy batter and then fried. The sauce has orange juice, zest, soy sauce, sugar, garlic, and ginger. It has a nice blend of sweet and tangy flavors that many enjoy. For a homemade version, check the Full Recipe. To make the sauce less sweet, cut down on sugar. You can replace some sugar with soy sauce for a saltier taste. Adding more orange juice can also help balance the sweetness. If you prefer a tangy flavor, increase the rice vinegar. Taste as you mix to find your perfect balance. Yes, you can make this dish vegan. Replace the chicken with tofu or tempeh. Use plant-based egg substitutes for the batter. For the sauce, ensure the soy sauce is vegan-friendly. This way, you can enjoy a tasty vegan Orange Chicken dish without losing flavor. You can buy Panda Express Orange Chicken at any Panda Express location. They also offer delivery through their app or various food delivery services. If you want to enjoy it at home, you can try making it yourself with the Full Recipe. In this article, we covered key ingredients, step-by-step instructions, and tips for making orange chicken. You learned about ingredient swaps and how to achieve crispy chicken. You also discovered variations and storage tips for leftovers. Remember, cooking is about enjoying the process. Feel free to experiment with flavors and ingredients. Make it your own and share it with friends. Your take on orange chicken can be a fun twist on this classic dish!

Panda Express Orange Chicken Flavorful and Easy Recipe

If you crave the tangy and sweet goodness of Panda Express Orange Chicken, you’re in luck! I’ll show you how

To make the best jalapeño poppers, gather these key items: - 12 fresh jalapeño peppers, halved and deseeded - 8 oz cream cheese, softened - 1 cup shredded sharp cheddar cheese - ½ cup crumbled feta cheese - 2 cloves garlic, minced - 1 teaspoon smoked paprika - ½ teaspoon black pepper - ½ teaspoon salt - ½ cup breadcrumbs - 2 tablespoons olive oil - Fresh cilantro or parsley for garnish These ingredients create a creamy and spicy filling. The cream cheese adds richness, while cheddar gives a nice bite. Feta cheese adds a hint of saltiness, making each popper burst with flavor. You can customize your poppers with some fun add-ins. Here are a few ideas: - Cooked bacon bits for added crunch and flavor. - Chopped green onions for a fresh taste. - Different cheeses like pepper jack for extra heat. - Black beans for a heartier filling. If you're out of jalapeños, try using mini sweet peppers. They are milder and still delicious. Having the right tools makes cooking easier. For jalapeño poppers, I recommend: - A mixing bowl for your filling. - A baking sheet lined with parchment paper. - A sharp knife for slicing jalapeños. - A spoon for stuffing the peppers. - An oven to get them perfectly crispy. Using the right tools helps ensure your poppers turn out great. You can find the full recipe here to guide you through each step. To make the best jalapeño poppers, start by preheating your oven to 375°F (190°C). Next, grab a mixing bowl. Combine the softened cream cheese, shredded cheddar cheese, crumbled feta cheese, minced garlic, smoked paprika, black pepper, and salt. Mix these until smooth and creamy. Take your halved jalapeños and stuff each one with the cheese mixture. Fill them generously for a tasty bite. In another bowl, mix breadcrumbs with olive oil. This makes them crunchy. Sprinkle this mixture over each stuffed jalapeño. Place them on a baking sheet lined with parchment paper. Bake in the oven for 20-25 minutes. You want the jalapeños soft and the tops golden. Once done, let them cool for a few minutes. Finally, add fresh cilantro or parsley for a pop of color. For perfect texture, make sure your cream cheese is soft. This helps in mixing and stuffing. Don’t skip the breadcrumbs! They add a nice crunch on top. Watch your baking time closely. If you bake them too long, they'll become mushy. If you want them extra crispy, turn on the broiler for the last minute. Just keep an eye on them to avoid burning. When serving jalapeño poppers, think about colors and flavors. Arrange them on a bright platter. Add a few lime wedges on the side for zest. You can also serve them with a small bowl of ranch or salsa for dipping. For a fun twist, place them on a wooden board with fresh herbs. This makes your poppers look gourmet and inviting. Enjoy your flavorful and fun snack! When choosing jalapeños, look for firm peppers. They should have a bright green color. Avoid any that feel soft or have dark spots. Fresh jalapeños have a shiny skin. A fresh pepper should feel heavy for its size. You can also smell them. A good jalapeño has a spicy scent. To stuff your jalapeños well, use a small spoon. Fill each half with your cheese mix. Make sure to pack it tight but don’t overfill. The cheese should not spill out while cooking. You can also use a piping bag for a neater look. This trick helps to keep everything tidy. For milder poppers, remove all seeds and membranes. These parts hold most of the heat. You can also mix in some sour cream or yogurt with the cheese. This will tone down the spice. If you like heat, leave some seeds in. Experiment until you find your perfect balance. {{image_2}} You can change the cheese to suit your taste. Try mozzarella for a gooey texture. For a stronger flavor, use pepper jack. Goat cheese adds a tangy twist. Mix and match cheeses for fun surprises! If you love heat, choose fresh jalapeños with stems. The seeds hold most spice. For milder poppers, use poblano peppers instead. You can also soak jalapeños in water to tone down the heat. Adjust the spice to fit your crowd's taste. You can make jalapeño poppers without meat or dairy. Use a mix of vegan cream cheese and nutritional yeast. For extra flavor, add chopped spinach or artichokes. This way, everyone can enjoy this tasty snack! For the full recipe, check out the Spicy Cheesy Jalapeño Poppers . To keep your jalapeño poppers fresh, let them cool first. Place them in an airtight container. They will stay good in the fridge for up to three days. Make sure to separate layers with parchment paper. This helps them stay crispy. When you're ready to enjoy leftovers, preheat your oven to 350°F (175°C). Spread the poppers on a baking sheet. Heat them for about 10-15 minutes. This keeps the cheese melty and the jalapeños tender. You can also use an air fryer. Set it to 350°F (175°C) and cook for about 5-7 minutes for a quick reheat. If you want to save jalapeño poppers for later, freezing is a great option! Place the cooked poppers on a baking sheet. Freeze them for about an hour until firm. Then, pack them in a freezer-safe bag. They can last up to three months in the freezer. To cook from frozen, bake them at 375°F (190°C) for 25-30 minutes. Enjoy the spicy, cheesy goodness anytime! Check the full recipe for more details. The best jalapeño poppers come from brands that focus on quality. Look for poppers made with fresh ingredients. Check for brands that use real cheese and avoid fillers. I recommend trying local shops or farmers' markets. You can also find tasty frozen options in stores. Just read the label to ensure quality. Always choose poppers that have a good balance of spice and cheese. Yes, you can make jalapeño poppers ahead of time. Prepare the filling and stuff the jalapeños. Then, cover them well and store them in the fridge. They can stay fresh for up to a day. When you're ready to bake, place them in the oven straight from the fridge. This saves time and gives you a tasty snack when you need it. Jalapeño poppers have roots in Tex-Mex cuisine. These tasty bites became popular in the 1980s. Cooks started stuffing jalapeños with cheese and other fillings. Over time, they grew in fame across the United States. People love them for their spicy kick and creamy filling. Today, they appear at parties and gatherings everywhere. For a full recipe, check out the Spicy Cheesy Jalapeño Poppers recipe! Jalapeño poppers are tasty snacks. We covered key ingredients, cooking steps, and fun ideas. You learned how to pick juicy jalapeños and stuff them right. We also shared ways to mix up the cheese. Remember to store leftovers properly for later. Enjoy making these poppers for friends and family. Try all the tips to make your snacks great. Happy cooking!

Best Jalapeño Poppers Flavorful and Fun Snack Recipe

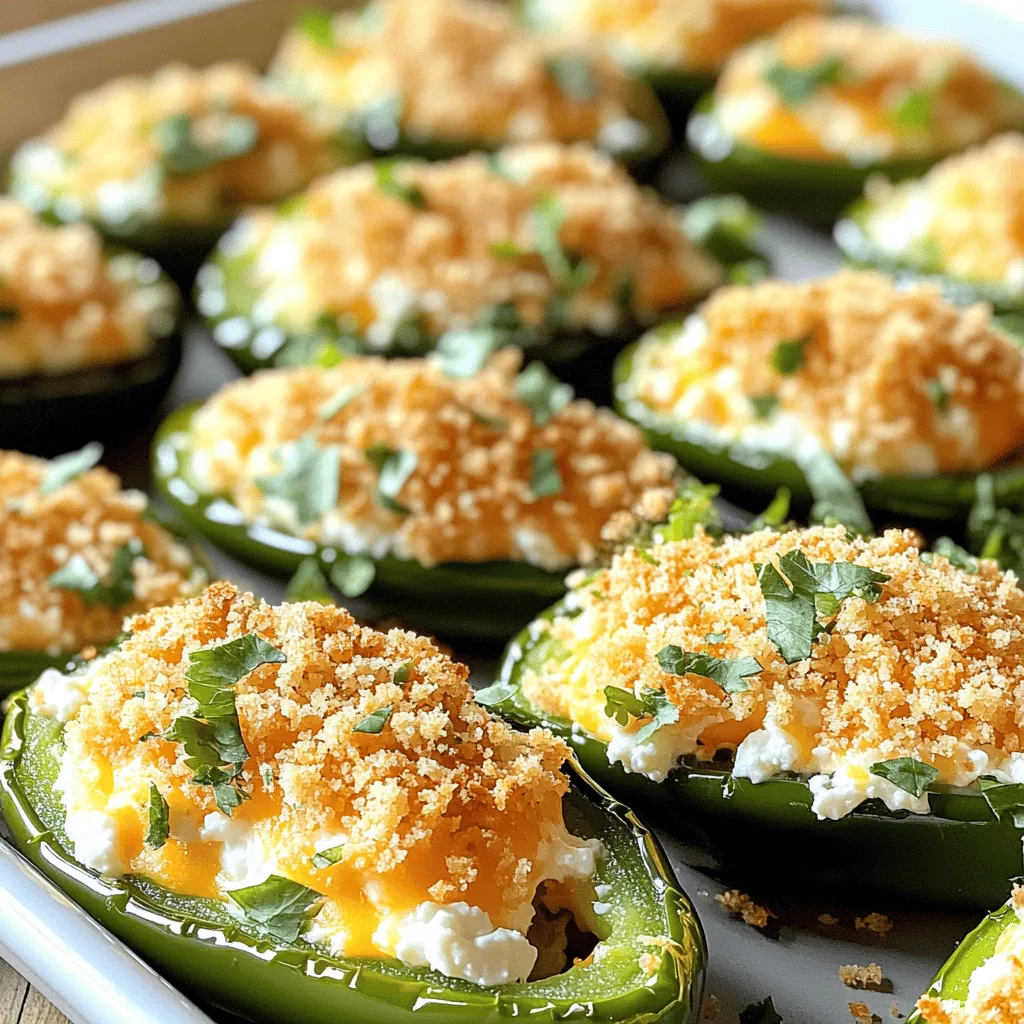
Are you ready to spice up your snack game? In this post, I’ll share the best jalapeño poppers recipe that’s

To make a tasty Cajun Chicken and Sausage Gumbo, gather these items: - 1 pound boneless, skinless chicken thighs, cut into bite-sized pieces - 1 pound smoked sausage, sliced (andouille sausage works great) - 1/2 cup vegetable oil - 1/2 cup all-purpose flour - 1 large onion, diced - 1 green bell pepper, diced - 1 stalk celery, diced - 3 garlic cloves, minced - 6 cups chicken broth - 2 tablespoons Cajun seasoning - 1 teaspoon dried thyme - 2 bay leaves - 1 cup okra, sliced (fresh or frozen) - Salt and pepper to taste - 1/4 cup fresh parsley, chopped (for garnish) - Cooked white rice (for serving) - Hot sauce (for serving) You can swap some ingredients if needed. Here are a few ideas: - Use chicken breasts instead of thighs for leaner meat. - Swap smoked sausage for kielbasa if you can't find andouille. - Olive oil can replace vegetable oil for a different taste. - Use vegetable broth instead of chicken broth for a vegetarian option. - Fresh okra can be replaced with frozen okra if that's what you have. Using fresh ingredients gives the best flavor. Fresh vegetables add crunch and brightness. However, frozen options work well too. They often save time and are just as nutritious. For example, frozen okra is convenient and still tasty. Using frozen chicken is fine, but make sure to thaw it first. Fresh herbs like parsley add a lovely touch. If you can, choose fresh for the best gumbo experience. To make the roux, start by heating the vegetable oil in a large pot. Use medium heat. Gradually whisk in the flour until smooth. Keep stirring for about 20-30 minutes. You want the roux to turn a deep caramel color. Watch it closely so it doesn't burn. This is the base of your gumbo. It adds flavor and richness. Next, prepare the "holy trinity." This mix includes onion, bell pepper, and celery. Dice one large onion, one green bell pepper, and one stalk of celery. Once your roux is ready, add these vegetables to the pot. Sauté them for about 5-7 minutes. You want them to soften but not brown. This adds a wonderful flavor to your gumbo. Now it's time to cook the chicken and sausage. Add one pound of chicken thighs and one pound of smoked sausage to the pot. Stir everything together to coat with the roux and vegetables. Sauté for about 5 minutes until the chicken starts to brown. Pour in six cups of chicken broth. Add Cajun seasoning, thyme, bay leaves, and okra. Stir well to mix. Bring the gumbo to a boil, then reduce the heat. Cover it and let it simmer for around 45 minutes, stirring occasionally. Adjust the salt and pepper to your taste. If you want a thicker gumbo, simmer it uncovered for another 10-15 minutes. Just before serving, remove the bay leaves, and ladle the gumbo over cooked white rice. Garnish with fresh parsley and serve hot sauce on the side. Enjoy this comforting dish! For the full recipe, refer to the earlier section. To get the right roux color, start with equal parts oil and flour. Heat the oil over medium heat. Whisk in the flour slowly. Stir non-stop for about 20 to 30 minutes. Keep an eye on the color. You want it to turn a deep caramel brown. This gives the gumbo its rich flavor. If it burns, you must start over. Patience is key here! For a good Cajun flavor, use a blend that has paprika, garlic, and cayenne. You can buy ready-made Cajun seasoning. Or, make your own mix at home. A simple recipe includes: - 2 tablespoons paprika - 1 tablespoon onion powder - 1 tablespoon garlic powder - 1 teaspoon cayenne pepper - 1 teaspoon dried thyme - 1 teaspoon black pepper - 1 teaspoon salt Mix these together in a bowl. Store in a jar for future use. This blend will elevate your gumbo, giving it that authentic kick! If you want a thicker gumbo, let it simmer uncovered for 10 to 15 minutes. This helps the liquid reduce. You can also add a bit more okra, as it helps thicken the dish. Another option is to mash some of the okra into the gumbo. If you want an even richer texture, add a bit more roux. Just be sure to cook it a little longer to avoid a raw flour taste. {{image_2}} You can easily add seafood to your gumbo for a new twist. Shrimp, crab, or fish work well. Just cook them in the last 10 minutes of simmering. This way, they stay tender and tasty. I love adding shrimp for its sweet flavor. Adjust the seasoning as needed to complement the seafood. Adding a few drops of lemon juice can brighten the dish too. For a vegetarian or vegan gumbo, swap the chicken and sausage for hearty veggies or plant-based proteins. You can use mushrooms, eggplant, or lentils. Replace chicken broth with vegetable broth to keep the flavor rich. Add more spices to enhance the taste. You can also add beans for protein. This version is just as hearty and filling. If you like heat, add more Cajun seasoning or hot sauce. You can also use fresh peppers like jalapeños for extra spice. Be careful not to overdo it; you want a balanced flavor. For a milder dish, reduce the seasoning. Add a touch of cream or coconut milk for richness without heat. Don't forget, you can adjust the spices to your taste! For the full recipe, check out the detailed steps above. Enjoy cooking! To store leftover gumbo, let it cool at room temperature. Once cool, transfer it to a safe container. Seal the container tightly to keep out air. You can store the gumbo in the fridge for up to three days. Make sure to label it with the date to track freshness. Freezing gumbo is a great way to keep it longer. Pour the cooled gumbo into freezer-safe bags or containers. Leave some space for expansion. Seal them well and label with the date. You can freeze gumbo for up to three months. When ready to eat, thaw it overnight in the fridge. When reheating gumbo, do it slowly for the best taste. Pour the gumbo into a pot and heat it over medium-low heat. Stir often to avoid sticking. If it seems thick, add a bit of water or broth. You can also microwave it in a safe bowl. Heat in short bursts, stirring in between. This keeps the flavor fresh and tasty. Enjoy your gumbo with some rice and hot sauce, just like in the Full Recipe! For Cajun gumbo, I recommend using andouille sausage. It has a nice smoky flavor. This sausage adds depth and spice to the dish. If you can't find andouille, look for any smoked sausage. Just choose one that has bold flavors. You can use chicken breasts in your gumbo. However, chicken thighs are better for flavor. Thighs stay juicier and tender during cooking. If you use breasts, watch the cooking time closely. You don’t want them to dry out. To thicken gumbo without a roux, you can use okra. It thickens the dish nicely and adds texture. Another option is to mash some beans or use cornstarch. Mix cornstarch with cold water first, then add it to the gumbo. Both methods work well and keep the flavor rich. If you want to dive deeper into making this dish, check out the Full Recipe. It provides all the details to create a delicious Cajun Chicken and Sausage Gumbo! To make a great gumbo, you need to pay attention to each step. We covered the best ingredients, including fresh and frozen options. The roux is crucial for flavor and texture, so follow the tips for the perfect color. Don't forget variations, like seafood or vegan options, to suit your taste. Storing and reheating gumbo properly keeps it delicious for later. Overall, with the right tricks, you can create a dish that impresses everyone. Enjoy making your gumbo and have fun experimenting!

Cajun Chicken and Sausage Gumbo Flavorful Home Recipe

Are you ready to whip up a bowl of warm, hearty Cajun Chicken and Sausage Gumbo? This flavorful dish is

- 1 lb chicken tenders - 1 cup grated Parmesan cheese - 1 cup breadcrumbs (preferably panko) - 3 cloves garlic, minced - 1 lemon (zest and juice) - 1 teaspoon dried oregano - 1 teaspoon salt - ½ teaspoon black pepper - 2 tablespoons olive oil Gather these ingredients to create your Lemon Garlic Parmesan Chicken Tenders. The chicken tenders serve as the main star, bringing juicy texture. Grated Parmesan cheese adds a rich, nutty flavor. Breadcrumbs deliver a perfect crunch, especially if you use panko. Garlic gives this dish a delightful aroma and taste. The zest and juice of lemon brighten the flavors and add a tangy twist. Dried oregano brings an earthy note, enhancing the overall taste. For seasonings, salt and black pepper ensure each bite is well-balanced. Finally, olive oil adds moisture and helps the coating crisp up perfectly in the oven. Check out the [Full Recipe] for exact measurements and cooking instructions! 1. Preheat your oven to 400°F (200°C). This helps cook the chicken evenly. 2. Prepare the baking sheet by lining it with parchment paper. This makes cleanup easy. 1. In a large bowl, combine the grated Parmesan cheese, breadcrumbs, minced garlic, lemon zest, dried oregano, salt, and black pepper. Mix well until everything is even. 2. In a separate bowl, whisk together the olive oil and lemon juice. This adds flavor and helps the coating stick. 1. Dip each chicken tender into the lemon and olive oil mix. Make sure all sides are coated well. 2. Roll each tender in the Parmesan breadcrumb mixture. Press gently so the coating sticks. 3. Place the coated tenders on the prepared baking sheet, spaced out evenly. 4. Bake in the preheated oven for 20-25 minutes. Look for a golden brown color and check that the chicken is cooked through. 5. Once done, take the tenders out and let them rest for a few minutes. Garnish with chopped parsley before serving. Enjoy your delicious Lemon Garlic Parmesan Chicken Tenders! For the full recipe, check out the complete guide above. To get a crispy coating, use panko breadcrumbs. They give a light crunch. Make sure to coat each tender well. Press down gently to help the crumbs stick. Bake at 400°F for 20-25 minutes. This time ensures the chicken cooks fully. Check for a golden brown color on the coating. For dipping sauces, ranch and garlic mayo work great. They add a nice creamy flavor. You can also try honey mustard for a sweet twist. As for side dishes, a fresh salad pairs well. Roasted veggies also complement the chicken tenders nicely. For a fun touch, serve with lemon wedges. They add zest and freshness to each bite. You can find the full recipe for Lemon Garlic Parmesan Chicken Tenders [here](#). {{image_2}} You can make these chicken tenders even better for you. Instead of frying, bake them. Baking keeps the flavor while cutting down on fat. Just follow the full recipe for the baking steps. You can also use gluten-free breadcrumbs. This swap makes the dish safe for those with gluten issues. Look for gluten-free panko for that extra crunch. Want to change up the flavor? Try adding spices or herbs. A sprinkle of paprika gives a nice kick. You can also add fresh herbs like thyme or rosemary for extra taste. If you’re a cheese lover, substitute different cheeses. Cheddar or mozzarella can work great here. Each cheese brings its unique flavor to the dish. Experiment and find your favorite mix! After cooking, let the chicken tenders cool to room temperature. Place them in an airtight container. Store them in the fridge for up to three days. Keeping them sealed helps retain flavor and moisture. To reheat, preheat your oven to 350°F (175°C). Place the chicken tenders on a baking sheet. Heat for 10-15 minutes until warm. This method keeps the coating crispy and delicious. You can also use a microwave if you’re in a hurry. However, it might make them a bit soggy. To freeze chicken tenders, first, let them cool completely. Arrange them in a single layer on a baking sheet. Freeze for about an hour until solid. This prevents them from sticking together. Once frozen, transfer the tenders to a freezer bag. Remove all air before sealing. They can stay good in the freezer for up to three months. When you’re ready to eat them, take the chicken tenders out of the freezer. Place them in the fridge to thaw overnight. For faster thawing, you can use a microwave on the defrost setting. After thawing, reheat as directed above. Enjoy your tasty chicken tenders again! For the full recipe, check the previous section. How long to bake chicken tenders? Bake chicken tenders for 20 to 25 minutes at 400°F (200°C). Check for a golden-brown color. The chicken should also be cooked through. Can I use chicken breasts instead? Yes, you can use chicken breasts. Just cut them into strips. Adjust the cooking time as needed. How do I know when the chicken is done? Check the internal temperature with a meat thermometer. It should reach 165°F (75°C). The juices should run clear, not pink. What to serve with Lemon Garlic Parmesan Chicken Tenders? These tenders pair well with a fresh salad or roasted vegetables. You can also serve them with fries or rice. Add lemon wedges for a zesty touch. Can I prepare them ahead of time? Yes, you can prep the chicken tenders a few hours in advance. Keep them in the fridge until you are ready to bake. This helps the flavors blend. How do I make them spicier? To add heat, mix red pepper flakes into the breadcrumb mix. You can also add hot sauce to the olive oil and lemon juice mix. Caloric content per serving Each serving has about 350 calories. This may vary based on portion size and exact ingredients used. Nutritional benefits of main ingredients Chicken is a great source of protein. Parmesan cheese adds calcium. Garlic offers health benefits, including boosting the immune system. Lemon provides vitamin C, which is good for your skin. This guide covered making Lemon Garlic Parmesan Chicken Tenders. We explored the key ingredients like chicken, cheese, and breadcrumbs. I detailed preparation steps, from coating to baking and serving. You learned tips for crispy texture and pairing ideas. I also shared storage info and common FAQs. Try these easy tips and enjoy tasty meals. Cooking can be fun and rewarding!

Lemon Garlic Parmesan Chicken Tenders Delight Recipe

If you crave a tasty and easy meal, you’ve hit the jackpot! This Lemon Garlic Parmesan Chicken Tenders recipe is

For a great seafood salad, you need fresh seafood. I like using: - 200g cooked shrimp, peeled and deveined - 200g cooked calamari rings - 150g crab meat, shredded These seafood choices give a nice mix of flavors and textures. The shrimp adds sweetness, while the calamari gives a slight chew. The crab meat brings a rich taste. Next, add some colorful veggies to brighten your salad. I recommend: - 1 cup cherry tomatoes, halved - 1 cucumber, diced - 1 avocado, diced - 1/4 red onion, finely chopped - 2 tablespoons fresh dill, chopped These veggies not only add color but also crunch. The cherry tomatoes pop with juice, while the cucumber and avocado add creaminess. Dill gives a fresh herb taste that ties everything together. The dressing is what makes the salad shine. For the dressing, use: - Juice of 1 lemon - 3 tablespoons olive oil - Salt and pepper to taste This simple mix brings flavor without overpowering the seafood. The lemon juice adds brightness, while the olive oil gives a smooth finish. This dressing is key to the full recipe. Start by gathering your seafood. You need cooked shrimp, calamari, and crab meat. Use 200g of shrimp, 200g of calamari rings, and 150g of crab meat. Place all the seafood in a large bowl. Gently mix them. You want them to combine without breaking apart. This step keeps the salad looking nice. Next, you’ll add color and crunch. Halve 1 cup of cherry tomatoes and dice 1 cucumber and 1 avocado. Chop 1/4 of a red onion finely. Toss these veggies into the bowl with the seafood. Their fresh flavors will brighten up the dish. The mix of textures adds interest to every bite. Now, let’s make the dressing. In a small bowl, whisk together the juice of 1 lemon, 3 tablespoons of olive oil, and 2 tablespoons of chopped fresh dill. Add a pinch of salt and pepper to taste. This dressing will bring all the flavors together. It’s both bright and flavorful, perfect for seafood. Pour the dressing over the seafood and vegetables. Gently toss everything to coat. Let the salad sit for about 10 minutes. This rest time helps the flavors blend. Finally, serve the seafood salad over mixed salad greens. It’s a quick and fresh delight, ready to enjoy! Check out the Full Recipe to see all the details. To make your seafood salad shine, pick the freshest seafood. Look for shrimp that smell like the ocean, not fishy. The color should be bright and firm. For calamari, choose rings that are white and glossy. Crab meat should be pale and flaky. Always check the sell-by date. Fresh seafood is key for great flavor. Serve your seafood salad chilled on a warm day. This dish pairs well with crusty bread or crackers. A light white wine complements the flavors nicely. If you want a twist, try adding a side of fruit salad. Fresh herbs, like parsley, can add extra color on top. Don’t overcook your seafood. This makes it tough and rubbery. Also, avoid heavy dressings that mask the seafood taste. If you chop the veggies too small, they can get lost in the salad. Lastly, let your salad sit for a few minutes to meld the flavors but not too long. Enjoying it fresh gives the best taste. {{image_2}} To make an Asian-inspired seafood salad, add some fun flavors. You can use soy sauce and sesame oil for the dressing. Toss in ingredients like shredded carrots and cilantro. You could also add sliced radishes for a nice crunch. This twist brings a fresh taste to your seafood salad. Try using cooked shrimp and crab for the best mix. If you like Caesar salad, you can make a seafood version. Use romaine lettuce as the base. Add seafood like shrimp and crab meat. For the dressing, mix mayonnaise, lemon juice, and Parmesan cheese. Toss in croutons for some crunch. This style adds a creamy and rich taste to your dish. It feels like a classic but with seafood. For a vegan take on seafood salad, use plant-based seafood options. You can find products that mimic shrimp or crab. Use chickpeas or tofu to add protein. For the dressing, mix tahini, lemon juice, and garlic. You can still enjoy the fresh veggies like cucumber and tomatoes. This version is light and healthy while being full of flavor. You can find the full recipe [here](#). To keep your seafood salad fresh, store it in an airtight container. Make sure to seal it well. Place the container in the fridge right after serving. This keeps the salad cool and safe. If you have any leftover dressing, store it separately. This prevents the salad from getting soggy. Properly stored, your seafood salad lasts about 2 to 3 days in the fridge. After that, the seafood may lose its flavor and texture. Always check for any off smells or changes in color before eating. If you see or smell anything unusual, it’s best to toss it out. Seafood salad is best enjoyed cold. If you need to warm it, do so gently. Place it in a pan on low heat. Heat just until it is warm, not hot. This keeps the seafood tender. Microwaving is not recommended, as it can make the seafood rubbery. Yes, you can use frozen seafood. Just thaw it first. Frozen seafood is often safe and good. It can save time and money. Look for quality brands that freeze fresh seafood quickly. Mixed salad greens work well with seafood salad. You can also use arugula or spinach. These greens add fresh flavors. They also give a nice crunch. Adding herbs, like parsley or basil, enhances taste too. To make a healthier dressing, swap olive oil for yogurt. Greek yogurt adds creaminess with less fat. Mix it with lemon juice, herbs, and a dash of salt. This dressing is light but full of flavor. Yes, this recipe is great for meal prep. You can store it in the fridge for up to three days. Just keep the dressing separate until serving. This keeps everything fresh and tasty. A crisp white wine pairs best with seafood salad. Try a Sauvignon Blanc or a Pinot Grigio. These wines enhance the seafood flavors. They also balance the salad's freshness. Enjoy your meal with a nice glass of wine! This article covered how to make a delicious seafood salad. We explored the best seafood choices, tasty vegetables, and dressings. I shared step-by-step instructions to prepare each part. You learned tips to pick fresh ingredients and serve your salad right. Lastly, I provided ideas for variations and storage hints. Remember, making a great seafood salad is easy with the right steps. Enjoy experimenting with flavors and impress your friends!

Seafood Salad Quick and Fresh Delight Recipe

If you crave a light and tasty meal, this Seafood Salad Quick and Fresh Delight Recipe is for you! Packed

- 1 cup stone-ground grits - 4 cups chicken or vegetable broth - 1 cup shredded Gouda cheese - 1 cup milk - 1/2 cup heavy cream - 1/2 teaspoon smoked paprika - 1/4 teaspoon cayenne pepper - 1/2 teaspoon garlic powder - 1/2 teaspoon salt - 1/4 teaspoon black pepper - 2 tablespoons unsalted butter - 2 green onions, sliced Baked Gouda cheese grits are a warm and creamy dish. Each ingredient plays a key role. The stone-ground grits offer a rich texture. Using chicken or vegetable broth adds depth. Gouda cheese brings a distinct flavor that melts beautifully. Milk and heavy cream give the dish its creaminess. The seasonings add warmth and spice. Smoked paprika gives a hint of sweetness. Cayenne pepper adds a little heat. Garlic powder boosts the taste, while salt and black pepper enhance all these flavors. For garnishes, unsalted butter adds richness. Sliced green onions provide a fresh touch. This combination makes the dish visually appealing and tasty. You can find the full recipe above for all the details on how to bring this delightful meal to your table. - Preheat the oven to 350°F (175°C). - Grease a medium-sized baking dish with butter or oil. - In a large saucepan, bring your chicken or vegetable broth to a boil. - Slowly whisk in the stone-ground grits. - Reduce the heat to low and stir continuously. - Keep stirring for 5-7 minutes until the grits thicken. - Once thickened, remove the pan from heat. - Stir in the unsalted butter until it melts. - Add the milk, heavy cream, and shredded Gouda cheese. - Mix in smoked paprika, cayenne pepper, garlic powder, salt, and black pepper. - Transfer the creamy mixture into your greased baking dish. - Smooth the top with a spatula for even cooking. - Place the dish in the preheated oven. - Bake for 30-35 minutes until it turns golden brown and bubbly. - After baking, let it cool for a few minutes. - Garnish with sliced green onions before serving. Follow these steps, and you’ll enjoy a warm, cheesy dish that feels like a hug! For all the details, check out the Full Recipe. - Use stone-ground grits for the best texture. They have a rich, nutty flavor. - Stir continuously to prevent lumps. This keeps your grits smooth and creamy. - Adjust milk and cream for desired creaminess. More dairy gives a richer taste. - Monitor baking time for the perfect golden crust. Keep an eye on it during the last few minutes. - Experiment with additional cheeses or spices. Try adding sharp cheddar or Italian herbs for a twist. - Consider adding sautéed vegetables for extra flavor. Onions, bell peppers, or spinach work well. Baked Gouda cheese grits are versatile. You can mix and match flavors to make them your own. For the full recipe, check out the section above! {{image_2}} You can make Baked Gouda Cheese Grits even better with different cheeses. Try using sharp cheddar for a tangy taste. Pepper jack adds a nice kick too. For a creamier texture, blend in some cream cheese. This adds richness and makes the dish even more comforting. Want to change the flavor? Add fresh herbs like thyme or rosemary. They add a nice aroma. If you like heat, throw in some diced jalapeños or chili flakes. A little spice can bring the dish to life and make it exciting. Looking for more substance? Mix in cooked bacon or sausage. This makes it hearty and filling. For a southern twist, top your grits with shrimp. The seafood pairs well with the creamy cheese and grits. For the full recipe and to explore more, check the [Full Recipe]. Store any leftovers in an airtight container. They will stay fresh for up to 3 days. I always let them cool before sealing. This helps keep the texture nice. You can freeze baked gouda cheese grits for up to 2 months. Just make sure they are in a freezer-safe container. When ready to enjoy, thaw in the fridge overnight before reheating. To reheat, you have two great options. For a crispy top, place them in the oven at 350°F. Bake until warmed through, about 15-20 minutes. If you need a quick option, use the microwave. Heat in short bursts, stirring in between, until hot. Yes, prepare the dish in advance and refrigerate before baking. This saves time and helps flavors blend. When you're ready, just pop it in the oven. It will still taste fresh and delicious. These grits shine as a side dish with chicken or seafood. You can also enjoy them as a main dish. Add toppings like sautéed shrimp or fresh herbs for extra flair. To make the grits creamier, increase the milk and cream. Another tip is to add more cheese right before baking. This will give you that rich, smooth texture you crave. This blog post shared a simple recipe for baked Gouda cheese grits. We covered the key ingredients, from stone-ground grits to seasonings and garnishes. You learned step-by-step instructions, plus tips for perfecting your dish. Variations let you customize flavors and add protein. Remember, leftovers store well in the fridge or freezer. Enjoy experimenting with this dish and serve it proudly. Baked Gouda cheese grits can bring warmth and comfort to your meals.

Baked Gouda Cheese Grits Rich and Comforting Delight

Are you ready to elevate your comfort food game? Baked Gouda Cheese Grits offer a rich and creamy delight that’s

Older posts
Newer posts
← Previous Page1 … Page45 Page46 Page47 … Page73 Next →

dsad

© 2025 So Yum Recipes • Built with GeneratePress

Our Policies

  • Copyright Policy
  • Cookie Policy
  • GDPR Policy
  • Privacy Policy
  • Disclaimer
  • Terms Of Use

More Information

  • Home
  • About
  • Contact
  • Appetizers
  • Dessert
  • Dinner
  • Drinks
©2025, So Yum Recipes About Back To Top