Skip to content
DisclaimerTerms Of UseGDPR PolicyCookie Policy

So Yum Recipes

  • Home
  • Drinks
  • Appetizers
  • Dinner
  • Dessert
  • About
  • Contact
  • Privacy Policy
DisclaimerTerms Of UseGDPR PolicyCookie Policy

Chloe

To make Quick Crispy Parmesan Fried Tortellini, gather these simple ingredients: - 12 oz cheese tortellini (fresh or frozen) - 1 cup breadcrumbs (panko recommended for extra crunch) - 1/2 cup grated Parmesan cheese - 2 teaspoons Italian seasoning - 1/2 teaspoon garlic powder - Salt and pepper to taste - 2 large eggs, beaten - Vegetable oil for frying - Fresh parsley, chopped (for garnish) For the best results, consider using these brands or types: - Tortellini: Look for fresh or frozen options from brands like Rana or Buitoni. - Breadcrumbs: Panko from Kikkoman gives a great crunch. - Parmesan Cheese: Freshly grated cheese often tastes better than pre-grated. - Italian Seasoning: McCormick or Simply Organic provides a good balance of flavors. Each serving of this dish contains approximately: - Calories: 340 - Protein: 14g - Carbohydrates: 34g - Fat: 18g - Fiber: 1g This dish is tasty and easy to make. You can find the full recipe to follow along! Start by cooking the tortellini. If it’s frozen, follow the package directions. Fresh tortellini cooks in boiling water for 3-4 minutes. You want it al dente, so don’t overcook. After cooking, drain the tortellini and let it cool for a bit. This helps with the breading later. Next, set up your breading station. In one shallow bowl, mix the breadcrumbs, Parmesan cheese, Italian seasoning, garlic powder, salt, and pepper. This mix adds great flavor. In another bowl, beat the eggs until smooth. This will help the breadcrumbs stick to the tortellini. Now it's time to coat the tortellini. First, dip each piece into the beaten eggs. Let any extra egg drip off. Then roll it in the breadcrumb mix. Press gently to make sure it sticks well. Heat vegetable oil in a large skillet until it shimmers. Add the coated tortellini in batches. Fry them for 2-3 minutes on each side until they turn golden brown and crispy. Flip them carefully using tongs for even cooking. Once they are crispy, use a slotted spoon to lift them out. Place them on a paper towel-lined plate to soak up the extra oil. This keeps them from getting soggy. Finally, transfer your crispy tortellini to a serving platter. Garnish with fresh chopped parsley. Serve warm with marinara sauce or pesto for dipping. Enjoy your delicious Quick Crispy Parmesan Fried Tortellini! For the full recipe, check out the complete details above. To get that perfect crispy bite, choose panko breadcrumbs. They are light and airy. Mix in grated Parmesan cheese for added flavor and crunch. Make sure the oil is hot enough before frying. This helps seal the coating quickly. Fry in small batches to avoid steaming. Overcrowding the pan can lead to soggy tortellini. One common mistake is skipping the cooling step. If you don’t let the tortellini cool, the coating may slide off. Also, don’t rush the frying process. If the oil isn’t hot, the tortellini will absorb too much oil. Lastly, avoid using too much salt in the breadcrumb mix. The Parmesan already adds a salty kick. Use a large skillet for frying. A cast iron pan works great for even heat. Tongs are essential for flipping the tortellini without damage. A slotted spoon helps drain excess oil easily. Paper towels are useful for patting down the fried tortellini. For best results, try a thermometer to check the oil temperature. For a full recipe, check the recipe section above. {{image_2}} You can change the cheese or filling in your tortellini to suit your taste. Instead of cheese, try spinach or meat-filled tortellini. You can also use different cheeses. Ricotta, mozzarella, or even goat cheese work great. Each choice adds a unique flavor and texture. Experiment with your favorites. If you want a twist on the breading, try different coatings. For a gluten-free option, use crushed cornflakes or almond flour. You can also use a mix of breadcrumbs and crushed nuts for added crunch. For a spicy kick, add cayenne pepper or paprika to your breadcrumbs. Pair your crispy tortellini with fun dips. Marinara is a classic choice. Pesto adds a fresh taste. You can also try ranch or garlic aioli for something different. Serve with a side salad or steamed veggies for a complete meal. These sides add color and balance to your plate. For the full recipe, check the earlier section. To keep your leftover fried tortellini fresh, place them in an airtight container. Make sure they cool down first. Store them in the fridge for up to three days. This method helps maintain their flavor and prevents sogginess. When you want to enjoy your leftover tortellini, use an oven for the best results. Preheat the oven to 375°F (190°C). Spread the tortellini on a baking sheet in a single layer. Heat them for about 10-12 minutes until they are crispy again. Avoid the microwave, as it can make them soft. If you have extra fried tortellini, you can freeze them. Place them in a single layer on a baking sheet and freeze for about an hour. Once frozen, transfer them to a freezer bag. They can last up to three months. When you're ready to eat, cook them straight from the freezer. Fry them for a few extra minutes to ensure they stay crispy. Enjoy your Quick Crispy Parmesan Fried Tortellini whenever you like! For more details, check the Full Recipe. Yes, you can use frozen tortellini. Just cook it according to the package instructions. Drain it well and let it cool a bit before breading. This helps the coating stick better. To make this dish healthier, try these tips: - Use whole wheat breadcrumbs instead of regular ones. - Bake the tortellini instead of frying. Just spray them lightly with oil and bake until crispy. - Serve with a fresh salad on the side for added nutrients. Crispy tortellini taste great with many sauces. Here are some favorites: - Marinara sauce for a classic touch. - Pesto sauce for a fresh, herby flavor. - Ranch dressing for a creamy dip. Experiment with your choices to find your favorite! Yes, you can prepare tortellini in advance. Cook and cool the tortellini, then store it in the fridge. Bread them just before frying. This keeps them fresh and crispy. For the full recipe, check out the earlier section. In this post, we covered key ingredients for your crispy tortellini. You learned the necessary steps for preparing and frying them. I shared tips for getting a perfect texture and avoiding mistakes. We also explored different filling options and serving ideas. Finally, I provided storage and reheating tips. With these insights, you can make delicious crispy tortellini at home. Enjoy experimenting and sharing this tasty dish with others!

Quick Crispy Parmesan Fried Tortellini Delight Recipe

Are you ready to elevate your snack game? This Quick Crispy Parmesan Fried Tortellini Delight Recipe will do just that!

- 1 cup all-purpose flour - 1/2 cup granulated sugar - 1/2 cup unsweetened cocoa powder - 1 teaspoon baking powder - 1/2 teaspoon baking soda - 1/4 teaspoon salt - 1/2 cup buttermilk - 1/4 cup vegetable oil - 1 large egg - 1 teaspoon vanilla extract The base of your Boston Cream Bars starts with all-purpose flour. This gives the bars structure. Granulated sugar adds sweetness, while unsweetened cocoa powder gives that rich chocolate taste. Baking powder and baking soda help the bars rise. Salt balances the flavors. Buttermilk adds moisture and a nice tang. Vegetable oil keeps the bars soft. The egg binds everything together, and vanilla extract gives a warm flavor. - 8 ounces semi-sweet chocolate, chopped - 1 cup heavy cream For the chocolate ganache, semi-sweet chocolate is key. It adds a rich chocolate layer. Heavy cream makes it smooth and creamy. Heat the cream and pour it over the chocolate to melt it, creating a glossy finish. - 2 cups whole milk - 2/3 cup granulated sugar - 1/4 cup cornstarch - 1/4 teaspoon salt - 4 large egg yolks - 2 tablespoons unsalted butter - 1 teaspoon vanilla extract Vanilla pastry cream is the heart of this dessert. Whole milk makes it rich and creamy. Granulated sugar adds sweetness, and cornstarch thickens it up. Salt enhances the flavors. Egg yolks give it a rich color and taste. Unsalted butter adds a silky texture, and vanilla extract gives it that classic flavor. For the complete recipe, check the Full Recipe section. 1. Preheat your oven to 350°F (175°C). Grease and flour an 8x8 inch baking pan. This keeps the cake from sticking. 2. In a large bowl, mix the dry ingredients. Combine 1 cup of all-purpose flour, 1/2 cup of granulated sugar, 1/2 cup of unsweetened cocoa powder, 1 teaspoon of baking powder, 1/2 teaspoon of baking soda, and 1/4 teaspoon of salt. 3. In another bowl, mix the wet ingredients. Whisk together 1/2 cup of buttermilk, 1/4 cup of vegetable oil, 1 large egg, and 1 teaspoon of vanilla extract. 4. Pour the wet mix into the dry mix. Stir until just combined. Don't overmix; lumps are fine. 1. Pour the batter into your prepared baking pan. Smooth the top with a spatula. 2. Bake for 25-30 minutes. To check for doneness, insert a toothpick into the center. If it comes out clean, it's done. 3. Cool the cake in the pan for 10 minutes. Then, transfer it to a wire rack to cool completely. 1. To make the vanilla pastry cream, heat 2 cups of whole milk in a saucepan until steaming. 2. In a separate bowl, whisk 2/3 cup of granulated sugar, 1/4 cup of cornstarch, and 1/4 teaspoon of salt. 3. Whisk 4 large egg yolks in another bowl. Slowly add half of the hot milk to the yolks while whisking. 4. Return this mix to the saucepan and cook over medium heat. Whisk constantly until thick. Remove it from heat, stir in 2 tablespoons of butter and 1 teaspoon of vanilla extract. Cover with plastic wrap and chill until cool. 5. For the chocolate ganache, heat 1 cup of heavy cream in a small saucepan until it simmers. Pour it over 8 ounces of chopped semi-sweet chocolate and let it sit for 5 minutes. Stir until smooth. 1. Once the cake has cooled, cut it in half horizontally. You now have two layers. 2. Spread the vanilla pastry cream on the bottom layer. Carefully place the top layer back on. 3. Pour the chocolate ganache over the top layer. Spread it evenly with a spatula. 4. Refrigerate the assembled bars for at least 1 hour. This helps the ganache set before you slice them into squares. Enjoy your Boston Cream Bars! For the full recipe, check the ingredients and steps outlined above. To make sure your Boston Cream Bars bake evenly, it’s key to preheat your oven to 350°F (175°C). This helps the cake rise just right. Greasing and flouring your pan is also important. It helps the cake slide out easily. To check if your cake is done, use a toothpick. Insert it into the center of the cake. If it comes out clean, your cake is ready. If it has some batter on it, bake for a few more minutes. When making vanilla pastry cream, avoid lumps by whisking well. Always mix the sugar, cornstarch, and salt before adding to the hot milk. This helps it blend smoothly. If your cream does get lumpy, you can strain it through a fine sieve. For a glossy ganache, let the chopped chocolate sit in the warm cream for five minutes. Stir gently until smooth. If you want it thicker, let it cool slightly before pouring it over your bars. For a lovely display, serve your Boston Cream Bars on a nice platter. You can dust them with powdered sugar for a sweet touch. Adding chocolate curls or fresh berries makes the dessert look even nicer. These simple details impress your guests and make the dessert feel special. For more details, check out the Full Recipe. {{image_2}} You can change the taste of your Boston Cream Bars by adding flavors. Try adding a bit of espresso to the pastry cream for a coffee kick. Just mix one tablespoon of espresso powder in with the sugar and cornstarch when you prepare the cream. For chocolate lovers, mix in some cocoa powder to make a rich chocolate pastry cream. You can also infuse your ganache with liqueurs. A splash of orange liqueur or rum can add a fun twist. Just add about one to two tablespoons of liqueur to the chocolate ganache mixture. This will give your bars a unique flavor that surprises everyone. If you need a gluten-free treat, you can still enjoy these bars. Simply swap out the all-purpose flour with a good gluten-free flour blend. Many brands work well for baked goods, so choose one that you like. Make sure to check the other ingredients too. Some baking powders and other mixes may contain gluten. Always read labels closely to ensure everything is safe. This way, everyone can enjoy your delicious Boston Cream Bars. Mini Boston Cream Bars are perfect for parties or as a small treat. To make these bite-sized versions, simply cut the cake into smaller squares or use a mini muffin pan to bake. Adjust the baking time if you use a mini pan. Smaller sizes will bake faster, so check them after about 15 to 20 minutes. This way, you’ll have cute, little desserts that are easy to grab and enjoy. For the filling, you can still use the same pastry cream and ganache. They will taste just as great in mini form! To keep your Boston Cream Bars fresh, store them in the fridge. Wrap the assembled bars tightly in plastic wrap. This helps prevent them from drying out. If you use an airtight container, that works too! In the fridge, the bars last about 3 to 4 days. After this, they may lose some texture and taste. For long-term storage, freezing is a great option. Cut the bars into squares before freezing. Wrap each piece in plastic wrap, then place them in a freezer bag. This way, they stay fresh for up to 3 months. When you want to enjoy them again, take out the bars and let them thaw in the fridge. This keeps the texture nice. When serving the bars after storage, you can enjoy them cold straight from the fridge. If you like them a bit warmer, heat them in the microwave for about 10 to 15 seconds. Just be careful not to overheat! This can make the chocolate ganache too soft. The bars will still taste delicious, but keeping an eye on the texture is key. Enjoy those sweet bites! Boston Cream Pie is actually a cake. It has two layers filled with vanilla cream and topped with chocolate. Boston Cream Bars, on the other hand, are more like a dessert bar. They have a cake base with cream filling in the middle, topped with chocolate ganache. The bar form makes them easier to cut and serve. Yes, you can use store-bought pastry cream for Boston Cream Bars. It saves time and still tastes good. However, making your own pastry cream gives a fresher taste. Homemade cream also allows you to control the sweetness and flavor. You can make Boston Cream Bars a day ahead. Start by baking the cake and making the pastry cream. Once cooled, layer everything and store it in the fridge. Cover it well so it stays fresh. The ganache can also be made ahead. Just warm it slightly before serving to keep it smooth. Boston cream bars are a delightful treat made with simple ingredients. You learned how to make them from scratch, including cake, pastry cream, and ganache. Remember to follow the tips for even baking and smooth cream. You can even try fun variations, like flavored creams or mini bars. Proper storage helps keep them fresh. Now, enjoy sharing these sweet bars with friends and family. They’ll love your homemade touch!

Boston Cream Bars Irresistible and Easy Delight

If you crave a sweet treat that’s simple yet impressive, look no further! Boston Cream Bars deliver all the classic

- 3 large ripe tomatoes, sliced - 8 oz fresh mozzarella cheese, sliced - 1 cup fresh basil leaves - 2 tablespoons extra virgin olive oil - 1 tablespoon balsamic glaze - Salt and freshly cracked black pepper to taste Choosing the best tomatoes for taste and ripeness Select tomatoes that are bright in color and firm. They should have a sweet smell. Look for tomatoes that feel heavy for their size. Heirloom tomatoes are a great choice for added flavor. Selecting high-quality mozzarella Use fresh mozzarella for the best taste. It should feel soft and moist. Taste it before using to ensure it has a rich and creamy flavor. If you can, find mozzarella packed in water. Importance of fresh basil in the flavor profile Fresh basil adds a unique, aromatic flavor to your salad. Look for vibrant green leaves without brown spots. The leaves should feel soft and fragrant. Avoid dried basil, as it won't give the same fresh taste. For the full recipe, check out the Caprese Delight Salad section. 1. Start by washing the tomatoes and basil leaves. Use cold water to clean them well. 2. Pat the tomatoes and basil dry with a kitchen towel. This step helps keep the salad crisp. 3. Next, grab a large serving platter. This is where you will arrange your salad layers. 1. Begin layering the salad. Place a slice of tomato on the platter. 2. Add a slice of fresh mozzarella on top of the tomato. 3. Repeat this process, alternating between tomato and mozzarella slices. 4. Tuck fresh basil leaves in between the layers. This adds flavor and color. 1. Drizzle extra virgin olive oil over the salad. This enhances the taste. 2. Add a drizzle of balsamic glaze for a touch of sweetness. 3. Season your salad with salt and freshly cracked black pepper. This brings out all the flavors. 4. Let the salad sit for about five minutes. This helps the flavors blend together. For the full recipe, check out the Caprese Delight Salad section above! To make your Caprese salad look amazing, serve it on a lovely platter. This adds a nice touch. Alternate layers of tomatoes and mozzarella for a colorful display. Tuck fresh basil leaves in between the layers for a pop of green. For a final touch, sprinkle chopped basil on top and add whole leaves as decoration. You can make your salad even better by adding extra ingredients. Try slices of avocado for creaminess or add a handful of arugula for a peppery bite. For the balsamic glaze, experiment with different types. A sweet fig balsamic can bring a unique flavor, while a spicy chili balsamic adds a kick. Caprese salad pairs well with many dishes. Serve it alongside grilled chicken or fish for a complete meal. It also works great with crusty bread for a light lunch. This salad is perfect for picnics, outdoor gatherings, or as a starter for dinner parties. It’s fresh and vibrant, making it ideal for warm days. For the full recipe, check here: [Full Recipe]. {{image_2}} You can switch out mozzarella for other cheeses. Burrata adds creaminess. Goat cheese brings a tangy taste. Mixing cheeses creates fun flavors. Try pairing mozzarella with burrata for a rich bite. Each cheese adds its own charm to the salad. Heirloom tomatoes make a colorful choice. They come in many shades and shapes. Their unique flavors can surprise you! You can also swap herbs. Oregano can add a new twist. Fresh mint or parsley can work too, depending on your taste. Caprese salad varies across Italy. In Naples, they use sweet San Marzano tomatoes. In Sicily, you might find caprese with capers and olives. Each region has local ingredients that change the dish. Explore these styles to find your favorite twist! To keep leftover Caprese Salad fresh, store it in an airtight container. This helps prevent drying out. If you have leftover ingredients, keep them separate. Store the tomatoes, mozzarella, and basil apart. This way, each stays fresh longer. For the best taste, eat the salad within two days. Ripe tomatoes can last about three days in the fridge. Fresh mozzarella lasts about a week, but it’s best within a few days. Basil leaves lose flavor quickly. Try to use them within two days for the best taste. If you have leftover mozzarella, toss it into pasta or a sandwich. Leftover tomatoes can enhance soups or sauces. What is the origin of Caprese Salad? Caprese Salad comes from Italy, specifically the island of Capri. It features fresh ingredients. The bright colors represent the Italian flag: red, white, and green. This dish first gained fame in the 1920s. It is simple but full of flavor. How long can you prepare the salad in advance? You can prepare the salad up to 30 minutes in advance. This gives flavors time to blend. However, it's best to serve it fresh. If you wait too long, the tomatoes may get soggy. Keep the basil leaves fresh until serving. Can I use store-bought balsamic glaze? Yes, you can use store-bought balsamic glaze. It saves time and adds sweetness. Just drizzle it over the salad before serving. If you prefer, you can make your own glaze at home. Homemade glaze offers a richer flavor. What’s the best mozzarella type for Caprese Salad? Fresh mozzarella is the best choice for Caprese Salad. It has a soft texture and mild taste. Look for mozzarella packed in water. This type stays fresh and creamy. Burrata is another tasty option if you want something richer. Is Caprese Salad suitable for vegetarians? Yes, Caprese Salad is perfect for vegetarians. It contains no meat or animal byproducts. The main ingredients are tomatoes, mozzarella, and basil. This dish is healthy and full of nutrients. Gluten-free considerations for the salad Caprese Salad is naturally gluten-free. All the ingredients are safe for a gluten-free diet. Enjoy it without worry if you are gluten intolerant. Just be sure to check any dressings you add for gluten. Caprese Salad is fresh and simple. It combines ripe tomatoes, mozzarella, basil, olive oil, and balsamic glaze. We discussed tips for choosing the best ingredients and how to layer them for style. Adding extra flavors or swapping ingredients makes it unique. Store leftovers carefully to keep them fresh. Enjoy this salad for any meal or gathering. I hope you feel inspired to make your own Caprese Salad now. It's easy, healthy, and delicious.

Caprese Salad with Fresh Mozzarella Delightful Recipe

Are you ready to elevate your summer meals? This Caprese Salad with fresh mozzarella is a simple, yet delightful dish

- 400g paneer, cubed - 1 can (400ml) coconut milk - 2 stalks of lemongrass, finely chopped (white part only) - 1 onion, finely chopped - 3 cloves garlic, minced - 1 inch ginger, grated - 2 green chilies, slit (adjust based on spice preference) - 1 teaspoon turmeric powder - 1 tablespoon curry powder - 1 tablespoon soy sauce - Fresh cilantro, for garnish - Salt to taste To make Paneer Lemongrass Coconut Curry, you need fresh and vibrant ingredients. The star of this dish is the paneer, which is soft and rich. The coconut milk adds creaminess, while lemongrass gives a bright flavor. I love to use fresh lemongrass when I can. It adds a lovely citrus note. If you can’t find it, use lemongrass paste as a substitute. It’s still tasty. The aromatics, like onion, garlic, and ginger, bring warmth to the dish. These flavors mix beautifully with the spices. Turmeric and curry powder create a lovely golden color and depth. Don’t forget about the soy sauce. It adds a hint of umami. This balance of flavors makes each bite so good. When serving, top with fresh cilantro for a pop of color and freshness. This dish is great with rice or naan. You can find the full recipe for all the steps to create this delightful meal. Enjoy cooking! - Heat vegetable oil over medium heat. - Sauté onion until translucent (about 5 minutes). These steps start the magic. The oil warms up and helps to release flavors. When the onion turns translucent, it adds a sweet base to the dish. - Stir in garlic and ginger; cook until fragrant (1-2 minutes). - Incorporate lemongrass and green chilies, cooking for a couple of minutes. Garlic and ginger work together to create an amazing aroma. Lemongrass gives a fresh, citrusy touch. Green chilies add spice, so adjust based on your taste. - Add turmeric and curry powder; mix well and cook for another minute. - Gently add paneer; stir to combine, then pour in coconut milk and soy sauce. - Allow the mixture to simmer, adjusting salt to taste. Turmeric adds color and warmth. Mixing in the paneer lets it soak up all those tasty flavors. The coconut milk makes it creamy and rich. Let it simmer so the flavors meld beautifully. For the full recipe, you can refer to the [Full Recipe]. Enjoy the process of creating this delightful dish! To keep your paneer soft, use fresh paneer. Cut it into cubes, but avoid overcooking. Add the paneer gently to the pan, letting it soak up the flavors without breaking apart. If your curry is too thick, simply add a splash of water. Stir it in slowly until you reach your desired consistency. Want a bolder taste? Add more green chilies or a pinch of chili powder for heat. For sweetness, try stirring in a teaspoon of sugar or a splash of maple syrup. To balance flavors, squeeze some fresh lime juice into the dish. This adds a nice tang and makes everything pop! Use a non-stick pan for the best results. This helps prevent sticking and makes serving easier. A heavy-bottomed skillet works well, too. It distributes heat evenly, ensuring your curry cooks properly. Always keep your utensils handy, as you’ll need to stir often to blend those rich flavors together. For the full recipe, check out the complete guide to making Paneer Lemongrass Coconut Curry! {{image_2}} You can make this dish even better by adding more veggies. Bell peppers bring a nice crunch. Spinach adds a lovely green color and extra nutrients. Both mix well with the creamy curry. Want to switch up the protein? You could use chicken, shrimp, or even chickpeas. Each option provides a unique taste. This way, you can keep the recipe fresh and exciting. If you want to change the flavor, try different spices. Instead of curry powder, use garam masala for a warm taste. You can also try cumin or coriander for a new twist. Fresh herbs can also change things up. Basil or mint can add bright notes. Experimenting with spices and herbs can lead to delightful surprises. You can easily make this recipe vegan. Just swap the paneer for tofu. Tofu soaks up flavors well and gets creamy when cooked. If you're gluten-free, serve the curry with rice instead of naan. This makes it safe for those with gluten sensitivities. With these small changes, everyone can enjoy this dish. For the full recipe, check out the details above. After cooking Paneer Lemongrass Coconut Curry, store any leftovers in an airtight container. The best practice is to let it cool before sealing. This helps keep it fresh. In the fridge, the curry stays good for about 3 to 4 days. Always check for signs of spoilage before eating. To freeze your curry, choose a freezer-safe container. Leave some space at the top for expansion. You can also use freezer bags; just make sure to remove excess air. The curry can last up to 2 to 3 months in the freezer. When you're ready to eat, thaw it overnight in the fridge. Reheat gently on the stove, stirring often. This helps keep the flavors intact. You can also microwave it in short bursts, stirring in between. If the curry thickens too much after freezing, add a splash of coconut milk or water to reach your desired consistency. Enjoy the rich flavors just like when it was first made! Yes, you can use frozen paneer. First, take it out of the freezer. Place the paneer in warm water for about 15 minutes. This helps it to thaw quickly. After that, cut it into cubes. Using thawed paneer works well in this dish. It absorbs all the lovely flavors of the curry. You can serve this curry with several tasty sides. Here are some popular options: - Jasmine rice - Warm naan - Roti or chapati - Quinoa for a healthy twist Pairing these sides makes the meal complete and satisfying. The spiciness of this curry depends on your choice of green chilies. If you want it mild, use one chili or none. For a spicier kick, add two or three. You can also add a pinch of cayenne if you like heat. Remember, you control the spice level! This blog post shows you how to make a delicious Paneer Lemongrass Coconut Curry. We covered the main ingredients and spices, plus step-by-step instructions to cook your dish perfectly. I shared tips for great texture and flavor, and offered variations for dietary needs. In closing, this recipe is flexible and full of flavors. With simple adjustments, you can suit your taste. Enjoy cooking, and don’t forget to share your results with others!

Paneer Lemongrass Coconut Curry Flavorful Comfort Dish

Are you ready to dive into a bowl of comfort? Paneer Lemongrass Coconut Curry is a dish that wraps you

- 1 lb steak tips (sirloin or ribeye) - 4 tablespoons unsalted butter - 4 cloves garlic, minced - 1 teaspoon fresh thyme leaves - Salt and freshly ground black pepper to taste - 8 oz rigatoni pasta - 1 cup heavy cream - 1 cup shredded mozzarella cheese - ½ cup grated Parmesan cheese - 1 teaspoon garlic powder - Fresh parsley, chopped (for garnish) When I cook Garlic Butter Steak Tips with Cheesy Rigatoni, I always start with quality ingredients. The steak tips are key. I prefer sirloin or ribeye for their rich flavor and tenderness. Choose cuts that look fresh and bright. Next, I grab my garlic and herbs. Fresh thyme adds a lovely touch. It works well with garlic, which brings a nice kick. Use unsalted butter to control the salt level in the dish. For the rigatoni, I love the shape. It holds sauce well and pairs perfectly with the creamy cheese mix. Heavy cream makes it rich, while mozzarella and Parmesan add a cheesy depth. Don’t forget about salt and pepper. They enhance the flavors of every ingredient. Fresh parsley is great for garnish. It makes the dish look bright and inviting. If you want to see the full recipe, check it out [here](#). First, fill a large pot with water and add a pinch of salt. Bring the water to a rolling boil. Once boiling, add 8 oz of rigatoni pasta. Cook it for about 8-10 minutes, or until it is al dente. This means the pasta should be firm but not hard. After cooking, drain the pasta in a colander and set it aside. Now, take 1 lb of steak tips, either sirloin or ribeye, and place them in a bowl. Generously season the steak tips with salt, freshly ground black pepper, and 1 teaspoon of garlic powder. This will add a great flavor to the meat. Mix the seasonings well to ensure each piece is coated evenly. In a large skillet, melt 2 tablespoons of butter over medium-high heat. Once the butter is hot and bubbly, add the seasoned steak tips in a single layer. Sear them for about 3-4 minutes on each side. You want them to turn a nice brown color and reach your desired doneness. Once cooked, remove the steak from the skillet and keep it warm on a plate covered with foil. In the same skillet, lower the heat to medium. Add the remaining 2 tablespoons of butter. Once it melts, add 4 cloves of minced garlic and 1 teaspoon of fresh thyme leaves. Sauté for about 1-2 minutes until the garlic smells nice and fragrant. Next, pour in 1 cup of heavy cream and stir to mix it well with the garlic butter. Gradually add in 1 cup of shredded mozzarella cheese and ½ cup of grated Parmesan cheese. Stir continuously until the cheese melts and the sauce becomes smooth and creamy. Now, it’s time to mix it all together. Add the drained rigatoni to the skillet and toss it gently in the creamy sauce. Then, return the warm steak tips back into the skillet and mix everything together until well combined. For serving, transfer the delicious mixture to plates or a large serving dish. You can garnish it with freshly chopped parsley for a nice touch. Enjoy your comforting and cheesy Garlic Butter Steak Tips with Cheesy Rigatoni! For the full recipe, check out the link provided. For steak tips, I love using sirloin or ribeye. These cuts are tender and full of flavor. Sirloin is lean but juicy. Ribeye has more fat, adding rich taste. Both work well when cut into bite-sized pieces. Choose steak that has a nice red color. Look for marbling, which means fat within the meat. This adds flavor and keeps the steak moist. To avoid overcooked steak, use a meat thermometer. Aim for 130°F for medium-rare and 140°F for medium. Sear the steak for 3-4 minutes on each side. This gives you a nice crust. Remove the steak from heat just before it reaches your target temperature. The meat will continue to cook while it rests. Let it sit for a few minutes before serving. This keeps the juices in. You can enhance the flavors of your steak tips in many ways. Try adding smoked paprika for a smoky taste. Rosemary works well too, adding a fresh, earthy note. You can also mix in some crushed red pepper for a bit of heat. Fresh herbs like parsley or thyme can brighten the dish. Remember, simple ingredients can make a big impact on flavor. For the full recipe, check out the detailed instructions. {{image_2}} You can use many types of pasta. While rigatoni is great, consider penne, fusilli, or even farfalle. Each shape holds sauce differently, adding unique textures. Short pasta works well for this dish. Long pasta can also be fun, but it’s trickier to mix with steak. Choose what you like best! If you want to change the protein, chicken or tofu are awesome options. For chicken, use boneless thighs or breasts, cut into bite-sized pieces. Cook them just like the steak tips for juicy bites. Tofu is great for a veggie twist. Press it to remove extra water. Then, cut it into cubes, season, and cook until golden. Making a meatless version is easy! Swap the steak for mushrooms. Portobello or cremini mushrooms offer a hearty bite. Sauté them until soft and golden. You can also add your favorite vegetables, like zucchini or bell peppers. Just remember to cook them well to bring out their flavors. This way, you get a rich, tasty meal without meat! Explore these variations to make the recipe fit your taste! If you want the full details and steps, check the Full Recipe. To keep your Garlic Butter Steak Tips with Cheesy Rigatoni fresh, store them in an airtight container. Make sure the dish cools down first. Place it in the fridge within two hours after cooking. Leftovers can last up to three days. Label the container with the date. This helps you track freshness. When it’s time to enjoy your leftovers, reheating is key. You can use the microwave or the stove. For the microwave, heat in short bursts. Stir often to avoid hot spots. If using the stove, add a splash of cream or water. This keeps the sauce creamy. Heat on low, stirring gently until warm. To freeze, let the dish cool completely. Then, transfer it to a freezer-safe container. Leave some space at the top, as food expands when frozen. Wrap it tightly with plastic wrap, then cover with a lid. It can stay in the freezer for up to three months. To defrost, move it to the fridge overnight before reheating. This keeps the texture nice and tasty. Yes, you can prep this dish in advance. Cook the rigatoni and steak tips first. Store them separately in the fridge. You can mix them with the garlic butter sauce just before serving. This keeps the pasta and steak fresh and tasty. You can pair this dish with a simple salad. A fresh green salad with a light vinaigrette works great. Steamed vegetables like broccoli or green beans are also good choices. Breadsticks or garlic bread add a nice touch too. This recipe is not spicy. It has a rich garlic flavor with no heat. If you want some spice, add red pepper flakes. You can also serve hot sauce on the side for those who like it spicy. For the full recipe, you can find it [here](https://example.com/full-recipe). In this post, we explored how to make Garlic Butter Steak Tips and Cheesy Rigatoni. You learned about the key ingredients, step-by-step cooking methods, and tips to perfect your dish. Remember to choose the right steak and avoid overcooking for the best flavor. You can also make this meal with different pasta or protein options. Enjoy experimenting with these recipes, and don’t forget to share your results with friends and family! Your cooking journey starts now.

Garlic Butter Steak Tips with Cheesy Rigatoni Delight

If you love rich flavors and hearty dishes, you’re in for a treat! This Garlic Butter Steak Tips with Cheesy

To make a delightful pistachio cake, you'll need the following ingredients: - 1 cup pistachios, shelled and lightly toasted - 1 ½ cups all-purpose flour - 1 teaspoon baking powder - ½ teaspoon baking soda - ½ teaspoon salt - ½ cup unsalted butter, softened - 1 cup granulated sugar - 3 large eggs - 1 teaspoon vanilla extract - ½ cup Greek yogurt - ¼ cup milk - ½ cup powdered sugar (for glaze) - 1 tablespoon lemon juice Gather these items before you start. Each one plays a vital role in creating the cake's rich flavor and texture. The toasted pistachios add a lovely nutty taste. The Greek yogurt helps keep the cake moist, while the lemon juice gives it a bright finish. You can find the full recipe in the article above, which guides you step by step in making this lovely dessert. - Preheat your oven to 350°F (175°C). Prepare a 9-inch round cake pan by greasing and flouring it, or use parchment paper. - In a food processor, pulse the shelled pistachios until they are finely chopped. Set aside some for later. - In a bowl, cream the softened butter and granulated sugar. Mix them until light and fluffy. This will take about 3-4 minutes. - Add the eggs one at a time. Make sure to mix well after each egg. Then, stir in the vanilla extract. - Next, mix in the Greek yogurt and milk. Make sure they are fully blended. - Gradually add the dry ingredients to the wet mixture. Fold gently until just combined. Be careful not to overmix. - Finally, fold in the chopped pistachios into the batter. - Pour the batter into the prepared cake pan. Smooth the top with a spatula. - Bake in the preheated oven for 30-35 minutes. Check with a toothpick; it should come out clean. - Once baked, let the cake cool in the pan for 10 minutes. Then transfer it to a wire rack to cool completely. - For the glaze, mix powdered sugar and lemon juice in a bowl until smooth. If needed, add a little lemon juice or water. - Once the cake is cool, drizzle the lemon glaze over the top. Sprinkle the reserved chopped pistachios for garnish. You can find the Full Recipe for this delightful pistachio cake to follow every step easily! To get a soft and fluffy cake, do not overmix the batter. When you fold in the flour, mix gently. Stop as soon as you can no longer see dry flour. Overmixing can make the cake tough. Using room temperature ingredients also helps. When butter and eggs are at room temp, they blend better. This makes your cake light and airy. You can add extra flavor to your pistachio cake. A little almond extract goes well with the pistachios. You could also mix in some chocolate chips for a sweet twist. If you like more sweetness, adjust the sugar. Taste the batter before baking. This way, you can balance the sweetness and texture to your liking. Try adding a pinch of salt to enhance the flavors, too. For more ideas, check out the Full Recipe for fun variations! {{image_2}} You can play with flavors in your pistachio cake. Adding spices like cardamom or cinnamon can bring a warm twist. Just a pinch can change the whole taste. I love how these spices add depth to the cake's sweet notes. You can also substitute nuts. Try walnuts or almonds for a different crunch. For chocolate lovers, add chocolate chips to the batter. The mix of chocolate and pistachio makes for a delightful surprise! If you want a gluten-free cake, use almond or oat flour instead of all-purpose flour. Both options work well and keep the cake moist. Just remember to adjust the baking time if needed. For vegan options, replace eggs with flaxseed meal or applesauce. Use plant-based milk and dairy-free yogurt too. These swaps keep the cake tasty and light. You can enjoy delightful pistachio cake no matter your diet! Check out the Full Recipe for more details on making these variations. To keep your pistachio cake fresh, wrap it well. Use plastic wrap or aluminum foil. You can also place it in an airtight container. Store it at room temperature for up to three days. If you want it to last longer, refrigerate it. The cold can change the texture a bit, but it stays tasty. Freezing your cake is easy. First, let it cool completely. Then, wrap it tightly in plastic wrap. For extra protection, wrap it in foil too. This helps keep it fresh for up to three months. When you want to enjoy it, thaw the cake in the fridge overnight. Reheat it in the oven at 350°F for about 10 minutes. This keeps it moist and fluffy, just like when you first baked it. To make the cake moist, you can add more yogurt or milk. Using full-fat yogurt gives a rich taste. You can also add an extra egg to the batter. This helps to bind the ingredients and keeps the cake soft. Another tip is to brush the cake with a simple syrup after baking. Just mix equal parts sugar and water, heat until dissolved, and brush it on while the cake is warm. This adds moisture and sweetness. You can use raw pistachios, but the flavor will change. Toasted pistachios have a deeper, nuttier taste. Raw pistachios can make the cake taste milder. If you still want to use them, chop them finely and fold them into the batter. Just remember, the texture might be a bit different. Toasting brings out the best flavor, so consider it for the best results. To check if the cake is done, insert a toothpick into the center. If it comes out clean or with a few crumbs, the cake is ready. You can also gently press the top; it should spring back. Another sign is the edges pulling away from the pan. If it looks golden brown on top, that’s a good sign too. Always trust your instincts, but these tips help ensure a perfect bake. This blog post outlined how to make a delicious pistachio cake. We covered essential ingredients, clear steps, and helpful tips for the best results. Remember, using room temperature ingredients and not overmixing can make a big difference. You can also try fun variations like adding spices or different nuts. Storing your leftovers correctly ensures every bite stays fresh. Enjoy baking this cake and share it with friends. It’s a treat that everyone will love!

Delightful Pistachio Cake Simple and Tasty Recipe

Craving a unique dessert that’s simple yet delicious? Look no further! This Delightful Pistachio Cake recipe combines rich flavors with

To make a delicious Vegan Christmas Pie, gather these ingredients: - 1 pre-made vegan pie crust - 1 cup cooked and mashed sweet potatoes - 1 cup cooked lentils - 1 cup sautéed mushrooms (mixed varieties) - 1 cup chopped kale or spinach - 1/2 cup finely chopped onions - 2 cloves garlic, minced - 1 teaspoon dried thyme - 1 teaspoon dried rosemary - 1 tablespoon soy sauce or tamari - 1 tablespoon nutritional yeast - Salt and pepper to taste - 1/4 cup vegetable broth These ingredients come together to create a warm and hearty filling. If you need to swap some ingredients, here are some ideas: - Sweet potatoes: You can use pumpkin or butternut squash instead. - Lentils: Chickpeas or black beans work great too. - Mushrooms: Try using cooked eggplant or zucchini if you don't have mushrooms. - Kale or spinach: Swiss chard or collard greens are also good choices. - Soy sauce: Coconut aminos or tamari is a great gluten-free option. These swaps keep the flavors intact while catering to your needs. This pie shines with seasonal ingredients. Sweet potatoes add a touch of sweetness and creaminess. They also provide nutrients, making your meal wholesome. Mushrooms bring umami flavors and a hearty texture. Kale or spinach adds vibrant color and crucial vitamins. Using fresh herbs like thyme and rosemary gives your pie a festive aroma. Nutritional yeast adds a cheesy flavor without dairy. Embrace these seasonal ingredients for a dish that feels like a warm hug! For the complete recipe, check the Full Recipe section. Start by gathering all your ingredients. You need a pre-made vegan pie crust and the filling items. Here’s what you need: - 1 cup cooked and mashed sweet potatoes - 1 cup cooked lentils - 1 cup sautéed mushrooms (mixed varieties) - 1 cup chopped kale or spinach - 1/2 cup finely chopped onions - 2 cloves garlic, minced - 1 teaspoon dried thyme - 1 teaspoon dried rosemary - 1 tablespoon soy sauce or tamari - 1 tablespoon nutritional yeast - Salt and pepper to taste - 1/4 cup vegetable broth Preheat your oven to 375°F (190°C). This step warms up the oven while you prep your pie. In a pan, pour a splash of vegetable broth over medium heat. Add the chopped onions. Sauté them until they turn soft and clear, about 5 minutes. Then, toss in the minced garlic. Cook for another minute until it smells sweet. Now, stir in the sautéed mushrooms, cooked lentils, and sweet potatoes. Mix them well. Add the chopped kale or spinach, dried thyme, rosemary, soy sauce, nutritional yeast, salt, and pepper. Stir everything together until it blends nicely. Let the mixture cook on low heat for a few minutes. This helps the kale wilt and mix with all the flavors. You want a warm, rich filling that smells great! Once your filling is ready, spoon it into the pre-made vegan pie crust. Spread it evenly for a good bite every time. Bake the pie in the preheated oven for 30 to 35 minutes. Look for a golden crust. The filling should be hot throughout. After baking, take it out and let it cool for 10 minutes. This cooling time helps it set up a bit. Serve your Vegan Christmas Pie warm. For a festive touch, sprinkle fresh herbs on top and add a side of cranberry sauce. Enjoy your beautiful creation! For the full details, check the Full Recipe. To get a great crust, use a pre-made vegan pie crust. This saves time and effort. If you want to make your own, use cold vegan butter and ice water. Mix the flour and butter until it feels like sand. Then, add ice water slowly. Roll it out and place it in your pie pan. Prick the bottom with a fork to avoid bubbles. Bake it for about 10 minutes before adding the filling. This will keep it crisp and flaky. To boost the filling's flavor, use fresh herbs like thyme and rosemary. These herbs add a strong taste. You can also try adding a splash of soy sauce or tamari. This adds umami and depth. Nutritional yeast gives a cheesy flavor without dairy. Mix everything well, so each bite is full of flavor. If you like a bit of heat, add some red pepper flakes. Presentation is key for a festive pie. Serve the pie warm, straight from the oven. A sprinkle of fresh herbs on top makes it look lovely. Consider adding a side of cranberry sauce for a pop of color. The sweet-tart sauce pairs well with the savory pie. Slice the pie carefully with a sharp knife to keep the filling intact. For a special touch, use a decorative pie crust cut-out on top before baking. This adds charm and visual interest. {{image_2}} You can change the filling of your Vegan Christmas Pie to suit your taste. Try using roasted butternut squash instead of sweet potatoes for a sweeter touch. If you love beans, swap lentils for black beans or chickpeas. For a spicier kick, add diced jalapeños or chili powder. You can even mix in nuts like walnuts or pecans for a crunchy texture. Explore these options to find your perfect flavor! If you need a gluten-free crust, use almond flour or oat flour. You can also buy pre-made gluten-free pie crusts for ease. Another option is to make a crust with mashed potatoes or cauliflower. Simply press the mixture into your pie dish and bake it lightly before adding the filling. This creates a delicious base that holds the flavors well. To make your pie look festive, use fresh herbs like rosemary or thyme as a garnish. You can also add cranberries on top for color. If you want a fun touch, cut out shapes from a vegan pastry sheet and place them on top. Stars or holly leaves work great! These simple decorations make your pie not just tasty, but beautiful too. To keep your Vegan Christmas Pie fresh, start by letting it cool completely. Wrap it tightly in plastic wrap or foil. You can also place it in an airtight container. This prevents moisture loss and keeps flavors intact. Store it in the fridge for up to four days. If you want to save it longer, consider freezing it. When you're ready to enjoy your leftovers, preheat your oven to 350°F (175°C). Remove the pie from the fridge and unwrap it. Place it on a baking sheet to catch any drips. Heat it for about 20-25 minutes, or until warm throughout. You can also microwave slices for quick reheating. Just cover them with a damp paper towel to keep them moist. Freezing is a great way to save your Vegan Christmas Pie for later. Make sure the pie is completely cool before freezing. Wrap it tightly in plastic wrap, followed by aluminum foil. Label it with the date for easy tracking. It can last up to three months in the freezer. To thaw, place it in the fridge overnight before reheating. This keeps the crust crispy and the filling tasty. Enjoy your pie anytime you crave that festive flavor! The best pie crust for vegan pies is a pre-made vegan crust. Look for one made with plant-based fats. Many brands offer great options in stores. You can also make your own using flour, coconut oil, and water. This way, you control the ingredients. A flaky crust complements the filling well and adds texture. Yes, you can make this pie ahead of time. Prepare the filling and assemble the pie. Cover it and store it in the fridge for up to two days. You can also bake the pie in advance. Just reheat it in the oven before serving. This saves time on busy days and lets the flavors meld. The Vegan Christmas Pie lasts about three to four days in the fridge. Store it in an airtight container to keep it fresh. If you want to save it for longer, freeze it. Wrap it tightly in plastic wrap and foil. It can last up to three months in the freezer. Just thaw it in the fridge before reheating. Enjoy this festive treat even after the holidays! You now have all the tools to make a great Vegan Christmas Pie. We covered ingredients, cooking steps, and tips for a perfect crust. Don't forget your options for fillings and gluten-free choices. Proper storage ensures your leftovers stay fresh. Remember, cooking should be fun and creative. Enjoy making this pie with loved ones. Your holiday table will shine with this delicious treat. Embrace the spirit of the season with your unique touch!

Vegan Christmas Pie Festive and Flavorful Delight

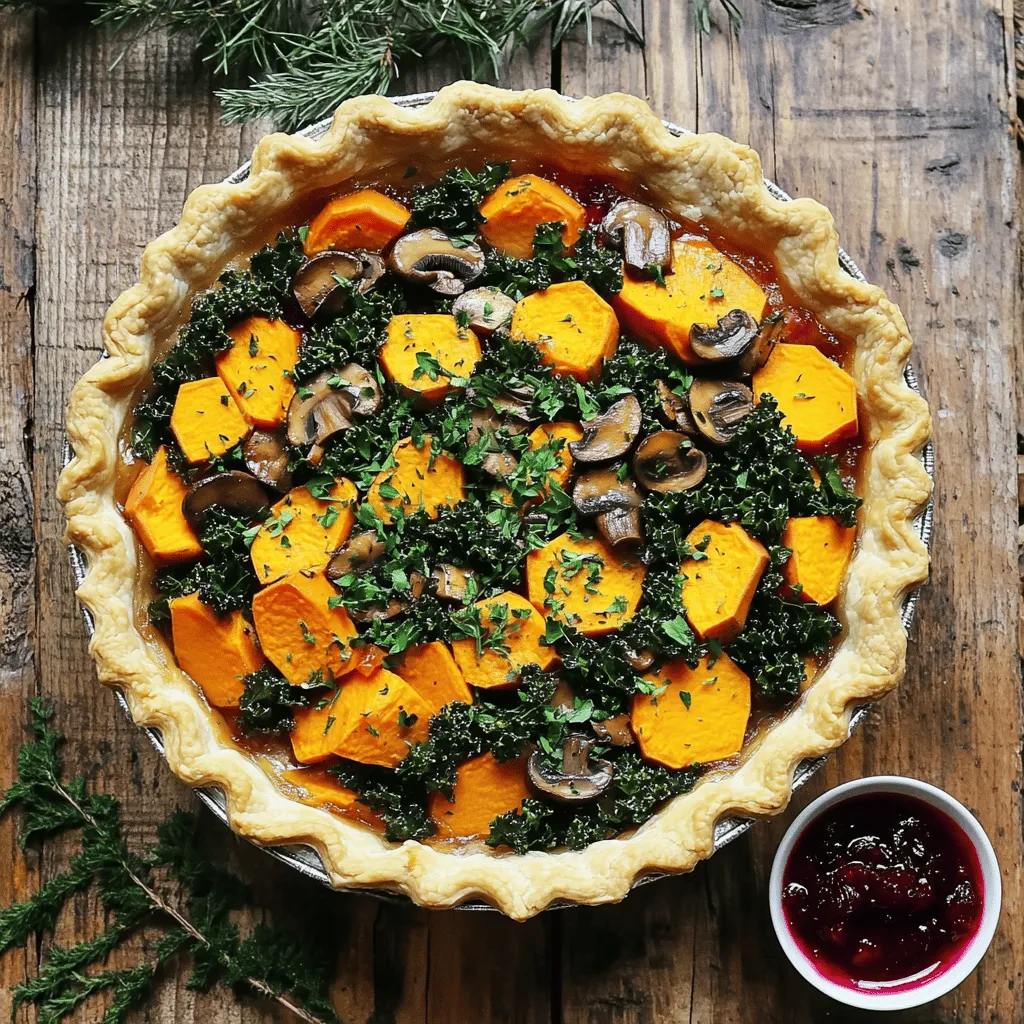
Looking to impress your guests this holiday season? My Vegan Christmas Pie is a festive and flavorful delight that everyone

To make these soft and tasty rolls, you will need: - 2 cups all-purpose flour - 1 cup canned pumpkin - 1/4 cup warm milk (or plant-based milk) - 1/4 cup olive oil - 2 tablespoons fresh rosemary, finely chopped - 1 tablespoon sugar - 1 teaspoon salt - 1 teaspoon instant yeast - 1/2 teaspoon ground cinnamon - 1/4 teaspoon ground nutmeg - 1/4 teaspoon black pepper - Extra rosemary sprigs for garnish Fresh rosemary makes a big difference. Choose rosemary that is bright green and fragrant. Avoid any that looks brown or dry. You can also use dried rosemary if fresh isn’t available; however, cut the amount in half. For dietary needs, you can swap the milk with almond or oat milk. If you want a gluten-free option, use a gluten-free flour blend. Just check that your yeast is gluten-free. These rolls are simple to prepare. The blend of pumpkin and rosemary creates a unique flavor. Enjoy the process and the delightful smell that fills your kitchen! For the full recipe, refer to the section below. To start making rosemary pumpkin bread rolls, we first need to activate the yeast. In a small bowl, mix warm milk with sugar. Sprinkle the instant yeast on top and let it sit for about 5 minutes. You want it to get frothy. This means your yeast is active and ready to help your dough rise. Next, let’s mix the dry and wet ingredients. In a large bowl, combine the flour, salt, cinnamon, nutmeg, and black pepper. Stir these dry ingredients well. Then, make a well in the center. Add the canned pumpkin, olive oil, chopped rosemary, and your yeast mixture. Mix it all with a wooden spoon until a dough starts to form. If your dough is sticky, add flour a little at a time. Aim for a soft dough that is not sticky. Now we focus on creating the perfect dough consistency. Once your dough comes together, knead it on a floured surface. Knead for about 5 to 7 minutes. You want it smooth and elastic. This kneading helps develop gluten, which makes your rolls soft. It’s time for the dough to rise. Place your kneaded dough in a greased bowl. Cover it with a clean kitchen towel. Let it rise in a warm spot for about 1 hour, or until it doubles in size. This is the first rise. After it has risen, gently punch it down to release air. Now, divide the dough into 12 equal pieces. Shape each piece into a roll. Place the rolls on a baking sheet lined with parchment paper. Cover them again with a towel and let them rise for another 30 to 40 minutes. This is your second rise. When your rolls have puffed up, preheat your oven to 375°F (190°C). Bake the rolls for 15 to 20 minutes, or until they turn golden brown. Remove them from the oven and let them cool for a few minutes. You can add extra rosemary sprigs for a nice touch. For the full recipe, please refer to the complete instructions provided. To boost the taste of your rosemary pumpkin bread rolls, try adding other herbs. Thyme and sage pair well with rosemary. They bring a warm, earthy taste. For a kick, add a pinch of red pepper flakes. This adds a nice zing. To infuse more pumpkin flavor, use fresh pumpkin puree instead of canned. You can roast and mash your pumpkin for a richer taste. Also, adding a bit of pumpkin spice can deepen the flavor. This mix usually includes cinnamon, nutmeg, and cloves. One common mistake is dough that is too sticky. If your dough feels sticky, add a bit more flour. A soft, but not sticky, dough is what you want. Knead it until it feels smooth and elastic. Another issue is rolls drying out. To avoid this, cover the rolls with a towel while they rise. Keep them in a warm place, but not too hot. After baking, wrap them in a cloth to keep them soft. These rosemary pumpkin bread rolls pair wonderfully with soups and salads. Try them with a warm, creamy pumpkin soup for a cozy meal. They also work well with a simple green salad. For a creative presentation, serve them in a basket lined with a cloth. Drizzle with olive oil or melted butter for extra richness. You can also add a sprig of fresh rosemary on top for a lovely touch. For more ideas, check out the Full Recipe for tips on how to make these rolls shine. {{image_2}} You can mix things up by using other herbs. Try thyme or sage instead of rosemary. Each herb adds its own taste. For a cheesy twist, add grated cheese like cheddar or feta. This will make your rolls rich and savory. Cheese melts into the dough, making the rolls soft and flavorful. If you're in the mood for something sweet, you can change the rolls. Add a bit more sugar to the dough. Consider mixing in chocolate chips or dried fruits like cranberries. For a sweet topping, try a glaze made from powdered sugar and milk. These sweet rolls will be a hit at breakfast or as a dessert. For the full recipe, check out the detailed instructions and ingredients list. To keep your cooked rosemary pumpkin bread rolls fresh, store them in an airtight container. This will help prevent them from drying out. You can also wrap each roll in plastic wrap for extra protection. When ready to eat, reheat them in the oven at 350°F (175°C) for about 10 minutes. This warms them up nicely and keeps them soft. Freezing is a great way to keep extra rolls for later. If you want to freeze unbaked rolls, shape them first and place them on a baking sheet. Freeze them until firm, then transfer to a freezer bag. For baked rolls, let them cool completely. Wrap each roll in foil or plastic wrap. Place them in a freezer bag to save space. To thaw, simply take out the rolls and leave them in the fridge overnight. Reheat baked rolls in the oven at 350°F (175°C) for around 15 minutes. This will refresh their texture and flavor. For unbaked rolls, you can bake them straight from frozen, just add a few extra minutes to the baking time. To store leftover rolls, first let them cool completely. Then, place them in an airtight container. You can keep them at room temperature for up to two days. For longer storage, wrap them in plastic wrap and place them in the fridge. They can last up to a week this way. If you want to keep them fresh for a month, freeze them. Just make sure to wrap them well to avoid freezer burn. Yes, you can make these rolls gluten-free. Use a gluten-free all-purpose flour mix instead of regular flour. Make sure the mix contains xanthan gum or add some for better texture. The rolls may vary in texture but should still taste great. I recommend testing a small batch first to get the right feel. To adjust the recipe, simply cut all the ingredients in half. This will give you six rolls instead of twelve. If you want just a few rolls, you can also make a quarter of the recipe. Just remember to keep an eye on the baking time, as smaller rolls may bake faster. You can try many fun variations. Swap rosemary for thyme or sage for a different herb flavor. Add cheese, like cheddar or feta, for a savory twist. You can also mix nuts or seeds into the dough for added crunch. For a sweeter touch, add chocolate chips or dried fruit into the mix. To check if the rolls are done, look for a golden-brown color. You can also tap the bottom of a roll; if it sounds hollow, it’s done. Use a toothpick to test the center; it should come out clean. Remember, baking times may vary based on your oven, so keep an eye on them. Here’s a quick look at the ingredients and steps to make rosemary pumpkin bread rolls. You will love how easy and fun this recipe is! Ingredients: - 2 cups all-purpose flour - 1 cup canned pumpkin - 1/4 cup warm milk (or plant-based milk) - 1/4 cup olive oil - 2 tablespoons fresh rosemary, finely chopped - 1 tablespoon sugar - 1 teaspoon salt - 1 teaspoon instant yeast - 1/2 teaspoon ground cinnamon - 1/4 teaspoon ground nutmeg - 1/4 teaspoon black pepper - Extra rosemary sprigs for garnish Cooking Steps: 1. Mix warm milk and sugar in a small bowl. Add instant yeast and wait 5 minutes. 2. In a large bowl, mix flour, salt, cinnamon, nutmeg, and black pepper. 3. Make a well in the flour and add pumpkin, olive oil, chopped rosemary, and yeast mix. 4. Stir until a dough forms. If sticky, add flour, one tablespoon at a time. 5. Knead the dough on a floured surface for 5-7 minutes until smooth. 6. Put the dough in a greased bowl, cover, and let rise for 1 hour in a warm spot. 7. Preheat your oven to 375°F (190°C). 8. Punch down the risen dough. Divide it into 12 pieces and shape each into a roll. 9. Place rolls on a parchment-lined baking sheet. Cover and let rise for 30-40 minutes. 10. Bake for 15-20 minutes until golden brown. 11. Cool for a few minutes and garnish with rosemary. For a detailed view of the preparation, check the Full Recipe. I hope you enjoy making these rolls! In this blog post, I covered how to make rosemary pumpkin bread rolls. You learned about the essential ingredients and how to pick fresh rosemary. I provided step-by-step instructions for making the dough and tips for rising and baking. Don't forget the flavor tips, common mistakes, and serving suggestions to enjoy these rolls. Experiment with different herbs and sweet variations to make this recipe your own. By following my storage tips, these rolls can stay fresh longer, ready for you to enjoy!

Rosemary Pumpkin Bread Rolls Easy and Soft Delight

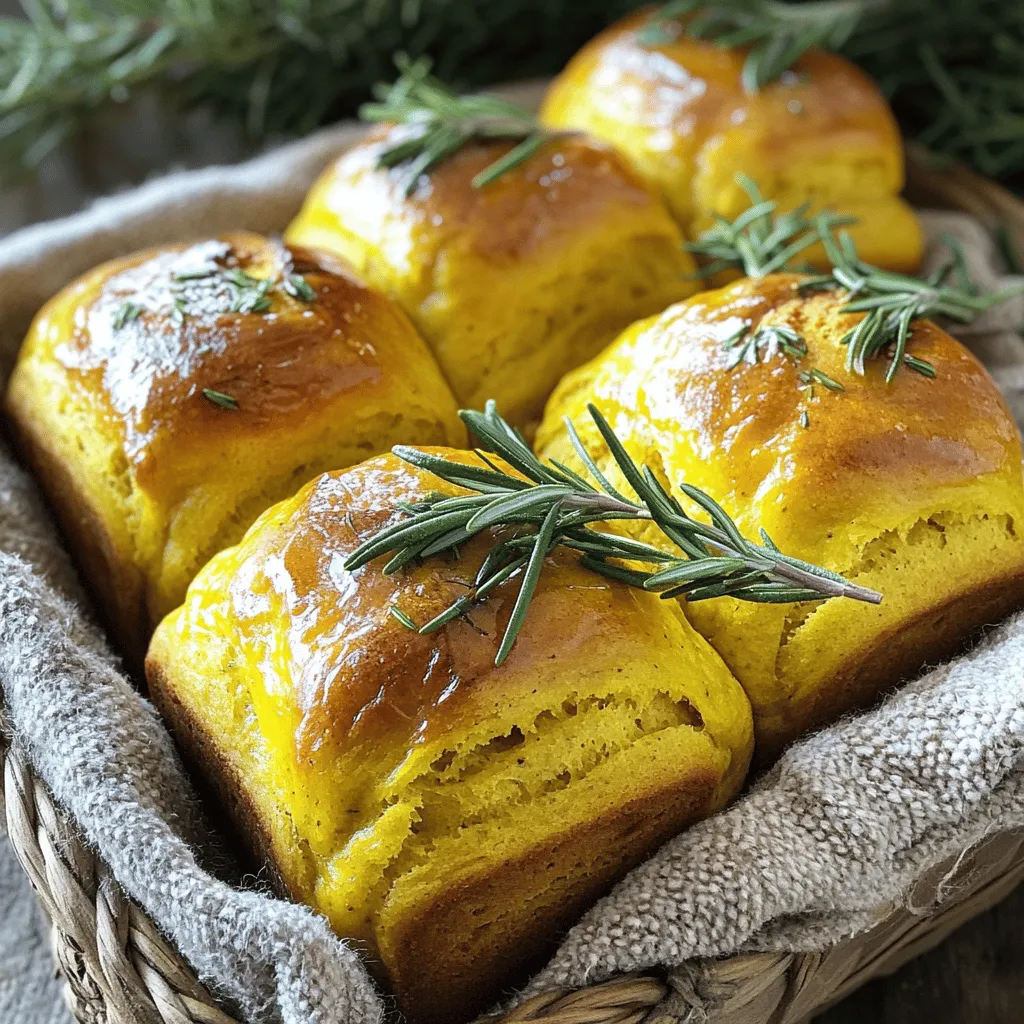
Are you ready to elevate your baking game with the warm, inviting flavor of rosemary and pumpkin? In this easy

To make your no-bake mini lemon cheesecakes, you need a few simple ingredients. Each one plays a key role in creating the perfect balance of flavors and textures. - 1 cup graham cracker crumbs - 1/4 cup unsalted butter, melted - 2 cups cream cheese, softened - 1 cup powdered sugar - 1/4 cup fresh lemon juice - Zest of 1 lemon - 1 teaspoon vanilla extract - 1 cup heavy whipping cream - Fresh berries and mint leaves for garnish (optional) Gather these ingredients first to set yourself up for success. The graham cracker crumbs form the base, giving a crunchy texture. The cream cheese adds that creamy richness we all love. The lemon juice and zest bring a bright, fresh flavor that wakes up your taste buds. Lastly, the whipped cream adds lightness to the cheesecake filling. Feel free to customize your toppings! Fresh berries and mint leaves look great and add a burst of flavor. For the full recipe, you can refer to the [Full Recipe]. To start, mix the graham cracker crumbs and melted butter in a bowl. This blend should look like wet sand. Next, grab a muffin tin and line it with cupcake liners. Distribute the crumb mixture evenly into each liner. Press down firmly to form a nice, solid crust. This step is key for a great base. In a new bowl, beat the cream cheese until it is smooth and creamy. This will take just a few minutes. Then, add the powdered sugar, fresh lemon juice, lemon zest, and vanilla extract. Mix everything together until it is fully combined and smooth. The lemon will give it a bright flavor. Now, take another bowl and whip the heavy cream until stiff peaks form. This means it should hold its shape well. Gently fold the whipped cream into the cream cheese mixture. Do this carefully to keep the light, fluffy texture. This makes the filling airy and delicious. Spoon the creamy filling into each muffin liner on top of the crust. Smooth the tops with a spatula to make them look nice. Finally, place the mini cheesecakes in the fridge for at least 4 hours to set. They need this time to become firm and tasty. When ready, you can garnish them with fresh berries and mint leaves if you like. Enjoy your delightful treat! For the complete recipe, check the [Full Recipe]. Using room temperature ingredients is key for smooth filling. Cold cream cheese can clump. Let it sit out for 30 minutes before mixing. This step helps blend it easily with sugar and lemon juice. Whipping cream should reach the right consistency. You want stiff peaks, which means it stands tall when lifted with a spoon. Over-whipping can make it grainy. Stop mixing as soon as you see those peaks. Serve your mini cheesecakes on a decorative platter. A colorful display makes them look special. You can drizzle lemon curd on top for an extra burst of flavor. This adds a nice shine and a tangy twist. Fresh berries and mint leaves also enhance the look. Arrange them creatively around the cheesecakes. The contrast of colors makes your treat even more inviting. One common mistake is overmixing the filling. This can make the texture too airy and less creamy. Mix just until everything is combined for the best result. Not pressing the crust firmly enough is another issue. A loose crust can crumble when you serve it. Use the back of a spoon to press down hard and form a solid base. {{image_2}} You can easily change the flavor of these mini cheesecakes. One fun way is to add fruit purees. You can use berries, mango, or even passion fruit. Just swap out some lemon juice for the fruit puree. This gives each cheesecake a unique taste. If you want a twist on the classic, try lime or orange instead of lemon. Both options add a fresh zing. The creamy filling pairs well with these flavors. You can mix and match to find your favorite! Want to make your cheesecake a bit healthier? Try using Greek yogurt instead of cream cheese. Greek yogurt gives a nice tang and cuts down on fat. You can also use sweeteners like honey or agave syrup. These add sweetness without refined sugar. Just adjust the amount to taste. If you need gluten-free options, you can easily make a crust from ground nuts. Almond or pecan flour works great. Just mix it with a little melted butter. For a vegan version, use coconut cream in place of cream cheese. You can also use maple syrup as a sweetener. This will keep the cheesecake creamy and delicious while making it plant-based. Each of these variations keeps the spirit of a classic cheesecake while catering to different diets. Feel free to explore these options and create your own version. You can find the Full Recipe to guide your new creations. To keep your mini lemon cheesecakes fresh, store them in the fridge. Use an airtight container to prevent them from absorbing other smells. They will stay fresh for about 4 to 5 days. If you plan to enjoy them later, freezing is a great option. To freeze your mini cheesecakes, follow these steps: - Wrap each cheesecake in plastic wrap tightly. - Place them in a freezer-safe bag or container. - Label the bag with the date. They can last up to 2 months in the freezer. When you want to enjoy them, remove the cheesecakes from the freezer. Place them in the fridge overnight to thaw. Check for signs that your cheesecakes have gone bad. Look for: - An off smell or sour odor. - A change in color or texture. - Mold on the surface. If you notice any of these signs, it is best to throw the cheesecakes away. Always trust your senses when it comes to food safety. No-Bake Mini Lemon Cheesecakes last about 4 to 5 days in the refrigerator. Store them in an airtight container to keep them fresh. If you want to keep them longer, you can freeze them. They stay good in the freezer for about 2 months. Just remember to wrap them well to avoid freezer burn. Yes, you can make these cheesecakes ahead of time. I recommend preparing them the day before you plan to serve them. This way, they have plenty of time to set in the fridge. Plus, it will save you time on the day of your event, letting you enjoy your guests more. If you don’t have heavy whipping cream, you can use a few alternatives. You can use whole milk mixed with butter. Mix ¾ cup of whole milk with ¼ cup of melted butter. Another option is to use coconut cream. It adds a nice flavor and works well in this recipe. To make the crust stick better, use more butter in your graham cracker mixture. A good rule is to use about ½ cup of melted butter for every cup of crumbs. Press the mixture firmly into the muffin liners. This will help the crust hold together when serving. You can also chill the crust for about 15 minutes before adding the filling, which helps it set better. You now have a simple recipe for no-bake mini lemon cheesecakes. We covered key ingredients, step-by-step instructions, and tips for the best texture. Remember to use fresh ingredients for great taste. Feel free to experiment with flavors and make it your own. Store them properly in the fridge or freezer to enjoy later. These treats are perfect for any occasion. Enjoy making and sharing your mini cheesecakes!

No-Bake Mini Lemon Cheesecakes Delightful Easy Treat

Looking for a simple dessert that packs a citrusy punch? These No-Bake Mini Lemon Cheesecakes are your answer! With a

- 200g cooked shrimp, peeled and deveined - 200g calamari rings, cooked - 200g mussels, cleaned and cooked Freshness matters greatly when choosing seafood. Look for shrimp that smells sweet, not fishy. The calamari should be firm and glossy, while mussels should be closed tight. Quality seafood makes all the difference in taste and texture. - 1 cup cherry tomatoes, halved - 1/2 cup cucumber, diced - 1/4 red onion, thinly sliced When picking vegetables, choose vibrant colors. Look for firm cherry tomatoes and crisp cucumbers. The red onion should be fresh with no soft spots. Quality produce enhances the salad's flavor and makes it visually appealing. - 3 tablespoons extra-virgin olive oil - 2 tablespoons lemon juice - Salt and pepper to taste - 1 tablespoon capers, rinsed and drained For the dressing, use high-quality extra-virgin olive oil. Fresh lemon juice brightens the salad. Season with salt and pepper to your liking. Capers add a lovely briny flavor that complements the seafood. This combination of ingredients creates a fresh and flavorful Italian seafood salad that everyone will enjoy. You can find the complete recipe in the Full Recipe section. To start, combine the main proteins: cooked shrimp, calamari rings, and mussels. This mix gives your salad a great variety of textures. Use fresh seafood. It makes a big difference in taste. Always ensure the seafood is cooked thoroughly. This step keeps your dish safe and flavorful. For the best results, you can boil or steam the seafood briefly. This retains its taste and keeps it tender. Next, let's chop the vegetables for your salad. I like to use cherry tomatoes, cucumber, and red onion. Chop the tomatoes in half for a pop of color. Dice the cucumber into small pieces for a nice crunch. Slice the red onion thinly to mix in smoothly. Once chopped, mix these veggies into your seafood bowl. This colorful blend adds freshness and flavor. Now, it's time to make the dressing. In a small bowl, whisk together extra-virgin olive oil and lemon juice. This combination creates a bright and zesty flavor. Add salt and pepper to taste. Make sure to whisk until the mixture is well combined. This helps it emulsify, which means it blends nicely together. Pour the dressing over the seafood and vegetable mix. Toss gently until everything is coated. Timing is key; let it rest in the fridge for at least 30 minutes. This waiting time allows the flavors to meld beautifully. For the full recipe, you can check the main section. To boost the flavor of your Italian seafood salad, marinate your seafood. A simple mix of lemon juice, olive oil, and herbs works wonders. Let it sit for at least 30 minutes. This makes every bite more delicious. - Suggested herbs: parsley, basil, and oregano. - Spices to try: red pepper flakes for heat, or black pepper for depth. These additions will elevate your dish to the next level. A beautiful salad makes it even more appealing. Use a large shallow bowl or individual plates for serving. This adds elegance and makes it feel special. - Garnishes: fresh lemon wedges and extra parsley brighten the dish. - Creative serving suggestions: serve with crusty bread or alongside a light white wine. These details make your meal look as good as it tastes. Avoid overcooking your seafood. It should be tender and juicy. Overcooked seafood becomes rubbery and less enjoyable. Also, be careful with your seasoning. Too much salt or not enough can ruin your salad. Start with a little and add more as needed. Every detail counts in making the perfect Italian seafood salad. For the full recipe, check out the complete guide. {{image_2}} You can switch up the seafood in your salad. Crab and scallops can be great alternatives. They add a sweet and rich flavor. If you're looking for a vegetarian option, try marinated artichokes or chickpeas. These add texture and flavor without seafood. Feel free to add extra veggies. Bell peppers and avocados work well in this salad. They bring color and crunch. You can also use different dressings. A balsamic vinaigrette can give a nice twist. Just make sure it complements the seafood. Italian seafood salads vary by region. In the south, you may find more shellfish, while the north might use fresh fish. Each area uses local ingredients. This makes every version unique and special. Enjoy exploring these different flavors! To store leftovers safely, place the seafood salad in an airtight container. This keeps air out and helps it stay fresh. Ensure your fridge is at or below 40°F (4°C) for best results. Use the salad within three days for the best taste. Best practices for maintaining freshness include: - Do not leave the salad out for over two hours. - If you add extra ingredients, they can affect freshness. - Always keep the salad refrigerated until serving. Can you freeze Italian seafood salad? Yes, but it is not ideal. Freezing can change the texture of seafood. If you must freeze it, use a freezer-safe container. Label it with the date so you remember when you froze it. Recommended methods for freezing and thawing: - Portion the salad into smaller containers for easy use. - Thaw it in the fridge overnight before eating. - Do not refreeze once it has thawed. How long can it last in the fridge? The salad can last for up to three days in the fridge. After that, the quality may drop. Signs of spoilage to look out for: - A sour smell or off odor. - Changes in color, especially in the seafood. - A slimy texture on the seafood or vegetables. For a delicious meal, always check for these signs before enjoying your Italian seafood salad. For the complete recipe, check the Full Recipe section above. Italian seafood salad is a fresh dish from coastal Italy. It mixes various seafood with crisp vegetables. It is light, bright, and perfect for warm days. You can find variations in many regions, but the core ingredients remain the same. You often see shrimp, mussels, and calamari. This dish highlights the sea's flavors and the joy of simple, fresh ingredients. To add heat, you can use red pepper flakes. Start with a small pinch and mix it in well. You can also add sliced jalapeños for a fresh kick. If you like a strong flavor, try using spicy olive oil. Don’t forget to taste as you go. This way, you can find the right heat for your palate. Yes, Italian seafood salad is gluten-free. The main ingredients, like seafood and vegetables, do not contain gluten. However, always check the label on any dressings or added ingredients. Some store-bought dressings may have gluten. If you make the dressing yourself, you can be sure it is safe. You can prepare Italian seafood salad ahead of time. Just make sure to keep it cool in the fridge. It tastes even better after the flavors meld. I recommend making it up to one day in advance. Just mix in the dressing right before serving. This keeps the salad fresh and crunchy. Serve Italian seafood salad in a large shallow bowl or on individual plates. Garnish it with lemon wedges and more parsley for color. Pair it with a crisp white wine or sparkling water. A light, fruity beverage complements the dish well. Enjoy it as a starter or a light meal. For the full recipe, check out the details above. We explored how to create a fresh and tasty Italian seafood salad. Starting with quality seafood and fresh veggies boosts flavor. We also learned the right way to mix the dressing and present the dish. Remember to avoid common mistakes, like overcooking. You can even customize the salad to fit your tastes. With proper storage, you can enjoy leftovers safely. Italian seafood salad is not just a meal; it’s a delightful experience that celebrates freshness and flavor.

Italian Seafood Salad Fresh and Flavorful Recipe

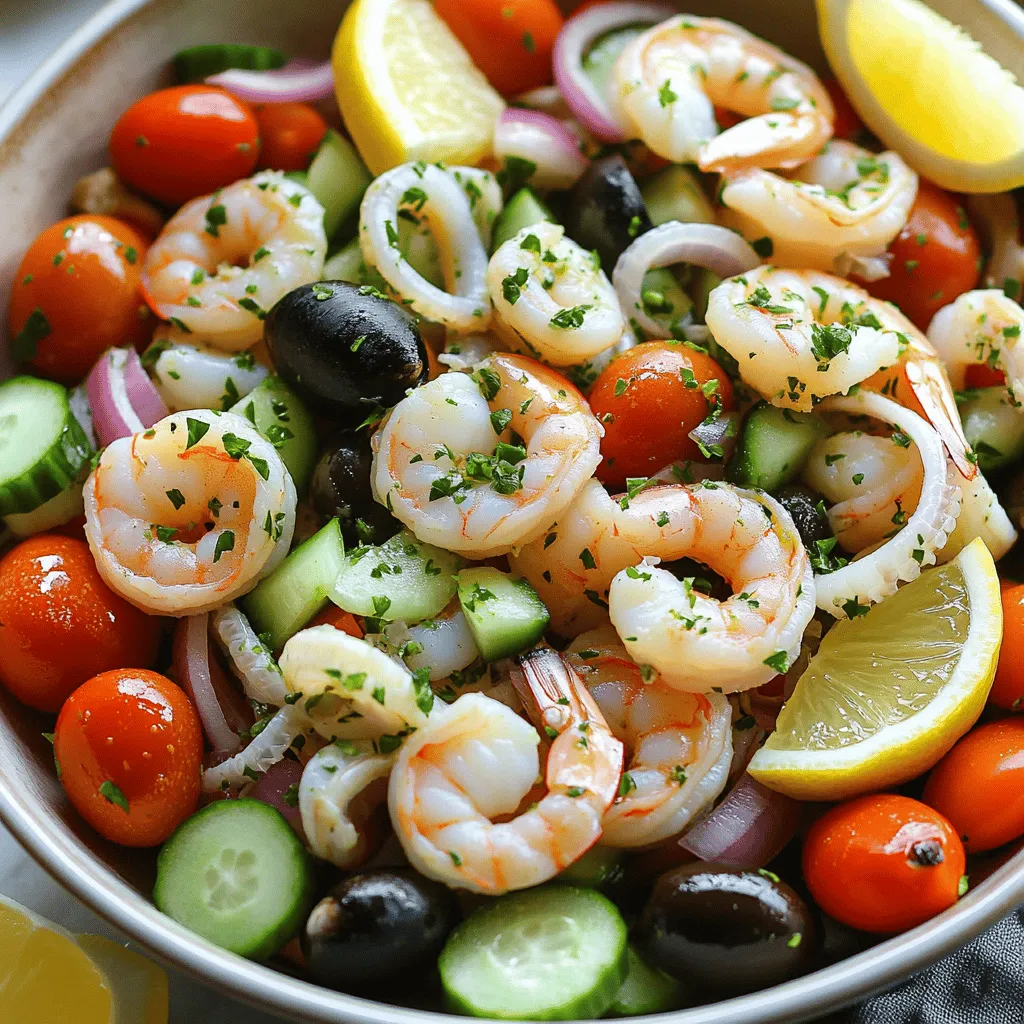
Are you ready to dive into a world of fresh flavors? This Italian Seafood Salad is a vibrant, mouthwatering dish

Older posts
Newer posts
← Previous Page1 … Page44 Page45 Page46 … Page73 Next →

dsad

© 2025 So Yum Recipes • Built with GeneratePress

Our Policies

  • Copyright Policy
  • Cookie Policy
  • GDPR Policy
  • Privacy Policy
  • Disclaimer
  • Terms Of Use

More Information

  • Home
  • About
  • Contact
  • Appetizers
  • Dessert
  • Dinner
  • Drinks
©2025, So Yum Recipes About Back To Top