Skip to content
DisclaimerTerms Of UseGDPR PolicyCookie Policy

So Yum Recipes

  • Home
  • Drinks
  • Appetizers
  • Dinner
  • Dessert
  • About
  • Contact
  • Privacy Policy
DisclaimerTerms Of UseGDPR PolicyCookie Policy

Chloe

- 1 medium butternut squash, peeled and diced - 1 cup Arborio rice - 4 cups vegetable broth The main stars of this dish are butternut squash and Arborio rice. The squash adds a sweet, nutty flavor. Arborio rice gives the risotto its creamy base. Using a fresh medium butternut squash makes all the difference. - 1 small onion, finely chopped - 2 cloves garlic, minced - 1 teaspoon fresh thyme leaves (or ½ teaspoon dried thyme) Aromatics like onion and garlic bring warmth to the dish. Thyme adds a fragrant note that pairs well with the squash. I love using fresh thyme, but dried works too in a pinch. - 2 tablespoons olive oil - ½ cup grated Parmesan cheese - Salt and pepper to taste - Fresh parsley for garnish The olive oil enriches the risotto and helps cook the veggies. Parmesan cheese gives it that creamy and rich finish. You can adjust salt and pepper to match your taste. Fresh parsley adds a pop of color and freshness. If you want to dive deeper, check the Full Recipe for step-by-step instructions. Each ingredient plays a key role in making this dish a creamy delight! Heat the vegetable broth in a medium saucepan over low heat. This step keeps the broth warm. It helps the rice cook evenly and absorb flavor. In a large skillet, heat the olive oil over medium heat. Add the finely chopped onion and cook until it turns soft. This takes about five minutes. Then, stir in the minced garlic and thyme. Cook for one more minute to blend the scents. Now, add the diced butternut squash to the skillet. Stir it gently for about ten minutes. The squash should start to soften. Next, add the Arborio rice. Stir well to coat the rice with oil and mix it with the vegetables. Cook this for two minutes. This step gives the rice a nice toasted flavor. Start adding the warmed vegetable broth. Use one ladle at a time. Stir frequently and wait for the rice to absorb the broth before adding more. Continue this until the rice looks creamy and is al dente. This takes about 18 to 20 minutes. Once the risotto is cooked, stir in the grated Parmesan cheese. Season with salt and pepper to taste. Let it sit for a couple of minutes to thicken up before serving. This makes it rich and creamy. You can follow the full recipe to see all the steps in detail. To make smooth risotto, stir often. This helps release the starch from the rice. The starch makes your risotto creamy. Add broth slowly. Start with one ladle at a time. Let the rice soak up the broth before adding more. This method keeps the rice from becoming mushy. Aim for a creamy texture, but the rice should still have a slight bite. Arborio rice is the best choice for risotto. It has a high starch content. This helps create that creamy texture we all love. Other types of rice, like long-grain, won't work as well. They lack the same starch. Arborio rice also absorbs flavors better. This means your butternut squash risotto will taste amazing. You can take your risotto to the next level. Try adding fresh herbs like sage or rosemary. They add a nice touch of flavor. You can also mix in spices like nutmeg for warmth. For a kick, add a pinch of red pepper flakes. If you want more depth, consider adding a splash of white wine. This adds acidity and richness to the dish. For the best results, use these tips from the Full Recipe. {{image_2}} You can easily make Butternut Squash Risotto more colorful. Try adding other veggies like spinach, peas, or mushrooms. Each adds a unique taste and texture. Fresh herbs can also brighten up the dish. Some good choices include basil, parsley, or even a little rosemary. Mixing in these flavors makes the risotto a fun dish to create and enjoy. Want to boost the protein in your risotto? You can add chicken, shrimp, or plant-based proteins. For chicken, simply cook diced pieces before adding the rice. If you prefer shrimp, add them during the last few minutes of cooking. For a plant-based option, try chickpeas or lentils. They blend well and keep the dish hearty. Each choice gives you a different twist on this creamy delight. Changing the cheese or spices can alter the flavor of your risotto. While Parmesan is classic, you can try goat cheese for a tangy taste. Feta also works well, adding a salty kick. For spices, consider nutmeg or smoked paprika. These add warmth and depth. You can explore different combinations to find your favorite flavor profile. Each variation makes your risotto special. Check out the Full Recipe for more details on making this dish. To store leftover risotto, let it cool down first. Place it in an airtight container. Make sure to cover it well. The risotto will stay fresh in the fridge for about 3 days. Avoid leaving it out at room temperature for too long. Bacteria can grow if food sits out too long. When reheating risotto, I suggest using a skillet or a saucepan. Add a splash of broth or water to keep it creamy. Heat it over low to medium heat. Stir often to prevent it from sticking. This method helps restore its original texture. You can also use the microwave, but add moisture. Cover the bowl loosely to allow steam to escape while reheating. You can freeze risotto if you won't eat it soon. Split it into smaller portions for easy thawing. Use freezer-safe bags or containers. Remember to leave some space for expansion as it freezes. When you're ready to eat it, thaw it overnight in the fridge. Reheat it gently, adding broth to restore its creaminess. Freezing can change the texture, but it will still taste great! For the full recipe, check out the complete guide to making creamy butternut squash risotto. Yes, you can prep Butternut Squash Risotto in advance. Cook the risotto but leave out the cheese. Store it in a container. When ready to serve, reheat it on the stove. Add broth to help it regain creaminess. Stir in the cheese just before serving for the best taste. If you need a substitute for Parmesan, try nutritional yeast. It gives a cheesy flavor without dairy. You could also use vegan cheese or pecorino cheese for a different taste. Both are great options to keep your risotto creamy and delicious. Butternut Squash Risotto lasts about 3 to 5 days in the fridge. Store it in an airtight container to keep it fresh. Always check for any off smells or changes in texture before eating. When in doubt, throw it out. Safety first! This blog post covers all you need to make Butternut Squash Risotto. We discussed the main ingredients, like butternut squash and Arborio rice. You learned how to cook each component to create a creamy dish. I shared tips for perfect risotto and variations to match your taste. Finally, we explored storage options and answered common questions. Cooking this dish is simple and rewarding. Enjoy the flavors and warmth it brings to your table. Discover the joy of making risotto and share it with others!

Butternut Squash Risotto Flavorful and Creamy Delight

Are you ready to indulge in a warm, comforting dish? My butternut squash risotto is rich, creamy, and bursting with

To make this tasty dish, you need a few key items: - 2 slices of wholegrain or sourdough bread - 1 ripe avocado - 2 large eggs - 1 tablespoon olive oil - Salt and pepper, to taste These ingredients create a delicious base for your toast. The bread gives you a nice crunch. The avocado adds creaminess, and the eggs bring protein. You can add fun twists to your toast: - 1/2 teaspoon red pepper flakes (optional) - Fresh lemon juice, to taste - Fresh microgreens or arugula, for garnish These toppings can enhance flavor and texture. They also add a pop of color. Each ingredient packs a punch of nutrition: - Wholegrain or sourdough bread: Provides fiber and energy. - Avocado: Full of healthy fats, vitamins, and minerals. - Eggs: Great source of protein and essential nutrients. - Olive oil: Contains healthy fats that support heart health. - Salt and pepper: Adds flavor without extra calories. - Red pepper flakes: Can boost metabolism and add spice. - Lemon juice: Offers vitamin C and brightens flavors. - Microgreens or arugula: Add vitamins and a fresh taste. These ingredients not only taste great but also offer many health benefits. This is why I love making Avocado and Egg Breakfast Toast. You can enjoy it as a meal or snack. For the full recipe, check out the details above. Start by toasting your bread. I like using wholegrain or sourdough. Toast the slices until they turn a nice golden brown. You can use a toaster or an oven for this. Make sure the toast is crispy, but not burnt. While your bread toasts, it's time to prepare the avocado. Cut the ripe avocado in half and remove the pit. Scoop out the green flesh into a bowl. Use a fork to mash it until it's creamy. Add a squeeze of fresh lemon juice, salt, and pepper to taste. Mix well to combine. Next, cook the eggs in a non-stick skillet. Heat one tablespoon of olive oil over medium heat. Crack your eggs into the skillet. Cook them how you like—sunny-side up or over-easy works great. Add a pinch of salt and pepper. For some heat, sprinkle red pepper flakes as they cook. Once the toast is ready, it’s time to assemble. Spread a generous layer of the mashed avocado on each slice. Make sure to cover the bread well. This is where the flavor starts to shine. Now, carefully place one cooked egg on top of each avocado toast. This makes it look pretty and adds protein. Finish by sprinkling some fresh microgreens or arugula on top. This adds a fresh touch. Serve your toast right away for the best taste. Enjoy your meal! For the full recipe, check out the complete instructions above. To mash avocado well, start with a ripe one. A ripe avocado feels soft but not mushy. Cut it in half and remove the pit. Scoop the flesh into a bowl. Use a fork to mash it until creamy. Add lemon juice to keep it fresh and bright. Season with salt and pepper to taste. If you want a kick, add red pepper flakes. This mix makes your avocado flavorful and smooth. Cooking eggs can change the whole toast vibe. For sunny-side up, cook them gently on medium heat. Let the whites set while the yolk stays runny. For over-easy, flip the egg carefully after a few minutes. Cook for another minute to set the yolk a bit. If you prefer scrambled eggs, whisk them in a bowl first. Pour into the skillet and stir until fluffy. Season with salt and pepper for extra flavor. Choosing the right bread is key for great toast. Wholegrain bread gives a nutty flavor and is healthy. Sourdough has a tangy taste and a chewy texture. Both options toast well and hold toppings nicely. You can also try rye or gluten-free bread if you prefer. Whatever you choose, make sure it’s fresh for the best taste. Toast until it's golden brown and crispy for the perfect base. For the full recipe, visit the Avocado and Egg Breakfast Toast section. {{image_2}} You can change up your avocado and egg breakfast toast in many ways. Try adding sliced tomatoes or radishes for a fresh crunch. Crumbled feta or goat cheese gives a creamy touch. For a savory kick, sprinkle smoked paprika or garlic powder on top. You can also use fresh herbs like basil or cilantro. Each topping adds a new layer of flavor to your dish. If you want a vegan twist, skip the eggs. Use mashed chickpeas or tofu instead. Season them with lemon juice, salt, and pepper for taste. You can also add nutritional yeast for a cheesy flavor. This keeps your toast creamy and delicious without dairy. Want to make your breakfast toast even better? Add sliced avocado with a drizzle of balsamic glaze. You can also mix in some sautéed spinach or kale. For a touch of sweetness, a few slices of ripe pear or apple work well. These add-ins boost flavor and nutrition in your meal. Check out the Full Recipe for more ideas! To keep your ingredients fresh, place them in airtight containers. Store leftover avocado in a bowl with lemon juice to slow browning. Wrap your bread in plastic or foil to keep it from drying out. Eggs should stay in their original carton in the fridge. This keeps them safe and fresh. If you have leftover toast, reheat it in the oven or toaster. This helps restore its crispiness. Avoid using the microwave, as it can make toast chewy. Heat the toast at a low setting for a few minutes until warm. To keep avocado fresh, store it with the pit if you have half left. This helps slow down browning. Use lemon juice on cut avocado to keep it green. Wrap it tightly in plastic wrap and store it in the fridge. If you have a whole avocado, keep it in a cool, dark place. For more details about making this dish, check out the Full Recipe. Yes, you can use many types of bread. Whole grain, sourdough, or rye work well. Gluten-free bread is also a great option. Just make sure it toasts nicely. Each type adds a unique flavor and texture to your dish. To make this dish low-calorie, you can reduce the amount of avocado. Use only half of a ripe avocado instead of a whole one. You can also skip the olive oil when cooking the eggs. Opt for poached or boiled eggs, which need no added fat. Healthy sides can enhance your meal. Consider serving sliced tomatoes, a small salad, or fresh fruit. These options add color and nutrients to your plate. They also balance the richness of the avocado and egg. Yes, but some parts should stay separate. You can mash the avocado and store it in the fridge. To keep it fresh, add lemon juice. Toast the bread and cook the eggs right before serving for the best taste. This keeps everything fresh and tasty. For the full recipe, refer to the earlier section. This post covered how to make Avocado and Egg Breakfast Toast. We discussed ingredients, cooking steps, and storage tips. You learned how to mix flavors and enjoy various toppings. This dish is healthy, quick, and fun to make. With a few tweaks, you can personalize it. So, get creative and enjoy your tasty breakfast!

Avocado and Egg Breakfast Toast Easy and Tasty Meal

Start your day right with a delicious Avocado and Egg Breakfast Toast! This tasty meal is quick to make and

- 1 bag (32 oz) frozen tater tots - 1 lb ground beef or turkey - 2 cups shredded cheddar cheese - 1 cup shredded Monterey Jack cheese The base of this dish is simple yet satisfying. Frozen tater tots add a crispy texture. You can use either ground beef or turkey for protein. Both options work well, so choose your favorite. The blend of cheddar and Monterey Jack cheeses makes everything creamy and flavorful. - 1 cup canned black beans, rinsed and drained - 1 cup corn kernels (fresh, frozen, or canned) - 1/2 cup black olives, sliced You can jazz up your casserole with tasty add-ins. Black beans add fiber and protein. Corn provides sweetness and crunch. Sliced olives bring a briny flavor that complements the other ingredients. Feel free to mix and match based on what you have. - 1/2 cup sour cream - 1 avocado, diced - 2 green onions, chopped Garnishes make your dish look special. Sour cream adds creaminess and coolness. Diced avocado brings richness and a fresh taste. Chopped green onions add a pop of color and mild onion flavor. These toppings enhance the overall experience and make it more inviting. For the full recipe, check out the detailed steps to create this delicious casserole. - Preheat the Oven First, set your oven to 400°F (200°C). This will help your casserole cook evenly. - Cooking the Meat In a large skillet, heat your pan over medium heat. Add 1 pound of ground beef or turkey. Cook until it turns brown. Drain any extra fat. Next, add taco seasoning as instructed on the packet. Mix in 1 cup of rinsed black beans, 1 cup of corn, and 1 cup of salsa. Let this simmer for about 5 minutes. - Layering the Ingredients Grab a greased 9x13 inch baking dish. Spread the meat mixture evenly on the bottom. Then, layer half of the frozen tater tots over the meat. - Cheese Distribution Tips Next, sprinkle 1 cup of shredded cheddar cheese and 1 cup of Monterey Jack cheese on top of the tater tots. After that, add the rest of the tater tots, followed by the remaining cheese. This ensures every bite is cheesy and delicious. - Cooking Time and Temperature Place your assembled casserole in the preheated oven. Bake for 25 to 30 minutes. Look for crispy tater tots and melted cheese. - Cooling and Serving Suggestions After baking, let the casserole cool for a few minutes. Top it with sliced black olives, diced avocado, chopped green onions, and a dollop of sour cream. Serve hot, and enjoy this hearty meal! For the complete recipe, check out the Full Recipe section. - Oven Settings: Bake the casserole at 400°F (200°C). This heat makes the tater tots crispy and golden. A hotter oven helps the cheese melt evenly too. - Recommended Baking Dish: Use a 9x13 inch baking dish. It fits the layers well, ensuring even cooking. Glass or metal works fine, but metal gives a crispier bottom. - Dietary Substitutions: You can swap ground beef for turkey or a meat alternative. If you want it meat-free, add extra beans or veggies instead. - Flavor Boosts and Seasoning Ideas: Add fresh herbs like cilantro or parsley for freshness. A dash of hot sauce or some chili powder can kick up the heat. Consider adding diced jalapeños for more spice. - Serving Style: Serve right from the baking dish for a casual feel. This dish looks great when it’s bubbly and fresh out of the oven. - Garnishing for Visual Appeal: Top with sliced black olives, diced avocado, and green onions. Add a sprinkle of cilantro for color and freshness. A lime wedge on the side adds a zesty touch that brightens the dish. For full instructions on making this delicious meal, check out the Full Recipe. {{image_2}} For a vegetarian option, you can substitute the meat with plant-based proteins like lentils or mushrooms. These add a nice texture and flavor. You can also add diced bell peppers, zucchini, or spinach to boost nutrition. These veggies bring color and taste to your casserole. They make it hearty and filling. If you love heat, add sliced jalapeños to the top before baking. They give a nice kick. You can also mix in spicy salsa instead of regular salsa. This will enhance the flavors and bring more spice to the dish. Adjust the amount based on your heat preference. For a fun twist, you can turn this into a breakfast casserole. Just add beaten eggs and your choice of breakfast meats like sausage or bacon. This makes a great brunch option. Serve it with fresh fruit or a light salad for balance. To keep your Loaded Nacho Tater Tot Casserole fresh, follow these best storage practices: - Allow the casserole to cool to room temperature. - Cover the dish tightly with plastic wrap or foil. - Store in the fridge for up to 3 days. For containers, I recommend using: - Airtight glass containers for easy reheating. - Plastic storage containers with a secure lid to prevent spills. If you want to save some for later, freezing is a great option. Here’s how to prepare it: - Let the casserole cool completely before freezing. - Cut it into portions for easy thawing later. - Wrap each piece in plastic wrap, then place in a freezer bag. For thawing, do the following: - Move the casserole to the fridge the night before you plan to eat it. - If you’re in a rush, you can thaw it in the microwave on defrost mode. When it comes to reheating, you have two main options: - Oven: Preheat your oven to 350°F (175°C). Cover the casserole with foil and heat for about 20 minutes. Remove the foil for the last 5-10 minutes to crisp up the top. - Microwave: Place a portion in a microwave-safe dish. Heat for 2-3 minutes or until warm. To maintain crispiness: - If using the microwave, avoid covering with a lid. This keeps the steam out and helps keep the top crunchy. - For the oven, ensure it’s covered until the last few minutes to prevent drying out. Yes, you can use fresh tater tots. - Cooking Time Adjustments: If you use fresh tater tots, you may need to cook them for a shorter time. Start with 20 minutes at 400°F. Check for crispiness. - Taste Differences: Fresh tater tots can taste lighter and fluffier. They add a nice homemade feel to the dish. You can store this casserole for a few days. - Refrigeration Duration: Keep it in the fridge for up to 3 days. Make sure it is in a sealed container. - Freezing Timeframe: If you freeze it, use it within 2 months. Wrap it well to prevent freezer burn. Pairing sides can make your meal even better. - Side Dish Ideas: Try a fresh salad or some tortilla chips. Guacamole and salsa are great choices, too. - Drink Pairings: I recommend serving it with a cold soda or a light beer. Lemonade is also a refreshing option. This blog post covered how to make a Loaded Nacho Tater Tot Casserole. You learned about key ingredients like tater tots, ground meat, and cheeses. I shared tips for prepping, assembling, and baking for the best results. You can customize your dish and manage leftovers easily. In conclusion, this casserole is fun to make and share. Enjoy experimenting with flavors and variations to match your taste!

Loaded Nacho Tater Tot Casserole Tasty and Easy Meal

Craving a fun, filling dish? You’ll love my Loaded Nacho Tater Tot Casserole! It combines crispy tater tots, savory ground

- 1 cup red lentils, rinsed - 1 can (400ml) coconut milk - 1 tablespoon coconut oil - 1 medium onion, diced - 2 cloves garlic, minced - 1-inch piece of ginger, grated - 1 tablespoon red curry paste - 4 cups vegetable broth - 1 medium carrot, diced - 1 bell pepper, diced (any color) - 1 cup spinach, roughly chopped - 1 tablespoon lime juice - Salt and pepper to taste - Fresh cilantro, for garnish Coconut Curry Lentil Soup is not just tasty; it is also filled with good stuff. The red lentils are high in protein and fiber. They help keep you full and satisfied. Coconut milk adds creaminess and a touch of sweetness. It makes the soup rich without being heavy. Using fresh veggies like carrots and bell peppers gives the soup crunch and color. The onion, garlic, and ginger build a flavorful base. Each ingredient plays a role in making this soup vibrant and healthy. For tools, grab a large pot, a cutting board, and a knife. Measuring cups and spoons are needed for accuracy. A stirring spoon helps mix all the goodness together. This soup is easy to make. You will find that it comes together quickly, perfect for a busy day. You can find the full recipe to make this delicious soup with ease. 1. Heat coconut oil and sauté onion. Start by taking a large pot. Set it on medium heat. Add one tablespoon of coconut oil. Let it melt. Then, add one diced medium onion. Sauté for about five minutes until it looks clear and soft. 2. Add garlic, ginger, and red curry paste. Next, chop two cloves of garlic and grate one inch of ginger. Toss them into the pot with the onion. Stir for about one minute. Then, add one tablespoon of red curry paste. Mix it well for two minutes. This step builds a great flavor base. 1. Pour in vegetable broth and coconut milk. Now it's time to add liquid. Pour in four cups of vegetable broth. Then, add one can of coconut milk. Stir it well to blend all the flavors. 2. Add lentils, carrot, and bell pepper. Rinse one cup of red lentils and add them to the pot. Next, chop one medium carrot and one bell pepper (any color will do). Toss them in and stir. Bring everything to a boil. After it boils, turn down the heat and let it simmer for 25 to 30 minutes. The lentils should be soft when done. 1. Stir in spinach and lime juice. Once the lentils are tender, take one cup of roughly chopped spinach. Add it to the pot along with one tablespoon of lime juice. Cook for another two to three minutes until the spinach wilts. 2. Season with salt and pepper. Finally, taste the soup and add salt and pepper as needed. This step ensures your Coconut Curry Lentil Soup is just right. For the complete recipe, refer to the [Full Recipe]. Enjoy your cooking! To boost the flavor of your coconut curry lentil soup, consider these tips: - Use homemade vegetable broth for better taste. Store-bought broth can lack depth. Homemade broth adds rich flavors. You can simmer vegetables like carrots, celery, and onions for hours to create a base that shines. - Adjust curry paste to preference for spice. Not all curry pastes are the same. Some are mild, while others pack heat. Start with a small amount, taste, and add more if needed. This way, you control the spice level. When making this soup, be aware of these common pitfalls: - Overcooking lentils for a mushy texture. Lentils cook quickly. If you cook them too long, they become mushy. Aim for tender but firm lentils. This texture adds to the soup's overall appeal. - Not rinsing lentils can cause a gritty soup. Rinsing your lentils removes dirt and dust. It also prevents grit from ending up in your soup. Take a moment to rinse them well before adding them to your pot. For the complete recipe, check out the [Full Recipe]. {{image_2}} You can switch things up in this soup. If you want a new texture, use chickpeas instead of lentils. They add a nice bite. For the coconut milk, you can choose between full-fat or light. Full-fat gives a creamier taste, while light keeps it lighter. This soup is vegan-friendly. It uses no animal products, so everyone can enjoy it. It’s also gluten-free. All the ingredients are free from gluten. This makes it a great choice for those with gluten sensitivities. How long will it keep in the fridge? Coconut Curry Lentil Soup can last for about 5 days in the fridge. Make sure to let it cool first before storing. Best practices for cooling and storing: Place the soup in an airtight container. This way, it keeps fresh and prevents spills. Label the container with the date. This helps you track freshness. How to properly freeze Coconut Curry Lentil Soup: To freeze, let the soup cool completely. Then, pour it into freezer-safe containers or bags. Leave some space at the top. Soup expands when frozen. Reheating suggestions for optimal taste: When you are ready to eat, thaw it overnight in the fridge. Heat it on the stove over low heat. Stir often to avoid sticking. Add a splash of vegetable broth if it seems thick. Enjoy the warm, flavorful soup! To add spice, you can use chili peppers. Try fresh jalapeños or serranos for heat. You can also add crushed red pepper flakes or cayenne pepper. Start with a small amount and taste. Adjust the spice level to suit your taste buds. Another option is to use a spicier red curry paste. Remember, you can always add more heat, but it's hard to remove it. Yes, you can make this soup in a slow cooker. Start by sautéing the onion, garlic, and ginger in a pan. Then, add these to your slow cooker. Pour in the vegetable broth and coconut milk next. Add all other ingredients except for spinach and lime juice. Cook on low for 6-8 hours or high for 3-4 hours. Stir in the spinach and lime juice just before serving. This soup pairs well with rice or quinoa. You can also serve it with crusty bread for dipping. A fresh salad with cucumber or avocado adds a nice crunch. For a complete meal, try serving it with grilled chicken or tofu. The soup's rich flavors balance well with light sides. This blog post showed you how to make Coconut Curry Lentil Soup, step by step. You learned about the key ingredients and the tools needed. The cooking steps are simple, ensuring you get a tasty meal quickly. Remember the tips to avoid common mistakes and enhance flavor. Feel free to try variations or dietary swaps that fit your needs. Proper storage will keep your soup fresh and tasty. Enjoy this nourishing dish and share it with others!

Coconut Curry Lentil Soup Healthy and Flavorful Recipe

Craving a warm and healthy meal? This Coconut Curry Lentil Soup is your answer! Rich in flavor and loaded with

To create this zesty delight, gather these fresh and simple ingredients: - 1 cup long-grain white rice - 2 cups vegetable broth (or water) - 1 tablespoon olive oil - 2 cloves garlic, minced - Zest of 1 lime - Juice of 1 lime - 1/2 cup fresh cilantro, chopped - 1 teaspoon sea salt - 1/2 teaspoon black pepper - Optional: 1/4 teaspoon ground cumin for added flavor For the best taste, I recommend using: - Rice: Look for brands like Jasmine or Basmati for the fluffiest rice. - Broth: Choose low-sodium vegetable broth, such as Swanson or Pacific Foods, for balanced flavor. - Olive Oil: Extra virgin olive oil, like Filippo Berio, adds richness. You can make this dish work for everyone by swapping some ingredients: - Use brown rice for more fiber and a nuttier taste. Just increase cooking time to about 40 minutes. - For a lower sodium dish, opt for homemade broth or water instead of store-bought broth. - If you're avoiding gluten, rest assured, this recipe is naturally gluten-free! This Zesty Cilantro Lime Rice fits many diets while remaining fresh and flavorful. Enjoy crafting your perfect dish! To make Zesty Cilantro Lime Rice, start by rinsing 1 cup of long-grain white rice under cold water. This removes excess starch and makes the rice fluffy. Next, heat 1 tablespoon of olive oil in a medium saucepan over medium heat. Add 2 cloves of minced garlic and sauté for about 1 minute. Be careful not to let it burn. Stir in the rinsed rice and toast it for 2-3 minutes. After toasting, pour in 2 cups of vegetable broth or water. Add the zest and juice of 1 lime, 1 teaspoon of sea salt, and 1/2 teaspoon of black pepper. If you like, you can add 1/4 teaspoon of ground cumin for extra flavor. Stir well to mix everything together. Bring this mixture to a boil, then reduce the heat to low. Cover the pot and let it simmer for 18-20 minutes until the rice is cooked and the liquid is absorbed. When done, remove it from the heat. Let it sit covered for 5 more minutes. Finally, fluff the rice with a fork. Gently fold in 1/2 cup of chopped cilantro until it's evenly mixed. The key to perfect rice lies in rinsing and toasting. Rinsing removes starch, leading to fluffy rice. Toasting the rice in oil and garlic adds flavor and keeps grains separate. Always use the right water-to-rice ratio. For long-grain rice, the ratio is 2:1. If you want a little crunch, reduce the liquid slightly. Letting the rice rest off the heat after cooking helps it fluff up. Remember to fluff with a fork gently. This keeps the grains whole and light. Many people skip rinsing the rice, which leads to sticky rice. Avoid burning the garlic when sautéing, as it gives a bitter taste. Ensure you cover the pot while simmering; this keeps steam in and cooks the rice evenly. Stirring too much during cooking can break the grains, making them mushy. Lastly, don’t skip the resting step; it’s key for fluffy rice. For the full recipe, check out the complete list of instructions. To boost the flavor of Zesty Cilantro Lime Rice, consider adding more spices. A pinch of ground cumin adds warmth. You can also try smoked paprika for a hint of smokiness. Fresh herbs like parsley or green onions can add brightness. Experiment with flavors that you love to make it your own. Rinsing rice is key. It removes excess starch, which helps create fluffy rice. Use cold water and rinse until it runs clear. Toasting the rice is just as important. Sautéing the rinsed rice in olive oil and garlic for a few minutes adds depth. This step helps the grains absorb flavors better. For fluffy rice, let it rest after cooking. Once the rice is done, turn off the heat and keep the pot covered. Let it sit for five minutes. This allows steam to finish cooking the rice. Fluffing with a fork also helps separate the grains. Avoid using a spoon, as it can mash the rice. Follow these tips from the Full Recipe for perfect results every time. {{image_2}} You can easily change the flavors in this dish. For a spicy kick, add diced jalapeños. They bring heat and a nice crunch. You can also mix in black beans for extra protein and fiber. They pair well with the zesty rice. Try adding corn for sweetness or diced tomatoes for a fresh twist. This recipe is very flexible. To make it vegan, just use vegetable broth instead of water. The rice tastes great without any animal products. For gluten-free options, make sure the broth is certified gluten-free. You can also swap the white rice for brown rice. Just remember, brown rice takes longer to cook. How you serve the rice can make a big difference. Use a colorful bowl to show off the bright green cilantro. You can garnish the top with lime wedges for a pop of color. Serve it alongside grilled chicken or fish for a complete meal. It also tastes great with a sprinkle of feta or avocado slices on top. To keep your Zesty Cilantro Lime Rice fresh, let it cool first. Place it in an airtight container. Make sure the lid seals well. Store it in the fridge for up to four days. If you want to keep it longer, consider freezing it. When it’s time to eat the leftover rice, reheat it gently. You can use the microwave or stovetop. If using the microwave, add a splash of water. Cover it to keep the moisture in. Heat for about one to two minutes, or until warm. Stir halfway through to heat evenly. If you freeze the rice, use a freezer-safe bag or container. Remove as much air as possible before sealing. This helps prevent freezer burn. It can last up to three months in the freezer. When ready to use, thaw it in the fridge overnight. Reheat as mentioned earlier for the best flavor. To make Zesty Cilantro Lime Rice without broth, simply use water instead. The key is to season the rice well. Add more lime juice and zest for flavor. You can also mix in extra herbs. This will give you a tasty base without using broth. Yes, you can use brown rice instead of white rice. However, brown rice needs more water and a longer cooking time. Use 2.5 cups of water for 1 cup of brown rice. Cook for about 40-45 minutes. The result will be a nuttier flavor and chewier texture. The best way to reheat cilantro lime rice is on the stove. Add a splash of water to a pan. Heat it on low while stirring. This keeps the rice moist and fluffy. You can also use the microwave. Just add a few drops of water and cover it. Yes, Zesty Cilantro Lime Rice is gluten-free. The main ingredients, rice, and cilantro, do not contain gluten. Always check for gluten in any broth used, if you decide to add it. This makes it a great option for those with gluten sensitivity. For the complete recipe, check out the Full Recipe above! Zesty Cilantro Lime Rice is simple to make and full of flavor. We covered the essential ingredients, cooking steps, and tips to ensure perfect rice. Remember the variations for different diets and preferences. Storing leftovers properly keeps your rice fresh longer. Enjoy experimenting with this dish! With the right ingredients and techniques, you’ll impress everyone at your next meal.

Zesty Cilantro Lime Rice Fresh and Flavorful Delight

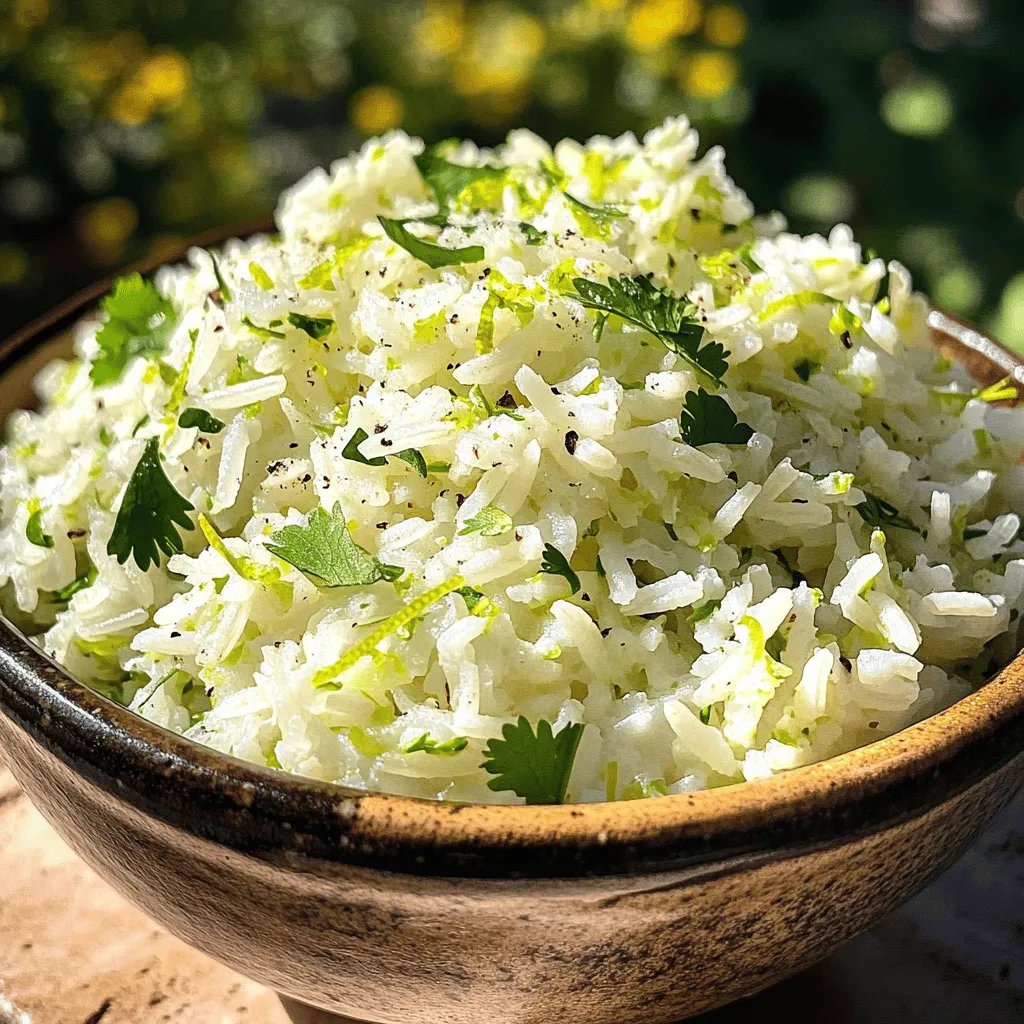
If you’re looking to spice up your meals, look no further. My Zesty Cilantro Lime Rice is a fresh, flavorful

- 12 oz fettuccine pasta - 1 cup heavy cream - 1/2 cup unsalted butter - 1 cup freshly grated Parmesan cheese - 1/2 teaspoon garlic powder - Salt and freshly cracked black pepper, to taste - Chopped parsley for garnish When I make Fettuccine Alfredo, I love using simple, quality ingredients. The pasta is the star. I always choose fresh fettuccine if I can find it. It gives that perfect bite. Heavy cream adds richness. Unsalted butter enhances the flavor without being too salty. Freshly grated Parmesan cheese is a must. Pre-grated cheese often lacks flavor and texture. Garlic powder adds a subtle kick without being overpowering. Don't forget salt and black pepper to taste. Finally, I like to garnish with chopped parsley. It adds a pop of color and freshness. - Alternative pasta options: You can use other types of pasta like tagliatelle or linguine. - Gluten-free alternatives: Look for gluten-free fettuccine made from rice or corn. - Non-dairy substitutes: Use coconut cream or cashew cream for a dairy-free version. These swaps help you enjoy this dish, no matter your needs. Feel free to get creative with what you have at home. The heart of Fettuccine Alfredo is in its creamy sauce, so you can adapt it to fit your taste. For the full recipe, check [Full Recipe]. To start, bring a large pot of salted water to a boil. Use enough water so the pasta can move freely. Add the fettuccine and cook it according to the package instructions, usually about 8-10 minutes. You want it al dente, which means it should be firm to the bite. Why is reserving pasta water important? This water is starchy, and it helps thicken your sauce. It also adds flavor. So, before you drain the pasta, take out about one cup of that water. Set it aside and then drain the fettuccine. Now, let’s make the sauce. In a large skillet, melt half a cup of unsalted butter over medium heat. Once the butter is melted, pour in one cup of heavy cream. Whisk these two together well. Bring the mixture to a gentle simmer. Next, add half a teaspoon of garlic powder. Whisk it in and let it cook for about 2-3 minutes. This step adds flavor and depth to your sauce. After your sauce is ready, it’s time to mix everything. Gradually add one cup of freshly grated Parmesan cheese to the skillet. Whisk continuously until the cheese melts completely. The sauce should be smooth and creamy. If you find the sauce is too thick, that’s where your reserved pasta water comes in. Add a little bit at a time until you reach the desired consistency. Now, add the drained fettuccine to the skillet. Toss it well to coat the pasta evenly with the sauce. Season with salt and freshly cracked black pepper to taste. This will elevate the flavors and make your dish truly delightful. For an extra touch, garnish with chopped parsley. This adds a pop of color and freshness to your creamy fettuccine Alfredo. Enjoy your meal! For the full recipe, check out the details above. To cook perfect fettuccine, start with a large pot of water. Use plenty of salt; it should taste like the sea. Bring the water to a boil before adding the pasta. Stir the pasta often. This keeps it from sticking together. Cook until it is al dente, firm but not hard. To prevent clumping, drain the pasta quickly. Always save some pasta water before you drain. This water is starchy and helps the sauce stick. You can add it later if the sauce is too thick. For a great meal, pair your fettuccine Alfredo with a light salad. A simple green salad with a lemon vinaigrette works well. If you want a drink, a chilled white wine is a good choice. It cuts the creaminess of the sauce. To make your dish look restaurant-style, use a large plate. Twirl the fettuccine into a nest in the middle. Sprinkle with chopped parsley for a pop of color. A little extra Parmesan on top adds a nice touch. One big mistake is overcooking the pasta. This makes it mushy and not fun to eat. Always check your pasta a minute early. Another mistake is using pre-grated cheese. It often has anti-caking agents that can change the sauce's texture. Always grate your cheese fresh for the best flavor. For the full recipe, check the details above. {{image_2}} You can make your Fettuccine Alfredo even better with some classic additions. Grilled chicken or shrimp adds protein and flavor. Simply cook them on a grill or stovetop before mixing them in. Try adding veggies like broccoli or peas for a fresh touch. These veggies not only add color but also provide great taste and nutrition. To boost the taste of your Alfredo, consider some flavor enhancements. Adding lemon zest gives a bright kick that balances the creaminess. You can also experiment with different cheese types. Mixing in some Romano or even a bit of blue cheese can create a unique twist. If you need dietary adaptations, there are great options. For a vegan Fettuccine Alfredo, use cashew cream or coconut milk instead of heavy cream. Nutritional yeast can replace Parmesan cheese for that cheesy flavor without dairy. If you want a low-calorie version, try using whole wheat pasta or zucchini noodles. You can cut down on fat by using less butter or cream while still enjoying a tasty meal. To keep your Fettuccine Alfredo fresh, first let it cool. Place it in an airtight container. This helps prevent moisture loss. Store it in the fridge for up to three days. Make sure to label your container with the date. This way, you won't forget how long it's been there. When you're ready to enjoy your leftovers, you have a couple of options. The microwave is quick and easy. Use a microwave-safe dish and cover it loosely. Heat in short bursts, stirring in between. This helps it warm evenly. If you prefer the stove, use a saucepan. Add a splash of cream or reserved pasta water. This keeps the sauce from separating. Stir until warmed through, and enjoy! Freezing Fettuccine Alfredo is simple. Start by letting it cool completely. Divide it into portions for easy thawing. Use freezer-safe bags or containers. Remove as much air as possible to avoid freezer burn. Label each bag with the date. When you're ready to eat, move it to the fridge to thaw overnight. To heat, use the same methods mentioned before. Add a little cream to restore creaminess. Enjoy your meal even days later! To thicken your Alfredo sauce, you can use a few methods. - Add more cheese: Grate in more Parmesan cheese for a thicker mix. - Cornstarch slurry: Mix 1 tablespoon of cornstarch with 2 tablespoons of water, then stir it in. - Flour: Create a roux by mixing equal parts butter and flour. Cook it briefly, then add cream. - Egg yolk: Whisk one egg yolk in before serving for added richness. Don’t forget about pasta water! Reserve some before draining the pasta. This starchy water can help adjust the sauce’s thickness. Just add a little at a time until you reach the right texture. You can store Fettuccine Alfredo in the fridge for about 3 to 4 days. Keep it in an airtight container to maintain freshness. Watch for signs of spoilage. If you see any mold or it smells off, throw it away. Yes, you can prepare Fettuccine Alfredo in advance! - Meal prep tips: Cook the pasta and make the sauce separately. Combine them just before serving. - Reheating: When reheating, add a splash of cream or reserved pasta water. This helps keep the sauce creamy and smooth. To make your meal complete, consider these side dishes: - Garlic bread: A crunchy side that pairs well with the creamy sauce. - Caesar salad: The crisp greens balance the richness of the Alfredo. - Steamed vegetables: Broccoli or asparagus adds color and nutrition. For drinks, try pairing it with a glass of Chardonnay or a light red wine. These flavors complement the dish beautifully. In this post, we explored how to make a delicious Fettuccine Alfredo, from ingredients to cooking tips. You learned ingredient options and how to avoid common mistakes. The right techniques can help you create a creamy sauce that tastes great. Remember to consider variations and dietary needs. Fettuccine Alfredo is versatile and tasty, making it perfect for any meal. Now, get in the kitchen and enjoy your cooking adventure!

Classic Fettuccine Alfredo Creamy and Simple Recipe

Welcome to the creamy world of Classic Fettuccine Alfredo! This simple recipe offers a rich and delicious dish that you

- 2 cups fresh strawberries, hulled and sliced - 1/4 cup granulated sugar - 1 teaspoon lemon juice - 1 cup all-purpose flour - 1/2 cup granulated sugar (for cake) - 1 1/2 teaspoons baking powder - 1/4 teaspoon salt - 1/2 cup unsalted butter, softened - 2 large eggs - 1 teaspoon vanilla extract - 1/2 cup whole milk - 1 cup heavy whipping cream - 2 tablespoons powdered sugar - Fresh mint leaves for garnish (optional) This list makes the perfect strawberry shortcake cake jars. You will need fresh strawberries for the best flavor. I love using ripe, juicy berries. They make the dish pop with sweetness and color. The sugar helps to draw out the juices from the strawberries. Just a bit of lemon juice brightens everything up. The cake is made from basic pantry staples. All-purpose flour, baking powder, and salt give it a light texture. Butter adds richness. Eggs help bind everything together. Vanilla extract rounds out the taste, making it warm and inviting. Don't forget the whole milk! It keeps the cake moist and tender. Whipped cream is the final touch. Heavy whipping cream whips up beautifully and creates a fluffy topping. Powdered sugar sweetens it just right. If you want, you can add fresh mint leaves for a nice garnish. They add color and a fresh taste. If you want to see how to put all this together, check out the Full Recipe. First, you need to macerate the strawberries. This helps them become juicy and sweet. In a medium bowl, mix 2 cups of sliced strawberries with 1/4 cup of granulated sugar and 1 teaspoon of lemon juice. Gently toss the berries to coat them. Let this sit for at least 30 minutes. This timing allows the strawberries to release their delicious juices. Next, let's bake the cake. Start by preheating your oven to 350°F (175°C). In a mixing bowl, whisk together 1 cup of all-purpose flour, 1/2 cup of granulated sugar, 1 1/2 teaspoons of baking powder, and 1/4 teaspoon of salt. In another bowl, beat 1/2 cup of softened unsalted butter until creamy. Then, add 2 large eggs and 1 teaspoon of vanilla extract, mixing well. Gradually add the dry mix to the butter mixture, alternating with 1/2 cup of whole milk. Mix until just combined. Pour the batter into a greased 9-inch round cake pan. Bake for 20-25 minutes. Check if it’s done by inserting a toothpick in the center. If it comes out clean, your cake is ready. Let it cool in the pan for 10 minutes before moving it to a wire rack. After the cake cools, it’s time to whip the cream. In a mixing bowl, use a hand mixer to beat 1 cup of heavy whipping cream until soft peaks form. This takes about 2-3 minutes. Then, add 2 tablespoons of powdered sugar and continue to beat until you reach stiff peaks. Be careful not to overbeat, as this can turn your cream into butter. Now comes the fun part: assembling the cake jars. Cut your cooled cake into small squares. Grab your clean mason jars or dessert cups. Start layering by adding a layer of cake pieces at the bottom. Next, add a layer of your macerated strawberries with their juices. Then, add a layer of whipped cream. Repeat these layers until the jars are full. Finish with a dollop of whipped cream on top for a nice touch. For best presentation, try to keep the layers even. This not only makes them look pretty but also ensures a great mix of flavors in each bite. Enjoy your Strawberry Shortcake Cake Jars! For the complete recipe, check out the full recipe. To make a moist cake, pay close attention to your baking time and ingredient amounts. Start by checking the cake a few minutes before the timer goes off. If a toothpick comes out clean, it is done. Overbaking can dry it out. You can also add a bit more milk to the batter for extra moisture. This little change can keep the cake soft and fluffy. Whipping cream is simple, but it can be tricky. Use a cold bowl and cold beaters for best results. Start beating slowly, then increase the speed. Stop when you see soft peaks. If you beat too long, the cream can turn into butter. Add a bit of vanilla or almond extract to enhance the flavor. This small step makes a big difference. Layering is key for a great presentation and taste. Start with cake pieces at the bottom. Make sure to add enough strawberries and juice for flavor. This gives moisture to the cake. Alternate layers until the jar is full. Finish with whipped cream on top for a nice look. This method makes each bite a delight. For an extra touch, sprinkle some mint leaves on top. For the full recipe, check out [Full Recipe]. {{image_2}} You can switch up the fruits in your cake jars. Try blueberries or peaches for a tasty twist. You can even make a mixed fruit version. Infusing flavors also works well. For example, add a splash of orange juice or almond extract. If you want a different cake base, consider chocolate or vanilla. You can use a chocolate cake for a rich flavor. Vanilla adds a nice, classic taste. Each choice can change the whole dessert. To make a lighter version, you can swap some ingredients. Use low-fat yogurt instead of heavy cream. This keeps the creaminess but cuts fat. You can also choose plant-based milk for a dairy-free option. Coconut milk adds a fun flavor, too. Using whole grain flour can add fiber. It’s a simple way to boost nutrition without changing taste. You can still enjoy a treat that feels indulgent. Garnishes can make your jars shine. In spring, add fresh flowers to the top. Edible flowers are pretty and safe to eat. In the fall, use pumpkin spice to give a cozy feel. During the holidays, a sprinkle of cinnamon or nutmeg can add warmth. You can also add crushed nuts for a nice crunch. These touches make your dessert feel special for any occasion. To keep your strawberry shortcake cake jars fresh, store them in the fridge. Use airtight containers or sealable jars. This helps maintain their flavor and texture. If you want to keep them longer, you can freeze the jars. Just make sure to leave some space at the top. The cake expands when frozen. Always label the jars with the date for easy tracking. These cake jars can stay fresh in the fridge for up to 3 days. If you freeze them, they last about 2 months. However, for the best taste, it’s best to enjoy them sooner. After thawing, eat the jars within 1 day for the best flavor. If you have leftover ingredients, don’t waste them! You can easily make more cake jars. Simply cut any leftover cake into small pieces. Mix any extra strawberries with sugar for a quick topping. Use the leftover whipped cream to layer in new jars. This way, you can create a fresh treat without starting from scratch. Plus, it's a fun way to experiment with flavors! Yes, you can make these jars ahead of time. I recommend prepping the layers separately. Store the cake, strawberries, and whipped cream in separate containers. This keeps everything fresh. Assemble the jars just before serving. This way, the cake stays light and fluffy. You can prepare the strawberries and cream a day ahead. Just keep them in the fridge. To avoid soggy cake, use a few simple tricks. First, avoid over-soaking the cake in strawberry juices. Use a light hand when layering. Instead of pouring juice on the cake, spoon it over gently. This keeps your layers dry. Also, make sure to use a sturdy cake. A denser cake holds up better with moisture. Follow the ingredient ratios closely in the recipe to ensure the perfect texture. You can switch things up with many fruits. Consider using blueberries, raspberries, or peaches. Each fruit brings its own flavor. You can even mix different fruits for a fun twist. Try layering strawberries with peaches for a summer treat. Or use all three berries for a berry medley. Don’t be afraid to experiment! Use the same method of macerating fruits to enhance their natural sweetness. For the full recipe, check the main section above. This blog post detailed how to make delicious Strawberry Shortcake Cake Jars. We covered key ingredients like fresh strawberries and whipped cream. You learned step-by-step baking instructions and tips to keep your cake moist. We also explored variations for flavor and health, alongside storage tips to extend shelf life. In conclusion, creating cake jars is simple and fun. Enjoy experimenting with flavors and surprises in each jar!

Strawberry Shortcake Cake Jars Simple and Delicious Treat

Are you ready to create a delightful treat that’s simple and fun? Strawberry Shortcake Cake Jars combine sweet strawberries, fluffy

To make Mini Pineapple Upside Down Cheesecakes, gather these simple ingredients: - 1 cup graham cracker crumbs - 1/4 cup unsalted butter, melted - 2 cups cream cheese, softened - 1 cup powdered sugar - 1 teaspoon vanilla extract - 1/4 cup sour cream - 1 can (20 oz) pineapple slices, drained and cut into smaller pieces - 1/4 cup brown sugar - Maraschino cherries for garnish - Fresh mint leaves for garnish These ingredients create a delicious blend of flavors and textures. The graham cracker crumbs form a crunchy base. Cream cheese adds a rich creaminess. The pineapple gives a sweet and tangy twist. Each ingredient plays a key role in making this dessert special. Using unsalted butter helps control the salt level. The vanilla extract enhances the sweetness. Sour cream adds moisture and tang. Pineapple slices, when mixed with brown sugar, caramelize beautifully in the oven. Finally, maraschino cherries and mint leaves make the cheesecakes look festive and fun. You can find the full recipe at the end of this article. Enjoy making these delightful treats! 1. Preheat your oven to 350°F (175°C). Line a muffin tin with paper liners or grease it well. 2. In a medium bowl, combine the graham cracker crumbs and melted butter. Mix until the crumbs are evenly coated. 3. Press about 1 tablespoon of the crumb mixture into the bottom of each muffin cup to form a crust. Bake for 5 minutes, then remove from the oven and let cool slightly. 1. In a large mixing bowl, beat the softened cream cheese until smooth and creamy. 2. Gradually add the powdered sugar, mixing well until incorporated. 3. Add the vanilla extract and sour cream to the cream cheese mixture; beat until smooth. 1. In a small bowl, combine the brown sugar and chopped pineapple pieces. 2. Place a spoonful of the pineapple-brown sugar mixture on top of each cooled crust in the muffin tin. 3. Pour the cheesecake filling over the pineapple layer in each cup, filling them almost to the top. 4. Bake for 15-18 minutes, or until the edges are set but the center still has a slight jiggle. 5. Remove from the oven and let cool to room temperature. Refrigerate the cheesecakes for at least 2 hours (or overnight) to set completely. 6. Before serving, top each cheesecake with a maraschino cherry and a sprig of fresh mint for garnish. For a full recipe, check out the main article! To get the best cheesecake, start by beating the cream cheese. Use a hand mixer on medium speed until it is very smooth and creamy. This step is key. Make sure to scrape down the sides of the bowl. It helps mix everything well. Next, avoid overmixing your batter. Once you add the sugar and other ingredients, mix just until combined. Overmixing can add too much air. This air can cause cracks in the cheesecake when it bakes. For a fun garnish, add a maraschino cherry on top of each cheesecake. It adds a pop of color. Fresh mint leaves also make a great touch. You can also drizzle some caramel or chocolate sauce over the top for extra flavor. Pair these cheesecakes with fresh fruit or whipped cream. They also go well with a scoop of vanilla ice cream. This adds a nice creamy contrast. If your cheesecakes crack, don’t worry. You can fix them by cooling them slowly. Let them cool in the oven with the door slightly open. This helps reduce the temperature change. To ensure your crust doesn’t burn, watch the baking time closely. Keep an eye on them after the first 5 minutes. If they look too dark, pull them out. You want a golden color, not brown. For the full recipe, check out the details above! {{image_2}} To make your mini cheesecakes even better, you can add coconut or lime. Coconut gives a tropical twist. Lime adds a zesty touch. Just mix shredded coconut or lime zest into the cream cheese filling. You can also try different fruits, like mango or berries. Each fruit brings its own flavor. You might find a new favorite! If you want to change the sweetness, consider using honey or agave syrup. These options give a unique taste. Adjust the amount to keep the right sweetness level. For a sugar-free version, use a sugar substitute like stevia. This keeps your mini cheesecakes tasty without sugar. Mini cheesecakes are fun, but you can try new formats too. You can convert them into a layered cheesecake. Just stack layers of cheesecake and fruit in a jar or dish. It looks fancy and tastes great! Another option is to create a no-bake version. This saves time and keeps it light. Just chill the mixture and enjoy! For more details on making these delicious treats, check out the Full Recipe. To keep your mini cheesecakes fresh, store them in the fridge. Use an airtight container. They stay tasty for up to five days. If you want to save them longer, freeze them. Wrap each cheesecake in plastic wrap. Then, place them in a freezer-safe bag. They can last up to three months in the freezer. If you freeze your cheesecakes, thaw them in the fridge overnight. This keeps them creamy. Avoid using a microwave, as it can change the texture. After thawing, let them sit at room temp for about 30 minutes. This brings back their lovely taste. In the fridge, mini cheesecakes last about five days. Look for signs of spoilage. If they smell off or have a change in texture, toss them. Freshness is key to enjoying your delightful treat. Proper storage helps keep these cheesecakes tasting their best. You can find the full recipe to try these out for yourself! Yes, you can! I recommend making them a day in advance. This way, the flavors meld beautifully. Just keep them in the fridge overnight. It saves time and makes serving easier. If you want a change, try using digestive biscuits or vanilla wafers. You can also use oats mixed with melted butter. These options give a different taste and add some fun to the crust. Absolutely! Fresh pineapple adds a lovely texture and bright flavor. Just make sure to chop it finely. It might be a bit juicier, so adjust the sugar if needed. This will keep your cheesecakes from becoming too wet. They need at least two hours to set well. For best results, chill them overnight. This helps the flavors develop and makes them creamier. Trust me, the wait is worth it! For the detailed recipe, check the Full Recipe. These mini cheesecakes are simple and fun to make. You learned about essential ingredients and step-by-step instructions, covering crust, filling, and baking. I shared tips for a perfect texture and ways to enhance flavors. We discussed storage and answers to your common questions. Remember, experimenting with variations can lead to delicious outcomes. Enjoy your baking adventure with these tasty treats!

Mini Pineapple Upside Down Cheesecakes Delightful Treat

Are you ready to indulge in a sweet treat that’s both fun and delicious? Mini Pineapple Upside Down Cheesecakes combine

To make hard candy without corn syrup, gather these key ingredients: - 2 cups granulated sugar - 1/2 cup filtered water - 1/4 teaspoon cream of tartar - 1 teaspoon flavored extract (like peppermint, lemon, or cherry) - Food coloring (optional) - Powdered sugar for dusting These simple ingredients create a sweet treat that brings joy and nostalgia. Each one plays a role in making the candy smooth and tasty. You can try different sweeteners in place of granulated sugar. For example, honey or agave syrup can work, but they may change the texture. If you want a low-sugar option, consider using stevia or erythritol. Both provide sweetness without the calories. Flavoring is another area to explore. Besides classic flavors, use extracts like vanilla, almond, or even unique ones like coconut or orange. Experiment with combinations to find your favorite mix. To make your hard candy unique, think about adding some fun extras. You can mix in: - Crushed nuts for a crunchy texture - Dried fruit bits for a fruity twist - Edible glitter for a sparkling finish These add-ins can elevate your candy and make it more special. Just remember to keep the proportions balanced. Too many extras might affect the candy's texture. For the full recipe, check out Sweet Nostalgia: Hard Candy Delights. Start by gathering your ingredients. You need: - 2 cups granulated sugar - 1/2 cup filtered water - 1/4 teaspoon cream of tartar - 1 teaspoon flavored extract - Food coloring (optional) - Powdered sugar for dusting In a medium saucepan, mix the granulated sugar, filtered water, and cream of tartar. Stir gently until the sugar fully dissolves. This step helps to create a smooth candy syrup. Next, place the saucepan over medium-high heat. Allow the mixture to come to a boil. Do not stir once it boils. You want a clear syrup. Keep an eye on the syrup's temperature. Use a candy thermometer to check it. You need it to reach 300°F (150°C). This process takes about 10-15 minutes. Once the syrup reaches the right temperature, remove the saucepan from the heat. Let the bubbles settle down. Stir in your chosen flavored extract and food coloring if you want. Pour the hot syrup onto a greased marble slab or a parchment-lined baking sheet. Let it cool slightly, about 5-10 minutes. When it's cool enough to handle, use buttered hands to stretch and pull the candy into long ropes. Be careful of the heat! Cut the ropes into bite-sized pieces using kitchen scissors or a sharp knife. Finally, dust the candy pieces with powdered sugar to stop them from sticking. Let them cool completely. For the full recipe, check out Sweet Nostalgia: Hard Candy Delights. To make hard candy, you want a smooth texture. Crystallization can ruin your candy. Use cream of tartar in your mix. It helps keep the sugar from forming crystals. Stir the sugar mixture gently until it dissolves. Once it boils, do not stir again. This keeps the syrup clear and shiny. The right temperature is key for hard candy. You need to reach the hard crack stage. This is about 300°F (150°C). Use a candy thermometer for accuracy. Cooking it too low will lead to soft candy. Cooking too high can burn it. Keep an eye on the thermometer as you boil. Flavor extracts can change your candy's taste. Choose high-quality extracts for the best flavor. Popular choices include peppermint, lemon, and cherry. Start with one teaspoon for a strong flavor. Feel free to mix flavors for fun combinations. Just remember, a little goes a long way! {{image_2}} You can play with flavors when making hard candy. Try classic flavors like peppermint or lemon. You can also explore unique ones like lavender or coconut. Use one teaspoon of the flavor extract in your recipe. This simple swap can change the whole taste of your candy. If you want to mix flavors, go for it! Cherry and lime make a fun combo. Adding color makes your candy pop! Use food coloring to create bright hues. Just a few drops can change clear candy into a rainbow treat. Mix colors or layer them for a fun effect. You can even create swirls. Use a toothpick to swirl different colors together. Get creative with your color choices for fun treats. Make your candy fit the season! For Halloween, try orange and black colors with pumpkin spice flavor. At Christmas, make red and green candies flavored with peppermint. For spring, pastel colors with floral flavors like rose are lovely. You can even shape your candy to match the holiday. Use cookie cutters for fun shapes. This adds a personal touch to your treats. For more details, check the Full Recipe. To keep your hard candy fresh, store it in an airtight container. Use a glass jar or a plastic bin with a tight lid. Make sure the candy is completely cool before putting it away. This prevents moisture from forming inside the container. Avoid warm areas, as heat can melt the candy and ruin its shape. Keep your hard candy in a cool, dry place. A pantry or a cupboard works well. If you live in a humid area, consider using a desiccant packet to absorb moisture. Do not store hard candy in the fridge, as this can cause it to become sticky. Hard candy can last a long time, but it can spoil. If you see any sugar crystals forming on the surface, it may be time to toss it. Also, if you notice any unusual smells or changes in color, it’s best to discard it. Always trust your senses when it comes to food safety. Yes, you can use other sugars. Brown sugar gives a caramel taste. You can also try coconut sugar for a unique flavor. Just keep in mind that each sugar can change the candy's texture. Granulated sugar works best for a clear and hard candy. Cream of tartar helps to keep sugar from forming crystals. This keeps your candy smooth and clear. It acts like a stabilizer during cooking. Without it, your candy may turn out grainy. It’s a small but mighty ingredient in this recipe. If your candy is too soft, it may not have reached the right temperature. Use a candy thermometer to check. If it crystallizes, try adding a bit of water and reheat it gently. You can also try reworking the candy by melting it again. This is a great way to save your batch. In this blog post, we explored the key ingredients and steps to create hard candy. You learned about essential components, alternative sweeteners, and how to customize your candy with add-ins. We covered tips for preventing crystallization and perfect cooking temperatures. Lastly, we discussed fun flavor combinations and best practices for candy storage. Making hard candy is rewarding. You can try new flavors and colors for every season. Enjoy your candy-making journey and share your creations with others!

Hard Candy Without Corn Syrup Easy and Tasty Recipe

Are you tired of hard candies packed with corn syrup? You’re not alone! In my latest post, I’ll share a

- 8 oz (225 g) pasta (penne or fusilli works well) - 1 lb (450 g) ground beef - 1 medium onion, finely chopped - 3 cloves garlic, minced - 1 cup (240 ml) heavy cream - 1 cup (100 g) shredded mozzarella cheese - 1/2 cup (50 g) grated Parmesan cheese - 1 tablespoon tomato paste - 1 teaspoon Italian seasoning - Salt and pepper to taste - Fresh parsley, chopped for garnish Gather these items before you start cooking. They make this creamy ground beef pasta a hit! The pasta type is key. I love using penne or fusilli for their shape. It holds the sauce well. Next, the ground beef adds richness. Choose lean beef for less fat. Chopping the onion finely helps it cook faster. Minced garlic brings in great flavor. Heavy cream makes the dish creamy and rich. The cheeses are crucial for that cheesy goodness. Mozzarella melts beautifully, while Parmesan adds a salty punch. Tomato paste gives color and depth to the sauce. Italian seasoning ties everything together with herbs. Don’t forget salt and pepper for taste. Finally, fresh parsley adds a pop of color. It makes the dish look and taste fresh. For the complete recipe, refer to the Full Recipe section. Happy cooking! First, fill a large pot with water. Add salt and bring it to a boil. Once boiling, add your pasta. Cook it until it's al dente, which means it should still have a little bite to it. This usually takes about 8 to 10 minutes. When done, drain the pasta in a colander. Be sure to save about 1/2 cup of that starchy pasta water. You’ll use it later to help your sauce. Next, grab a large skillet and set it on medium heat. Add the ground beef to the skillet. Let it cook for about 5 to 7 minutes. Use a spatula to break the beef into smaller pieces. This helps it cook evenly. Keep an eye on it to make sure it browns nicely. You want it to be fully cooked before moving on. Now, it’s time to add some flavor. Toss in the chopped onion to the skillet with the beef. Cook for about 3 to 4 minutes until the onion turns soft and clear. After that, add the minced garlic. Cook that for one more minute. You’ll love the smell! Then, stir in the heavy cream and the tomato paste. Mix it well and let it simmer for about 2 to 3 minutes. Next, it's cheese time! Gradually add the shredded mozzarella and grated Parmesan cheese. Stir until both cheeses melt into a creamy sauce. If your sauce looks too thick, add some of the reserved pasta water. Do this a little at a time until you reach the creaminess you want. Finally, add the cooked pasta to the skillet. Toss everything together so the pasta gets coated in that rich, creamy beef sauce. Sprinkle in the Italian seasoning, salt, and pepper to taste. Give it one last mix. Let it heat for just a minute. Now, you’re ready to plate up your creamy ground beef pasta. To avoid overcooked pasta, follow these tips: - Boil in salted water for flavor. - Use a timer and check a minute early. - Drain when pasta is al dente, firm to bite. For a creamy sauce consistency, remember these steps: - Use heavy cream; it creates a rich texture. - Gradually add cheese for smoothness. - If too thick, slowly mix in reserved pasta water. Want to boost flavor? Consider these herbs and spices: - Fresh basil or oregano adds freshness. - A pinch of red pepper flakes gives heat. - A sprinkle of garlic powder enhances taste. Different types of cheese can change the flavor: - Try cheddar for a sharp twist. - Use cream cheese for extra creaminess. - Feta cheese offers a tangy contrast. For ideal side dishes with creamy ground beef pasta, consider: - Garlic bread for a crunchy contrast. - Steamed broccoli for a fresh touch. - A simple green salad for balance. Garnishing ideas for a visually appealing plate: - Fresh parsley adds a pop of color. - Grated cheese on top looks inviting. - A drizzle of olive oil enhances shine. This recipe is not just about taste; it's about presentation too. For the full recipe, check out the detailed instructions! {{image_2}} You can use many types of pasta for this dish. Penne and fusilli are my favorites. They hold sauce well. However, you can try spaghetti, linguine, or farfalle. If gluten-free pasta fits your needs, options are plenty. Look for rice or corn-based pasta. They work great and taste good. If you want a lighter meal, swap ground beef for turkey or chicken. Both options cook well and taste great. For a vegetarian dish, use plant-based ground meat. Brands like Beyond Meat or Impossible Burger work well. They add protein and stay creamy. This creamy sauce is the star, but you can add veggies too. Spinach, mushrooms, or bell peppers mix in nicely. They bring color and flavor. Also, feel free to try different sauces. Alfredo sauce gives a rich taste and works well with the same ingredients. Experiment and find your favorite. For the full recipe, check the provided details. To store creamy ground beef pasta, use an airtight container. Let your pasta cool at room temperature first. This helps keep it fresh. You can keep it in the fridge for up to three days. Make sure to label the container with the date. This way, you know when to use it. Reheat creamy ground beef pasta in a skillet over low heat. Stir often to keep it from sticking. You can also use the microwave. If using the microwave, cover the dish with a damp paper towel. This helps keep moisture in. Add a splash of heavy cream or pasta water to keep it creamy. This way, it won't dry out. To freeze creamy ground beef pasta, let it cool completely. Use a freezer-safe container or a zip-top bag. Try to remove as much air as possible to prevent freezer burn. You can freeze it for up to three months. When ready to eat, thaw it overnight in the fridge. Reheat it gently, adding a little cream or water as needed. You can use several options instead of heavy cream. Milk with butter works well. Mix 1 cup of milk with 2 tablespoons of melted butter. This gives a similar richness. You can also use half-and-half for a lighter taste. Coconut cream adds a unique flavor for a dairy-free option. Keep in mind these swaps may change the sauce's final taste and texture. If you want a low-carb dish, try using zucchini noodles or spaghetti squash. Both options add great texture and flavor. You can also find low-carb pasta made from almond flour or konjac root. These alternatives help keep the meal satisfying without the extra carbs. Yes, you can prepare creamy ground beef pasta in advance. Cook the pasta and sauce separately. Store them in airtight containers in the fridge. When you are ready to serve, combine and heat them together in a skillet. Add a splash of milk or broth to keep the sauce creamy when reheating. In this blog post, we covered how to make creamy ground beef pasta. We reviewed key ingredients, cooking steps, and tips to make it perfect. We also explored variations and storage options for leftovers. To sum up, this dish is simple, delicious, and can adapt to your tastes. Whether you stick to the classic recipe or mix it up, you'll enjoy every bite. Happy cooking!

Creamy Ground Beef Pasta Savory Family Dinner Delight

Craving a quick yet delicious family meal? This Creamy Ground Beef Pasta is your answer! With just a few basic

Older posts
Newer posts
← Previous Page1 … Page42 Page43 Page44 … Page73 Next →

dsad

© 2025 So Yum Recipes • Built with GeneratePress

Our Policies

  • Copyright Policy
  • Cookie Policy
  • GDPR Policy
  • Privacy Policy
  • Disclaimer
  • Terms Of Use

More Information

  • Home
  • About
  • Contact
  • Appetizers
  • Dessert
  • Dinner
  • Drinks
©2025, So Yum Recipes About Back To Top