Skip to content
DisclaimerTerms Of UseGDPR PolicyCookie Policy

So Yum Recipes

  • Home
  • Drinks
  • Appetizers
  • Dinner
  • Dessert
  • About
  • Contact
  • Privacy Policy
DisclaimerTerms Of UseGDPR PolicyCookie Policy

Chloe

- 2 pounds chicken wings - 1 tablespoon olive oil - 1 teaspoon baking powder - 1 teaspoon garlic powder - 1 teaspoon onion powder - 1 teaspoon smoked paprika - 1/2 teaspoon cayenne pepper - 1 teaspoon salt - 1/2 teaspoon black pepper - Fresh parsley for garnish For this recipe, I focus on using fresh chicken wings. They hold flavor well and get crispy. Next, I add olive oil. It helps the wings brown and crisp up nicely. The seasoning mix is where the magic happens. Baking powder is key. It draws moisture out and makes the skin crisp. Garlic and onion powder add depth. Smoked paprika gives a hint of smokiness. Adjust the cayenne for spice. The salt and pepper enhance all the flavors. If you want to make it pretty, add fresh parsley on top. It adds a pop of color and freshness. For the full recipe, check out the earlier section. First, preheat your oven to 425°F (220°C). This high heat helps the wings get crispy. Next, prepare your baking sheet. Line it with aluminum foil for easy cleanup. Place a wire rack on top of the baking sheet. This rack lets hot air flow around the wings, making them crispier. In a large bowl, combine 2 pounds of chicken wings with the seasonings. Add 1 teaspoon each of baking powder, garlic powder, onion powder, and smoked paprika. For some heat, include 1/2 teaspoon of cayenne pepper. Season with 1 teaspoon of salt and 1/2 teaspoon of black pepper. Toss everything well so the wings are fully coated. Next, drizzle 1 tablespoon of olive oil over the seasoned wings. Toss again to ensure each wing is coated in oil and spices. This step adds flavor and helps with crispiness. Arrange the wings in a single layer on the wire rack. Make sure to leave space between them. This helps air circulate and keeps them crispy. Now, bake the wings in your preheated oven for 40 to 45 minutes. Flip them halfway through cooking for even crispiness. They should turn golden brown and look delicious. When they are done, take the wings out and let them rest for a few minutes. This helps the juices settle. If you like, sprinkle fresh parsley on top for a nice touch. Enjoy your crispy baked chicken wings! For a complete guide, check out the Full Recipe. To get the best crispiness, use baking powder. It helps to dry out the skin. When you dry the skin, it cooks better. This browns and crisps the wings. A wire rack is key too. It lets air flow around the wings. This helps them become crispy all over. If you bake them directly on the pan, they may get soggy. Marinate your wings for at least 30 minutes. This helps the flavors soak in. You can also marinate them overnight for a richer taste. For marinades, try soy sauce and honey for sweetness. You can also use hot sauce for a spicy kick. Lemon juice adds a nice zing too. Larger wings need more time to cook. Smaller wings will cook faster. For bigger wings, aim for 50 minutes. For smaller ones, check around 35 minutes. Always test for doneness. The wings should reach 165°F (74°C) to be safe. If they look golden brown and crispy, they are likely ready. {{image_2}} You can change the flavors of your crispy baked chicken wings easily. Here are two popular options: - Spicy Korean-style wings: Add gochujang or Korean chili paste to your seasoning mix. This gives the wings a sweet and spicy kick. Toss the wings in a mix of gochujang, honey, and soy sauce before baking. The result is a mouthwatering treat. - Sweet chili-glazed wings: For a sweet twist, mix sweet chili sauce with a bit of soy sauce. Brush this glaze on the wings during the last 10 minutes of baking. This method gives you a sticky and tasty wing that everyone will love. If you want to switch things up, try these cooking methods: - Air fryer version: Using an air fryer is fast and easy. Preheat the air fryer to 400°F (200°C). Place the seasoned wings in a single layer. Cook for about 25-30 minutes, shaking the basket halfway through. You'll get crispy wings without the oven. - Grilling tips for smoky flavor: For a smoky taste, grill the wings. Preheat your grill to medium heat. Place the wings on the grill and cook for 20-25 minutes, turning often. This method adds a nice char and flavor that baked wings can't match. Enjoy your crispy baked wings with these ideas: - Best dips to pair with baked wings: Classic choices include ranch, blue cheese, or honey mustard. You can also try a spicy sriracha mayo for something new. Each dip enhances the flavor of the wings. - Side dishes for a complete meal: Pair your wings with celery sticks, carrot sticks, or a fresh salad. You can also serve them with fries or potato wedges for a fun meal. Each side complements the crispy wings well. For more detailed steps and a complete guide, check the Full Recipe. To store your baked chicken wings, let them cool first. Place them in an airtight container. This helps keep them fresh. You can also wrap them tightly in plastic wrap or aluminum foil. In the fridge, they stay good for about three to four days. When you're ready to eat again, I recommend using the oven. Preheat it to 350°F (175°C). Place the wings on a baking sheet lined with foil. Bake for about 10-15 minutes. This method keeps them crispy. If you use a microwave, they may get soggy. If you must use a microwave, place a paper towel over the wings to help absorb moisture. To freeze cooked wings, let them cool completely. Place them in a freezer-safe bag or container. Make sure to remove as much air as possible. They can last up to three months in the freezer. To thaw, move them to the fridge overnight. Reheat them in the oven using the same method mentioned. This keeps them crispy and tasty. For the full recipe and more details, check the [Full Recipe]. To make your wings extra crispy, focus on air circulation and baking techniques. Here are key tips: - Use baking powder: It helps draw moisture from the skin, creating crispiness. - Choose a wire rack: Place your wings on a wire rack over a baking sheet. This allows hot air to circulate around the wings. - Space them out: Arrange the wings in a single layer. This prevents them from steaming and promotes crispness. - Flip halfway: Turn the wings over halfway through baking for even crispiness. For extra crunch, you can bake them a bit longer. Just keep an eye on them to avoid burning. Yes, you can use frozen chicken wings! Here’s how to cook them from frozen: - Increase baking time: Add about 10-15 minutes to the cooking time. This ensures they cook through. - No thawing needed: You can bake them straight from the freezer. Just make sure to season them well. - Check doneness: Use a meat thermometer to ensure they reach 165°F (74°C) before serving. Cooking from frozen is quick and easy, making it a great option for busy days. Dipping sauces enhance the flavor of your wings. Here are some popular choices: - Buffalo sauce: A classic for a spicy kick. - Ranch dressing: Creamy and cool, great for balancing heat. - Blue cheese dressing: Rich and tangy, perfect for bold flavors. - Honey mustard: Sweet with a bit of tang, a nice contrast to savory wings. You can also make your own sauces! Try mixing equal parts mayonnaise and sour cream for a simple dip. Enjoy your wings with your favorite sauces and make every bite count! For the full recipe, check [Full Recipe]. Baked chicken wings are easy and fun to make. We covered the key ingredients and the perfect steps for crispiness. Tips for marinating and adjusting cooking times can help elevate your dish. You can also try variations for different flavors, cooking methods, and serving ideas. Lastly, knowing how to store and reheat wings keeps them tasty. With these insights, you can enjoy wings any night with confidence. Now, get ready to impress your friends and family with your delicious homemade wings!

Crispy Baked Chicken Wings Savory and Simple Recipe

If you’re craving a tasty snack that’s both easy to make and loved by everyone, look no further! These crispy

To make honey garlic pork chops, you need the following items: - 4 boneless pork chops - 1/4 cup honey - 3 cloves garlic, minced - 2 tablespoons soy sauce (or coconut aminos for a gluten-free option) - 1 tablespoon apple cider vinegar - 1 teaspoon fresh ginger, grated - Salt and pepper to taste - 2 tablespoons olive oil - Fresh parsley, chopped (for garnish) When measuring ingredients, precision matters. Use a liquid measuring cup for honey. It helps to pour it easily. For garlic, fresh is best, but you can use garlic powder. If you prefer a gluten-free option, swap soy sauce with coconut aminos. This keeps the flavor while meeting dietary needs. Using quality ingredients makes a big difference. Fresh pork chops ensure tenderness and rich taste. Honey adds a sweet touch, while fresh garlic brings a nice punch. When the flavors meld, they create a wonderful balance. Good ingredients lead to a meal that shines. For a deeper flavor, always choose fresh herbs and spices. They elevate your dish and make it special. To start, gather your ingredients. You need honey, minced garlic, soy sauce, apple cider vinegar, grated ginger, salt, and pepper. In a small bowl, whisk together the honey, garlic, soy sauce, vinegar, and ginger. This mix creates a sweet and tangy marinade that makes the pork chops shine. Next, season the pork chops with salt and pepper. This step adds flavor right to the meat. Place the seasoned chops in a resealable plastic bag or a shallow dish. Pour the marinade over the chops. Make sure they are well coated. Seal the bag or cover the dish and place it in the fridge. Let the chops marinate for at least 30 minutes. If you have more time, you can marinate them for up to 4 hours for even better flavor. When you're ready to cook, heat olive oil in a large skillet over medium-high heat. Remove the pork chops from the marinade, but keep the marinade for later. Add the chops to the hot skillet. Cook for 4-5 minutes on each side. Use a meat thermometer to check the internal temperature; it should reach 145°F (63°C). After cooking, pour the reserved marinade into the skillet. Let it simmer for 2-3 minutes to thicken. Finally, take the pork chops out and let them rest for a few minutes before serving. Drizzle the thickened sauce over the chops and garnish with fresh parsley. Enjoy your meal! For detailed instructions, check the Full Recipe. To cook pork chops well, start with a good sear. Heat your skillet before adding the pork. This helps lock in juices. Cook each side for about 4-5 minutes. Check that the internal temperature reaches 145°F (63°C). This ensures the pork is safe and juicy. Let them rest for a few minutes after cooking. This allows the juices to settle. The marinade is key for flavor. Use fresh garlic for the best taste. Honey adds sweetness, while soy sauce gives saltiness. Apple cider vinegar adds a nice tang. If you want more kick, try adding chili flakes. Fresh ginger can brighten the dish. Don’t be afraid to experiment with spices or herbs. They can change the whole meal! A large skillet works best for this recipe. Use non-stick or cast iron for easy cooking. A heavy skillet holds heat well. This helps with even cooking. If you prefer, you can grill the chops too. Just make sure to watch them closely. The goal is a nice brown crust without burning. For the best results, use a meat thermometer. This takes the guesswork out of cooking. Explore my Full Recipe for the detailed steps! {{image_2}} You can swap pork chops for other meats. Chicken breasts work well and absorb flavors nicely. You can also try this recipe with firm tofu for a tasty vegetarian option. Just cut the tofu into thick slices to get a good sear. If you crave heat, add red pepper flakes to the marinade. A teaspoon or two will give a nice kick. For a sweeter taste, increase the honey to half a cup or add a splash of orange juice. This will balance the savory garlic flavor beautifully. Try serving your pork chops with a side of apple sauce for a classic touch. A tangy mustard sauce can also enhance the dish’s flavor. If you like Asian flavors, mix soy sauce with sesame oil and drizzle it over the top for a fun twist. Explore the Full Recipe to discover how these variations can transform your meal! After you enjoy your Honey Garlic Pork Chops, store any leftovers in an airtight container. Place the pork chops in the fridge within two hours of cooking. They will stay fresh for up to three days. Make sure to keep the marinade separate to maintain the flavor. To reheat, the best method is using a skillet. Add a splash of water or broth to keep them moist. Heat on medium-low until warmed through, about 5-7 minutes. You can also use the microwave. Heat them in short bursts of 30 seconds, checking often to avoid drying them out. If you want to keep them longer, freezing is a great option. Wrap each pork chop tightly in plastic wrap, then place them in a freezer bag. They will last up to three months in the freezer. When ready to eat, thaw them in the fridge overnight before reheating. For more details, check the Full Recipe. Yes, you can use bone-in pork chops. Bone-in chops add more flavor and moisture. Just make sure they are about the same thickness as boneless chops. This helps them cook evenly. You may need to adjust the cooking time slightly. The goal is to reach an internal temperature of 145°F (63°C). Honey Garlic Pork Chops pair well with many sides. Here are a few ideas: - Steamed broccoli - Mashed potatoes - Rice or quinoa - Roasted vegetables - A fresh green salad These sides balance the sweet and savory flavors of the pork. You should marinate the pork chops for at least 30 minutes. For the best flavor, you can marinate them for up to 4 hours. If you marinate longer, the flavors soak in better. Just avoid going beyond 24 hours, as the meat may become too soft. Yes, you can make this recipe gluten-free. Use coconut aminos instead of soy sauce. They taste great and add a nice flavor. Always check the labels to ensure other ingredients are gluten-free. This way, you can enjoy the dish without worry. For the full recipe, check out the detailed instructions. This guide covers everything you need for perfect Honey Garlic Pork Chops. We explored key ingredients, cooking steps, and storage tips. Each part plays a big role in taste and texture. If you use quality ingredients, follow the marinade steps, and try the suggested tips, your meal will shine. Don't hesitate to experiment with flavors and proteins. Enjoy your cooking journey with these delicious chops!

Honey Garlic Pork Chops Simple and Flavorful Meal

Looking for a tasty meal that’s easy to make? Honey Garlic Pork Chops are the answer! This simple recipe is

To make this tasty treat, gather these main ingredients: - 2 cups heavy cream - 1 cup whole milk - 3/4 cup granulated sugar - 2 teaspoons vanilla extract - 1/2 teaspoon salt - 1/2 cup mini chocolate chips - 1 cup cookie dough bites (homemade or store-bought) These ingredients create a rich and creamy base. The heavy cream adds the smooth texture that makes this ice cream so delightful. Whole milk balances the creaminess while sugar sweetens the mix. Vanilla extract brings warmth, and a pinch of salt enhances all the flavors. You can add your twist to this ice cream. Consider these optional ingredients: - Crushed nuts for crunch - Swirls of caramel or fudge - Different types of chocolate chips - Flavor extracts like almond or mint Using these additions, you can create a unique flavor profile. If you love nuts, add chopped walnuts or pecans. For a fun surprise, try swirls of caramel. These options let you experiment and find your perfect bite. Here’s a quick look at the nutritional breakdown for one serving of this ice cream: - Calories: 350 - Total Fat: 25g - Saturated Fat: 15g - Carbohydrates: 30g - Sugar: 20g - Protein: 4g This ice cream is a treat, so enjoy it in moderation. It has a good amount of sugar and fat, making it rich and decadent. Check the labels if you use store-bought cookie dough for extra info. You can find the full recipe in the article to guide you through making this delicious ice cream. To start, grab a large mixing bowl. Add 2 cups of heavy cream, 1 cup of whole milk, and 3/4 cup of granulated sugar. Use a whisk to mix until the sugar dissolves. Then, add 2 teaspoons of vanilla extract and 1/2 teaspoon of salt. Mix again until everything is well combined. Next, pour the mixture into your ice cream maker. Follow the manufacturer's instructions for churning. This usually takes around 20 to 25 minutes. Keep an eye on it until you see a soft-serve consistency. During the last 5 minutes of churning, add in 1/2 cup of mini chocolate chips and 1 cup of cookie dough bites. Gently fold them in to mix evenly. After churning, transfer your ice cream to a lidded container. Smooth the top with a spatula. Freeze it for at least 4 hours or until firm. When it's time to serve, let it sit out for a few minutes. This helps soften it for easier scooping. Enjoy this delightful treat! For the full recipe, check the section above! When making chocolate chip cookie dough ice cream, avoid over-churning. If you churn too long, the ice cream can become icy. Watch the time closely, especially the last few minutes. Another mistake is adding too much cookie dough at once. If you clump it together, it can freeze too hard. Instead, break it into smaller pieces. To boost flavor, use high-quality vanilla extract. This small change makes a big difference. You can also try different chocolate chips. Experiment with dark, milk, or even white chocolate. For added texture, include chopped nuts or sprinkles. This gives each bite a fun crunch. Serve your ice cream in waffle cones or clear bowls. This adds a touch of flair. Top it with extra cookie dough bites and a drizzle of chocolate sauce. Make sure to scoop the ice cream when it’s slightly softened. This helps you get perfect, round scoops. Enjoy your delicious treat! For the full recipe, check out the detailed instructions. {{image_2}} You can make this ice cream dairy-free and vegan easily. Swap heavy cream and milk with coconut cream and almond milk. Use maple syrup instead of granulated sugar for sweetness. Look for vegan cookie dough bites or make your own with plant-based butter. This way, you still enjoy the treat without dairy. Get creative with flavors! Add peanut butter or mint extract for a twist. You can also mix in crushed cookies or nuts for crunch. Try different chocolate chips, like dark or white chocolate. Each change adds a new layer of fun to your ice cream. Ice cream sandwiches are a great way to enjoy your treat. Use two cookies and fill them with your chocolate chip cookie dough ice cream. You can make your own cookies or buy them. For a fun twist, roll the edges in sprinkles or mini chocolate chips. This makes a perfect summer snack! For the complete recipe, check out the Full Recipe section. To keep your chocolate chip cookie dough ice cream fresh, store it in an airtight container. This prevents freezer burn and keeps the ice cream creamy. Make sure to press a piece of plastic wrap against the surface before sealing. This helps keep air out and moisture in. Your ice cream can stay good in the freezer for about two weeks. However, for the best flavor and texture, try to eat it within a week. When you’re ready to enjoy, let the container sit at room temperature for a few minutes. This softens the ice cream, making it easier to scoop. Look for ice crystals on the surface. These mean the ice cream may have freezer burn. If it smells off or has a strange color, it’s best to toss it. Always trust your senses. If something seems wrong, it’s safer to not eat it. Yes, you can use store-bought cookie dough. It saves time and effort. Just make sure you choose high-quality dough. You want the flavor to shine through in your ice cream. I like using mini cookie dough bites. They mix well and add a nice texture. Homemade ice cream can last about two weeks in the freezer. After that, it may lose some taste and texture. To keep it fresh, store it in an airtight container. This helps prevent freezer burn and keeps it creamy. I recommend a compressor ice cream maker for best results. These machines chill the mixture fast. This helps make a smoother ice cream. If you want a more affordable option, a bowl-style maker works too. Just remember to freeze the bowl ahead of time. Yes, you can make this ice cream without a machine. Pour the mixture into a large container and freeze it. Every 30 minutes, stir it well for the first few hours. This helps break up ice crystals and keeps the ice cream creamy. Once it’s firm, scoop it out and enjoy! For the full recipe, check out the earlier section. You now know how to make chocolate chip cookie dough ice cream. We covered key ingredients, preparation steps, and tips to avoid common mistakes. You also learned ways to customize flavors and store your ice cream properly. Remember, making ice cream at home can be fun and tasty. Use this guide to enjoy a sweet treat that suits your taste. Happy making!

Chocolate Chip Cookie Dough Ice Cream Simple Treat

Do you crave a sweet and creamy treat that brings back childhood memories? Look no further than Chocolate Chip Cookie

- 1 large head of cauliflower, cut into florets - 4 tablespoons olive oil - 4 cloves garlic, minced - 1 teaspoon dried oregano - 1 teaspoon smoked paprika - Salt and pepper to taste - ½ cup grated Parmesan cheese - 2 tablespoons fresh parsley, chopped (for garnish) - Optional: ¼ teaspoon red pepper flakes The main ingredients for this recipe are simple yet effective. The large head of cauliflower gives a great base. You want to cut it into florets so that they roast evenly. The olive oil adds richness and helps achieve a golden color. Garlic does its magic by infusing flavor into every bite. Seasonings are key to making this dish shine. Dried oregano adds a touch of earthiness. Smoked paprika brings warmth and depth. Salt and pepper are essential for balance. The Parmesan cheese creates a creamy layer and a delightful crust. Fresh parsley adds color and freshness when you serve. For those who like some heat, the red pepper flakes are optional. A little kick can elevate the dish. You can find the full recipe details to make this tasty Garlic Parmesan Cauliflower. 1. Preheat your oven to 425°F (220°C). This step is key for crispiness. 2. Line a baking sheet with parchment paper. This makes cleanup easy. 3. In a large bowl, add the cauliflower florets. 4. Pour in the olive oil and add the minced garlic. 5. Sprinkle in oregano, smoked paprika, salt, and pepper. 6. If you like heat, toss in red pepper flakes. 7. Mix everything well until the cauliflower is coated. 1. Spread the cauliflower on the baking sheet in a single layer. 2. Place the sheet in the oven and roast for 20-25 minutes. 3. Make sure to stir halfway through cooking. This helps even roasting. 1. Remove the baking sheet from the oven. 2. Immediately sprinkle the grated Parmesan cheese on top of the hot cauliflower. 3. Put it back in the oven for 5 more minutes. 4. The cheese should melt and bubble nicely. 5. Finally, garnish with fresh chopped parsley before serving. Try the full recipe for a tasty dish that everyone will love! To make your Garlic Parmesan Cauliflower even better, try adding spices. Here are some ideas: - Italian Seasoning: Adds a nice herby flavor. - Cumin: Gives a warm, earthy taste. - Lemon Zest: Brightens the dish with freshness. For oils, olive oil is best for roasting. It adds flavor and helps crisp up the cauliflower. You can also use avocado oil. It has a high smoke point, which is great for roasting. To get the perfect roast, you need high heat. Preheat your oven to 425°F (220°C). Spread the cauliflower in a single layer. This allows it to cook evenly. Stir halfway through to ensure all sides get crispy. For even seasoning, mix the spices well before adding them to the cauliflower. This helps every piece get coated. Toss the florets gently to avoid breaking them. Garlic Parmesan Cauliflower pairs well with many dishes. Serve it alongside grilled chicken or fish for a complete meal. You can also enjoy it on its own as a tasty snack. For plating, use a white bowl to show off the golden color. Drizzle a little olive oil on top for shine. Finish with fresh parsley for a pop of color. Your dish will look as good as it tastes! For the full recipe, check out the complete guide to Garlic Parmesan Cauliflower. {{image_2}} You can swap out Parmesan cheese for different types of cheese. Try using Pecorino Romano for a sharper taste. Nutritional yeast is a great vegan option. It adds a cheesy flavor without dairy. For cauliflower, you can use other varieties like Romanesco or broccoli. Both bring a unique look and taste. Cauliflower rice also works if you want a different texture. To add some heat, mix in red pepper flakes. It gives the dish a spicy kick that pairs well with garlic. You can also experiment with other cheeses. Feta or cheddar can change the flavor profile. Adding herbs like thyme or rosemary can also enhance the taste. These herbs work well with garlic and cheese. To make this dish gluten-free, check all your ingredients. The recipe is already gluten-free as it stands. For a vegan version, use olive oil, garlic, and nutritional yeast. Skip the Parmesan cheese and replace it with a vegan cheese. Many brands now offer great cheese substitutes. These small changes let you enjoy Garlic Parmesan Cauliflower while meeting your dietary needs. To keep Garlic Parmesan Cauliflower fresh, let it cool first. Then, place it in an airtight container. This helps prevent moisture loss. Store it in the fridge for up to three days. Using glass containers works well. They keep the flavors intact and are easy to clean. When reheating, aim to keep the texture crisp. The oven works best for this. Preheat it to 350°F (175°C). Spread the cauliflower on a baking sheet and heat for about 10 minutes. This helps regain its crunch. The microwave can also work if time is short. Heat it for 1-2 minutes. However, it may lose some crispness. Yes, you can freeze Garlic Parmesan Cauliflower! To freeze, let it cool completely. Place it in a freezer-safe bag or container. Remove as much air as possible to avoid freezer burn. It can last up to three months. When ready to eat, thaw it in the fridge overnight. Reheat it in the oven for the best results. What is the best way to cut cauliflower for roasting? I recommend cutting the cauliflower into even florets. This helps them roast evenly. Aim for pieces about 1 to 2 inches wide. If they are too small, they may burn. If they are too large, they will not cook through. How long does Garlic Parmesan Cauliflower last in the fridge? Garlic Parmesan Cauliflower lasts about 3 to 5 days in the fridge. Store it in an airtight container to keep it fresh. Reheat it well before serving to enjoy the flavors again. What are the health benefits of cauliflower? Cauliflower is low in calories but high in vitamins. It is rich in vitamin C, which helps boost your immune system. It also has fiber that aids digestion. Eating cauliflower may help with weight loss too. Is Garlic Parmesan Cauliflower suitable for keto diets? Yes, Garlic Parmesan Cauliflower is a great choice for keto diets. It is low in carbs and high in flavor. You can enjoy it as a side dish without worrying about carbs. How long does it take to roast cauliflower at different temperatures? At 425°F (220°C), roasting takes about 20 to 25 minutes. If you roast at 375°F (190°C), it may take 30 to 35 minutes. Always check for tenderness and a golden color. Can I prepare Garlic Parmesan Cauliflower in advance? Yes, you can prep it in advance. Cut the cauliflower and mix it with oil and seasonings. Store it in the fridge for up to 24 hours before roasting. This can save time on busy days. For the full recipe, check out the Garlic Parmesan Cauliflower Delight. This post covered how to make Garlic Parmesan Cauliflower from start to finish. We discussed main ingredients, step-by-step instructions, and storage tips. You can easily change flavors and make dietary swaps, too. Remember, this dish is not just tasty; it’s also healthy. Try it as a side or a snack. Enjoy crafting this simple, flavorful recipe, and feel free to experiment with your favorite ingredients!

Garlic Parmesan Cauliflower Flavorful and Easy Recipe

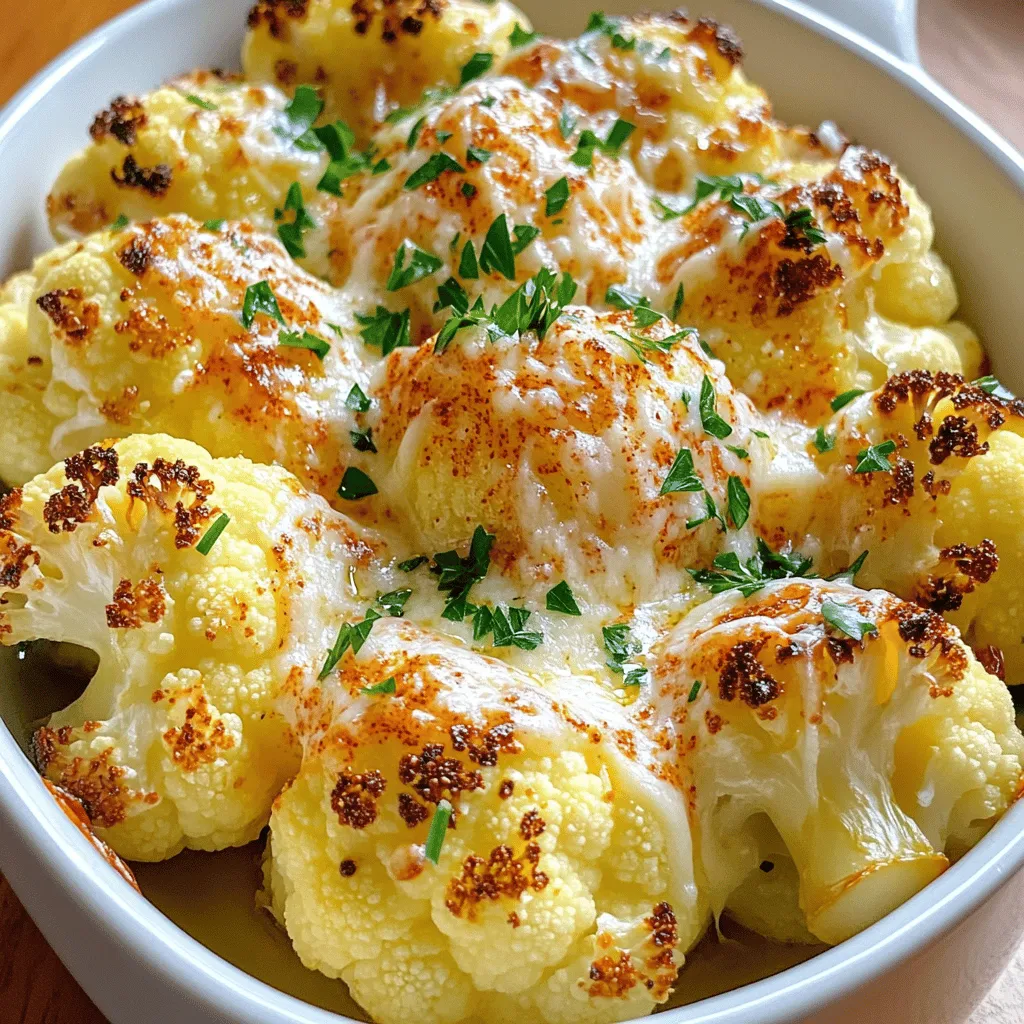
Are you ready to transform cauliflower into a tasty dish? My Garlic Parmesan Cauliflower recipe is both simple and full

- 1.5 lbs boneless, skinless chicken breasts, sliced into thin strips - 2 tablespoons olive oil - 1 tablespoon chili powder - 1 teaspoon cumin - 1 teaspoon smoked paprika - 1/2 teaspoon garlic powder - 1/2 teaspoon onion powder - Salt and pepper to taste - 1 red bell pepper, sliced - 1 yellow bell pepper, sliced - 1 red onion, sliced - 1 lime, juiced - Fresh cilantro, chopped (for garnish) - Tortillas (for serving) This recipe starts with the main ingredients. The chicken gives the dish its protein. I love using boneless, skinless chicken breasts, as they cook quickly. The sliced vegetables add color and flavor. Bell peppers and red onion work perfectly here. For seasonings, I use a mix of chili powder, cumin, and smoked paprika. These spices bring warmth and depth to the dish. - Avocado or guacamole - Sour cream or Greek yogurt - Shredded cheese - Fresh salsa - Spanish rice or black beans When serving, consider adding toppings. Avocado or guacamole adds creaminess. Sour cream or Greek yogurt can balance the spice. For a cheesy touch, sprinkle shredded cheese on top. Fresh salsa adds brightness. I also enjoy serving these fajitas with Spanish rice or black beans for a complete meal. You can find the full recipe mentioned above to make these delicious sheet pan chicken fajitas. Prepping the chicken Start by slicing 1.5 lbs of boneless, skinless chicken breasts into thin strips. This helps the chicken cook evenly and absorb all the flavors. Place the chicken in a large mixing bowl. Chopping vegetables Next, chop your veggies. Slice 1 red bell pepper, 1 yellow bell pepper, and 1 red onion. The colors add great appeal to your dish. Toss the chopped veggies into the bowl with the chicken. Preheating the oven Set your oven to 400°F (200°C). This high heat helps to roast the chicken and veggies quickly. Line a large sheet pan with parchment paper. This makes cleanup easy later. Baking the mixture In your bowl, add 2 tablespoons of olive oil, 1 tablespoon of chili powder, 1 teaspoon of cumin, 1 teaspoon of smoked paprika, 1/2 teaspoon of garlic powder, 1/2 teaspoon of onion powder, salt, and pepper. Toss everything well. Then, spread the mixture evenly on the prepared sheet pan. Bake for 20-25 minutes. Stir halfway to ensure even roasting. Check that the chicken is cooked through and the veggies are tender. How to serve with tortillas Once your fajitas are done, serve them warm with tortillas. You can use flour or corn tortillas based on your taste. Garnishing tips For a fresh touch, sprinkle chopped cilantro on top. A squeeze of lime juice adds a bright flavor. These simple garnishes make your dish pop! Enjoy your Sizzling Sheet Pan Chicken Fajitas with friends and family. For great flavor, marinate your chicken. Use a mix of olive oil, lime juice, and spices. Let it sit for at least 30 minutes. This helps the chicken soak in the taste. You can add a bit of honey for sweetness. If you want more heat, try adding cayenne pepper. Adjust spices based on your taste. Use less for mild flavor or more for a kick. To get juicy chicken, do not overcook it. Bake at 400°F for 20-25 minutes. Check the chicken's internal temperature; it should reach 165°F. Stir halfway through cooking for even results. If you want crispy veggies, spread them out well on the pan. This helps them roast nicely. Serve your fajitas with fresh tortillas. You can add dips like guacamole or salsa on the side. For a fun touch, use colorful plates to present your meal. Add a sprinkle of fresh cilantro for a pop of color. You can also serve with lime wedges for an extra zing. Want to impress? Make a fajita bar where everyone can build their own. For the full recipe, check out the link above. {{image_2}} You can change the protein in this dish. Try shrimp, beef, or tofu. Each option adds a unique taste. For a twist, use turkey breast. It cooks well and stays juicy. You can also mix up the veggies. Instead of bell peppers, use zucchini or mushrooms. Asparagus and corn also work nicely. They add color and crunch to your meal. Adjusting spice levels is simple. If you want more heat, add cayenne pepper or diced jalapeños. You can mix in fresh chili for a kick. On the other hand, keep it mild with less chili powder. Adding a touch of honey can balance out the heat. Try this if you want a sweeter flavor. A squeeze of lime juice can also enhance the taste. For gluten-free options, use corn tortillas instead of flour. They pair well with the fajitas. If you follow a keto diet, skip the tortillas altogether. Serve the chicken and veggies on a bed of lettuce. You can also use cauliflower rice as a base. This keeps the meal low in carbs while still being filling. After your fajitas, store leftovers right away. This keeps them fresh and tasty. Place the fajita mix in an airtight container. Glass containers work best, as they won't stain or hold odors. Make sure to cool the fajitas to room temperature before sealing. This prevents condensation, which can make the food soggy. To reheat, you have two main options: the oven or microwave. The oven gives better flavor but takes longer. Preheat it to 350°F (175°C). Place the fajitas on a baking sheet and heat for about 10-15 minutes. Stir them halfway to warm evenly. For the microwave, use a microwave-safe dish. Cover it with a lid or plastic wrap. Heat for 1-2 minutes. Stir and check if they are warm enough. If not, heat in 30-second intervals. Freezing fajitas is easy and saves time for later. To freeze, let the fajita mix cool completely. Then, divide it into portions. Use freezer bags or airtight containers. Make sure to remove as much air as possible to prevent freezer burn. To thaw, place the frozen fajitas in the fridge overnight. This gives you a simple meal for the next day. You can also defrost them in the microwave if you are short on time. Just be careful not to cook them while thawing. Enjoy your meal anytime with these simple storage tips! How to make Sheet Pan Chicken Fajitas ahead of time? To make these fajitas ahead of time, slice the chicken and veggies. Mix them with the spices and oil. Store everything in an airtight container in the fridge. You can prep this up to 24 hours before cooking. Just remember to bake them fresh when you are ready to eat. Can I use frozen chicken for the recipe? Yes, you can use frozen chicken. However, thaw it completely before cooking. This helps the chicken cook evenly. If you bake it from frozen, the cooking time will increase. What temperature should I bake fajitas at? Bake your sheet pan chicken fajitas at 400°F (200°C). This temperature helps the chicken and veggies cook nicely without burning. How do I know when the chicken is done? Check the chicken's internal temperature. It should reach 165°F (74°C). The chicken should also be no longer pink in the middle. Can I use different spices? Absolutely! Feel free to swap spices to match your taste. Try adding taco seasoning or cayenne pepper for extra kick. Are there low-calorie alternatives? Yes, you can use skinless chicken thighs instead of breasts. Swap in less oil or use cooking spray. You can also add more veggies for a healthy boost. This article covered essential steps for making delicious Sheet Pan Chicken Fajitas. You learned about main ingredients, prep and cooking methods, and serving tips. We also explored variations for different diets. Remember, experimenting with flavors and textures can make your meal even better. Use these tips to create a dish that suits your taste. Now, you’re ready to impress your friends and family with tasty fajitas. Enjoy your cooking journey!

Sheet Pan Chicken Fajitas Flavorful and Easy Meal

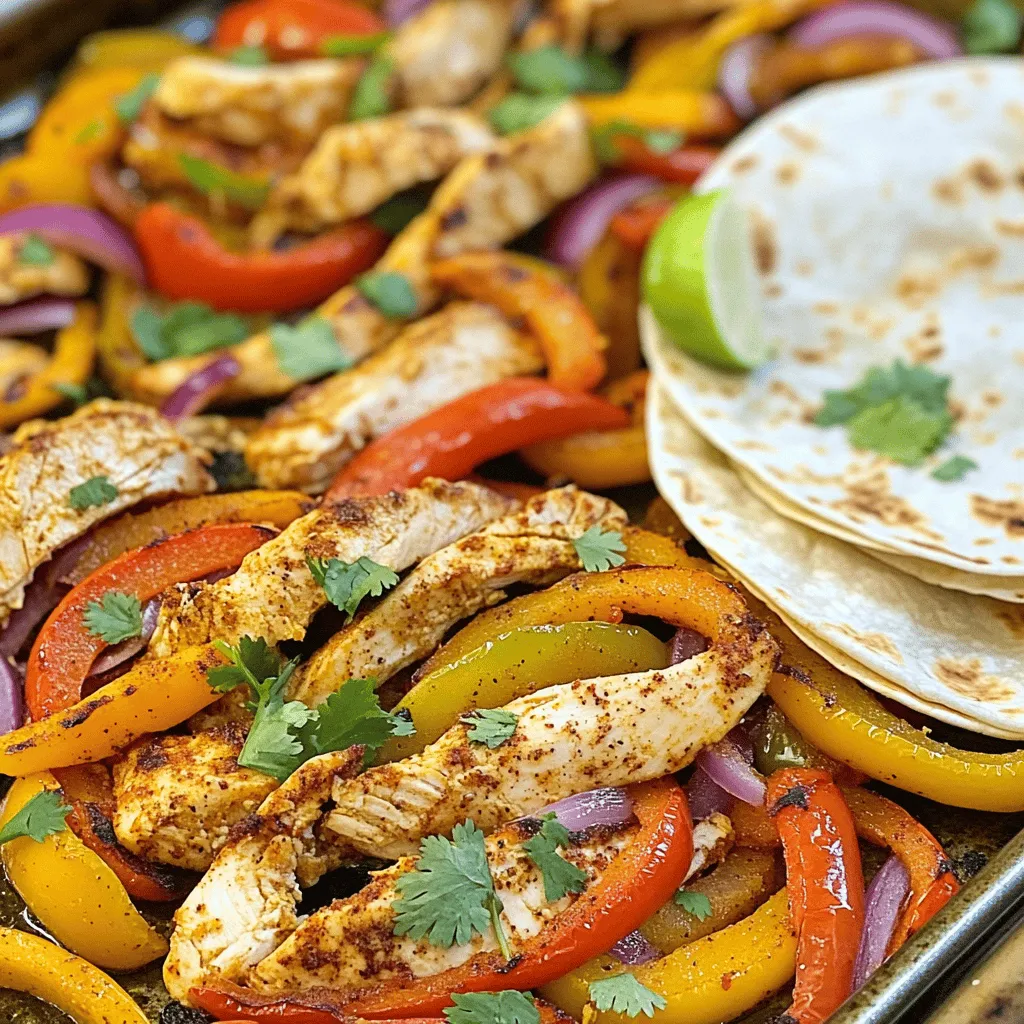
Looking for a quick, tasty dinner? Try my Sheet Pan Chicken Fajitas! This dish is simple to make, packed with

- 1 cup quinoa, rinsed - 2 cups vegetable broth - 1 medium onion, finely chopped - 2 cloves garlic, minced - 1 carrot, diced - 1 bell pepper, diced (any color) - 1 zucchini, diced - 1 teaspoon ground cumin - 1 teaspoon smoked paprika - 1/2 teaspoon turmeric - 1/4 teaspoon black pepper - 1/2 cup peas (fresh or frozen) - 2 tablespoons olive oil - 1/4 cup chopped fresh parsley or cilantro - Salt to taste - Optional: Lemon wedges for serving These ingredients make the pilaf both tasty and healthy. Quinoa is a great grain. It is packed with protein and fiber. The veggies add color and nutrients. The spices bring warmth and depth. You can find the full recipe on my website. Fresh herbs add a bright finish to the dish. Lemon wedges give a nice touch. They add a zing that pairs well with the flavors. This dish is easy to make. It is perfect for weeknight meals or special occasions. - Heat the olive oil in a large skillet over medium heat. - Sauté the onion until it is soft and light in color. - Add the minced garlic and cook until it smells great. - Add the diced carrot, bell pepper, and zucchini to the skillet. Cook until the vegetables are soft, about 5-7 minutes. - Incorporate ground cumin, smoked paprika, turmeric, and black pepper. Mix well and let it cook for about 2 minutes. - Mix in the rinsed quinoa and stir it with the veggies and spices. Pour in the vegetable broth and add salt to taste. Bring this to a boil. Then, lower the heat and cover to simmer for about 15 minutes. - When the quinoa is done, use a fork to fluff it. - Add in the peas and chopped parsley or cilantro. Let it sit, covered, for 5 more minutes to warm the peas. - Taste and adjust seasoning if needed. Serve the pilaf warm with optional lemon wedges on the side. For the complete recipe, check out the Full Recipe section. - Rinse quinoa for optimal fluffiness. This step removes bitter saponins. - Control salt levels with low-sodium broth. This keeps your dish healthy and tasty. - Try adding nuts or dried fruits for texture. Almonds or raisins work well. - Experiment with different herbs such as thyme or dill. Fresh herbs boost flavor. - Garnish with fresh herbs and serve with lemon wedges. This adds color and freshness. - Use a colorful bowl to enhance visual appeal. A bright bowl makes the dish pop. These small tips can make a big difference in taste and look. For the full recipe and steps, check the Full Recipe. {{image_2}} You can make your savory quinoa pilaf even better by adding protein. Chickpeas or beans work well. They not only boost protein but also add great texture. If you want a non-vegetarian option, grilled chicken or shrimp is perfect. These choices make your dish heartier and more filling. For a vegan dish, use vegetable broth instead of chicken broth. This keeps your pilaf plant-based while still being tasty. If you want more protein, substitute tofu for some of the vegetables. Tofu absorbs flavors well and adds a nice bite. One of my favorite things about this recipe is how flexible it is. You can swap in seasonal vegetables based on what you have. In the spring, try adding asparagus or peas. In the fall, butternut squash is a great choice. Adding greens like spinach or kale gives a nutritional boost and makes your dish vibrant. After enjoying your savory quinoa pilaf, store leftovers in an airtight container. Place it in the fridge. It stays fresh for about 3-5 days. This keeps it tasty and safe to eat. If you want to save some for later, freeze the pilaf in portions. Use freezer bags or containers for easy storage. When you're ready to eat, thaw it in the refrigerator. This method helps maintain its flavor and texture. To reheat, you can use the stovetop. Add a splash of broth to keep it moist. Heat it gently until warm. You can also use a microwave. Just heat until warmed through, stirring occasionally for even heat. Quinoa cooks quickly. It usually takes about 15 minutes. You can rinse it first to remove the bitter coating. This helps the quinoa taste better. Once the water boils, reduce the heat and cover it. Let it simmer gently until it is fluffy and holds its shape. Yes, you can make savory quinoa pilaf ahead of time. Cook it fully and let it cool. Then, store it in an airtight container in the fridge. It stays good for about 3 to 5 days. Before serving, simply reheat it on the stove or in the microwave. You can add a splash of broth to keep it moist. Savory quinoa pilaf pairs well with many dishes. Here are some great options: - Grilled chicken or fish - Roasted vegetables - A fresh salad - Stuffed peppers - A yogurt sauce or tzatziki These sides add more flavor and make a complete meal. You can easily change the flavors in quinoa pilaf. Some popular options include: - Adding nuts like almonds or walnuts for crunch - Mixing in dried fruits like raisins or cranberries for sweetness - Using different veggies like spinach or mushrooms - Trying spices like curry powder for a new twist Feel free to get creative with your favorite ingredients! Yes, you can use different types of broth. Vegetable broth is common, but chicken broth adds a richer flavor. You can also use low-sodium options to control the salt level. For a unique twist, try using coconut milk or mushroom broth. Each option will give your pilaf a special taste. For the full recipe, check out the entire guide to making savory quinoa pilaf. This blog post shared how to make a tasty savory quinoa pilaf. We covered the main ingredients, cooking steps, and different variations you can try. You now have tips for storing leftovers and reheating too. Remember, cooking is fun and you can change the recipe to fit your tastes. Enjoy making this dish and feel free to share your results. Explore new flavors and enjoy each bite!

Savory Quinoa Pilaf Flavorful Healthy Side Dish

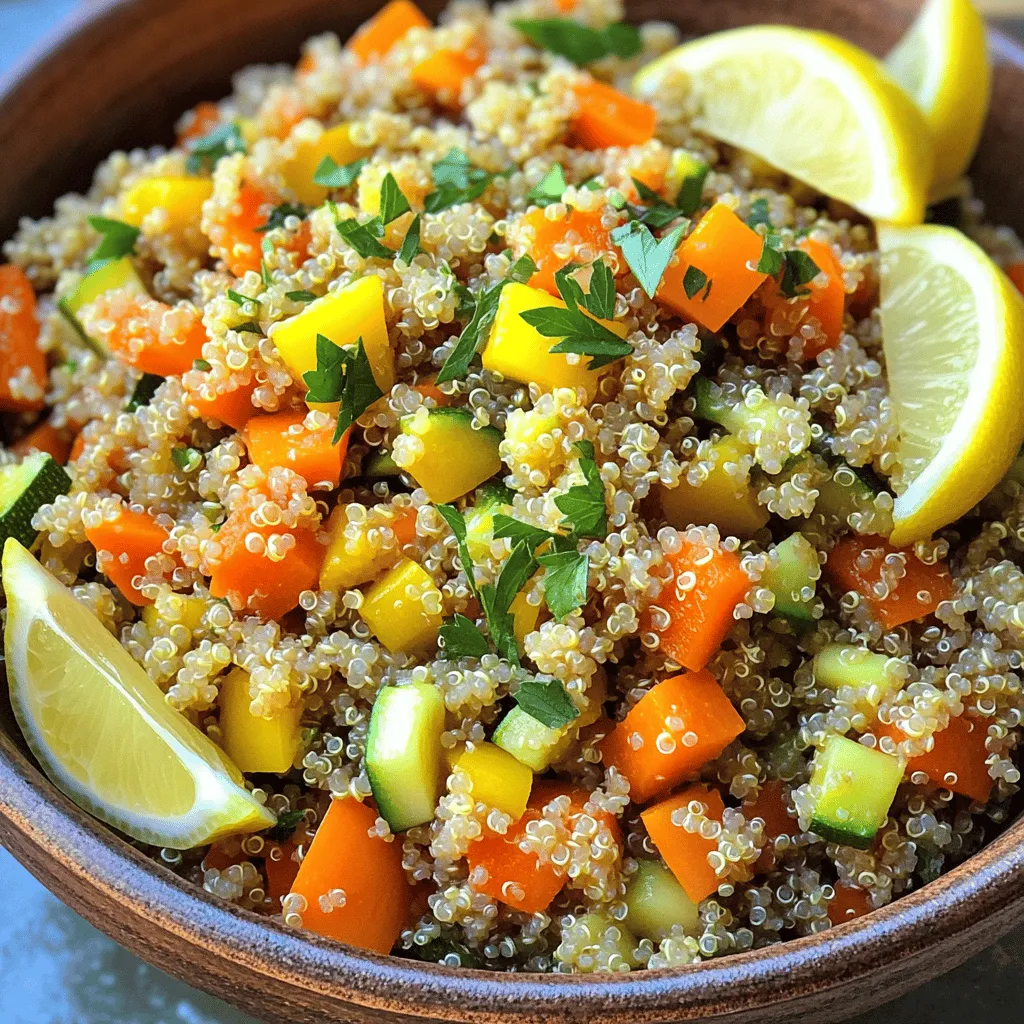
If you’re looking for a tasty and healthy side dish, you’re in the right place! This Savory Quinoa Pilaf is

- 4 salmon fillets (about 6 oz each) - 2 tablespoons olive oil - 1 lemon, zested and juiced - 2 tablespoons fresh dill, chopped (or 1 tablespoon dried dill) - 3 cloves garlic, minced - Salt and pepper to taste - Lemon slices for garnish - Optional: Cooked quinoa or wild rice for serving When making lemon dill salmon, fresh ingredients shine. I love using vibrant lemon zest and juice for bright flavor. Fresh dill gives the dish a lovely herbal note. If fresh dill is not available, dried dill works too. Garlic adds a nice aromatic punch that pairs well with the fish. Make sure to season your salmon with salt and pepper. This step amplifies the flavors and enhances the taste. I often garnish my finished dish with lemon slices. They not only look pretty but also add a fresh burst of flavor. For a hearty meal, serve the salmon over cooked quinoa or wild rice. These grains soak up the lemon dill sauce and make the dish even more satisfying. You can find the full recipe above for easy reference. Enjoy crafting this delightful dish! - Preheat your oven to 400°F (200°C). This step is key. A hot oven helps the salmon cook evenly. - Combine olive oil, lemon juice, lemon zest, dill, garlic, salt, and pepper. Mix these ingredients in a small bowl. The lemon juice adds brightness. The dill gives a nice herbal flavor. - Place fillets in a baking dish and coat with the marinade. Lay the salmon skin-side down. Use a brush or spoon to cover each fillet. Make sure every piece has a good amount of the mixture. Let it soak in for about 15-20 minutes. This waiting time helps the flavors blend. - Bake salmon and garnish with lemon slices. Put the dish in the oven. Bake for 12-15 minutes. The salmon is done when it flakes easily with a fork. After baking, add fresh lemon slices on top. This adds a nice touch and flavor. For a great meal, serve it with cooked quinoa or wild rice. You can drizzle any leftover marinade over the top for extra taste. For the full recipe, check the detailed instructions. Monitoring cooking time is key to a great dish. Salmon cooks fast, so watch it closely. Bake it for 12 to 15 minutes. You want it just right, not overcooked. If you leave it too long, the fish can dry out. Use a fork to check. If it flakes easily, it’s done. For a flavor boost, marinate the salmon. Let it sit for 15 to 20 minutes. This allows the lemon and dill to soak in. You can add herbs like parsley or thyme for extra taste. A touch of honey can balance the lemon’s tartness too. Experiment with spices like paprika for a warm kick. To ensure your salmon stays flaky and moist, start with fresh fish. Dry it gently with a paper towel before cooking. This helps the marinade stick. Avoid cooking at too high a temperature. Lower heat can help keep it tender. Adding a splash of broth or white wine in the dish can also help maintain moisture. For the full recipe, check out the Citrus Herb Delight: Lemon Dill Salmon. {{image_2}} Grilling lemon dill salmon gives it a smoky taste. To grill, first, preheat your grill to medium-high heat. Brush the salmon fillets with the lemon dill mixture just like you do for baking. Then, place the fillets directly on the grill grates. Grill each side for about 4-5 minutes. Check for doneness by seeing if the salmon flakes easily. Grilled salmon has a great char and flavor that is hard to beat. You can switch up the herbs in this recipe. Try using fresh parsley, chives, or tarragon instead of dill. Each option brings a unique flavor to the dish. For example, tarragon adds a sweet, anise-like taste. If you want a more earthy flavor, rosemary works well too. Do not be afraid to mix and match. This way, you can create your own favorite version of lemon dill salmon. Pair your lemon dill salmon with tasty side dishes. Steamed green vegetables like asparagus or broccoli add color and crunch. A light salad with mixed greens and a lemon vinaigrette can brighten the meal. Quinoa or wild rice offers a hearty base that complements the salmon's flavors. You can even serve it with roasted potatoes for a cozy vibe. These sides make your meal complete and satisfying. After you enjoy your lemon dill salmon, store leftovers properly. Place the cooked salmon in an airtight container. Make sure to cool it down first. This helps keep it fresh. Store the container in the fridge for up to three days. If you want to keep the salmon longer, freezing is a good option. When you are ready to eat your leftovers, reheat the salmon carefully. The best way is to use the oven. Preheat the oven to 350°F (175°C). Place the salmon on a baking sheet. Cover it with foil to keep it moist. Heat for about 10-15 minutes or until warm. You can also use the microwave. If you choose this method, heat it in short bursts. Check after every 30 seconds. This will help you avoid overcooking. If you want to freeze your lemon dill salmon, follow these steps. First, let the salmon cool completely. Wrap each piece tightly in plastic wrap. Then, place them in a freezer-safe bag or container. Make sure to remove as much air as possible. Label the bag with the date. You can freeze the salmon for up to three months. To thaw, move the salmon to the fridge a day before you plan to eat it. This will help keep the taste and texture nice. You can tell if salmon is done by looking for a few signs. First, the salmon should change from a bright pink to a light pink or opaque color. Second, use a fork to gently flake the salmon. If it flakes easily, it is cooked. Finally, the thickest part of the fillet should reach an internal temperature of 145°F (63°C). Be careful not to overcook it. Overcooked salmon can become dry and tough. Yes, you can use frozen salmon. Just make sure to thaw it first. The best way to thaw salmon is to place it in the fridge overnight. If you're in a hurry, you can seal it in a plastic bag and submerge it in cold water for about an hour. When using thawed salmon, you might need to adjust the baking time slightly. Check for doneness a few minutes earlier to avoid overcooking. If you can't find dill, don't worry! You can use other herbs. Fresh parsley or tarragon work well in place of dill. Basil also adds a nice flavor, but it changes the dish a bit. You can even try fresh chives for a mild onion taste. Experiment with these herbs to find your favorite flavor! You’ve learned how to make a tasty lemon dill salmon. We covered key steps like mixing the marinade, baking, and serving perfectly. Remember to watch the cooking time for the best results. You can swap ingredients or try grilling for a new twist. Storing leftovers correctly helps keep your meal fresh. Keep experimenting with flavors and side dishes. Enjoy your cooking journey!

Lemon Dill Salmon Flavorful and Simple Bake Recipe

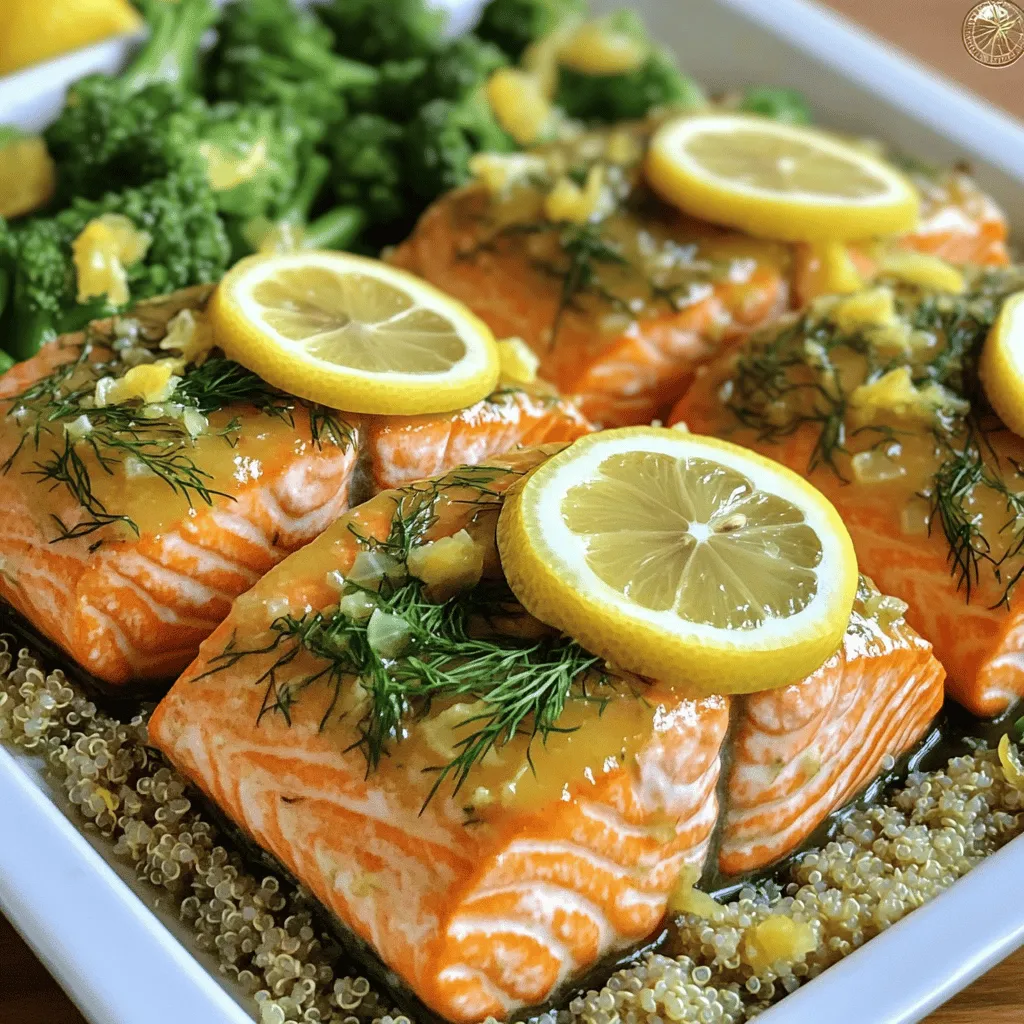
Looking for a delicious and easy dinner? Try my Lemon Dill Salmon recipe! This flavorful dish combines fresh ingredients for

- 1 ripe avocado - 1/4 cup fresh lime juice - 1/2 cup plain Greek yogurt - 1 tablespoon honey or agave syrup - 1 garlic clove, minced - 1/4 teaspoon ground cumin - Salt and pepper to taste - 2 tablespoons fresh cilantro, chopped (optional) The first key player in this dressing is the ripe avocado. It makes the dressing creamy and smooth. When selecting an avocado, look for one that yields slightly to gentle pressure. This means it is ripe and ready for your dish. Next, fresh lime juice adds zest and brightness. The tangy taste of lime balances the creaminess of the avocado. Fresh juice is best, as it has more flavor than bottled options. Greek yogurt is a fantastic addition, providing protein and a lovely tang. This thick yogurt helps make the dressing rich without adding too much fat. It’s a great swap for heavy creams. Honey or agave syrup adds a touch of sweetness. This flavor helps to balance the lime’s tartness. You can adjust the amount based on your taste. A minced garlic clove adds depth and savory notes. It gives the dressing a bit of a kick without being overpowering. Ground cumin brings warmth and earthiness to the mix. Just a little bit goes a long way in enhancing the overall flavor. Finally, don't forget salt and pepper. These simple seasonings help to bring all the flavors together. Use them to your taste. You can also include fresh cilantro for a burst of herb flavor. If you enjoy its taste, chop it finely and mix it in. Avocados are a superfood packed with healthy fats. They are rich in monounsaturated fats, which help your heart. They also provide fiber, potassium, and vitamins. Lime juice is low in calories but high in vitamin C. This vitamin is good for your immune system and skin. Its acidity helps with digestion too. Greek yogurt is full of protein and probiotics. Probiotics are great for gut health. It also contains calcium, which is important for strong bones. Together, these ingredients make a tasty dressing that is also good for you. You can enjoy this dressing guilt-free. For the full recipe, check out the Zesty Avocado Lime Dressing. 1. Cutting and scooping the avocado Start by cutting the avocado in half. Be careful with the knife. Remove the pit gently. Use a spoon to scoop out the green flesh into a blender. 2. Adding ingredients to the blender Next, add 1/4 cup of fresh lime juice. Then, include 1/2 cup of plain Greek yogurt. Add 1 tablespoon of honey or agave syrup. Toss in 1 minced garlic clove and 1/4 teaspoon of ground cumin. 3. Blending for the perfect texture Blend the mixture on high speed until it’s smooth and creamy. If it seems too thick, pour in a tablespoon of water. Blend again until you reach your desired texture. 1. Adjusting consistency with water If your dressing is still thick, add more water bit by bit. This helps you control the thickness. 2. Tasting and seasoning tips Taste your dressing. It should be bright and fresh. Sprinkle in salt and pepper to your liking. Season a little, taste, and adjust again if needed. 3. Adding cilantro for enhanced flavor If you love herbs, mix in 2 tablespoons of chopped fresh cilantro. This adds a burst of flavor. Stir it in gently. 1. Importance of refrigerating the dressing Pour the dressing into a jar or bowl. Refrigerate it for at least 30 minutes. This chilling time helps all the flavors blend well. 2. Flavor melding process As the dressing chills, the lime and garlic flavors will meld. You’ll notice a richer taste after it sits. Enjoy your zesty avocado lime dressing with your favorite dishes! - Using ripe avocados for creaminess: Choose avocados that give slightly when you press them. This means they are ripe and will blend smoothly, giving your dressing a rich texture. - Fresh lime juice vs. bottled: Always opt for fresh lime juice. It adds a bright taste that bottled juice can’t match. Fresh juice brings life to your dressing. - Optimal seasoning suggestions: Start with a pinch of salt and pepper. Taste as you go. You can also add a dash of cumin or chili powder for an extra kick. - Over-blending the dressing: Blend just until smooth. If you blend too much, the dressing may become too thin. - Skipping the chilling time: Letting the dressing chill for at least 30 minutes is key. This helps the flavors blend and taste better. - Not adjusting seasoning: Always taste before serving. You might need to add more salt, lime, or even honey for balance. - Recommended blenders and processors: A high-speed blender works best for a smooth dressing. Brands like Vitamix or Ninja are great choices. A standard food processor can also do the job well. - Other useful kitchen tools: Keep measuring spoons and cups handy. A citrus juicer makes getting fresh lime juice easier. A spatula helps scrape down the sides of the blender. For the full recipe, check out the Zesty Avocado Lime Dressing section above. {{image_2}} You can switch Greek yogurt for vegan options like silken tofu or cashew cream. This works well for a dairy-free version. For sweeteners, honey adds a floral note, while agave syrup gives a mild taste. You can also try maple syrup for a different flavor. Spice it up! Add herbs like dill or basil for a fresh twist. A pinch of cayenne can bring heat, while smoked paprika adds depth. This dressing pairs perfectly with a mixed green salad. It also works great as a dip for fresh veggies or chips. Try it on tacos or drizzled over grilled meats. It even complements seafood, adding a creamy zing to shrimp or fish dishes. You can make this dressing gluten-free by sticking to the basic recipe. If you want a vegan version, just use a plant-based yogurt. For low-carb diets, skip the sweeteners or use a low-carb option like erythritol. This dressing fits many diets, making it a versatile choice for any meal. For the full recipe, check the Zesty Avocado Lime Dressing section above. To keep your Avocado Lime Dressing fresh, store it in the fridge right after making it. Use an airtight container to prevent air from spoiling the flavors. A glass jar works great as it seals well and looks nice. Make sure to seal it tightly. This will help maintain its creamy texture and zesty taste. When stored properly in the fridge, your dressing can last about 3 to 5 days. Look for signs of spoilage, like a change in color or smell. If it turns brown or smells off, it’s best to toss it. Freshness is key to enjoying its bright flavor. You can freeze Avocado Lime Dressing! Use a freezer-safe container and leave some space at the top, as it may expand. When you're ready to use it, thaw it in the fridge overnight. Mix it well after thawing, as the ingredients may separate. This way, you can enjoy your dressing later without losing its taste! To make your dressing thicker, add more avocado. You can also use less lime juice or yogurt. Blend it again after adding more ingredients until smooth. This helps achieve the right texture. You can also chill it longer to make it creamier. Yes, you can use lemon juice in place of lime juice. This swap will give your dressing a different taste. Lemon adds a bright, fresh flavor. However, lime juice offers a unique zest that pairs well with avocado. Avocado Lime Dressing is great on salads. It also works well as a dip for veggies or chips. You can drizzle it on grilled meats or fish for added flavor. Try it in wraps or as a spread on sandwiches. You can keep the dressing in the fridge for up to five days. Store it in an airtight container for best results. Check for any off smells or color changes before using. If it looks good, it should be fine. Yes, this dressing is perfect for meal prep. It stores well and saves you time on busy days. Make a batch at the start of the week. It will add quick flavor to your meals and snacks. Check the Full Recipe for storage tips! In this post, we explored how to make Avocado Lime Dressing from fresh ingredients. We covered preparation, mixing tips, and storage. You learned about the health benefits of avocados and Greek yogurt. Remember, choose ripe avocados and chill the dressing for the best flavor. Whether you use it for salads or as a dip, this dressing adds a tasty touch. Enjoy experimenting with variations to make it your own.

Avocado Lime Dressing Flavorful and Simple Recipe

Are you ready to elevate your salads with a vibrant twist? This Avocado Lime Dressing is not just simple to

To make your crispy fried eggplant, you need these key items: - 2 medium eggplants, sliced into 1/4-inch rounds - 1 cup all-purpose flour - 1 teaspoon garlic powder - 1 teaspoon onion powder - 1 teaspoon paprika - Salt and pepper to taste - 2 large eggs - 1 cup breadcrumbs (preferably panko for extra crunch) - Vegetable oil for frying These ingredients create a perfect blend for crispy texture and rich flavor. You can add these ingredients for even more taste: - 1 teaspoon cayenne pepper for heat - 1 teaspoon dried oregano for a herbaceous note - Fresh parsley or basil for garnish These extras can elevate your dish and impress your guests. Having the right tools makes cooking easier. Here are my must-haves: - Sharp knife for slicing the eggplant - Three shallow bowls for the breading station - Deep frying pan or Dutch oven for frying - Slotted spoon for flipping and removing eggplant - Paper towels for draining excess oil Using these tools ensures a smooth cooking process and great results. For the full recipe, refer to the detailed instructions above. Start by slicing two medium eggplants into 1/4-inch rounds. This size helps them cook evenly. Next, sprinkle the slices with salt. This step pulls out extra moisture and bitterness. Let the slices sit for 30 minutes. After that, rinse the slices under cold water. Pat them dry with paper towels. This process ensures a tasty and crispy final dish. Now, let’s set up our breading station. First, grab a shallow bowl and mix 1 cup of all-purpose flour with 1 teaspoon each of garlic powder, onion powder, paprika, salt, and pepper. In another bowl, beat two large eggs until smooth. In a third bowl, place 1 cup of breadcrumbs. Panko works great for extra crunch. Dip each eggplant slice first into the flour mixture. Shake off the extra flour. Next, coat it in the egg, making sure to cover it well. Finally, press it into the breadcrumbs. This will create a nice layer. Repeat this for all slices. For frying, heat about 1/2 inch of vegetable oil in a deep frying pan over medium heat. Aim for about 350°F or 175°C. Carefully add the breaded eggplant slices in batches. Fry them for about 3-4 minutes on each side. This timing helps them turn golden brown. Use a slotted spoon to flip them. Once crispy, transfer the slices to a plate lined with paper towels. This will absorb any extra oil. Now, your crispy fried eggplant is ready to enjoy! You can check the full recipe for any details you might have missed. Choosing the right eggplant is key. Look for firm, smooth skin without spots. The weight should feel heavy for its size. Young eggplants are best. They have fewer seeds and a sweeter taste. If the eggplant feels soft, it's likely overripe and bitter. Always pick eggplants that feel solid and fresh. To get that perfect crunch, follow these tips. Start by salting the eggplant slices. This helps remove moisture and bitterness. Let them sit for at least 30 minutes. Rinse and dry them well before breading. Use panko breadcrumbs for extra crunch. When frying, do not crowd the pan. Fry in batches to keep the oil hot. This helps achieve that golden-brown color and crisp texture. Watch out for these common errors. Do not skip salting the eggplant. This step is crucial for flavor and texture. Avoid using too much oil. If the oil is too shallow, the eggplant may not fry evenly. Also, don’t rush the frying. Allow each piece to cook fully before flipping. Lastly, resist the urge to move them around too much. Let them sit in the oil to get crispy. Follow these tips for a tasty, crispy fried eggplant experience! {{image_2}} You can add fun flavors to crispy fried eggplant with spices. Try using curry powder for a warm, earthy taste. For a spicy kick, add cayenne pepper or chili flakes. You can also mix up the herbs. Italian herbs like oregano and thyme work great too. Even a bit of lemon zest can brighten the flavor. Experiment until you find your favorite blend! You don’t have to fry your eggplant to make it crispy. Baking is a great option. Preheat your oven to 425°F (220°C). Place the breaded slices on a baking sheet lined with parchment paper. Spray them lightly with cooking oil. Bake for 20-25 minutes, flipping halfway through. For air frying, set your air fryer to 375°F (190°C). Cook for about 10-15 minutes. Both methods give you a lighter, yet still crispy, eggplant! Crispy fried eggplant shines on its own, but it pairs well with many foods. Serve it with marinara sauce for dipping. A tangy yogurt sauce adds a nice touch too. You can also stack the slices in a sandwich or use them in a salad. Top your eggplant with feta cheese or fresh herbs for extra flavor. These ideas will make your meal even more delicious. If you're looking for the full recipe, check it out [here](#). To store your leftover crispy fried eggplant, let it cool down first. Place the slices in an airtight container. Make sure to layer them with paper towels. This helps absorb any moisture and keeps them crispy. Store the container in the fridge. They will stay fresh for about 2-3 days. When you’re ready to enjoy your leftovers, reheating is key. I recommend using an oven or an air fryer. Preheat the oven to 375°F (190°C). Place the eggplant slices on a baking sheet. Bake for about 10-15 minutes until they are hot and crispy. If using an air fryer, set it to 350°F (175°C) and heat for about 5-7 minutes. Avoid the microwave, as it can make them soggy. If you want to freeze your crispy fried eggplant, it’s best to freeze them before frying. After breading, arrange the slices in a single layer on a baking sheet. Place the baking sheet in the freezer for about 1-2 hours. Once frozen, transfer the slices to a freezer-safe bag. They will keep well for up to 3 months. When you’re ready to cook them, fry them straight from the freezer. Check the full recipe for detailed cooking instructions. Yes, you can easily make Crispy Fried Eggplant gluten-free. Just swap out the all-purpose flour for a gluten-free flour blend. You can also use gluten-free breadcrumbs. Make sure to check the labels to ensure they are certified gluten-free. This way, you can enjoy the same crispy texture without the gluten. To keep your eggplant crispy, salt is key. Start by slicing the eggplant and sprinkling it with salt. Let it sit for about 30 minutes. This draws out excess moisture and bitterness. After that, rinse the slices well and pat them dry with paper towels. Proper drying is crucial to avoid sogginess. Also, ensure your oil is hot enough when frying. This helps create that golden, crispy exterior. Crispy Fried Eggplant goes great with several sauces. A classic marinara sauce is always a hit. You can also try a tangy tzatziki or a spicy aioli for a twist. For something unique, a sweet chili sauce adds a nice kick. Experiment with different sauces to find your favorite pairing! You learned how to make crispy fried eggplant today. We covered key ingredients, steps to prepare, and the right tools. I shared tips for choosing the best eggplants and avoiding mistakes. You also discovered fun flavor variations and storage methods. Now, you can enjoy delicious, crunchy eggplant any time. With these skills, feel free to experiment and personalize your dish. Your kitchen adventures await!

Crispy Fried Eggplant Irresistible Cooking Guide

Crispy fried eggplant is a dish that will steal your heart. With the right steps, you can create a crunchy,

To make these tasty lemon poppy seed muffins, gather the following ingredients: - 1 ½ cups all-purpose flour - 1 tablespoon poppy seeds - 1 teaspoon baking powder - ½ teaspoon baking soda - ¼ teaspoon salt - ½ cup unsalted butter, softened - 1 cup granulated sugar - 2 large eggs - Zest of 1 lemon - ½ cup plain yogurt - 2 tablespoons fresh lemon juice - 1 teaspoon vanilla extract For a sweet glaze, use these simple ingredients: - ½ cup powdered sugar - 2 tablespoons fresh lemon juice These muffins offer a delightful balance of flavors and nutrients. Each muffin contains roughly: - Calories: 180 - Protein: 3g - Fat: 7g - Carbohydrates: 27g - Fiber: 1g - Sugar: 10g This breakdown helps you understand what you’re enjoying with every bite. Enjoy the flavor without guilt! For the full recipe, check out the complete guide. Start by preheating your oven to 350°F (175°C). This step is key for even baking. While the oven warms up, line your muffin tin with paper liners. This makes cleanup easy and helps the muffins pop out smoothly. In a medium bowl, whisk together the dry ingredients. Combine 1 ½ cups of flour, 1 tablespoon of poppy seeds, 1 teaspoon of baking powder, ½ teaspoon of baking soda, and ¼ teaspoon of salt. This mix gives your muffins the right texture and flavor. Set this bowl aside for later. In a large bowl, add ½ cup of softened unsalted butter and 1 cup of granulated sugar. Use a mixer to cream them together until the mixture is light and fluffy. This step adds air and helps your muffins rise perfectly. Next, add two large eggs one at a time, mixing well after each. After that, stir in the zest of 1 lemon, ½ cup of plain yogurt, 2 tablespoons of fresh lemon juice, and 1 teaspoon of vanilla extract until everything is blended well. Now it's time to bring the wet and dry ingredients together. Gradually add the dry mix to the wet mix. Stir gently until just combined. Be careful not to overmix; a few lumps are okay. This keeps your muffins light and fluffy. When the batter looks good, scoop it into the muffin tin. Fill each cup about two-thirds full. This allows room for the muffins to rise without overflowing. Bake your muffins for 18-20 minutes. To check if they are done, insert a toothpick in the center. If it comes out clean, they are ready. Once baked, let them cool in the pan for 5 minutes. Then, transfer them to a wire rack. While they cool, prepare a glaze by mixing ½ cup of powdered sugar with 2 tablespoons of fresh lemon juice in a bowl. Drizzle this glaze over the warm muffins for a sweet finish. To keep your muffins moist, use yogurt in the batter. The yogurt adds creaminess and keeps the muffins soft. Also, do not overmix the batter. Overmixing can make muffins tough. Mix just until the dry and wet ingredients come together. This helps trap air and keeps them light. One common mistake is not measuring the flour correctly. Too much flour can lead to dry muffins. Use a spoon to scoop the flour into the measuring cup, then level it off with a knife. Also, make sure your oven is at the right temperature. An oven thermometer can help. Lastly, don't skip the muffin liners. They help with easy removal and keep the muffins from sticking. To check if your muffins are done, use a toothpick. Insert it into the center of a muffin. If it comes out clean, they are ready. If it has batter on it, bake for a few more minutes. Another method is to gently press the top of a muffin. It should spring back if it is done. These tips help ensure your Lemon Poppy Seed Muffins turn out great every time. For a full guide, check the Full Recipe. {{image_2}} You can enjoy lemon poppy seed muffins with or without glaze. The glaze adds sweetness and a nice shine. It mixes powdered sugar with lemon juice. If you want a lighter muffin, skip the glaze. The muffins still taste great on their own. If you have dietary needs, you can easily adjust this recipe. For gluten-free muffins, use a gluten-free flour blend. You can swap regular yogurt for dairy-free yogurt. If you prefer to cut sugar, use a sugar substitute. These changes keep the taste while meeting your needs. To make your muffins stand out, add fruits or nuts. Blueberries, raspberries, or chopped apples work well. Nuts like walnuts or almonds add crunch. Just fold them into the batter before baking. This gives you a new twist on a classic recipe. You can find the full recipe above to start your baking adventure! To store your leftover lemon poppy seed muffins, let them cool completely first. Place them in an airtight container. This keeps them fresh and soft. You can also wrap each muffin in plastic wrap for extra protection. Store them at room temperature for up to three days. If you want them to last longer, consider freezing them. Freezing is a great way to keep your muffins fresh for later. After they cool, wrap each muffin in plastic wrap. Then, place them in a freezer bag. Make sure to squeeze out all the air. Label the bag with the date. You can freeze muffins for up to three months. When you're ready to enjoy one, just take it out and let it thaw at room temperature. Reheating your lemon poppy seed muffins is easy. Preheat your oven to 350°F (175°C). Place the muffins on a baking sheet. Heat them for about 5 to 10 minutes. This warms them up and makes them taste fresh again. You can also use a microwave. Just heat them for about 15 to 20 seconds. Enjoy them warm for the best flavor! For the full recipe, check out the complete details. Yes, you can use whole wheat flour. It will make your muffins denser. Start with half whole wheat and half all-purpose flour. This mix keeps the flavor light while adding some whole grain goodness. To reduce sweetness, cut down the sugar to ¾ cup. You can also add extra lemon juice for a tangy kick. Adding some plain yogurt helps balance the flavors without adding more sugar. To make these muffins vegan, replace eggs with flax eggs. Mix 2 tablespoons of ground flaxseed with 6 tablespoons of water. Let it sit until it thickens. Use plant-based yogurt and dairy-free butter in the recipe. Dense muffins often happen from overmixing the batter. Mix until just combined. Also, check your baking powder. It should be fresh for the best rise. If your muffins are still dense, add a bit more baking soda. Yes, you can make mini muffins! Just fill the mini muffin tin about halfway. Bake for 12-15 minutes. Keep an eye on them to avoid overbaking. These muffins burst with bright lemon flavor. The poppy seeds add a nice crunch and nutty taste. Together, they create a light, fresh muffin that’s perfect for breakfast or a snack. If you want more zest, add extra lemon zest to the batter. For the full recipe, check out the Lemon Poppy Seed Delight. You learned how to make lemon poppy seed muffins from scratch. We covered the ingredients, step-by-step instructions, and helpful tips. Plus, you discovered variations and storage methods. These muffins can be sweet or simple, based on your choices. With practice, you can bake perfect muffins every time. Enjoy experimenting with flavors and share your creations! Happy baking!

Lemon Poppy Seed Muffins Quick and Easy Recipe

Are you ready to bake the fluffiest Lemon Poppy Seed Muffins? This quick and easy recipe is perfect for a

Older posts
Newer posts
← Previous Page1 … Page39 Page40 Page41 … Page76 Next →

dsad

© 2025 So Yum Recipes • Built with GeneratePress

Our Policies

  • Copyright Policy
  • Cookie Policy
  • GDPR Policy
  • Privacy Policy
  • Disclaimer
  • Terms Of Use

More Information

  • Home
  • About
  • Contact
  • Appetizers
  • Dessert
  • Dinner
  • Drinks
©2025, So Yum Recipes About Back To Top