Skip to content
DisclaimerTerms Of UseGDPR PolicyCookie Policy

So Yum Recipes

  • Home
  • Drinks
  • Appetizers
  • Dinner
  • Dessert
  • About
  • Contact
  • Privacy Policy
DisclaimerTerms Of UseGDPR PolicyCookie Policy

Chloe

- 1 lb ground beef - 1/2 cup breadcrumbs - 1/4 cup grated Parmesan cheese - 1/2 cup honey - 1/4 cup soy sauce - 2 tablespoons sriracha - Sesame seeds - Chopped green onions In this recipe, the main ingredients create a tasty base for the meatballs. Ground beef gives them rich flavor and a nice texture. Breadcrumbs help bind the mixture. Parmesan cheese adds a savory kick that complements the sweet sauce. For the sauce, honey brings sweetness that balances spice. Soy sauce adds depth and umami. Sriracha gives the meatballs their signature heat. You can adjust the sriracha to suit your taste. If you like it hotter, add more! Optional garnishes like sesame seeds and chopped green onions enhance the dish. They add crunch and color. I love to sprinkle these on right before serving. It makes everything look more appealing. This recipe is simple, quick, and perfect for any dinner. Check the Full Recipe for complete details. - Preheat the oven to 400°F (200°C). - In a large bowl, combine ground beef, breadcrumbs, Parmesan cheese, parsley, egg, garlic, salt, and pepper. Mix until smooth. This mix is key to great meatballs. - Scoop out about 1 tablespoon of the meat mixture. Roll it into a ball. Repeat this until all the mixture is shaped. You will have about 20 meatballs. - Place the meatballs on a baking sheet lined with parchment paper. Make sure they have space. This helps them cook evenly. - Bake for 18-20 minutes. The meatballs should be golden brown and cooked through. - While the meatballs bake, mix the sauce ingredients in a saucepan: honey, soy sauce, sriracha, rice vinegar, and ginger. - Heat over medium heat. Stir until warm and all ingredients blend well. - Once the meatballs are done, take them out of the oven. - Place them in a large bowl, then pour the sauce over them. Toss gently to coat. This sweet and spicy sauce brings flavor to each bite. Enjoy the balance of heat and sweetness in every mouthful of these delicious meatballs. If you want the full recipe, you can check out the detailed instructions in the [Full Recipe]. - Use lean ground beef for a healthier option. - Ensure even mixing of ingredients. This helps the meatballs hold together well. Make sure the breadcrumbs, cheese, and spices blend in with the meat. You can use your hands for a thorough mix. - Adjust sriracha for spice preference. If you love heat, add more sriracha. For a milder taste, reduce it. - Experiment with additional herbs and spices. Try adding garlic powder or onion powder for extra flavor. Fresh herbs like basil or cilantro can add freshness too. - Serve with a side of rice or colorful veggies. This makes the meal vibrant and fun. You can use bell peppers, carrots, or snap peas for color. - Garnish with herbs for added flair. A sprinkle of fresh parsley or cilantro makes the dish pop. It also adds a fresh taste that complements the meatballs nicely. For the full recipe, check out [Full Recipe]. {{image_2}} You can switch up the meat in these meatballs. Ground turkey or chicken works great. They will still be juicy and full of flavor. If you are gluten-free, use gluten-free breadcrumbs. This simple swap keeps the texture nice without the gluten. To change the flavor of the sauce, try using maple syrup instead of honey. This makes the dish vegan-friendly and still sweet. For a fun twist, add pineapple juice to the sauce. This brings a tropical flair and pairs well with the spice. These meatballs are so versatile! You can serve them with pasta, which is a classic choice. They also taste amazing in a sub sandwich, perfect for lunch or dinner. If you're hosting a party, serve them as an appetizer. Everyone will love grabbing these sweet and spicy bites! To keep your sweet and spicy meatballs fresh, refrigerate them promptly. Place the meatballs in an airtight container. This helps to lock in moisture and flavor. They can last in the fridge for up to three days. If you want to store them longer, freezing is a great option. To freeze, first let the meatballs cool completely. Then, place them in a freezer-safe bag or container. Remove as much air as possible. This way, they can last up to three months in the freezer without losing quality. When reheating, you have two main options: oven or microwave. For the oven, preheat it to 350°F (175°C). Place the meatballs on a baking sheet. Cover them with foil to keep them moist. Heat for about 15-20 minutes. For the microwave, place meatballs in a microwave-safe dish. Add a splash of water to maintain moisture. Heat in 30-second intervals, checking until warm. Both methods work well, but the oven keeps them crispy. How long do sweet and spicy meatballs last? In the fridge, they last about three days. In the freezer, they can stay good for three months. Always check for signs of spoilage. Look for changes in color or smell. If they seem slimy or have an off odor, it's best to discard them. Keeping track of storage time helps ensure you enjoy these delicious meatballs at their best. For more details on the recipe, check out the Full Recipe. You can serve sweet and spicy meatballs with a variety of sides. Here are some great options: - Steamed rice: It soaks up the sauce well. - Noodles: Soft noodles add a nice texture. - Colorful bell peppers: They make a great side. - Salad: A fresh salad balances the meal. - Bread: Soft bread is perfect for dipping. Yes, you can make the meatballs ahead of time. Here’s how: - Prepare the meatballs: Follow the recipe to form the meatballs. - Store them: Place them on a baking sheet and freeze until firm. - Transfer: Move the frozen meatballs to a freezer bag. - Refrigerate: Thaw them in the fridge overnight for easy cooking later. You can also bake and store them in the fridge for up to three days. The sweet and spicy flavor comes from the sauce. Here’s how it works: - Honey: This adds sweetness and a rich flavor. - Sriracha: This gives the meatballs their spicy kick. - Soy sauce: It adds depth and umami. - Ginger and rice vinegar: They enhance the overall flavor. This balance of sweet and spicy creates a dish that excites your taste buds. Enjoy the full recipe to get all the flavors just right! To make sweet and spicy meatballs, we combined key ingredients like ground beef, breadcrumbs, and Parmesan. We shared step-by-step instructions for preparation, baking, and sauce mixing. Tips for perfect meatballs and storing leftovers help you enjoy this dish for days. Remember, you can customize flavors and make it your own! Enjoy experimenting with sauces and servings. These meatballs can fit any meal or gathering. Keep it tasty and simple!

Sweet and Spicy Meatballs Flavorful Dinner Delight

Get ready to elevate your dinner game with my Sweet and Spicy Meatballs! This dish is a perfect blend of

To make the best chocolate chip banana bread, you need just a few simple ingredients. Here’s what you’ll need: - 3 ripe bananas, mashed - 1/3 cup melted coconut oil - 1/2 cup brown sugar - 1 large egg, beaten - 1 teaspoon vanilla extract - 1 teaspoon baking soda - Pinch of salt - 1 cup all-purpose flour - 1/2 cup dark chocolate chips - 1/2 teaspoon ground cinnamon (optional) - 1/2 cup chopped walnuts (optional) Each ingredient plays a key role in creating a moist and flavorful loaf. The ripe bananas add natural sweetness and moisture. The melted coconut oil keeps the bread soft. Brown sugar gives it a rich flavor. You can swap ingredients if needed. For example, use melted butter instead of coconut oil. If you want a vegan option, try a flax egg instead of a regular egg. Feel free to add your twist! Try adding dried fruits or different nuts. Check out the Full Recipe for more details on how to combine these ingredients into a delicious treat. - Preheat the oven to 350°F (175°C). Grease a 9x5-inch loaf pan with oil or line it with parchment paper. This helps the bread come out easily. - In a mixing bowl, mash the ripe bananas. Add melted coconut oil and mix well. This makes the bread moist and tasty. - Stir in brown sugar, the beaten egg, and vanilla extract. Mix until smooth and creamy. This adds sweetness and flavor. - Sprinkle in the baking soda and a pinch of salt. If you want, add half a teaspoon of ground cinnamon for a nice touch. Mix again until well combined. - Gradually add one cup of all-purpose flour. Gently fold it into the mixture until just combined. Be careful not to overmix, as this can make the bread tough. - Finally, gently fold in half a cup of dark chocolate chips and chopped walnuts if you are using them. This adds a rich flavor and crunch. - Pour the batter into the prepared loaf pan. Smooth the top with a spatula to make it even. - Place the pan in the preheated oven and bake for 50-60 minutes. Check doneness by inserting a toothpick into the center. It should come out clean when done. - Allow the banana bread to cool in the pan for about 10 minutes. After that, transfer it to a wire rack to cool completely before slicing. Enjoy your delicious creation! For the complete recipe, check out the Full Recipe section. To check if your banana bread is done, insert a toothpick into the center. If it comes out clean, your bread is ready. If there is batter on the toothpick, bake for a few more minutes. Avoid overmixing your batter. Mix the flour until just combined with the wet ingredients. Overmixing can make the bread tough. You want a light, fluffy texture. For extra flavor, try adding spices like cinnamon or nutmeg. These spices enhance the sweetness and warmth of the banana bread. Using ripe bananas is key for the best sweetness. Look for bananas with brown spots. The riper they are, the sweeter your bread will taste. {{image_2}} You can make your chocolate chip banana bread even better with fun mix-ins. Here are some ideas: - Nuts and Seeds: Add 1/2 cup of chopped walnuts or pecans for crunch. You can also try sunflower seeds or pumpkin seeds. They add a nice texture and healthy fats. - Dried Fruits: Mix in 1/2 cup of dried fruit like raisins or cranberries. They give a sweet burst of flavor. You can even use coconut flakes for a tropical twist. If you have special dietary needs, you can still enjoy this banana bread: - Gluten-Free Options: Swap all-purpose flour for a gluten-free blend. Many brands work well, but check for a one-to-one ratio. This way, you can still enjoy a soft, tasty loaf. - Vegan Substitutions: For a vegan version, skip the egg. Use 1/4 cup of applesauce or a flax egg instead. Just mix one tablespoon of flaxseed meal with three tablespoons of water and let it sit for a few minutes. This will help bind the ingredients. Feel free to get creative. Each mix-in can change the taste and texture, making your chocolate chip banana bread unique! For the full recipe, check out the earlier section. Store your chocolate chip banana bread at room temperature. Wrap it in plastic wrap or foil. It will stay fresh for about 2 to 3 days. If you live in a warm area, place it in the fridge. The cool air can help keep it fresh longer. However, it might change the bread’s texture a bit. Chilling can make it denser and less moist. If you want to save some banana bread for later, freezing is a great option. Wrap pieces tightly in plastic wrap, then place them in a freezer bag. This helps to keep the bread fresh and tasty. It can last up to 3 months in the freezer. To thaw and reheat your banana bread, pull out a piece and leave it at room temperature. This usually takes about 1 to 2 hours. You can also microwave it for about 15-20 seconds to warm it up. Enjoy your banana bread warm, and it will taste just like fresh-baked! For the Full Recipe, check back to make sure you have it handy. How do I make banana bread without eggs? You can use applesauce or flaxseed meal instead. For flaxseed, mix 1 tablespoon with 2.5 tablespoons of water. Let it sit for a few minutes. This mix works well as a binder in the recipe. Can I substitute the coconut oil? Yes, you can use vegetable oil or melted butter. Both options add moisture. Each option brings a slightly different flavor, so choose based on your taste. How ripe should the bananas be? Use ripe bananas with brown spots. The riper, the better! Overripe bananas have more sweetness and blend well into the bread. They also add a lovely flavor. Why is my banana bread too dense? Dense banana bread can come from overmixing the batter. Mix just until combined. Also, check your baking soda. If it’s old, it might not rise well. What can I do if my bread isn’t cooking in the center? If the center is raw, bake longer at a lower temperature. Cover with foil to prevent burning. Check doneness with a toothpick. If it comes out clean, it’s ready! This blog post provided a clear guide to making delicious banana bread. We covered the key ingredients, step-by-step instructions, and tips for the best results. Remember to use ripe bananas for sweetness and avoid overmixing the batter. Explore variations and dietary adjustments to make this recipe your own. Lastly, store your banana bread properly to keep it fresh. Enjoy your baking journey and share your tasty results!

Chocolate Chip Banana Bread Irresistible Easy Recipe

If you love the sweet smell of baked goods wafting from your kitchen, then this Chocolate Chip Banana Bread recipe

- 2 cups shredded cooked chicken - 8 oz cream cheese - ½ cup sour cream - ½ cup mayonnaise The base of this dip is simple yet delicious. The shredded chicken gives it a hearty feel. You can use rotisserie chicken for ease. The cream cheese provides a rich, creamy texture. Sour cream and mayonnaise add a nice tang. This mix creates a base that everyone loves. - ¾ cup Buffalo sauce - 1 cup shredded cheddar cheese - 1 cup crumbled blue cheese (optional) - 2 green onions for garnish Now, let’s spice it up! Buffalo sauce gives this dip its kick. Adjust the amount based on how spicy you want it. Cheddar cheese adds a nice, melty layer. If you like blue cheese, fold that in for extra flavor. Finally, chopped green onions make it pretty and fresh. - Recommended dippers: tortilla chips, celery sticks, or veggies For dipping, I love tortilla chips. They add a nice crunch. Celery sticks are great for a fresh bite. You can also use other veggies for a colorful platter. Each dipper brings its own fun to the table. For the Full Recipe, check the detailed instructions. Enjoy making this tasty treat! - Step 1: Preheat the oven First, set your oven to 350°F (175°C). This step is key for even cooking. - Step 2: Mix base ingredients In a large mixing bowl, add 8 oz of softened cream cheese, ½ cup of sour cream, and ½ cup of mayonnaise. Blend these until they are smooth. You can use an electric mixer or a spatula for this. - Step 3: Add shredded chicken and Buffalo sauce Now, mix in 2 cups of shredded cooked chicken. Pour in ¾ cup of Buffalo sauce too. Make sure to stir everything well until it’s evenly mixed. - Step 4: Transfer to baking dish and top with cheese Grab an 8x8 inch baking dish. Spread the mixture into it evenly. Top it with ½ cup of shredded cheddar cheese. This will create a tasty golden crust. - Step 5: Bake and garnish Place the dish in your preheated oven. Bake it for 20-25 minutes. When it’s bubbly and golden, it’s ready! Remove it and let it cool a bit. Finally, sprinkle chopped green onions on top for a fresh touch. - You will need the following tools: - Large mixing bowl - Electric mixer or spatula - 8x8 inch baking dish - Measuring cups and spoons - Mixing spoon These tools will make your cook time smoother and more fun! - Best chicken options: I love using rotisserie chicken for this dip. It’s already cooked, so it saves time. You can also use leftover chicken from other meals. Just make sure it is shredded fine for even mixing. - Cream cheese alternatives: If you want a lighter dip, try Greek yogurt instead of cream cheese. It adds a nice tang and keeps it creamy. You can also use low-fat cream cheese, but the flavor may change a bit. - Ensuring the right consistency: To get the perfect blend, mix your cream cheese, sour cream, and mayonnaise well. They should be smooth before adding chicken. This helps create a creamy texture that everyone loves. - Avoiding overbaking: Keep an eye on the dip while it bakes. You want it bubbly with a golden crust, but overbaking can dry it out. If it looks done at 20 minutes, pull it out to avoid drying. - Ideal temperature for serving: Buffalo chicken dip tastes best warm. Let it cool for a few minutes after baking, but serve it while it's hot. This keeps it creamy and flavorful. - Enhancing flavors with add-ons: Consider topping your dip with extra cheese or chopped green onions. You can also add a drizzle of extra Buffalo sauce on top for an added kick. Serve with tortilla chips or crunchy veggies for a fun twist. {{image_2}} To make a spicy Buffalo chicken dip, you can add more Buffalo sauce. This extra heat will thrill spice lovers. You can also toss in some jalapeños for a fresh kick. Chop them up fine and mix them in. This adds texture and zest to the dip. Adjust the spice to fit your taste. If you want it hotter, go for more sauce. Just be careful; too much can overpower the other flavors. If you want a creamier dip, consider adding more cheese. Extra shredded cheese makes the dip richer. You can mix in mozzarella or pepper jack for a different taste. Sour cream is another great addition. It makes the dip smooth and adds a tangy flavor. You can blend in a bit more sour cream or even cream cheese. This will enhance the overall creaminess and make every bite delightful. For those looking for lighter options, you can substitute certain ingredients. Use low-fat cream cheese and mayonnaise. You can also try Greek yogurt instead of sour cream. This keeps the dip creamy while cutting calories. You might even use shredded rotisserie chicken that is skinless. These swaps make the dish healthier without losing flavor. Enjoy the same tasty dip but with a better balance for your diet. For the full recipe, check out the detailed instructions and ingredient list. To store leftover Buffalo Chicken Dip, let it cool first. Then, transfer it to an airtight container. You can keep it in the fridge for up to four days. This dip tastes great even after a day or two! If you want to freeze it, make sure it’s in a freezer-safe container. You can freeze it for up to three months. When you’re ready to enjoy it again, thaw it in the fridge overnight. Reheat it in the oven at 350°F (175°C) until it’s hot throughout. Stir it well for even warmth. Buffalo Chicken Dip stays fresh in the fridge for about four days. If frozen, it lasts for about three months. Always check for any change in smell or color before eating. Enjoy this tasty dip while it’s at its best! Yes, you can make Buffalo Chicken Dip ahead of time. Prepare the dip, then store it in the fridge. This way, you save time on party day. I suggest making it the night before. Just cover it tightly and keep it cold. When you are ready to serve, bake it as usual. It will taste just as good! Yes, using frozen chicken is fine. Make sure to thaw it safely in the fridge. You can also cook it straight from frozen. Just boil it until it’s fully cooked. Then shred it for the dip. This method keeps the chicken juicy and tender. Buffalo Chicken Dip goes well with many things. Here are a few tasty options: - Tortilla chips - Celery sticks - Carrot sticks - Crackers - Pita bread These dippers add crunch and flavor. You can mix and match based on your guests' taste! To adjust the spice level, you have a few options. For a milder dip, use less Buffalo sauce. You can also add more cream cheese or sour cream. If you want it spicier, add extra Buffalo sauce or some chopped jalapeños. Taste as you go to find the right balance. The Full Recipe includes all the ingredients and steps needed to make this dip. You’ll find everything from the chicken to the baking instructions. For a detailed guide, check out the [Full Recipe](#). Enjoy making this crowd-pleaser! Buffalo Chicken Dip is a fun and tasty dish. We covered its main ingredients, like chicken and cheese, and the easy steps to make it. Remember to check the tips for the best taste and texture. You can try variations for those who love spice or want healthier options. Store leftovers right, and you’ll enjoy this dip later. It’s perfect for gatherings and pairs well with many snacks. Make it your own and enjoy every bite!

Buffalo Chicken Dip Irresistible Party Favorite Treat

Looking for the ultimate crowd-pleaser? Buffalo Chicken Dip is your go-to party favorite! With its creamy texture and spicy kick,

To make a healthy breakfast smoothie, start with fresh fruits and veggies. Here’s what I recommend: - Fruits: Use 1 ripe banana, 1 cup mixed berries (like strawberries, blueberries, and raspberries). - Vegetables: Add 1/2 cup spinach leaves for extra nutrients. For the base, you can choose between: - Dairy: Use regular milk or yogurt for creaminess. - Non-Dairy: Unsweetened almond milk is a great option too. Don't forget to add some nutrition boosters: - Seeds: Chia seeds provide fiber and omega-3s. - Nuts: Natural peanut butter or almond butter gives healthy fats and protein. If you want to make your smoothie dairy-free, here are some options: - Milk: Swap cow's milk for almond, soy, or oat milk. - Yogurt: Use coconut yogurt instead of regular yogurt. For lower sugar options, consider these fruits: - Fruit Alternatives: Use avocado for creaminess or unsweetened applesauce for sweetness. If you want to change the nut butter, try: - Variations: Use sunflower seed butter or cashew butter instead of peanut or almond butter. By mixing and matching these ingredients, you can create your perfect healthy breakfast smoothie. Check out the Full Recipe for more details on how to blend these flavors together! To start, grab your blender. First, add the sliced banana and mixed berries. This mix gives sweetness and flavor. Next, add the spinach leaves for extra nutrition. Layering is key! Place the leafy greens on top of the fruit. This helps them blend well without clumping. Now, pour in the unsweetened almond milk. This makes your smoothie creamy and rich. Then, sprinkle in chia seeds and add your choice of nut butter. This boosts healthy fats and protein. If you enjoy a sweeter drink, add honey or maple syrup. Blend on high speed until everything is smooth. Need a colder drink? Toss in some ice cubes and blend again. This makes your smoothie thicker and refreshing. Taste it! If you want it sweeter, add more honey or almond milk. Pour into a glass and enjoy your energizing berry banana smoothie right away! What if your smoothie is too thick? Add a splash of almond milk to loosen it up. Blend again until you reach your desired consistency. If the smoothie is too watery, you can add more fruit or a bit of ice. This will make it thicker again. Dealing with unwanted chunks can be frustrating. To fix this, blend longer. Make sure all the ingredients are fully mixed. If clumps remain, try cutting the fruits smaller before blending. This helps everything blend smoothly. For the complete recipe, check the Full Recipe. To make a healthy smoothie, you want a good mix of nutrients. This means having carbs, proteins, and fats. Here are some tips to help you balance your smoothie: - Add fruits like bananas and berries for natural sweetness and carbs. - Include greens such as spinach for fiber and vitamins. - Use protein from yogurt or nut butter to keep you full. - Healthy fats can come from nuts or seeds, which help with absorption of vitamins. - Avoid extra sugar; try using spices like cinnamon for flavor instead. Fiber and protein are key players in breakfast smoothies. Fiber helps digestion and keeps you satisfied. Protein gives you energy and helps build muscles. Together, they make your smoothie a perfect meal. Preparing your smoothie can be quick and easy. Here are some great tips: - Prep ingredients ahead of time. Slice fruits and store them in bags. - Use frozen fruits for convenience. They keep your smoothie cold and thick. - Store leftovers in the fridge for later. Just make sure to use them within a day or two. By following these tips, you can make smoothie-making fast and fun! For a delicious start, you can try the Energizing Berry Banana Smoothie from the Full Recipe. {{image_2}} You can easily change your smoothie to meet your needs. For a high-protein smoothie, add Greek yogurt or protein powder. These options boost protein and keep you full longer. You can also use silken tofu for a creamy texture. If you want low-calorie options, focus on greens and low-sugar fruits. Spinach, kale, and cucumbers are great. Use water or unsweetened almond milk as your base. This keeps your smoothie light and refreshing. For post-workout recovery, add ingredients with carbs and protein. Oats or a banana can help restore energy. Mixing in protein powder and nut butter provides the fuel you need to recover well. Get creative with your smoothie flavors! For tropical vibes, blend pineapple, mango, and coconut milk. This mix brings a sunny taste to your mornings. If you love chocolate, try adding cocoa powder or chocolate protein powder. It adds richness and satisfies your sweet tooth without added sugar. Don’t forget to spice things up! Try cinnamon, ginger, or even fresh mint. These ingredients add unique flavors and extra health benefits. To store leftover smoothies, pour them into a clean glass or jar. Make sure to leave some space at the top. This helps avoid spills when sealing the container. Use airtight containers for the best results. Glass jars with lids work great, as do BPA-free plastic bottles. Refrigeration keeps smoothies fresh for up to 24 hours. If you want to keep them longer, freezing is your best option. Frozen smoothies can last up to three months. Just remember to thaw them in the fridge overnight before drinking. Smoothies can be stored for one day in the fridge. After that, they may lose flavor and nutrients. If you see separation or an off smell, it’s time to toss it. Smoothies are best when fresh, so drink them soon after making them. If you freeze a smoothie, consume it within three months for the best taste. Always check for odd colors or smells before drinking. It’s safer to toss a smoothie than to risk drinking a bad one. What is the best time of day to drink a breakfast smoothie? The best time to drink a breakfast smoothie is in the morning. It gives you energy for your day. Smoothies are quick to make and easy to enjoy. You can sip them while you get ready. Plus, they are full of nutrients to kickstart your metabolism. Can I meal prep smoothies in advance? Yes, you can meal prep smoothies! You can make them the night before or even freeze them. Just blend your ingredients, then pour them into jars. In the morning, you can take one out and let it thaw. This saves time and ensures you have a healthy meal ready. Are breakfast smoothies filling enough to replace a meal? Absolutely! A well-made breakfast smoothie can replace a meal. If you add fruits, veggies, and protein, it will keep you full. The fiber from fruits and greens makes you feel satisfied. Just make sure to include a good balance of ingredients. Can I use frozen fruits instead of fresh? Yes, frozen fruits work great in smoothies! They are often picked at peak ripeness and locked in nutrients. Plus, they make your smoothie colder and thicker. Using frozen fruits can help you avoid waste if fresh fruits go bad too quickly. What are the health benefits of using spinach in smoothies? Spinach is a superfood for smoothies! It is low in calories but high in nutrients. It adds vitamins A, C, and K, plus iron and calcium. You won't taste it much, but you will get a healthy boost. Adding spinach is an easy way to get more greens into your diet. Are there low-carb options for breakfast smoothies? Yes, you can make low-carb smoothies! Use low-carb fruits like berries and avoid bananas. Add ingredients like spinach or avocado for creaminess without many carbs. You can also use unsweetened almond milk as a base. This keeps your smoothie tasty and healthy without too many carbs. For more tips and a full recipe, check out the Energizing Berry Banana Smoothie! In this blog post, we explored how to craft a healthy breakfast smoothie. We detailed key ingredients, substitutions, and the blending process. You learned tips for balancing nutrients and customizing smoothies for specific goals. We also covered storage methods and answered common FAQs. Smoothies can be easy, tasty, and nutritious. By using the right ingredients and preparation methods, you can enjoy a good start to your day. Experiment with flavors and find what works best for you. Your perfect smoothie is just a blend away!

Healthy Breakfast Smoothie Simple and Energizing Recipe

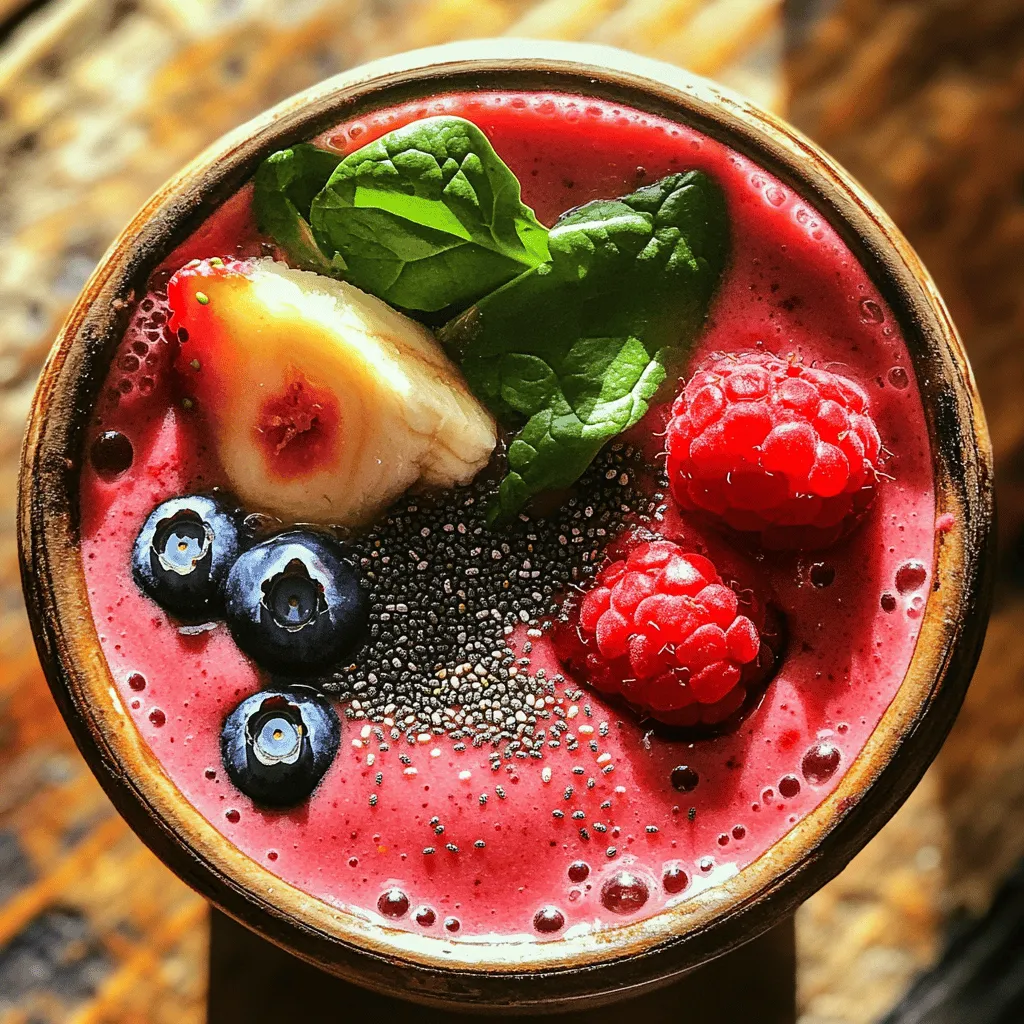
Start your day with a boost! My healthy breakfast smoothie recipe is simple, tasty, and energizing. Packed with fruits, veggies,

- 1 lb shrimp, peeled and deveined - 2 ripe avocados, diced - 1 cup cherry tomatoes, halved - 1 small red onion, finely chopped - 1 cucumber, diced - 2 tablespoons olive oil - 2 tablespoons lime juice - 1 tablespoon honey - 1 teaspoon garlic powder - Salt and pepper to taste - Fresh cilantro or parsley, for garnish Gathering the right ingredients makes this shrimp avocado salad shine. First, use fresh shrimp. Look for shrimp that are firm and smell like the sea. If you can, buy them from a trusted source. Next, choose ripe avocados. They should yield slightly to gentle pressure. This ensures they are creamy and flavorful. Cherry tomatoes add a sweet burst to the dish. Halve them for easy mixing. A small red onion adds a sharp taste. Chop it finely to spread the flavor. The cucumber brings a cool crunch. Dice it small to blend well with the other ingredients. For the dressing, olive oil provides richness. Lime juice adds a bright kick. Honey balances the flavors with a touch of sweetness. Garlic powder gives a warm depth. Adjust salt and pepper to fit your taste. Don't forget the garnish! Fresh cilantro or parsley not only looks nice but also adds freshness. Now that you have all your ingredients, you're ready to create a dish everyone will love. For the full recipe, check out the instructions in the next section. To boil shrimp properly, start by bringing a large pot of water to a rolling boil. Add a pinch of salt for flavor. Place the shrimp into the pot. Cook them for 2 to 3 minutes. You’ll know they are done when they turn pink and opaque. Remove the shrimp and drain. Rinse them under cold water to stop the cooking. This method keeps the shrimp tender and juicy. Next, we’ll prepare the salad base. In a mixing bowl, combine the cooked shrimp with the diced avocados, halved cherry tomatoes, diced cucumber, and chopped red onion. Be gentle when mixing. You want to combine the ingredients without mashing the avocados. This keeps the salad looking fresh and colorful. For the dressing, grab a small bowl. Whisk together the olive oil, lime juice, honey, garlic powder, salt, and pepper. Keep whisking until the mixture is well combined. Taste it to see if you need to adjust the seasoning. A little extra lime juice or salt can make a big difference. Drizzle the dressing over the shrimp and salad mix. Toss gently to coat everything well. Follow these steps, and you will have a delightful shrimp avocado salad. For the full recipe, check out the details above. How to select ripe avocados Choosing the right avocado is key. Look for avocados that yield slightly to gentle pressure. The skin should be dark green or black, depending on the variety. Avoid any that have large indentations or dark spots. If they are hard, leave them at room temperature for a few days. This will help them ripen. Tips for preventing avocado from browning To keep your avocado fresh, use lime juice right after cutting. The acid in lime juice slows browning. You can also store cut avocado with the pit inside. Cover it tightly with plastic wrap or place it in an airtight container. This blocks air and helps keep it green. Serving ideas to enhance visual appeal Serve your salad in a large glass bowl. This shows off the bright colors of the shrimp, tomatoes, and avocado. For a fancy touch, use individual glasses. This makes each serving look special and allows guests to enjoy their own portion. Garnishing for freshness and flavor Top your salad with fresh herbs. Chopped cilantro or parsley adds both color and taste. You can also sprinkle some lime zest for an extra zing. A few lime wedges on the side make a nice addition too. This makes your dish look inviting and fresh, perfect for any occasion. For the Full Recipe, check out the detailed steps that lead you to this delicious Shrimp Avocado Salad. {{image_2}} You can make this shrimp avocado salad even better by adding more veggies. Try mixing in bell peppers for a sweet crunch or shredded carrots for color. You might also add radishes for a bit of spice. Each veggie brings a new taste that enhances the salad. If you want to switch up the protein, consider using crab or chicken. Crab gives a sweet flavor, while chicken adds heartiness. Both options pair well with the creamy avocado, making each bite delightful. The dressing plays a big part in the flavor of this salad. You can use different dressings to elevate the taste. A balsamic vinaigrette adds a tangy kick, while a lemon vinaigrette brightens the dish. Both options offer fresh notes that balance the richness of the avocado. Creamy dressings also work well. You could use a yogurt-based dressing for a lighter touch or a classic ranch for a familiar taste. Just remember to adjust the dressing amount based on your preference. Enjoy exploring these variations for a unique twist on the classic recipe! For the full recipe, check out the details above. To keep your shrimp avocado salad fresh, store it right away. Use an airtight container to seal in flavors. This salad tastes best when eaten fresh, but you can keep leftovers for up to two days in the fridge. Make sure to layer ingredients with plastic wrap to reduce air exposure. This helps the avocados from browning too fast. If you know you will have leftovers, consider storing the dressing separately. Combine it right before serving for the best taste. You should not reheat shrimp and avocado salad. Shrimp can become tough and rubbery when heated. Avocado also loses its creamy texture and flavor when warmed. If you have extra shrimp, you can heat them in a pan. Just warm them gently and serve them alongside the salad. Enjoy the salad cold for a refreshing bite! To get great shrimp for your salad, start with fresh shrimp. If you can, buy shrimp that is already peeled and deveined. This saves time and makes cooking easier. Steps for cooking shrimp: - Boil water in a large pot. - Once boiling, add the shrimp. - Cook for 2-3 minutes. Watch for the shrimp to turn pink. - Drain and rinse under cold water. This stops the cooking and keeps shrimp tender. Overcooking shrimp makes it tough. So, keep an eye on the time. Perfect shrimp adds a nice touch to your shrimp avocado salad. Yes, you can prepare this salad ahead. Make sure to store it well. Tips for pre-preparation: - Cook the shrimp and let it cool. - Mix the dressing and store it separately. - Combine the shrimp, avocado, and other veggies just before serving. This keeps the avocado fresh and bright. If you want to serve the salad later, chill it for about 30 minutes. This keeps it cool and tasty. Pairing your salad with good sides makes it even better. Suggested side dishes: - Crisp tortilla chips add crunch. - A light, tangy coleslaw balances flavors. - Grilled corn on the cob is sweet and savory. Beverage options: - A cold glass of iced tea is refreshing. - Sparkling water with lime offers a nice zing. - Pairing with a light white wine can elevate the meal. These choices enhance the meal and make it more enjoyable. This blog post covers a simple shrimp avocado salad recipe. You learned how to select fresh ingredients and craft a tasty dressing. We explored tips for the best salad presentation and storage. Remember, you can customize your salad with extra veggies or different proteins. In closing, this dish is both healthy and easy to make. Enjoy it for a light meal or a special occasion. Try it out today and impress your loved ones!

Savory Shrimp Avocado Salad Fresh and Flavorful Dish

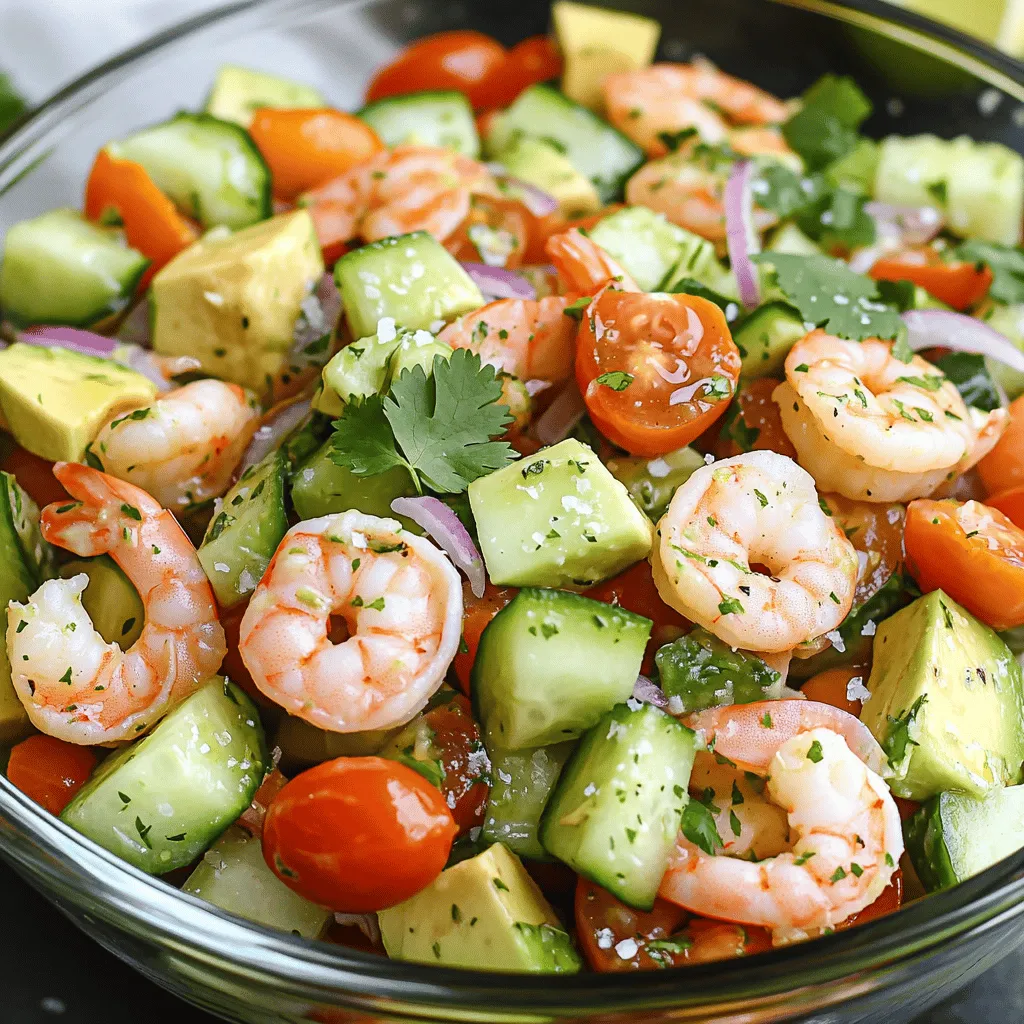
Looking for a fresh and tasty dish that’s simple to make? My Savory Shrimp Avocado Salad brings delightful flavors and

- 2 medium sweet potatoes, peeled and diced - 1 can (15 oz) black beans, drained and rinsed - 1 tablespoon olive oil - 1 teaspoon cumin - 1 teaspoon smoked paprika - 1/2 teaspoon garlic powder - Salt and pepper to taste - 8 small corn tortillas - 1 avocado, sliced - 1/4 cup chopped fresh cilantro - 1 lime, cut into wedges - Optional: sliced radishes for garnish You can swap sweet potatoes with butternut squash for a different flavor. If you want more protein, add quinoa or lentils. Use any beans you like, but black beans work best here. Corn tortillas can be replaced with flour tortillas if you prefer. For a creamier texture, consider adding Greek yogurt instead of avocado. This recipe serves four and provides a balanced meal. Each taco has about 230 calories. You get around 8 grams of protein, 10 grams of fiber, and 60 grams of carbs. Sweet potatoes offer lots of vitamins, and black beans boost the protein. This meal is filling and healthy, perfect for lunch or dinner. Start by gathering your ingredients. You will need sweet potatoes, black beans, and spices. Peel and dice the sweet potatoes into small cubes. This helps them cook evenly. Drain and rinse the black beans to remove extra salt. Preheat your oven to 425°F (220°C). This step is important for roasting the sweet potatoes perfectly. Spread the diced sweet potatoes on a baking sheet. Drizzle with olive oil and sprinkle with cumin, smoked paprika, garlic powder, salt, and pepper. Toss them well to coat evenly. Roast these in the oven for about 25-30 minutes. Make sure to toss them halfway through. You want them tender and slightly caramelized. While they roast, heat the black beans in a small saucepan over medium heat. Stir occasionally until warmed through. Season with salt and pepper to taste. Once the sweet potatoes are ready, it’s time to assemble your tacos. Warm the corn tortillas in a dry skillet for about 30 seconds on each side. This makes them soft and easy to fold. Place a generous scoop of roasted sweet potatoes on each tortilla. Add a spoonful of black beans on top. Finish with avocado slices and chopped cilantro. Squeeze fresh lime juice over everything. If you like, add sliced radishes for a crunchy garnish. Serve immediately with lime wedges for extra flavor. For the full recipe, check the details above. Roasting sweet potatoes brings out their natural sweetness. First, cut them into small, even pieces. This helps them cook evenly. Spread them on a baking sheet in a single layer. Make sure they are not crowded. Drizzle with olive oil and toss them well with spices. Roast at 425°F for 25-30 minutes. Halfway through, stir them for even browning. When done, they should be tender and slightly caramelized. Spices can make sweet potatoes pop. Cumin adds warmth and depth. Smoked paprika gives a nice smoky flavor. Garlic powder adds a hint of savory taste. Adjust the amount of each spice to your liking. Don't forget to season with salt and pepper to enhance the flavors even more. You can also try adding chili powder for a kick. Corn tortillas work best for these tacos. They are tasty and hold up well. Warm them in a dry skillet for a few seconds on each side. This makes them soft and easy to fold. If you want a different option, try flour tortillas. They are larger and softer. Just pick what you like best for your taco experience. For the complete recipe, check out the Full Recipe section. {{image_2}} You can easily make these tacos vegan and gluten-free. Use corn tortillas, as they are naturally gluten-free. For vegan options, check that your toppings, like avocado and cilantro, are fresh and free from animal products. If you want more protein, add quinoa or tofu. You can even swap black beans for lentils for a different taste. Tacos are fun because you can add so many toppings. Try adding sliced jalapeños for heat. Fresh salsa or pico de gallo brightens the flavors. You can also sprinkle some feta cheese for a salty touch. A dollop of sour cream or a cashew cream can add creaminess. Don’t forget to serve with lime wedges to squeeze on top! Mix up the spices to change the flavor. Instead of cumin, try chili powder for a bolder taste. Add a pinch of cayenne pepper if you enjoy spice. You can also switch the smoked paprika for regular paprika for a milder flavor. If you want a sweet touch, add a bit of cinnamon to the sweet potatoes. Each change makes the dish exciting and new! For the full recipe, check the Sweet Potato and Black Bean Tacos section above. Once you finish your tacos, store any leftovers in an airtight container. Keep the sweet potato and black bean mix separate from the tortillas. This way, the tortillas stay soft and don’t get soggy. You can store the mix in the fridge for up to three days. To reheat, you can use a skillet or the microwave. If using a skillet, heat it over medium heat. Add the sweet potato and black bean mix, stirring until warm. For the tortillas, warm them in the skillet for about 30 seconds on each side. If using a microwave, place the mix in a safe dish, cover it, and heat for about one minute. Check to ensure it’s warm all the way through. You can freeze the sweet potato and black bean mix for later use. Place it in a freezer-safe bag or container. Remove as much air as possible before sealing. It will keep well for up to three months. When ready to use, thaw it overnight in the fridge. Reheat as mentioned above. Remember, do not freeze the tortillas, as they won’t hold up well after thawing. For a quick meal, you can prepare the full recipe and freeze the leftovers. To add heat, try these tips: - Add jalapeños: Chop fresh jalapeños and mix them with the black beans. - Use hot sauce: Drizzle your favorite hot sauce over the tacos before serving. - Spicy spices: Add cayenne pepper or chili powder to the sweet potatoes. These options let you control the heat level to suit your taste. Yes, you can prepare parts of the tacos ahead: - Roast sweet potatoes: You can roast the sweet potatoes and store them in the fridge. - Heat black beans: Warm the black beans when ready to serve. - Tortillas: Warm the tortillas just before you assemble the tacos. This method saves time and keeps your meal fresh and tasty. Serve these tacos warm with fresh toppings. Here are my favorites: - Avocado slices: They add creaminess and flavor. - Cilantro: Fresh cilantro gives a nice touch. - Lime wedges: A squeeze of lime brightens the tacos. - Radishes: Sliced radishes add crunch and color. Arrange everything on a platter for a fun taco night! For a detailed guide, check the Full Recipe. This guide covers all you need for sweet potato and black bean tacos. You learned about the ingredients, measurements, and nutritional info. You discovered preparation steps and cooking tips to make them tasty. We explored variations like vegan options and how to store leftovers well. In summary, enjoy the flavors and creativity with these tacos. You can make them your own in many ways. Now, it's time to gather your ingredients and start cooking!

Savory Sweet Potato and Black Bean Tacos Recipe

Are you ready to spice up your dinner routine? My Savory Sweet Potato and Black Bean Tacos are a delight!

- 1 medium head of cauliflower, cut into florets - 1 cup sharp cheddar cheese, shredded - 1 cup mozzarella cheese, shredded - 1/2 cup cream cheese, softened - 1 cup sour cream - 1/4 cup grated Parmesan cheese The main star of this dish is the cauliflower. It gives a great base for creamy goodness. I love using fresh cauliflower florets. They stay firm and give a nice texture when you bake them. The cheeses are essential for that cheesy flavor. Sharp cheddar adds a bold taste, while mozzarella gives a nice melt. Parmesan adds a salty hint that ties everything together. The creamy ingredients, like cream cheese and sour cream, create a rich texture that makes every bite satisfying. - 1 teaspoon garlic powder - 1 teaspoon onion powder - Salt and pepper to taste - 1/2 cup breadcrumbs (optional, for topping) - 2 tablespoons fresh parsley, chopped (for garnish) Seasonings are key to making your casserole pop. Garlic powder and onion powder add depth to the flavor. You can adjust salt and pepper based on your taste. Want some crunch? Add breadcrumbs on top before baking. They create a golden crust that contrasts with the creamy filling. Don’t forget to sprinkle fresh parsley on top for a burst of color and freshness. For the full recipe, you can refer to the detailed instructions above. First, preheat the oven to 375°F (190°C). This step is key for the perfect bake. While the oven heats, steam the cauliflower florets. Steam them for about 5-7 minutes. You want them tender yet still crisp. After steaming, drain the cauliflower and set it aside. In a large bowl, start mixing the creamy base. Combine softened cream cheese and sour cream. Add garlic powder, onion powder, salt, and pepper to the mixture. Stir until it blends smoothly. Next, incorporate half of the sharp cheddar and mozzarella cheese. Mix until well combined. This creamy blend is what brings the dish to life. Now, fold the steamed cauliflower into the cheese mixture. Ensure every floret gets coated. Transfer this mixture into a greased 9x13 inch baking dish. Spread it out evenly. Next, layer the remaining cheddar, mozzarella, and grated Parmesan on top. If you like a crunchy texture, sprinkle breadcrumbs over the cheese. Finally, bake in the preheated oven for 25-30 minutes. Keep an eye on it. Look for bubbly and golden brown cheese. To steam cauliflower perfectly, start with fresh florets. Cut them into small, even pieces. This ensures they cook uniformly. Steam for only 5-7 minutes. You want them tender but still crisp. Overcooking makes them mushy. Drain the cauliflower well after steaming. Excess water can make your casserole watery. To avoid a watery casserole, mix the steamed cauliflower with your creamy cheese blend right away. This helps absorb any remaining moisture. Also, consider using less sour cream or cream cheese if your mixture feels too runny. For extra flavor, consider adding more seasonings. A pinch of smoked paprika or crushed red pepper can spice things up. Fresh herbs like thyme or rosemary add a nice touch too. If you want different cheese flavors, try swapping some ingredients. Gruyère or gouda can work well. They add depth and richness. You can also mix in some blue cheese for a bolder taste. Just adjust the amount based on your preference. For a milder flavor, stick with mozzarella and cream cheese. For the full recipe, check out [Full Recipe]. {{image_2}} For a low-carb twist, try using cauliflower rice instead of florets. This change cuts carbs while keeping the great taste. You can make your own rice by pulsing cauliflower in a food processor until it resembles grains. You can use alternative cheeses to lower carbs. Look for cheeses like mozzarella or goat cheese, which have fewer carbs than cheddar. If you want to make this dish vegetarian or vegan, there are easy swaps. Use plant-based cream and cheese substitutes to keep it creamy. Brands like cashew cheese or almond cream work well. You can also add more veggies for extra nutrition. Spinach, bell peppers, or even broccoli mix well with the casserole. This not only boosts nutrition but also adds fun colors and flavors to the dish. Explore the full recipe for all the details on making this delicious Cheesy Cauliflower Casserole! To store your cheesy cauliflower casserole, let it cool first. Place it in an airtight container. This keeps it fresh for up to four days in the fridge. If you have a larger portion, cut it into smaller pieces. This way, you only heat what you need. When you reheat, set your oven to 350°F (175°C). Cover the casserole with foil to keep it moist. Heat for about 15-20 minutes. Check if it's hot all the way through before serving. To freeze the casserole, first allow it to cool completely. Then, wrap it tightly in plastic wrap. You can also place it in a freezer-safe container. It will last for up to three months in the freezer. When you are ready to enjoy it again, take it out and thaw it in the fridge overnight. After thawing, bake it at 375°F (190°C) for about 25-30 minutes. This will get the cheese bubbly and golden again. Enjoy your cheesy delight from the freezer! For the complete recipe, check out the [Full Recipe]. You can prepare this casserole in advance. First, steam the cauliflower and mix it with the cheese mixture. Then, place it in a baking dish but don't bake it yet. Cover it tightly with plastic wrap or foil and store it in the fridge. You can make it one day ahead. When you're ready to serve, just bake it as directed. This saves you time on busy days. Yes, you can use frozen cauliflower! Just thaw the cauliflower first. Drain any excess water, then steam it for about 3-5 minutes. This will keep it tender. After that, mix it into the cheese mixture as you would with fresh cauliflower. The taste will be just as good. Look for a bubbly top and melted cheese. The edges should be golden brown. You can also check the center with a fork; it should be hot and soft. Let it cool slightly before serving. Enjoy the creamy goodness! You’ve learned how to make a tasty Cheesy Cauliflower Casserole with simple steps. Start with fresh cauliflower and mix in delicious cheeses, cream, and spices. After baking, you can enjoy a creamy and cheesy dish. Remember, you can tweak the recipe to fit your needs, whether you want it low-carb or vegan. Store leftovers properly for future meals. Use this guide to impress family and friends with your cooking skills. Enjoy your culinary adventure with this easy recipe!

Cheesy Cauliflower Casserole Creamy Flavor Delight

If you’re looking for a comforting dish that’s both creamy and cheesy, get ready for my Cheesy Cauliflower Casserole. This

- Quinoa and Broth - 1 cup quinoa - 2 cups vegetable broth or water Quinoa is a healthy grain. It cooks fluffy and adds protein. Use vegetable broth for extra flavor. - Fresh Produce (Tomatoes, Cucumber, Bell Pepper, Red Onion) - 1 cup cherry tomatoes, halved - 1 cucumber, diced - 1 bell pepper (red or yellow), diced - 1/2 red onion, finely chopped Fresh produce makes this salad bright and tasty. Cherry tomatoes add sweetness. Cucumber adds crunch. Bell pepper gives color. Red onion adds a nice kick. - Fats and Condiments (Olives, Feta Cheese, Olive Oil, Lemon Juice) - 1/2 cup Kalamata olives, pitted and sliced - 1/2 cup feta cheese, crumbled - 1/4 cup olive oil - 2 tablespoons lemon juice Kalamata olives bring a salty punch. Feta cheese adds creaminess. Olive oil and lemon juice make a zesty dressing. - Herbs and Spices (Oregano, Fresh Parsley, Salt, Pepper) - 1 teaspoon dried oregano - 1/4 cup fresh parsley, chopped - Salt and pepper to taste Oregano gives a Mediterranean flair. Fresh parsley adds brightness. Adjust salt and pepper for your taste. This mix of ingredients makes the Mediterranean Quinoa Salad a flavorful and fresh dish. For the complete list of instructions, check the Full Recipe. Rinsing and Cooking Quinoa First, measure 1 cup of quinoa. Place it in a fine mesh strainer. Rinse it under cold water. This step removes any bitterness. Next, add the rinsed quinoa to a medium saucepan. Pour in 2 cups of vegetable broth or water. Bring the mixture to a boil over high heat. Once boiling, reduce the heat to low. Cover the pan and let it simmer for about 15 minutes. The quinoa is done when the liquid is absorbed. Cooling Process After cooking, fluff the quinoa with a fork. Transfer it to a large bowl to cool. Let it sit until it reaches room temperature. This keeps your salad fresh and tasty. Combining Fresh Ingredients While the quinoa cools, prepare the fresh veggies. Take 1 cup of cherry tomatoes and halve them. Dice 1 cucumber and 1 bell pepper. Finely chop 1/2 a red onion. Slice 1/2 cup of Kalamata olives. In a large mixing bowl, combine all these fresh ingredients. Add 1/2 cup of crumbled feta cheese and 1/4 cup of chopped fresh parsley. Preparing the Dressing In a small bowl, make the dressing. Whisk together 1/4 cup of olive oil, 2 tablespoons of lemon juice, 1 teaspoon of dried oregano, and a pinch of salt and pepper. This dressing adds a zesty flavor to your salad. Tossing the Salad Once the quinoa is cool, add it to the bowl with the veggies. Pour the dressing over the salad. Gently toss everything together. Make sure each ingredient gets coated with the dressing. Adjusting Seasonings Taste your salad. You may want more salt, pepper, or lemon juice. Adjust the seasonings to fit your preference. This step ensures your Mediterranean Quinoa Salad is just right. For the full recipe, check the earlier section. - Alternative Grains: You can swap quinoa for bulgur or farro. These grains offer different textures and flavors. They can make your dish unique. Try bulgur for a softer bite or farro for a chewy texture. - Dairy-Free Options: If you want to skip dairy, use nutritional yeast instead of feta cheese. It adds a cheesy flavor without milk. You can also use avocado for creaminess. - Additional Herbs and Spices: To boost taste, add fresh basil or mint. These herbs give a fragrant touch. You can also sprinkle in some cumin or paprika for a warm spice note. - Suggested Toppings: Consider adding toasted nuts or seeds. Pine nuts or sunflower seeds add crunch. You can also drizzle balsamic glaze for a sweet finish. - Serving Suggestions: Serve this salad in a large bowl for a family-style meal. You can also plate it in individual bowls for a more formal touch. - Garnishing Tips: Garnish with extra parsley and whole olives on top. This adds color and visual appeal. A lemon wedge on the side can invite guests to add more zing. For the full recipe, check out the Mediterranean Quinoa Salad 🥗. {{image_2}} For those who follow a vegan diet, skip the feta cheese. Use a dairy-free cheese or leave it out. The salad stays fresh and tasty without it. You can also make this dish gluten-free by ensuring you use certified gluten-free quinoa. If you're looking to boost protein, add chickpeas. They pair well with the other ingredients. You can also grill chicken. This will add a lovely smoky flavor. Both options make the salad heartier and more filling. Using seasonal vegetables makes this salad even better. In the summer, add ripe tomatoes and bell peppers. In the fall, try roasted squash or sweet potatoes. Each season brings new flavors to enjoy. You can also adjust the dressing based on what's in season. In the summer, use fresh herbs like basil. In the winter, add a touch of warm spices like cumin. These small changes can change the whole taste of the salad. Want to mix it up? Try Mediterranean quinoa salad with a twist. Add diced mango for a sweet touch. You can also use avocado for creaminess. These additions can create a vibrant, fresh take on this classic dish. The Mediterranean quinoa salad is versatile. The full recipe allows you to explore different tastes and textures. Experiment and find combinations you love! To keep your Mediterranean quinoa salad fresh, store it in the fridge. Use an airtight container. This helps prevent moisture loss and keeps the flavors intact. The salad can last for about three to five days in the fridge. If you have extra dressing, store it separately. This way, your salad stays crisp. Freezing is also an option. However, freezing can change the texture of some ingredients. I suggest freezing only the quinoa and not the veggies or feta. To freeze, place the quinoa in a freezer-safe bag. Make sure to remove as much air as possible. Quinoa can last up to three months in the freezer. For the best taste and quality, eat your salad within three days. After that, it may start losing its freshness. Look for signs of spoilage, such as a sour smell or a slimy texture. If you notice any of these signs, it's best to toss it out. When stored properly, fresh ingredients like tomatoes and cucumbers can lose their crunch over time. To keep them fresh, use them within the first two days. Reheating your quinoa salad needs care. You want to maintain its flavor and texture. The best method is to warm it gently in a pan on low heat. Add a splash of olive oil or lemon juice to help with moisture. Stir gently until it’s warmed through. Avoid microwaving, as it can make the salad soggy. If you prefer it cold, you can enjoy it straight from the fridge. Just remember to give it a good toss before serving. How long does Mediterranean Quinoa Salad last in the fridge? This salad can last up to three days in the fridge. Store it in an airtight container. This helps keep it fresh and tasty. Can I prepare this salad in advance? Yes, you can make this salad ahead of time. It tastes even better after chilling for a few hours. Just keep the dressing separate until you are ready to serve. What can I serve with Mediterranean Quinoa Salad? You can serve this salad with grilled chicken, fish, or even pita bread. It pairs well with hummus or tzatziki sauce too. What are the health benefits of quinoa? Quinoa is a great source of protein. It has all nine essential amino acids. It is also high in fiber and antioxidants. This makes quinoa a healthy choice for many diets. Is this salad low in calories? Yes, Mediterranean Quinoa Salad is low in calories. Each serving has about 200 calories. It is filling yet light, making it a great option for lunch or dinner. What is a typical serving size for quinoa salad? A typical serving size is about one cup. This gives you a good balance of flavors and nutrients. How many people does this recipe serve? This recipe serves four people. It’s perfect for sharing at a picnic or family meal. You can easily double the recipe if you need more. Check the Full Recipe for details. This blog post covered how to make a delicious Mediterranean quinoa salad. We looked at key ingredients like fresh veggies, herbs, and healthy fats. You learned step-by-step how to prepare, mix, and serve your salad. I shared tips on variations and storage too. In the end, making this salad is not just easy; it’s fun. You can customize it to fit your taste. Enjoy the fresh flavors and healthy benefits that come from your kitchen!

Mediterranean Quinoa Salad Flavorful and Fresh Dish

Are you ready to dive into a vibrant and nutrient-packed Mediterranean Quinoa Salad? This dish bursts with fresh flavors and

To make Spicy Shrimp Pasta, gather these fresh and pantry ingredients: - Fresh Ingredients: - 8 oz linguine or spaghetti - 1 lb large shrimp, peeled and deveined - 1 medium bell pepper, sliced (preferably red or yellow) - 1 zucchini, sliced into thin half-moons - 4 cloves garlic, minced - 1 can (14 oz) diced tomatoes, drained - Fresh basil or parsley, for garnish (optional) - Essential Pantry Items: - 3 tablespoons olive oil - 1 teaspoon red pepper flakes (adjust for spice level) - Salt and pepper to taste - Optional Garnishes and Toppings: - Grated Parmesan cheese, for serving (optional) These ingredients create a quick and tasty meal. You can adjust the spice level with red pepper flakes. Fresh herbs add a nice touch, and cheese makes it creamy. This dish is perfect for a busy weeknight or a cozy dinner. If you want the full recipe, check out the rest of the article. To cook the pasta, fill a large pot with water. Add a good amount of salt; this helps flavor the pasta. Bring the water to a boil. Add 8 ounces of linguine or spaghetti. Cook according to the package instructions. You want it to be al dente, which means firm but not hard. To check, taste a strand a minute or two before the timer goes off. When it’s done, save 1 cup of pasta water. Drain the rest and set the pasta aside. For perfect shrimp, start with large, peeled, and deveined shrimp. Heat 2 tablespoons of olive oil in a large skillet over medium-high heat. Add the shrimp in a single layer. Season with salt and pepper. Cook for 2-3 minutes until they turn pink and opaque. Timing is key! Don’t overcook them; they can get rubbery. Once cooked, remove the shrimp from the skillet and set them aside. Choose fresh bell peppers and zucchini. For bell peppers, I prefer red or yellow for color. Slice the bell pepper and zucchini into thin pieces. This helps them cook quickly and evenly. In the same skillet, add a tablespoon of olive oil. Toss in 4 cloves of minced garlic and 1 teaspoon of red pepper flakes. Stir for about 30 seconds. This brings out the flavors and gets your kitchen smelling great! Next, add the sliced bell pepper and zucchini to the skillet. Sauté for 3-4 minutes until they soften. Pour in one can of drained diced tomatoes. Stir well to mix everything. Now, return the shrimp to the skillet. Add the cooked pasta. Mix it all together. If it looks dry, gradually add that reserved pasta water until you reach your desired consistency. Now it’s time to taste! Adjust the seasoning with more salt and pepper if needed. Let everything cook together for 2-3 minutes. This helps the flavors blend nicely. When serving, plate the Spicy Shrimp Pasta and garnish with fresh basil or parsley. You can also sprinkle grated Parmesan cheese on top if you like. Enjoy your beautiful dish! To adjust the heat in your Spicy Shrimp Pasta, use red pepper flakes. Start with one teaspoon for a mild kick. If you want it spicier, add more. Just remember, it's easier to add heat than to take it away. For different flavors, consider using: - Cayenne pepper for a stronger heat - Smoked paprika for a smoky touch - Curry powder for a unique spin Fresh herbs can elevate your dish. I love using basil or parsley for garnish. They add freshness and color. You can also try these herbs: - Cilantro for a bright flavor - Oregano for an earthy taste - Thyme for a subtle sweetness If you don't have fresh herbs, dried herbs work too. Just use half the amount since dried herbs are more potent. Time-saving techniques can help you cook faster. Here are some ideas: - Prep your ingredients first. Chop veggies and measure spices ahead of time. - Use a large skillet to cook everything in one pan. It saves time on cleanup. - A pasta pot with a built-in strainer can make draining pasta quick and easy. For tools, I recommend having a sharp knife for chopping and a good-quality skillet for sautéing. These will make cooking more fun and less stressful. {{image_2}} To make a meatless dish, swap the shrimp for white beans or mushrooms. Both options add protein and texture. Beans bring a creamy feel, while mushrooms add a hearty bite. Use the same cooking steps, but sauté these ingredients until tender. This keeps the dish flavorful and satisfying without shrimp. If you want more protein, chicken or scallops work well. For chicken, cut it into small pieces and cook it until golden brown. Scallops take just a few minutes to cook. Adjust the cooking time to about 4-5 minutes for chicken and 2-3 minutes for scallops. Be sure to season them as you would the shrimp! You can use many pasta types for this dish. Penne or fettuccine are great alternatives. Each type has its own cooking time. For penne, cook for about 11-12 minutes; for fettuccine, aim for 8-10 minutes. Just follow the package instructions. This adds variety and keeps your meals interesting. For the full recipe, check the details above! To keep your Spicy Shrimp Pasta fresh, follow these steps: - Cool it down: Let the pasta sit at room temp for about 30 minutes. - Use airtight containers: Store in glass or plastic containers with tight lids. - Label and date: Write the date on the container. This helps you keep track. Storing it properly helps avoid spoilage. Always refrigerate leftovers within two hours. When reheating Spicy Shrimp Pasta, do it gently. Here’s how: - Use the stovetop: Heat on low in a skillet. - Add water or broth: This adds moisture back in. Use a few tablespoons. - Cover with a lid: This keeps steam in and helps heat evenly. You can also use the microwave. Just cover the dish and stir halfway through. If you want to freeze your Spicy Shrimp Pasta, here’s what to do: - Cool completely: Make sure it’s fully cooled before freezing. - Use freezer-safe bags: Squeeze out as much air as possible. - Portion it out: Freeze in single servings for easy meals later. To thaw, move it to the fridge overnight. Reheat as mentioned above for the best results. Yes, you can use frozen shrimp. Just make sure to thaw them first. Place the shrimp in a bowl of cold water for about 15-20 minutes. Change the water if it gets warm. After thawing, pat the shrimp dry with paper towels. This helps them cook better and not get watery. You can use the same cooking time as fresh shrimp. To make Spicy Shrimp Pasta gluten-free, use gluten-free pasta. Options like brown rice pasta or quinoa pasta work well. Cook them according to the package instructions. These alternatives have a similar taste and texture. Just be sure to check the brands for gluten-free labels. You can pair this dish with a simple green salad. A side of garlic bread also goes great. Steamed vegetables like broccoli or asparagus add color and nutrition. If you like, serve it with a light white wine for a nice touch. Spicy Shrimp Pasta can last about 3 days in the fridge. Store it in an airtight container to keep it fresh. Make sure to let it cool before sealing. When ready to eat, reheat it on the stove or in the microwave. Just add a splash of water or oil to keep it moist. This blog post gave you all you need for a tasty Spicy Shrimp Pasta. We explored fresh ingredients, step-by-step cooking, and tips to customize flavor. You learned how to store and reheat leftovers too. Experiment with spices and herbs to make this dish yours. Each choice adds a unique twist. Don't hold back—get creative and enjoy cooking!

Spicy Shrimp Pasta Flavorful and Quick Dinner Recipe

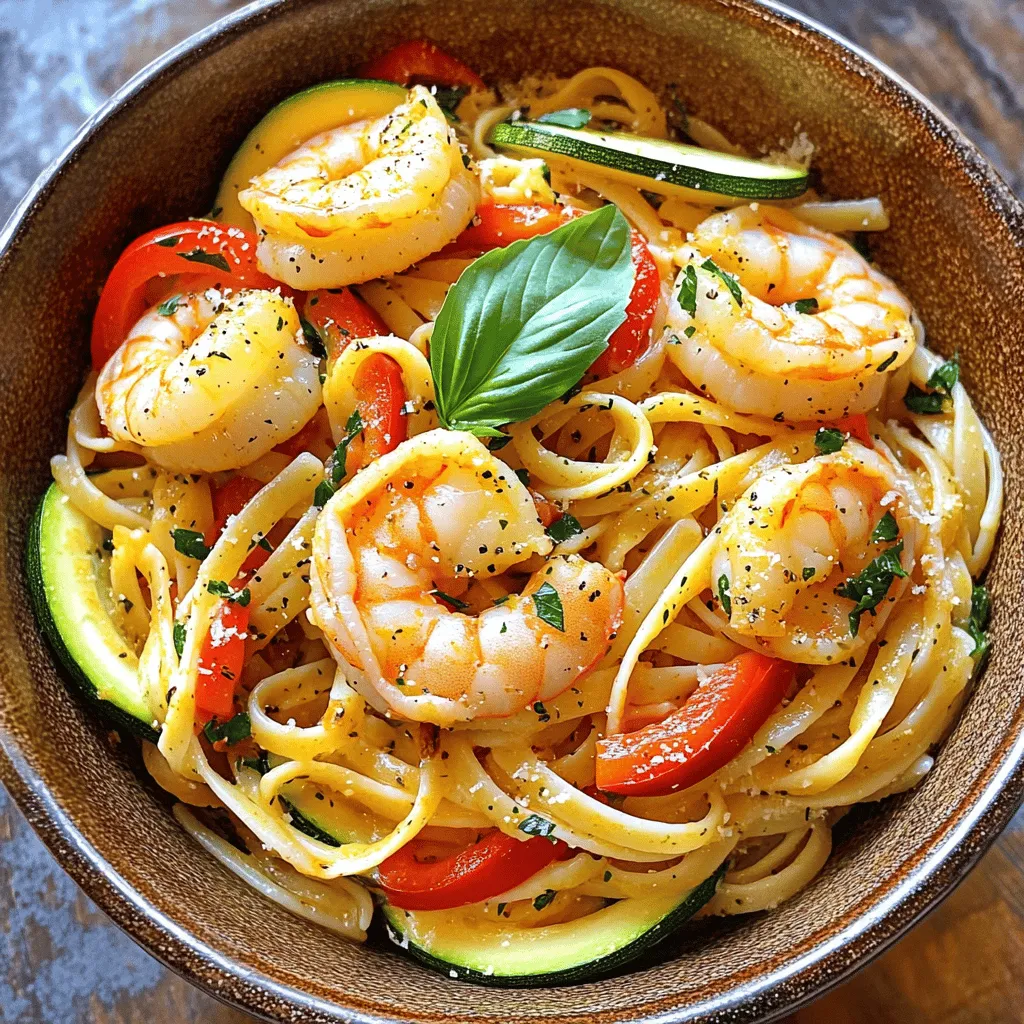
Looking to spice up your dinner routine? This Spicy Shrimp Pasta recipe is not only quick to prepare, but it’s

- 2 cups cooked jasmine rice (preferably cold) - 1 cup mixed bell peppers (red, yellow, green), diced - 1 cup broccoli florets - 1 cup peas (fresh or frozen) - 2 carrots, diced - 2 green onions, sliced - 3 cloves garlic, minced - 2 tablespoons soy sauce (low sodium) - 1 tablespoon sesame oil - 1 tablespoon vegetable oil - 1 teaspoon ginger, grated - Salt and pepper to taste - Optional: 2 eggs, beaten for a vegetarian option When you gather your ingredients, aim for freshness. Cold jasmine rice works best. This rice does not clump, and it adds nice texture. Mix bell peppers add color and sweetness. Broccoli adds crunch and nutrition. Peas give a pop of flavor. Carrots offer sweetness and color, while green onions bring a mild onion taste. Garlic and ginger amplify the dish's flavor. For seasoning, use low-sodium soy sauce and sesame oil. These enhance the taste without overpowering it. Optional eggs can add protein and richness. You can skip them for a vegan version. Understanding these ingredients helps you make the best vegetable fried rice. If you are curious about nutritional facts or serving ideas, check the full recipe for more details. First, gather your ingredients. This makes cooking easier and more fun. Chop all your vegetables. Dice the bell peppers and carrots. Slice the green onions. Break the broccoli into small florets. If you use frozen peas, there’s no need to chop them. Next, cook jasmine rice. Cold rice works best. If you have leftover rice, use that! It prevents clumping and helps with frying. Heat the vegetable oil in a large skillet or wok over medium-high heat. Add the minced garlic and grated ginger. Sauté for about 30 seconds until they smell great. Now it’s time to add the veggies. Toss in the bell peppers, carrots, and broccoli. Stir-fry for 3-4 minutes until they start to soften. Add the peas and cook for one more minute. Push the veggies to one side of the skillet. If you want to add eggs, pour the beaten eggs on the empty side. Scramble them until they are fully cooked. Then mix them with the vegetables. Next, add the cold jasmine rice. Use a spatula to break up any clumps gently. Drizzle soy sauce and sesame oil over the rice mixture. Stir everything together for 2-3 minutes until well combined and hot. Now for the final touches! Season with salt and pepper to your liking. Add the sliced green onions and mix well. With these steps, you’ll have a tasty dish. If you want more detailed instructions, check the Full Recipe for all the steps! - Best type of rice to use: I recommend jasmine rice. Its fluffy texture works well. It absorbs flavors without becoming mushy. - Importance of using cold rice: Cold rice is key. Freshly cooked rice can be sticky. Cold rice separates easily. It keeps your fried rice light and fluffy. - Recommended cooking oil choices: For the best flavor, use a mix of sesame oil and vegetable oil. Sesame oil adds depth. Vegetable oil has a high smoke point, great for frying. - Additional seasonings to consider: Try adding chili sauce for some heat. You can also use oyster sauce or hoisin sauce. These boost the taste and add more layers to your dish. - How to customize vegetable choices: Feel free to swap in your favorite veggies. Zucchini, corn, or snap peas all work well. Mix and match for fun flavors and colors. - Presentation ideas for serving: Serve your fried rice in bowls. Top with sliced green onions and sesame seeds. This adds a nice crunch and a pop of color. - Dish pairings and accompaniments: Fried rice pairs well with dishes like spring rolls or dumplings. You can also serve it alongside grilled meats or tofu for a complete meal. Enjoy every bite! {{image_2}} To make your vegetable fried rice fully vegan, skip the eggs. You can add more veggies or plant-based protein. Tofu is a great choice. Just cube it and sauté until golden. You can also use tempeh or edamame for extra protein. Both options keep the dish filling and tasty. For a gluten-free version, choose gluten-free soy sauce. Tamari is a popular choice. You can also try coconut aminos for a sweeter flavor. If you need to avoid rice, use quinoa or cauliflower rice. These options add great texture and flavor while keeping it gluten-free. Want to spice things up? Add proteins like shrimp or chicken. Cook them first, then mix with the veggies. For plant-based options, try crispy tofu or seitan. Creative veggie combos can include zucchini, snap peas, or mushrooms. This keeps your dish interesting and colorful. For the complete recipe, check out the [Full Recipe]. To store leftover vegetable fried rice, let it cool first. Place it in an airtight container. This keeps the rice fresh. Use a container that seals well to avoid moisture. You can store it in the fridge for up to three days. The best way to reheat vegetable fried rice is in a skillet. Heat it over medium heat. Add a little oil or water to keep it moist. Stir it often to heat evenly. If you want fluffy rice, break apart any clumps before reheating. This keeps your fried rice light and tasty. Yes, you can freeze vegetable fried rice. Make sure to cool it completely before packing. Use freezer-safe bags or containers. This helps prevent freezer burn. When you’re ready to eat, thaw it in the fridge overnight. Reheat it in a skillet for the best results. You can add chili sauce, red pepper flakes, or sriracha. These spices boost heat and flavor. A splash of soy sauce mixed with chili oil works too. You can also toss in fresh chopped chili peppers. Start with a little, then add more if you like it hot! Yes, using leftover rice is perfect for fried rice. Cold, day-old rice has a firmer texture. This helps each grain stay separate while cooking. Freshly cooked rice can become mushy. So, always opt for chilled rice if possible. It will give you the best results. Vegetable fried rice lasts about 3 to 5 days in the fridge. Store it in an airtight container. To keep it fresh, cool it before refrigerating. When you are ready to eat, just reheat it well. Make sure it gets hot all the way through. This blog has covered how to make a tasty vegetable fried rice. We discussed main ingredients like rice, fresh veggies, and seasonings. You learned step-by-step instructions to make it just right. I also shared tips for flavor and storage. In the end, vegetable fried rice is simple, flexible, and delicious. Feel free to adjust it to suit your taste. Enjoy creating your own version!

Vegetable Fried Rice Simple and Flavorful Recipe

If you love quick, tasty meals, this Vegetable Fried Rice recipe is for you! Packed with colorful veggies and rich

Older posts
Newer posts
← Previous Page1 … Page38 Page39 Page40 … Page76 Next →

dsad

© 2025 So Yum Recipes • Built with GeneratePress

Our Policies

  • Copyright Policy
  • Cookie Policy
  • GDPR Policy
  • Privacy Policy
  • Disclaimer
  • Terms Of Use

More Information

  • Home
  • About
  • Contact
  • Appetizers
  • Dessert
  • Dinner
  • Drinks
©2025, So Yum Recipes About Back To Top