Skip to content
DisclaimerTerms Of UseGDPR PolicyCookie Policy

So Yum Recipes

  • Home
  • Drinks
  • Appetizers
  • Dinner
  • Dessert
  • About
  • Contact
  • Privacy Policy
DisclaimerTerms Of UseGDPR PolicyCookie Policy

Chloe

- Pre-made pizza dough (store-bought or homemade) - Marinara sauce - Fresh mozzarella cheese - Sliced tomatoes - Fresh basil leaves - Olive oil - Garlic powder - Seasoning (salt, black pepper, red pepper flakes) - Additional cheese varieties (parmesan, goat cheese) - Veggies (bell peppers, olives) - Protein options (pepperoni, sausage) To make a great Margherita pizza, start with fresh ingredients. The dough is the base. You can use store-bought dough or make your own. I often grab some pre-made dough when I am short on time. Next, you need marinara sauce. A good sauce adds depth and flavor. I love to use homemade sauce when I can, but store-bought works well too. Fresh mozzarella cheese is key for that creamy texture. Sliced tomatoes add sweetness. You can’t skip fresh basil; it brings a bright taste. Drizzling olive oil on top gives flavor and helps everything cook well. Garlic powder adds an extra punch. Don’t forget seasoning! Salt, black pepper, and red pepper flakes can really enhance the dish. If you want to get creative, consider optional add-ins. Try adding different cheeses like parmesan or goat cheese. Veggies like bell peppers or olives can add great flavor. If you like meat, pepperoni or sausage is a tasty choice too. This mix of ingredients makes a simple yet delicious Margherita pizza. For the full recipe, you can check [Full Recipe]. - Preheat your oven to 475°F (245°C). This high heat makes the crust crisp. - If you have a pizza stone, place it in the oven. This helps cook the pizza evenly. If not, use a baking sheet. Dust it with flour or cornmeal to prevent sticking. - On a clean, floured surface, stretch or roll out the dough. Aim for a 12-inch circle. - Transfer the dough to your prepared baking sheet or pizza peel. - Spread a layer of marinara sauce on the dough. Leave a 1-inch border around the edges. - Evenly distribute the fresh mozzarella slices on top of the sauce. Then, add the sliced tomatoes. - Drizzle the olive oil over everything. Sprinkle garlic powder, salt, black pepper, and red pepper flakes if you like a kick. - Carefully transfer the pizza to the oven or onto the heated stone. - Bake for 10 to 15 minutes. Check for a golden crust and bubbling cheese. - Once baked, remove the pizza from the oven. Top with fresh basil leaves right away. Let it cool for a minute before slicing. For the full recipe, check out the details above. Enjoy your tasty Margherita pizza! To get the best crust, oven temperature is key. Preheat your oven to 475°F (245°C). This high heat helps the crust rise and become crisp. If you have a pizza stone, use it. It keeps heat well and cooks the bottom evenly. If you don’t have one, a baking sheet works too, but it may not give the same crispness. Evenly spread your toppings for a balanced bite. Start with the sauce, then add cheese, and finally, place the tomatoes. This order helps the cheese melt well. To avoid burning, keep an eye on the cheese as it melts. If you notice it browning too fast, lower the heat slightly. Seasonings make a big difference. I like to use garlic powder, salt, and black pepper. These add depth to the pizza. For a fun twist, try red pepper flakes for heat. Drizzling olive oil on top gives a lovely finish. You can also add balsamic vinegar for a sweet touch. {{image_2}} Many places put their own twist on Margherita pizza. The Neapolitan style is the most famous. It uses simple, fresh ingredients. This style has a thin, soft crust with a charred bottom. You can also find variations with extra toppings. Some people add more basil for a fragrant touch. Others like a drizzle of balsamic glaze for sweetness. If you want a healthier option, try a cauliflower crust. It’s low in carbs and still tasty. Whole wheat dough is another great choice. It adds fiber and has a nutty flavor. You can also find gluten-free dough for those with allergies. Each option brings its own unique taste to your pizza. Using seasonal vegetables can elevate your pizza. Zucchini and bell peppers add crunch and color. These veggies work well with the classic flavors of Margherita pizza. When it comes to tomatoes, fresh ones are best, but canned tomatoes can work too. Just be sure to drain excess liquid to keep your pizza from getting soggy. After enjoying your Margherita pizza, you might have some slices left. To keep your pizza fresh, refrigerate it. Place the slices in an airtight container. This helps keep the crust from getting soggy. If you do not have a container, wrap the pizza in aluminum foil. Make sure it is tight to prevent air from getting in. When it is time to eat your leftovers, you want to reheat them well. The oven works best for crisping the crust. Preheat your oven to 375°F (190°C). Place the pizza directly on the oven rack or on a baking sheet. Heat it for about 10 minutes. This will help keep the crust nice and crunchy. If you are short on time, you can use a microwave. Place the pizza on a microwave-safe plate. To keep the crust from getting chewy, place a cup of water in the microwave with it. Heat for about 30 seconds. This method can help, but the crust may not be as crisp. If you have more pizza than you can eat, freezing is a great option. Let the pizza cool completely before freezing. Wrap each slice in plastic wrap or aluminum foil. Make sure it is tight to avoid freezer burn. Place the wrapped slices in a freezer bag or container. Try to remove as much air as possible. To thaw your pizza, take it out of the freezer. Place it in the fridge for a few hours or overnight. You can also use the microwave to thaw it quickly. Just be careful not to heat it too long. Once thawed, you can reheat it in the oven. Properly stored, your pizza can last in the freezer for up to three months. Enjoy your Margherita pizza whenever you like! Margherita pizza comes from Naples, Italy. It dates back to the late 1800s. The queen of Italy, Margherita di Savoia, inspired its name. Local chef Raffaele Esposito created the pizza to honor her. He used simple toppings: tomatoes, mozzarella, and basil. These colors represent the Italian flag. Margherita pizza is now loved worldwide for its fresh taste and quality ingredients. Yes, you can make Margherita pizza vegan. Instead of fresh mozzarella, try using plant-based cheese. Many brands offer good dairy-free options. You can also use cashew cheese for a creamy touch. For the crust, ensure your dough has no dairy. Most store-bought doughs are vegan, but check the label. Use olive oil and fresh veggies for extra flavor. You can easily customize your Margherita pizza. Here are a few ideas: - Add extra cheese: Try goat cheese or feta for a tangy taste. - Mix in veggies: Bell peppers, spinach, or mushrooms add color and crunch. - Include proteins: Pepperoni, chicken, or even prosciutto can be great. - Experiment with herbs: Oregano or thyme can enhance the flavor. Feel free to get creative with toppings! The best oven temperature for pizza is 475°F (245°C). At this heat, the crust cooks well and gets crispy. If you have a pizza stone, preheat it in the oven for great results. This helps create a nice, even bake. Bake your pizza for about 10-15 minutes. Watch for the cheese to bubble and the crust to turn golden. Making Margherita pizza is simple and fun. You start with easy ingredients like dough and cheese. Then, follow the steps to bake it just right. Don’t forget tips for a perfect crust and tasty toppings! In the end, you can enjoy a hot, homemade pizza. Customize it to your taste. Keep leftovers fresh for later. This meal is a classic that brings joy to the table. You can impress friends and family with your pizza skills!

Easy Margherita Pizza Tasty and Simple Recipe Guide

Are you ready to make a delicious Easy Margherita Pizza at home? This recipe is simple, fun, and full of

To make baked feta pasta, you will need: - 200g pasta (preferably penne or fusilli) - 200g feta cheese - 2 cups cherry tomatoes, halved - 4 cloves garlic, minced - 1/4 cup olive oil - 1 teaspoon dried oregano - 1/2 teaspoon red pepper flakes (optional) - Salt and pepper to taste - Fresh basil leaves for garnish - Grated Parmesan cheese for serving (optional) These ingredients come together to create a rich and creamy dish. The feta cheese melts and mixes with the tomatoes, making the sauce tasty and smooth. I like using short pasta shapes like penne or fusilli. They hold the sauce well and make each bite a delight. You can also try farfalle or rigatoni for a unique twist. The key is to choose pasta that will catch all the creamy goodness from the sauce. You can add fun toppings to boost flavor. Fresh basil leaves add a bright touch. Grated Parmesan cheese gives a nice salty kick. You might also sprinkle some extra red pepper flakes for heat. Feel free to get creative with your toppings, as they can elevate the dish even more. First, gather all your ingredients. This makes cooking easier and faster. You need: - 200g pasta (preferably penne or fusilli) - 200g feta cheese - 2 cups cherry tomatoes, halved - 4 cloves garlic, minced - 1/4 cup olive oil - 1 teaspoon dried oregano - 1/2 teaspoon red pepper flakes (optional) - Salt and pepper to taste - Fresh basil leaves for garnish - Grated Parmesan cheese for serving (optional) Next, preheat your oven to 400°F (200°C). This step is key for getting the right texture. In a large baking dish, place the feta cheese in the center. Surround it with the halved cherry tomatoes and minced garlic. This mix adds great flavor. Drizzle the olive oil over everything. Sprinkle with oregano, red pepper flakes, salt, and pepper. Now, it’s time to bake! Place your dish in the oven for 25-30 minutes. You want the feta to soften and the tomatoes to blister. This will create a rich, creamy sauce. While the feta and tomatoes bake, cook your pasta. Boil salted water in a large pot. Add the pasta and cook until al dente, following package instructions. Once done, drain it and set it aside. When the feta and tomatoes are ready, take the dish out of the oven. Use a fork to mash the feta and mix it with the tomatoes. This creates a luscious sauce. Add the cooked pasta to the baking dish. Toss everything together until well combined. Taste and adjust seasoning if needed. Serve your dish hot, garnished with fresh basil leaves and a sprinkle of grated Parmesan cheese, if desired. Enjoy your delicious baked feta pasta! For the full recipe, check the ingredients and step-by-step instructions earlier. To get a rich, creamy texture in your baked feta pasta, choose your feta wisely. Use block feta, not crumbled. The block melts better and creates a nice sauce. When the feta bakes, it softens and mixes well with the tomatoes. After baking, mash the feta with a fork. This step is key! Mix it well with the tomatoes to create that creamy goodness. The olive oil adds to the smooth texture, so don’t skip it. If you have leftovers, store them in an airtight container. This keeps the pasta fresh. Make sure to cool it completely before sealing. You can keep it in the fridge for up to three days. If you want to freeze it, use a freezer-safe container. Just note that the texture may change a bit after freezing. To reheat, warm it slowly in a pan over low heat. Add a splash of water or olive oil to help it keep moisture. Timing is important for the best flavors. Preheat your oven to 400°F before you start prepping. This ensures the feta and tomatoes cook evenly. Bake them for 25-30 minutes until the tomatoes blister. While they bake, start cooking your pasta. Aim for your pasta to be done just as the feta and tomatoes are ready. This way, they mix together hot and fresh. You’ll get the best taste when everything is combined right away. {{image_2}} You can boost the taste of your baked feta pasta with fun add-ins. Try tossing in some spinach or kale for extra greens. These will add color and nutrients. Artichoke hearts are another great choice. They bring a nice tangy flavor. If you like protein, add grilled chicken or shrimp. This makes the dish heartier and more filling. For a burst of zest, squeeze fresh lemon juice over the pasta before serving. You can even stir in olives for a briny kick. Each add-in makes the dish unique and tasty. Don't worry if you don't have all the exact ingredients. You can switch up the pasta type. Use any shape you have on hand, like spaghetti or rigatoni. If you're out of feta, cream cheese or goat cheese works too. They give a creamy texture and rich taste. Fresh tomatoes can be replaced with canned tomatoes. Just drain them first to avoid excess liquid. You can also mix in different herbs like thyme or rosemary in place of oregano. Feel free to get creative and use what you have. This dish is great on its own, but you can serve it in fun ways. Try it as a side dish for grilled meats. It pairs well with chicken or steak. You could also serve it in a bowl topped with fresh herbs. For a lighter meal, eat it with a fresh salad. You can even pack it for lunch! This dish tastes great cold as well. Just keep it in the fridge and enjoy it later. Explore these serving ideas to keep your meals fresh and exciting. To keep your baked feta pasta fresh, let it cool completely. Use an airtight container. Store it in the fridge for up to three days. If you have leftovers, try to keep the pasta and sauce together. This way, the flavors stay rich and creamy. When you're ready to enjoy your leftovers, preheat your oven to 350°F (175°C). Place the pasta in an oven-safe dish. Cover it with foil to keep it moist. Heat for about 15-20 minutes. You can also reheat it in the microwave. Use a microwave-safe bowl and heat in short bursts. Stir often to warm it evenly. If you want to freeze your baked feta pasta, do it before adding any fresh herbs or cheese. Store it in a freezer-safe container. It can last for up to three months. To reheat, thaw it overnight in the fridge. Then, follow the reheating instructions mentioned above. Enjoy your delicious dish anytime! For Baked Feta Pasta, I like using penne or fusilli. These shapes hold sauce well. Penne has a nice bite, while fusilli twists grab the creamy feta. You can use any pasta you enjoy, but these two work best for this dish. Yes, you can make Baked Feta Pasta ahead of time. You can prepare it up to the baking step. Store it in the fridge for a day or two. When you’re ready, bake it until bubbly. This saves time on busy days. To adjust the spice level, simply change the red pepper flakes. For mild heat, use less or none at all. For more heat, add more flakes. You can also sprinkle some black pepper for a little kick. Taste as you go to find your perfect level. Yes, this dish is great for meal prep. You can make a big batch and store it in portions. It keeps well in the fridge for up to four days. Just reheat it in the oven or microwave when you’re ready to eat. Some common mistakes include not preheating the oven or overcooking the pasta. Make sure to bake the feta and tomatoes until they are soft and blistered. Also, don’t forget to mix the feta and tomatoes well for a creamy sauce. Following the Full Recipe helps avoid these pitfalls. When making Baked Feta Pasta, you need a few simple items. Here’s the list: - 200g pasta (preferably penne or fusilli) - 200g feta cheese - 2 cups cherry tomatoes, halved - 4 cloves garlic, minced - 1/4 cup olive oil - 1 teaspoon dried oregano - 1/2 teaspoon red pepper flakes (optional) - Salt and pepper to taste - Fresh basil leaves for garnish - Grated Parmesan cheese for serving (optional) These ingredients come together to create a dish full of flavor. The feta cheese becomes creamy. The tomatoes burst with sweet juice. Garlic adds a nice kick. Olive oil ties it all together, making each bite delicious. You can use different pasta types too. Penne and fusilli work well, but feel free to try others. I like to keep it simple. Fresh basil gives a nice finish. It adds color and a fresh taste. If you want, sprinkle some Parmesan on top for extra flavor. For the complete Baked Feta Pasta Delight recipe, check out the ingredients and step-by-step instructions sections. Baked feta pasta is simple and tasty. We covered the main ingredients, pasta types, and optional toppings. I shared easy steps to prep and bake the dish. We also discussed tips for creamy texture and safe storage. Variations can add fun flavors, too. Stay creative as you make this dish. Enjoy making it your own with unique ingredients. Whether you share it or keep it for yourself, baked feta pasta brings joy to every meal.

Baked Feta Pasta Flavorful and Simple Recipe Guide

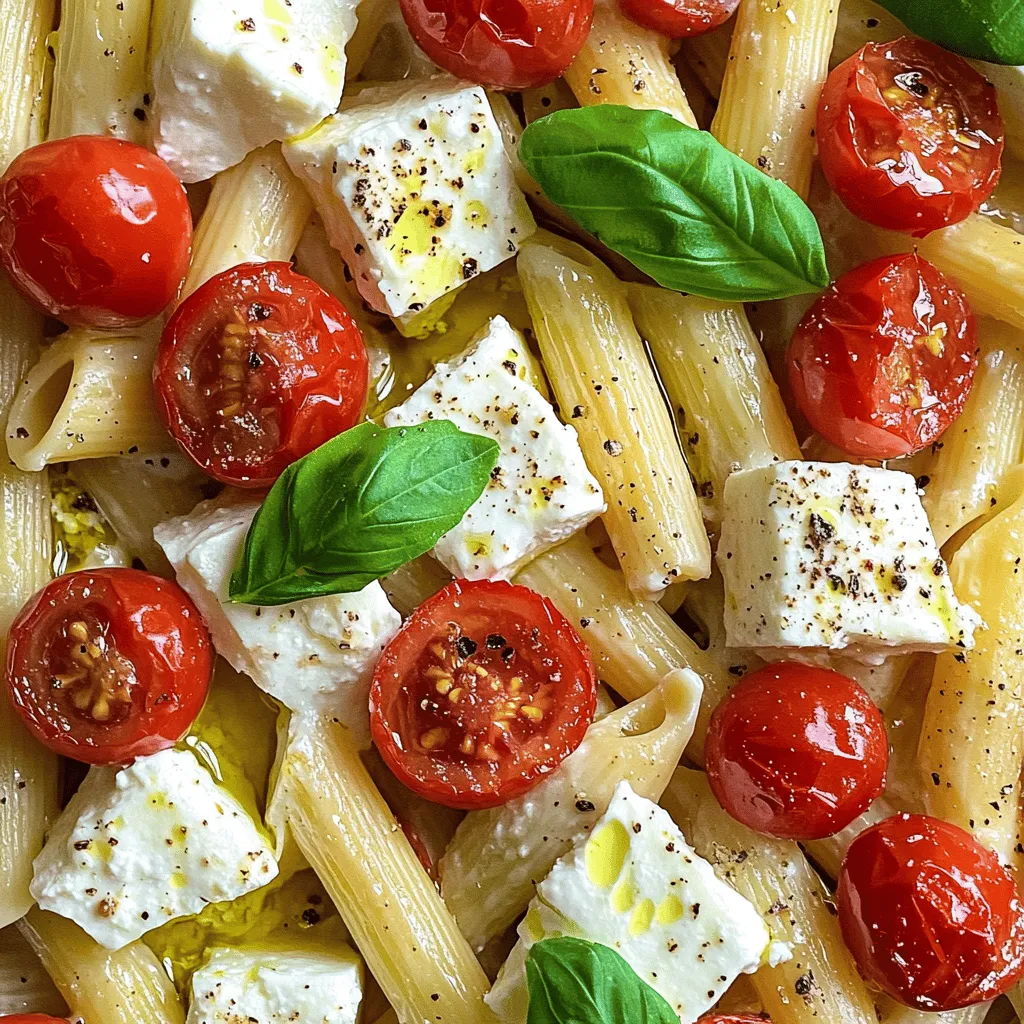
Looking for a tasty and easy dish? Baked Feta Pasta is your answer. It mixes creamy feta with fresh tomatoes

- 4 large russet potatoes - 1 tablespoon olive oil - Salt and pepper to taste - 1 cup shredded cheddar cheese - 1/2 cup cooked chicken, shredded (optional) - 1/2 cup black beans, rinsed and drained - 1/2 cup diced tomatoes - 1/2 cup corn kernels (canned or frozen) - 1/4 cup diced red onion - 1 jalapeño, sliced (optional, for heat) - 1/2 cup sour cream - 1/4 cup fresh cilantro, chopped - 1 avocado, diced - 1 teaspoon taco seasoning - Baking sheet - Mixing bowl - Fork for piercing potatoes When making loaded potato skins, focus on fresh, quality ingredients. Start with large russet potatoes. They hold up well and become crispy. Olive oil adds flavor and helps achieve that perfect crunch. Use salt and pepper to season each layer of your dish. For the filling, cheddar cheese is a must for that gooey texture. Feel free to add shredded chicken if you want protein. Black beans, corn, and tomatoes add flavor and color. Don't forget the fresh onion and jalapeño for a bit of spice. Lastly, top your creations with sour cream and fresh cilantro. Avocado adds a creamy touch. This balanced mix of flavors makes each bite a delight. You can find the complete recipe in the Full Recipe section. - Step 1: Preheat oven and prepare potatoes Start by preheating your oven to 400°F (200°C). Next, wash the russet potatoes well. Dry them with a towel. Use a fork to poke several holes in each potato. This helps the steam escape. - Step 2: Bake potatoes until tender Rub the potatoes with olive oil. Then, season them with salt and pepper. Place the potatoes on the oven rack or a baking sheet. Bake for 45 to 60 minutes. They should be tender when you poke them with a fork. - Step 3: Cool and scoop out potato flesh After baking, let the potatoes cool for a few minutes. When they are cool enough to handle, cut each potato in half lengthwise. Scoop out most of the flesh, leaving about 1/4 inch around the skin. This creates a boat for your filling. - Step 4: Brush skins and sprinkle with seasoning Brush the insides of the potato skins with olive oil. Then, sprinkle taco seasoning inside each skin. This adds great flavor. - Step 5: Bake for crispiness Place the potato skins back in the oven. Bake them for 10 minutes, or until they become crispy. This step is key for a great texture. - Step 6: Prepare filling mixture In a mixing bowl, combine shredded chicken (if using), black beans, diced tomatoes, corn, and red onion. Add salt and pepper to taste. This mixture will fill your skins with flavor. - Step 7: Fill skins and top with cheese Take the skins out of the oven. Fill each one with your mixture. Top them with shredded cheddar cheese and jalapeño slices if you like heat. - Step 8: Bake until cheese is melted Bake the filled skins for another 5 to 10 minutes. You want the cheese to melt and bubble nicely. Now, you have savory loaded potato skins ready to impress! For the full recipe, check out the detailed preparation steps above! To get crispy potato skins, olive oil is key. It helps brown the skins. Use enough oil to coat them well. Season with salt and pepper to enhance flavor. If you're using larger potatoes, you might need to bake them a bit longer. Check for doneness by piercing them with a fork. They should feel soft inside. This ensures you get a nice, crispy skin after the second bake. Spices can boost the taste of your loaded potato skins. Try adding garlic powder or paprika for a kick. You can also swap out toppings to create new flavors. Consider using different cheeses, like pepper jack for heat or feta for a tang. Fresh herbs like chives or parsley add brightness. You can even top them with crispy bacon bits or avocado slices for extra richness. Presentation matters! Serve your loaded potato skins on a large platter. Garnish with fresh cilantro and lime wedges. This makes them look appealing and colorful. For dipping sauces, I recommend sour cream or a spicy ranch dressing. You can also try guacamole for a creamy twist. These pairings make your snack even more fun and flavorful. {{image_2}} You can easily make loaded potato skins vegetarian. Instead of using shredded chicken, add more beans or vegetables. Black beans work great for protein. You can also try pinto beans or even quinoa for a fun texture. For cheese lovers, swap cheddar for mozzarella or a creamy goat cheese. If you prefer vegan options, use vegan cheese. It melts well and keeps the flavor rich. If you like heat, add more jalapeños or drizzle some spicy sauce on top. You can also use spicy sausage instead of chicken. Chorizo adds a nice kick. Just cook it first, and mix it with your filling. For an extra touch, sprinkle some crushed red pepper flakes on top before serving. You can give your potato skins a global flair. For a Southwestern twist, mix in corn and black beans with taco seasoning. An Italian version could include marinara sauce, mozzarella, and basil. For Mediterranean flavors, add feta cheese, olives, and fresh herbs like oregano. Experiment with different seasoning blends to find your favorite mix. Each variation brings a new taste and experience to this classic dish. Check out the Full Recipe for more ideas on how to create your perfect loaded potato skins! To store your loaded potato skins, let them cool first. Place them in an airtight container. They stay fresh for up to four days in the fridge. This keeps them from drying out and losing flavor. When it's time to enjoy your leftovers, I recommend using the oven for best results. Preheat your oven to 350°F (175°C). Place the skins on a baking sheet, and heat them for about 10-15 minutes. This method keeps the skins crispy. If you’re in a rush, you can use the microwave. Heat them for 1-2 minutes, but this may make them a bit soggy. Freezing loaded potato skins is a great way to save some for later. Wrap each skin tightly in plastic wrap, then place them in a freezer bag. They can last up to three months in the freezer. To thaw, simply move them to the fridge overnight. When ready to eat, reheat them in the oven for that crispy texture. This way, you can enjoy these tasty snacks anytime! Don’t forget to check the Full Recipe for more details. To make loaded potato skins crispy, start with the right technique. - Use russet potatoes; they are starchy and crisp up well. - Preheat your oven to 400°F (200°C) before baking. - Poke holes in the potatoes to let steam escape. - Rub the skins with olive oil. This adds flavor and helps them crisp. - Bake the potatoes until tender, then scoop out some flesh. - Brush the insides with more olive oil and sprinkle with seasoning. - Bake them again for about 10 minutes to achieve that perfect crunch. These steps ensure you get a delightfully crispy texture that enhances every bite. Yes, you can prepare loaded potato skins ahead of time. Here’s how: - Bake the potatoes and scoop them out as usual. - Store the empty potato skins in an airtight container in the fridge. - You can also prepare the filling separately. Combine your ingredients and store them too. - When you're ready to eat, simply fill the potato skins and bake them. This approach saves time and makes for a quick snack or meal. If you need a substitute for sour cream, several options exist: - Greek yogurt gives a similar tangy flavor. - Cream cheese can work if you want a richer taste; just thin it out with milk. - For a dairy-free option, use cashew cream or avocado. - Hummus also adds creaminess with a different flavor profile. Feel free to experiment with these alternatives to find what you like best. Loaded potato skins offer a tasty way to use simple ingredients. You start with russet potatoes, fill them with cheese, chicken, and beans, and bake them to perfection. Use my tips for crispy skins and flavor boosts to make them special. Whether you prefer classic recipes or spicy twists, there's something for everyone. Now you have all the tools to create amazing loaded potato skins at home. Enjoy your cooking adventure!

Loaded Potato Skins Savory and Satisfying Snack

Craving a snack that’s both savory and satisfying? You’re in the right place! Loaded potato skins are simple to make

To make a tasty creamy tomato basil soup, you need a few key ingredients: - 2 tablespoons olive oil - 1 medium onion, diced - 2 cloves garlic, minced - 1 (28-ounce) can crushed tomatoes - 2 cups vegetable broth These ingredients form the base of your soup. The olive oil adds richness, while the onion and garlic bring depth of flavor. Crushed tomatoes give the soup its signature color and taste, and vegetable broth provides a savory backdrop. You can make your soup even better with these optional ingredients: - 1 tablespoon balsamic vinegar - 1 teaspoon sugar - 1 cup heavy cream (or coconut cream for a vegan option) - 1/2 cup fresh basil leaves, chopped - Optional: Croutons for garnish Balsamic vinegar and sugar can enhance sweetness and balance acidity. Heavy cream makes the soup creamy, while coconut cream is a great dairy-free choice. Fresh basil adds a burst of flavor, and croutons give a nice crunch. Each serving of this creamy tomato basil soup is packed with nutrition: - Calories: 300 - Fat: 20g - Carbohydrates: 25g - Protein: 5g This soup is hearty and satisfying. You can enjoy it without guilt, knowing it offers a good balance of flavors and nutrients. For the full recipe, check out Creamy Tomato Basil Bliss. To start, you need to sauté the onions and garlic. Heat 2 tablespoons of olive oil in a large pot over medium heat. Add one medium onion, diced. Cook for 5 to 7 minutes until it becomes soft and clear. This brings out the sweet taste of the onion. Then, add 2 cloves of minced garlic. Cook for another 1 to 2 minutes. The garlic should smell amazing! Next, it’s time to combine the ingredients for simmering. Pour in one 28-ounce can of crushed tomatoes and 2 cups of vegetable broth. Add 1 tablespoon of balsamic vinegar and 1 teaspoon of sugar. Season with salt and pepper. Mix it all well. Bring this mixture to a simmer. Let it cook for 20 minutes. This lets all the flavors mix together. Now it’s time to make the soup creamy! You can use an immersion blender for this step. Just blend the soup right in the pot until it’s smooth. If you don’t have one, carefully pour the soup into a standard blender, then blend. This gives you that rich, creamy texture you want. After blending, return the soup to low heat. Stir in 1 cup of heavy cream. You can use coconut cream if you want a vegan option. Heat it through but do not let it boil. Now, fold in 1/2 cup of fresh basil leaves. This will make the soup taste fresh and vibrant. Before serving, taste the soup and adjust the seasoning if needed. You can add more salt or pepper to fit your taste. When ready, serve this soup in bowls. You can garnish it with a drizzle of cream, some fresh basil, and croutons for a nice crunch. For the full recipe, check out the details above. Enjoy your cooking! To make your Creamy Tomato Basil Soup rich and smooth, use heavy cream or coconut cream. Heavy cream gives a rich texture, while coconut cream offers a vegan option. Avoid using low-fat creams; they can make the soup thin and watery. Common mistakes include adding the cream too early or boiling the soup after adding the cream. Always add the cream last and keep the heat low to maintain that smooth texture. To boost the flavor, try adding more herbs like oregano or thyme. A pinch of red pepper flakes can also add a nice kick. If your soup tastes too acidic, balance it with a teaspoon of sugar or a splash of vinegar. These ingredients help round out the flavors. Pair your soup with crusty bread or a fresh salad for a complete meal. You can also add croutons on top for a crunchy texture. For a creative touch, drizzle some cream on the surface and sprinkle fresh basil leaves. This not only looks beautiful but also enhances the flavor. For the full recipe, check out the Creamy Tomato Basil Bliss . {{image_2}} To make Creamy Tomato Basil Soup vegan, you can swap out the heavy cream. Use coconut cream instead; it brings a nice richness. For broth, choose vegetable broth. This keeps the flavor vibrant while making the soup plant-based. Fresh tomatoes can replace canned ones for a brighter taste. If you do this, use about 2 pounds of ripe tomatoes. Blanch and peel them before adding. Adding extra veggies boosts nutrition. Try carrots or spinach for color and health benefits. Just chop them finely and cook with the onions. Add Italian flavors like oregano or thyme to deepen the taste. For a spicy kick, toss in some diced peppers or chili flakes. This gives the soup a fun, fiery twist. You can also add a splash of balsamic vinegar for a sweet depth. All these twists make the soup exciting and unique. For the full recipe, check out the Creamy Tomato Basil Bliss section. To store leftover soup, let it cool first. Pour it into a clean, airtight container. Make sure to leave some space at the top for expansion. You can store it in the fridge for up to five days. When you want to eat it again, just reheat it gently on the stove. If you have more soup than you can eat, freezing is a great option. Use freezer-safe containers or bags. Pour the cooled soup into them, leaving space at the top. This helps it freeze well without breaking the container. To thaw, move the soup to the fridge for a few hours or overnight. If you’re in a hurry, you can also use the microwave. When reheating, do it slowly on the stove. Stir often to keep it smooth. In the fridge, your creamy tomato basil soup will last about five days. In the freezer, it can last for up to three months. Be sure to label the containers with the date. This way, you won’t forget how long it has been stored. Enjoy your delicious soup whenever you want! You can make this soup healthier in a few simple ways. First, swap heavy cream for coconut cream or a low-fat option. This change cuts down on calories while still keeping it creamy. You can also use low-sodium vegetable broth to reduce salt. If you want more veggies, add carrots or spinach. They boost nutrition without changing the taste much. Lastly, use fresh tomatoes instead of canned ones for more vitamins. Yes, you can use dried herbs. However, fresh basil gives a brighter flavor. If you use dried, reduce the amount since it’s stronger. A good rule is to use one-third of the amount of dried herbs. Mix them in at the start to let their flavors bloom. Keep in mind that the taste will change slightly, but it will still be delicious. This soup pairs well with many sides. A classic choice is grilled cheese sandwiches. Their crunch complements the soup’s creaminess. You can also serve a fresh salad with mixed greens. Croutons add a nice crunch too. For a twist, try garlic bread or a savory focaccia. Each option enhances your meal and makes it more filling. For the full recipe, check out the earlier section! This post covered key ingredients for creamy tomato basil soup and how to make it. I shared steps for preparation, blending, and serving. You learned tips for perfect texture and flavor, along with creative variations. Remember to store leftovers properly and know how long they last. With these insights, you can create a delicious soup. Enjoy experimenting with flavors and make it your own!

Creamy Tomato Basil Soup Flavorful and Easy Recipe

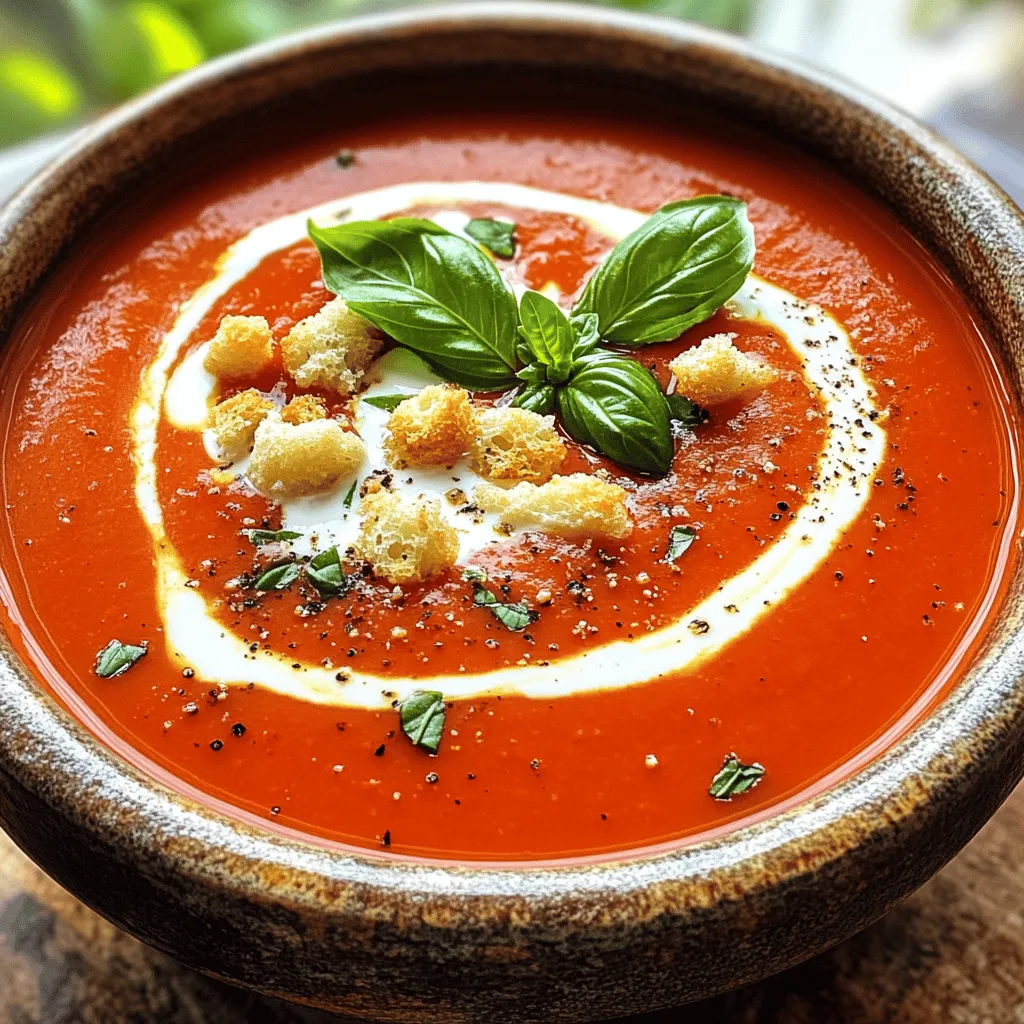
Are you ready to make a bowl of comforting deliciousness? This creamy tomato basil soup is both flavorful and easy

To create a simple and tasty chicken pot pie, gather these key ingredients: - 2 cups cooked chicken, shredded - 1 cup frozen mixed vegetables (peas, carrots, corn) - 1 small onion, finely chopped - 2 cloves garlic, minced - 1/2 cup chicken broth - 1 cup milk - 1/3 cup all-purpose flour - 1 teaspoon dried thyme - 1 teaspoon salt - 1/2 teaspoon black pepper - 2 tablespoons butter - 1 ready-made pie crust (or homemade, if preferred) These ingredients come together to create a rich and comforting filling. The chicken provides protein, while the vegetables add color and nutrients. The broth and milk help form a creamy sauce that binds everything together. You can easily customize your chicken pot pie by adding or swapping ingredients. Here are some ideas: - Fresh herbs: Add parsley, rosemary, or sage for extra flavor. - Different vegetables: Try broccoli, green beans, or mushrooms. - Cheese: A bit of cheddar can make the filling extra creamy. - Spices: Consider adding paprika or cayenne for a kick. - Crust options: Use puff pastry or biscuit dough for a different texture. Feel free to mix and match to suit your tastes. This flexibility makes the recipe fun and personal. To ensure your chicken pot pie shines, pay attention to ingredient quality: - Chicken: Use leftover roast chicken or rotisserie for the best flavor. - Vegetables: Fresh or frozen work well. Frozen saves time and keeps it easy. - Broth: Choose low-sodium chicken broth for better control over salt levels. - Dairy: Use whole milk for creaminess, but low-fat options are fine too. - Flour: All-purpose flour is standard, but you can use whole wheat for more fiber. Always taste as you cook. This helps you adjust flavors to your liking. For a complete guide, check the Full Recipe. 1. Preheat your oven to 425°F (220°C). 2. Melt the butter in a large skillet over medium heat. 3. Add the chopped onion and garlic. Sauté until the onion is soft and clear, about 3 minutes. 4. Sprinkle the flour over the mixture. Stir constantly for about 1 minute to form a roux. 5. Slowly whisk in the chicken broth and milk. Keep stirring until it thickens, about 3-4 minutes. 6. Mix in the shredded chicken, frozen vegetables, thyme, salt, and pepper. Stir well and heat for 2 more minutes. 7. Pour the mixture into a pie dish. 8. Unroll the pie crust over the filling. Seal the edges by crimping. 9. Cut a few slits in the top for steam to escape. 10. Bake for 30-35 minutes until the crust is golden brown. 11. Let it cool for 5-10 minutes before serving. - Step 1: Image of the oven set to 425°F. - Step 2: Video showing butter melting in the skillet. - Step 3: Photo of sautéed onion and garlic. - Step 4: Video demonstrating roux formation with flour. - Step 5: Image of the thickened broth mixture. - Step 6: Photo of all ingredients combined in the skillet. - Step 7: Video of pouring the mixture into the pie dish. - Step 8: Image of the pie crust being placed over the filling. - Step 9: Video showing how to crimp the edges. - Step 10: Photo of the pie just out of the oven. - Step 11: Image of the finished pie cooling. - Prepare all ingredients before you start cooking. This saves time. - While the filling cooks, roll out the pie crust. This multitasking speeds up the process. - Use pre-cooked chicken to cut down on cooking time. - Clean as you go to keep your workspace tidy and organized. - Set a timer for each step to stay on track and avoid distractions. This easy chicken pot pie recipe combines rich flavors with simple steps. Enjoy creating this warm, comforting dish! For the complete guide, refer to the Full Recipe. To make the best chicken pot pie, use good quality ingredients. Fresh chicken adds great taste. If you use frozen chicken, thaw it first. A mix of fresh and frozen vegetables works well, too. I like adding thyme for flavor. It gives a nice touch to your filling. When making the roux, stir constantly. This helps avoid lumps. If you see lumps, don’t worry! Just whisk harder, and it will smooth out. One big mistake is overcooking the filling. You should heat it until warm, not too long. This keeps your chicken juicy. Another mistake is using a crust that is too thick. A thin crust bakes better and stays crispy. Don’t forget to cut slits in the top! This lets steam escape and keeps the crust from getting soggy. For a golden brown crust, brush the top with milk or egg wash. This adds color and shine. Bake in a preheated oven at 425°F. Check the pie after 25 minutes. If the edges brown too fast, cover them with foil. This protects them from burning while the center cooks. Enjoy your tasty creation! For the full recipe, click [Full Recipe]. {{image_2}} You can change the flavor of your chicken pot pie by using different proteins or veggies. Instead of chicken, try turkey or beef. For a vegetarian option, use mushrooms or lentils. You can also mix in different vegetables. Sweet potatoes, broccoli, or green beans work well. Just make sure they are cut into small pieces for even cooking. Always adjust the seasonings to match the flavors of your new ingredients. If you need a gluten-free option, use a gluten-free pie crust. Many brands offer these in stores. You can also make your own with almond or coconut flour. For a homemade crust, combine flour, butter, and water. Roll it out and place it over your filling. If you want to skip the crust altogether, try a biscuit topping. Just drop spoonfuls of biscuit dough on top before baking for a fun twist. To make this dish dairy-free, swap regular milk for almond or oat milk. You can also use dairy-free butter. If you want to make a low-calorie version, reduce the amount of butter and use less flour. You can also add more veggies to bulk up the dish while keeping it light. These small changes still keep the meal tasty without losing its charm. For a full recipe, check out the details to ensure you get the perfect pot pie. After you enjoy your chicken pot pie, store leftovers promptly. Let the pie cool down to room temperature. Cover it tightly with plastic wrap or foil. You can also place it in an airtight container. This keeps the pie fresh and tasty for up to three days in the fridge. To freeze your chicken pot pie, follow these steps. First, allow the pie to cool completely. Wrap it well in plastic wrap, then in aluminum foil. This helps prevent freezer burn. You can freeze the pie for up to three months. When you are ready to eat, thaw it in the fridge overnight. To reheat your chicken pot pie, preheat your oven to 350°F (175°C). Remove any plastic wrap or foil. Place the pie on a baking sheet to catch spills. Heat it for about 20-25 minutes. This ensures the filling gets hot and the crust stays crispy. For microwave reheating, use medium power for about 5-7 minutes. Enjoy your comforting meal just like the first time! For the full recipe, check back to the earlier section. The best way to reheat chicken pot pie is in the oven. Preheat your oven to 350°F (175°C). Place the pie on a baking sheet to catch spills. Cover the pie with foil to keep it moist. Heat for about 20-25 minutes, or until warm. Check the center with a knife. If it is hot, it's ready to eat! Yes, you can make chicken pot pie ahead of time. Prepare the filling and let it cool. Store it in the fridge for up to two days. You can also freeze it. Just make sure to wrap it well. When you are ready to bake, add your crust and follow the baking instructions from the Full Recipe. Chicken pot pie pairs well with many sides. Here are some great options: - A fresh green salad - Steamed broccoli or green beans - Mashed potatoes for a cozy touch - A fruit salad for a sweet contrast These sides add variety and balance to your meal. Enjoy experimenting with different combinations! This blog post covered all you need to make a great chicken pot pie. First, we outlined essential and optional ingredients. Next, we shared clear step-by-step instructions. I added tips, tricks, and variations to help you customize your dish. Lastly, best practices for storage ensure your leftovers taste just as good. Cooking can be fun and rewarding. With these insights, you can create a perfect pot pie every time. Enjoy your cooking journey!

Easy Chicken Pot Pie Simple and Delicious Recipe

If you’re craving a warm, comforting meal, this Easy Chicken Pot Pie recipe is just for you. With simple ingredients

- 4 medium-sized russet potatoes - 1 cup shredded cheddar cheese - 1/2 cup cream cheese, softened - 3 tablespoons unsalted butter, melted - 2 tablespoons olive oil - 1 teaspoon garlic powder - 1 teaspoon paprika - Salt and pepper, to taste - 2 tablespoons fresh chives, chopped (for garnish) - Optional: 1/2 cup crispy fried onions (for topping) To make Cheesy Hasselback Potatoes, you need simple and fresh ingredients. I love using russet potatoes because they get nice and fluffy inside. The combination of cheddar and cream cheese makes the dish rich and creamy. You can adjust the spices to match your taste. Garlic powder and paprika add a great flavor kick. Don't forget the salt and pepper to bring it all together. For the finish, I like to use fresh chives. They add a nice touch of color and flavor. If you want some crunch, crispy fried onions on top are a fun choice. This recipe uses a mix of classic ingredients to create a dish that feels fancy yet is easy to make. Check the Full Recipe for step-by-step details on how to prepare this delightful dish! - Preheat your oven to 400°F (200°C). - Wash and dry the potatoes. - Create slits in each potato about 1/4 inch apart. To make the perfect Cheesy Hasselback Potatoes, start by preheating your oven. This step is key for even cooking. While the oven warms up, wash your russet potatoes. Make sure to dry them well. Next, grab a sharp knife and carefully slice each potato. The slits should not go all the way through. Stop about 1/2 inch from the bottom. This will help the potatoes cook evenly and look stunning. - Mix together the seasoning mixture. - Brush the mixture onto the potatoes. In a small bowl, mix melted butter, olive oil, garlic powder, paprika, salt, and pepper. This seasoning mix adds great flavor. Now, place the potatoes on a baking sheet lined with parchment paper. Use a brush to apply the mix all over. Be sure to drizzle some into the slits for extra taste. - Roast in the oven for 30 minutes. - Add cream cheese and cheddar cheese. - Final baking for golden topping. Roast your seasoned potatoes in the oven for about 30 minutes. This step starts to soften them. After 30 minutes, it’s time to add the cream cheese. Carefully spoon a dollop into each slit. Then, sprinkle shredded cheddar cheese on top. Return the potatoes to the oven and bake for an additional 15-20 minutes. You want the cheese to melt and turn golden brown. Once done, your Cheesy Hasselback Potatoes will be a feast for the eyes and the taste buds. For the full recipe, check the details above. To slice your potatoes evenly, place them between two wooden spoons. This trick helps you avoid cutting all the way through. Aim for slits about 1/4 inch apart. This creates the lovely fan effect. For the cheese to melt perfectly, add it in layers. First, put cream cheese into the slits, then top with cheddar. It layers flavors and makes it creamy and cheesy. You can use different oils to change the flavor. Try using sunflower oil or avocado oil for a twist. Each oil brings its own taste and aroma. Baking time can change based on potato size. Smaller potatoes need less time, while larger ones may take longer. Keep an eye on them, and adjust as needed to ensure they cook just right. Serve your Hasselback potatoes on a colorful plate. This enhances their visual appeal. You might also consider pairing them with a fresh salad or grilled veggies. For garnishing, sprinkle fresh chives on top. They add a pop of color and a nice onion flavor. If you like crunch, add crispy fried onions on top for extra texture. For the full recipe of Cheesy Hasselback Potatoes, check the recipe section above. {{image_2}} You can change the cheese to suit your taste. Instead of cheddar, try mozzarella for a milder flavor. Gouda adds a rich, creamy touch. You can also mix cheeses for depth. For toppings, think outside the box! Bacon bits add crunch and savory taste. Fresh herbs like rosemary or thyme bring a burst of freshness. These small changes make each bite exciting. If you want a lighter dish, use low-fat cream cheese. It keeps the creamy texture without all the fat. You can also sneak in veggies. Try adding spinach or broccoli between the potato slits. This adds nutrients and color. You can enjoy a tasty treat while staying healthy. Cheesy Hasselback Potatoes can fit into any meal. Serve them with grilled chicken or steak for a hearty dinner. They also pair well with a fresh salad for a lighter option. To turn them into a full meal, add a side of roasted vegetables. This way, you get a balance of flavors and nutrients. After enjoying your cheesy Hasselback potatoes, store leftovers properly. First, let them cool down to room temperature. Then, place them in an airtight container. This helps keep them fresh. If you want to refrigerate them, use the container for up to three days. For longer storage, consider freezing. Wrap each potato tightly in plastic wrap, then place them in a freezer bag. They can last up to three months in the freezer. When it's time to enjoy leftovers, you want them warm and cheesy again. The best method is to reheat in the oven. Preheat your oven to 350°F (175°C). Place the potatoes on a baking sheet. Cover them with foil to keep moisture in. Heat for about 15-20 minutes. This way, the cheese stays melty and the potato warms through. You can also use the microwave, but they might dry out. If using the microwave, cover with a damp paper towel. This helps keep them moist. If stored correctly, your cheesy Hasselback potatoes last three days in the fridge. If frozen, they maintain quality for about three months. Remember, the longer they sit, even in the freezer, the more flavor they lose. Always check for signs of freezer burn before eating. Yes, you can prepare these potatoes ahead of time. Start by washing and slicing the potatoes as usual. After that, brush on your seasoning mixture. Wrap them tightly in plastic wrap or foil. Store them in the fridge for up to 24 hours. When you are ready, take them out, add the cheese, and bake. This saves time for your meal. For Hasselback potatoes, russet potatoes work best. They are starchy and have a fluffy texture when cooked. Yukon Gold potatoes are also a good choice. They are creamy and hold their shape well. Avoid waxy potatoes as they won’t crisp up as nicely. You can tell if the potatoes are done by checking their texture. They should be soft all the way through. Use a fork to poke them. If it slides in easily, they are ready. The cheese on top should be bubbly and golden brown. This means they have reached the perfect melt. You now know how to make cheesy Hasselback potatoes. Start with simple ingredients like russet potatoes and cheese. Follow the steps for perfect baking and seasoning. Remember to use tips for even slicing and cheese melting. Explore variations to customize your dish. With the right storage, your leftovers stay tasty. These potatoes can impress at any meal. Enjoy trying different flavors and sharing them with friends. Happy cooking!

Cheesy Hasselback Potatoes Savory and Easy Delight

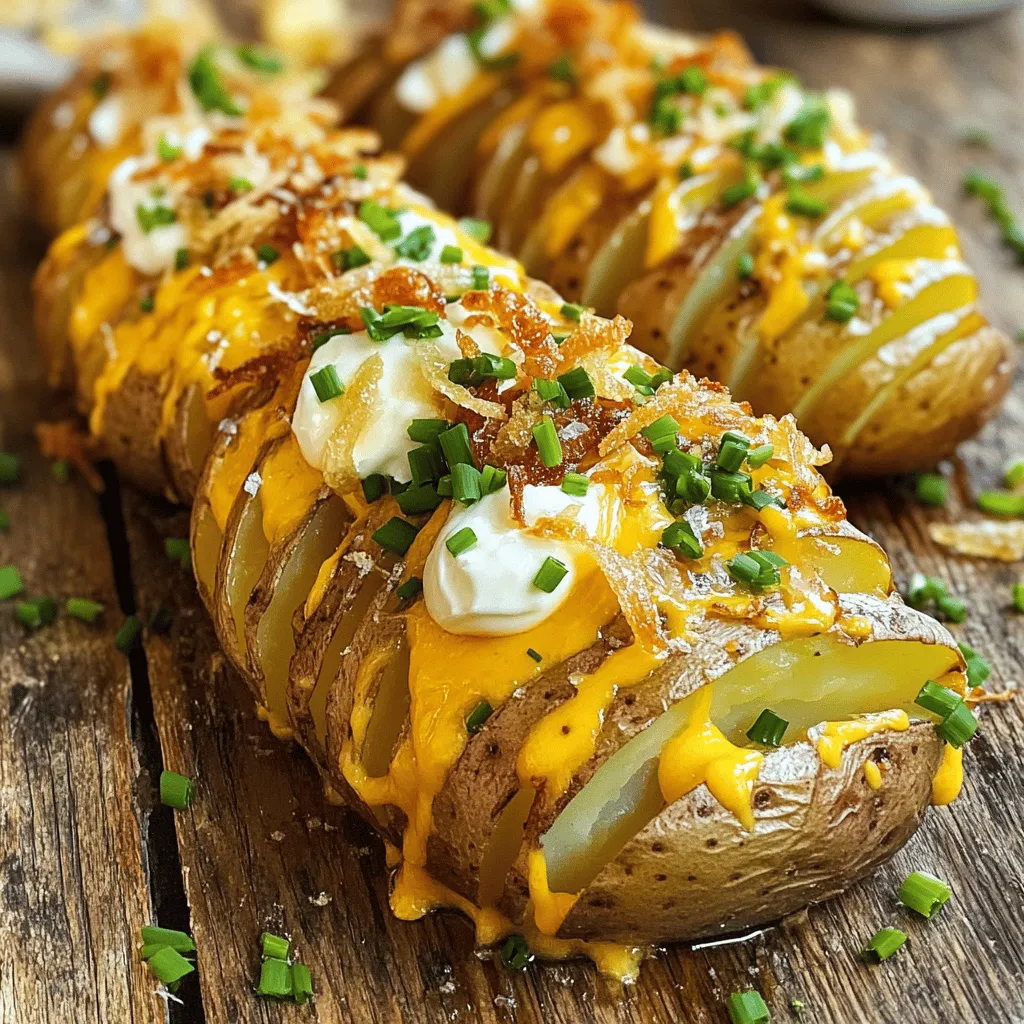
Indulge your taste buds with my easy and savory Cheesy Hasselback Potatoes! These crispy, cheesy wonders are a perfect side

- 4 chicken thighs, bone-in and skin-on - 1/4 cup honey - 1/4 cup Dijon mustard - 2 tablespoons apple cider vinegar - 2 cloves garlic, minced - 1 teaspoon smoked paprika - 1 teaspoon salt - 1/2 teaspoon black pepper - 2 tablespoons olive oil - Fresh thyme sprigs for garnish You need these simple ingredients for honey mustard chicken thighs. Each item brings its own flavor. The chicken thighs give you juicy meat and crispy skin. Honey adds sweetness, while Dijon mustard provides a nice tang. Apple cider vinegar enhances the sauce's flavor. Garlic adds depth with its strong taste, and smoked paprika brings warmth. Salt and pepper season the dish just right. Olive oil helps the chicken brown beautifully. Fresh thyme adds a nice herbal note for garnish. - Additional spices for flavor - Alternative sweeteners Feel free to experiment with optional ingredients. You can add spices like cayenne for heat or rosemary for a fresh taste. If you want to adjust the sweetness, try maple syrup or agave nectar. Each choice can create a new twist on this classic dish. This flexibility makes it fun and exciting to cook. Don't forget to check the [Full Recipe] for detailed steps! - Preheat the oven to 400°F (200°C). - In a bowl, whisk together the honey, Dijon mustard, apple cider vinegar, minced garlic, smoked paprika, salt, and black pepper. Mix until it is smooth and creamy. This sauce is the star of the dish. - Pat the chicken thighs dry with paper towels. This will help them get crispy. - Heat 2 tablespoons of olive oil in an oven-safe skillet over medium-high heat. - Once the oil is hot, place the chicken thighs skin-side down in the skillet. - Sear the chicken for about 5-7 minutes. You want the skin to be golden brown and crispy. - Flip the chicken thighs over and pour the honey mustard sauce over them. Make sure they are well coated. - Transfer the skillet to your preheated oven. Bake for about 25-30 minutes. The chicken should reach an internal temperature of 165°F (74°C). - Once done, take the skillet out of the oven. Let the chicken rest for 5 minutes. This helps keep it juicy. - Drizzle some of the sauce from the skillet over the thighs before serving. - Garnish with fresh thyme sprigs for added flavor and a nice look. You can find the full recipe for this delicious dish to make it easily at home. Enjoy your meal! To get crispy skin on chicken thighs, start by drying them well with paper towels. This helps the skin brown nicely. Use medium-high heat when searing the thighs. Place them skin-side down in a hot skillet. Cook for about 5-7 minutes until the skin is golden brown. This step adds flavor and texture. Ensure your chicken is cooked thoroughly by using a meat thermometer. The internal temperature should reach 165°F (74°C). This guarantees the chicken is safe to eat. After baking, let the chicken rest for 5 minutes. This keeps the juices inside and makes the meat tender. Adjust the sweetness or tanginess of the sauce to fit your taste. If you like it sweeter, add more honey. For more tang, increase the apple cider vinegar. Taste as you mix to find the perfect balance for you. When coating the chicken, pour the sauce evenly over the thighs. Make sure each piece is well covered. This helps the flavors soak in while cooking. Use a spoon to drizzle extra sauce over the thighs when serving. It adds a nice touch and enhances the dish. For the full recipe, check out the details above. {{image_2}} You can play with the mustard type in this recipe. Dijon mustard gives a nice kick, but you can also try yellow mustard or whole grain mustard. Each type brings its own flavor. If you want a milder taste, yellow mustard works well. Whole grain mustard adds texture and depth. You might also swap chicken thighs for chicken breasts. Chicken breasts cook faster and are leaner. Just be careful not to overcook them. They can dry out more quickly than thighs. Adjust the cooking time to suit the breasts. Adding herbs and spices can make a big difference. Fresh herbs like rosemary or parsley can brighten up the dish. You can also use dried herbs such as oregano or thyme. A pinch of red pepper flakes adds heat if you like spice. You can modify the sauce for different flavors too. Try adding soy sauce for a savory twist. A splash of orange juice can give a sweet and zesty note. Experiment with what you have on hand to keep it fresh and exciting. For the full recipe, check out the details above. To store honey mustard chicken thighs, let them cool first. Place the chicken in an airtight container. This way, it stays fresh longer. You can keep it in the fridge for up to 3 days. When you want to eat it again, just reheat gently. If you have leftovers, freezing is a great option. Wrap each chicken thigh tightly in plastic wrap. Then, place them in a freezer bag. This helps to keep the flavor and moisture. You can freeze them for up to 3 months. When you're ready to enjoy, take the chicken out of the freezer. Let it thaw in the fridge overnight. To reheat, place it in a preheated oven at 350°F (175°C) for about 20-25 minutes. This will help keep it juicy and tasty. Can I use boneless chicken thighs for this recipe? Yes, you can use boneless chicken thighs. They cook faster than bone-in thighs. Watch the cooking time closely. Boneless thighs should reach 165°F (74°C) quickly. How can I tell when the chicken is fully cooked? Use a meat thermometer. Insert it into the thickest part of the thigh. It should read 165°F (74°C). The juices should run clear, not pink. What sides pair well with honey mustard chicken thighs? I love serving honey mustard chicken with: - Roasted vegetables - Garlic mashed potatoes - Steamed green beans - A fresh garden salad Can this recipe be made on the grill? Yes, grilling is a great option! Preheat your grill to medium heat. Marinate the chicken in the honey mustard sauce for at least 30 minutes. Grill for 6-8 minutes on each side until cooked through. How to adapt this recipe for an air fryer? To use an air fryer, preheat it to 375°F (190°C). Coat the chicken thighs with the sauce. Place them in the air fryer basket. Cook for about 20-25 minutes or until they reach 165°F (74°C). Enjoy the crispy skin! For the full recipe, check out the detailed cooking steps provided earlier. This recipe for honey mustard chicken thighs is simple and tasty. We covered the ingredients, preparation steps, and cooking tips that ensure success. You can vary flavors easily or store leftovers for later. Remember, cooking can be fun and creative! Whether you use chicken thighs or try new spices, enjoy making this dish. With easy steps and twists, you can impress family and friends. Happy cooking!

Honey Mustard Chicken Thighs Easy and Flavorful Meal

Looking for a quick and tasty dinner? Honey Mustard Chicken Thighs are the answer! This easy meal is packed with

- 1 lb ground beef - 2 cups rotini pasta - 1 medium onion, chopped - 3 cloves garlic, minced The main ingredients create the base of this dish. Ground beef adds protein and flavor. Rotini pasta holds sauce well and gives a fun twist. Chopped onion adds sweetness, while minced garlic brings a savory touch. - 2 cups beef broth - 1 cup milk - 1 cup shredded cheddar cheese - 1 tablespoon ketchup - 1 tablespoon mustard - 1 teaspoon Worcestershire sauce The additional ingredients boost taste and creaminess. Beef broth adds depth. Milk makes the dish rich and creamy. Cheddar cheese melts into gooey goodness. Ketchup, mustard, and Worcestershire sauce mix to give that classic cheeseburger flavor. - Chopped pickles - Green onions Garnishes add a fresh touch. Chopped pickles give crunch and tartness. Green onions offer color and a mild onion flavor. Add these to elevate your dish even more. For the full recipe, check out the details and instructions. Enjoy your cooking! How to brown the ground beef Start by heating a large pot over medium heat. Add 1 pound of ground beef. Use a spatula to break it apart. Cook until it turns brown, about 5-7 minutes. Drain any extra fat if needed. This step adds flavor to your pasta. Sautéing the onion and garlic Next, add 1 chopped onion and 3 minced garlic cloves to the pot. Cook for 3-4 minutes. Stir often until the onion is soft and clear. This step builds a nice base for your dish. Combining ingredients and bringing to a simmer Now, it’s time to add more ingredients. Pour in 2 cups of beef broth and 1 cup of milk. Add 1 tablespoon of ketchup, 1 tablespoon of mustard, and 1 teaspoon of Worcestershire sauce. Stir well and bring the mix to a simmer. This will create a rich sauce. Adding rotini pasta and cooking time Once simmering, add 2 cups of rotini pasta to the pot. Mix everything together. Cover the pot and let it cook for 10-12 minutes. Stir occasionally to stop the pasta from sticking. Cook until the pasta is tender. How to melt the cheddar cheese After cooking, take the pot off the heat. Add 1 cup of shredded cheddar cheese. Stir until the cheese melts and becomes creamy. This makes your dish rich and cheesy. Seasoning to taste Finally, season with salt and pepper. Taste the pasta and adjust if needed. You can also add chopped pickles and green onions on top as a fun garnish. Enjoy your One Pot Cheeseburger Pasta! For the full recipe, check the details above. To prevent pasta from sticking, stir it well as it cooks. Use a large pot to give the pasta room to move. If the pasta sticks, try adding a splash of oil or more liquid. If your sauce is too thick, add more beef broth or milk. This will help create a creamy texture. For a thicker sauce, let it simmer longer to reduce the liquid. Adding spices can boost the flavor of your dish. Try garlic powder, onion powder, or paprika for a fun twist. You can also include Italian seasoning or crushed red pepper for some heat. For toppings, consider adding chopped pickles or green onions. These add crunch and a fresh taste. You can also sprinkle extra cheese on top before serving for a cheesy finish. One common mistake is overcooking the pasta. This can make it mushy. To avoid this, check for doneness a minute or two before the suggested cooking time. Another mistake is forgetting to drain excess fat from the beef. Too much fat can make your dish greasy. Drain it before adding the other ingredients for a balanced taste. For the full recipe, check out the recipe section. {{image_2}} You can easily change the meat in this recipe. Ground turkey or chicken works well. These leaner meats add less fat but keep the dish tasty. You can also use plant-based ground meat if you want a meatless option. If you need gluten-free pasta, there are great choices. Look for brown rice or chickpea pasta. They cook nicely and taste good in this dish. You can make a vegetarian version too. Simply skip the meat and add more veggies. Mushrooms, bell peppers, or zucchini add flavor and texture. For a dairy-free version, choose plant-based milk and cheese. Almond milk or oat milk can replace regular milk. Nutritional yeast can give a cheesy flavor without dairy. Changing the cheese can enhance the taste. Try mozzarella for a milder flavor or pepper jack for some spice. Adding vegetables boosts nutrition and flavor. Spinach, peas, or broccoli mix well into the pasta. They add color and extra vitamins to your meal. For the full recipe, check out the details above. To store your cheeseburger pasta, wait until it cools down. Then, scoop it into an airtight container. Proper storage helps keep it fresh. You can keep it in the fridge for about 3 to 5 days. If you want it to last longer, freezing is a great choice. When it's time to eat, you need to reheat the pasta. The best way is to use a pot on low heat. Add a splash of milk or broth to keep it moist. Stir often to avoid burning. If you use the microwave, heat it in short bursts. Stir between each burst for even warming. To freeze your cheeseburger pasta, let it cool first. Then, put it in a freezer-safe bag or container. Make sure to remove as much air as possible. This helps prevent freezer burn. It can stay frozen for up to 3 months. When you're ready to eat, thaw it overnight in the fridge. Reheat it slowly on the stove, adding a bit of liquid to keep it creamy. Enjoy your tasty meal again! For the full recipe, check out the details above. How do I make One Pot Cheeseburger Pasta ahead of time? You can make this dish ahead of time. Cook the pasta, then let it cool. Store it in the fridge in an airtight container. When ready to eat, reheat it on the stove. Add a splash of milk to keep it creamy. Can I use different types of pasta? Yes, you can switch the pasta type. Penne, fusilli, or even spaghetti work well. Just adjust the cooking time based on the pasta you choose. What to serve with cheeseburger pasta? This meal pairs well with a simple salad. Try a green salad with lettuce, tomatoes, and cucumbers. You can also serve it with garlic bread for a heartier meal. Can I make this dish spicy? Absolutely! Add red pepper flakes or diced jalapeños for heat. You can also use spicy mustard instead of regular mustard. This adds a nice kick to the dish. Is this recipe healthy? This recipe can be balanced. Ground beef offers protein, while pasta gives carbs. You can use whole wheat pasta for more fiber. Adding veggies boosts the nutrition too. Can I modify it for specific dietary needs? Yes, you can make it fit your needs. Use lean ground turkey for less fat. For gluten-free, choose gluten-free pasta. You can also make it vegetarian by using lentils instead of meat. This article detailed the process of making One Pot Cheeseburger Pasta. We covered the main and additional ingredients, preparation steps, and cooking tips. You learned how to store leftovers and suggested variations for different diets. Remember, cooking is about trial and fun, so don’t be afraid to mix things up. Enjoy your meal, and make it yours! Keep experimenting to find your perfect flavor blend.

One Pot Cheeseburger Pasta Quick and Tasty Meal

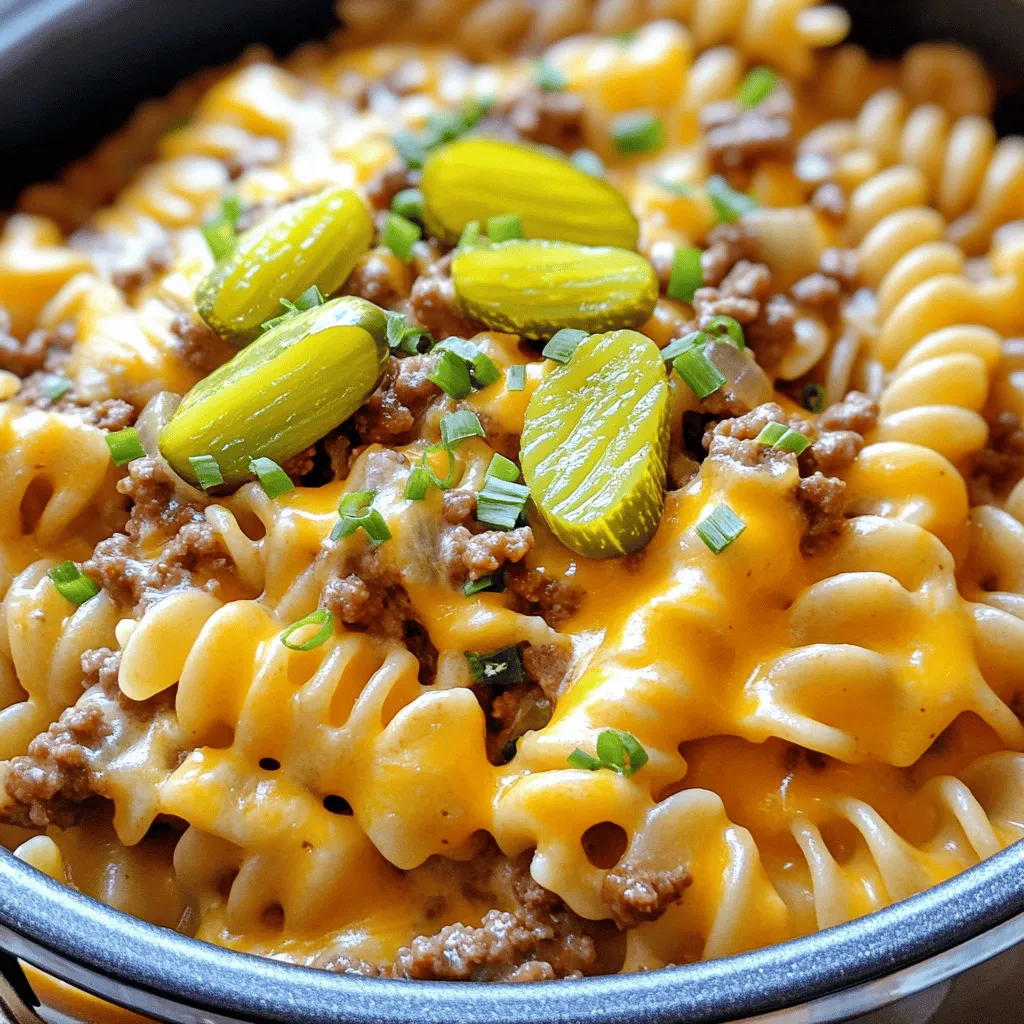
If you crave a quick and tasty meal, One Pot Cheeseburger Pasta hits the spot! This dish combines all the

- 12 large pasta shells - 2 cups cooked chicken, shredded - 1 cup ricotta cheese - 1 cup mozzarella cheese, shredded - 1/2 cup grated Parmesan cheese - 2 cups Alfredo sauce (store-bought or homemade) These main ingredients come together to create a rich and creamy dish. The pasta shells hold the filling well and make each bite a delight. Shredded chicken adds protein, while the cheeses bring a creamy texture. You can use store-bought Alfredo sauce for ease or make your own from scratch for added flavor. - 1 teaspoon garlic powder - 1 teaspoon onion powder - Salt and pepper to taste - Fresh parsley, chopped (for garnish) Seasonings are key in this recipe. Garlic and onion powder enhance the filling's taste without overpowering it. Adjust the salt and pepper to your liking. Fresh parsley adds a pop of color and freshness when you serve the dish. Feel free to explore the [Full Recipe] for detailed steps on how to put it all together! 1. Preheating the oven: Start by setting your oven to 375°F (190°C). This helps the dish cook evenly. 2. Cooking the pasta shells: Boil water in a large pot. Add the pasta shells and cook them as the package says, until they are al dente. This means they should still have a little firmness. Once they’re done, drain the shells and set them aside. 1. Combining shredded chicken and cheese mixture: In a big bowl, mix together 2 cups of shredded chicken, 1 cup of ricotta cheese, half of the mozzarella cheese, and 1/2 cup of grated Parmesan cheese. 2. Seasoning the filling: Add 1 teaspoon of garlic powder, 1 teaspoon of onion powder, and salt and pepper to taste. Stir well. This mix will create a tasty filling for the shells. 1. Filling the pasta shells: Take a spoonful of the chicken and cheese mixture. Carefully stuff each shell with the filling. 2. Spreading Alfredo sauce in the baking dish: In a 9x13 inch baking dish, pour 1 cup of Alfredo sauce on the bottom. This keeps the shells from sticking and adds flavor. 3. Baking techniques: Place the stuffed shells in the dish, filling side up. Pour the rest of the Alfredo sauce over the shells. Top with the remaining mozzarella cheese. Cover the dish with aluminum foil and bake for 25 minutes. After that, take off the foil and bake for 10 more minutes. The cheese should be bubbly and golden. This process makes a creamy and delicious meal. You can find the full recipe in the earlier section. Enjoy every bite! To avoid overcooked pasta, cook the shells until they are al dente. This means they should be firm but not hard. Check the package for time and start testing a minute before it ends. Drain the shells gently and rinse them with cold water. This stops the cooking and helps keep their shape. To ensure a creamy texture, use a good Alfredo sauce. Mix in some of the sauce with the filling. This keeps the inside nice and moist. When you pour sauce over the stuffed shells, make sure it covers all the pasta. This helps the shells stay creamy while they bake. For proper storage, keep leftovers in airtight containers. This keeps them fresh longer. Place the container in the fridge right after the meal. They stay good for about three to four days. For reheating, the oven works best. Preheat it to 350°F (175°C). Place the stuffed shells in a baking dish and cover them with foil. Heat for about 20 minutes. If you want a crispy top, remove the foil for the last five minutes. Adding vegetables can make the dish more colorful and healthy. Spinach, mushrooms, or bell peppers work great. Just sauté them a bit before mixing them into the filling. You can also use different sauces. Try a marinara sauce for a twist. You can blend Alfredo sauce with pesto for a fresh flavor. Experiment and find what you love! {{image_2}} You can switch up the protein in Chicken Alfredo Stuffed Shells. Using rotisserie chicken saves time and adds great flavor. Just shred the chicken and mix it into the filling. If you prefer a vegetarian dish, try using cooked spinach or mushrooms. Both options keep the dish hearty and satisfying. Enhancing flavors can elevate your stuffed shells. Adding spices like cayenne gives a gentle kick. Italian herbs can add warmth and depth. For a burst of flavor, incorporate sun-dried tomatoes. They add a sweet and tangy profile that pairs well with the creamy Alfredo sauce. If you need gluten-free options, use gluten-free pasta shells. They work just as well and keep the dish delicious. For those avoiding dairy, try plant-based cheese alternatives. They melt nicely and still provide that creamy texture we love. For the full recipe, check out the detailed steps and ingredients listed above. To keep your Chicken Alfredo Stuffed Shells fresh, use airtight containers. This helps to prevent air from getting in, which can cause spoilage. Store them in the fridge for up to three days. Make sure the shells are completely cool before sealing them. This helps avoid extra moisture, which can lead to sogginess. If you want to save some for later, freezing is a great option. For best results, freeze the shells before baking. Place them in a single layer on a baking sheet until they freeze. Then, transfer them to a freezer-safe bag or container. This method stops the shells from sticking together. Chicken Alfredo Stuffed Shells can last for up to three months in the freezer. When you’re ready to eat them, thaw the shells overnight in the fridge. This makes sure they warm evenly. After thawing, bake them in the oven until heated through. You can follow the cooking instructions from the Full Recipe for the best results. Enjoy your creamy meal anytime! Chicken Alfredo Stuffed Shells last about 3 to 5 days in the fridge. Store them in an airtight container to keep them fresh. Make sure the shells cool down before sealing. If you want to enjoy these later, label the container with the date. This way, you won't lose track of how long they've been stored. Yes, you can prepare Chicken Alfredo Stuffed Shells ahead of time. Assemble the shells and place them in a baking dish. Cover with foil and store in the fridge for up to 24 hours. Just remember to add a few extra minutes to the baking time if they are cold from the fridge. This makes dinner easy and quick, even on busy nights. For side dishes, consider a simple green salad or garlic bread. A fresh Caesar salad adds a nice crunch. If you want something warm, steamed broccoli pairs well. For drinks, a light white wine like Pinot Grigio works great. You can also serve lemonade for a refreshing non-alcoholic option. To make Chicken Alfredo Sauce from scratch, you need just a few ingredients: - 1 cup heavy cream - 1/2 cup grated Parmesan cheese - 2 tablespoons butter - 1 clove garlic, minced - Salt and pepper to taste In a saucepan, melt the butter over low heat. Add minced garlic and cook for about 1 minute. Then, pour in the heavy cream. Stir in the Parmesan cheese and mix until smooth. Season with salt and pepper. Cook until the sauce thickens slightly. This simple homemade sauce adds a rich flavor to your stuffed shells. For the full recipe, check this [Full Recipe]. In this blog post, we covered how to make Chicken Alfredo Stuffed Shells. You learned about the main ingredients, seasonings, and step-by-step instructions. Tips for cooking and storing the dish were shared, along with variations and FAQs. Take these ideas and make your own great dish. Enjoy your cooking, and share these tasty shells with friends and family! Happy cooking!

Chicken Alfredo Stuffed Shells Easy and Creamy Recipe

Are you ready to impress your family with a meal that combines comfort and flavor? Chicken Alfredo Stuffed Shells are

To make Sweet Chili Chicken Stir Fry, gather these fresh ingredients: - 1 lb (450g) boneless chicken breast, sliced into thin strips - 2 tablespoons vegetable oil - 1 red bell pepper, sliced - 1 yellow bell pepper, sliced - 1 cup broccoli florets - 1 carrot, julienned - 3 cloves garlic, minced - 1 tablespoon fresh ginger, grated - 1/4 cup sweet chili sauce - 2 tablespoons soy sauce - 1 tablespoon rice vinegar - 1 teaspoon sesame oil - Salt and pepper to taste - 2 green onions, chopped (for garnish) - Cooked jasmine rice (for serving) Using fresh ingredients makes a big difference in flavor. Fresh chicken and veggies taste better. They also hold more nutrients. However, frozen options work too. They save time and reduce waste. Just ensure to thaw them properly before cooking. You can swap out some ingredients if needed: - Use turkey instead of chicken for a lighter option. - Try snap peas or asparagus instead of broccoli for variety. - If you don’t have sweet chili sauce, mix honey with hot sauce. - Use coconut aminos instead of soy sauce for a gluten-free option. These substitutions keep the dish tasty while making it your own. For the full recipe, check out the complete instructions. Start with 1 pound of boneless chicken breast. Slice it into thin strips. This helps it cook quickly. Heat 1 tablespoon of vegetable oil in a skillet over medium-high heat. Add the chicken strips to the pan. Cook them for about 5 to 7 minutes. Stir until they turn brown and are no longer pink inside. Once done, take the chicken out and set it aside. In the same skillet, pour in the other tablespoon of vegetable oil. Add 3 cloves of minced garlic and 1 tablespoon of grated ginger. Sauté them for 30 seconds until you smell the aroma. Next, toss in 1 sliced red bell pepper, 1 sliced yellow bell pepper, 1 cup of broccoli florets, and 1 julienned carrot. Stir-fry the veggies for 4 to 5 minutes. You want them tender but still crisp. Now it’s time to bring it all together! Return the cooked chicken to the skillet with your veggies. In a small bowl, mix together 1/4 cup of sweet chili sauce, 2 tablespoons of soy sauce, 1 tablespoon of rice vinegar, and 1 teaspoon of sesame oil. Pour this sauce over the stir-fry. Toss everything to coat well. Cook for another 2 to 3 minutes until the sauce is hot. Season with salt and pepper to taste. Serve over jasmine rice and garnish with chopped green onions. Enjoy your meal! For the full recipe, be sure to check out the details above! To make your Sweet Chili Chicken Stir Fry shine, focus on high heat. Use a large skillet or wok. This helps you get that nice sear on the chicken. Cut your chicken into thin strips. This ensures quick cooking and even flavor. When you add garlic and ginger, do so for just 30 seconds. This brings out their best flavors without burning them. Lastly, make sure to toss the ingredients well. This coats everything with that tasty sauce. One mistake is overcrowding the pan. If you add too much chicken at once, it will steam instead of sear. This makes it less tasty. Another common mistake is not prepping your ingredients first. Have everything ready to go. This way, you cook faster and keep the stir-fry crisp. Lastly, don't skip the seasoning. Salt and pepper are key to bringing out all the flavors. To change the spice level, start with the sweet chili sauce. You can use less if you want it milder. For more heat, add red pepper flakes or sriracha. Mix these in with your sauce at the end. Taste as you go. This way, you can find the perfect balance for your taste. Remember, you can always add more spice, but you can't take it out! If you want a sweeter flavor, add a little honey or sugar. This creates a nice contrast to the heat. {{image_2}} You can easily change the meat in this dish. Try shrimp or tofu for a twist. Both options cook fast and soak up flavor well. If you prefer beef, use thinly sliced flank steak. For pork lovers, use tenderloin slices. Each swap keeps the dish light and tasty. To make this dish vegetarian or vegan, use tofu or tempeh. Both options are protein-rich and will absorb the sweet chili sauce. Make sure to press tofu first, so it holds its shape. You can also add chickpeas for extra protein and texture. This way, you still enjoy a filling meal without meat. Feel free to mix up the veggies in your stir fry. Snap peas, mushrooms, or zucchini work great. You can also add baby corn or snow peas for crunch. The key is to choose colorful vegetables. They not only taste good but also make your meal look amazing. Remember, cooking them until just tender keeps them crisp and bright. For the full recipe, check out the complete guide above. Storing leftovers from your sweet chili chicken stir fry is easy. Let the stir fry cool down first. Then, place it in an airtight container. This keeps it fresh in the fridge for up to three days. To keep flavors strong, avoid adding rice to the stir fry when storing. Store rice separately. You can freeze sweet chili chicken stir fry for longer storage. Use freezer-safe containers or bags. Be sure to remove as much air as possible. This helps prevent freezer burn. It can last up to three months in the freezer. When you're ready to eat, thaw it in the fridge overnight. Reheating your sweet chili chicken stir fry is simple. You can use a stove or a microwave. To reheat on the stove, add a little oil to a pan. Heat over medium until warm, stirring often. If using a microwave, place the stir fry in a microwave-safe dish. Cover it and heat for 1-2 minutes. Stir halfway through for even heating. Always check the temperature before serving. Make sure it is hot throughout. For the full recipe, check the earlier section. Sweet chili sauce is a sweet and spicy sauce. It mixes sugar, chili, and vinegar. You can find it in most stores. The sauce adds flavor and a bit of heat to dishes. I love using it in stir-fries. It makes any meal taste gourmet. Yes, you can prepare Sweet Chili Chicken Stir Fry ahead of time. Cook the chicken and veggies, then cool them. Store in an airtight container in the fridge. When you're ready to eat, just reheat it in a pan. This saves time on busy nights. A few great side dishes complement this stir fry. Here are my favorites: - Steamed jasmine rice - Fried rice with peas and eggs - A fresh cucumber salad - Crunchy spring rolls These sides add variety and texture to your meal. To adjust sweetness, try these tips: - Add more sweet chili sauce for a sweeter flavor. - Mix in a bit of honey or sugar if you prefer more sweetness. - Use less sweet chili sauce for a less sweet dish. Taste as you go to find your perfect balance. In this post, we explored the key ingredients for Sweet Chili Chicken Stir Fry, including fresh versus frozen options and substitutions. I shared step-by-step cooking instructions and tips for maximizing flavor while avoiding common mistakes. We also discussed variations like protein swaps and veggie combos, along with storage tips for leftovers. This dish is fun and flexible, making it perfect for any meal. With a bit of creativity, you can enjoy a stir fry that fits your taste. Try it out and enjoy!

Sweet Chili Chicken Stir Fry Quick and Healthy Meal

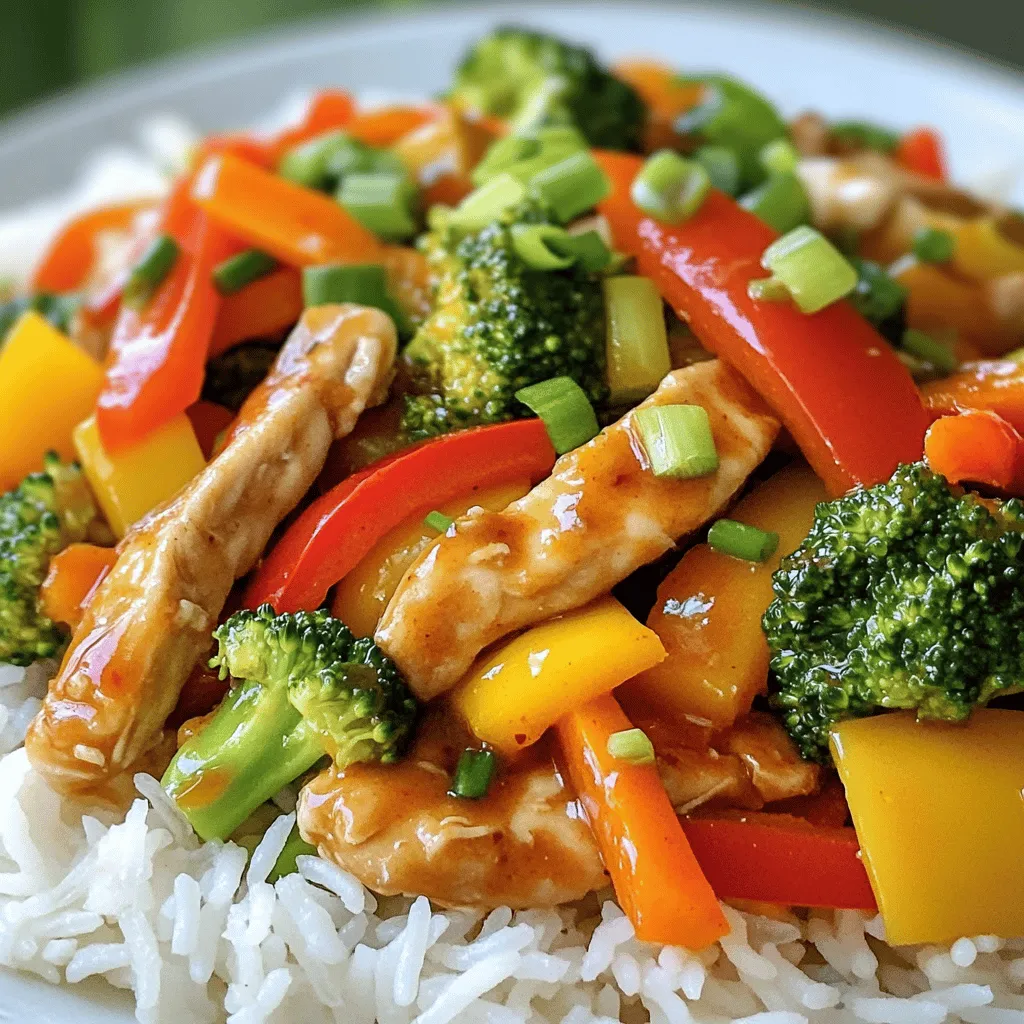
Looking for a quick, healthy meal that’s bursting with flavor? Sweet Chili Chicken Stir Fry is your answer! This dish

Older posts
Newer posts
← Previous Page1 … Page33 Page34 Page35 … Page77 Next →

dsad

© 2025 So Yum Recipes • Built with GeneratePress

Our Policies

  • Copyright Policy
  • Cookie Policy
  • GDPR Policy
  • Privacy Policy
  • Disclaimer
  • Terms Of Use

More Information

  • Home
  • About
  • Contact
  • Appetizers
  • Dessert
  • Dinner
  • Drinks
©2025, So Yum Recipes About Back To Top