Skip to content
DisclaimerTerms Of UseGDPR PolicyCookie Policy

So Yum Recipes

  • Home
  • Drinks
  • Appetizers
  • Dinner
  • Dessert
  • About
  • Contact
  • Privacy Policy
DisclaimerTerms Of UseGDPR PolicyCookie Policy

Chloe

- 4 cups fresh ripe tomatoes - 1 medium onion - 3 cloves garlic - 2 cups vegetable broth - 1 cup heavy cream - 1/4 cup fresh basil leaves - 2 tablespoons olive oil - 1 teaspoon sugar - Salt and pepper to taste - Crusty bread or croutons for serving To make creamy tomato basil soup, fresh ingredients are key. I love using ripe tomatoes. They give the soup a bright, fresh taste. You can use any variety you like, but the sweeter, the better. A medium onion adds depth. The garlic brings a nice aroma to the pot. For the broth, vegetable broth works best. It keeps the soup light and allows the tomato flavor to shine. Heavy cream is what makes this soup creamy and rich. If you want a luscious texture, don’t skip it! Fresh basil adds a pop of herbal flavor. - Large pot - Immersion blender or regular blender - Measuring cups and spoons Having the right tools makes cooking easier. A large pot is a must for this recipe. You can use an immersion blender to make the soup smooth. If you don’t have one, a regular blender works just as well. Just be careful when blending hot soup! You will also need measuring cups and spoons to get the right amounts. For a delicious meal, serve the soup with crusty bread or croutons. They add a nice crunch and make the meal more filling. For the full recipe, check out [Full Recipe]. Enjoy creating this comforting dish! - Sauté onion and garlic Start by heating olive oil in a large pot over medium heat. Add the diced onion and sauté for 5 minutes. You want the onion to turn soft and clear. Next, stir in minced garlic and cook for another minute. This step adds a lovely aroma to your soup. - Add tomatoes and sugar Now, toss in the chopped tomatoes and sugar. Mix everything well. Cook this mixture for about 10 minutes. As the tomatoes cook, they will soften and release their juices. This is where the magic begins! - Pour in vegetable broth Once the tomatoes are soft, pour in the vegetable broth. Bring the mixture to a boil. Once it boils, reduce the heat and let it simmer for 15 minutes. This helps all the flavors blend beautifully. - Puree the soup After simmering, use an immersion blender to puree the soup until it's smooth. If you don’t have an immersion blender, you can transfer the soup to a regular blender in batches. Just be careful with the hot soup! - Stir in heavy cream Once the soup is smooth, return it to low heat. Now, stir in the heavy cream. Let it warm, but don’t let it boil. This adds richness and creaminess to your soup. - Add fresh basil and season to taste Finally, add the fresh basil, salt, and pepper. Stir well to combine all the flavors. Taste and adjust the seasoning if needed. Now your creamy tomato basil soup is ready to serve! For a full recipe, check out the [Full Recipe]. Enjoy this delicious soup with crusty bread or croutons for a perfect meal! Using an immersion blender is my favorite way to blend this soup. It saves time and keeps the pot clean. Just place the blender in the pot and blend until smooth. If you use a regular blender, work in batches. Be careful, as hot soup can splash. To achieve a silky texture, blend long enough to break down all the bits. This makes the soup feel rich and creamy. Presentation matters! For a rustic look, serve the soup in deep bowls. Drizzle a little cream on top and sprinkle fresh basil for color. You can also add a few croutons for crunch. Crusty bread is perfect for dipping. It adds texture and enhances the flavors. To boost flavor, consider adding spices like paprika or cayenne pepper. A bit of parmesan cheese stirred in can also elevate the taste. If you want a creamier soup, add more heavy cream or even a dollop of sour cream. Adjust the creaminess based on your taste. Everyone has a different preference, so experiment to find your perfect balance. {{image_2}} You can make a vegan version of this creamy tomato basil soup easily. First, substitute the heavy cream with coconut cream. This gives the soup a rich and creamy texture, while adding a hint of sweetness. Next, ensure you use vegetable broth instead of chicken broth. This keeps your soup plant-based and full of flavor. To keep this soup gluten-free, check all your ingredients. Many vegetable broths are gluten-free, but always read labels to be sure. For croutons, you can use gluten-free bread. Just toast it until crunchy, then cut it into cubes. This way, you can enjoy the soup without worry. Want to change the taste? You can add roasted red peppers for a smoky flavor. Just blend them into the soup for an extra kick. You can also use different herbs like thyme or oregano. Mix and match to find your favorite flavor combinations. Each change can make the soup unique and special. To store leftover soup, let it cool first. Pour it into a container. Use a lid to cover it tightly. You can keep it in the fridge for up to 4 days. Glass or plastic containers work best for storage. Make sure the container is airtight to keep the soup fresh. To freeze the soup, follow these steps: 1. Allow the soup to cool completely. 2. Pour it into freezer-safe containers or bags. 3. Leave some space at the top for expansion. 4. Seal the containers or bags tightly. 5. Label them with the date. When you are ready to eat it, thaw the soup in the fridge overnight. For quick thawing, you can run the bag under cold water. To reheat, pour the soup into a pot over medium heat. Stir often until it’s hot. The soup stays fresh for about 4 days in the fridge. If you freeze it, it lasts for 2 to 3 months. To know if the soup is bad, check for these signs: - An off smell - Changes in color - Any mold on the surface If you notice any of these, discard the soup. Enjoy your creamy tomato basil soup without worries! Check out the Full Recipe to make sure you have the perfect balance of flavors. You can thicken your soup in a few ways. Here are common thickening agents you can use: - Cornstarch: Mix 1 tablespoon with cold water, then stir it into the soup. - Flour: Make a roux by cooking equal parts of flour and butter, then add it in. - Mashed potatoes: Add a few spoonfuls of mashed potatoes for extra creaminess. - Cream cheese: Stir in cream cheese for a rich and thick texture. Each method adds a unique touch to your soup! Yes, you can use canned tomatoes. Here are the pros and cons of using canned tomatoes: - Pros: Canned tomatoes are convenient and save time. They are also picked at their peak. - Cons: Fresh tomatoes have a brighter flavor. Canned tomatoes may have extra sodium. If you choose canned, look for high-quality options without added sugar. To add heat to your soup, consider these suggestions: - Red pepper flakes: Start with a pinch and adjust to taste. - Hot sauce: A few drops can enhance the flavor. - Chili powder: Add a teaspoon for warmth and depth. - Jalapeños: Diced fresh or pickled jalapeños can spice things up. Start with small amounts, so you can control the heat level. Pairing your soup with the right sides is key for a complete meal. Here are popular options: - Grilled cheese: A classic choice that complements the soup's creaminess. - Crusty bread: Perfect for dipping and soaking up the soup. - Salad: A light, fresh salad can balance the richness. - Croutons: Add texture and crunch on top of your soup. Enjoy exploring different combinations with your creamy tomato basil soup! For the full recipe, check out the details above. In this blog post, I walked you through making creamy tomato basil soup. You learned about key fresh ingredients, supplies needed, and simple steps to prepare this dish. I also shared tips for blending, serving, and enhancing flavors. You can easily customize this recipe for vegan and gluten-free diets. Finally, I covered storage options to keep your soup fresh. Enjoying this warm, cozy dish can be a delightful experience, whether alone or with friends. Give it a try and enjoy the flavors it brings!

Creamy Tomato Basil Soup Rich and Flavorful Recipe

If you’re craving comfort food, I have the perfect recipe for you: Creamy Tomato Basil Soup. This rich and flavorful

- 1 cup quinoa - 1 cup cherry tomatoes, halved - 1 cucumber, diced - 1 bell pepper (red or yellow), diced - 1/2 red onion, finely chopped - 1/2 cup Kalamata olives, pitted and sliced - 1/2 cup feta cheese, crumbled (optional for a vegan version) To create a vibrant Mediterranean Quinoa Salad, you need fresh, colorful ingredients. Quinoa forms the base, bringing protein and texture. Use ripe cherry tomatoes for sweetness and a pop of color. Crisp cucumbers add crunch while bell peppers give a sweet, juicy flavor. Red onions add a sharp bite, enhancing the salad's taste. Kalamata olives introduce a briny flavor that balances everything. If you like cheese, feta crumbles bring a creamy touch. - 1/4 cup olive oil - 2 tablespoons lemon juice - 1 teaspoon dried oregano - Salt and pepper to taste The dressing is key to bringing the flavors together. Olive oil provides richness, while lemon juice adds brightness. Dried oregano gives a classic Mediterranean touch. Don’t forget to season with salt and pepper to enhance the taste. - Avocado, diced - Chickpeas, drained and rinsed - Alternative herbs or spices Customization is fun! You can add diced avocado for creaminess. Chickpeas boost protein and make the salad heartier. Feel free to experiment with herbs like basil or mint, or spices like cumin for a unique twist. Mixing and matching can make this salad your own! For the full recipe, check out the [Full Recipe] section. To start, you need to measure and rinse 1 cup of quinoa. Rinsing helps remove bitterness. Next, combine the rinsed quinoa with 2 cups of water or vegetable broth in a medium saucepan. Bring this mixture to a boil over high heat. Once it reaches a boil, reduce the heat to low. Cover the pot and let it simmer for about 15 minutes. The quinoa will become fluffy and absorb all the liquid. After that, remove it from the heat and let it cool. While the quinoa cools, chop and dice your fresh vegetables. You will need 1 cup of halved cherry tomatoes, 1 diced cucumber, 1 diced bell pepper, and 1/2 finely chopped red onion. You should also slice 1/2 cup of pitted Kalamata olives. Combine all these chopped vegetables in a large mixing bowl. This mixture brings color and crunch to your salad. In a small bowl, whisk together the dressing ingredients. Use 1/4 cup of olive oil, 2 tablespoons of lemon juice, and 1 teaspoon of dried oregano. Add salt and pepper to taste. You can adjust the seasoning based on your preference. This dressing will give the salad great flavor and tie all the ingredients together. Now, it’s time to mix everything. Add the cooled quinoa to your bowl of vegetables. Pour the dressing over it and gently toss to combine. If you want, sprinkle 1/2 cup of crumbled feta cheese on top. Mix it lightly once again. This step helps the flavors blend well. Allow the salad to sit for at least 15 minutes to let the flavors meld together before serving. Enjoy your fresh and flavorful Mediterranean quinoa salad! For a complete guide, refer to the Full Recipe. To make your quinoa shine, start by rinsing it. Rinsing removes the bitter saponins. This simple step makes your quinoa taste better. Use a fine-mesh strainer to rinse it under cool water for a minute. After rinsing, cook the quinoa. You can use either water or vegetable broth for added flavor. Bring it to a boil, then reduce the heat. Cook for about 15 minutes until it’s fluffy. Let it cool before adding it to your salad. Choose a large bowl for serving your salad. A bright bowl makes the colors pop. You can also use mason jars for individual servings. This adds a fun touch to your meal. For a side dish, pair the salad with grilled chicken or fish. It also goes well with pita bread or hummus. These pairings enhance the Mediterranean vibe. Store your salad in an airtight container. This keeps it fresh for up to three days. The flavors get better as it sits. If you can, make it a day ahead. This gives the salad time to meld. Keep the feta cheese separate until serving. This avoids sogginess. When you’re ready to eat, just toss it and enjoy. For more details, check the Full Recipe. {{image_2}} You can easily make this salad vegan. Just skip the feta. It still tastes great without it. If you need a gluten-free option, quinoa is already gluten-free. You can enjoy this dish worry-free! Feel free to mix up the veggies. Try adding spinach, zucchini, or bell peppers in different colors. You can even swap quinoa for grains like farro or barley. Both add a nice texture and flavor. Add crunch by tossing in nuts or seeds. Almonds or sunflower seeds work well. For dressings, you can use balsamic vinegar or a yogurt-based one. Both options enhance the taste and make the salad even more exciting. For the full recipe, check out the Mediterranean Quinoa Salad 🥗. To keep your Mediterranean quinoa salad fresh, store it in the fridge. Use an airtight container. This helps prevent the salad from drying out or absorbing other odors. Make sure to cool the salad before sealing it. This keeps the texture nice and firm. Your salad can last for about three to five days in the fridge. Look for signs of spoilage like a sour smell or mushy veggies. If you notice these, it’s best to toss the salad. Always trust your senses when checking for freshness. You can freeze quinoa salad, but it might change texture. If you want to freeze it, place it in a freezer-safe container. Leave some space at the top for expansion. Thaw it in the fridge overnight before eating. Enjoy your salad with a fresh twist! For the full recipe, check out the Mediterranean quinoa salad section. You can use couscous or bulgur as great alternatives. Both grains have a similar texture and cook quickly. Couscous is tiny and light, while bulgur is more chewy. They both soak up flavors well and work nicely in salads. Making Mediterranean Quinoa Salad takes about 30 minutes total. You need around 15 minutes for prep and another 15 minutes to cook the quinoa. It’s quick and easy, perfect for a fast meal. Yes, Mediterranean Quinoa Salad is very healthy. Quinoa is a complete protein, meaning it has all nine essential amino acids. It is also high in fiber and low in calories. Each serving has around 200-250 calories, depending on the ingredients used. Absolutely! You can add cooked chicken, tuna, or beans for extra protein. Chickpeas are a great option too. They blend well with the salad's flavors and make it more filling. You can customize it to fit your taste and needs perfectly. For the full recipe, check out the section above. This blog post covered how to make a delicious Mediterranean Quinoa Salad. You learned about required and optional ingredients, simple steps for cooking, and tips to enhance flavor. I shared ways to customize the salad for different diets and how to store leftovers. Remember, this dish is versatile and fun to make. You can always adjust it to your taste. Enjoy creating your own version of this salad that is not only tasty but also healthy!

Mediterranean Quinoa Salad Fresh and Flavorful Dish

Looking for a fresh and flavorful dish that’s healthy and satisfying? Mediterranean Quinoa Salad is the answer! Bursting with colorful

To make your homemade granola bars, start with these basic ingredients: - 2 cups rolled oats - 1 cup mixed nuts (almonds, walnuts, and pecans), chopped - ½ cup honey or maple syrup - ½ cup natural peanut butter or almond butter - ½ cup dark chocolate chips - ¼ cup unsweetened coconut flakes - 1 teaspoon vanilla extract - ½ teaspoon sea salt - ½ teaspoon cinnamon These ingredients come together to create a tasty and satisfying snack. The oats provide a hearty base. The nuts add crunch and healthy fats. Honey or maple syrup acts as a natural sweetener and binder. Peanut butter gives creaminess and extra flavor. Dark chocolate chips bring a sweet touch, while coconut adds a tropical flair. You can customize your granola bars in many ways. Here are some great options: - ¼ cup dried fruits (raisins, cranberries, or apricots) - Seeds (like pumpkin or sunflower) - Spices (like nutmeg or ginger) - Protein powder for a protein boost Feel free to mix and match these add-ins. They allow you to create a flavor that fits your taste. Each ingredient in these bars has its own health perks: - Rolled oats: Full of fiber, they help with digestion and keep you full. - Mixed nuts: Packed with protein and healthy fats, they support heart health. - Honey or maple syrup: These natural sweeteners provide quick energy and antioxidants. - Peanut butter: A great source of protein, it helps with muscle repair. - Dark chocolate: Contains antioxidants, which can boost mood and health. - Coconut flakes: Provide healthy fats and add some sweetness. By choosing these ingredients, you make a snack that is both tasty and good for you. Enjoy creating your own delicious granola bars with this recipe! Start by gathering all your ingredients. This recipe is simple and quick. You will need rolled oats, nuts, honey, peanut butter, chocolate chips, coconut, vanilla, salt, and cinnamon. Feel free to add dried fruits if you like. Make sure to measure everything accurately for the best results. 1. Preheat the oven to 350°F (175°C). This helps the bars cook evenly. 2. Line an 8x8-inch baking dish with parchment paper. Leave some paper hanging over the edges. This makes it easy to lift out the bars later. 3. Mix the dry ingredients in a big bowl. Combine the oats, chopped nuts, coconut, salt, and cinnamon. Stir well to combine. 4. Melt the wet ingredients. In a microwave-safe bowl, combine honey and peanut butter. Microwave for 30 seconds. Stir until smooth. 5. Add vanilla to the melted mixture. Stir this in well. 6. Combine wet and dry. Pour the melted mixture over the dry ingredients. Mix well to coat everything evenly. 7. Fold in chocolate chips and dried fruits if you choose to use them. This adds more flavor and fun. 8. Transfer the mixture to the lined baking dish. Press it down firmly. Make sure it is even all over. 9. Bake for 20-25 minutes. Look for golden edges and a set middle. This shows they are ready. 10. Cool the bars in the dish for 10 minutes. Then lift them out using the parchment paper. Place them on a cutting board to cool completely. 11. Cut into bars. You can cut them into any size you like. Store them in an airtight container. Baking times may vary based on your oven. Check the bars after 20 minutes. They should look golden and firm. If they are still soft, bake for a few more minutes. Keep an eye on them to avoid burning. Enjoy your Nutty Chocolate Bliss Granola Bars! To get the best texture in your granola bars, press the mixture down firmly. This helps the bars hold together well. If you want chewy bars, bake them for less time. For crunchier bars, bake until golden brown. Also, let them cool completely before cutting. This step helps them firm up nicely. One common mistake is using too much liquid. This can make your bars too soft. Make sure to measure your honey or syrup accurately. Another mistake is not mixing well. You want every oat and nut coated with the wet mixture. If you skip this step, the bars may crumble. Spices can make your granola bars pop with flavor. Try adding a pinch of nutmeg or ginger for a warm taste. You can also use different extracts. Almond extract pairs well with nuts, while coconut extract enhances the coconut flakes. These small changes can take your bars from good to great! For the full recipe, check out the Nutty Chocolate Bliss Granola Bars. {{image_2}} To make vegan granola bars, swap honey for maple syrup. Use almond or cashew butter instead of peanut butter. These changes keep the bars plant-based and tasty. You can also add seeds like chia or flax for extra crunch. For gluten-free bars, choose certified gluten-free oats. This ensures no cross-contamination with gluten. You can also use brown rice syrup instead of honey. Always check labels on nut butters and chocolate chips, as some may contain gluten. Granola bars are great for experimenting with flavors. Here are some fun ideas: - Chocolate Coconut: Add extra dark chocolate chips and more coconut flakes. - Cinnamon Apple: Mix in dried apples and a dash more cinnamon. - Peanut Butter Banana: Include banana chips and a bit of mashed ripe banana for moisture. - Maple Pecan: Replace honey with maple syrup and add extra chopped pecans. These variations let you create your perfect granola bar. Feel free to mix and match flavors to suit your taste! To keep your granola bars fresh, store them in an airtight container. This prevents air from making them stale. Place parchment paper between layers if you stack them. This will stop them from sticking together. Always keep the bars in a cool, dry place. Avoid direct sunlight, which can cause the bars to melt. Homemade granola bars can last up to a week at room temperature. If you want them to last longer, freezing is a great option. When stored properly, they can stay good for up to three months in the freezer. Just remember to label the container with the date. To freeze granola bars, first let them cool completely. Then, wrap each bar in plastic wrap. Next, place the wrapped bars in a freezer-safe bag or container. Squeeze out as much air as you can before sealing. When you're ready to eat, just take one out and let it thaw for a few minutes. Enjoy your Nutty Chocolate Bliss Granola Bars anytime! Yes, you can substitute many ingredients. You can use any nuts you like. Almond butter works well if you don’t have peanut butter. For sweeteners, feel free to swap honey for maple syrup. If you’re allergic to nuts, try seeds like sunflower or pumpkin seeds. You can also change the chocolate chips to carob chips or leave them out. Dried fruits can be replaced with whatever you enjoy, like figs or dates. Just keep the ratios similar to ensure the bars stick together. To make your granola bars chewy, use more sticky ingredients. Increase the honey or add more nut butter. You can also add mashed bananas or applesauce for moisture. Mixing in fewer dry ingredients can help too. Bake the bars for a shorter time, just until they are set but not hard. This will keep them softer and chewier. If you want a soft texture, avoid overbaking. The best way to cut granola bars is to use a sharp knife. First, let them cool completely on a cutting board. You can score the bars lightly before cutting them. This helps guide the knife. Use a gentle sawing motion to avoid crushing the bars. If they stick to the knife, dip it in warm water. This will make cutting easier. Aim for even sizes so they look nice and are easy to grab. - Including the Full Recipe: Nutty Chocolate Bliss Granola Bars 🥜 Homemade granola bars are easy to make and full of good stuff. We covered the main ingredients, different add-ins, and their benefits. Step-by-step instructions guide you in making the perfect bars. I shared tips for great texture and flavor, along with fun variations like vegan options. Storage is key for freshness, and I included details on keeping them tasty. With these insights, you can create your own tasty bars. Enjoy your cooking adventure and let your creativity shine!

Savory Homemade Granola Bars Quick and Easy Recipe

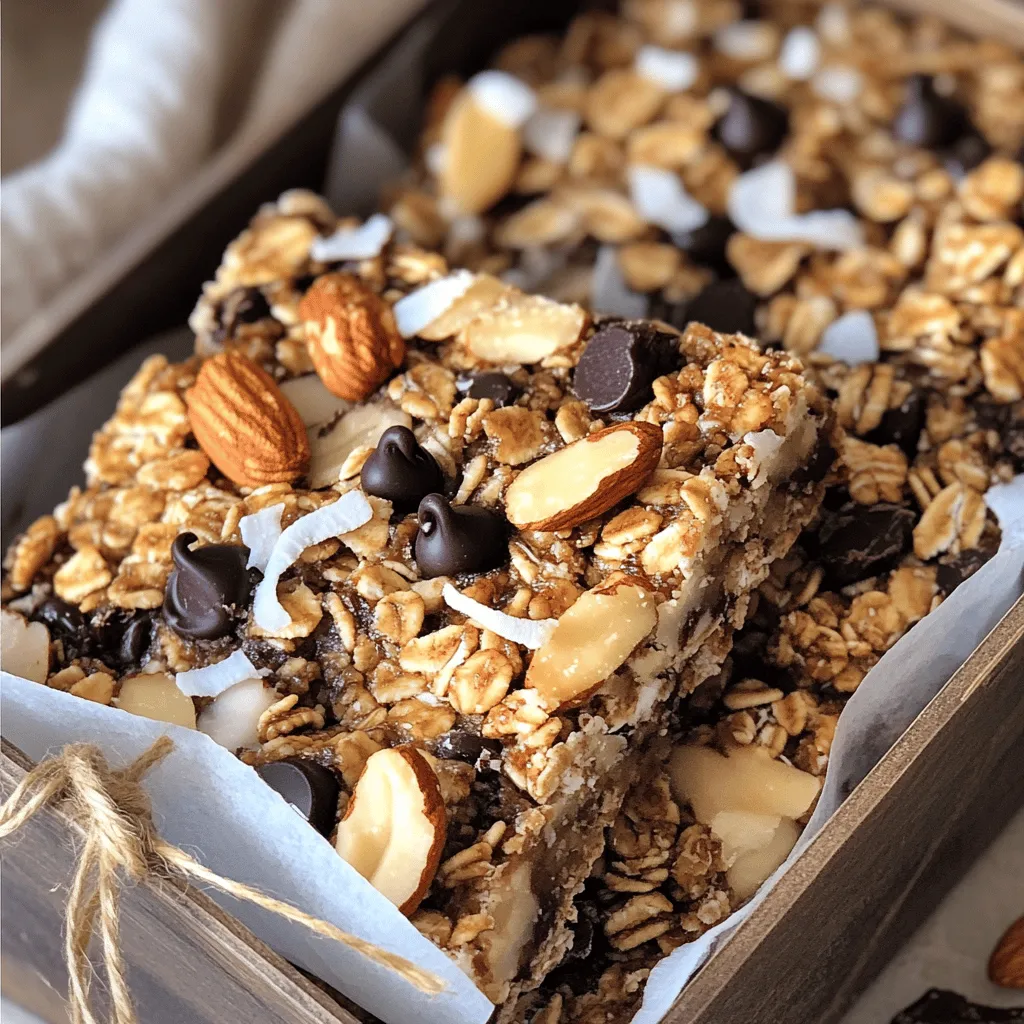
Are you ready to whip up a delicious snack that’s both healthy and fun? My quick and easy homemade granola

- 1 lb boneless, skinless chicken thighs (diced) - 1 can coconut milk - 2 tablespoons red curry paste - 1 tablespoon vegetable oil - 1 medium onion (chopped) - 2 cloves garlic (minced) - 1-inch piece ginger (grated) - 1 red bell pepper (sliced) - 1 cup green beans (trimmed) - 1 tablespoon fish sauce - 1 tablespoon brown sugar - Juice of 1 lime - Fresh cilantro (for garnish) - Salt and pepper to taste - Large skillet or pot - Measuring spoons - Cutting board - Sharp knife - Stirring utensil When I make coconut curry chicken, I always gather these key ingredients first. Fresh and tasty items make a big difference. I prefer using boneless, skinless chicken thighs because they stay juicy. Coconut milk gives the dish its creamy texture and rich flavor. Red curry paste adds warmth and depth to each bite. For the best flavor, I add onion, garlic, and ginger. These aromatics create a base that enhances the dish. The red bell pepper and green beans add color and crunch. Fish sauce and brown sugar balance the dish with saltiness and sweetness. The lime juice brightens everything up at the end. You’ll also need a large skillet or pot to cook everything. A measuring spoon helps with precise amounts. A sharp knife makes chopping easy and quick. Lastly, a sturdy stirring utensil is essential for mixing the ingredients well. If you want to see the full recipe, check out the Full Recipe section. - Heat vegetable oil in a large skillet over medium heat. - Add the chopped onion and sauté until it turns translucent, about 3-4 minutes. - Next, stir in the minced garlic and grated ginger. Cook for 1-2 minutes until fragrant. - Add the diced chicken thighs into the skillet. Season with salt and pepper. Cook until the chicken is browned on all sides, about 5-6 minutes. - Stir in the red curry paste. Mix it well with the chicken and cook for 1-2 minutes to deepen the flavor. - Pour in the coconut milk. Then, add the sliced red bell pepper and green beans. Make sure to stir well to combine all the ingredients. - Add the fish sauce and brown sugar. Bring the mixture to a gentle simmer. Cook for 10-15 minutes until the chicken is fully cooked and the vegetables are tender. - Squeeze in the lime juice and stir gently. Taste it and adjust seasoning with more salt, pepper, or lime juice if needed. - Serve the coconut curry chicken hot, garnished with fresh cilantro. For the full recipe, check out the [Full Recipe]. To brown chicken perfectly, heat the oil in your skillet first. Add the chicken once the oil is hot. Cook the chicken without stirring for a few minutes. This helps it to get a nice brown color. Turn the chicken to brown all sides. For simmering curry, keep the heat low. A gentle simmer lets the flavors mix well. Stir occasionally to prevent sticking. If it bubbles too much, lower the heat. To adjust spice levels in your curry, taste as you go. If it's too mild, add more red curry paste. For heat, try adding sliced chili peppers. If it's too hot, balance it with a bit of brown sugar. If you don't have fish sauce, soy sauce works great. For brown sugar, you can use honey or maple syrup. These substitutes still add a nice flavor. Serve your coconut curry chicken over jasmine rice or quinoa. Both soak up the delicious sauce well. You can also use cauliflower rice for a low-carb option. For garnishing, chop fresh cilantro and sprinkle it over the top. Add lime wedges on the side for a fresh finish. This adds color and brightens the dish. For full details, check the Full Recipe. {{image_2}} You can change up the protein in coconut curry chicken. Try using tofu or shrimp if you want. Tofu gives a nice texture, while shrimp cooks quickly. Both options still soak up that yummy curry flavor. For vegetables, you have plenty of choices. Zucchini and carrots work well in the curry. They add color and crunch. You can mix and match based on what you have at home. This makes the dish fun and fresh every time! Coconut curry chicken can take on different flavors, too. If you want a Thai twist, add some basil or lime leaves. These herbs brighten the dish and add a fresh taste. For an Indian twist, use garam masala or turmeric. This will give your curry a warm, rich flavor. You can also add chickpeas for more texture and protein. Both styles create a unique meal that feels special. If you need gluten-free options, just skip the fish sauce. Use gluten-free soy sauce instead. This keeps the flavor while making it friendly for everyone. For a vegan version, swap the chicken for chickpeas or more veggies. Use vegetable broth instead of fish sauce. The coconut milk will still give you that creamy feel. This way, everyone can enjoy coconut curry chicken! To keep your coconut curry chicken fresh, place leftovers in the fridge right away. Use airtight containers for best results. This method stops bacteria from growing and keeps flavors intact. Divide the curry into smaller portions. This makes it easier to reheat later. When it's time to enjoy your leftovers, reheat gently. Use a pot on the stovetop for even heating. Stir often to avoid hot spots. If you choose the microwave, cover the bowl with a lid. This traps steam and keeps the chicken juicy. Heat in short bursts, checking often. You can freeze coconut curry chicken for up to three months. Let the curry cool completely before storing. Transfer it to freezer-safe containers or bags. Be sure to remove as much air as possible. When ready to eat, thaw in the fridge overnight before reheating. Coconut curry chicken is a rich dish from Southeast Asia. It blends tender chicken with creamy coconut milk. The dish often uses spices like curry paste, garlic, and ginger. It has a warm, comforting flavor that many love. You can find variations in Thai and Indian cuisines. Each region adds its own twist to the base recipe. Yes, you can prepare coconut curry chicken ahead of time. Cooking it a day before can deepen the flavors. Just let it cool and store it in the fridge. When you’re ready to eat, heat it gently on the stove. The sauce will thicken a bit, but it will taste even better. To spice up your coconut curry chicken, try adding fresh chili peppers. You can include sliced jalapeños or Thai bird chilies for more heat. Another option is to mix in extra red curry paste. Taste as you go to find the right spice level for you. Coconut curry chicken pairs well with a few side dishes. Try serving it over jasmine rice or quinoa to soak up the sauce. You can also add a side of steamed vegetables. Fresh cilantro and lime wedges make great garnishes. They add color and extra flavor to your meal. In this blog post, we covered how to make tasty coconut curry chicken. You learned about the key ingredients, helpful cooking tools, and easy steps to prepare the dish. We discussed tips for cooking, flavor enhancements, and variations to fit different diets. Plus, we shared best practices for storing and reheating leftovers. Coconut curry chicken is versatile and delicious. Enjoy trying different flavors and make it your own!

Coconut Curry Chicken Flavorful and Simple Recipe

Are you craving a dish that’s bursting with flavor yet simple to make? In this post, I’ll guide you through

- 2 medium sweet potatoes, peeled and diced - 1 can (15 oz) black beans, rinsed and drained - 1 can (15 oz) diced tomatoes with green chilies - 1 medium onion, chopped Sweet potatoes bring a sweet and hearty flavor. Black beans add protein and fiber. Diced tomatoes give a tangy kick. Onions add depth to the base. - 2 teaspoons chili powder - 1 teaspoon cumin - 1 teaspoon smoked paprika - 1/2 teaspoon cayenne pepper (optional, for heat) Chili powder and cumin are key for warmth. Smoked paprika adds a rich, smoky note. Cayenne pepper gives an optional heat boost. Adjust to your taste. - 1 bell pepper (red or green), diced - 2 cups vegetable broth - 1 tablespoon olive oil - Salt and pepper to taste - Fresh cilantro, chopped (for garnish) - Avocado slices (for serving) Bell peppers add crunch and color. Vegetable broth is the chili's base. Olive oil helps sauté the veggies. Cilantro gives a fresh finish. Avocado slices make it creamy and rich. This Sweet Potato Black Bean Chili is not just tasty; it is also full of nutrients. You can find the full recipe to create this easy weeknight meal. - Heat olive oil over medium heat. - Sauté onion and bell pepper until translucent. This step adds a sweet base to your chili. - Add garlic, chili powder, cumin, smoked paprika, and cayenne. - Stir and cook until fragrant. The aroma will fill your kitchen and excite your taste buds. - Add sweet potatoes and cook for 5 minutes. They will start to soften and absorb flavors. - Pour in vegetable broth, diced tomatoes, and black beans. This creates a hearty, colorful mix. - Bring to a boil, then reduce heat to low. - Cover and simmer for 25-30 minutes. The chili will thicken, and the sweet potatoes will become tender. - Season with salt and pepper. Taste as you go to get it just right. - Mash some sweet potatoes for thickness if desired. This adds creaminess without any dairy. - Serve hot, garnished with cilantro and avocado slices. They add freshness and a lovely look to your bowl. For the full experience, check out the Full Recipe. This chili is a perfect weeknight meal! To boost the taste of your sweet potato black bean chili, add some lime juice. This simple addition brings a bright note that balances the rich flavors. You can also try different beans or vegetables. For example, pinto beans or corn can change the texture and taste. Mix it up to find your favorite combo! For a smoother chili, use an immersion blender. Blend until you reach your desired texture. It makes the chili creamy without losing the hearty feel. You can also adjust the simmer time. The longer you simmer, the sweeter the sweet potatoes become. Taste as you go to find your perfect level of sweetness. Batch cooking this chili is a great idea. Make a big pot for easy weeknight meals. Store leftovers in portions for quick lunches or dinners later. Just freeze them in airtight containers. When you’re ready to eat, thaw overnight in the fridge for easy reheating. {{image_2}} You can easily change some ingredients to make this chili your own. For example, you can substitute sweet potatoes with butternut squash. This swap offers a similar texture and taste. You can also use different bean varieties. Try pinto beans or kidney beans for a new flavor. Do you like it spicy? You can increase or decrease the cayenne pepper to fit your taste. If you want more heat, add jalapeños. Just chop them up and toss them in when you add the other vegetables. This chili is already vegan and can be gluten-free. Just make sure your vegetable broth is labeled gluten-free. For a cheesy flavor without dairy, use nutritional yeast as a garnish. It adds a nice touch and extra nutrients. Feel free to explore these variations while making your Sweet Potato Black Bean Chili. The full recipe guides you through the basics, but these tips help you customize it to your liking. You can store leftover chili in an airtight container. It stays fresh for up to 5 days in the fridge. This makes it easy for quick meals later in the week. Just scoop some out when you need it. If you want to keep it longer, freeze the chili. Use freezer-safe containers for best results. It lasts up to 3 months in the freezer. To enjoy it later, thaw it overnight in the refrigerator. This way, it heats up evenly. When you’re ready to eat, reheat the chili on the stovetop or in the microwave. If it looks thick, add a splash of broth. This helps keep the chili nice and smooth. Enjoy your tasty, homemade meal without any hassle. For the full recipe, check out the earlier section. Yes, you can! Just follow the same steps as the stovetop method. After you prepare the base with onions and spices, transfer everything into your slow cooker. Cook on low for 6-8 hours. This method allows the flavors to meld beautifully while you go about your day. If you want more heat, it’s easy to spice it up. Add more cayenne pepper during cooking. You can also toss in fresh chilies, like jalapeños or serranos, for an extra kick. Just remember, start small and taste as you go. You can always add more! This chili is so versatile! Serve it with rice or warm tortillas for a filling meal. You can also add a side salad for freshness. Don’t forget toppings! Avocado and cilantro make great additions. They add creaminess and brightness that balance the chili's warmth. For the full recipe, check out the details above! This blog post covered how to make a delicious Sweet Potato Black Bean Chili. We discussed the main ingredients, seasonings, and step-by-step instructions. You learned tips for enhancing flavor and storage options. You can easily adjust spice levels and try different variations. This chili is perfect for meal prep and can be served with many sides. Enjoy making this hearty dish that warms the body and soul. Embrace the flavor, and happy cooking!

Sweet Potato Black Bean Chili Flavorful Weeknight Meal

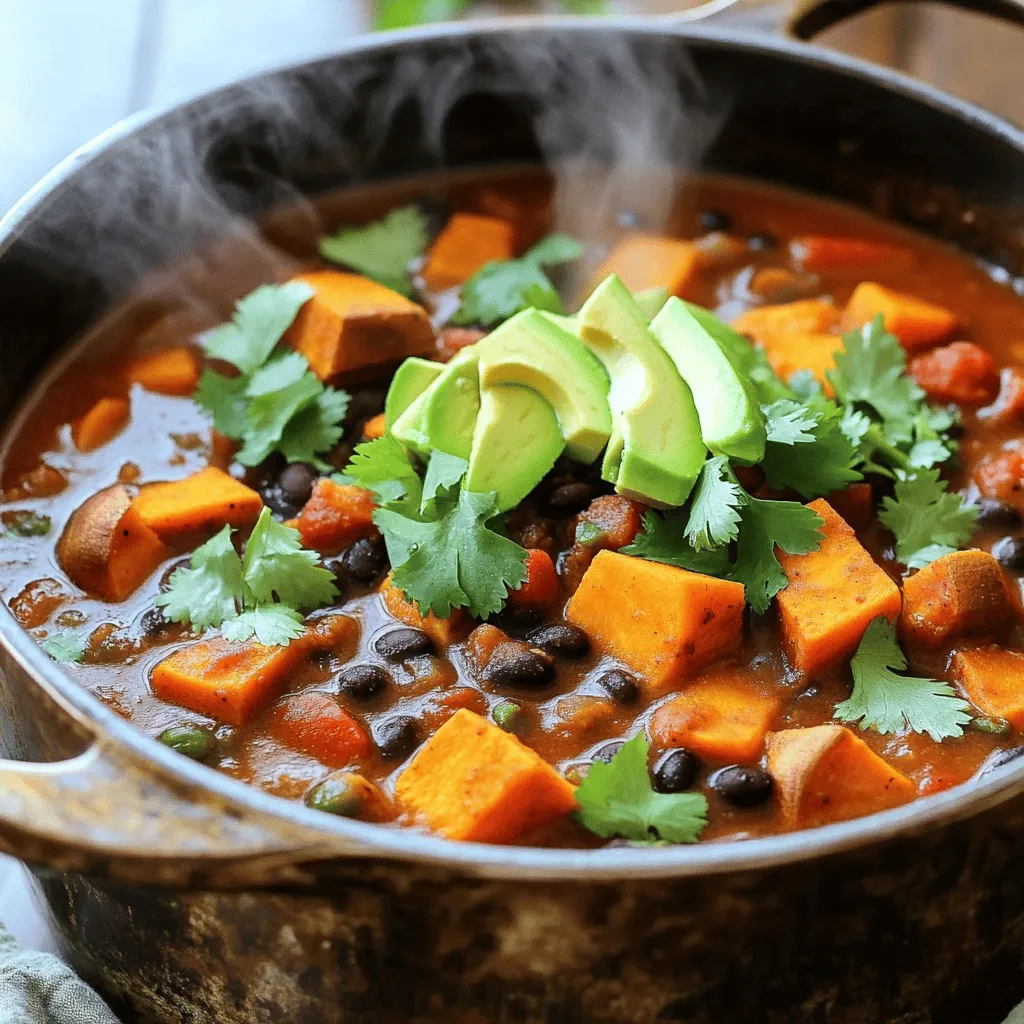
Looking for a hearty, nutritious meal that’s easy to make? This Sweet Potato Black Bean Chili is packed with flavor

- 1 large head of cauliflower, cut into florets - 4 cloves of garlic, minced - 1/4 cup grated Parmesan cheese - 1/4 cup olive oil To make Garlic Parmesan Roasted Cauliflower, you need fresh, crisp cauliflower florets. Choose a large head for the best flavor and texture. You will also need garlic to give it that rich, bold taste. Parmesan cheese adds a savory touch, while olive oil helps the cauliflower roast perfectly. - 1 teaspoon paprika - 1/2 teaspoon salt - 1/4 teaspoon black pepper Seasonings are key to elevating the dish. Paprika brings warmth and color. Salt enhances all the flavors, and black pepper adds a little kick. - 1 tablespoon fresh parsley, chopped (for garnish) - 1 tablespoon lemon juice (optional) For extra flair, consider using fresh parsley as a garnish. It adds a pop of color and freshness. A squeeze of lemon juice gives it a zesty finish, brightening the flavors. You can find the full recipe to make this delightful side dish and impress your friends and family. - Preheat the oven: Set your oven to 425°F (220°C). This heat helps the cauliflower get crispy. - Wash and cut the cauliflower: Rinse the cauliflower well. Cut it into bite-sized florets. Use a paper towel to dry them. This helps the garlic mixture stick better. - Prepare the garlic mixture: In a big bowl, mix the minced garlic, olive oil, paprika, salt, and black pepper. Stir well until everything is combined. - Toss cauliflower with garlic mixture: Add the cauliflower florets to the bowl. Toss them until they are fully coated in the mixture. - Add Parmesan cheese: Sprinkle the grated Parmesan cheese over the cauliflower. Toss again to make sure the cheese is evenly spread. - Roast in the oven: Spread the cauliflower on a baking sheet lined with parchment paper. Roast for about 25-30 minutes. Flip the florets halfway through for even cooking. They should be golden brown and tender when done. For the full recipe, check out the details above! The best oven temperature for roasting cauliflower is 425°F (220°C). This heat gives the florets a nice golden color. It also helps keep them tender inside. Make sure to space the florets evenly on the baking sheet. This step allows hot air to flow around each piece, ensuring they roast well. If they are too close, they may steam instead of roast. Using fresh herbs can really boost the taste of your dish. Chopped parsley adds a bright touch. You might also try fresh thyme or rosemary for a different flavor. If you're feeling adventurous, swap the Parmesan with other cheeses. Grated Pecorino Romano or nutritional yeast can also work well. Both add a unique twist while keeping the dish creamy. If you're busy, you can prep the cauliflower earlier. Cut the florets and store them in the fridge for up to a day. Just make sure to keep them in an airtight container. For reheating, use the oven to keep the texture crispy. Warm them at 350°F (175°C) until hot. This method helps maintain their flavor and crunch. For a quick option, you can also use a microwave, but it may soften the cauliflower. You can check the full recipe if you want more details on preparation. {{image_2}} You can change up Garlic Parmesan Roasted Cauliflower with fun extras. Adding spices like cayenne gives it heat. You can also try cumin for a warm flavor. Mixing in other vegetables can add color and taste. Carrots or bell peppers work well. Just cut them into pieces. Toss them with the cauliflower for even cooking. If you follow a vegan diet, you can swap the Parmesan cheese. Nutritional yeast gives a cheesy flavor without dairy. For gluten-free options, this dish is already safe. Just check your spices to ensure they are gluten-free. This way, everyone can enjoy this tasty side. Garlic Parmesan Roasted Cauliflower pairs well with many proteins. Try it with grilled chicken or fish for a balanced meal. It also makes a great snack or appetizer. Serve it with a dip, like ranch or hummus, for extra flavor. You can also enjoy it cold in salads or wraps. After enjoying your Garlic Parmesan Roasted Cauliflower, store your leftovers to keep them fresh. Place the cooled cauliflower in an airtight container. This method helps preserve flavor and texture. Keep the container in the fridge. It will stay good for about 3 to 4 days. If you want to store it longer, consider freezing. Spread the cooled cauliflower on a baking sheet. Freeze it for about an hour. Then, transfer it to a freezer-safe bag. This way, it won’t stick together. It can last up to three months in the freezer. How long does Garlic Parmesan Roasted Cauliflower last? In the fridge, expect it to last 3 to 4 days. In the freezer, it can last up to three months. Look for signs of spoilage. If the cauliflower looks slimy or smells off, discard it. Freshness is key to enjoying this dish at its best. To reheat, the oven is your best friend. Preheat it to 350°F (175°C). Place the cauliflower on a baking sheet. Heat for about 10 to 15 minutes. This helps to keep the texture crispy. You can also use the microwave if you're in a hurry. Place it in a microwave-safe dish. Heat in short bursts, checking often. This way, it stays warm without losing too much texture. Enjoy your flavorful side dish again! Roasting cauliflower takes about 25 to 30 minutes. I recommend checking it at 25 minutes. You want it golden brown and tender. Flip the florets halfway through. This helps them cook evenly and get that nice roasted flavor. Yes, you can use frozen cauliflower. However, it may release more water during cooking. This can make it less crispy. To help, thaw the cauliflower and pat it dry before roasting. You might need to adjust the cooking time too. Keep an eye on it as it roasts. This dish pairs well with many foods. Try serving it with grilled chicken, steak, or fish. It also complements pasta dishes nicely. For a vegetarian option, enjoy it with a mixed green salad or grain bowls. Feel free to get creative with your pairings! You can prepare the cauliflower up to a day ahead. Just cut it into florets and store them in the fridge. When you are ready, toss them with the garlic mixture and roast. You can also roast them in advance and reheat them. They taste great even after some time! For the full recipe, check out Garlic Parmesan Roasted Cauliflower. Now you know how to make Garlic Parmesan Roasted Cauliflower with ease. You’ve learned the key ingredients, preparation steps, and best practices for roasting. Use the tips to enhance flavors and create variations that fit your taste. Consider the storage tips to keep leftovers fresh and delicious. This simple dish can be a treat or a side. Whether you cook it as a snack for yourself or serve it to guests, it’s sure to impress. Enjoy your tasty creation!

Garlic Parmesan Roasted Cauliflower Tasty Side Dish

Are you searching for an exciting side dish that’s both tasty and easy to make? Look no further than Garlic

To make these tasty tacos, gather these simple ingredients: - 2 chicken breasts, diced - 1 ripe mango, diced - 1 small red onion, finely chopped - 1 jalapeño, deseeded and minced - 2 cloves garlic, minced - 1 teaspoon ground cumin - 1 teaspoon smoked paprika - 1 tablespoon olive oil - Salt and pepper to taste - 8 small corn tortillas - Fresh cilantro, for garnish - Lime wedges, for serving Choosing fresh ingredients makes your tacos shine. Look for vibrant mangoes that yield slightly when pressed. This means they are ripe and sweet. For chicken, pick breasts that are pink and firm. Avoid any with a gray hue. When selecting onions, choose ones that feel heavy and have no soft spots. Fresh cilantro should look bright and green, not wilted. You can easily swap some ingredients for a different taste. For a milder taco, use a bell pepper instead of jalapeño. If you don’t have fresh mango, try canned mango or even pineapple. For a lighter option, use grilled shrimp or tofu instead of chicken. Lastly, you can use flour tortillas if you prefer them over corn. This recipe brings fun to the table with bold flavors and fresh ingredients. For the full recipe, check the earlier section. Enjoy cooking! Start by cutting the chicken breasts into small, even pieces. This helps them cook quickly. In a large bowl, mix the chicken with ground cumin, smoked paprika, minced garlic, and jalapeño. Sprinkle salt and pepper to taste. Stir the mix well to coat the chicken evenly. Cover the bowl and let it sit for at least 15 minutes. This lets the flavors soak into the chicken. Heat the olive oil in a skillet over medium-high heat. Once the oil is hot, add the marinated chicken pieces. Cook the chicken for about 7-10 minutes. You want it to turn golden brown and be fully cooked. Stir it occasionally to ensure even cooking. When done, remove the skillet from the heat. In a separate bowl, combine the diced mango and chopped red onion. This will create a refreshing salsa. Warm the corn tortillas in a dry skillet for about 30 seconds on each side. This makes them soft and easy to fold. Now, it’s time to assemble your tacos! Place a generous spoonful of the cooked chicken on each tortilla. Top it with the mango salsa. Finish by adding fresh cilantro on top. Serve with lime wedges on the side for a zesty kick. Enjoy your delicious Spicy Mango Chicken Tacos! For a full recipe, refer to the complete instructions above. To make your Spicy Mango Chicken Tacos burst with flavor, try these tips. First, let the chicken marinate longer than 15 minutes if you can. This allows the spices to soak in deeply. Add a splash of lime juice to the chicken mix for brightness. Use ripe mangoes, as their sweetness will balance the heat from the jalapeño. Fresh cilantro adds a lovely touch. Feel free to sprinkle some on top before serving. One common mistake is overcooking the chicken. Aim for a golden brown color, not dry. Also, don’t skip the warming of tortillas. This small step makes them soft and pliable. Avoid adding too much salt to the chicken; the mango salsa should bring its own flavor. Lastly, don’t forget to deseed the jalapeño if you want less heat! Serve your tacos with lime wedges on the side for a zesty kick. Pair them with a fresh salad or some Mexican rice. You can also add black beans for extra protein. For drinks, try a light beer or a fruity mocktail. These pairings will enhance your meal and make it feel special. For the full recipe, check out the Spicy Mango Chicken Tacos. {{image_2}} You can easily make these tacos vegetarian. Swap the chicken for black beans or grilled veggies. Use the same spices to keep the flavor strong. You can add diced bell peppers or zucchini for extra crunch. Mushrooms also work well; their texture is hearty and satisfying. If you want to mix it up, try different fruit salsas. Pineapple salsa adds a sweet and tangy twist. Papaya or kiwi can also brighten the dish. Combine diced fruits with onion and lime juice for a fresh taste. Each fruit brings a unique flavor, making every taco special. You can adjust the heat level to suit your taste. For milder tacos, skip the jalapeño or use a bell pepper. If you like it hot, add more jalapeño or some chili flakes. You can also serve hot sauce on the side for those who crave extra spice. Personalizing the heat makes the meal enjoyable for everyone. For the full recipe, check out Spicy Mango Chicken Tacos. After you enjoy your Spicy Mango Chicken Tacos, you might have some leftovers. Store them in an airtight container. This keeps chicken and salsa fresh. Make sure to cool them down to room temperature first. Place the container in the fridge. They will last for 3 days. Keep the tortillas separate to avoid sogginess. To enjoy your tacos again, reheat them with care. First, warm the chicken in a skillet over medium heat. Stir it often until it is hot. For tortillas, use a dry skillet. Heat them for about 30 seconds on each side. This will make them soft and warm. Assemble the tacos again with the chicken and salsa. If you want to save your chicken and salsa for later, you can freeze them. Place the chicken in a freezer-safe bag. Squeeze out as much air as you can. For the salsa, use a separate container. It can freeze well, but the texture may change. Use within 2 months for the best taste. When you’re ready, thaw them in the fridge overnight before reheating. This way, you can enjoy your Spicy Mango Chicken Tacos anytime! For the full recipe, check the details above. To tone down the heat, skip the jalapeño. Instead, use sweet bell peppers. You can also add more mango to balance the spice. Mixing in avocado will add creaminess. This helps to cool the dish while keeping the flavor. Yes, you can! Try shrimp, beef, or tofu instead of chicken. Each protein brings a new taste. Just adjust the cooking time based on what you choose. For shrimp, cook until pink. For beef, ensure it reaches a safe temperature. Serve these tacos with a fresh salad or corn on the cob. Rice and beans also work nicely. For a crunchy touch, add tortilla chips with salsa. These sides add more color and flavor to your meal. To make these tacos gluten-free, use corn tortillas. Check labels for other ingredients. Ensure any sauces or seasonings are gluten-free as well. This way, everyone can enjoy the meal without worry. Each taco has protein from chicken, vitamins from mango, and fiber from tortillas. The exact nutrition depends on serving size. On average, one taco has about 200 calories. It offers a good balance of nutrients for a healthy meal. For the full recipe, check out the details above. In this article, I covered the key steps to making Spicy Mango Chicken Tacos. We explored ingredient selection, proper cooking methods, and creative variations. Remember, fresh ingredients make a big difference. Follow the tips to avoid mistakes and enhance flavor. You can try vegetarian options or different salsas based on your taste. Proper storage helps keep leftovers fresh. With the answers to common questions, you are ready to enjoy these tasty tacos. Dive in, experiment, and share your delicious creations!

Spicy Mango Chicken Tacos Flavorful and Simple Meal

Get ready to spice up your meal with my delicious Spicy Mango Chicken Tacos! They combine tender chicken and fresh

To make my Peanut Butter Banana Overnight Oats, you need: - 1 cup rolled oats - 2 cups almond milk (or your favorite milk) - 2 ripe bananas, one sliced and one mashed - 1/4 cup peanut butter (smooth or crunchy) - 2 tablespoons honey or maple syrup (optional) - 1/2 teaspoon cinnamon - 1 tablespoon chia seeds (optional) - Pinch of sea salt These ingredients create a tasty and filling breakfast. The oats soak up the milk, making them creamy and delicious. You can add fun twists to your oats. Here are some ideas: - Sliced almonds for crunch - Extra banana slices for sweetness - Cocoa nibs for a chocolate touch - Granola for added texture Feel free to mix and match. Customize your oats based on what you love! When choosing ingredients, look for these: - Rolled oats: Choose certified gluten-free if needed. - Bananas: Ripe bananas are sweeter and mash easily. - Peanut butter: Select natural peanut butter without added sugar. - Milk: Use unsweetened almond milk for fewer calories. Quality ingredients make a big difference in taste. Always go for fresh and organic when you can. Enjoy your Peanut Butter Banana Bliss Overnight Oats! Start by gathering your ingredients. You need rolled oats, almond milk, bananas, peanut butter, honey or maple syrup, cinnamon, chia seeds, and a pinch of salt. In a medium bowl, add the rolled oats, mashed banana, almond milk, and peanut butter. If you want it sweeter, add honey or maple syrup. Sprinkle in cinnamon and chia seeds, then stir everything well. Once mixed, scoop the mixture into jars or bowls. Fill them about two-thirds full. This space lets the oats expand as they soak. Next, slice the second banana and layer the slices on top. Make sure to spread them out evenly. Cover the jars with lids or plastic wrap. Place them in the fridge overnight, or for at least four hours. To make your overnight oats even better, use ripe bananas. They add great natural sweetness. Stir the oats well in the morning. If they feel too thick, add a splash of milk to loosen them. Topping options are fun! Try sliced almonds, extra banana slices, or cocoa nibs for texture. For a beautiful look, serve in clear jars and sprinkle cinnamon on top. Remember to check the Full Recipe for all the details! To make perfect overnight oats, start with good ingredients. Use rolled oats for the best texture. They soak up the liquid well and stay chewy. Mix your oats with almond milk and mashed banana. Add peanut butter for creaminess and flavor. Stir everything together until it is smooth. Portion the mix into jars, filling them about two-thirds full. This allows space for the oats to expand. Top each jar with banana slices. Cover them and put them in the fridge overnight. The key to great overnight oats is the consistency. If you like thicker oats, use less liquid. If you want them runnier, add more almond milk. After soaking overnight, give them a stir. If they are too thick, splash in some milk. This will loosen them up. You can also adjust sweetness by adding honey or maple syrup. Taste and see what you like best! Store your overnight oats in the fridge. They will keep for about three to five days. To refresh them, stir in a bit of milk before eating. This brings back their creamy texture. If you want to enjoy them later, you can freeze them. Just make sure to use jars that can go in the freezer. Enjoy your Peanut Butter Banana Bliss Overnight Oats with your favorite toppings. You can add sliced almonds or granola for crunch. {{image_2}} You can switch up the nut butter in your overnight oats. Try almond butter, cashew butter, or even sunflower seed butter. Each nut butter brings its unique flavor. Almond butter adds a hint of sweetness, while sunflower seed butter is great for nut-free diets. You can experiment and find your favorite. Mixing different nut butters can also create fun new tastes. Fruits can boost the flavor and nutrition of your oats. You can add berries like strawberries, blueberries, or raspberries. They pair well with bananas and peanut butter. You might also try apples or peaches for a twist. Dried fruits like raisins or cranberries add sweetness too. You can even mix in some cocoa powder for a chocolatey kick. The options are endless, so get creative! If you want to keep your overnight oats lighter, there are simple changes you can make. Use less peanut butter or swap it with a lower-calorie nut butter. You can choose unsweetened almond milk instead of regular milk. Skip the honey or syrup, or use a sugar substitute. Adding more fruits can also help fill you up without adding too many calories. This way, you can enjoy your breakfast and still stick to your health goals. For more ideas, check out the Full Recipe for Peanut Butter Banana Bliss Overnight Oats! I recommend storing your Peanut Butter Banana Overnight Oats in airtight containers. Glass jars work best. Make sure to leave some space at the top. This allows for the oats to expand as they soak in the milk. If you have toppings like sliced bananas or nuts, keep them separate until you are ready to eat. This keeps everything fresh and crunchy. When stored properly, these oats will last up to five days in the fridge. After that, the texture may change. The bananas might brown and become mushy. For the best taste, enjoy your oats within the first three days. Always check for any odd smells or changes in color before eating. You can freeze your Peanut Butter Banana Overnight Oats for up to three months. Portion them into freezer-safe containers or jars. Leave space at the top, as the oats will expand. When you are ready to eat, move a jar to the fridge for a night to thaw. In the morning, stir and add any fresh toppings you like. This way, you have a quick and easy meal ready to go! Yes, you can use quick oats instead of rolled oats. Quick oats will soften faster. They may change the texture of your dish. Rolled oats give a chewier bite. If you prefer creamy oats, quick oats work well. Just keep in mind that they may not hold up as long in the fridge. Overnight oats should sit for at least four hours. However, I recommend leaving them overnight. This allows the oats to absorb the liquid and soften fully. The longer they sit, the creamier they become. You can prep them in the evening and enjoy them the next morning. Yes, you can easily prepare this recipe for a larger group. Just multiply the ingredients by the number of servings you need. Use larger bowls or jars for mixing. This way, you can save time and effort. Everyone will love this tasty breakfast! Check out the full recipe for serving ideas. To make Peanut Butter Banana Overnight Oats, you need a few key ingredients. Here's what you will need: - 1 cup rolled oats - 2 cups almond milk (or any preferred milk) - 2 ripe bananas, one sliced and one mashed - 1/4 cup peanut butter (smooth or crunchy) - 2 tablespoons honey or maple syrup (optional for sweetness) - 1/2 teaspoon cinnamon - 1 tablespoon chia seeds (optional for added texture) - Pinch of sea salt - Toppings: sliced almonds, extra banana slices, cocoa nibs, or granola These ingredients create a creamy and filling breakfast. The rolled oats provide fiber, while bananas add natural sweetness. Peanut butter gives a rich flavor and healthy fats. If you want to switch up the taste, you can use different milk or sweeteners. Each ingredient plays a role in the taste and texture. - Rolled Oats: This is the base. They soak up the liquid well. - Almond Milk: Use any milk you like. It adds creaminess. - Bananas: They add sweetness and moisture. - Peanut Butter: It gives a nutty flavor and protein. - Honey or Maple Syrup: This is optional. It can make it sweeter. - Cinnamon: Adds warmth and spice. - Chia Seeds: They can add texture and nutrients. - Sea Salt: Just a pinch enhances all the flavors. You can adjust the recipe to fit your taste. Here are some ideas: - Different Nut Butters: Try almond or cashew butter for a change. - Fruits: Add berries, apples, or mangoes for variety. - Seeds: Flaxseeds or pumpkin seeds can boost nutrition. - Yogurt: Mix in some yogurt for creaminess and tang. When picking your ingredients, look for the best quality. - Oats: Choose organic if possible. They taste better and are healthier. - Nut Butters: Find ones with no added sugar or oils. Pure is best. - Bananas: Pick ripe bananas. They add the best flavor. - Milk: Go for unsweetened varieties to control sweetness. These simple tips help you make the best Peanut Butter Banana Overnight Oats. For the full recipe, check out Peanut Butter Banana Bliss Overnight Oats 🥜. You now know how to create tasty peanut butter banana overnight oats. We've covered the must-have and fun ingredients, and how to prepare them step by step. I shared tips to help you make perfect oats each time. You’ve also learned about yummy variations and smart storage options. Try this dish for a healthy breakfast that you can enjoy anytime. The full recipe for Peanut Butter Banana Bliss Overnight Oats is ready for you to savor. Enjoy your flavorful journey with oats!

Peanut Butter Banana Overnight Oats Easy Recipe Guide

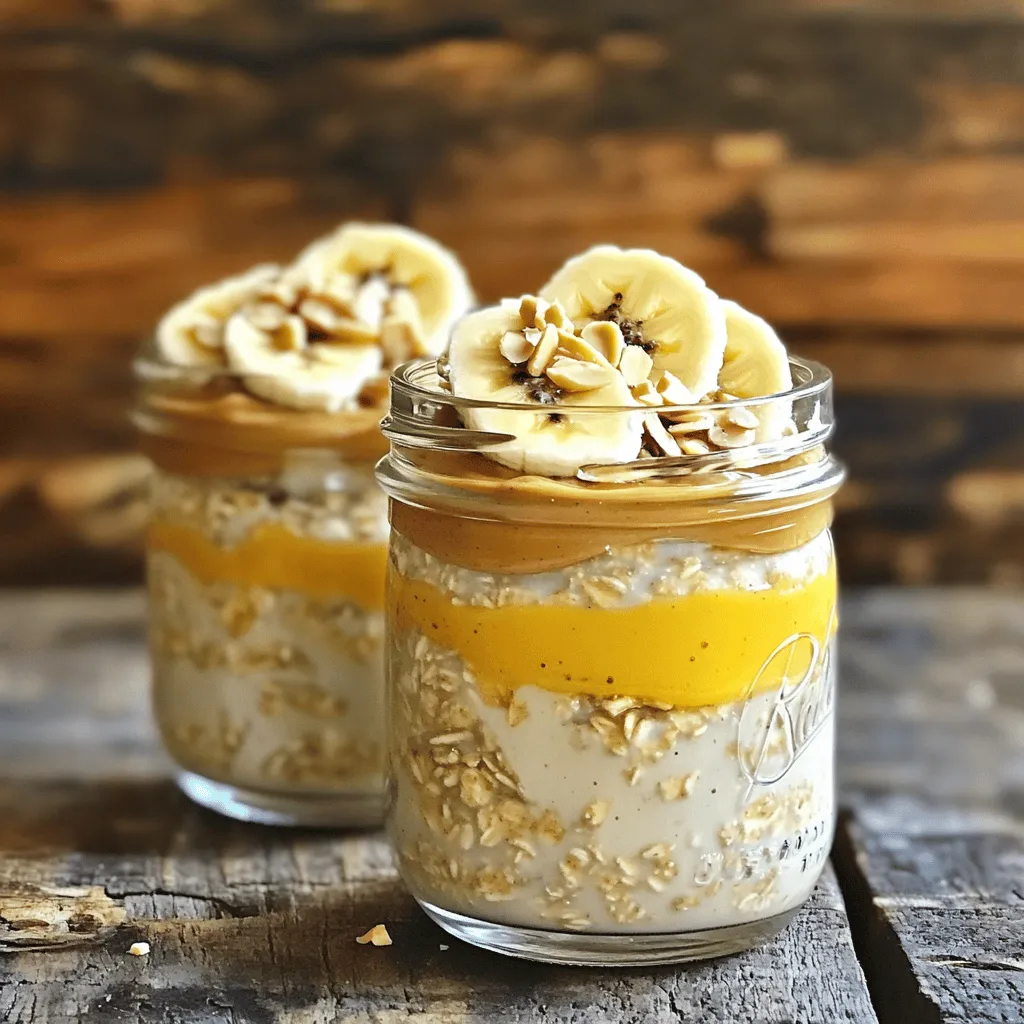
Start your day right with this quick and tasty Peanut Butter Banana Overnight Oats recipe! In just minutes, you can

- 4 boneless, skinless chicken thighs - 2 cups broccoli florets - 1 bell pepper (red or yellow), sliced - 1 medium zucchini, sliced - 1 red onion, chopped - 4 cloves garlic, minced - 1 lemon (zest and juice) - 2 tablespoons olive oil - 1 teaspoon dried oregano - 1 teaspoon paprika - Salt and pepper to taste - Fresh parsley, chopped for garnish I love using fresh ingredients when I cook. For this One-Pan Lemon Garlic Chicken and Veggies, I choose vibrant veggies. The bright colors make the dish pop. Chicken thighs work best. They stay juicy and tender during cooking. The garlic adds a lovely flavor. I use four cloves, but you can adjust to taste. The lemon gives a fresh zing. Remember to use both the zest and juice for the best taste. Olive oil helps everything cook well. Seasoning is key. I add oregano and paprika for depth. Salt and pepper enhance all the flavors. Don't forget fresh parsley for a nice touch at the end. This recipe is simple and quick. You can find the Full Recipe to guide you through! First, gather your ingredients. In a small bowl, combine the lemon juice, lemon zest, olive oil, minced garlic, oregano, paprika, salt, and pepper. Mix them well to create a fresh marinade. This mix brings out the bright flavors of lemon and garlic. You will love how it smells! Next, take your chicken thighs and place them in a large bowl or a resealable bag. Pour half of the marinade over the chicken. Make sure all pieces are coated well. Let the chicken marinate for at least 15 minutes. This step is key to getting all that tasty flavor inside the meat. If you have time, marinate for longer. While the chicken is soaking up the flavor, it’s time to prep the veggies. In a large mixing bowl, toss the broccoli, bell pepper, zucchini, and red onion. Pour the remaining marinade over the veggies and mix them well. This will ensure every bite is full of flavor. The veggies will add color and crunch to your dish. Now, preheat your oven to 400°F (200°C). On a large baking sheet, arrange the marinated chicken thighs in the center. Surround them with the seasoned vegetables. Make sure to spread them out for even cooking. Bake everything in the preheated oven for 25-30 minutes. The chicken should reach an internal temperature of 165°F (75°C) and the veggies should be tender and slightly caramelized. After baking, let the dish rest for a few minutes, then garnish with fresh chopped parsley. Enjoy your one-pan lemon garlic chicken and veggies delight! For the complete recipe, check the Full Recipe. For the best flavor, marinate your chicken for at least 15 minutes. This time allows the lemon and garlic to soak into the meat. If you have more time, let it marinate for up to an hour. This longer marinating time brings out deeper flavors. To get tender and caramelized veggies, cut them into even pieces. This helps them cook at the same rate. Toss the veggies with the marinade well. Make sure each piece gets coated. When roasting, give them enough space on the pan. If they are too close, they will steam instead of roast. Garnish your dish with fresh parsley for a pop of color. You can also add a sprinkle of lemon zest for a bright touch. Consider using fresh herbs like thyme or basil. These can add extra flavor and make your dish look fancy. For a bit of heat, add a dash of red pepper flakes. {{image_2}} You can switch the chicken for many other proteins. Try using shrimp for a quick meal. It cooks fast and pairs well with lemon and garlic. Salmon is another great option. Its rich flavor complements the dish nicely. If you want a plant-based choice, use chickpeas or tofu. Both soak up the marinade well and add protein. Feel free to get creative with your veggies! Asparagus or green beans work great in spring. In the fall, try adding butternut squash or Brussels sprouts. You can also mix in seasonal favorites like carrots or sweet potatoes. Using different vegetables adds color and flavor. Don't be afraid to experiment with what you have on hand. You can change the flavor profile easily. For a spicy kick, add red pepper flakes to the marinade. If you love herbs, toss in fresh thyme or rosemary. A splash of soy sauce can give a tasty twist. You could even go with a honey mustard glaze for a sweet touch. Each variation brings a new and exciting taste to the dish. To store leftovers, let the dish cool first. Place chicken and veggies in an airtight container. This keeps them fresh. You can store them in the fridge for up to 3 days. If you want to keep it longer, consider freezing. For freezing, ensure the dish cools completely. Use a freezer-safe container or a resealable bag. Remove as much air as possible. This helps prevent freezer burn. You can freeze One-Pan Lemon Garlic Chicken and Veggies for up to 3 months. When you're ready to eat, thaw it overnight in the fridge. To reheat, use the oven for best results. Preheat your oven to 350°F (175°C). Place the dish in an oven-safe pan. Cover it with foil to keep it moist. Heat for about 20 minutes or until warm. You can also use a microwave. Heat in short intervals, stirring in between. This keeps the chicken juicy and the veggies tender. Bake this dish for 25 to 30 minutes at 400°F (200°C). This time makes sure the chicken is fully cooked. The chicken should reach 165°F (75°C) inside. The veggies will get tender and slightly caramelized. You can check the chicken with a meat thermometer for accuracy. Yes, you can use skin-on chicken. It adds flavor and keeps the meat moist. However, it also adds calories and fat. If you prefer a lighter meal, stick with skinless chicken. The choice depends on your taste and dietary goals. This dish pairs well with rice or quinoa. You can also serve it with a fresh salad. Garlic bread makes a nice side too. These options balance the meal and add variety to your plate. Yes, this recipe is quite healthy. The chicken is a great source of protein. The veggies add vitamins, minerals, and fiber. Overall, it's low in carbs and full of nutrients. Each serving is around 350 calories. This makes it a perfect choice for a balanced meal. You can prepare the chicken and veggies ahead. Marinate the chicken and store it in the fridge for up to 24 hours. You can also chop the veggies in advance. Just keep everything in separate containers. When you're ready, bake it fresh for the best taste. For the full recipe, check the earlier section. This recipe for One-Pan Lemon Garlic Chicken and Veggies combines tasty, fresh ingredients to create an easy meal. You learned to marinate chicken and prep vegetables for roasting. Tips showed how to achieve perfect flavor and texture. Remember, you can swap proteins and veggies to fit your taste. This dish stores well, letting you enjoy leftovers. I hope this inspires you to try new variations, making dinner fun and simple.

One-Pan Lemon Garlic Chicken and Veggies Delight

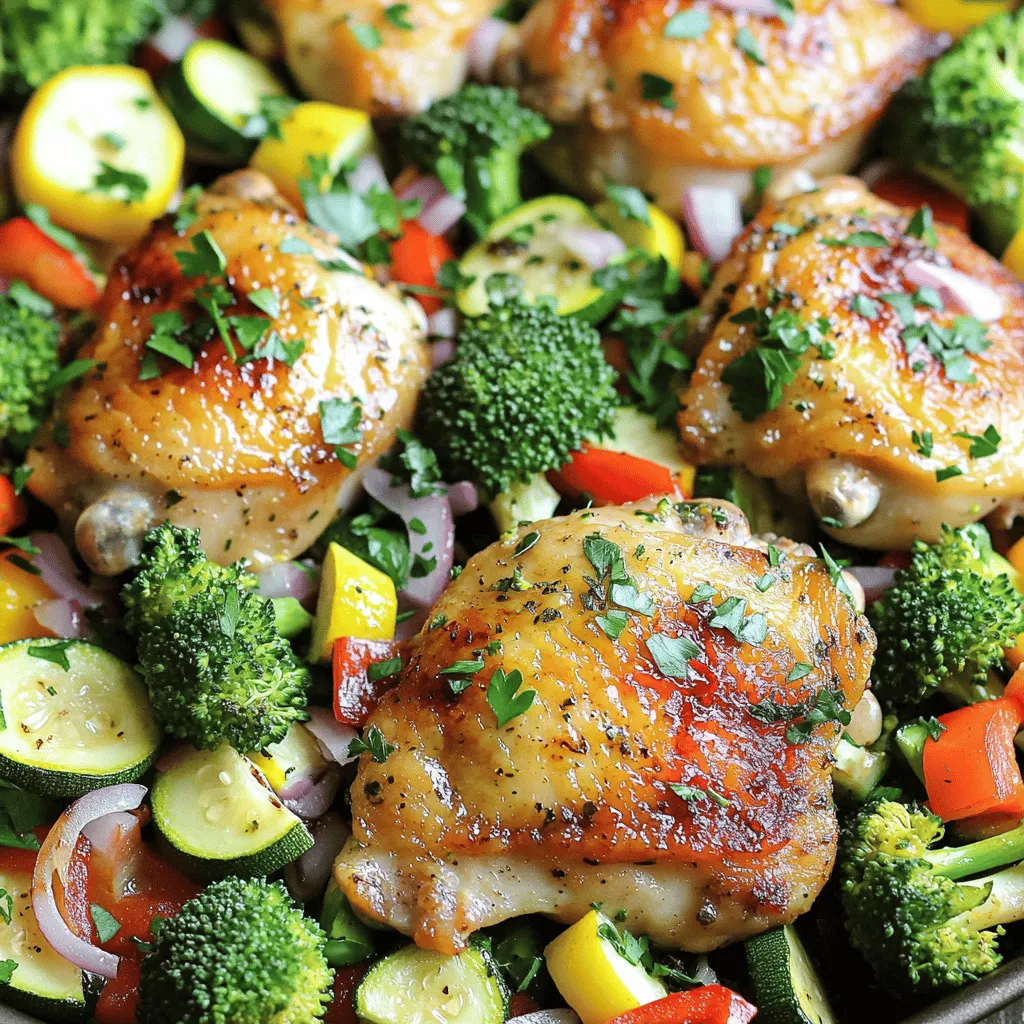
Looking for a simple yet delicious meal? This One-Pan Lemon Garlic Chicken and Veggies Delight is just what you need!

To make easy veggie quesadillas, you need a few key ingredients. Here’s what you will need: - 4 large flour tortillas - 1 cup shredded cheddar cheese - 1 cup shredded mozzarella cheese - 1 bell pepper (any color), diced - 1 small zucchini, diced - 1 cup fresh spinach, chopped - 1/2 cup corn (canned or frozen) - 1 teaspoon cumin - 1 teaspoon paprika - Salt and pepper to taste - 2 tablespoons olive oil - Sour cream or salsa for serving (optional) Using fresh vegetables gives a bright taste and better texture. Frozen veggies can also work well. They are quick and easy. Just thaw them before cooking. Choosing the right cheese is key. Cheddar adds a sharp flavor, while mozzarella melts beautifully. Combining both gives you a rich, gooey filling that everyone loves. You can add more flavors and textures to your quesadillas. Here are some ideas: - Black beans or pinto beans for extra protein - Mushrooms for a savory, earthy taste - Onions for sweetness - Jalapeños for a spicy kick You can also explore spices. Try adding chili powder or garlic powder for depth. A pinch of oregano can add an herbaceous note. Mix and match to find your favorite blend! For the full recipe, check out the complete list of ingredients above. Enjoy this easy and tasty meal! To make these easy veggie quesadillas, start by prepping your vegetables. First, wash the bell pepper and zucchini. Next, cut the bell pepper into small, even pieces. Dice the zucchini into similar-sized chunks for even cooking. Finally, chop the fresh spinach into small bits. This helps it mix well with other veggies. Now, it's time to sauté. Heat 1 tablespoon of olive oil in a large skillet over medium heat. Add the diced bell pepper and zucchini. Cook for about 5 minutes, stirring often, until they soften. Then, add the chopped spinach and corn. Cook for an additional 2-3 minutes until the spinach wilts. Season the mix with cumin, paprika, salt, and pepper. Stir well and remove from heat. Next, let’s cook the quesadillas on the stovetop. Use a separate non-stick skillet and heat a small amount of olive oil over medium heat. Place one tortilla in the skillet. On one half, sprinkle a layer of cheddar and mozzarella cheese. Then, add a generous amount of the sautéed veggie mix on top of the cheese. Sprinkle a bit more cheese over the veggies. This helps keep everything together. Now, fold the tortilla in half. Cook for about 3-4 minutes on each side. You want the tortilla golden brown and the cheese melted. Repeat this process with the rest of the tortillas and filling. Finally, it's time to serve your quesadillas. Cut each quesadilla into wedges for easy eating. You can serve them warm with sour cream or salsa on the side. These dips add extra flavor and make the meal even better. Enjoy your delicious veggie quesadillas! For the full recipe, check out the details above. To get the perfect crispy tortilla, use a non-stick skillet. Heat it over medium heat. Add a small amount of olive oil before each quesadilla. This helps the tortilla crisp up nicely. Cook each side for about 3-4 minutes. Watch for a golden color on the outside. You can also press down lightly on the quesadilla with a spatula. This helps the cheese melt evenly and creates a nice crunch. For cooking times, keep an eye on the heat. If it’s too high, the tortilla may burn before the cheese melts. If it’s too low, the quesadilla may get soggy. Medium heat works best. Make sure to flip the quesadilla gently to avoid spills. To store leftover quesadillas, let them cool completely. Wrap them tightly in plastic wrap. You can also use an airtight container. This keeps them fresh for up to 3 days in the fridge. If you want to store them longer, freeze them. Wrap each quesadilla in foil, then place them in a freezer bag. They can last up to 3 months in the freezer. When reheating quesadillas, use the skillet again for the best results. Heat a small amount of oil over medium heat. Cook each side for about 2-3 minutes until hot. You can also use the microwave for a quick reheat, but this may make the tortilla soft. Enjoy your leftover quesadillas just like the first time! For the full recipe, check out the details above. {{image_2}} You can easily add meat to your veggie quesadillas. Chicken or shrimp work great. For chicken, use cooked and shredded pieces. For shrimp, you can use raw shrimp and cook them until pink. When adding meat, adjust your cooking times. If using raw shrimp, cook them for about 2-3 minutes before adding veggies. For chicken, ensure it’s heated through, which takes about 5 minutes. If you want a vegan option, choose dairy-free cheese and corn tortillas. Many stores sell these now. For gluten-free quesadillas, use corn tortillas instead of flour. They crisp up nicely and taste great. Always check labels to ensure they meet your needs. You can enjoy all the flavors while keeping it simple. This way, everyone can enjoy a tasty meal. Each serving of these Easy Veggie Quesadillas is packed with nutrients. You get about 15 grams of protein, 10 grams of fat, and 40 grams of carbs. The protein comes from the cheese and vegetables. The fat mainly comes from the cheese and olive oil. The carbs come from the tortillas and veggies. Eating these quesadillas gives you many health benefits. Bell peppers are rich in vitamins A and C. Zucchini adds fiber and hydration. Spinach is a superfood full of iron and antioxidants. Corn provides energy and adds a sweet crunch. Together, these veggies boost your health and taste fantastic. These quesadillas are great for vegetarians. You can easily make them vegan by swapping the cheese with plant-based options. I love using almond or coconut cheese for a creamy texture. Watch out for allergens. The main ingredients are gluten and dairy. If you have these allergies, choose gluten-free tortillas and dairy-free cheese. Always read labels to ensure your ingredients are safe. How to prevent quesadillas from getting soggy? To keep your quesadillas crispy, avoid overloading them with filling. Use less cheese and veggies. Always cook them on medium heat, so they get golden but don’t steam. If you use frozen veggies, make sure to thaw and drain them first. This helps keep moisture down. Can these be made ahead of time? Yes, you can make quesadillas ahead of time. Cook them, let them cool, and store them in the fridge. When ready to eat, reheat them in a skillet for a few minutes. This keeps them crispy and delicious. What if I don’t have certain ingredients? You can swap ingredients easily. Don’t have bell pepper? Use onion or carrots instead. No mozzarella? Try using only cheddar. Just keep the basic idea of cheese and veggies, and you’ll be fine. Can I bake these quesadillas instead of frying? Absolutely! Just preheat your oven to 400°F (200°C). Place the quesadillas on a baking sheet and brush them lightly with olive oil. Bake for about 10-15 minutes, flipping halfway through. They’ll come out crispy and tasty! For the full recipe, check the detailed instructions. In this blog post, we explored making Easy Veggie Quesadillas. We covered essential ingredients like fresh vegetables and the right cheese. Optional mix-ins, spices, and serving ideas added to the recipe's versatility. You now know how to prepare and cook perfect quesadillas, and how to store or reheat leftovers. Variations for meat and dietary needs can fit any palate. Enjoy your veggie quesadilla journey! You'll impress everyone with your delicious creations.

Easy Veggie Quesadillas Flavorful and Quick Meal

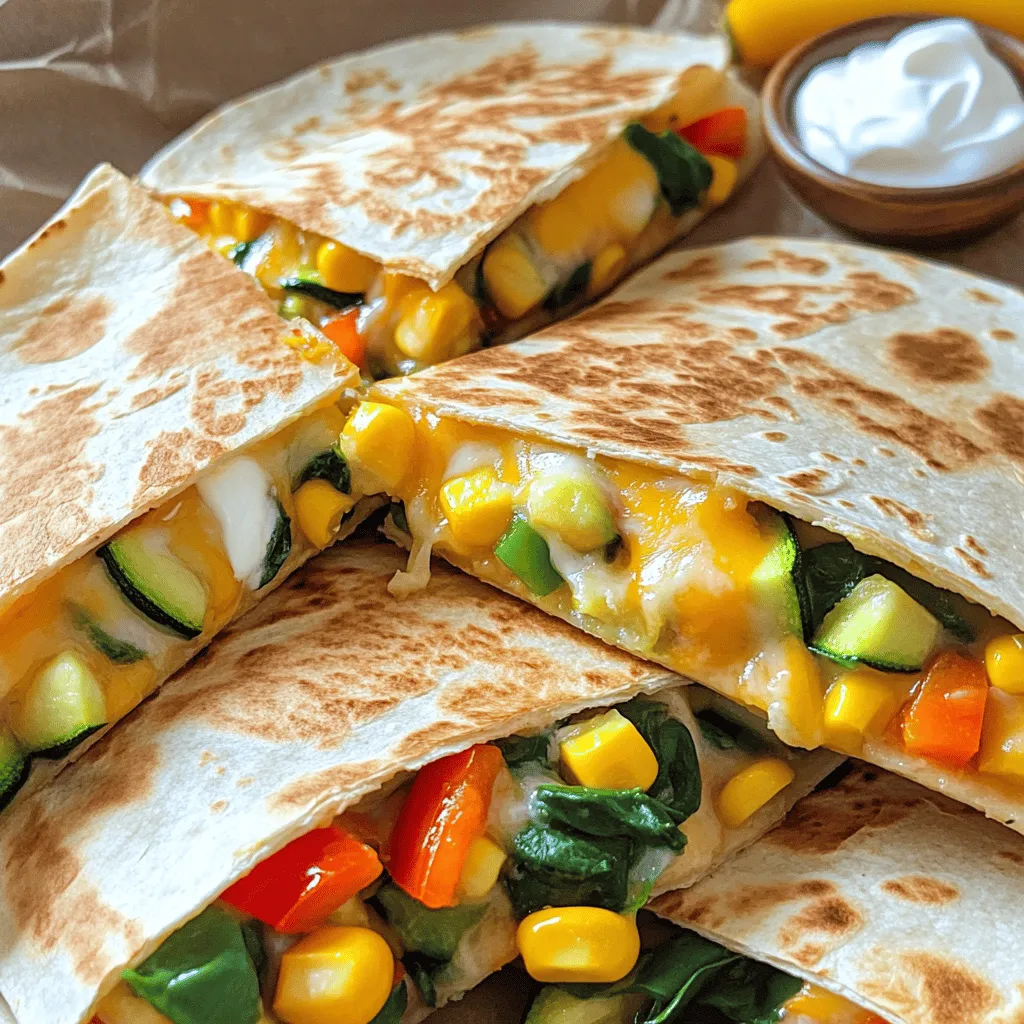
Craving a quick and tasty meal? Look no further! These Easy Veggie Quesadillas are not only packed with flavor, but

Older posts
Newer posts
← Previous Page1 … Page17 Page18 Page19 … Page30 Next →

dsad

© 2025 So Yum Recipes • Built with GeneratePress

Our Policies

  • Copyright Policy
  • Cookie Policy
  • GDPR Policy
  • Privacy Policy
  • Disclaimer
  • Terms Of Use

More Information

  • Home
  • About
  • Contact
  • Appetizers
  • Dessert
  • Dinner
  • Drinks
©2025, So Yum Recipes About Back To Top