Skip to content
DisclaimerTerms Of UseGDPR PolicyCookie Policy

So Yum Recipes

  • Home
  • Drinks
  • Appetizers
  • Dinner
  • Dessert
  • About
  • Contact
  • Privacy Policy
DisclaimerTerms Of UseGDPR PolicyCookie Policy

Chloe

- 1 cup rolled oats - 1/2 cup natural peanut butter - 1/3 cup honey or maple syrup - 1/2 cup chocolate chips (dark or semi-sweet) - 1/4 cup ground flaxseed (optional) - 1/2 teaspoon vanilla extract - A pinch of salt These ingredients are simple and easy to find. The rolled oats provide a nice base for the bites. Peanut butter adds creaminess and flavor. Honey or maple syrup gives a sweet touch. Chocolate chips bring joy and a hint of indulgence. Ground flaxseed is optional but boosts nutrition. Vanilla extract enhances the taste, and salt balances sweetness. - Nutritional supplements - Different types of nut butters - Various sweeteners You can mix in some optional add-ins. Nutritional supplements can boost health benefits. Swap out peanut butter for almond or cashew butter for a twist. If you want it sweeter, try agave syrup or coconut sugar. - Mixing bowl - Baking sheet - Parchment paper - Measuring cups and spoons You will need a few tools. A mixing bowl is essential for combining ingredients. A baking sheet helps with shaping and cooling the bites. Parchment paper keeps things tidy and prevents sticking. Lastly, measuring cups and spoons ensure accurate ingredient amounts. For the full recipe, check the section titled Peanut Butter Chocolate Chip Energy Bites. First, grab a medium bowl. Add 1 cup of rolled oats, 1/2 cup of natural peanut butter, and 1/3 cup of honey or maple syrup. Mix these three ingredients well until they blend into a thick paste. Next, incorporate 1/2 cup of chocolate chips, 1/4 cup of ground flaxseed if you want extra nutrition, 1/2 teaspoon of vanilla extract, and a pinch of salt. Stir everything together until the mixture is sticky and you can no longer see dry oats. Now it’s time to form the energy bites. Use your hands to shape the mixture into small balls, about 1 inch wide. If the mix feels too sticky, dampen your hands with a little water. You can also chill the mixture for 15-20 minutes to help with shaping. This will make it much easier to work with. Once you have shaped all the bites, place them on a baking sheet lined with parchment paper. Refrigerate the bites for about 30 minutes. This helps them firm up nicely. After they chill, transfer the bites to an airtight container. Store them in the fridge where they will stay fresh for up to one week. For the full recipe, check the ingredients section above! To keep your energy bites from sticking to your hands, try these tips: - Dampen hands method: Wet your hands with a little water before you shape the bites. This easy trick makes it less sticky. - Chilling the mixture: If the mix is too sticky, pop it in the fridge for about 15-20 minutes. It firms up and is easier to handle. You can make your energy bites even tastier with simple tweaks: - Adding spices or extracts: Try adding cinnamon or a drop of almond extract for a unique flavor. These small changes give your bites a whole new taste. - Using different types of chocolate: Swap dark chocolate for white or milk chocolate. Each type brings its own sweetness and flavor to the bites. These bites are great for meal prep. Here’s how to do it right: - Best practices for meal prep: Make a big batch on the weekend. Store them in the fridge for quick snacks during the week. - Freezing options and tips: You can freeze your energy bites too. Just place them in a single layer on a baking sheet, freeze until solid, then move them to a bag. They last up to three months! {{image_2}} You can switch up the nut butter in these energy bites. Try almond butter or cashew butter for a new taste. Each nut butter brings its own flavor and texture. This adds fun and keeps things fresh. Mix-ins can also boost the flavor. Try adding dried fruit like cranberries or raisins. Seeds like chia or sunflower seeds work well too. They add crunch and extra nutrition. Get creative with your choices. These energy bites can fit many diets. Want a vegan option? Use maple syrup instead of honey. Make sure to choose a nut butter with no added ingredients. For gluten-free needs, check your oats. Some oats have gluten. Look for certified gluten-free oats to be safe. You can also use gluten-free sweeteners if you want. These energy bites are great with fruits. Pair them with apple slices or banana for a tasty snack. You can also serve them with yogurt. This adds creaminess and makes a fun treat. Try using them as a topping for breakfast bowls. They add sweetness and crunch to oatmeal or smoothie bowls. With these bites, breakfast becomes a delightful experience. For the full recipe, check the full recipe section. To keep your peanut butter chocolate chip energy bites fresh, store them in an airtight container. This helps keep moisture out and flavor in. You can place them in the fridge for easy access. If you want to save some for later, freezing is a great option. Just make sure to wrap them well or use a freezer-safe container. This way, they stay tasty for longer. In the fridge, these energy bites last about a week. Look for any changes in color or smell. If they smell off or look moldy, it’s time to toss them. Always trust your senses. Fresh bites should smell like peanut butter and chocolate, not sour or strange. If you have leftover energy bites, don’t worry! You can get creative. Chop them up and add them to smoothies for a quick boost. They also work great in baked goods. Mix them into muffins or cookies for a fun twist. With a bit of imagination, your leftovers can become a new treat! Yes, you can use almond butter. It has a different taste but still works well. Just swap it in for the same amount. Almond butter gives a nice nutty flavor. It’s also a great option for those who prefer nuts other than peanuts. This recipe makes about 12 to 15 bites. You can easily adjust the size to make more or fewer bites. If you want larger snacks, form bigger balls. For smaller ones, make them about half an inch. Absolutely! You can use sun butter or pumpkin seed butter instead of nut butter. Both options keep the bites tasty and nut-free. Just follow the same steps in the recipe. Each bite has a good mix of protein, carbs, and healthy fats. They are about 100 calories per bite, depending on the exact ingredients. You get protein from peanut butter and energy from oats and honey. The chocolate chips add a bit of sweetness too. You can adjust the sweetness by using less honey or maple syrup. You can also try using a sugar substitute if you like. Taste the mixture before rolling it into bites. This way, you can find the sweetness that fits your taste best. For a richer flavor, you can even add a bit of cocoa powder. For the full recipe, check the earlier section. In this blog post, I walked you through making tasty energy bites. We covered key ingredients like oats, peanut butter, and chocolate chips. I shared step-by-step instructions and helpful tips to avoid stickiness. You learned about variations and storage options, too. These energy bites are easy, healthy, and fun to customize. You can enjoy them anytime for a quick snack. Get creative and make these bites your own!

Peanut Butter Chocolate Chip Energy Bites Made Easy

Looking for a quick, delicious snack? Let’s make Peanut Butter Chocolate Chip Energy Bites! They are packed with flavor and

To make the best homemade strawberry ice cream, you need fresh strawberries. Use 2 cups of ripe strawberries. Make sure to hull and slice them. Fresh strawberries give the ice cream a bright flavor. Sweetness and creaminess come from sugar and dairy. You’ll need: - 3/4 cup granulated sugar, divided - 1 cup heavy cream - 1 cup whole milk The sugar helps balance the tartness of the strawberries. The cream and milk create a rich, smooth texture. Flavor is key in ice cream. You will need: - 1 teaspoon vanilla extract - 1 tablespoon lemon juice Vanilla adds warmth, while lemon juice brightens the taste. Together, they enhance the strawberry flavor. For the full recipe, you can refer to the section above. To start, you need fresh strawberries. Take 2 cups of hulled and sliced strawberries. In a large bowl, mix the strawberries with 1/4 cup of sugar. Use a fork or potato masher to gently mash them. This helps the strawberries release their juices. Let this sit for about 30 minutes. This step is key for flavor. After the strawberries have rested, it’s time to blend. Pour the strawberry mixture into a blender. Puree until smooth, but leave some small chunks if you like. You can set aside a few mashed strawberries for more texture. Next, in another bowl, whisk together 1 cup of heavy cream, 1 cup of whole milk, and the remaining 1/2 cup of sugar. Add in 1 teaspoon of vanilla extract and 1 tablespoon of lemon juice. Make sure the sugar dissolves fully. Now, fold the strawberry puree into the cream mixture. Taste it and add more sugar if you want it sweeter. Now comes the fun part: churning! Pour the mixture into your ice cream maker. Follow the manufacturer's instructions. Usually, this takes about 20 to 25 minutes. You want it to reach a soft-serve consistency. If you want firmer ice cream, transfer it to an airtight container. Freeze it for at least 4 hours. When you're ready to enjoy, scoop it into bowls. You can add fresh strawberry slices or a drizzle of chocolate sauce on top for an extra treat. For the full recipe, check out the details above! To make your ice cream creamy, churn it well. Churning adds air and keeps it light. If you want a firmer ice cream, freeze it longer. Let it sit at room temperature for a few minutes before serving. This helps scoop it easily. A good tip is to store it in a shallow container. This way, it freezes evenly and stays smooth. You can boost the flavor of your ice cream. Add a pinch of salt to bring out the sweetness. Try mixing in fresh mint leaves or a splash of balsamic vinegar. These add a nice twist. You can also blend in some other fruits, like bananas or peaches. They will mix well with strawberries and add fun flavors. One common mistake is over-churning the ice cream. This can make it too hard. Remember to keep an eye on the time. Also, don’t skip the lemon juice. It brightens the taste and balances the sweetness. Lastly, avoid using too much sugar at once. Taste as you go to find the perfect sweetness. For the best results, follow the Full Recipe carefully. {{image_2}} You can change your strawberry ice cream with fun add-ins. Try mixing in crushed cookies, like Oreos or graham crackers. You can also add chocolate chips for a sweet crunch. If you want a berry mix, swap in raspberries or blueberries. They blend well with strawberries. For a tropical twist, add some diced mango or pineapple. These flavors give your ice cream a new life. If you want a dairy-free version, use coconut milk instead of cream and milk. This gives a rich flavor and creamy texture. Almond milk is another option, but it tastes lighter. You can also use soy or oat milk for a great base. Sweeten with maple syrup or agave nectar instead of sugar. This keeps your ice cream sweet and tasty without dairy. Serving strawberry ice cream can be fun! Use fresh strawberry slices on top for a bright look. You could also drizzle chocolate sauce or caramel for extra flavor. Serve in waffle cones for a fun treat. For a fancy touch, add a sprig of mint or a dollop of whipped cream. You can also make ice cream sandwiches using cookies or brownies. These ideas make your dessert even more special. For the full recipe, check out the Sweet Strawberry Bliss section. Homemade strawberry ice cream tastes best fresh, but you can store it. To keep it tasty, freeze the ice cream right after churning. Make sure it is in a well-sealed container. This helps prevent freezer burn and keeps it creamy. For best results, consume within two weeks. Choose the right container for storing your ice cream. A glass or plastic container works well. Make sure it has a tight lid. Avoid using metal containers, as they can cause ice crystals to form. You can also use a loaf pan covered tightly with plastic wrap for easy scooping. Sometimes, ice cream can get hard and icy in the freezer. To fix this, remove it from the freezer and let it sit for about 10 minutes. This softens it up. You can also stir it gently with a spatula to break up any ice crystals. If it’s too hard, just let it sit a bit longer before scooping. Enjoy your homemade strawberry ice cream at its best! Homemade strawberry ice cream can last about two weeks in the freezer. After that, it may lose its creamy texture and flavor. To keep it fresh, store it in an airtight container. Yes, you can use frozen strawberries! Just let them thaw first. This way, they can mash and blend easily. Frozen strawberries may change the texture a bit, but they still taste great. To make ice cream at home, you need a few key tools: - Mixing bowls - A fork or potato masher - A blender or food processor - An ice cream maker - An airtight container for freezing These tools help you create a smooth, creamy dessert. For the full recipe, check the previous section! Making strawberry ice cream at home is simple and fun. We covered fresh strawberries, sugar, and essential flavorings. You learned step-by-step how to prepare, blend, and churn the mix. With tips on texture and flavor, you can avoid common mistakes. Explore fun variations and smart storage tricks to keep your ice cream fresh. In the end, you’ll enjoy a cool treat made your way. Now, go make some delicious ice cream and share it with others!

Homemade Strawberry Ice Cream Scrumptious Delight

Are you ready to cool down with a sweet treat? This Homemade Strawberry Ice Cream recipe shines with fresh strawberries

- 1 can (15 oz) chickpeas, rinsed and drained - 1 tablespoon olive oil - 1 teaspoon cumin - 1 teaspoon smoked paprika - 1/2 teaspoon cayenne pepper (adjust to taste) - 1/2 teaspoon garlic powder - 1/2 teaspoon onion powder - Salt and pepper to taste - 8 small corn or flour tortillas Chickpeas are the star of this dish. They are full of protein and fiber, making them a healthy choice. I always rinse and drain them well, so they mix nicely with spices. Spices and seasonings give these tacos their kick. The cumin and smoked paprika add depth, while cayenne pepper brings the heat. You can adjust the cayenne to match your taste. Tortillas are the base for our tasty tacos. You can choose corn for a more authentic flavor or flour for a softer bite. Both work well. Just make sure to warm them up before you fill them. This keeps them pliable and ready for all the delicious toppings. - 1 cup shredded cabbage (green or purple) - 1 avocado, sliced - 1/4 cup fresh cilantro, chopped Toppings make these tacos even better. Cabbage adds crunch and freshness. You can use green or purple cabbage, depending on what you like. Avocado adds creaminess, balancing the spice from the chickpeas. And cilantro gives a burst of flavor. It’s a must-have for a fresh taste. - 1 lime, cut into wedges - Hot sauce for serving For an extra zing, add lime wedges on the side. Squeeze some juice over your tacos for brightness. Hot sauce is great if you want more heat. It’s all about making the dish your own. This recipe is easy, flavorful, and perfect for any meal. You can find the full recipe above to guide you through each step. To start, you need to prep the chickpeas. First, take one can of chickpeas. Rinse them well and drain. In a medium bowl, use a fork or a potato masher to mash half of the chickpeas. This gives a nice mix of textures, with some whole for crunch. Next, heat one tablespoon of olive oil in a skillet over medium heat. Add the chickpeas, both mashed and whole. Sprinkle in the spices: one teaspoon of cumin, one teaspoon of smoked paprika, half a teaspoon of cayenne pepper, half a teaspoon of garlic powder, and half a teaspoon of onion powder. Don’t forget to season with salt and pepper to taste. Sauté this mix for about five to seven minutes. Stir it often until the chickpeas are hot and a bit crispy. While the chickpeas cook, it’s time to heat the tortillas. You can warm them in a pan or microwave. If you use a pan, heat it on low. For the microwave, wrap the tortillas in a damp paper towel and heat them for about 30 seconds. This keeps them soft and easy to fold. To make sure your tortillas stay pliable, try not to overheat them. If they get too hot, they may crack. Now comes the fun part—assembling the tacos! Take a warm tortilla and add a good scoop of the spicy chickpeas on top. Next, layer on some shredded cabbage for crunch and a few slices of avocado for creaminess. Finish with a sprinkle of fresh cilantro. Serve your tacos with lime wedges on the side. Squeeze some lime juice over the tacos just before eating. If you like it spicy, drizzle on some hot sauce. For the full recipe, check out the detailed instructions. Enjoy your tasty creation! To adjust the heat, start with cayenne pepper. You can add more for a kick. If you prefer less spice, use less cayenne. You can also try other spices like smoked paprika or chili powder. Each spice gives a different taste. For a crunchy texture, sauté the chickpeas until they are slightly crispy. If you want more crunch, add some roasted nuts or seeds as toppings. Balancing ingredients helps too. Use fresh cabbage for crunch and creamy avocado for smoothness. This mix keeps each bite interesting. Pair your tacos with a fresh side salad. A simple green salad can be perfect. You can also serve with rice or quinoa for a filling meal. For drinks, try a light beer or sparkling water with lime. These drinks complement the spicy flavors well. Check out the Full Recipe for all the details on making these tasty tacos! {{image_2}} You can easily make these tacos vegan. For toppings, try using: - Fresh salsa - Diced tomatoes - Vegan cheese These add great taste and color. You can heat the chickpeas in various ways. Try baking them for a crunch, or use a microwave for speed. Each option gives a unique texture. To spice things up, consider other spice mixes. A dash of chili powder or smoked salt can change the flavor. You can also add proteins like black beans or lentils for extra energy. This makes your meal more filling and satisfying. You can choose between flour and corn tortillas. Flour tortillas are soft and chewy. Corn tortillas are gluten-free and have a nice crunch. For a fun twist, you can make your own tortillas. Just mix masa harina with water, press them flat, and cook them on a hot skillet. It’s simple and tastes fresh! For the Full Recipe, check out the link. To keep your spicy chickpea tacos fresh, store them in an airtight container. Place any leftover chickpeas and toppings separately. This prevents sogginess. Store them in the fridge for up to three days. After that, they may lose their taste and texture. When reheating, you want to keep the texture nice. I recommend using a skillet over medium heat. This way, the chickpeas can get a little crispy again. You can also use the microwave but be careful; it might make them soft. Warm the tortillas separately to maintain their pliability. If you want to save tacos for later, freeze them. Wrap each assembled taco tightly in plastic wrap. Place wrapped tacos in a freezer bag. They can last up to three months. When you’re ready to eat, thaw them in the fridge overnight. Reheat in a skillet for the best texture. Enjoy your meal just like the first time! To make spicy chickpea tacos, follow these key steps: 1. Start by mashing half of the chickpeas with a fork. This gives a nice texture. 2. Heat olive oil in a skillet over medium heat. Add both mashed and whole chickpeas. 3. Sprinkle in spices: cumin, smoked paprika, cayenne pepper, garlic powder, onion powder, salt, and pepper. 4. Sauté for about 5 to 7 minutes. Stir often until heated through and slightly crispy. 5. Warm your tortillas in a pan or microwave. Use a low heat setting to avoid drying them out. 6. Assemble tacos by adding chickpeas to tortillas. Top with shredded cabbage, avocado, and cilantro. 7. Serve with lime wedges and hot sauce, if you like it spicy. You can find the full recipe above for all the steps and details. Yes, you can easily make these tacos gluten-free. Use corn tortillas as they are naturally gluten-free. Many brands also offer gluten-free flour tortillas made from rice or almond flour. Always check the packaging to ensure they meet your dietary needs. If you want to switch things up, here are some alternatives: - Black beans for a different taste and texture. - Lentils for a softer and protein-rich option. - Quinoa for added crunch and a nutty flavor. These options can change the taco experience while keeping it delicious! Spicy chickpea tacos are best eaten fresh but can be stored. Here are some tips: - Refrigeration: Store leftovers in an airtight container for up to 3 days. - Reheating: Heat them in a skillet for about 5 minutes or in the microwave. This keeps them warm and soft. - Freezing: You can freeze the chickpea filling for up to one month. Just thaw it before reheating. Enjoy your tacos later while keeping their yummy taste! In this blog post, we explored delicious chickpea tacos. We covered key ingredients like chickpeas, spices, and tortillas. You learned how to prepare chickpeas, heat tortillas, and assemble your tacos. Tips on spice levels and crunchy textures helped refine your dish. We shared variations, storage info, and answers to common questions. These tacos are tasty and easy to make. Try different toppings and enjoy your meal!

Spicy Chickpea Tacos Flavorful and Easy Recipe

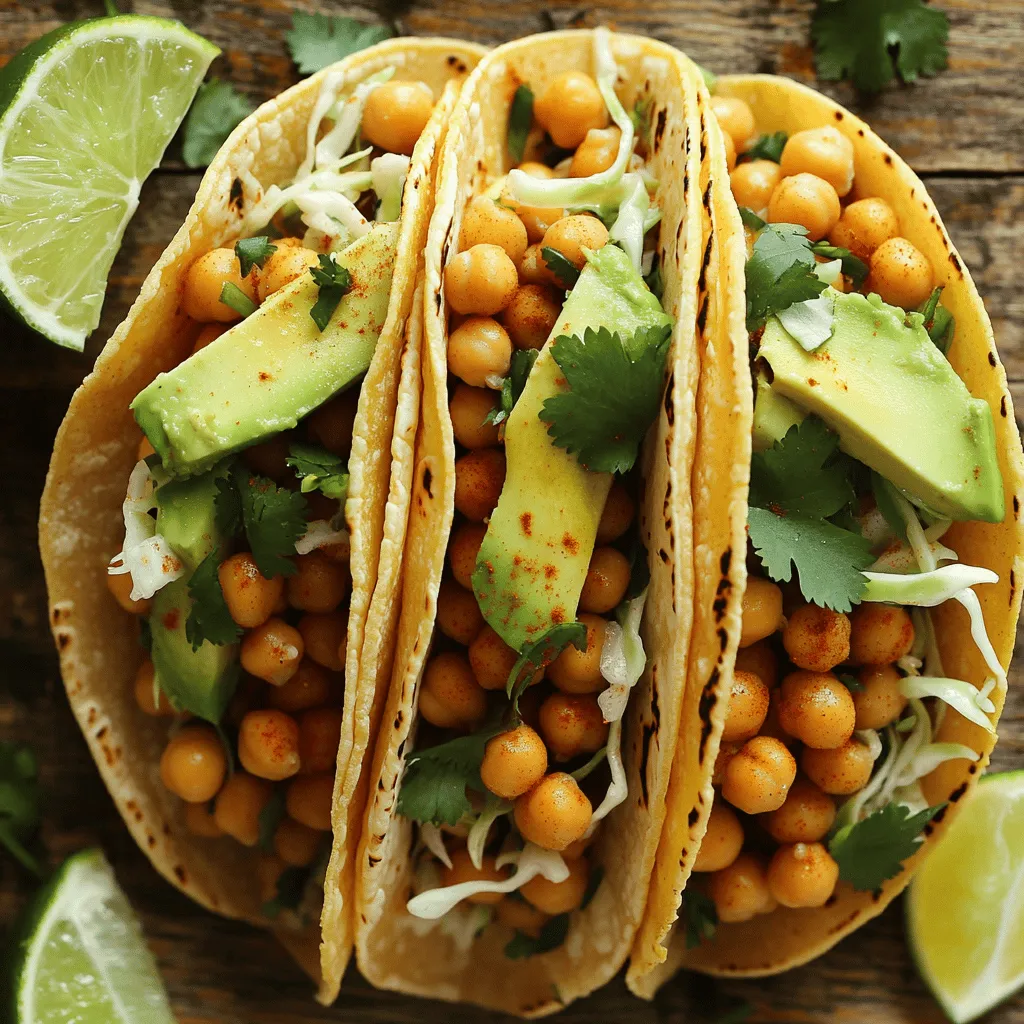
Are you ready to spice up taco night? My Spicy Chickpea Tacos are not just packed with flavor, but they’re

- 1 cup all-purpose flour - 1 cup brown sugar, packed - 1/2 cup granulated sugar - 1/2 cup unsalted butter, softened - 1 tsp vanilla extract - 1/4 tsp salt - 1 cup cream cheese, softened - 1/2 cup mini chocolate chips - 1/4 cup chopped nuts (optional) - 1/4 cup powdered sugar (optional, for extra sweetness) To make the best chocolate chip cookie dough dip, you need key ingredients. First, start with all-purpose flour. This gives the dip its cookie dough texture. Next, use brown sugar and granulated sugar for sweetness. The brown sugar adds depth and moisture. Unsalted butter is essential. It makes the dip creamy and rich. Don’t forget the vanilla extract; it enhances the flavor. A pinch of salt balances the sweetness. Cream cheese is the star here. It gives the dip its smoothness and creaminess. Mini chocolate chips add fun bursts of chocolate. If you like, add chopped nuts for crunch. Finally, powdered sugar is optional for extra sweetness. These ingredients combine to create a delightful treat. You can find the Full Recipe to guide you through each step. Enjoy making this sweet dip! - Creaming the Butter and Sugars Start with a large bowl. Add the softened butter, brown sugar, and granulated sugar. Mix them together until they are smooth and fluffy. This step is key for texture. You want to beat them well to trap air, making the dip light. - Adding Vanilla and Salt Next, pour in the vanilla extract. Add the salt for flavor. Stir this mixture well. This will enhance the sweet taste and bring out the flavors. - Gradually Incorporating the Flour Now, slowly add the all-purpose flour to the creamy mixture. Stir gently until just combined. Be careful not to overmix. You want it to stay soft and cookie-like, not tough. - Mixing in the Cream Cheese In a separate bowl, beat the softened cream cheese until it’s smooth. Then add it to the cookie dough mixture. Blend thoroughly until everything is well combined. This creates a rich and creamy base for your dip. - Folding in Chocolate Chips and Nuts Gently fold in the mini chocolate chips and nuts, if you choose to use them. Mix until they are evenly distributed. This gives your dip that classic cookie flavor with every bite. - Chilling Before Serving Finally, transfer the dip to a fun serving bowl. Cover it and chill in the refrigerator for at least 30 minutes. Chilling helps the flavors meld and makes it even more delicious. Enjoy with your favorite dippers! To make your chocolate chip cookie dough dip great, you need smooth cream cheese. Start by letting it sit at room temperature for a bit. This makes it easier to mix. Use a hand mixer to whip it until creamy. This step is key for a nice texture. Next, adjust the sweetness. If you like your dip sweeter, you can add powdered sugar. Start with just a little, then taste it. You can always add more if you need. This way, you get the sweetness just right for you. Serving your dip well makes it even more fun. Use a colorful bowl; it makes your dip pop. You can sprinkle some mini chocolate chips on top for a nice touch. Add fresh mint leaves for color and freshness. Arrange your dippers, like graham crackers and fruit, around the bowl. This not only looks good but also invites everyone to dig in. {{image_2}} You can make your Chocolate Chip Cookie Dough Dip even better with some fun add-ins. Try using different types of chocolate chips. Dark, milk, or even white chocolate chips bring new flavors. You can mix and match to find your favorite. Another great option is to incorporate nut butters. Peanut butter or almond butter adds a creamy texture. This also gives a nutty taste that pairs well with chocolate. Just fold in a few tablespoons for a delightful twist. If you have dietary needs, you can still enjoy this dip. For a gluten-free version, swap the all-purpose flour for a gluten-free blend. Make sure to check the labels on your ingredients to be safe. For a vegan alternative, use vegan butter and cream cheese. You can also choose dairy-free chocolate chips. This way, everyone can enjoy this tasty treat without worry. The Full Recipe can easily adapt to these needs, ensuring everyone can join the fun. To keep your chocolate chip cookie dough dip fresh, use an airtight container. Glass or plastic containers work well. Make sure the lid seals tightly. Store the dip in the refrigerator. It will stay good for about 3 to 5 days. If you notice any off smells or colors, it’s best to toss it out. You can freeze unused dip for later enjoyment. To do this, place the dip in a freezer-safe container. Leave some space at the top, as the dip may expand. Seal the container tightly and label it with the date. The dip freezes well for up to 3 months. To thaw the dip, move it from the freezer to the fridge. Let it sit overnight to soften. If you’re in a hurry, you can use the microwave. Just heat it in short bursts, mixing in between. This way, you keep the dip creamy and tasty. Enjoy your delicious treat anytime! Can I eat raw flour? No, you should not eat raw flour. It can have harmful bacteria. To stay safe, you can heat the flour in the oven before using it. Just spread it on a baking sheet and heat it at 350°F for about 5 minutes. This will kill any bacteria. How long does the dip last in the fridge? The dip can last up to five days in the fridge. Store it in an airtight container. Make sure it is well covered to keep it fresh. If it starts to smell or change color, it's best to throw it away. What can I use instead of cream cheese? You can use Greek yogurt or mascarpone cheese instead of cream cheese. These options give a nice creamy texture. They also add a different taste that can be fun to try. Can I make this dip ahead of time? Yes, you can make this dip ahead of time. It tastes even better after chilling in the fridge. Prepare it a day before your event, and let the flavors blend overnight. Just remember to keep it covered. Best Dippers for Your Dip For the best experience, use graham crackers, pretzels, or fresh fruit slices. Apple or strawberry slices work well with the sweet dip. You can also try vanilla wafers or even mini pancakes for a fun twist. Pairing Options for Events or Parties This dip is perfect for parties and gatherings. Pair it with a variety of dippers to please all your guests. You could even set up a dip station with different toppings. Adding a sprinkle of sea salt or nuts can make it even more special. This blog post covered everything you need for a tasty chocolate chip cookie dough dip. We looked at key ingredients, outlined step-by-step instructions, and shared useful tips. I also added variations for different diets and fun serving ideas. In summary, this dip is delicious and easy to make. Whether you stick to the classic recipe or get creative, it’s sure to impress. Enjoy making it for your next gathering!

Chocolate Chip Cookie Dough Dip Easy Delightful Treat

Craving a sweet treat that’s both easy to make and delicious? Look no further! This Chocolate Chip Cookie Dough Dip

- 4 large bell peppers (any color) - 1 cup quinoa, rinsed - 2 cups vegetable broth - 1 can (15 oz) black beans, rinsed and drained - 1 cup corn (frozen or canned) - 1 medium onion, diced - 2 cloves garlic, minced - 1 teaspoon cumin - 1 teaspoon smoked paprika - 1 teaspoon chili powder - 1 cup diced tomatoes (fresh or canned) - Salt and pepper, to taste - Fresh cilantro, for garnish - Avocado slices, for serving You can swap ingredients too! Try brown rice instead of quinoa. Use chickpeas for a twist. You can also add spinach for more greens or switch the spices to your taste. This dish packs a punch of nutrition. Quinoa is a superfood. It has lots of protein and fiber. One cup of cooked quinoa gives you about 8 grams of protein. That helps build muscles. It also gives you 5 grams of fiber. Fiber is good for digestion. Black beans also add protein. They provide about 15 grams per cup. They help keep you full longer. The peppers are low in calories and high in vitamins. They are full of vitamin C and antioxidants. Overall, this meal is healthy and filling. It’s a great choice for anyone who wants to eat well. To start, choose large bell peppers. Look for ones that are firm and shiny. They should feel heavy for their size. Slice off the tops and remove the seeds and membranes. This helps create a bowl for your filling. Rinse the peppers under cold water to clean them. Place them upright in a baking dish to hold them steady while cooking. For perfectly cooked quinoa, rinse it first to remove bitterness. In a medium pot, combine 1 cup of quinoa with 2 cups of vegetable broth. Bring this mix to a boil. Then, reduce the heat, cover, and let it simmer for about 15 minutes. Check the quinoa after 15 minutes. It should be fluffy and the broth fully absorbed. If it looks wet, cook a few minutes more. Heat a large skillet over medium heat. Add a splash of water or vegetable broth. Sauté the diced onion until it turns soft, about 5 minutes. Then, add minced garlic and cook for another minute. Now stir in black beans, corn, cumin, smoked paprika, chili powder, diced tomatoes, salt, and pepper. Let this mixture cook for about 5 minutes. This helps all the flavors blend well. Once the quinoa is done, fluff it with a fork. Add the cooked quinoa to your skillet mix and stir well. Now, gently spoon the filling into each hollowed pepper. Pack the mixture in lightly to avoid overflow. Cover your baking dish with aluminum foil. Bake at 375°F for 25-30 minutes. After that, remove the foil and bake for an additional 10 minutes. This helps the tops get a nice char. After baking, let the peppers cool for a few minutes. Garnish with fresh cilantro and serve with slices of avocado on the side. For the complete recipe, refer to the Full Recipe. When making vegan quinoa stuffed peppers, a few errors can ruin the dish. - Overcooking quinoa or undercooking peppers: Quinoa should be fluffy. Stick to the timing. For peppers, they need to be tender but still firm. - Not seasoning adequately: Don't skip the spices! They add depth. Taste your filling and adjust the salt and pepper. Pair your stuffed peppers with tasty sides to enhance the meal. - Sides that pair well: Serve them with a fresh salad or a warm grain like brown rice. - Suggestions for toppings: Try fresh avocado slices or a dollop of vegan sour cream. Fresh herbs, like cilantro, also add a pop of flavor. Having the right tools makes cooking easier and more fun. - Essential tools for the recipe: You will need a baking dish, a medium saucepan, and a large skillet. - Optional gadgets that make cooking easier: A rice cooker can help with quinoa. A food processor can chop veggies quickly. For the full recipe, check out the detailed instructions above. Enjoy your cooking! {{image_2}} You can change the filling in stuffed peppers to suit your taste. Quinoa is great, but you can also use other grains like rice or barley. For a protein boost, try lentils or chickpeas. Each option gives a different flavor and texture. If you have dietary needs, there are many ways to adapt the recipe. For a low-carb option, use cauliflower rice instead of grains. You can also skip beans for a nut-free dish. The key is to keep the filling tasty and satisfying. Herbs and spices can change the flavor of your stuffed peppers. Try adding fresh herbs like basil or parsley for a bright taste. Dried herbs like oregano or thyme can also enhance the dish. Don’t be shy with spices! A pinch of cayenne can add heat, while a dash of turmeric offers warmth and color. You can also mix in other vegetables. Chopped zucchini, mushrooms, or spinach add color and nutrition. Just sauté them with the onions for a few minutes before mixing with the quinoa. This way, you create a filling that is both delicious and colorful. For the full recipe, check out the vibrant vegan quinoa stuffed peppers. To keep your vegan quinoa stuffed peppers fresh, follow these steps: - Cool Down: Let the peppers cool to room temperature first. - Refrigerate: Place them in an airtight container. Store in the fridge for up to 4 days. - Label: Write the date on the container to track freshness. Using glass containers is a great choice. They keep the food fresh and help avoid any plastic taste. If you want to save some for later, freezing is easy. Here’s how: 1. Cool Completely: Ensure the stuffed peppers are cool before freezing. 2. Wrap: Wrap each pepper in plastic wrap or foil. This helps prevent freezer burn. 3. Container: Place wrapped peppers in a freezer-safe bag or container. You can freeze them for up to 3 months. When you're ready to eat, here’s how to reheat: - Thaw: Take them out and let them thaw in the fridge overnight. - Oven: Preheat the oven to 375°F (190°C). Place peppers in a baking dish. Cover with foil and bake for 20-25 minutes. - Microwave: If you’re short on time, heat them in the microwave. Cook for 3-4 minutes or until hot. Following these steps will keep your flavors intact while making them easy to enjoy later. For the full recipe, check earlier in the article. Yes, you can prepare these stuffed peppers in advance. This saves time on busy days. Here are some tips: - Prep the filling: Cook the quinoa and sauté the veggies. - Stuff the peppers: Fill each pepper and place them in a baking dish. - Cover tightly: Use plastic wrap or aluminum foil to keep them fresh. - Refrigerate: Store them in the fridge for up to 2 days. When you are ready to bake, remove the cover and bake as directed in the Full Recipe. If they are cold, add an extra 5-10 minutes to the baking time. Look for a few signs while baking. The peppers should be tender but not mushy. Here’s what to check: - Color: The tops should be slightly charred and the peppers should look vibrant. - Texture: A fork should easily pierce the pepper's skin. - Filling: The filling should be hot and bubbly. These signs tell you that your stuffed peppers are ready to enjoy! Yes, quinoa stuffed peppers are gluten-free. Quinoa is a grain that contains no gluten. All the other ingredients in this recipe are also gluten-free. Here’s a quick breakdown: - Bell peppers: Naturally gluten-free. - Quinoa: A gluten-free grain packed with protein. - Black beans and corn: Both are gluten-free and nutritious. This dish is perfect for anyone avoiding gluten while still enjoying a tasty meal! This blog post covered how to make delicious quinoa stuffed peppers. We discussed the essential ingredients, their health benefits, and step-by-step cooking instructions. I shared tips on avoiding common mistakes and suggested ways to customize your dish. Remember, cooking can be fun and easy. Use your creativity to try new flavors and techniques. Enjoy your healthy meal!

Vegan Quinoa Stuffed Peppers Flavorful and Nutritious

Looking for a delicious vegan dish that packs a nutritional punch? You’ve come to the right place! In this article,

- 1 pound large shrimp, peeled and deveined - 4 tablespoons olive oil - 4 cloves garlic, minced - Zest of 1 lemon - 1/4 cup fresh lemon juice - 1/2 teaspoon red pepper flakes - Salt and pepper to taste - 2 tablespoons fresh parsley, chopped - Lemon wedges for serving The ingredients for zesty lemon garlic shrimp combine to create a bright flavor. The shrimp serve as the star of the dish, offering a sweet and tender bite. Olive oil adds richness, while garlic gives a strong, savory touch. The zest and juice from the lemon bring a sharp, fresh taste. Red pepper flakes add just the right amount of heat. You can adjust the amount based on your spice preference. Lastly, a sprinkle of parsley adds a pop of color and herbiness. This dish is simple yet effective. Each ingredient works together in harmony. You can find the full recipe to guide you through the process. Whether you are cooking for yourself or friends, this meal will impress. Start by taking your large shrimp and placing them in a bowl. Add 4 tablespoons of olive oil, 4 minced garlic cloves, the zest of one lemon, and 1/4 cup of fresh lemon juice. Toss everything well to coat the shrimp evenly. Add 1/2 teaspoon of red pepper flakes, along with salt and pepper to taste. This mix brings out the zesty flavor. Let the shrimp marinate for 15 to 30 minutes at room temperature. This step is key to infusing the shrimp with all those bright flavors. Now, heat a large skillet over medium-high heat. Once it's hot, carefully add your marinated shrimp along with the marinade. Cook the shrimp for about 2 to 3 minutes on each side. You know they are done when they turn pink and opaque. Keep an eye on them, so they don’t overcook. This quick cooking time helps keep them juicy and flavorful. Once the shrimp are cooked, remove the skillet from the heat. Sprinkle 2 tablespoons of fresh chopped parsley over the shrimp for a pop of color and flavor. Serve your zesty lemon garlic shrimp right away with lemon wedges on the side. This adds an extra zesty touch that everyone will love. For the full recipe, check out the details above! When selecting shrimp, you can choose between fresh and frozen. Fresh shrimp often have a sweet taste. However, frozen shrimp can be just as good if thawed properly. Look for shrimp that are firm, not mushy. For this recipe, I recommend using large shrimp. They hold up well to cooking and create a nice bite. To make your dish stand out, adjust red pepper flakes to your liking. If you want a little heat, start with half a teaspoon. You can always add more. Adding fresh herbs like basil or thyme can bring complexity to the dish. They enhance the lemon and garlic flavors nicely. You can cook the shrimp in a skillet or on a grill. A skillet is faster and allows for more control. If you grill, make sure to keep an eye on them. Overcooking shrimp makes them tough. Cook until they turn pink, about 2-3 minutes per side. This keeps them juicy and tender. For the full recipe, refer to the earlier section. {{image_2}} To make your dish hotter, add more red pepper flakes or a splash of hot sauce. This adds a nice kick and can elevate the flavors. Start with a pinch and taste as you go. You can always add more heat, but it's hard to take it away. If you love creamy dishes, try mixing in heavy cream. This makes the sauce richer and adds a new layer of flavor. Just pour in the cream after cooking the shrimp. Stir it gently until it warms up. This variation is perfect for those who enjoy a more decadent meal. Zesty lemon garlic shrimp pairs well with many sides. Try serving it over pasta for a hearty meal. Rice also works great, soaking up the sauce. For a lighter option, serve it on a fresh salad. Each choice brings out the shrimp's bright flavors. Check out the Full Recipe to explore more ideas. To store leftover zesty lemon garlic shrimp, place it in an airtight container. Make sure to cool the shrimp to room temperature first. This helps keep it fresh. Store it in the fridge for up to three days. When you reheat, do so gently to avoid overcooking. If you want to freeze the shrimp, follow these steps: - Let the shrimp cool completely. - Place it in a freezer-safe bag or container. - Remove as much air as possible to prevent freezer burn. - Label the bag with the date. To reheat, thaw the shrimp overnight in the fridge. Then, heat it in a skillet until warmed through. In the fridge, zesty lemon garlic shrimp lasts about three days. In the freezer, it can last up to three months. Always check for any off smells or changes in texture before eating. Proper storage keeps your meal safe and tasty! Yes, you can use frozen shrimp. To prepare, first thaw the shrimp. Place them in a bowl of cold water for about 15-20 minutes. Change the water halfway to speed up the thawing. After thawing, drain and pat them dry with a paper towel. This helps the shrimp absorb the flavors better. Zesty lemon garlic shrimp pairs well with many sides. Here are some tasty options: - Cooked rice or quinoa for a hearty base - Pasta tossed in olive oil or lemon sauce - Fresh green salad with a light dressing - Grilled vegetables for a healthy touch - Crusty bread to soak up the extra sauce You can tell shrimp are cooked when they turn pink and opaque. Here are some tips: - Look for a tight C-shape; if they curl tightly, they are done. - Cook the shrimp for 2-3 minutes on each side. - Avoid overcooking, as shrimp can become rubbery. To sum up, making zesty lemon garlic shrimp is simple and quick. You start with fresh shrimp, flavorful garlic, and lemon. Marinate for the best taste and cook until pink. Adjust spices to your liking and serve hot with lemon wedges. This dish is not just tasty but also versatile and easy to store. Whether you enjoy it spicy or with creamy twists, it will please anyone. Now, you can enjoy this delightful meal at home, impressing family and friends with your skills.

Zesty Lemon Garlic Shrimp Flavorful and Easy Recipe

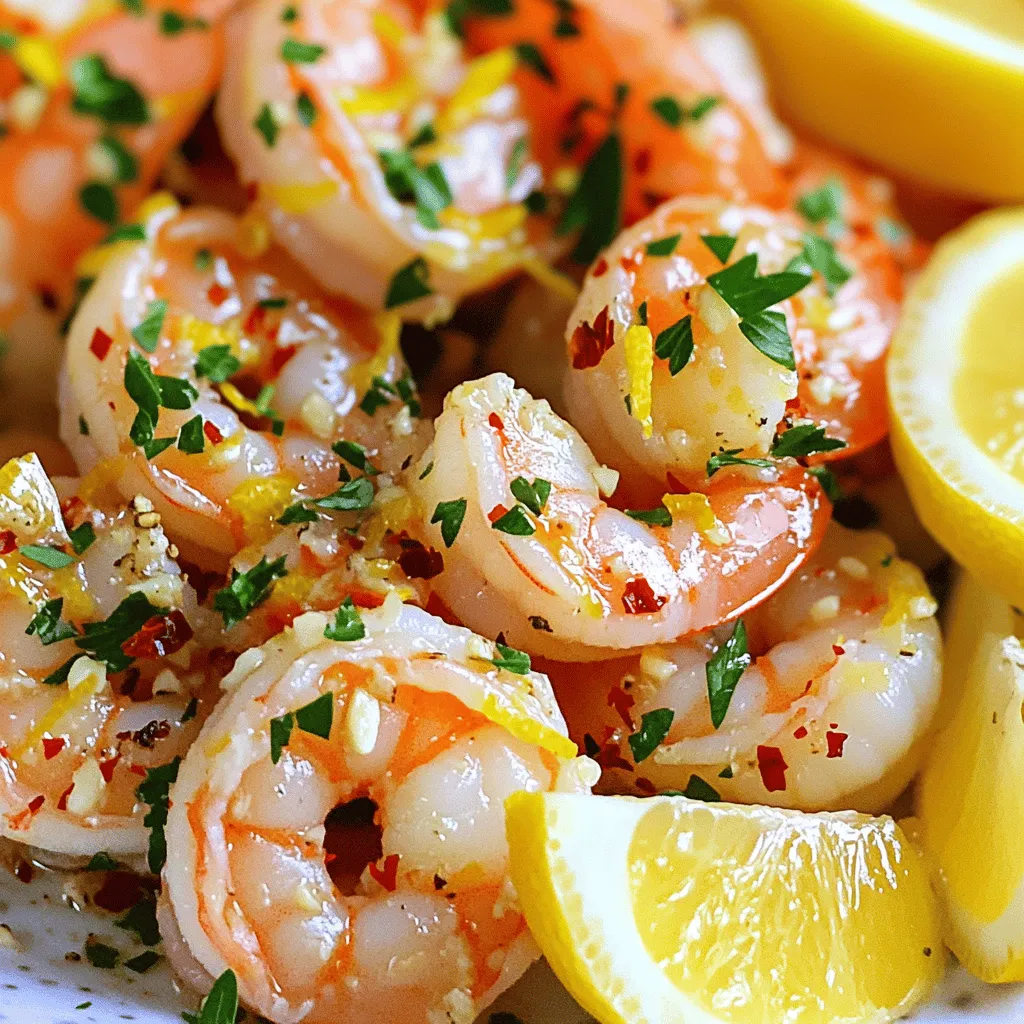
If you crave a quick, tasty meal, then you’ve come to the right place! My Zesty Lemon Garlic Shrimp recipe

- Ripe Bananas and Their Role: Ripe bananas are key for flavor and moisture. They add natural sweetness. Use bananas with brown spots for the best taste. - Importance of Unsalted Butter: Unsalted butter gives the cake a rich taste. It allows you to control the salt level in the recipe. Softened butter blends well with sugar, making your cake fluffy. - Choosing the Right Walnuts: Chopped walnuts add a crunchy texture. Choose fresh walnuts for a nutty flavor. You can toast them lightly to enhance their taste. - Flour Variety and Substitutions: All-purpose flour is best for this cake. If you want a lighter cake, use cake flour. You can also use whole wheat flour for a healthier option. - Baking Powder vs. Baking Soda: Baking powder helps the cake rise. Baking soda adds extra lift and color. Both make the cake fluffy and light. - How to Measure Ingredients Accurately: Use measuring cups for dry ingredients. Spoon flour into the cup, then level it off. This helps avoid too much flour, which can make the cake dense. - Heavy Whipping Cream Selection: Choose heavy whipping cream with at least 36% fat. This helps create a rich and thick topping. It holds its shape well on the cake. - Variations for Extra Flavor: You can add vanilla extract for a sweet touch. Try almond extract or cocoa powder for unique flavors. Just mix these in while whipping the cream. - How to Achieve Stiff Peaks: Beat the cream until it forms stiff peaks. This means it stands tall and holds its shape. Be sure not to overbeat, or it can turn into butter. For the full recipe, check out the complete guide. - Creaming Butter and Sugar Start by softening your butter. Use a bowl to mix the butter and sugar. Beat them until light and fluffy. This step adds air, making your cake rise well. - Combining Wet Ingredients Next, add eggs, mashed bananas, and vanilla to the bowl. Mix well until everything blends. You want a smooth, even mixture that smells great. - Folding in the Walnuts Now, grab your chopped walnuts. Gently fold them into the batter. This adds a nice crunch and flavor. Be careful not to over-mix; you want to keep the air in your batter. - Preparing the Baking Pan Preheat your oven to 350°F (175°C). Grease and flour a 9x13-inch baking pan. This helps the cake come out easily after baking. - Checking for Doneness Pour the batter into your pan. Bake for 25-30 minutes. Stick a toothpick in the center. If it comes out clean, your cake is ready. - Cooling the Cake Once baked, let your cake cool in the pan for a few minutes. Then transfer it to a wire rack. This helps it cool evenly and keeps it from getting soggy. - How to Whip Cream Properly Grab a mixing bowl and heavy whipping cream. Beat it with powdered sugar and vanilla until stiff peaks form. This means the cream holds its shape well. - Spreading Cream on the Cake Once the cake is cool, spread the whipped cream evenly on top. Use a spatula for a smooth finish. This adds a light, sweet touch to your cake. - Garnishing the Final Touch For the final touch, add extra chopped walnuts and banana slices. This makes your cake look pretty and adds more flavor. Enjoy your Heavenly Banana Walnut Cream Cake! For the full recipe, you can check out the details mentioned earlier. - Using Overripe Bananas: Choose bananas with lots of brown spots. They add more sweetness and moisture to your cake. Overripe bananas mix well and create a soft texture. - Adjusting Sugar Levels: You can cut down the sugar if you prefer less sweetness. Start by reducing it by 1/4 cup. Taste the batter and decide if you want more. - Storing the Cake Properly: Wrap the cake in plastic wrap. This keeps it moist and fresh. Store it in the fridge if you have leftovers. - Overmixing the Batter: Mix just until combined. Overmixing makes the cake dense and tough. Use a gentle hand when folding in the dry ingredients. - Underbaking Issues: Always check with a toothpick. If it comes out wet, the cake needs more time. Baking times can vary with ovens, so keep an eye on it. - Skipping the Cooling Process: Let the cake cool completely before adding cream. This prevents the cream from melting. A warm cake will ruin your beautiful topping. - Decoration Ideas: Add extra walnuts or banana slices on top. Drizzle some caramel sauce for a sweet touch. Use fresh mint leaves for color and freshness. - Serving Suggestions: Cut the cake into squares. Serve them on a nice plate to impress your guests. You can even serve with a scoop of vanilla ice cream. - Pairing with Beverages: This cake pairs well with coffee or tea. You can also serve it with a glass of milk for a classic treat. For the complete recipe, check out the Full Recipe section. {{image_2}} Adding Chocolate Chips You can add chocolate chips for a sweet twist. Use about 1 cup of semi-sweet chips. Fold them into the batter gently. The chocolate pairs well with the banana flavor. Incorporating Spices Adding spices can enhance the taste. Try cinnamon or nutmeg for warmth. Use about 1/2 teaspoon of each spice. This will give your cake a cozy, inviting aroma. Experimenting with Nut Types While walnuts are great, feel free to try other nuts. Pecans or almonds can add unique flavors. About 1 cup of chopped nuts works well. Mix it in the batter for a delightful crunch. Gluten-Free Options You can make this cake gluten-free. Use a gluten-free flour blend instead of all-purpose flour. Look for blends that include xanthan gum. This keeps the cake light and fluffy. Dairy-Free Cream Alternatives To make the cream topping dairy-free, use coconut cream. Chill the can overnight, then scoop out the cream. Beat it until fluffy for a rich, tasty topping. Vegan Substitutes You can easily make this cake vegan. Replace eggs with flax eggs, using 1 tablespoon of flaxseed meal mixed with 2.5 tablespoons of water. Substitute sour cream with almond yogurt for a creamy texture. Layer Cake vs. Single Layer You can create a layered cake if you prefer. Bake two or three layers and stack them. Add cream between each layer for a stunning look. Cupcake Adaptation Turn this recipe into cupcakes for easy serving. Fill each cupcake liner about two-thirds full. Bake for 18-20 minutes and enjoy bite-sized treats. Miniature Versions Make mini cakes for a fun twist. Use a muffin tin or mini cake pans. These are perfect for parties and easy to share. To keep your Heavenly Banana Walnut Cream Cake fresh, store it in the fridge. Wrap it tightly in plastic wrap or foil to prevent drying. You can also place it in an airtight container. This method helps maintain the cake's moisture and flavor. If you want to save some cake for later, freezing is a great option. First, slice the cake into individual pieces. Wrap each slice in plastic wrap and then in foil. This double wrapping prevents freezer burn. You can store it in the freezer for up to three months. When you're ready to enjoy it, thaw the slices in the fridge overnight. This keeps the texture moist and soft. The cake can last about five days in the fridge. Check for signs of spoilage before enjoying. If you see mold or an off smell, it's best to discard it. Trust your senses; when in doubt, throw it out. To make this cake from scratch, follow these key steps: 1. Preheat your oven to 350°F (175°C). Grease and flour your pan. 2. Cream the butter and sugar in a bowl until light and fluffy. 3. Add eggs one by one, mixing well with mashed bananas and vanilla extract. 4. Combine dry ingredients in a separate bowl and mix into the wet mixture. 5. Fold in walnuts gently to keep them whole. 6. Pour the batter into the prepared pan and bake for 25-30 minutes. 7. Cool the cake completely before adding the cream topping. Each step builds on the last, creating a delicious cake. Yes, you can use frozen bananas! Here are some tips: - Thaw the bananas first. Let them sit at room temperature until soft. - Drain excess liquid after thawing to prevent a soggy batter. - Mash them well to ensure a smooth mix in your batter. Frozen bananas can bring out a rich flavor, and they work well in this recipe. Store leftover cake properly to keep it fresh: - Cover the cake with plastic wrap or aluminum foil. - Keep it in an airtight container to avoid drying out. - Store it in the fridge if you have cream topping. It stays fresh for up to a week. Proper storage helps maintain flavor and texture. Yes, you can make this cake ahead of time. Here’s how: - Bake the cake and let it cool completely. - Wrap it tightly in plastic wrap and store it in the fridge. - Add cream topping just before serving for the best taste. Making it ahead can save time for special occasions. Check the Full Recipe for more details! In this post, you learned how to make a Heavenly Banana Walnut Cream Cake. We covered key ingredients, from ripe bananas to unsalted butter, and essential dry ingredients like flour. You saw detailed steps for preparing batter, baking, and making the cream topping. Tips for moisture, common mistakes, and fun variations were also shared. With these insights, you can create a cake that impresses everyone. Enjoy baking, and have fun experimenting with new flavors!

Heavenly Banana Walnut Cream Cake Delightful Recipe

Craving a dessert that’s as delightful as it is easy to make? Look no further! This Heavenly Banana Walnut Cream

To whip up this creamy delight, gather these simple ingredients. They come together to create a dish you will love. - Penne pasta - Broccoli florets - Chicken breasts - Heavy cream - Chicken broth - Parmesan cheese - Garlic - Olive oil - Italian seasoning - Salt and pepper - Fresh basil (optional) Each ingredient plays a key role. The penne pasta gives a great base. Broccoli florets add color and nutrition. Chicken breasts provide protein. Heavy cream makes the sauce rich. Chicken broth adds flavor depth. Parmesan cheese offers a cheesy finish. Garlic brings a savory touch. Olive oil keeps everything moist. Italian seasoning adds warmth. Salt and pepper enhance all the flavors. Fresh basil can brighten the dish if you choose. You can grab all these items at most stores. Make sure to check your pantry for any staples you might already have. With these ingredients, you're ready to create a wonderful meal. For the full recipe, check the section below. First, bring a large pot of water to a boil. Add salt to the water for flavor. Cook 8 oz of penne pasta as the package says. When the pasta has about 3 minutes left, add 2 cups of broccoli florets. This cooks the broccoli just right. After that, drain both the pasta and broccoli together. Set them aside for later. Next, heat 2 tablespoons of olive oil in a large skillet over medium heat. Add 2 diced chicken breasts. Season the chicken with salt, pepper, and 1 teaspoon of Italian seasoning. Cook it for about 5 to 7 minutes until it turns golden brown and is cooked through. Then, stir in 3 minced garlic cloves. Cook for another minute until the garlic smells nice. Now, pour in 1 cup of low-sodium chicken broth. Bring this mixture to a gentle simmer. Let it reduce for about 2 to 3 minutes. Lower the heat and add 1 cup of heavy cream. Stir until everything is mixed well. Gradually add 1 cup of grated parmesan cheese. Keep stirring until the sauce is creamy and smooth. Finally, add the cooked penne and broccoli to the skillet. Toss everything together so the pasta and broccoli are fully coated in the creamy sauce. If your sauce seems too thick, you can add a splash of pasta water. Taste it and adjust the salt and pepper if needed. Serve hot and garnish with fresh basil if you like. Enjoy this creamy broccoli and chicken penne delight! For more details, check the Full Recipe. To make the cream sauce perfect, use low heat. High heat can burn the cream. Always stir gently and let the sauce simmer. This helps blend the flavors well. If the sauce seems too thick, add a splash of pasta water. This will keep it smooth and creamy. For the best chicken, start with small pieces. Diced chicken cooks faster and evenly. Make sure to season well with salt and pepper. This adds flavor from the start. Cook until each piece is golden brown. This gives a nice texture and taste to the dish. To boost flavor, try adding garlic early on. It gives a strong base for the sauce. You can also mix in fresh herbs like basil or parsley. These add freshness and color. A squeeze of lemon juice can brighten the dish, too. Always taste as you go to find the right balance. This way, your Creamy Broccoli and Chicken Penne will shine. For the complete details, check out the Full Recipe. {{image_2}} You can easily swap out chicken for more veggies. Try using mushrooms, bell peppers, or zucchini. These will add great taste and texture. Use vegetable broth instead of chicken broth. The creamy sauce remains tasty and rich. This way, you keep the dish colorful and healthy. If you want to change the protein, think about shrimp or tofu. Shrimp cooks quickly and adds a nice touch. Tofu is a great option for a plant-based meal. Just be sure to press it first to remove excess water. You can also use cooked turkey or even beef for a twist. For a gluten-free version, switch to gluten-free penne. Many brands offer pasta made from rice or corn. Check the package for cooking times, as they may vary. Also, make sure your chicken broth and cream are gluten-free. This way, everyone can enjoy this creamy delight! Feel free to explore these variations to make this dish your own. For the full recipe, check the detailed instructions above. You can keep your Creamy Broccoli and Chicken Penne in the fridge. Place it in an airtight container. This way, it stays fresh for up to three days. Make sure it's cooled down before you store it. If you have a lot, divide it into smaller portions. This helps when you want to grab a quick meal. Freezing is a great option if you want to save leftovers. Use a freezer-safe container or a heavy-duty freezer bag. Squeeze out as much air as possible to avoid freezer burn. The dish can last up to two months in the freezer. When you’re ready to eat it, let it thaw in the fridge overnight. Reheat your Creamy Broccoli and Chicken Penne on the stovetop for the best results. Add a splash of chicken broth or water to help loosen the sauce. Heat it over medium-low heat, stirring often. This keeps it creamy. You can also use the microwave. Place it in a microwave-safe dish and cover it loosely. Heat in short bursts, stirring in between, until hot. For the full recipe, check out the details above. Yes, you can use frozen broccoli. Frozen broccoli cooks faster and is easy to use. Just add it to the boiling pasta a minute before draining. It will soften nicely and blend well with the dish. You can use half-and-half or a rich coconut milk. Both options will give you creaminess. If you want a lighter choice, use Greek yogurt mixed with a little broth for a tangy flavor. To make it dairy-free, swap heavy cream with coconut milk or a non-dairy cream. Use nutritional yeast instead of parmesan for a cheesy taste without dairy. Adjust the seasoning to balance flavors. This dish pairs well with a side salad or garlic bread. You can also serve it with roasted vegetables for added color and nutrients. A light, crisp white wine can complement the flavors nicely. To make Creamy Broccoli and Chicken Penne, follow these steps closely. 1. Cook the pasta: Start by boiling 8 oz of penne pasta in salted water. When the pasta has about 3 minutes left, add in 2 cups of broccoli florets. Drain both together and set them aside. This method helps keep the broccoli bright and tender. 2. Prepare the chicken: In a large skillet, heat 2 tablespoons of olive oil over medium heat. Add 2 diced chicken breasts, seasoning with salt, pepper, and 1 teaspoon of Italian seasoning. Cook for 5-7 minutes until the chicken is golden and fully cooked. 3. Add garlic: Once the chicken is done, stir in 3 minced garlic cloves. Cook for 1 minute until it smells amazing. Garlic adds a rich flavor base for this dish. 4. Make the broth mixture: Pour in 1 cup of low-sodium chicken broth. Bring it to a gentle simmer and let it reduce for 2-3 minutes. This step deepens the flavor. 5. Create the creamy sauce: Lower the heat and mix in 1 cup of heavy cream. Stir until well blended. Gradually add 1 cup of grated parmesan cheese, mixing until the sauce is creamy and smooth. 6. Combine everything: Add the cooked penne and broccoli to the skillet. Toss them in the creamy sauce to coat every piece well. If the sauce feels too thick, add a splash of pasta water to thin it out. 7. Season to taste: Taste your dish and adjust the seasoning with salt and pepper as needed. This step ensures every bite is perfect. 8. Serve hot: Dish out the pasta while it’s hot. You can garnish it with fresh basil if you like. This adds a fresh touch and looks pretty too. Enjoy your Creamy Broccoli and Chicken Penne! It’s a lovely meal that combines simple ingredients into a delightful dish. For the full recipe, check the earlier section. This blog post shared a simple way to make Creamy Broccoli and Chicken Penne. We looked at key ingredients like penne pasta, broccoli, and chicken. I gave you step-by-step instructions to prepare each part, from cooking chicken to making the sauce. Tips for perfecting flavors were included, along with variations for different diets. I also discussed how to store and reheat leftovers. Cooking can be easy and fun. Enjoy making this dish and sharing it with others. Your meal will impress!

Creamy Broccoli and Chicken Penne Delightful Dish

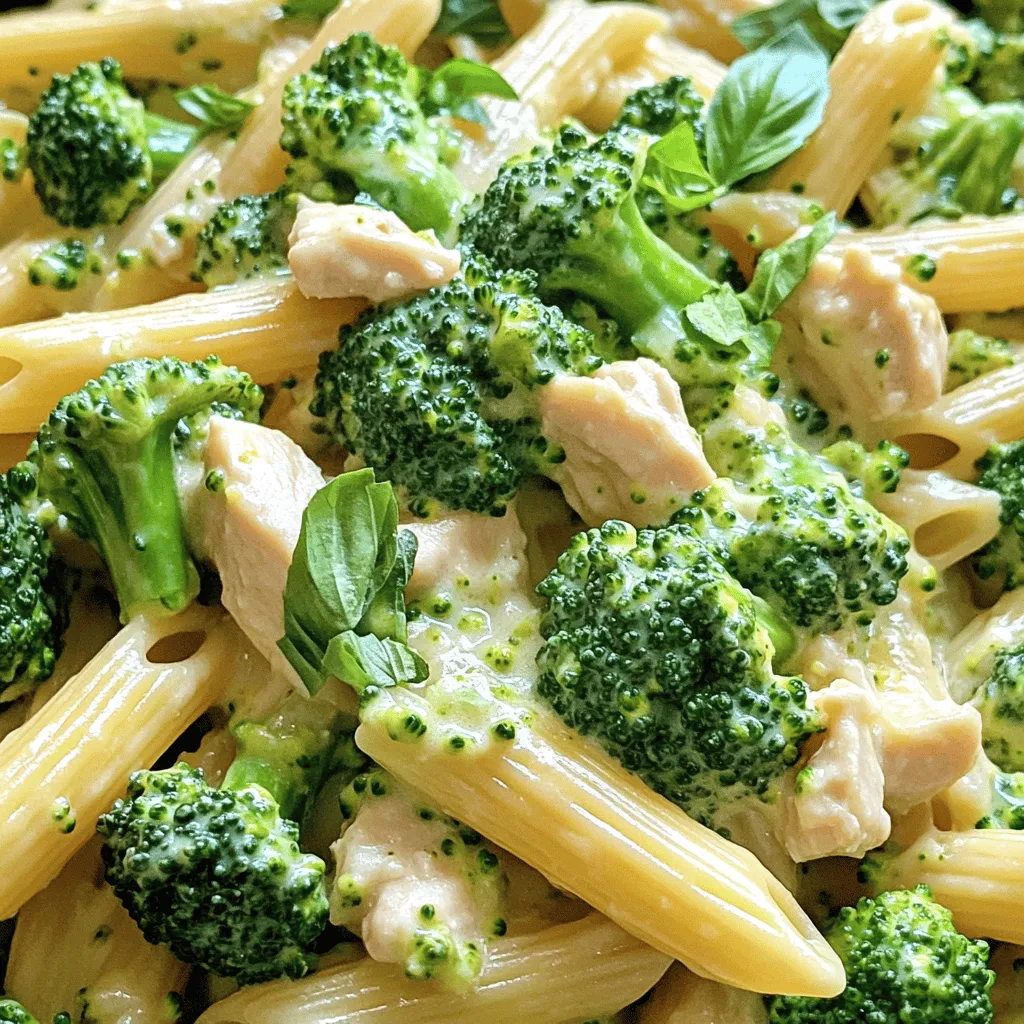
If you crave a meal that’s both creamy and comforting, you’ve landed in the right spot! I’m excited to share

The main ingredients for savory stuffed zucchini boats are simple and fresh. You will need: - 4 medium zucchini - 1 cup cooked quinoa - 1 cup cherry tomatoes, halved - 1 cup cooked black beans, drained and rinsed - 1/2 cup corn kernels (fresh or frozen) - 1 teaspoon cumin - 1 teaspoon smoked paprika - 1/2 teaspoon garlic powder - 1/2 teaspoon onion powder - Salt and pepper to taste - 1 cup shredded cheese (cheddar or a mix) - 2 tablespoons fresh cilantro, chopped (for garnish) - 1 tablespoon olive oil These ingredients blend well and create a hearty meal. You can change it up with optional ingredients. Try adding ground turkey or beef for more protein. You could also use different veggies, like bell peppers or spinach, to boost the flavor. If you want a spicy kick, add chili powder or jalapeños. For a lighter version, skip the cheese or use a dairy-free option. These choices let you make the dish your own while keeping it delicious. Check out the Full Recipe for more details on preparation. First, let's prep the zucchini and stuffing mixture. 1. Slice the zucchini: Cut each zucchini in half lengthwise. Use a spoon to scoop out the center, creating space for the filling. Save the scooped-out flesh for later. 2. Mix the stuffing: In a large bowl, add the cooked quinoa, halved cherry tomatoes, black beans, corn, spices, and half of the cheese. Chop the reserved zucchini flesh and mix it in. Season with salt and pepper. Next, we need to bake the stuffed zucchini. 1. Prepare the zucchini: Brush the hollowed zucchini halves with olive oil. Place them cut side up in a baking dish. 2. Fill the zucchini: Spoon the stuffing into each zucchini half. Pack it well so it doesn’t fall out. 3. Top with cheese: Sprinkle the remaining cheese on top of the stuffed zucchini. 4. Bake: Cover the dish with aluminum foil. Bake in a preheated oven at 375°F (190°C) for 25 minutes. 5. Finish baking: Remove the foil and bake for another 10-12 minutes. The cheese should be golden and bubbly. Finally, let's look at the finishing touches and serving. 1. Cool: Once baked, let the zucchini boats cool for a few minutes. 2. Garnish: Sprinkle fresh chopped cilantro on top for color and flavor. 3. Serve: Place the stuffed zucchini boats on a large platter. Drizzle with olive oil for a nice shine. Enjoy this flavorful dish with family or friends! For the complete cooking details, check out the Full Recipe. How do I achieve the best texture? To get the best texture, use medium-sized zucchini. They hold their shape well. Scoop out the insides gently to avoid breaking the skin. Bake the zucchini boats until they are just tender. This gives them a nice bite and keeps them from getting mushy. What cheese alternatives can I use for different flavors? You can use many different cheeses. Try mozzarella for a mild taste. Feta adds a tangy flavor. For a sharp taste, use aged cheddar. Vegan cheese works too if you want to skip dairy. Just make sure it melts well. How can I make it vegan or gluten-free? To make this dish vegan, skip the cheese or use a vegan option. For gluten-free, ensure your quinoa is certified gluten-free. You can also use brown rice or lentils as a filling to keep it hearty. These swaps make it friendly for many diets while still being tasty. For the full recipe, check out the section above. {{image_2}} When making savory stuffed zucchini boats, you can get creative with the stuffing. Here are some fun ideas to try. - Different Stuffing Ideas: You can use meat, cheese, or veggie-based fillings. Ground turkey or beef works great. For a cheesy option, use ricotta or goat cheese. If you want it meatless, try a mix of mushrooms and spinach. - Substituting Spices: Changing spices can change the flavor. Try adding Italian herbs like oregano and basil for a classic taste. For a kick, use chili powder or cayenne pepper. Experiment to find what you love! - Seasonal Variations: You can switch ingredients based on what’s in season. In summer, add fresh basil or zucchini blossoms. In fall, try pumpkin puree or sage. These changes can keep your dish fresh and exciting. These variations let you enjoy stuffed zucchini boats in many ways. Try the full recipe for a delicious start, and let your creativity shine! To keep your stuffed zucchini boats fresh, store them in the fridge. Place them in an airtight container. They will last for up to four days. If you want to save them longer, freezing is a smart choice. Wrap each zucchini boat in plastic wrap, then put them in a freezer-safe bag. Label the bag with the date. They can stay in the freezer for up to three months. When it’s time to eat, thaw the zucchini boats in the fridge overnight. To reheat, place them in the oven at 350°F (175°C) for about 15 to 20 minutes. This will help keep the flavors strong and the texture nice. You can also microwave them for about 3 to 5 minutes but be careful not to overcook, as that can make them soggy. For a quick meal, these boats are easy to enjoy anytime! Check out the Full Recipe for more details. How do I make zucchini boats more filling? To make zucchini boats more filling, add hearty ingredients. Consider adding ground turkey or beef. You can also mix in more grains, like brown rice or couscous. Another option is to pile on extra cheese. This will create a rich and satisfying meal. Can I prepare stuffed zucchini ahead of time? Yes, you can prepare stuffed zucchini ahead of time. Stuff the zucchini and cover them tightly with plastic wrap. You can store them in the fridge for up to 24 hours. When you are ready to bake, just pop them in the oven. This makes meal prep easy. What can I serve with stuffed zucchini boats? Stuffed zucchini boats pair well with many sides. A fresh salad with greens and tomatoes complements the dish nicely. You might also serve rice or quinoa on the side. For a heartier meal, try garlic bread or roasted vegetables. Each option adds flavor and balance to your meal. We covered how to prepare delicious stuffed zucchini boats with various ingredients and tips. You learned the best ways to prep, cook, and store them. Adding different flavors makes for exciting meals, whether you prefer meat, cheese, or veggies. Experiment with seasonal variations to keep things fresh. Remember, these boats are versatile and easy to make ahead. Enjoy your cooking adventure with stuffed zucchini, and share your tasty creations!

Savory Stuffed Zucchini Boats Flavorful and Easy Meal

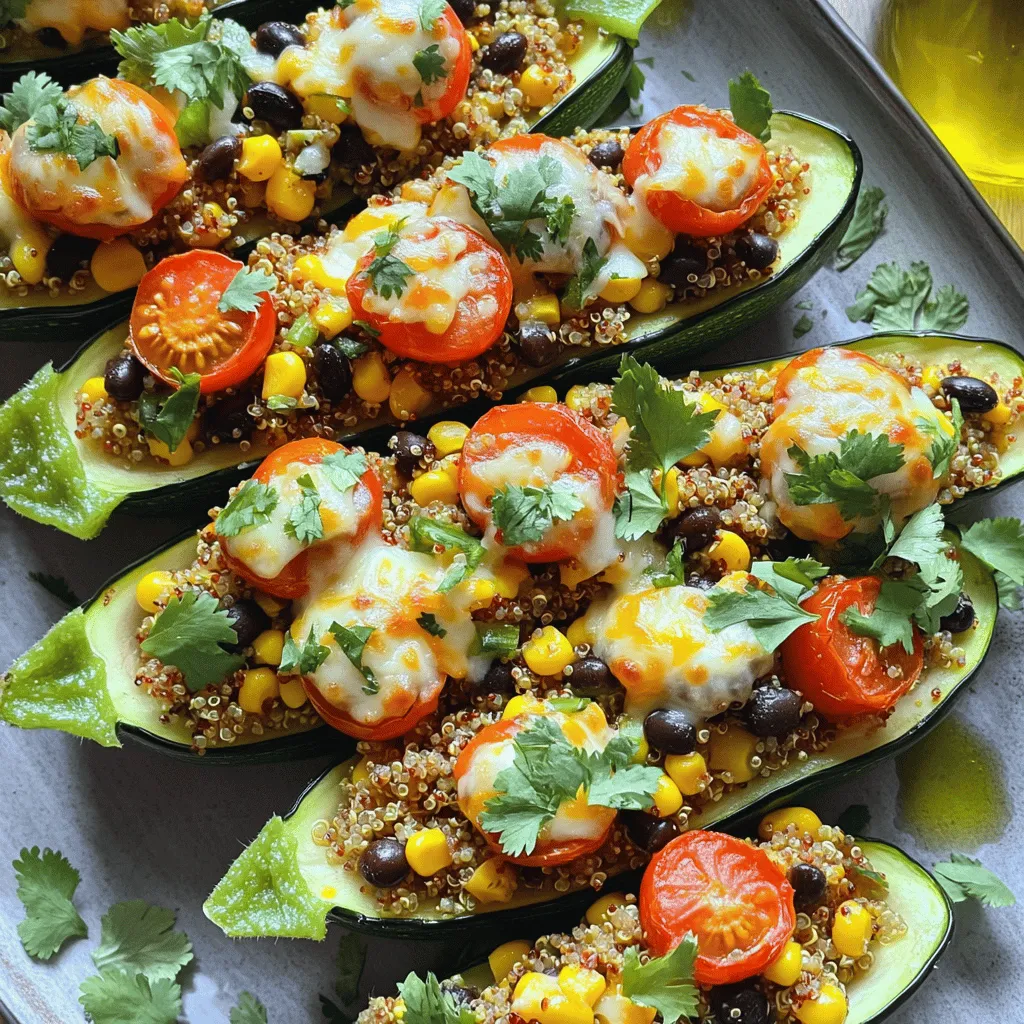
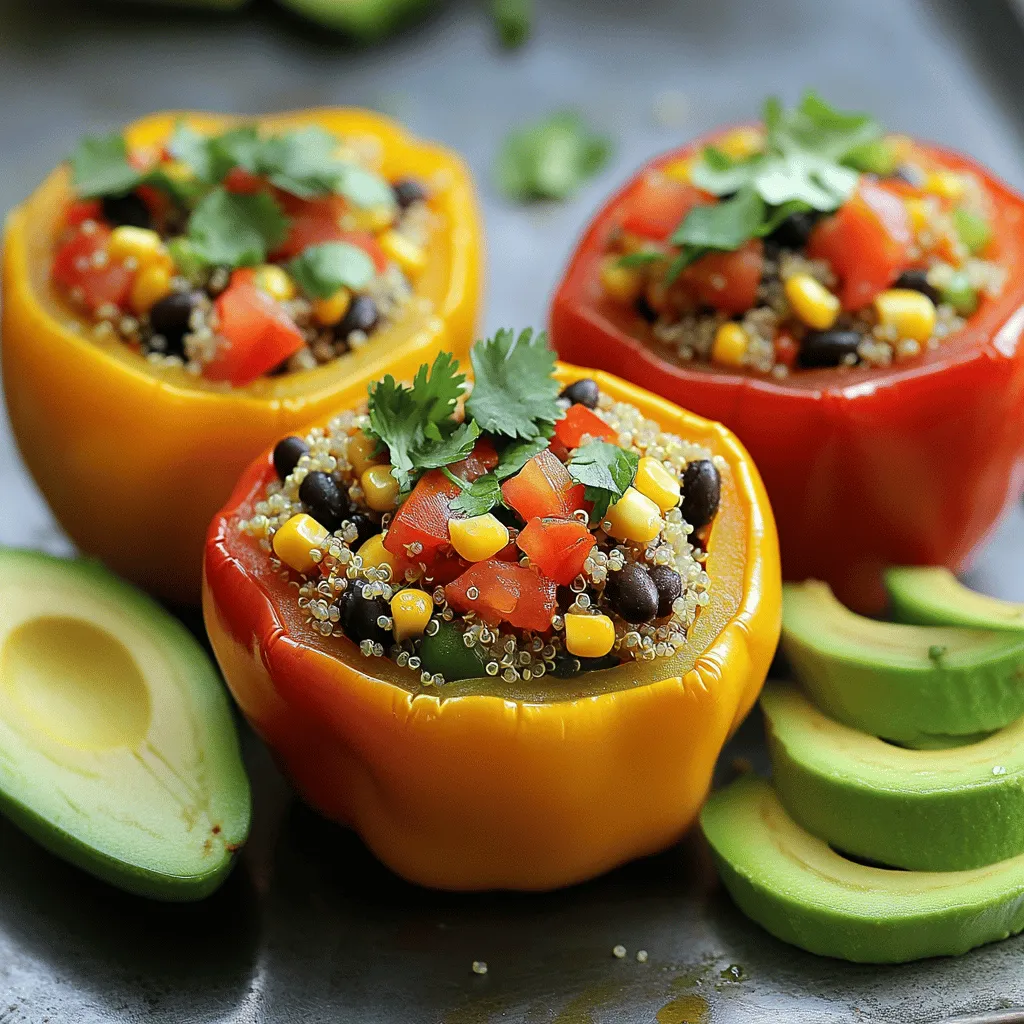
Looking for a quick, tasty meal that will impress your family? Savory stuffed zucchini boats are your answer! These delicious

- Spaghetti: 400g - Garlic: 6 cloves, thinly sliced - Extra virgin olive oil: 1/2 cup - Red pepper flakes: 1/2 teaspoon (adjust to taste) - Fresh parsley: 1/4 cup, finely chopped - Lemon zest and juice: from 1 lemon - Salt: to taste - Grated Parmesan or nutritional yeast (optional) This dish is simple yet full of flavor. The main ingredients shine through. Spaghetti provides a great base, while garlic adds richness. Olive oil makes everything smooth and tasty. For seasoning, red pepper flakes bring a little heat. You can adjust the amount to your liking. Fresh parsley adds a nice pop of color and freshness. Lemon zest and juice brighten the dish even more. When serving, remember to taste for salt. You can sprinkle grated Parmesan or nutritional yeast on top if you want. This adds a cheesy touch without being too heavy. For the full recipe, check out the detailed instructions. Enjoy your cooking! 1. Bring a large pot of salted water to a boil. 2. Add the spaghetti and cook until al dente. This usually takes about 8-10 minutes. 3. Reserve 1 cup of pasta water before draining the spaghetti. 1. In a large skillet, heat 1/2 cup of extra virgin olive oil over medium heat. 2. Add 6 cloves of thinly sliced garlic and 1/2 teaspoon of red pepper flakes. 3. Sauté gently until the garlic turns golden brown, about 2-3 minutes. Do not burn the garlic; it should be fragrant and light. 1. Lower the heat, then add the drained spaghetti to the skillet. 2. Toss the spaghetti well to coat it in the garlic oil. 3. Gradually add the reserved pasta water, a little at a time, stirring to emulsify. This will make a silky sauce that clings to the pasta. 4. Remove the skillet from heat and stir in the zest and juice of 1 lemon, plus 1/4 cup of finely chopped parsley. 5. Season with salt to taste before serving. For more details on the recipe, check the Full Recipe. - Use high-quality extra virgin olive oil for best results. - Be cautious when sautéing garlic to avoid bitterness. To get that real taste, the oil matters. I always choose extra virgin olive oil. It adds a rich flavor. When you heat it, keep an eye on the garlic. If it burns, the dish can turn bitter. That’s not what we want! - Add pasta water gradually to achieve desired sauce thickness. This dish needs a silky sauce. After cooking your spaghetti, save some pasta water. Add it a little at a time. Stir well as you pour it in. This will help the sauce stick nicely to the spaghetti. - Cook spaghetti just until al dente for optimal texture in the dish. Cooking time is key! You want your spaghetti to be al dente. This means it should be firm but not hard. Follow package instructions, but start checking a minute early. The right texture makes the dish shine. For the full recipe, check out the [Full Recipe]. {{image_2}} If you love heat, add more red pepper flakes. This simple change gives your dish a spicy kick. Start with one teaspoon and adjust to your taste. The heat pairs well with garlic. It adds depth and excitement. This variation keeps the dish bold yet simple. For extra flavor and nutrition, include sautéed spinach or cherry tomatoes. Spinach adds a nice green color and nutrition. Just sauté it for a few minutes until wilted. Cherry tomatoes bring sweetness and brightness. Add them in the last few minutes of cooking. This makes your meal look great and taste even better. If you want a heartier meal, add grilled chicken or shrimp. Cook the protein separately and toss it in at the end. This makes the dish filling and satisfying. You can also use plant-based options like chickpeas or tofu. They add protein without meat. Each option enhances the classic flavors of Aglio e Olio. You can store any leftovers in an airtight container. Keep them in the fridge for up to 3 days. This helps maintain the flavors and texture of your spaghetti aglio e olio. For reheating, I suggest using the stovetop. Add a splash of water or olive oil. This keeps your pasta from drying out and helps it stay tasty. Freezing spaghetti aglio e olio is not a good idea. The pasta will change texture and become mushy once thawed. Enjoy it fresh for the best taste! Aglio e Olio means "Garlic and Oil" in Italian. This dish highlights the simple yet bold flavors of garlic and olive oil. It is a classic dish from Naples, Italy, and requires few ingredients. This simplicity allows the garlic's aroma and the oil's richness to shine. Yes, you can use whole wheat spaghetti. Whole wheat pasta gives a nutty flavor and a heartier texture. It also adds extra fiber, making the dish a bit healthier. Keep in mind, whole wheat spaghetti may take slightly longer to cook. Adjust the cooking time to ensure it remains al dente. Yes, Spaghetti Aglio e Olio is naturally vegan. It uses just garlic, olive oil, and spaghetti. You can make it even more plant-based by skipping cheese. If you want a cheesy flavor, use nutritional yeast instead of Parmesan. This keeps the dish delicious and vegan-friendly while still being packed with flavor. For the full recipe, visit the [Full Recipe] section above. This blog post shared a simple yet delicious recipe for Aglio e Olio. We covered key ingredients like spaghetti, garlic, and olive oil, along with seasoning and garnishes. You learned step-by-step instructions for cooking the pasta and making garlic oil. Tips on achieving authentic flavor and variations were also included. In closing, Aglio e Olio is a versatile dish. You can customize it to fit your taste. Enjoy making this easy recipe, and feel free to experiment with different add-ins!

Spaghetti Aglio e Olio Simple Flavorful Recipe

Are you ready to whip up a dish that’s both simple and bursting with flavor? Spaghetti Aglio e Olio is

Older posts
Newer posts
← Previous Page1 … Page15 Page16 Page17 … Page30 Next →

dsad

© 2025 So Yum Recipes • Built with GeneratePress

Our Policies

  • Copyright Policy
  • Cookie Policy
  • GDPR Policy
  • Privacy Policy
  • Disclaimer
  • Terms Of Use

More Information

  • Home
  • About
  • Contact
  • Appetizers
  • Dessert
  • Dinner
  • Drinks
©2025, So Yum Recipes About Back To Top