Skip to content
DisclaimerTerms Of UseGDPR PolicyCookie Policy

So Yum Recipes

  • Home
  • Drinks
  • Appetizers
  • Dinner
  • Dessert
  • About
  • Contact
  • Privacy Policy
DisclaimerTerms Of UseGDPR PolicyCookie Policy

Chloe

Flour and Water Base The main ingredients for a great pajeon are flour and water. I use all-purpose flour because it gives the pancake a nice texture. Mixing flour with water creates a smooth batter. This batter holds everything together. Importance of Scallions Scallions are the star of this dish. They add fresh flavor and a crunch. You should chop them finely so they mix well into the batter. The more scallions, the better the taste. Optional Add-ins (Carrots, Gochugaru) You can add grated carrots for a hint of sweetness. This makes the pancake colorful and fun. If you like some heat, consider adding gochugaru, which are Korean red pepper flakes. This gives the pajeon a spicy kick. Here is the full recipe for crispy Korean scallion delight: - 1 cup all-purpose flour - 1 cup water - 1/2 teaspoon salt - 1 bunch scallions, finely chopped - 1/2 cup grated carrots (optional for sweetness) - 1/2 teaspoon gochugaru (Korean red pepper flakes, optional for heat) - 2 tablespoons vegetable oil (plus more for frying) - Soy sauce, for dipping Whisking the Ingredients Together Start by grabbing a large mixing bowl. In it, whisk together 1 cup of all-purpose flour, 1 cup of water, and 1/2 teaspoon of salt. You want a smooth batter without lumps. This batter is the foundation for your pajeon. The Role of Each Ingredient The flour gives the pancake its structure. Water helps to create a light texture. Salt enhances the flavors. Scallions, which you should chop finely, bring freshness and a nice crunch. If you like, add 1/2 cup of grated carrots for a touch of sweetness. For heat, mix in 1/2 teaspoon of gochugaru. Heating the Pan Correctly Use a non-stick frying pan and heat it over medium heat. Once hot, add 2 tablespoons of vegetable oil. You need enough oil to make the pancake crispy. Cooking Time and Texture Guidelines Pour half of your batter into the pan, spreading it out evenly. Cook for about 3-4 minutes. The edges should crisp up, and the bottom should turn golden brown. Flip the pancake carefully using spatulas. Cook the other side for another 3-4 minutes until it’s golden and crispy. Ideal Dipping Sauces (Soy Sauce) Serve your pajeon warm with soy sauce for dipping. The salty flavor pairs perfectly with the pancake. Presentation Tips for the Final Dish Place the scallion pancakes on a bright plate. Garnish with sesame seeds or fresh cilantro for color. A small dish of soy sauce and some chopped scallions make it look even better. For the full recipe, check the earlier section. Achieving Crispiness To make your pajeon crispy, use cold water in your batter. Cold water helps create steam, which adds air and lightness. Mix the batter until smooth but don't overmix. A few lumps are fine. Heat your pan well before adding oil. The oil should shimmer, not smoke. This step creates a nice crust. Avoiding a Soggy Pancake A soggy pancake is a common issue. To prevent this, keep the heat on medium-high. Avoid adding too many vegetables; they release moisture. If using carrots, make sure they're grated fine. You can also let the batter sit for about 10 minutes. This can help thicken it slightly. How to Adjust Ingredients for Personal Taste Feel free to change your pajeon. Love spice? Add more gochugaru. Want a sweeter taste? Toss in extra carrots. You can even add cooked seafood or mushrooms for a twist. Just remember to keep the flour and water ratio the same for best results. Cooking Techniques for Various Stovetops Different stovetops can affect cooking. If you use an electric stove, set it to medium-high. For gas stoves, adjust based on how fast it heats. Use a non-stick pan if you're new to cooking. This helps avoid sticking and makes flipping easier. If you have a cast-iron skillet, it retains heat well, giving a great crispy edge. {{image_2}} Pajeon has several tasty twists. One popular version is Seafood Pajeon. You can add shrimp or squid for a fresh ocean flavor. The seafood cooks quickly, adding a nice texture. Just chop the seafood into small pieces and mix it into the batter with the scallions. Another exciting option is Kimchi Pajeon. This version includes kimchi, giving your pancake a spicy kick. The fermentation adds depth to the flavor. Simply chop your kimchi and fold it into the batter. This adds a nice tang and heat, making it perfect for spice lovers. You can enjoy Pajeon even with dietary needs. For a vegan option, replace the egg with a flaxseed meal mix. Mix one tablespoon of flaxseed meal with three tablespoons of water. Let it sit to thicken before adding to the batter. For gluten-free Pajeon, use rice flour instead of all-purpose flour. It will give you that crispy texture you crave. You can also mix in other gluten-free flours, like almond or chickpea flour. Each adds a unique flavor while keeping things gluten-free. Feel free to experiment with these variations. You can create your own special Pajeon that suits your taste. Check out the Full Recipe to start making your crispy delight today! To keep your pajeon fresh, use proper storage techniques. First, let the pancakes cool completely. Place them in an airtight container. You can layer parchment paper between each pancake to prevent sticking. Seal the container tightly. For refrigeration, pajeon lasts up to three days. If you want to keep them longer, consider freezing. Wrap each pancake in plastic wrap and place them in a freezer bag. This method protects them from freezer burn. Frozen pajeon can last up to two months. To enjoy pajeon again, reheating is key. The best method is using a skillet. Heat a non-stick pan over medium heat. Add a small amount of oil to the pan. Place the pajeon in the pan and cook for about two minutes on each side. This keeps them crispy. You can also use an oven. Preheat it to 350°F (175°C). Place the pajeon on a baking sheet. Bake for about 10 minutes or until heated through. Avoid microwaving pajeon, as this may make them soggy. Proper reheating ensures you retain their delicious texture and flavor. What is Pajeon? Pajeon is a Korean scallion pancake. It combines flour, water, and scallions. This dish is crispy on the outside and soft inside. You can add optional ingredients like carrots or spicy gochugaru. It makes a great snack or side dish. How long can I store Pajeon? You can store Pajeon in the fridge for about 2 days. Just place it in an airtight container. To keep it fresh, reheat it in a pan. This helps restore its crispiness. Why is my Pajeon soggy? A soggy Pajeon often comes from too much water in the batter. Make sure to follow the recipe closely. If your pan isn’t hot enough, it can also cause sogginess. Always preheat your pan before adding the batter. How to fix burnt edges? If the edges of your Pajeon burn, lower the heat next time. Cooking on medium heat helps prevent burning. You can also trim off the burnt parts after cooking to make it look nicer. When is Pajeon traditionally served? Pajeon is popular during rainy days in Korea. People believe it brings good luck. It is also served during celebrations like Chuseok, the harvest festival. What are the cultural celebrations involving Pajeon? Pajeon plays a role in many Korean festivals. It is often served at family gatherings. Making Pajeon is a way to bond and share food with loved ones. Pajeon combines simple ingredients like flour, water, and scallions to create a tasty dish. We explored how to prepare the batter, cook it perfectly, and serve it well. Remember, adjusting flavors and textures can make it your own. Variations like seafood or kimchi add fun twists. Store leftovers properly to keep them fresh. Understanding Pajeon's cultural background adds to its enjoyment. Cooking should be fun, so enjoy making your Pajeon just the way you like it.

Pajeon: Korean Scallion Pancake Crispy Delight

If you love savory snacks, let me introduce you to Pajeon—Korean scallion pancakes that are crispy and delicious! This easy

For this seafood pasta salad, you want a mix of tasty seafood. Here are my top picks: - 1 cup cooked shrimp, peeled and deveined - 1 cup calamari rings, cooked - 1 cup scallops, cooked and quartered Using these seafood options gives your salad a fresh and rich flavor. Each type provides a unique taste and texture. Shrimp adds sweetness, calamari offers a nice bite, and scallops bring a buttery richness. The pasta and veggies play a big role in this dish. I recommend: - 8 ounces fusilli pasta - 1 cup cherry tomatoes, halved - 1/2 cup red bell pepper, diced - 1/4 cup red onion, finely chopped - 1/4 cup black olives, sliced - 1/3 cup fresh parsley, chopped Fusilli pasta holds the dressing well. Cherry tomatoes add a pop of color and sweetness. The bell pepper and red onion give a nice crunch, while black olives add a salty bite. Fresh parsley brings brightness and a lovely aroma. The dressing ties everything together. You’ll need: - 1/4 cup olive oil - 2 tablespoons lemon juice - 1 teaspoon garlic powder - 1 teaspoon dried oregano - Salt and pepper to taste This dressing is zesty and light. Olive oil adds richness, while lemon juice brings brightness. Garlic powder and oregano add depth, enhancing the seafood’s flavor. Adjust salt and pepper to your liking for a perfect balance. For the full recipe, check out the Full Recipe section. To start, cook 8 ounces of fusilli pasta in boiling water. Follow the package instructions until the pasta is al dente. This means it should still have a bit of bite. Once done, drain the pasta in a colander. Rinse it under cold water to stop the cooking. This helps keep the pasta firm and fresh. Now, place the cooled pasta in a large bowl. Next, grab another bowl. Here, mix 1 cup of halved cherry tomatoes, 1 cup of cooked shrimp, 1 cup of cooked calamari rings, and 1 cup of cooked scallops. Add in 1/2 cup of diced red bell pepper, 1/4 cup of finely chopped red onion, and 1/4 cup of sliced black olives. Then, sprinkle in 1/3 cup of chopped fresh parsley. This colorful mix adds flavor and texture to the salad. In a small bowl, whisk together 1/4 cup of olive oil and 2 tablespoons of lemon juice. Add 1 teaspoon of garlic powder and 1 teaspoon of dried oregano. Season with salt and pepper to taste. Whisk until the dressing looks smooth and well-mixed. This tangy dressing will elevate the flavors of the salad. Now, pour the dressing over the seafood and vegetable mixture. Gently toss everything together to coat evenly. After that, add this mixture to the bowl with the cooled pasta. Toss gently again until all ingredients are well combined. Cover the bowl and refrigerate for at least 30 minutes. This allows the flavors to blend. For the full recipe, check out the details above. To make great seafood pasta salad, you must cook the pasta just right. I recommend using fusilli pasta. This shape holds the dressing well and mixes with the seafood nicely. Cook the pasta until it's al dente, which means it's firm to the bite. This keeps the pasta from getting mushy. After cooking, drain the pasta and rinse it under cold water. This stops the cooking process and cools the pasta quickly. Flavor is key in any dish, especially in seafood pasta salad. I love to use fresh ingredients like cherry tomatoes and herbs. They add color and taste. A mix of garlic powder and dried oregano in the dressing boosts the flavor. Don't forget to add a splash of lemon juice for a bright finish. Salt and pepper are also important; they help bring all the flavors together. How you serve the salad matters. I like to use a large, shallow bowl for a beautiful display. It allows the colorful ingredients to shine. Garnish with extra parsley on top for a fresh look. Lemon wedges on the side offer a pop of color and can be squeezed over the salad for added zing. These small touches make your seafood pasta salad not just tasty but also a feast for the eyes. For the full recipe, check out the Zesty Seafood Pasta Salad Extravaganza. {{image_2}} You can switch up the seafood in your pasta salad. Try using crab meat or lobster for a rich taste. Cooked mussels or clams also add a nice touch. Each type brings its unique flavor. Mix and match to find what you love. While fusilli creates a great base, other pasta shapes work well too. You could use penne, farfalle, or even spaghetti. Each shape holds onto the dressing differently. Choose what sounds good to you! For a vegan twist, swap seafood for plant-based proteins. Use chickpeas or marinated tofu for protein. You can also add more crunchy veggies like cucumber and carrots. A lemon-tahini dressing would taste great here. This way, everyone can enjoy a fresh, flavorful delight. Check out the Full Recipe for more options! To keep your seafood pasta salad fresh, store it in an airtight container. This will keep out air and moisture. Place the salad in the fridge right after serving. It stays good for up to three days. If you notice any changes in color or smell, toss it out. Freezing is not the best option for seafood pasta salad. The texture of seafood changes when frozen and thawed. If you must freeze it, use a freezer-safe container. It can last for up to a month. When ready to eat, thaw it overnight in the fridge. Check for any off smells before serving. When you reheat, do it gently. Use the microwave or a stovetop. Heat only what you plan to eat. Seafood can become tough if heated too long. If it's cold, you can enjoy it straight from the fridge. The flavors will still be great! For the full recipe, check out the Zesty Seafood Pasta Salad Extravaganza. You can make this pasta salad a day before. Just follow the full recipe, and store it in the fridge. The flavors will mix well overnight. Before serving, give it a good stir. If it looks dry, add a little olive oil or lemon juice. The best seafood for a pasta salad is shrimp, scallops, and calamari. These options provide great taste and texture. You can also try crab or lobster for a twist. Make sure the seafood is cooked well and cut into bite-sized pieces. Yes, you can switch up the dressing. A creamy dressing, like ranch or Caesar, works well too. You can even make a simple vinaigrette with vinegar and mustard. Just make sure your dressing complements the seafood and veggies. Seafood pasta salad lasts about three days in the fridge. Keep it in an airtight container to maintain freshness. If you notice any off smells or changes in texture, it's best to discard it. In this blog post, we explored key seafood, pasta, and vegetable choices. You learned how to prepare these ingredients, create a tasty dressing, and mix everything together. I shared tips for cooking perfect pasta and enhancing flavors, plus fun presentation ideas. You also discovered variations, storage tips, and answers to common questions. Overall, seafood pasta salad is flexible, tasty, and perfect for any meal. Enjoy your cooking, and don’t hesitate to experiment with new flavors!

Savory Seafood Pasta Salad Fresh and Flavorful Delight

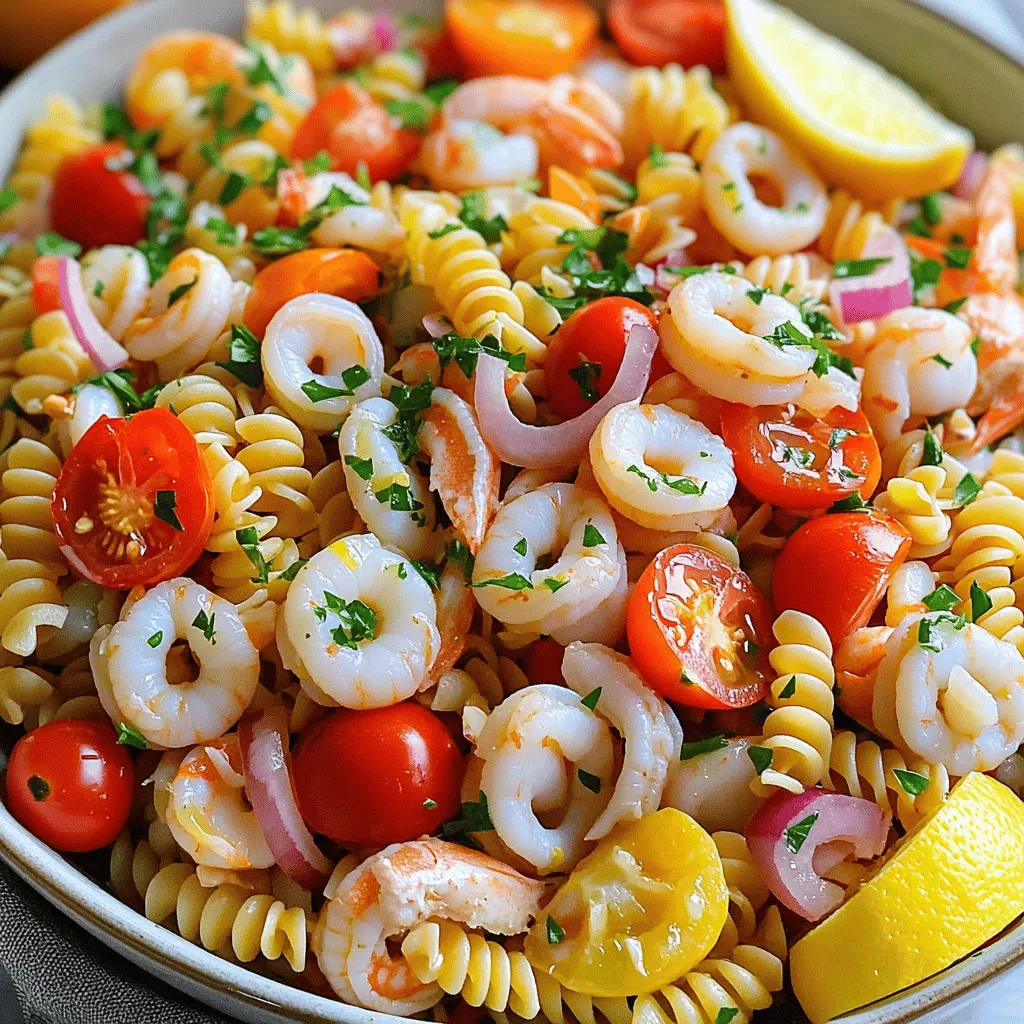
If you’re craving a dish that’s both fresh and tasty, a savory seafood pasta salad is the answer. This vibrant

To make a tasty Easy Lentil Stew, you need the right ingredients. Here’s what you will need: - 1 cup green or brown lentils, rinsed - 2 tablespoons olive oil - 1 onion, finely chopped - 2 carrots, diced - 2 celery stalks, diced - 4 cloves garlic, minced - 1 teaspoon ground cumin - 1 teaspoon smoked paprika - 1 bay leaf - 4 cups vegetable broth - 1 can (14 oz) diced tomatoes - 1 cup kale or spinach, chopped - Salt and pepper to taste - Fresh parsley, for garnish Each ingredient plays a key role in making this stew flavorful and hearty. Lentils are the star of this dish. They are packed with protein and fiber. You can use green or brown lentils, both work great. The olive oil helps to sauté the vegetables, unlocking their natural sweetness. Onions, carrots, and celery form the classic base for many soups and stews. They add depth and flavor. Garlic brings a nice aroma. The cumin and smoked paprika add warmth and a smoky flavor. The bay leaf infuses the stew with a subtle earthiness. Vegetable broth adds richness. The diced tomatoes contribute acidity, balancing the flavors. Adding kale or spinach at the end gives the stew a fresh touch and a pop of color. Don't forget to season with salt and pepper! And finally, garnish with fresh parsley for a bright finish. You can find the Full Recipe for this hearty dish to guide you through the cooking process. Setting Up Your Cooking Space Start by gathering all your ingredients. Lay them out so you can see everything. This makes cooking easier. You will need a large pot, a cutting board, and a sharp knife. Having a tidy space helps you focus on the dish. Importance of Rinsing Lentils Rinsing lentils is key. It removes dust and small stones. Place the lentils in a fine mesh strainer. Rinse them under cool water for a few minutes. This step ensures your stew tastes clean and fresh. Sautéing the Vegetables In your pot, heat the olive oil over medium heat. Add the chopped onion, carrots, and celery. Sauté these for about 5 to 7 minutes. You want them to soften and release their flavors. This forms the base of your stew. Adding Spices and Lentils Once the vegetables are soft, stir in the minced garlic. Add ground cumin, smoked paprika, and the bay leaf. Cook for one minute until you smell the spices. Now, add the rinsed lentils, vegetable broth, and diced tomatoes. Stir well to combine. Simmering the Stew Bring this mixture to a boil. When it starts bubbling, reduce the heat to low. Cover the pot and let it simmer for 25 to 30 minutes. Check the lentils often. They should be tender but not mushy. Incorporating Greens With about 5 minutes left, add the chopped kale or spinach. Stir it in until it wilts. This adds color and nutrition to your stew. Adjusting Seasoning Before Serving Taste your stew before serving. Add salt and pepper as needed. Remove the bay leaf for a clean finish. Your Easy Lentil Stew is now ready! For the full recipe, refer to the previous section. To make your stew even better, try adding extra spices. A pinch of cayenne adds heat. For a smoky taste, consider adding a bit of chipotle powder. Fresh herbs like thyme or rosemary can also enhance flavor. Using homemade vegetable broth is another great choice. It adds depth and richness. You can easily make broth by simmering vegetable scraps with water. This gives your stew a unique, fresh taste. Sautéing is key to building flavor. Always start with high heat to soften your onions and veggies. Stir them often to avoid burning. This step unlocks the flavors in your ingredients. Cooking low and slow is very important for the best results. Once you add the lentils and broth, let it simmer gently. This allows the flavors to meld and the lentils to soften perfectly. Trust me, patience pays off here! Serve your stew in warm bowls for a cozy feel. Pair it with crusty bread for a satisfying meal. You can also add a dollop of yogurt or sour cream for creaminess. For a pop of color, garnish with freshly chopped parsley. This small touch makes the dish look inviting. A sprinkle of black pepper on top can also add a nice finishing touch. For the full recipe, check out the Hearty Vegetable Lentil Stew section! {{image_2}} Different Types of Lentils You can use many lentils for your stew. Green and brown lentils work well. They hold their shape and add a nice texture. Red lentils cook down and become creamy. You can also try black lentils for a unique twist. Each type brings a different flavor and look to your dish. Choosing Seasonal Vegetables Using seasonal vegetables makes your stew fresh and tasty. In spring, add asparagus or peas. In summer, use zucchini or bell peppers. Fall calls for root veggies like squash or sweet potatoes. In winter, consider hearty greens like kale and cabbage. These swaps keep your stew exciting and full of flavor. Adding Proteins like Sausage Want to boost the flavor? Try adding cooked sausage. It brings a savory kick to your stew. You can use turkey sausage for a lighter option or classic pork sausage for richness. Just slice and add it in with the veggies. This addition makes your stew heartier and more filling. Incorporating Different Herbs Herbs can change the taste of your stew. Fresh thyme or rosemary pairs well with lentils. They add a fragrant aroma. You can also use bay leaves for depth. For a fresh finish, stir in parsley or cilantro just before serving. These herbs enhance the overall flavor and make it more vibrant. Instant Pot Version Using an Instant Pot? You’ll save time! Sauté the veggies first, just like in the stovetop method. Then, add all other ingredients, including lentils, and set the pot to high pressure for 15 minutes. Let it release naturally for 10 minutes. You’ll have a delicious stew in no time! Slow Cooker Option For the slow cooker, add all the ingredients in the morning. Set it on low for 6-8 hours. The lentils will soak up all the flavors. You’ll come home to a warm and hearty meal. This method is perfect for busy days, allowing you to enjoy a great dinner without the rush. How long does Easy Lentil Stew last in the fridge? It can last for about 4 to 5 days. Store it in an airtight container. This keeps it fresh and tasty. What are the best containers for storage? Use glass or BPA-free plastic containers. They seal well and help prevent spills. Label the container with the date. This way, you know how long it's been in the fridge. What are the steps to freeze leftovers? First, let the stew cool down. Next, pour it into freezer-safe bags or containers. Leave some space at the top, as the stew will expand. Seal them tightly and label with the date. How do I reheat for the best results? Thaw the stew in the fridge overnight. You can heat it on the stove or in the microwave. Stir occasionally to ensure it heats evenly. Add a splash of broth if it seems thick. This keeps the texture smooth. For the full recipe, check out the Hearty Vegetable Lentil Stew. It's a warm hug in a bowl! Can I make this Easy Lentil Stew in advance? Yes, you can make this stew ahead of time. It actually tastes better the next day. Just let it cool and store it in the fridge. Reheat it on the stove or in the microwave when you're ready to eat. What can I serve with lentil stew? Lentil stew pairs well with crusty bread or a fresh salad. You can also serve it with rice or quinoa for added texture. A dollop of yogurt or a sprinkle of cheese adds a nice touch too. Can I use canned lentils instead? You can use canned lentils if you are short on time. Rinse them well and add them in the last few minutes of cooking. This way, they stay tender and hold their shape. What's a good substitute for vegetable broth? If you don't have vegetable broth, you can use water with a little salt. You can also use chicken broth if you want a different flavor. Just keep in mind it will change the dish slightly. Is lentil stew healthy? Yes, lentil stew is very healthy. Lentils are high in protein and fiber. They also provide essential vitamins and minerals. This stew is a great choice for a balanced meal. How many calories are in this recipe? This recipe has about 300 calories per serving. It can vary based on your specific ingredients. Using less oil or skipping the bread will lower the calorie count. This blog post provided a clear guide to making a delicious lentil stew. We covered essential ingredients, cooking steps, and tips to enhance flavor. I shared several variations to suit your taste and offer storage advice for leftovers. Lentil stew is a healthy meal that's easy to make and enjoy. Try these steps, tips, and variations to create your perfect dish. You'll love how simple and tasty it can be!

Easy Lentil Stew Hearty and Flavorful Comfort Dish

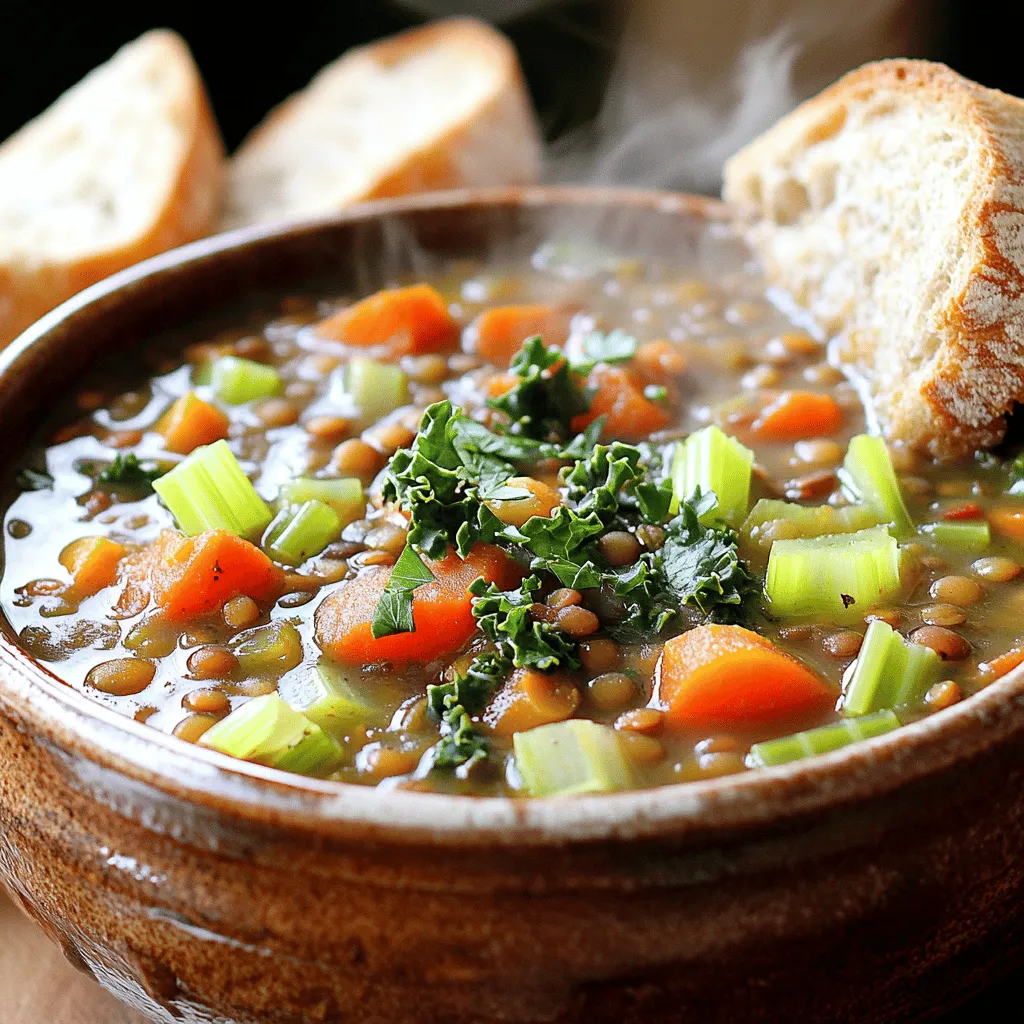
Looking for a warm and filling meal that’s easy to make? This Easy Lentil Stew is your answer! Packed with

- 1 lb ground beef - 1 cup shredded cheddar cheese - 1/2 cup cream cheese, softened - 1/4 cup grated Parmesan cheese - 1 clove garlic, minced - 1 teaspoon onion powder - 1 teaspoon garlic powder - 1 teaspoon dried oregano - Salt and pepper to taste The main ingredients create a tasty filling. Ground beef gives a hearty base. The mix of cheeses adds creaminess and rich flavor. Garlic and spices bring out the best taste. - 1 packet of refrigerated pizza dough (or crescent roll dough) - Olive oil, for brushing - Fresh parsley, chopped (for garnish) The dough wraps around the filling. It gives a lovely crust when baked. Olive oil helps achieve a golden color. Fresh parsley brightens the dish when served. You can swap ingredients based on your taste. Try ground turkey or chicken instead of beef. For cheese, mix in mozzarella or gouda. Fresh herbs like basil or thyme can replace oregano. This flexibility helps you enjoy the bombs your way. For the full recipe, check out the detailed instructions. 1. First, preheat your oven to 375°F (190°C). This heat ensures the bombs bake evenly. 2. Next, line a baking sheet with parchment paper. This step makes cleanup easy later. 3. In a large bowl, mix the ground beef, cheddar cheese, cream cheese, Parmesan cheese, minced garlic, onion powder, garlic powder, oregano, salt, and pepper. Blend them well until combined. This filling is key to the flavor. 1. Roll out the pizza dough on a floured surface. Aim for a thickness of about 1/4 inch. 2. Cut the dough into squares, roughly 4x4 inches. Each square should be large enough to hold the filling. 3. Place about a tablespoon of the beef mixture in the center of each square. Don’t overfill them, or they might spill. 4. Fold the corners of the dough over the filling. Pinch the seams to seal tightly. This step is crucial for keeping the filling inside. 5. Shape each bomb into a ball. Make sure it is smooth and sealed well. 1. Place the bombs seam-side down on the prepared baking sheet. This helps them keep their shape. 2. Brush the tops of each bomb with olive oil. This gives them a nice golden crust as they bake. 3. Bake in the preheated oven for 15-20 minutes. You want them golden brown and cooked through. 4. Once baked, remove the bombs from the oven and let them cool for a few minutes. 5. For a touch of color, garnish with freshly chopped parsley before serving. These steps will help you create delicious Garlic Parmesan Cheeseburger Bombs. For a complete list of ingredients and detailed instructions, check out the Full Recipe. To get a nice, even cook, make sure your oven is preheated before baking. When you place the bombs on the baking sheet, give them space to expand. This helps them brown well. To avoid soggy bottoms, use parchment paper or a silicone mat. This keeps moisture away from the dough as it bakes. These garlic parmesan cheeseburger bombs taste great with sauces. Try serving them with marinara or ranch dressing. They also go well with a crisp salad or some crunchy veggies on the side. For a heartier meal, pair them with fries or onion rings. To take the flavor up a notch, use fresh herbs. Chopped basil or parsley can add a bright touch. You can also play with different ground meats. Ground turkey or chicken offers a lighter option. Mixing in some spices or even a hint of heat can make each bomb unique. {{image_2}} You can use ground turkey or chicken instead of beef. This swap gives a lighter taste. For dairy-free or vegan options, try using plant-based ground meat. You can also replace cream cheese with a dairy-free cream cheese alternative. Adding sautéed vegetables enhances the filling's taste. Try bell peppers, onions, or mushrooms. For a spicy kick, mix in jalapeños or a dash of hot sauce. These additions bring new layers of flavor to the bombs. You can transform these bombs into sliders or mini-burgers. Just shape the dough and filling smaller. Baking gives a nice golden crust, while air frying offers a crispier outside. Both methods work well, so choose what you prefer. For the full recipe, check out the full recipe section! To keep your Garlic Parmesan Cheeseburger Bombs fresh, store them in the fridge. Place leftovers in an airtight container. This helps keep them moist and tasty. You can store them for up to three days. You have two good options for reheating: the microwave or the oven. The microwave is quick but can make the bombs soft. If you want a crispy texture, use the oven. Preheat your oven to 350°F (175°C). Place the bombs on a baking sheet and heat for about 10 minutes. This way, they regain their crunch. You can freeze these bombs before or after baking. If you freeze them raw, wrap each bomb in plastic wrap and place them in a freezer bag. They last up to three months this way. To bake later, thaw them in the fridge overnight before cooking. If you freeze them cooked, let them cool first. Then, follow the reheating instructions above. Enjoy the ease of having a tasty meal ready to go! How long do Garlic Parmesan Cheeseburger Bombs last in the refrigerator? These bombs can last up to three days in the fridge. Keep them in an airtight container to stay fresh. Can I make these bombs ahead of time? Yes, you can prepare the filling and assemble the bombs a day before. Just store them in the fridge until you're ready to bake. What should I do if my dough won't seal properly? If your dough won’t seal, try moistening the edges with water. This helps the dough stick together better. You can also pinch the seams tightly to ensure they close. How can I tell if my bombs are cooked through? Check if the tops are golden brown and the filling is hot. You can use a meat thermometer; the beef should reach 160°F (70°C). What’s the best dipping sauce for these bombs? Marinara sauce works great! Ranch dressing is also a tasty option. You can even try garlic aioli for a fun twist. Are there any good side dishes to serve with them? Serve with a simple salad or crunchy veggies. Sweet potato fries or potato wedges make great sides too. You learned how to make delicious Garlic Parmesan Cheeseburger Bombs. With easy steps, you can fill dough with tasty beef and cheese. You also saw options to swap ingredients or add flavor. Remember to store extras properly and reheat them right. Enjoy experimenting with different flavors and serve them hot! With these tips, you can impress anyone at your next meal. Dive into this fun recipe and share it with friends and family. Happy cooking!

Garlic Parmesan Cheeseburger Bombs Flavorful Delight

Craving a snack that packs a punch? Meet Garlic Parmesan Cheeseburger Bombs! These tasty bites combine juicy ground beef, melty

Chickpea salad melts are packed with flavor and nutrition. Here are the key ingredients: - 1 can (15 oz) chickpeas, drained and rinsed - 1/4 cup plain Greek yogurt - 1 tablespoon mayonnaise - 1 tablespoon Dijon mustard - 1/4 cup red onion, finely chopped - 1/4 cup cucumber, diced - 1/2 cup cherry tomatoes, halved - 1 tablespoon fresh dill, chopped (or 1 teaspoon dried dill) - Salt and pepper to taste - 4 slices whole grain bread - 1 cup shredded cheese (like mozzarella or cheddar) - Olive oil, for drizzling These ingredients come together to make a hearty and tasty lunch. Chickpeas are high in protein and fiber. They help keep you full longer. Greek yogurt adds creaminess and gives probiotics for gut health. Red onion adds flavor and antioxidants. Cucumbers bring hydration and crunch. Cherry tomatoes provide vitamins and a sweet taste. Fresh dill offers a burst of flavor and has anti-inflammatory properties. Whole grain bread gives fiber and energy. This meal is balanced and good for you. You can easily adjust the recipe for different needs. If you want it vegan, replace Greek yogurt and cheese with plant-based options. Use avocado or hummus instead of mayonnaise. If you are gluten-free, choose gluten-free bread. You can swap chickpeas for white beans or lentils if you have allergies. These changes keep the dish tasty while fitting your diet. For more details, check out the Full Recipe. To start, you need to prepare the chickpea mixture. First, take one can of chickpeas. Drain and rinse them well. Place the chickpeas in a mixing bowl. Use a fork to mash them. Aim for a chunky texture, leaving some whole chickpeas. This gives a nice bite. Next, add 1/4 cup of plain Greek yogurt and 1 tablespoon of mayonnaise. These add creaminess. Then, mix in 1 tablespoon of Dijon mustard for a tangy kick. Finely chop 1/4 cup of red onion and dice 1/4 cup of cucumber. Add these to the bowl. Then, halve 1/2 cup of cherry tomatoes and toss them in. Finally, sprinkle in 1 tablespoon of fresh dill, salt, and pepper. Stir everything until well combined. This mixture is full of flavor and texture. Now it's time to toast the bread. Preheat your broiler to high. Take 4 slices of whole grain bread. Place them on a baking sheet. Drizzle a little olive oil on each slice. This helps them crisp up. Put the baking sheet under the broiler for about 2-3 minutes. Watch closely to prevent burning. You want the bread to turn golden brown. This adds a nice crunch to your melts. After toasting the bread, it's time for the cheese. Take the baking sheet out of the oven. Spoon the chickpea salad mixture generously onto each slice of toasted bread. Make sure to cover the bread well. Then, sprinkle 1 cup of shredded cheese on top. You can use mozzarella or cheddar for this. Return the baking sheet to the broiler for another 2-4 minutes. Keep an eye on it as the cheese melts. You want it to be bubbly and slightly browned. Once done, remove it from the oven and let it cool for a minute. This will make it easier to eat. Enjoy your delicious Chickpea Salad Melts! For the full recipe, check out the details above. To get the best texture for your chickpea salad melts, mash the chickpeas just right. Use a fork to mash them until they are mostly smooth, but leave some whole. This gives a nice bite. If you mash them too much, the mixture will turn mushy. You want a mix of creamy and chunky for great mouthfeel. Serve your chickpea salad melts warm. This brings out the flavors of the cheese and the salad. You can top them with fresh herbs like parsley or more dill to add color. A drizzle of extra virgin olive oil adds richness too. For a fun twist, add sliced avocado or pickled jalapeños on top for extra flavor. Pair your chickpea salad melts with a light side. A fresh green salad with lemon vinaigrette works great. You can also serve them with roasted veggies for a heartier meal. If you want something crunchy, try serving with carrot sticks or cucumber slices. They add a nice contrast to the warm melts. For a cozy feel, a warm bowl of tomato soup complements this dish nicely. For the complete recipe, check out the [Full Recipe]. {{image_2}} To make vegan chickpea salad melts, skip the Greek yogurt and mayonnaise. Use mashed avocado or vegan mayo instead. It gives a creamy texture without dairy. You can also add a bit of lemon juice for flavor. This keeps the dish fresh and bright. For a spicy kick, add diced jalapeños or red pepper flakes to the chickpea mix. The heat pairs well with the coolness of the yogurt. You can also use pepper jack cheese for a spicier melt. It adds a nice flavor punch that wakes up your taste buds. If you need a grain-free or gluten-free option, use lettuce wraps instead of bread. Simply fill large lettuce leaves with the chickpea mixture. You can also use gluten-free bread. Just ensure it’s sturdy enough to hold the filling without falling apart. This keeps your meal light and healthy while still being satisfying. For more details on preparing these delicious variations, check the Full Recipe. Leftover chickpea salad melts are easy to store. Place them in an airtight container. Make sure to separate layers with wax paper to keep them fresh. You can keep them in the fridge for up to three days. If you notice any moisture, use a paper towel to absorb it. When you want to enjoy your chickpea salad melts again, reheating is simple. Preheat your oven to 350°F (175°C). Place the melts on a baking sheet and cover them with foil. This helps keep the bread from getting too hard. Heat them for about 10-15 minutes. Check to make sure the cheese is bubbly and warm. If you want to freeze chickpea salad melts, it’s best to freeze them before baking. Assemble the melts on a baking sheet, then wrap each one in plastic wrap. Store them in a freezer-safe bag or container. They can last for up to three months in the freezer. When ready to eat, thaw in the fridge overnight and then bake as usual. This method keeps your meal prep easy and delicious. For the full recipe, visit the Chickpea Salad Melts section. Yes, you can use canned chickpeas. They are quick and easy. Just drain and rinse them before using. This saves you time and makes cooking easier. Canned chickpeas have great taste and texture. You won’t lose any flavor by using them. Whole grain bread works best for Chickpea Salad Melts. It adds a nutty flavor and good texture. Sourdough or rye bread also makes great choices. They hold up well under the chickpea salad. Choose a bread you enjoy to enhance the meal. To make this recipe more filling, add protein. You can mix in cooked chicken or turkey. Tofu or tempeh also works well for a plant-based option. Adding avocado gives a creamy texture and healthy fats. You might also serve it with a side salad or soup. You can add a variety of toppings for fun. Try sliced avocado for creaminess. Fresh herbs like basil or cilantro add flavor. You could also use pickled jalapeños for heat. A drizzle of hot sauce gives a spicy kick. Get creative with your favorite toppings! Chickpea salad melts are simple and fun to make. We covered key ingredients, their benefits, and swaps for diets. You learned step-by-step instructions and tips for the best texture. Variations like vegan and spicy options offer great choices for everyone. Storing and reheating is easy, too. Embrace your creativity with this dish. Enjoy experimenting and making it your own!

Chickpea Salad Melts Tasty and Hearty Lunch Idea

Are you looking for a tasty and hearty lunch idea that’s quick to prepare? Look no further than Chickpea Salad

- 1 package (16 oz) frozen pierogi (choose your favorite filling) - 1 medium onion, diced - 2 cups shredded potatoes (fresh or frozen) Crockpot Pierogi Casserole is simple and tasty. The main ingredients make this dish special. You start with frozen pierogi. They save time and are easy to use. Choose your favorite filling, like cheese or potato. Next, you have shredded potatoes. They add creaminess and texture. Then, you have onion. Dicing the onion gives a nice flavor. You can also add garlic to boost the taste. - Alternative cheeses - Broth options (chicken or vegetable) - Vegetable substitutes You can make this casserole your own with optional ingredients. Try different cheeses, like mozzarella or gouda. Each cheese brings a new flavor. You can also choose chicken or vegetable broth. The broth adds moisture and makes the dish richer. If you want to add veggies, consider mushrooms or spinach. These add color and nutrients. - 1 teaspoon garlic powder - 1 teaspoon onion powder - Salt and pepper to taste - Fresh chives, chopped (for garnish) Seasoning is key to great flavor. Use garlic powder and onion powder for depth. Salt and pepper help balance the taste. Finally, fresh chives add a pop of color and flavor. They make your dish look nice and taste fresh. For the full recipe, check out the detailed steps to create this easy comfort food. To start, heat olive oil in a skillet over medium heat. Add the diced onion and sauté until it turns soft and clear, about 5-7 minutes. This step boosts the flavor of your casserole. Next, grab your crockpot. Layer half of the frozen pierogi at the bottom. Then, sprinkle half of the shredded potatoes evenly over the pierogi. Follow this with half of the sautéed onions, half of the sour cream, and half of the shredded cheese. Repeat this layering with the rest of the pierogi, potatoes, onions, sour cream, and cheese. Now it’s time to cook! You can set the crockpot on low for 6-8 hours or on high for 3-4 hours. Both settings work well. You want the potatoes to be tender and the cheese to be melted and bubbly. To check doneness, insert a fork into the layers; it should slide in easily. Once the cooking time is up, gently stir the casserole. This mixes the layers and makes each bite tasty. For serving, use bowls straight from the crockpot. Garnish with fresh chives for color and flavor. Pair with a crisp salad for a delightful meal. Enjoy your comforting Crockpot Pierogi Casserole! For the full recipe, check out the [Full Recipe]. To get the best texture in your crockpot pierogi casserole, start by choosing the right type of pierogi. I recommend using frozen pierogi with hearty fillings like potato and cheese. These will hold up well during cooking. If you decide to use fresh pierogi, reduce the cooking time to ensure they don’t turn mushy. For cooking times, set your crockpot on low for 6-8 hours or high for 3-4 hours. This will let the flavors blend and keep the pierogi tender. To make your casserole burst with flavor, incorporate spices and herbs. Simple additions like thyme or dill can elevate your dish. You can also sprinkle some paprika on top for an extra kick. Pair your casserole with a fresh salad or steamed veggies. These sides balance the richness of the casserole. Cheese is a game-changer in this dish. You can use sharp cheddar for a strong flavor. Monterey Jack or mozzarella can also work well if you prefer a milder taste. For a cheesy topping, mix some cheese with breadcrumbs and sprinkle it on top during the last 30 minutes of cooking. This adds a delicious crunch. For the full recipe, you can follow the steps laid out earlier. Enjoy your cooking! {{image_2}} You can easily change this casserole to fit your needs. For a vegetarian version, swap the pierogi filling. Use cheese and potato pierogi or try spinach and cheese for a fresh taste. You can also add sautéed mushrooms for more depth. If you're gluten-free, choose gluten-free pierogi. Many brands offer this option now. You can also make your own if you feel adventurous. Just replace regular flour with a gluten-free blend, and enjoy the same great taste. Pierogi come in many styles, depending on their region. You might explore flavors from Poland, Ukraine, or even the U.S. Each area has its own favorite fillings and spices. For instance, try adding sauerkraut for a tangy twist, or mix in some smoked sausage for a hearty version. You can also use local ingredients to enhance the dish. If you live near a farm, grab fresh herbs or seasonal vegetables. This not only boosts flavor but also gives your casserole a unique touch. Serving this casserole can be fun and creative. You can dish it up right from the crockpot, keeping it warm and inviting. For a nice touch, serve it in bowls and sprinkle fresh chives on top. This adds color and flavor. Pair your casserole with a crisp salad or some roasted veggies. A cold drink, like sparkling water or cider, can also complement the meal nicely. You’ll find that these pairings enhance the comfort food experience! For the full recipe, check out the [Full Recipe]. To store leftovers, let the casserole cool completely. Transfer it into an airtight container. Glass or plastic containers work well. Make sure to seal it tightly to keep out air. You can keep it in the fridge for up to three days. To reheat the casserole, use the microwave or the oven. In the microwave, heat in short bursts. Stir the casserole every minute to warm it evenly. In the oven, place it in a covered dish at 350°F for about 20 minutes. This keeps the flavors and texture nice. If it's dry, add a splash of broth. You can freeze leftovers for later use. First, cool the casserole and then cut it into portions. Wrap each portion tightly in plastic wrap. Place the wrapped portions in a freezer-safe bag or container. It can last up to three months in the freezer. To thaw, move it to the fridge for a few hours or overnight. Reheat as mentioned above. Enjoy your delicious meal again without fuss! For the Full Recipe, check out the earlier section. How long can I refrigerate leftovers? You can refrigerate leftovers for up to four days. Just store them in an airtight container. This keeps them fresh and safe to eat. Can I use fresh pierogi instead of frozen? Yes, you can use fresh pierogi! Fresh pierogi will add a nice texture. Just adjust the cooking time slightly since they may need less time than frozen ones. What to do if the casserole is too dry? If your casserole seems dry, add more broth. You can also stir in a little sour cream. This will help moisten it and add flavor. Can I cook this on a stovetop if I don’t have a crockpot? Yes, you can cook it on the stovetop! Just layer the ingredients in a large pot. Cook on low heat, covered, for about 30-45 minutes. Stir occasionally to avoid sticking. What can I substitute for sour cream? You can use Greek yogurt as a great sour cream substitute. It will give a similar tangy taste. You can also try cream cheese or a plant-based yogurt. How to make it dairy-free? To make this dish dairy-free, use dairy-free cheese and yogurt. Look for options made from nuts or soy. You can also omit cheese altogether for a lighter dish. This blog post covered how to create a delicious pierogi casserole. We talked about key ingredients like frozen pierogi, shredded potatoes, and savory onions. You learned step-by-step instructions for prep and cooking, plus tips for enhancing texture and flavor. I also shared various recipe variations and storage tips. As you try this dish, remember to experiment with ingredients and seasonings. Make it your own, and enjoy each bite with family and friends.

Crockpot Pierogi Casserole Easy Comfort Food Delight

Looking for a cozy dish that warms the heart? Try my Crockpot Pierogi Casserole! This easy recipe combines frozen pierogi

To create this delightful coconut panna cotta, gather these simple ingredients: - 2 cups coconut milk - 1 cup heavy cream - 1/2 cup granulated sugar - 2 teaspoons powdered gelatin - 3 tablespoons cold water - 1 teaspoon vanilla extract - Pinch of salt - Fresh mango slices (for garnish) - Toasted coconut flakes (for garnish) These ingredients combine to make a smooth and creamy dessert. Coconut milk gives it that rich flavor, while heavy cream adds a luscious texture. The sugar sweetens it just right, and the gelatin helps it set perfectly. The vanilla extract adds warmth, and a pinch of salt brings out all the flavors. Using fresh mango slices as a garnish adds a nice pop of color and flavor. Toasted coconut flakes give a crunchy finish that complements the creamy panna cotta. Once you gather these ingredients, you’re ready to make your Coconut Panna Cotta. For the complete method, check the Full Recipe. First, we need to prepare the gelatin. Take a small bowl and sprinkle the powdered gelatin over 3 tablespoons of cold water. Let it sit for about 5 minutes. This step helps the gelatin bloom. You want it to absorb the water and become soft. It is key for that perfect panna cotta texture. Next, let’s cook the coconut mixture. In a medium saucepan, combine 2 cups of coconut milk, 1 cup of heavy cream, 1/2 cup of granulated sugar, 1 teaspoon of vanilla extract, and a pinch of salt. Heat this mixture over medium heat. Stir it occasionally until the sugar dissolves. The mix should be warm but not boiling. This part is where the flavors come together. Once the mixture is warm, add the bloomed gelatin from the bowl. Stir continuously until the gelatin completely dissolves and the mixture is smooth. This step is important, as it ensures that the gelatin mixes well with the liquid. Now, let's set the panna cotta. First, remove the saucepan from the heat and let the mixture cool slightly. Next, pour the coconut mixture into individual ramekins or serving cups. Cover them with plastic wrap to keep out any odors in the fridge. Refrigerate the panna cotta for at least 4 hours. This time allows it to set properly. You can leave it overnight if you prefer. When you are ready to serve, gently run a knife along the edge of each panna cotta. Invert it onto a serving plate or serve directly in the ramekins. For a finishing touch, garnish with fresh mango slices and a sprinkle of toasted coconut flakes on top. This adds a nice crunch and tropical vibe to your dessert. If you want the full recipe, check out the details I provided earlier. Enjoy your creamy coconut panna cotta! To make coconut panna cotta just right, follow these key steps. First, use high-quality coconut milk. This ensures your panna cotta is rich and creamy. Second, don’t skip the blooming step for the gelatin. This helps it dissolve better in the warm mixture. If you want a firmer panna cotta, add a bit more gelatin. If you prefer it softer, reduce the amount. Substituting coconut cream You can swap some of the coconut milk for coconut cream. This will make your dessert even creamier. Coconut cream adds a lovely depth of flavor. Just remember to adjust the sugar, as coconut cream is richer. Adjusting sweetness Taste your mixture before pouring it into the ramekins. If you want it sweeter, add more sugar. You can also use honey or maple syrup for a different taste. Just mix it in well until it dissolves. Using fresh fruits and toppings Fresh fruits like mango, berries, or passion fruit add color and taste. They make your panna cotta look beautiful. Simply slice the fruit and place it on top before serving. You can also sprinkle toasted coconut flakes for extra crunch. Decorative serving ideas Use clear cups or glass jars for serving. This lets the creamy layers show through. You can layer the panna cotta with fruit puree for a stunning look. Another fun idea is to add a drizzle of chocolate sauce or a mint leaf on top for style. For a detailed guide, check out the Full Recipe. {{image_2}} You can enhance coconut panna cotta with tropical fruits. Think about adding fresh mango, pineapple, or passion fruit. These fruits bring bright flavors and colors. You can layer them on top or mix them into the panna cotta. For a fun twist, try a mango puree. It adds a sweet and fruity touch that pairs well with creamy coconut. You can infuse your panna cotta with different flavors. Here are a few ideas: - Coffee or chocolate infusion: Add brewed coffee or cocoa powder to the coconut mixture. This gives a rich, deep flavor. Just remember to adjust the sugar to balance the taste. - Citrus versions: Incorporate lemon or lime zest for a refreshing zing. This brightens up the dessert and adds a new dimension. These variations keep your panna cotta exciting and unique. If you want a vegan version, it’s easy to swap ingredients. Replace heavy cream with coconut cream or almond milk. This keeps the creamy texture and rich flavor. For the gelatin, use agar-agar. This seaweed-based thickener works well and sets the panna cotta nicely. Follow the same steps, but dissolve agar-agar in boiling water first. This ensures it activates properly. These simple changes let everyone enjoy this delightful dessert! After you make your coconut panna cotta, let it cool. Cover each ramekin with plastic wrap. This keeps it fresh in the fridge. You can store it for up to four days. The panna cotta stays creamy, and the flavor remains delightful. Just remember to keep it sealed tight to avoid absorbing other smells. You can freeze coconut panna cotta if you need to keep it longer. Place the panna cotta in a freezer-safe container. It can last in the freezer for about one month. To thaw, move it to the fridge overnight before serving. Avoid refreezing it after thawing, as it can change the texture. If you refrigerate the panna cotta, serve it cold. If you prefer it slightly warmed, place it in a microwave for about 10 seconds. Be careful not to heat it too long. You want to keep that creamy texture. Always check after heating to ensure it’s just right. For the best presentation, garnish with fresh mango slices and toasted coconut flakes just before serving. Coconut panna cotta stays fresh in the fridge for about 4 days. Make sure to store it in an airtight container. This keeps it tasting great and safe to eat. Yes, you can make coconut panna cotta a day or two ahead. This dessert tastes even better when chilled. Just follow the recipe and let it set well in the fridge. If you want a vegan option, use agar-agar instead of gelatin. Agar-agar is a seaweed-based thickener. It works well with coconut milk and gives a similar texture. You might need to adjust the amount, so check the package for details. You can serve coconut panna cotta in ramekins for a nice look. Just run a knife around the edge and flip it onto a plate. You can also leave it in the ramekins. Top with fresh mango slices and toasted coconut flakes for a tropical touch. For the full recipe, check out the earlier section. Coconut panna cotta is a fun dessert with rich flavors. We explored its simple ingredients, easy steps, and helpful tips. Don’t forget the variations to make it unique. You can add tropical fruits or try a vegan option. Proper storage ensures it stays fresh longer. Enjoy serving this treat that impresses everyone. With this guide, you can create a delicious panna cotta, delighting your friends and family.

Coconut Panna Cotta Delightfully Creamy Dessert Recipe

If you crave a dessert that’s creamy, dreamy, and tropical, let me introduce you to Coconut Panna Cotta. This delightful

To make these tasty chicken tenders, you need just a few key items: - 1 pound chicken tenders - 1 cup breadcrumbs (preferably panko for extra crunch) - 1/2 cup grated Parmesan cheese - 1 teaspoon garlic powder - 1 teaspoon onion powder - 1 teaspoon dried Italian seasoning - 2 large eggs - 1 tablespoon Dijon mustard - Salt and pepper to taste - Cooking spray or olive oil for greasing These ingredients come together to create a crispy, cheesy coating that makes each bite delightful. You can add more flavor to your chicken tenders with some optional seasonings. Here are some ideas: - Smoked paprika for a hint of smokiness - Cayenne pepper for a little heat - Lemon zest for a fresh touch - Fresh herbs like thyme or rosemary for extra aroma Feel free to mix and match these spices to make the dish your own. Dipping sauces can take your chicken tenders to the next level. Here are some crowd-pleasers: - Marinara sauce for a classic twist - Honey mustard for a sweet and tangy kick - Ranch dressing for a creamy option - BBQ sauce for a smoky flavor Serve your tenders with one or more of these dips for a fun, tasty experience. For the full recipe, check out the complete instructions above. Start by gathering all your ingredients. You will need chicken tenders, breadcrumbs, and Parmesan cheese. Make sure your chicken is fresh and thawed if frozen. Next, preheat your oven to 425°F (220°C). Lining a baking sheet with parchment paper helps make clean-up easy. It also helps the chicken crisp up nicely. In a shallow dish, mix the breadcrumbs, Parmesan cheese, garlic powder, onion powder, and Italian seasoning. This blend gives your chicken a tasty crust. Add salt and pepper to taste. In another bowl, whisk the eggs and Dijon mustard together. This mixture helps the breadcrumbs stick to the chicken. Now, take each chicken tender and dip it into the egg mixture. Let any extra egg drip off. Immediately place it into the breadcrumb mix. Press down to coat every side of the chicken. This ensures a good crunch. Place the coated chicken tenders on your prepared baking sheet. For extra crispiness, lightly spray the tops with cooking spray or drizzle with olive oil. Bake your chicken tenders in the preheated oven for 15 to 20 minutes. You want them cooked through and golden brown. To make them even crispier, turn on the broiler for the last 2 to 3 minutes. After baking, let the chicken cool for a few minutes before serving. This waiting time helps keep the juices inside. For a great touch, serve them with marinara sauce or honey mustard for dipping. Enjoy your delicious Oven-Baked Crispy Parmesan Chicken Tenders! For the full details on ingredients and more, check out the Full Recipe. To get that perfect crispiness, choose panko breadcrumbs. They create a light, crunchy coating. Make sure to coat the chicken evenly with the egg mixture. Let any excess drip off to avoid sogginess. After breading, lightly spray the chicken with cooking oil. This helps it brown well in the oven. Bake at 425°F (220°C) to achieve that golden look. If you want extra crispiness, broil for 2-3 minutes at the end. One common mistake is overcrowding the baking sheet. Leave space between each tender. This allows hot air to circulate and crisp everything up. Another mistake is skipping the oil spray. Without it, the tenders may not brown properly. Also, keep an eye on cooking time. Overbaking can lead to dry chicken. Use a meat thermometer to check for doneness; it should read 165°F (74°C). Serve your chicken tenders hot for the best taste. Arrange them on a platter for a nice look. Pair them with sauces like marinara or honey mustard. Fresh herbs, like parsley, add color and flavor. If you want to make it a meal, serve with a side salad or roasted veggies. This balances the meal and keeps it fresh. For the full recipe, check the section above. Enjoy your delicious creation! {{image_2}} You can change the taste of your chicken tenders easily. For a spicy kick, add cayenne pepper to the breadcrumb mix. A little goes a long way! If you love a smoky flavor, try smoked paprika instead. You can also mix in some lemon zest for a fresh twist. Each option adds a unique touch to your dish. If you need a gluten-free version, use gluten-free breadcrumbs. Many brands offer these now. You can also grind gluten-free crackers into crumbs. They work well and add a nice flavor. Just be sure to check the labels for any hidden gluten. Dipping sauces can make your chicken tenders even better. Try honey mustard for a sweet and tangy taste. BBQ sauce is always a favorite, too. For something different, mix yogurt with fresh herbs for a cool dip. A spicy sriracha mayo also adds a fun kick. Each sauce can change the whole meal! For more details on making these tasty tenders, check out the Full Recipe. After making your oven-baked crispy Parmesan chicken tenders, let them cool. Store them in an airtight container. They will stay fresh for up to three days in the fridge. To keep them crispy, place a paper towel at the bottom of the container. This helps absorb moisture. You can freeze the chicken tenders if you have leftovers. First, let them cool completely. Then, place them in a single layer on a baking sheet. Freeze them for about one hour. After that, transfer them to a freezer bag. They can last in the freezer for up to three months. Label the bag with the date for easy tracking. To reheat your chicken tenders, preheat the oven to 375°F (190°C). Place the tenders on a baking sheet. This helps them get crispy again. Bake for about 10-15 minutes or until heated through. You can also use an air fryer for reheating. Just set it to 350°F (175°C) for about 5-7 minutes. This gives you that fresh-out-of-the-oven taste. Enjoy your meal! For the full recipe, check the earlier section. You should bake chicken tenders for 15 to 20 minutes. This time allows the chicken to cook through. The coating will become golden and crispy. Always check the chicken's internal temperature. It should reach 165°F (75°C) for safety. Yes, you can use frozen chicken tenders. However, you need to adjust the cooking time. Frozen tenders may take longer to bake. I suggest following the package instructions for best results. Thawing them first can also help ensure even cooking. You can use crushed cornflakes or oats as substitutes for breadcrumbs. Panko breadcrumbs give a nice crunch, but alternatives work well too. You can also try ground nuts for a unique flavor. Each option will change the texture slightly, but all are tasty. To make chicken tenders extra crispy, use panko breadcrumbs. They are lighter and crispier than regular breadcrumbs. Also, lightly spray the tops with cooking oil before baking. Lastly, broil the tenders for the last few minutes. This creates a delightful crunch. For the full recipe, check the earlier section. You now have a clear guide to making crispy Parmesan chicken tenders. We explored key ingredients, the proper baking steps, and tips for achieving perfect crunch. Remember to try various flavors and sauces to keep things exciting. Store leftovers correctly to enjoy them later. Cooking should be fun and satisfying. With these steps, you can make a meal that everyone loves. Now, it’s time to get cooking and impress your family with your tasty chicken tenders!

Oven-Baked Crispy Parmesan Chicken Tenders Delight

Are you ready to take your chicken dinner to a whole new level? My Oven-Baked Crispy Parmesan Chicken Tenders are

To make Mini McGriddle Bites, you need simple ingredients: - 1 cup pancake mix - 3/4 cup buttermilk - 1 tablespoon maple syrup - 1 large egg - 1/2 pound breakfast sausage, cooked and crumbled - 1/2 cup shredded cheddar cheese - 1 tablespoon butter, for cooking - Additional maple syrup for serving These ingredients work well together. The pancake mix forms the base, while buttermilk adds a nice flavor. The egg binds everything, and maple syrup gives a sweet touch. The sausage and cheese add heartiness. You can boost flavor with some fun add-ins. Here are a few ideas: - Chopped green onions - Diced bell peppers - Cooked bacon bits - Spices like black pepper or paprika These add-ins bring different tastes and textures. You can mix and match based on what you enjoy. Each serving of Mini McGriddle Bites packs a good punch. Here’s a quick look at the nutrition: - Calories: About 250 - Protein: 12 grams - Fat: 15 grams - Carbohydrates: 20 grams This snack is filling and tasty. It offers protein from sausage and cheese, plus carbs from the pancake mix. Enjoy these bites as a quick meal or snack! For the full recipe, check out the instructions above. Start by grabbing a large mixing bowl. Add 1 cup of pancake mix. Then, pour in 3/4 cup of buttermilk. Next, add 1 tablespoon of maple syrup and crack in 1 large egg. Use a whisk and mix until just combined. Don't worry about lumps; they are okay. Now, fold in 1/2 pound of cooked and crumbled breakfast sausage. Add 1/2 cup of shredded cheddar cheese to the batter. Mix gently so that you keep the cheese and sausage pieces intact. Heat a skillet or griddle over medium heat. Add 1 tablespoon of butter and let it melt, coating the pan. For each mini pancake, scoop a tablespoon of batter onto the skillet. Aim for about 2 inches in diameter. Cook each mini pancake for 2-3 minutes. Wait for bubbles to form on the surface. Flip the pancakes and cook for another 1-2 minutes. They should turn a golden brown. Keep repeating this process until all the batter is used. Remember to add more butter as needed. Once all pancakes are cooked, it’s time to assemble. Take two mini pancakes and place a dollop of extra maple syrup between them. Press them gently together. You now have a tasty Mini McGriddle Bite! Enjoy these delightful snacks right away, or make a big batch for a fun gathering. For the complete recipe, check the Full Recipe above. To make great Mini McGriddle Bites, start with the right pancake batter. Use one cup of pancake mix for the base. Combine it with three-quarters of a cup of buttermilk. Add one tablespoon of maple syrup and one large egg. Mix just until smooth; a few lumps are fine. This keeps your pancakes fluffy and light. You will need a skillet or griddle for cooking. Preheat it on medium heat. Add one tablespoon of butter to coat the surface. This adds flavor and helps prevent sticking. Use a tablespoon to scoop the batter into small circles. Cook them for two to three minutes on one side. Look for bubbles on the surface as a sign to flip. Cook them until golden brown for the best taste. Serve your Mini McGriddle Bites warm. Stack them high on a plate for a fun look. Drizzle extra maple syrup on top for sweetness. You can also add fresh berries for color and taste. These bites make a great snack or breakfast. For extra flavor, try pairing them with sausage links or crispy bacon. Want to explore more? Check out the Full Recipe for complete details! {{image_2}} You can play with flavors in your Mini McGriddle Bites. Add chocolate chips for a sweet treat. Try spinach and feta for a savory twist. Other great options include diced jalapeños for some heat or blueberries for a fruity kick. These mix-ins make your bites fun and tasty. If you need gluten-free bites, use a gluten-free pancake mix. You can also make vegan Mini McGriddle Bites. Replace the egg with mashed banana or applesauce. Use plant-based sausage in place of regular sausage. For the buttermilk, try almond milk mixed with vinegar. These options keep the bites delicious for everyone. Serve your Mini McGriddle Bites in fun ways. Arrange them on a platter for a party. Stack them high and drizzle maple syrup on top. You can also pair them with fresh fruits, like strawberries and bananas. For a dipping experience, add small bowls of syrup or fruit compote. These ideas make your bites look and taste special. Check out the Full Recipe for more inspiration! Store any leftover Mini McGriddle Bites in an airtight container. Keep them in the fridge. They will stay fresh for up to three days. If you want to enjoy them later, make sure they cool completely. This helps prevent moisture from building up. When you're ready to eat your leftover bites, you can reheat them easily. Use a microwave, oven, or skillet. For a microwave, place them on a plate and heat for 20 to 30 seconds. If using an oven, preheat to 350°F (175°C). Heat for about 10 minutes or until warm. If you prefer the skillet, place them over low heat for a few minutes. This helps keep them crispy. You can freeze Mini McGriddle Bites for longer storage. First, lay them out on a baking sheet. Place them in the freezer until they are solid. Then, transfer them to a freezer bag. This helps save space. They will stay good for up to three months. To reheat, let them thaw in the fridge overnight. Then, follow the reheating instructions above. Enjoy your bites whenever you want! For the full recipe, check out the earlier section. Mini McGriddle Bites are small pancakes that blend sweet and savory flavors. They use pancake mix, buttermilk, sausage, and cheese. The result is a tasty snack that is both fluffy and filling. You can enjoy them for breakfast, lunch, or even dinner. They are fun to eat and perfect for sharing. Each bite offers a combination of maple syrup and sausage, bringing joy to your taste buds. Yes, you can make Mini McGriddle Bites ahead of time. Prepare them in advance and store them in the fridge. They stay fresh for up to two days. Just reheat them in a skillet or microwave when you are ready to eat. This makes them a great snack for busy days. They are easy to grab and go, perfect for a quick meal. Some great dipping sauces for Mini McGriddle Bites include maple syrup and honey. You can try spicy mustard or ranch dressing for a fun twist. You can also mix cream cheese with chives for a savory dip. These sauces add extra flavor and make each bite even better. Experiment with different options to find your favorite! In this post, I shared how to make Mini McGriddle Bites, from key ingredients to cooking steps. You learned tips for perfecting the pancake batter and explored fun flavor variations. Remember to store leftovers correctly for the best taste later. Mini McGriddle Bites are versatile and can cater to different diets. Try different flavors or serving ideas to keep things fresh. This treat is sure to please everyone. Enjoy your cooking adventures with these delicious bites!

Mini McGriddle Bites Easy and Flavorful Snack Ideas

Looking for a fun and tasty snack? Mini McGriddle Bites are here to impress! These little bites combine sweet and

- 1 ½ cups graham cracker crumbs - ½ cup unsalted butter, melted - 2 tablespoons sugar - 16 oz cream cheese, softened - 1 cup powdered sugar - 2 teaspoons vanilla extract - 3 large eggs - 1 cup sour cream - 1 tablespoon lemon juice - 2 cups fresh strawberries, hulled and sliced - 1 tablespoon sugar - 1 tablespoon lemon juice To create the perfect strawberry cheesecake, start with the crust. You need graham cracker crumbs, unsalted butter, and sugar. Mix them well, then press the mixture into a springform pan. This blend gives your cheesecake a sweet, crunchy base. For the filling, you will need cream cheese, powdered sugar, vanilla extract, eggs, sour cream, and lemon juice. Make sure your cream cheese is soft. This helps mix it easily. Beat the cream cheese before adding the sugar and other ingredients. This step is key for a creamy texture. For the topping, fresh strawberries are a must. You’ll slice them and mix them with sugar and lemon juice. This brings out their natural sweetness. Let them sit for a bit to create a lovely syrup. Using these ingredients from the Full Recipe will help you make a delicious strawberry cheesecake. - Preheat the oven to 325°F (160°C). - In a bowl, combine 1 ½ cups graham cracker crumbs, ½ cup melted unsalted butter, and 2 tablespoons sugar. Mix until the crumbs look like wet sand. - Press this mixture into the bottom of a 9-inch springform pan. Bake for 10 minutes, then remove and let it cool. - In a large bowl, beat 16 oz of softened cream cheese with an electric mixer. Keep mixing until it is smooth. - Gradually add 1 cup of powdered sugar, mixing until blended. - Now, slowly mix in 2 teaspoons vanilla extract, 3 large eggs (one at a time), 1 cup of sour cream, and 1 tablespoon lemon juice. Beat on low. Don’t overmix! - Pour the filling over the cooled crust. Smooth the top with a spatula. - Bake the cheesecake for 55 to 60 minutes. The edges should be set, but the center may jiggle a bit. - After baking, turn off the oven. Leave the cheesecake inside with the door slightly open for 1 hour to cool down slowly. - After that, let it cool to room temperature. Refrigerate for at least 4 hours or overnight before enjoying it. For the full recipe, check the main article. - Use room temperature ingredients for a smoother blend. - Avoid overmixing to prevent cracks. When making cheesecake, texture is key. If you want a smooth result, make sure your cream cheese is at room temperature. Cold cream cheese won’t blend well and can lead to lumps. I always take it out of the fridge an hour before I start. Mix it slowly, and don’t rush. Overmixing adds air, which can cause cracks when baking. Keep your mixer on low and blend just until combined. - Garnish with mint leaves and strawberry syrup. - Serve slices on individual plates for presentation. Presentation makes a big difference. I love to add fresh mint leaves on top for a pop of color. Drizzle some strawberry syrup around each slice for a nice touch. This simple step makes your cheesecake look more inviting. When serving, place each slice on individual plates. It adds a personal touch and makes it feel special. - Not letting the cheesecake cool gradually. - Skipping the refrigeration step. Cooling is crucial. After baking, let your cheesecake cool in the oven with the door slightly open. This helps prevent cracks. If you rush it, your cheesecake might crack. Also, refrigeration is a must. It helps set the flavors and gives the cheesecake its perfect texture. If you skip this step, you’ll end up with a cheesecake that isn’t as rich or creamy. For the full recipe, check out Strawberry Bliss Cheesecake . {{image_2}} You can make a quick no-bake version. This makes it easy and fast. Here’s how: - Ingredients: - 1 ½ cups graham cracker crumbs - ½ cup unsalted butter, melted - 2 cups cream cheese, softened - 1 cup powdered sugar - 1 cup whipped cream - 2 cups fresh strawberries, hulled and sliced - Instructions: 1. Mix graham cracker crumbs and melted butter in a bowl. 2. Press the mix into a springform pan. 3. In another bowl, beat cream cheese and powdered sugar until smooth. 4. Fold in the whipped cream gently. 5. Spread the mixture over the crust. 6. Top with fresh strawberries. 7. Chill for at least 4 hours before serving. You can also try crusts made of Oreos or nuts for a twist. If you want a vegan option, it's easy to swap out some ingredients. - Substitutions: - Use cashew cream or silken tofu instead of cream cheese. - Replace sour cream with coconut milk. - Make sure to blend the cashew cream or tofu until smooth. This will give you a creamy filling that everyone can enjoy. For those who need gluten-free, you can still enjoy this delight. - Crust: - Use gluten-free graham crackers for the crust. - You can also use almond flour mixed with butter as a base. - Tips: - Always check labels to ensure all ingredients are gluten-free. - Be careful with toppings and any mix-ins. These variations let you enjoy strawberry cheesecake in many ways. Try them and find your favorite! For the full recipe, check out the earlier sections. After enjoying your cheesecake, store leftovers in the refrigerator. Use an airtight container to keep it fresh. This method helps maintain the taste and texture. For the best flavor, eat your cheesecake within 3-4 days. You can freeze strawberry cheesecake for later enjoyment. To do this, wrap the cheesecake tightly in plastic wrap. Then, place it in a freezer-safe container. It can last up to three months in the freezer. When you're ready to eat it, thaw it in the fridge overnight. This method keeps the cheesecake creamy and tasty. Watch for changes to know if your cheesecake is still good. If the texture becomes grainy or if it smells off, it’s best to toss it. Cheesecake can last up to a week in the fridge. Always trust your senses when checking for spoilage. To check if your cheesecake is done, look for a slight jiggle in the center. The edges should be set, but the middle will still be soft. Turn off the oven and leave it inside for an hour. This helps it finish cooking slowly. Cooling it gradually prevents cracks. Yes, you can use frozen strawberries! They work well, but they may lose some firmness. Fresh strawberries taste brighter and look nicer. If you use frozen ones, let them thaw first. Then, drain excess liquid before adding them to your cheesecake. If you can't use cream cheese, here are some good options: - Greek yogurt for a creamy texture - Silken tofu for a vegan choice - Ricotta cheese for a lighter flavor These substitutes change the taste and texture a bit, but they still work great. Absolutely! You can prepare it a day or two in advance. Once it cools, cover it and refrigerate. Just make sure to add the strawberry topping right before serving. This keeps the strawberries fresh and flavorful. To cut your cheesecake neatly, use a sharp knife. Dip the knife in hot water and wipe it dry. Cut through the cheesecake, and repeat for each slice. This helps create clean edges. You can also use a piece of dental floss for a fun twist! This cheesecake recipe combines simple ingredients for a delightful treat. We covered how to make the crust, filling, and toppings, along with essential tips to avoid common mistakes. Remember, letting the cheesecake cool gradually is key. Whether making a classic or trying a no-bake version, you can enjoy your delicious creation! Store leftovers properly, and always check for spoilage. I hope you feel inspired to bake and share this tasty dessert with others!

Strawberry Cheesecake Delight Easy and Tasty Recipe

Are you ready to impress your friends and family with a scrumptious Strawberry Cheesecake? This easy and tasty recipe is

Older posts
Newer posts
← Previous Page1 … Page14 Page15 Page16 … Page30 Next →

dsad

© 2025 So Yum Recipes • Built with GeneratePress

Our Policies

  • Copyright Policy
  • Cookie Policy
  • GDPR Policy
  • Privacy Policy
  • Disclaimer
  • Terms Of Use

More Information

  • Home
  • About
  • Contact
  • Appetizers
  • Dessert
  • Dinner
  • Drinks
©2025, So Yum Recipes About Back To Top