Skip to content
DisclaimerTerms Of UseGDPR PolicyCookie Policy

So Yum Recipes

  • Home
  • Drinks
  • Appetizers
  • Dinner
  • Dessert
  • About
  • Contact
  • Privacy Policy
DisclaimerTerms Of UseGDPR PolicyCookie Policy

Chloe

To make a tasty pumpkin cream pie, you need some key ingredients. Here’s what you’ll need: - 1 ½ cups graham cracker crumbs - ⅓ cup granulated sugar - ½ cup unsalted butter, melted - 1 can (15 oz) pumpkin puree - 1 cup heavy cream - ½ cup brown sugar - 2 eggs - 1 teaspoon vanilla extract - 1 teaspoon ground cinnamon - ½ teaspoon ground ginger - ¼ teaspoon ground nutmeg - ¼ teaspoon salt - Whipped cream, for topping These ingredients blend well together to create a creamy and rich flavor. For a touch of flair, consider these optional ingredients for garnishing: - Whipped cream - Pumpkin spice These additions can enhance the pie's look and taste. They add a festive touch, especially for fall gatherings. Choosing the right ingredients makes a big difference. Here are some tips: - Graham cracker crumbs: Look for fresh crumbs. They should smell sweet and not stale. - Pumpkin puree: Use pure pumpkin, not pumpkin pie filling. This ensures no extra sugars or spices. - Heavy cream: Choose high-quality cream for a rich texture. It helps to create a smooth filling. - Spices: Freshly ground spices work wonders. They have a stronger flavor than pre-ground options. By following these tips, you will ensure your pie tastes amazing! To start, gather your ingredients for the crust. You need: - 1 ½ cups graham cracker crumbs - ⅓ cup granulated sugar - ½ cup unsalted butter, melted First, preheat your oven to 350°F (175°C). In a mixing bowl, combine the graham cracker crumbs and sugar. Pour in the melted butter and mix well. The mixture should feel like wet sand. Next, press this mixture into the bottom and up the sides of a 9-inch pie dish. Use the back of a measuring cup or your fingers to pack it down tightly. Bake the crust for 10 minutes. After that, take it out and let it cool while you prepare the filling. Now, let’s make the pumpkin filling. You will need: - 1 can (15 oz) pumpkin puree - 1 cup heavy cream - ½ cup brown sugar - 2 eggs - 1 teaspoon vanilla extract - 1 teaspoon ground cinnamon - ½ teaspoon ground ginger - ¼ teaspoon ground nutmeg - ¼ teaspoon salt In a large bowl, whisk together the pumpkin puree, heavy cream, brown sugar, eggs, and vanilla extract. Make sure everything is well blended. Then, add the ground spices: cinnamon, ginger, nutmeg, and salt. Whisk again until the mixture is smooth and fully combined. Pour the pumpkin filling into the cooled graham cracker crust. Spread it out evenly. Bake the pie in the preheated oven for 40-45 minutes. You will know it’s done when a toothpick inserted in the center comes out clean. Once baked, remove the pie from the oven. Let it cool to room temperature. After that, place it in the refrigerator for at least 2 hours. This helps the pie set up nicely. Before serving, top each slice with whipped cream. You can also sprinkle some pumpkin spice on top for extra flavor. Enjoy your delicious pumpkin cream pie! To make the best pumpkin cream pie, start with fresh ingredients. Use real pumpkin puree for the best taste. If you use canned pumpkin, make sure it is pure pumpkin, not pumpkin pie filling. For the crust, pack it tightly. This helps keep it from falling apart. Bake the crust until golden brown for a nice crunch. Make sure to cool it before adding the filling. This keeps the crust crisp and tasty. Homemade whipped cream elevates your pie. To make it, use heavy cream. Chill your mixing bowl and beaters first. This helps the cream whip better. Start whipping on low speed, then increase to high. Add sugar and vanilla for flavor. Whip until soft peaks form. Don't over-whip; it can turn into butter. Top each slice of pie with a big dollop for a creamy finish. Avoid these common mistakes to ensure success. First, don’t skip the cooling step for the crust. If it’s warm, it will make the filling runny. Second, don’t overmix the filling. Mix until just combined to keep it light. Lastly, avoid cutting the pie too soon. Let it chill for at least two hours. This helps the filling set properly. Enjoy your perfect pumpkin cream pie! {{image_2}} If you want to switch things up, try different crusts. A traditional pie crust works well. You can also use a cookie crust made from Oreos for a fun twist. For a gluten-free option, use almond flour or gluten-free graham crackers. Each crust brings its own flavor and texture. Just remember to adjust baking times if needed. You can play with the flavors in the filling. Add chocolate chips for a sweet surprise. Mixing in some caramel can give a rich taste. If you love spice, try adding a pinch of clove for depth. You can also use maple syrup instead of brown sugar for a different sweetness. Experiment and find what makes your taste buds dance! This pie is perfect for many occasions. For Thanksgiving, serve it with a dollop of whipped cream. At a summer BBQ, top it with fresh berries for color and taste. Hosting a dinner party? Use a decorative pie dish and add a sprinkle of nutmeg for flair. No matter when you serve it, this pie will impress your guests! Store your leftover pumpkin cream pie in the fridge. Place it in an airtight container. If you do not have one, cover the pie tightly with plastic wrap. This keeps it fresh for about 3 to 4 days. Always keep it chilled to maintain its creamy texture. You can freeze pumpkin cream pie for longer storage. First, let the pie cool completely. Wrap it well in plastic wrap, then in aluminum foil. This double layer helps prevent freezer burn. You can freeze it for up to 2 months. When ready to eat, thaw it in the fridge overnight. To reheat your pie, preheat the oven to 350°F (175°C). Cover the pie with foil to avoid browning. Heat it for about 10 to 15 minutes or until warm. This helps preserve its smooth filling and graham crust. Enjoy your slice with fresh whipped cream for the best taste! You can store pumpkin cream pie in the refrigerator for up to four days. Make sure to cover it well with plastic wrap or foil. This helps keep the pie fresh and tasty. Yes, you can use fresh pumpkin. Just be sure to cook and puree it first. Fresh pumpkin has a lovely flavor, but it needs more prep time. Canned pumpkin is easy and saves time in a busy kitchen. To get a creamy filling, use heavy cream and whisk it well. Make sure all ingredients are mixed smoothly. This helps create that rich texture we love in pumpkin cream pie. Yes, it is important to refrigerate the pie. It helps the filling set better and keeps it safe to eat. Always chill it for at least two hours before serving. Absolutely! You can make this dessert a day or two ahead. Just store it in the fridge until you are ready to serve. This way, you can enjoy your time with friends and family. You now have all the tools to make a delicious pumpkin cream pie. We explored key ingredients, step-by-step instructions, and tips to avoid common mistakes. Variations let you customize the dish for any occasion. Storage tips ensure your pie stays fresh and tasty. This dessert is perfect for gatherings or quiet nights at home. With practice and care, you’ll impress everyone with your skills. Enjoy every slice!

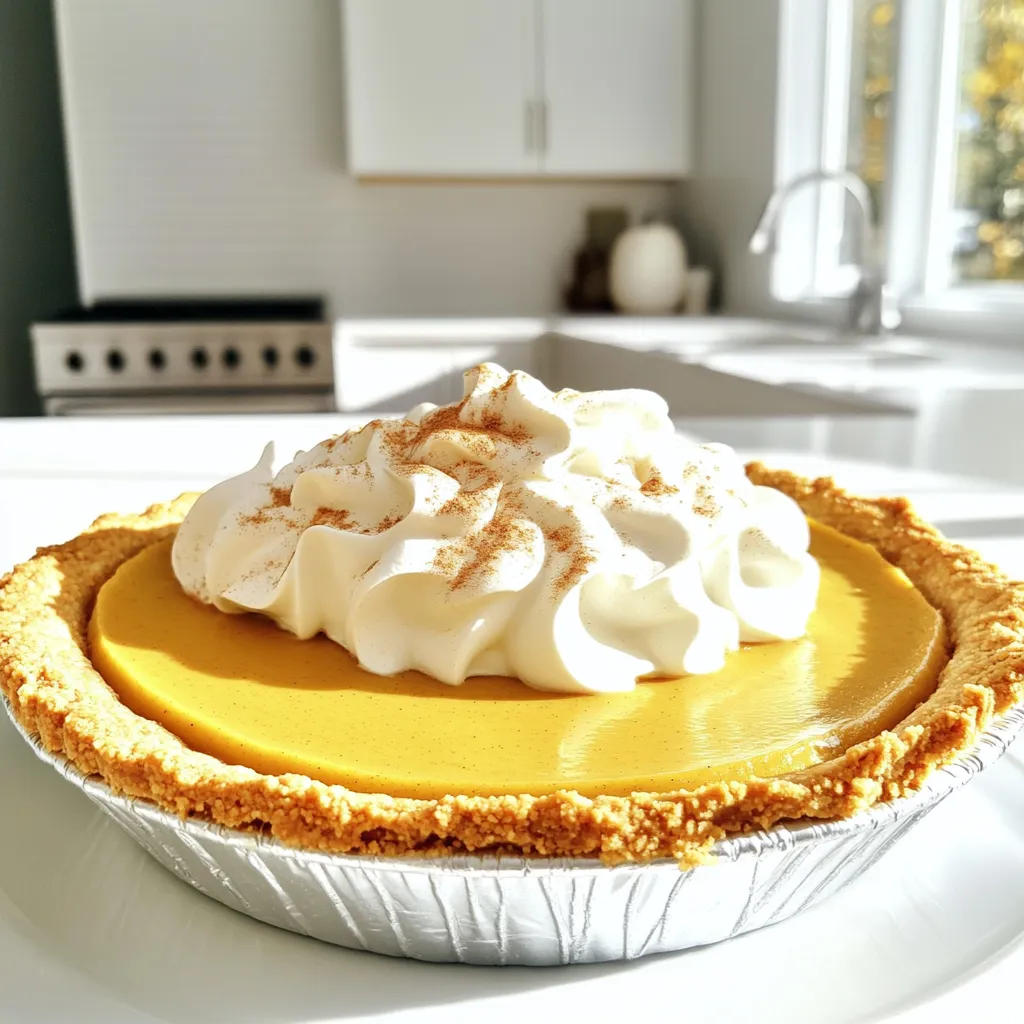
Pumpkin Cream Pie with Graham Crust Mouthwatering Delight

Ready to impress your guests with the perfect fall dessert? My Pumpkin Cream Pie with Graham Crust is rich, creamy,

- 1 cup pumpkin puree (canned or fresh) - 1 cup rolled oats - 1/2 cup almond butter (or peanut butter) For our Chocolate Pumpkin Energy Balls, we start with key ingredients that bring flavor and nutrition. Pumpkin puree is the star here. It adds a rich, creamy texture and a boost of vitamins. Use canned puree for ease or make your own with fresh pumpkin. Next, we have rolled oats. They give the energy balls structure and fiber. Oats keep you full and energized. Almond butter is our fat source. It provides healthy fats and a nutty flavor. You can swap it with peanut butter if you prefer that taste. - 1/2 cup dark chocolate chips - 1/4 cup maple syrup or honey - 1/4 cup shredded coconut (for rolling) Dark chocolate chips add a sweet, rich taste to your energy balls. They melt slightly and create a delightful texture. Maple syrup or honey acts as our sweetener. It gives the energy balls a touch of sweetness while blending well with the pumpkin flavor. If you want a fun texture, consider rolling the balls in shredded coconut. It adds a tropical twist and a nice chew. - 1 teaspoon vanilla extract - 1 teaspoon pumpkin spice blend (cinnamon, nutmeg, and ginger) - 1/2 teaspoon sea salt Vanilla extract enhances all the flavors. It adds warmth and depth to the energy balls. Pumpkin spice is a blend of cinnamon, nutmeg, and ginger. This mix brings a cozy, seasonal flavor that pairs perfectly with pumpkin. Lastly, a pinch of sea salt balances the sweetness. It enhances the overall taste and makes the chocolate pop. With these ingredients, you can create a delicious, no-bake treat that’s both satisfying and healthy. Start by getting a large mixing bowl. Add 1 cup of pumpkin puree, 1/2 cup of almond butter, 1/4 cup of maple syrup, and 1 teaspoon of vanilla extract. Mix these together until the mixture is smooth. This base is the heart of your energy balls. The pumpkin gives it flavor and moisture, while almond butter adds creaminess and protein. Once your base is smooth, it’s time to add the dry ingredients. Sprinkle in 1 cup of rolled oats, 1/2 cup of dark chocolate chips, 1 teaspoon of pumpkin spice, and 1/2 teaspoon of sea salt. Stir well until everything is evenly mixed. Each ingredient plays a role here: oats provide texture, chocolate adds sweetness, and spices give warmth. Now comes the fun part! Take about a tablespoon of the mixture in your hand and roll it into a ball. If you like, you can roll these balls in 1/4 cup of shredded coconut for a nice coating. Place the formed balls on a parchment-lined baking sheet. Repeat this until all the mixture is rolled into balls. After that, chill them in the fridge for at least 30 minutes. This helps them firm up and makes them easier to eat. To get the right texture for your energy balls, you can adjust the nut butter or oats. If the mixture feels too wet, add more oats. If it’s too dry, add a bit more nut butter. This way, you can find the perfect balance for your taste. The right texture makes a big difference in how they hold together. You can boost the flavor with extra spices or nuts. Try adding more pumpkin spice for warmth or a dash of cinnamon for a cozy touch. Chopped nuts like walnuts or pecans add crunch and flavor, too. You can even mix in sunflower seeds for a nut-free option. These small changes can make each bite more exciting. These energy balls are great on their own, but you can pair them with yogurt for a tasty snack. Serve them with a dollop of Greek yogurt for extra creaminess. You can also enjoy them with fresh fruit for a more balanced treat. They make a great addition to lunchboxes or quick breakfasts on the go. {{image_2}} If you need gluten-free options, use certified gluten-free oats. Regular oats may contain gluten from processing. Gluten-free oats allow everyone to enjoy these energy balls. They still taste great and keep the texture you love. Check labels when shopping for oats to ensure they meet gluten-free standards. You can easily change the flavor by using different nut butters. Almond butter adds a light taste, while peanut butter brings a rich nuttiness. You can also swap in dried fruits like cranberries or raisins. This change adds sweetness and chewiness to your energy balls. Experiment with flavors that you enjoy most to customize your snack. During fall, boost the spice flavor with cinnamon, nutmeg, or ginger. In winter, try adding a pinch of cardamom for warmth. Spring calls for bright flavors, so consider adding lemon zest. Summer is perfect for adding fresh mint or even coconut flakes. These small changes keep the energy balls exciting for any season. To keep your Chocolate Pumpkin Energy Balls fresh, use airtight containers. This prevents air from getting in and keeps them moist. Place a layer of parchment paper between layers if you stack them. Store them in the fridge to maintain texture and taste. The cold helps the flavors meld. In the fridge, these energy balls last about a week. They stay fresh and tasty when stored correctly. At room temperature, they last only a few days. The heat can make them soft and change the taste. You can freeze these energy balls for longer storage. To freeze, place them in a single layer on a baking sheet. Freeze them until solid, then transfer to an airtight container. When you're ready to eat, take them out and let them thaw for about 15 minutes. They will taste just as good! Yes, you can! Almond butter gives a nutty taste. Peanut butter adds a richer flavor. Cashew butter is creamy and mild. Each nut butter changes the flavor a bit, so pick one you like! You sure can! Use maple syrup instead of honey for sweetness. Choose almond or peanut butter that is free of animal products. All the other ingredients are already vegan, so you’re good to go! If you don’t have pumpkin puree, use sweet potato puree. It has a similar texture and flavor. You can also try applesauce for a fruity twist. Each of these options will still keep your energy balls tasty! You learned how to make tasty energy balls using simple ingredients like pumpkin puree and oats. Mixing in flavors like vanilla and spices adds deliciousness. Remember to adjust the texture with nut butter or oats. You can customize with chocolate chips or coconut too! Store them in airtight containers for freshness. With these tips and tricks, you’ll enjoy a fun, easy snack. Get creative with flavors or dietary needs. Enjoy your healthy treats!

Chocolate Pumpkin Energy Balls Easy No Bake Recipe

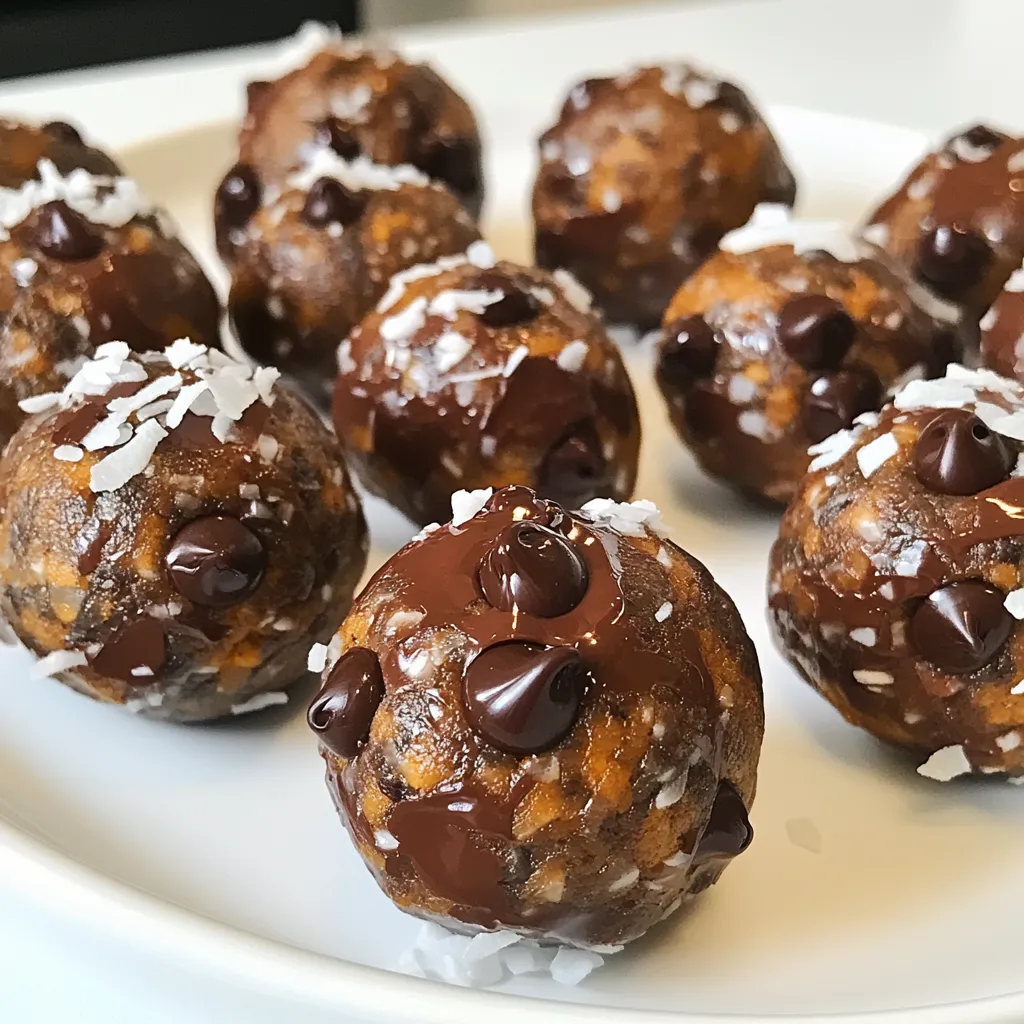
Looking for a tasty snack that packs a punch? Try my easy no-bake Chocolate Pumpkin Energy Balls! They combine healthy

- 4 large russet potatoes, peeled and diced - 1 medium onion, chopped - 3 cloves garlic, minced - 4 cups vegetable broth - 1 cup heavy cream - 1 cup shredded sharp cheddar cheese - ½ cup sour cream - 4 slices turkey bacon, cooked and crumbled - Seasoning ingredients: dried thyme, smoked paprika, salt, and pepper The main ingredients create a rich base for the soup. The russet potatoes lend a creamy texture when cooked. The onion and garlic add depth of flavor. Vegetable broth keeps it light and adds a savory touch. Heavy cream and sour cream make the soup smooth and rich. Cheddar cheese gives that classic loaded baked potato flavor. Turkey bacon adds a savory crunch. Seasonings like thyme and smoked paprika enhance the taste. - ¼ cup sliced green onions - Additional cheese Garnishes bring the soup to life. Sliced green onions add color and a fresh crunch. Extra cheese on top makes it more indulgent. You can mix and match these toppings to suit your taste. These small touches elevate the dish from good to great! - Peel and dice the potatoes. - Chop the onion. - Mince the garlic. Start by peeling four large russet potatoes. Dice them into small, even cubes. This helps them cook evenly. Next, chop one medium onion into small pieces. The onion adds flavor and sweetness. Then, mince three cloves of garlic. Garlic brings a nice depth to the soup. - Combine vegetables and broth in the slow cooker. - Add seasonings. In your slow cooker, mix the diced potatoes, chopped onion, and minced garlic. Pour in four cups of vegetable broth. This broth gives the soup its base. Next, add one teaspoon of dried thyme and one teaspoon of smoked paprika. Sprinkle in salt and pepper to taste. Stir everything together to blend the flavors. - Set timer for cooking on low or high. - Tips for checking potato tenderness. Cover the slow cooker and set it to cook. If you choose low, let it cook for about 6-8 hours. On high, it needs 4-5 hours. To check if the potatoes are tender, simply poke them with a fork. If they easily break apart, they are ready. - Use immersion blender or countertop blender. - How to achieve desired texture. Once the potatoes are tender, it's time to blend. You can use an immersion blender right in the slow cooker. If you prefer, transfer the soup in batches to a countertop blender. Blend until smooth. If you like a chunkier texture, blend less. - Stir in creams and cheeses. - Adjust seasoning to taste. After blending, stir in one cup of heavy cream and one cup of shredded sharp cheddar cheese. Mix until the cheese melts and the soup is creamy. Add half a cup of sour cream for extra richness. Taste the soup and adjust the seasoning if needed. - How to garnish and present the soup. - Pairing options (e.g., bread, salads). Ladle the soup into bowls. Top with crumbled turkey bacon and sliced green onions. You can add more cheese if you like. This soup pairs well with crusty bread or a fresh salad on the side. Enjoy your creamy delight! To make your loaded baked potato soup even better, add a touch of garlic powder. It boosts the savory taste. You can also sprinkle in some onion powder for extra depth. Try adding fresh herbs like chives or parsley to brighten the soup. They add a fresh taste that pairs well with potatoes. Slow cooking is all about patience. Cook on low for six to eight hours for the best flavor. If your soup doesn’t thicken, try blending it longer. This breaks down the potatoes more, creating a creamy texture. You can also add a bit of cornstarch mixed with cold water to help thicken it. If you want your soup thicker, blend some potatoes less. You can leave some chunks for a heartier bite. To make it creamier, add more heavy cream or sour cream. Balancing flavors is key. If it tastes too rich, add a squeeze of lemon juice to brighten it up. {{image_2}} For a vegetarian twist, you can swap out the turkey bacon. Use crispy chickpeas or roasted mushrooms for a tasty crunch. Instead of vegetable broth, try using a rich mushroom broth. This enhances the flavor and keeps it plant-based. You can also use plant-based cream alternatives. Coconut cream or cashew cream works great to add creaminess without dairy. Want some heat? Add red pepper flakes to your soup. Start with a pinch and adjust to your taste. If you want to change the spice profile, try adding curry powder. This gives the soup a unique flavor and makes it exciting. Feel free to get creative with vegetables. Adding corn or carrots can bring new flavors and textures. You might even try spinach for a pop of color. Cheese can also vary for different tastes. Swap sharp cheddar for gouda or pepper jack for a spicy kick. Each choice can change the whole soup experience. To keep your loaded baked potato soup fresh, cool it first. Pour it into airtight containers. Store it in the fridge. It can last up to four days. For freezing, use freezer-safe bags or containers. Remove as much air as you can. Label with the date and freeze for up to three months. When reheating, the stovetop works best for texture. Pour the soup into a pot. Heat it over medium heat, stirring often. This keeps it smooth. For the microwave, use a safe bowl. Heat in short bursts, stirring in between. This method is quick but may change the soup’s texture. In the fridge, your soup lasts about four days. Look for signs of spoilage. If it smells off or has a strange color, toss it. It's better to be safe with food. If you freeze it, remember to use it within three months for the best taste. Loaded baked potato soup is a rich, creamy dish. It blends potatoes, cheese, and bacon. This soup draws from the classic baked potato. It has roots in American comfort food. You can find many versions across the U.S. Each family may add their twist. Yes, you can easily make this soup dairy-free. Use coconut cream instead of heavy cream. For cheese, try nutritional yeast or vegan cheese. Sour cream can switch to cashew cream or dairy-free yogurt. These changes keep the soup creamy and tasty. To thicken your soup, try a few methods. You can blend some of the potatoes for creaminess. Another option is to add a cornstarch slurry. Mix equal parts cornstarch and cold water, then stir it in. Let it cook for a few more minutes. Absolutely! While russet potatoes work best, you can try others. Yukon gold potatoes offer a buttery flavor. Red potatoes keep their shape well in soup. Sweet potatoes add a unique sweetness. Each type brings its charm to the dish. This soup pairs well with many sides. Try crusty bread or garlic bread for dipping. A fresh garden salad adds a nice crunch. You can also add more toppings like cheese, bacon bits, or chives. These extras enhance the soup's flavor and texture. This blog post provided a full guide to making loaded baked potato soup. We covered the ingredients needed, the cooking steps, and some useful tips. You’ve learned how to prepare the soup, add flavors, and store leftovers. Experiment with variations to make the soup fit your taste. Whether you want it spicier or more creamy, the options are endless. Enjoy creating this comforting dish that warms the heart and fills the tummy!

Loaded Baked Potato Soup (Slow Cooker) Creamy Delight

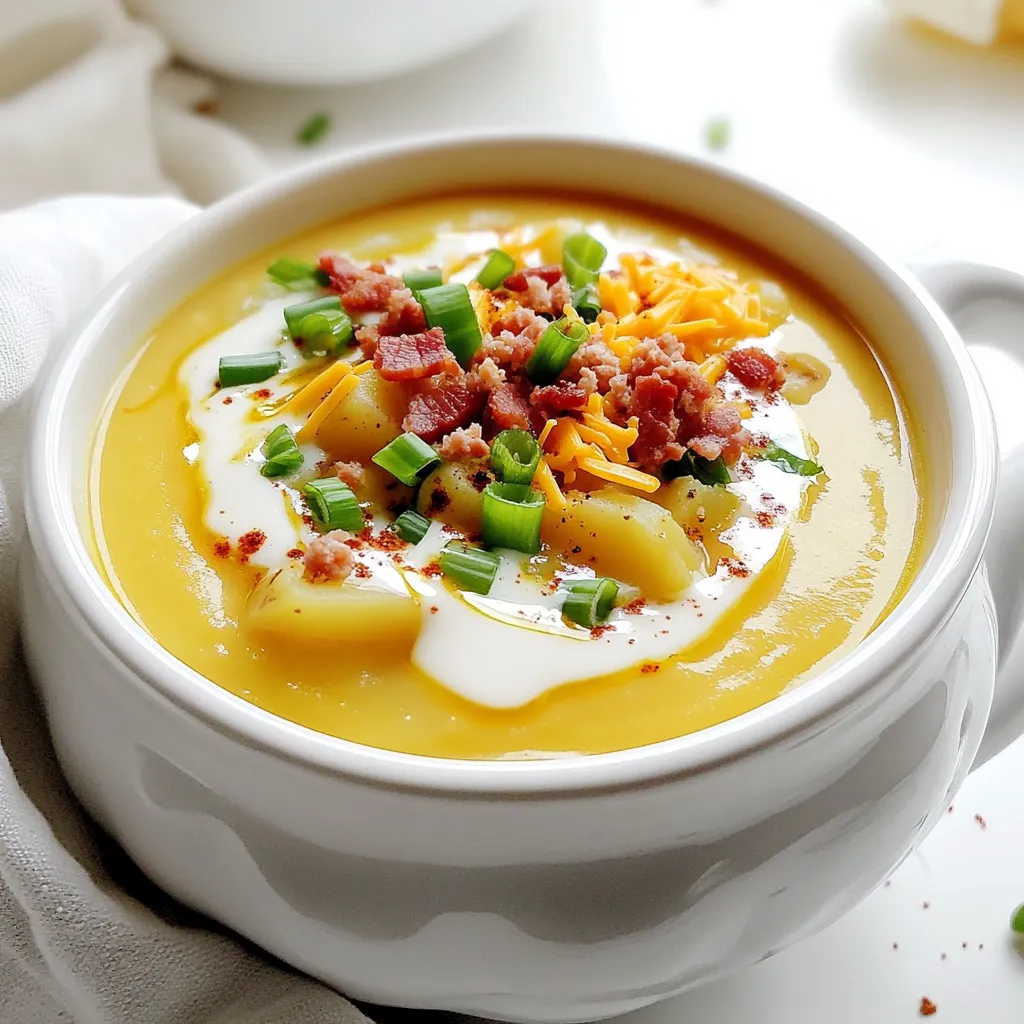
Craving a warm, creamy bowl of comfort? Let me introduce you to Loaded Baked Potato Soup (Slow Cooker) Creamy Delight!

To make this tasty dish, gather these main ingredients: - 14 oz firm tofu, pressed and cubed - 3 tablespoons honey or agave syrup - 2 cloves garlic, minced - 2 tablespoons low-sodium soy sauce - 1 teaspoon sesame oil - 1 teaspoon cornstarch - 1 teaspoon ginger, grated - Salt and pepper to taste These ingredients work together to create a sweet and savory flavor. Pressing the tofu helps it soak up the marinade well. You can add these optional ingredients for more taste: - 2 green onions, chopped (for garnish) - Sesame seeds (for garnish) These garnishes add a fresh, crunchy touch. If you need to change some ingredients, try these substitutes: - Use maple syrup instead of honey or agave for a vegan option. - Coconut aminos can replace low-sodium soy sauce for a gluten-free version. - If you don’t have sesame oil, olive oil works in a pinch. These swaps keep the dish tasty while fitting your needs. Start by pressing the tofu. This step is key for great texture. Wrap your firm tofu in a clean kitchen towel. Place a heavy object on top. Let it sit for about 15 to 20 minutes. This removes excess moisture. Once pressed, cut the tofu into bite-sized cubes. Aim for even sizes to ensure even cooking. In a mixing bowl, whisk together the marinade. Combine 3 tablespoons of honey or agave syrup, 2 minced garlic cloves, and 2 tablespoons of low-sodium soy sauce. Add 1 teaspoon of sesame oil and 1 teaspoon of grated ginger. Sprinkle in a pinch of salt and pepper. Finally, mix in 1 teaspoon of cornstarch. This will help the tofu crisp up nicely. Add the cubed tofu to the marinade. Gently toss until each piece is coated. Let the tofu marinate for at least 15 minutes. This step is important. It helps the tofu soak up all those yummy flavors. Preheat your air fryer to 375°F (190°C) for about 5 minutes. This ensures even cooking. Place the marinated tofu cubes in the air fryer basket. Make sure to spread them out in a single layer. Avoid overcrowding them for the best results. Air fry the tofu for 15 to 18 minutes. Shake the basket halfway through to ensure even crispiness. You want the tofu to turn golden brown and crispy on the outside. Once it's done, remove it from the air fryer. Drizzle any leftover marinade over the tofu pieces. Garnish the dish with chopped green onions and sesame seeds. This adds a nice touch before you serve. Enjoy your tasty Air Fryer Honey Garlic Tofu! To make your tofu crispy, start with firm tofu. Press it well to remove moisture. Wrap the tofu in a towel and place a heavy object on top for 15-20 minutes. This step helps the tofu absorb flavors better. After pressing, cut the tofu into small cubes. The smaller the cubes, the crispier they get in the air fryer. Marinating tofu is key to great flavor. Mix the marinade well before adding the tofu. Use honey or agave, garlic, soy sauce, sesame oil, ginger, and a pinch of salt and pepper. Toss the tofu gently until every piece is coated. Let the tofu sit in the marinade for at least 15 minutes. The longer it marinates, the more flavor it will soak up, making each bite delicious. You can change the sweetness to your liking. If you want it sweeter, add more honey or agave. For a savory kick, try adding more soy sauce. You can also add a dash of chili flakes if you like heat. Taste the marinade before using it. This way, you can adjust the flavors to suit your taste. {{image_2}} If you want a vegan twist, swap honey for agave syrup. Agave gives a similar sweetness. You can also use maple syrup for a different taste. Both options work well in this recipe. You still get that rich flavor without any animal products. Adding veggies boosts nutrition and flavor. Try bell peppers, broccoli, or snap peas. Cut them into bite-sized pieces. Toss them in the marinade along with the tofu. This way, they soak up all the tasty sauce. Air frying the veggies with the tofu makes everything crispy and delicious. For a spicy kick, add red pepper flakes or sriracha to the marinade. This adds heat and makes the dish exciting. If you prefer a citrusy flavor, use lime or lemon juice. Just replace some of the soy sauce with the juice. This freshens up the dish and adds a zesty twist. To store leftover tofu, let it cool first. Place it in an airtight container. You can keep it in the fridge for up to 3 days. Make sure to cover it well. This keeps the tofu fresh and tasty. To reheat the tofu, you can use the air fryer again. Set it to 350°F (175°C) for about 5-7 minutes. This method keeps the tofu crispy. You can also use a skillet on medium heat. Just add a little oil and cook until warm. If you want to freeze the tofu, this is easy too. Place the cooled tofu in a freezer-safe bag. Remove as much air as possible. You can freeze it for up to 3 months. When ready to eat, thaw it in the fridge overnight. Then, reheat it as mentioned above. Freezing can change the texture, making it chewier, which some people enjoy! You can use soft tofu, but firm tofu works best. Firm tofu holds its shape better while cooking. Soft tofu may break apart easily. If you want a firmer texture, always choose firm tofu for this recipe. To prevent sticking, coat the air fryer basket lightly with cooking spray. You can also toss the tofu cubes with a little oil before cooking. Make sure to place the tofu in a single layer. This helps air circulate around each piece, reducing the chance of sticking. Honey garlic tofu pairs well with rice or quinoa. Serve it with stir-fried vegetables for a balanced meal. A fresh salad can also complement the dish nicely. You can even add it to a grain bowl for extra flavor and texture. This post covers how to make air fryer honey garlic tofu. You learned about key ingredients, from firm tofu to exciting flavors. The step-by-step guide helps you prepare and cook the dish. Tips show how to get crispy tofu and perfect spices. I shared great storage ideas and answered common questions too. With this knowledge, you can try new flavors and enjoy a tasty meal. Air fryer honey garlic tofu is simple and delicious. Prepare, taste, and enjoy every bite!

Air Fryer Honey Garlic Tofu Easy and Flavorful Delight

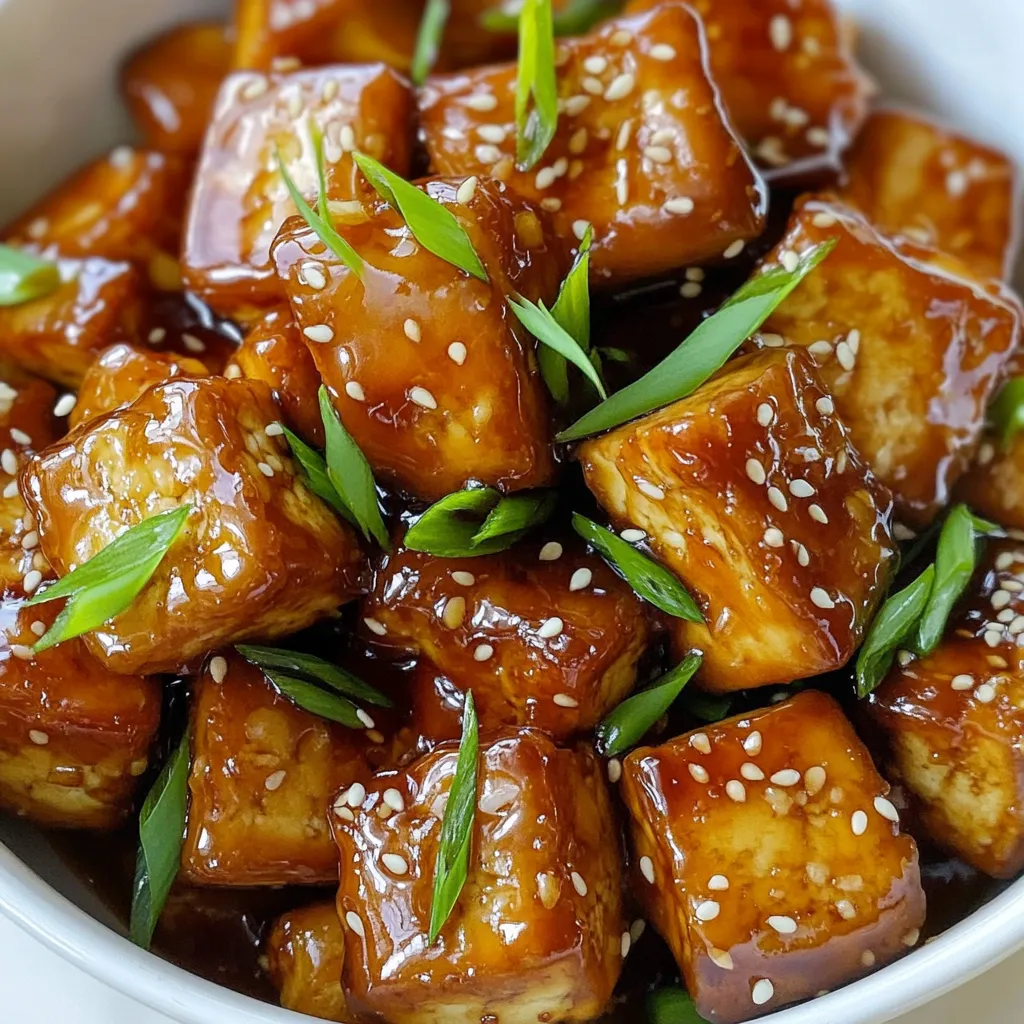
Are you ready to make a delicious meal with just a few steps? Today, I’m sharing my easy recipe for

- Large shrimp: 1 lb, peeled and deveined - Asparagus: 1 bunch, trimmed - Olive oil: 3 tablespoons - Lemon zest and juice: from 2 lemons - Garlic: 4 cloves, minced - Black pepper: 1 teaspoon - Sea salt: 1 teaspoon - Red pepper flakes: 1/2 teaspoon (optional) - Fresh parsley for garnish The main stars of this dish are the large shrimp and fresh asparagus. The shrimp should be juicy and sweet. You want them peeled and deveined to make cooking simple. For the asparagus, trim the ends for a clean bite. Now let’s talk about the dressing. Using good olive oil brings richness. The lemon zest and juice add bright, zesty notes. Fresh garlic gives a lovely aroma and taste. For spices, black pepper and sea salt are must-haves. Red pepper flakes can add a kick if you like heat. Finally, fresh parsley sprinkles on top for color and flavor. Gather all these ingredients to make your Lemon Pepper Shrimp & Asparagus Sheet-Pan a delightful dish! - Preheating the oven Start by preheating your oven to 400°F (200°C). This heat will cook the shrimp and asparagus perfectly. - Preparing shrimp and asparagus Next, take your large shrimp and peel them if you haven’t done so. Make sure they are deveined. For the asparagus, trim the ends off. This helps them cook evenly and taste great. - Combining shrimp and asparagus with oil and seasonings In a large bowl, add the shrimp and asparagus. Drizzle 3 tablespoons of olive oil over them. Then, add the zest and juice of 2 lemons, 4 minced garlic cloves, 1 teaspoon of black pepper, 1 teaspoon of sea salt, and 1/2 teaspoon of red pepper flakes if you want some heat. - Ensuring even coating Toss everything together well. Make sure every shrimp and asparagus piece gets coated with the mix. This step is key for flavor. - Spreading on baking sheet Now, spread the shrimp and asparagus in a single layer on a large baking sheet. This allows them to cook evenly without steaming each other. - Baking time and checking for doneness Bake them in the preheated oven for about 10 to 12 minutes. Keep an eye on them. The shrimp should turn pink and opaque, while the asparagus should be tender but still crisp. Use a fork to check if they are done. How to tell when shrimp are cooked Shrimp cook quickly. They turn pink and opaque when done. Look for a firm texture. If they curl into a tight “C” shape, they are overcooked. Achieving perfect asparagus texture For tender asparagus, trim the ends. Roast until bright green and slightly crisp. Aim for 10 to 12 minutes in the oven. Additional seasonings and sauces to try You can add a pinch of cayenne for heat. Try a splash of soy sauce for umami. Fresh herbs like dill or basil can brighten flavors too. Importance of using fresh ingredients Fresh shrimp and asparagus make a big difference. Fresh ingredients enhance taste and texture. Seek out local markets for the best options. Pairing with side dishes Serve with rice or quinoa to balance the meal. A crisp salad adds freshness. Garlic bread complements the shrimp well. Presentation ideas for a more appealing meal Use a large platter to serve. Arrange shrimp and asparagus in a colorful pattern. Garnish with parsley for a bright touch. {{image_2}} You can easily switch shrimp with chicken or tofu. If using chicken, cut it into bite-sized pieces. For tofu, press and cube it before cooking. Both options add different flavors to your dish. Adjust cooking times based on the protein you choose. Chicken needs more time, about 20-25 minutes, until it reaches 165°F. Tofu cooks quickly, so bake it for about 10-12 minutes, just like the shrimp. You can add more veggies to boost flavor. Bell peppers, zucchini, or cherry tomatoes work great. Each adds a unique taste and texture. Seasonal veggies can also make this dish shine. In spring, try asparagus and snap peas. In summer, use corn and squash. Fall brings great options like Brussels sprouts and carrots. Each choice lets you customize this dish to your taste. Herbs and spices can change your dish's flavor. Try thyme, oregano, or basil for a fresh twist. You can also explore spices like cumin or paprika for warmth. If you like heat, add more red pepper flakes or try jalapeños. For milder flavors, skip the heat and focus on lemon and garlic. Each choice can create a new experience with every bite. To store leftovers of Lemon Pepper Shrimp & Asparagus, let them cool first. Place the shrimp and asparagus in an airtight container. This keeps them fresh and tasty. You can store them in the fridge for up to three days. If you want to enjoy them later, make sure to check for any signs of spoilage before eating. Yes, you can freeze Lemon Pepper Shrimp & Asparagus. It’s best to freeze them right after cooking. Allow the dish to cool down, then transfer it to a freezer-safe container. You can store it in the freezer for about two months. When ready to eat, thaw it in the fridge overnight. Reheat it in the oven at 350°F until warm. This helps keep the flavors intact. Use glass or BPA-free plastic containers for storage. These containers help keep food fresh longer. It’s important to choose airtight containers. They prevent moisture and air from spoiling your meal. Always label your containers with the date. This way, you know when you made the dish. How long does it take to cook shrimp? Cooking shrimp takes about 10 to 12 minutes. You want them pink and opaque. When they curl into a C shape, they are done. Can I use frozen shrimp for this recipe? Yes, you can use frozen shrimp. Just thaw them first. Place them in a bowl of cold water for about 15 minutes. Pat them dry before cooking. What can I use if I don’t have asparagus? If you don’t have asparagus, try broccoli or green beans. Both work well and add great crunch. You can also use bell peppers for a pop of color. Can I skip the lemon juice? You can skip the lemon juice, but it adds a nice zing. If you want a substitute, use lime juice. It gives a similar bright flavor. What temperature should shrimp be cooked to? Shrimp should reach an internal temperature of 120°F (49°C). Use a food thermometer to check. This ensures they are safe to eat. Can I prepare this dish in advance? Yes, you can prep this dish ahead. You can marinate the shrimp and asparagus a few hours before cooking. Just cover and refrigerate until you’re ready to bake. This blog post covered a delicious Lemon Pepper Shrimp and Asparagus recipe. We went through key ingredients, like fresh shrimp and asparagus, and explored seasoning tips. Cooking steps included preparation, mixing, and baking for the best taste. Remember, you can customize this dish with other proteins and veggies, too. Storing leftovers properly keeps meals fresh for days. Enjoy cooking and experimenting with flavors to make each meal your own!

Lemon Pepper Shrimp & Asparagus Sheet-Pan Delight

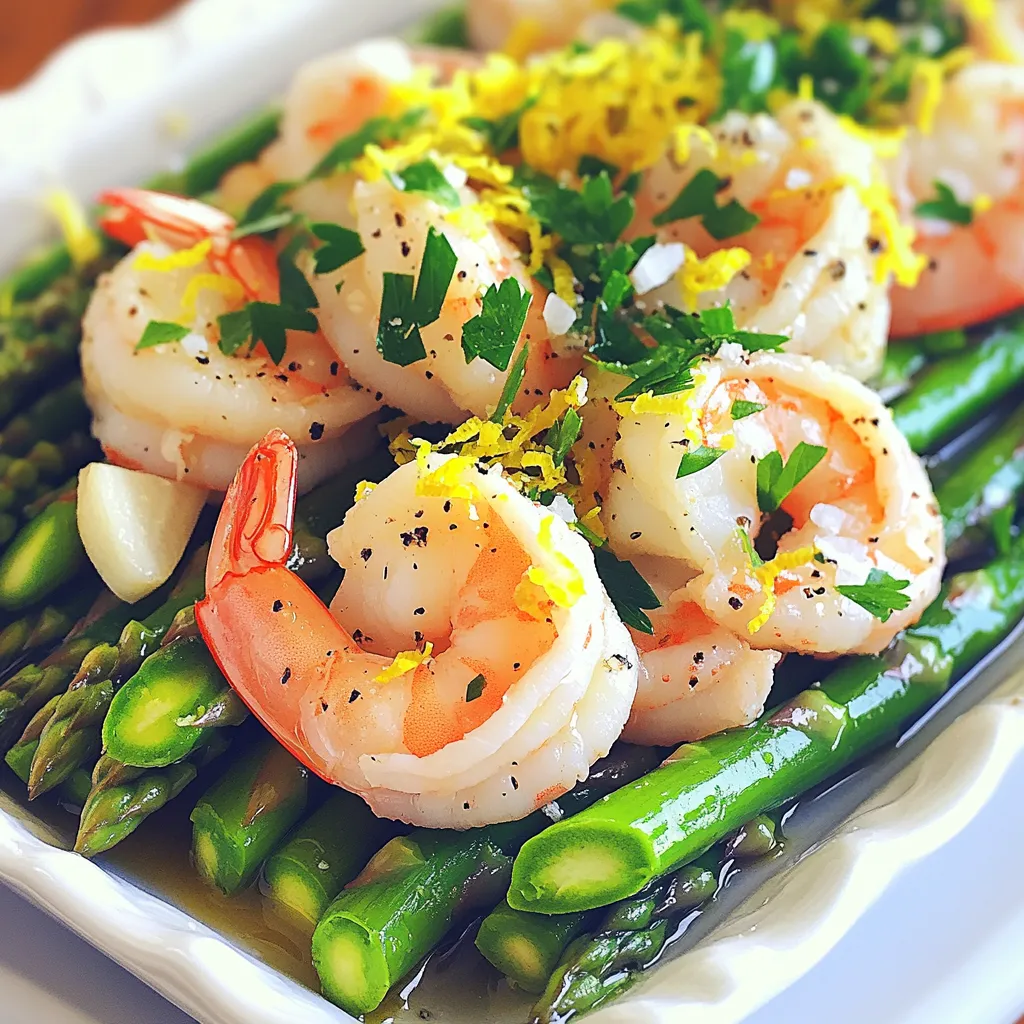
Looking for a quick and tasty meal? Try my Lemon Pepper Shrimp & Asparagus Sheet-Pan Delight! This dish combines juicy

- 1 cup unsalted butter - 1 cup brown sugar - 1/2 cup white sugar - 1 cup pumpkin puree (not pie filling) - 2 large eggs - 1 teaspoon vanilla extract - 2 cups all-purpose flour - 1 teaspoon baking powder - 1 teaspoon baking soda - 1 teaspoon ground cinnamon - 1/2 teaspoon ground ginger - 1/2 teaspoon nutmeg - 1/4 teaspoon salt - 1 cup chocolate chips (or butterscotch chips) - Optional: Chopped walnuts or pecans for topping Each ingredient plays a key role in creating the perfect blondie. The unsalted butter adds richness and flavor. Brown sugar gives a deep, caramel taste, while white sugar balances sweetness. The pumpkin puree provides moisture and that lovely fall flavor. Eggs help bind everything together, making blondies soft and chewy. Vanilla extract adds warmth. All-purpose flour gives structure to the batter. Baking powder and soda help the blondies rise. The spices—cinnamon, ginger, and nutmeg—bring warmth and depth. Salt enhances all the flavors, while chocolate or butterscotch chips add sweetness and texture. You can top your blondies with chopped walnuts or pecans for a delightful crunch. Using good-quality ingredients makes a big difference. Fresh spices and high-quality chocolate elevate the taste. So, gather these ingredients and let’s get baking! 1. Preheat the oven and prepare the baking dish Start by preheating your oven to 350°F (175°C). This step is key for even baking. Next, grease a 9x13 inch baking dish. You can also line it with parchment paper. This makes it easy to lift out the blondies later. 2. Melting and browning butter correctly In a medium saucepan, melt 1 cup of unsalted butter over medium heat. Stir it often. Watch it closely until it turns golden brown and smells nutty. This should take about 5 to 7 minutes. Be careful not to let it burn. Once done, remove it from the heat and let it cool slightly before using it in your mix. 3. Combining sugars with brown butter In a large mixing bowl, pour in the brown butter. Add 1 cup of brown sugar and 1/2 cup of white sugar. Stir these together until they are well mixed. This will create a rich, sweet base for your blondies. 4. Incorporating wet ingredients and dry ingredients Next, mix in 1 cup of pumpkin puree, 2 large eggs, and 1 teaspoon of vanilla extract. Stir this until it is smooth. In a separate bowl, whisk together 2 cups of all-purpose flour, 1 teaspoon of baking powder, 1 teaspoon of baking soda, 1 teaspoon of cinnamon, 1/2 teaspoon of ginger, 1/2 teaspoon of nutmeg, and 1/4 teaspoon of salt. Gradually add this dry mix to the wet mix, stirring gently. Be careful not to overmix. Finally, fold in 1 cup of chocolate chips and, if you like, some chopped walnuts or pecans. 5. Pouring batter and spreading in the dish Pour the batter into your prepared baking dish. Use a spatula to spread it evenly. This ensures all blondies bake at the same rate. 6. Baking time and toothpick test Place the dish in your preheated oven. Bake for 25 to 30 minutes. To check if they are done, insert a toothpick in the center. If it comes out with a few moist crumbs, the blondies are ready. Let them cool in the pan for about 10 minutes before moving them to a wire rack to cool completely. Now, you’re ready to enjoy your delicious brown butter pumpkin blondies! To get the best texture in your blondies, focus on mixing. You want a thick batter that holds its shape. This means adding dry ingredients slowly. Mix until you see no dry flour. Don’t stir too much, or your blondies will be tough. A few lumps are okay. These blondies shine with a scoop of ice cream on top. Vanilla goes well but feel free to try other flavors. A dollop of whipped cream can add a nice touch too. For a pretty finish, dust with powdered sugar. It makes them look fancy and inviting. To make brown butter, heat the unsalted butter in a pan. Stir it often until it turns golden brown. You will smell a nutty aroma when it's ready. This adds a rich flavor to your blondies. Brown butter is versatile. You can use it in cookies, sauces, and even risottos. It adds depth to many dishes. Enjoy experimenting with this flavor in your kitchen! {{image_2}} You can change the type of sugar in this recipe. Using all brown sugar gives a richer flavor. Mixing brown and white sugar adds depth. For a different taste, try using coconut sugar. It offers a unique twist. If chocolate chips are not your favorite, butterscotch chips work well too. They add a sweet, caramel-like flavor. You can even mix both for a fun treat! Want to spice things up? Add a pinch of ground cloves or allspice. These spices boost the warm, cozy notes of pumpkin. You could also try mixing in dried fruits like cranberries or raisins. They add sweetness and texture. Coconut flakes are another great mix-in. They bring a tropical taste that pairs well with pumpkin. Just be sure to adjust the amount of flour if you add extra ingredients. To make nut-free blondies, simply skip the nuts. If you want to keep some crunch, try sunflower seeds. They add a nice bite without nuts. For a gluten-free option, replace all-purpose flour with a gluten-free blend. Look for blends that include xanthan gum. This helps keep the texture just right. You can also use oat flour for a different flavor. To keep your brown butter pumpkin blondies fresh, store them at room temperature if you plan to eat them within a few days. Use an airtight container to prevent them from drying out. If you need to store them longer, put them in the fridge. This helps keep them moist but may change their texture slightly. Avoid covering them with plastic wrap. Instead, use a covered dish or an airtight container. This keeps them fresh without sticking together. If you want to freeze your blondies, first let them cool completely. Then, cut them into squares. Wrap each square in plastic wrap, then place them in a freezer bag. Be sure to squeeze out as much air as possible. When you’re ready to eat one, take it out of the freezer. Let it thaw in the fridge overnight or at room temperature for a few hours. You can also reheat them in the microwave for about 10-15 seconds for a warm treat. Brown butter pumpkin blondies can last up to one week at room temperature. If you store them in the fridge, they can last up to two weeks. However, freezing them is the best way to keep them fresh for up to three months. After that, the quality may decline, and they may lose their yummy taste and texture. Blondies and brownies both fall under the cookie bar category. The key difference lies in their main ingredients. Brownies use cocoa powder or melted chocolate, giving them a rich, dark color. Blondies skip the chocolate, using brown sugar and vanilla for sweetness. This creates a lighter, golden color and a chewy texture. Both are delicious, but they offer different flavor profiles. Yes, you can use fresh pumpkin! Start by roasting a sugar pumpkin until soft. Then, scoop out the flesh and puree it until smooth. Make sure to drain excess water for the best texture. Fresh pumpkin adds a vibrant flavor but may slightly change the moisture level. Adjust your baking time if needed, as fresh pumpkin can be wetter than canned. To check if your blondies are done, insert a toothpick into the center. If it comes out with a few moist crumbs, they are perfect. If it has wet batter on it, give them more time. Keep an eye on the edges; they should look set and slightly golden. Remember, they will continue to cook in the pan after you take them out. Yes, you can make these blondies dairy-free! Substitute the unsalted butter with a dairy-free butter or coconut oil. Use a dairy-free chocolate or butterscotch chip as well. This keeps the rich flavor while ensuring everyone can enjoy them. Just make sure to check the labels on your ingredients for any hidden dairy. This blog post covered how to make delicious blondies using simple ingredients. We explored each ingredient, from unsalted butter to spices, and went through step-by-step instructions for preparing, mixing, and baking. Remember the key tips for texture and flavor, plus variations for personalizing your blondies. Storing and freezing methods ensure you enjoy them later. Embrace your creativity with these recipes, and enjoy every bite of your tasty treats!

Brown Butter Pumpkin Blondies Easy Fall Treat

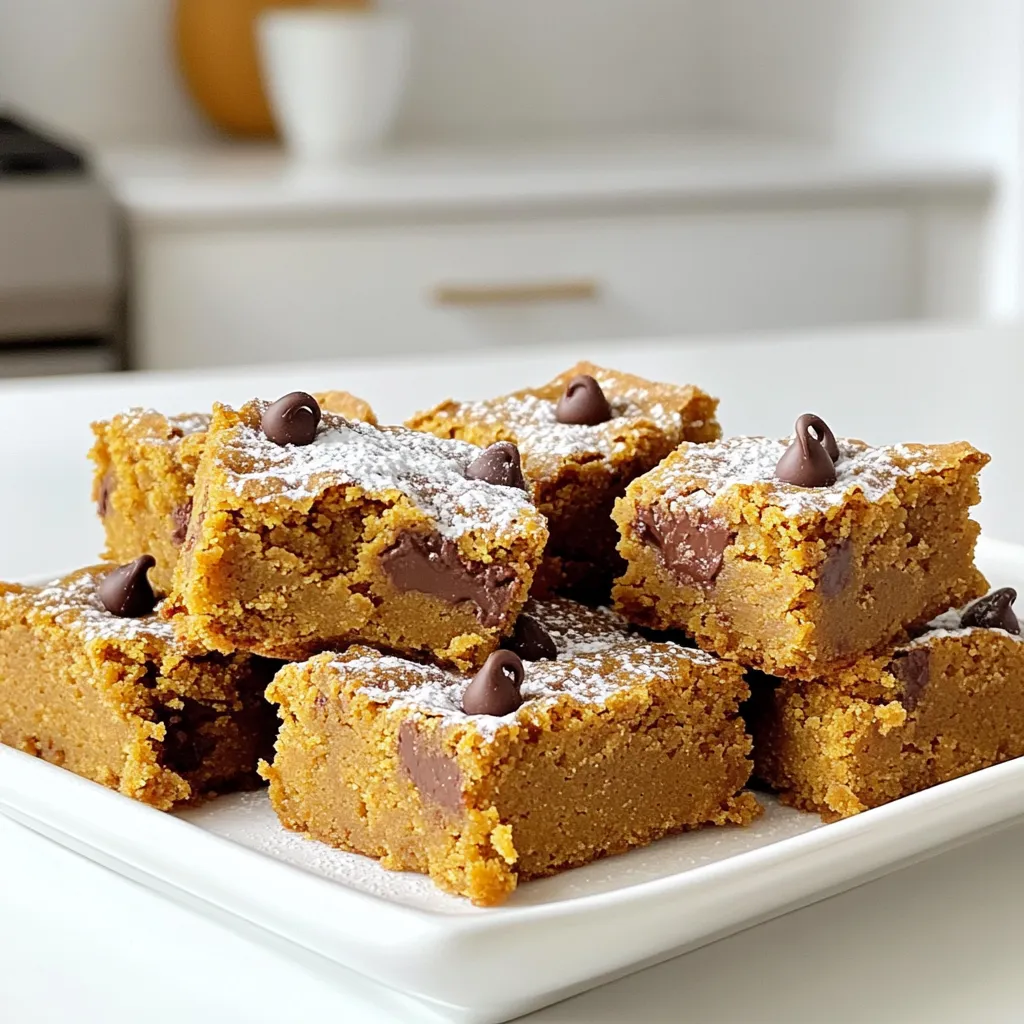
Fall is here, and it’s time to indulge in warm, cozy flavors! Say hello to my Brown Butter Pumpkin Blondies—a

To make this delicious cranberry almond coffee cake, here’s what you need: - 1 cup all-purpose flour - 1 teaspoon baking powder - 1/2 teaspoon baking soda - 1/4 teaspoon salt - 1/2 cup unsalted butter, softened - 3/4 cup granulated sugar - 2 large eggs - 1 teaspoon vanilla extract - 1/2 cup sour cream - 1 cup fresh or frozen cranberries - 1/2 cup sliced almonds - 1/4 cup powdered sugar (for dusting) You can swap some ingredients if needed. Here are some ideas: - Use whole wheat flour for a healthier option. - Substitute Greek yogurt for sour cream. - Replace unsalted butter with coconut oil for a dairy-free treat. - Maple syrup can replace granulated sugar, but adjust the liquid in the batter. - If you don't have almonds, try walnuts or pecans instead. This coffee cake serves eight people. Each serving has about: - Calories: 250 - Total fat: 12g - Saturated fat: 6g - Cholesterol: 50mg - Sodium: 150mg - Total carbohydrates: 34g - Dietary fiber: 1g - Sugars: 15g - Protein: 4g This coffee cake is a sweet treat. It pairs well with your morning coffee or afternoon tea. Enjoy making it! {{ingredient_image_1}} To start, gather your ingredients. You will need: - 1 cup all-purpose flour - 1 teaspoon baking powder - 1/2 teaspoon baking soda - 1/4 teaspoon salt - 1/2 cup unsalted butter, softened - 3/4 cup granulated sugar - 2 large eggs - 1 teaspoon vanilla extract - 1/2 cup sour cream - 1 cup fresh or frozen cranberries - 1/2 cup sliced almonds - 1/4 cup powdered sugar (for dusting) First, preheat your oven to 350°F (175°C). Grease and flour a 9-inch round cake pan. You can also line it with parchment paper. This makes it easier to remove the cake later. Next, take a medium bowl. Whisk together the flour, baking powder, baking soda, and salt. Set this bowl aside for now. In a large bowl, cream the softened butter and granulated sugar together. Use an electric mixer for about 3 to 4 minutes. The mixture should be light and fluffy. Now, add the eggs one at a time. Mix well after each egg. Then, stir in the vanilla extract. Gradually add the dry flour mixture. Alternate this with the sour cream. Start and end with flour. Mix until just combined. Be careful not to overmix. Finally, gently fold in the cranberries and sliced almonds. Use a spatula to ensure even distribution. Pour the batter into your prepared cake pan. Smooth the top with a spatula. Bake in your preheated oven for 30 to 35 minutes. To check if it’s done, insert a toothpick in the center. It should come out clean when the cake is ready. Once baked, remove the cake from the oven. Let it cool in the pan for 10 minutes. After that, transfer the cake to a wire rack. Let it cool completely. When the cake is cool, dust the top with powdered sugar. This gives it a beautiful finish. Enjoy your cranberry almond coffee cake with coffee, tea, or on its own! To make your coffee cake fluffy, use room-temperature butter. Room-temp butter mixes better and traps air. Cream the butter and sugar well. This adds volume. Mix until it looks light and fluffy. Be careful not to overmix the batter. This can make your cake dense. Fold in the cranberries and almonds gently. This keeps your batter airy. You can boost flavor by adding spices. A dash of cinnamon or nutmeg works well. Try a splash of almond extract for more almond taste. You can also mix in orange zest for a bright twist. Using fresh cranberries adds a tart flavor. If you use frozen, thaw them first. A common mistake is not measuring flour correctly. Too much flour can make your cake dry. Use the spoon and level method for accuracy. Another mistake is opening the oven door too soon. This can make your cake fall. Wait until at least 20 minutes before checking it. Lastly, don’t skip the cooling step. Cooling the cake helps it set properly. Pro Tips Use Fresh Ingredients: For the best flavor, opt for fresh cranberries when in season. If using frozen, do not thaw them before adding to the batter to avoid excess moisture. Alternate Mixing: To keep the cake light and fluffy, alternate adding the dry ingredients and sour cream. This helps prevent overmixing. Cool Completely: Allow the cake to cool completely on a wire rack before dusting with powdered sugar. This prevents the sugar from melting into the cake. Storage Tips: Store any leftovers in an airtight container at room temperature for up to 3 days, or refrigerate for longer freshness. {{image_2}} You can change the fruit in this coffee cake for a new taste. Try blueberries for a sweet twist. Raspberries add a nice tartness. Cherries work well too, giving a rich flavor. Just remember to keep the amount the same. One cup of fruit keeps the cake moist and tasty. If you want to switch nuts, consider walnuts or pecans. They both bring a great crunch. You can even skip the nuts if you prefer a nut-free cake. This recipe still works well without them. Just be sure to adjust your baking time if you change the texture. Making this cake vegan is simple. Use plant-based butter instead of regular butter. Substitute eggs with flaxseed meal or applesauce. One tablespoon of flaxseed mixed with three tablespoons of water works well. For sour cream, try coconut yogurt or a dairy-free alternative. Your cake will still be moist and delicious! To keep your cranberry almond coffee cake fresh, store leftovers in an airtight container. This helps prevent it from drying out. You can keep it at room temperature for up to two days. If you want to keep it longer, move it to the fridge. In the fridge, it will stay good for about a week. If you want to freeze the cake, first let it cool completely. Then, wrap it tightly in plastic wrap or aluminum foil. Place the wrapped cake in a freezer-safe bag or container. It will last for up to three months in the freezer. When you're ready to enjoy it, just thaw it in the fridge overnight. To reheat your coffee cake, preheat your oven to 350°F (175°C). Place the cake on a baking sheet and cover it with foil. Heat for about 10-15 minutes. You can also use the microwave. Just heat a slice for 20-30 seconds. Enjoy it warm for the best flavor! Yes, you can use frozen cranberries. They work well in this recipe. Just make sure to measure them while still frozen. This helps keep the cake moist. Do not thaw them before adding. Thawing may make them too wet and change the texture. To check if the cake is done, insert a toothpick into the center. If it comes out clean, the cake is ready. It should also be golden brown on top. The edges may pull away slightly from the pan. Bake for 30 to 35 minutes for best results. You can serve this cake with a dollop of whipped cream. A scoop of vanilla ice cream pairs nicely too. Fresh fruit or a light yogurt can be great options. A cup of tea or coffee complements the flavors well. Enjoy it as a sweet treat at breakfast or brunch. This blog post covered everything about making a delicious Cranberry Almond Coffee Cake. We explored all the ingredients, substitutions, and nutritional information. I shared step-by-step instructions, from prep to baking. You learned tips for fluffiness and flavor tricks, plus common mistakes to avoid. We also discussed fun variations and storage instructions. Remember, with the right ingredients and care, your cake will impress everyone. Enjoy baking and sharing this treat!

Cranberry Almond Coffee Cake Simple and Tasty Treat

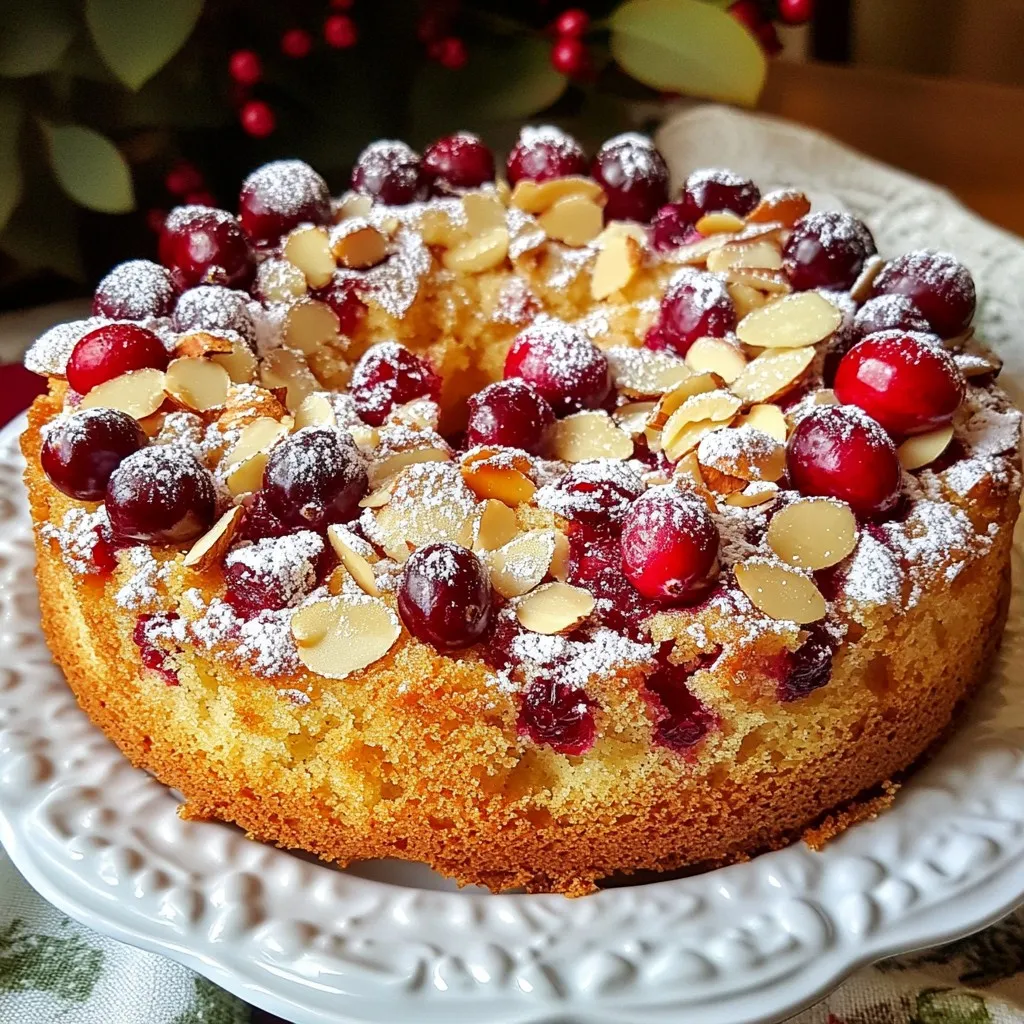
Do you crave a simple and tasty treat that brightens your mornings? Look no further! This Cranberry Almond Coffee Cake

- 1 cup canned pumpkin puree - 1/2 cup brown sugar, packed - 1/2 cup granulated sugar - 2 large eggs - 1 teaspoon vanilla extract These ingredients form the base of your muffins. Canned pumpkin puree gives moisture and flavor. Using both brown and granulated sugar adds depth and sweetness. Eggs bind the mixture, while vanilla extract enhances the taste. - 2 cups all-purpose flour - 1 teaspoon baking powder - 1 teaspoon baking soda - 1 teaspoon ground cinnamon - 1/2 teaspoon ground nutmeg - 1/2 teaspoon salt These dry ingredients create the structure of your muffins. All-purpose flour provides the right texture. Baking powder and baking soda help the muffins rise. Cinnamon and nutmeg add warm, cozy flavors, while salt balances the sweetness. - 1 cup semi-sweet chocolate chips - 1/2 cup pecans or walnuts, chopped (optional) Chocolate chips bring rich sweetness to each bite. Nuts add crunch and a nutty flavor. You can choose to include both or stick with just chocolate for a simpler muffin. 1. Preheat your oven to 350°F (175°C). This helps the muffins bake evenly. 2. Line a 12-cup muffin tin with paper liners. You can also use non-stick spray. This prevents sticking and makes cleanup easy. 1. In a large bowl, whisk together the canned pumpkin puree, vegetable oil, brown sugar, and granulated sugar. Mix until smooth. 2. Add the eggs, one at a time, mixing well after each one. Then stir in the vanilla extract. This adds flavor and richness to the muffins. 1. In a separate bowl, whisk together the all-purpose flour, baking powder, baking soda, ground cinnamon, ground nutmeg, and salt. This ensures even mixing. 2. Gradually add the dry mix to the wet ingredients. Stir gently until just combined. Don’t overmix; this keeps the muffins light and fluffy. 3. Fold in the semi-sweet chocolate chips and nuts if you are using them. This gives a nice crunch and sweet flavor. 1. Divide the batter evenly among the 12 muffin cups. Fill each about 2/3 full. This allows room for rising. 2. Bake in the preheated oven for 18-20 minutes. Check for doneness with a toothpick. It should come out clean when the muffins are ready. Enjoy the process and the wonderful smell that fills your kitchen! To get that perfect bakery-style muffin, focus on mixing. Always mix your wet ingredients until smooth. Then, add the dry ingredients slowly. Stir gently and stop when just combined. This helps keep the muffins light and fluffy. Overmixing can make them dense. Also, check the temperature of your ingredients. Use room-temperature eggs and pumpkin puree. This helps the batter mix better and rise nicely in the oven. Make your muffins look special with a touch of powdered sugar. Just dust it on top before serving. You can also serve them on rustic wooden boards. This gives a cozy, homey feel. If you want a bit more flair, drizzle some melted chocolate over the top. To keep your muffins fresh, store them in an airtight container. This keeps them soft for a few days. If you want to enjoy them later, freeze them. Just wrap each muffin in plastic wrap, then place them in a freezer bag. When you're ready to eat, reheat them in the microwave for a few seconds. This brings back the warm, soft texture. Enjoy your delicious muffins fresh out of the oven! {{image_2}} You can easily switch up the flavors in these muffins. Instead of just cinnamon, try ginger or allspice. These spices add warmth and depth. For a fruity twist, add cranberries or chopped apples. The tartness of cranberries pairs well with pumpkin, making each bite exciting. If you need a gluten-free option, use a 1-to-1 gluten-free flour blend. This keeps the texture light and fluffy. You can also swap sugar for honey or maple syrup for a healthier choice. These options add a unique flavor while reducing refined sugars. Want mini muffins? Just fill the mini muffin tin to about 2/3 full. Bake them for 12-15 minutes instead. For larger muffins, fill the cups more and bake longer, around 22-25 minutes. Adjusting size gives you more serving options for any occasion. Store your muffins at room temperature for the best taste. Keep them in an airtight container. This helps keep the muffins fresh and moist. If you leave them out, they can dry out quickly. Use a container that seals well. A simple plastic or glass container works great. For extra freshness, add a slice of bread. The bread will absorb any extra moisture. If you want to keep your muffins longer, freezing is the way to go. First, let the muffins cool completely. Then, wrap each muffin tightly in plastic wrap. Place the wrapped muffins in a freezer bag or container. This helps keep out air and moisture. You can freeze them for up to three months. To enjoy your muffins, thaw them properly. Leave them at room temperature for a few hours. You can also microwave them for a few seconds. This will help keep their soft texture. Enjoy your muffins warm for the best taste! Yes, you can use fresh pumpkin. To do this, roast fresh pumpkin until soft, then puree it. This gives a nice taste and texture. Just remember to drain excess liquid to avoid a soggy muffin. Canned pumpkin is easier, but fresh can be fun. To check if the muffins are done, insert a toothpick in the center. If it comes out clean or with a few crumbs, they are ready. If there’s wet batter on the toothpick, bake them a bit longer. The tops should be golden brown and spring back when touched. Absolutely! You can make these muffins a day in advance. Just store them in an airtight container at room temperature. They taste great fresh, but they also stay yummy for a day or two. You can warm them up in the microwave for about 10-15 seconds for a fresh taste. If you want to skip eggs, you have options. Use 1/4 cup of unsweetened applesauce for each egg. You can also use 1/4 cup of yogurt or a mashed banana. These swaps keep the muffins moist and tasty. Just remember to adjust the sweetness if needed. In this post, we explored how to make delicious pumpkin muffins. We covered essential and dry ingredients, plus optional add-ins. Detailed steps guided you from prepping your pan to baking the perfect muffins. I shared tips for texture, presentation, and freshness. Remember, you can customize these muffins to suit your taste. Experiment with spices, sizes, and even dietary swaps. Enjoy your baking, and make the best pumpkin muffins!

Bakery-Style Pumpkin Chocolate Chip Muffins Delight

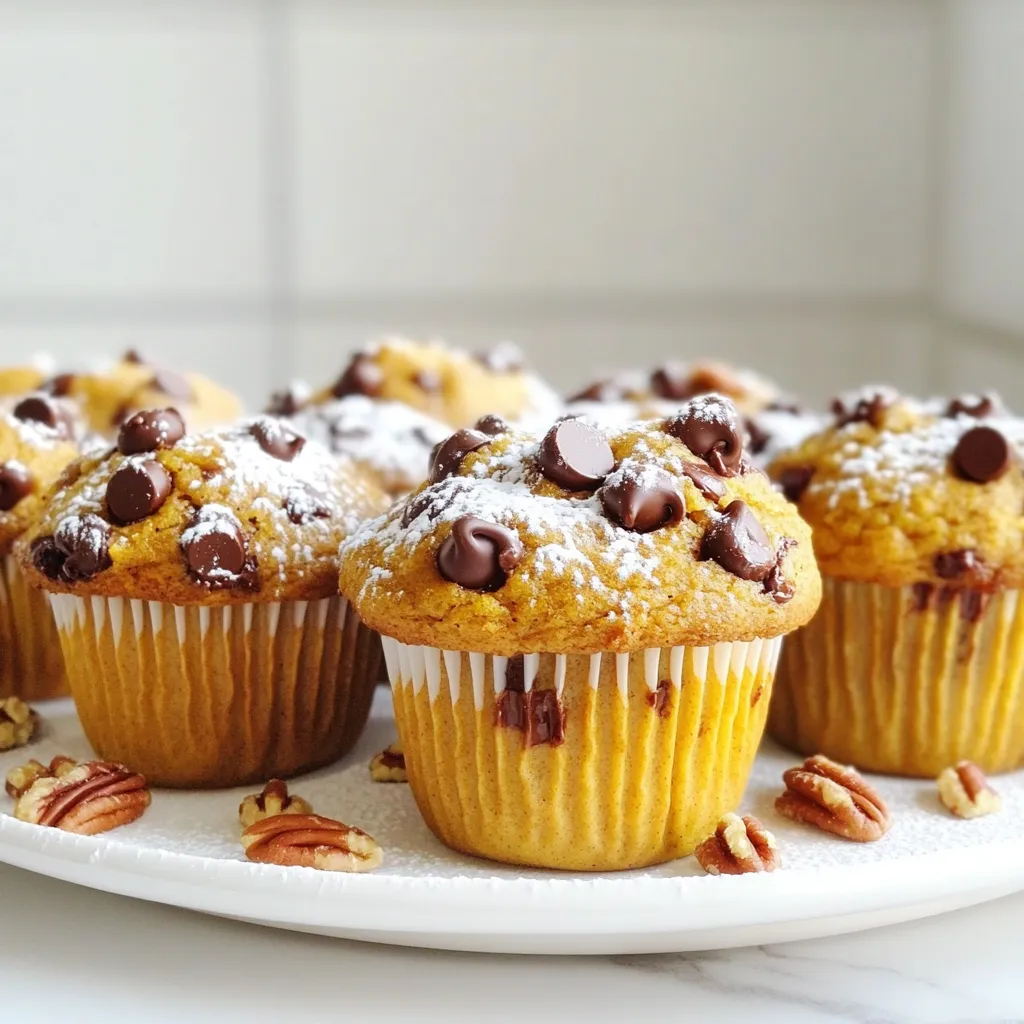
Get ready to bake the best pumpkin chocolate chip muffins ever! These bakery-style treats are soft, fluffy, and packed with

- 1 tablespoon olive oil - 1 small onion, finely chopped - 2 garlic cloves, minced - 1 cup Arborio rice - 4 cups vegetable broth - 1 cup fresh or frozen peas - 1 cup grated Parmesan cheese - 1/2 cup heavy cream - Salt and pepper to taste - Fresh basil leaves for garnish (optional) In this recipe, you'll need a few key ingredients. The olive oil gives the risotto a nice base. The onion adds sweetness, and the garlic brings great flavor. Arborio rice is special. It helps make the risotto creamy. Vegetable broth adds depth and richness to the dish. Peas add a pop of color and sweetness. Parmesan cheese makes everything creamy and cheesy. Heavy cream adds even more richness. Don’t forget salt and pepper to make the flavors shine. Lastly, fresh basil leaves are a lovely touch if you want to garnish your dish. Gathering these ingredients makes cooking easier and more fun! Each one plays an important role in creating a delicious meal. 1. Sauté onion and garlic: In a large pot, heat one tablespoon of olive oil over medium heat. Add one small chopped onion. Cook it until it looks clear, about 3 to 4 minutes. Then, add two minced garlic cloves. Cook for another minute. The smell will be amazing. 2. Toasting the rice: Next, stir in one cup of Arborio rice. Cook it for 2 to 3 minutes while stirring often. This will toast the rice slightly. Toasting adds a nice flavor to your risotto. 1. Adding vegetable broth: Now, it’s time for the broth. Gradually add four cups of vegetable broth, one cup at a time. Stir constantly. Wait until the rice absorbs most of the liquid before adding more. This step takes about 18 to 20 minutes. The rice should be creamy and a bit firm. 2. Stirring techniques for creaminess: Stirring is key. It helps release the rice's starch. This makes the risotto creamy. So keep mixing, and enjoy the process! 1. Stirring in peas: Five minutes before finishing, add one cup of fresh or frozen peas. Stir them in gently. They will cook quickly and add a pop of color. 2. Incorporating Parmesan and cream: Once the risotto is done, take it off the heat. Stir in one cup of grated Parmesan cheese and half a cup of heavy cream. Mix well until everything is creamy. Season with salt and pepper to taste. Enjoy your delicious dish! To make creamy risotto, stirring is key. You must stir often. This helps release the starch from the Arborio rice. Starch creates that rich, creamy texture we love. If you stop stirring, the rice can stick and burn. So, keep your spoon moving! The broth temperature matters too. Use warm broth, not cold. Cold broth cools the rice down and slows cooking. Warm broth keeps the cooking process steady. This way, the rice absorbs flavors better. You can change the cheese for new flavors. Try adding goat cheese or Gruyère. Each cheese brings its own taste and creaminess. This can make your dish unique. Adding herbs and spices can also boost flavor. Fresh basil, thyme, or parsley work well. You can even add a pinch of nutmeg for warmth. These tweaks make your risotto special and fun to create. {{image_2}} You can change this risotto based on the season. In spring, use fresh greens, mushrooms, or asparagus. These bright ingredients add color and taste. When adding greens, chop them finely and stir them in towards the end. This keeps them vibrant and crisp. You can also add protein to your risotto. Chicken or shrimp works great. If you choose chicken, use cooked pieces and mix them in when you add the cheese. If you pick shrimp, sauté them in the pot before adding the rice. This adds a nice flavor to your dish. If you need vegan or dairy-free options, it’s easy to adapt this recipe. Use vegetable broth and skip the heavy cream. Replace the Parmesan cheese with a vegan cheese or nutritional yeast. This gives you the cheesy flavor without the dairy. For gluten-free options, Arborio rice is naturally gluten-free. Just make sure your broth is also gluten-free. Always check labels to be sure. With these swaps, you can enjoy creamy risotto without worry. To keep your creamy risotto fresh, store it in the fridge. Place the risotto in an airtight container. This helps to lock in moisture and flavor. If you have a lot, divide it into smaller portions. This makes it easier to reheat later. Always let the risotto cool before sealing it. This prevents condensation, which can make your dish soggy. When it comes to reheating risotto, the best method is on the stovetop. Add a splash of vegetable broth or water to the pot. This keeps the risotto moist and creamy. Stir it over low heat until it warms through. Avoid using the microwave if you can. It often dries out the risotto, making it less enjoyable. If you must use the microwave, cover the dish with a damp paper towel. This helps trap some steam and keeps it moist. What makes risotto creamy? Risotto gets its creaminess from Arborio rice. This rice type has high starch content. As you stir the rice, it releases starch. This creates a smooth, rich texture. Adding cheese and cream also boosts the creaminess. The key is to stir often and add liquid slowly. Can I make risotto ahead of time? You can make risotto ahead, but it’s best fresh. If you must prepare it early, undercook it slightly. This way, it won’t become mushy when reheated. Store it in an airtight container in the fridge. When ready to serve, add a bit of broth to reheat and stir. Can I use regular rice instead of Arborio? You can use regular rice, but it won’t be the same. Arborio rice is best for risotto because of its starch. Other rice types may not give the same creamy texture. If you try another rice, expect a different result. What can I do if my risotto is too thick? If your risotto is too thick, add more broth. Stir in small amounts until you reach the right consistency. You can also add a splash of water. Stir well to bring back the creamy texture. Just remember, risotto should be creamy and flow slightly. In this post, we explored how to make creamy risotto. We covered essential ingredients like Arborio rice and broth. You learned step-by-step instructions, tips for creamy texture, and tasty variations. Remember, constant stirring is key to the best risotto. Don’t hesitate to experiment with different flavors and ingredients. Proper storage and reheating keep leftovers tasty, too. Enjoy making this dish, and have fun creating your own unique versions!

One-Pot Creamy Parmesan Risotto with Peas Delight

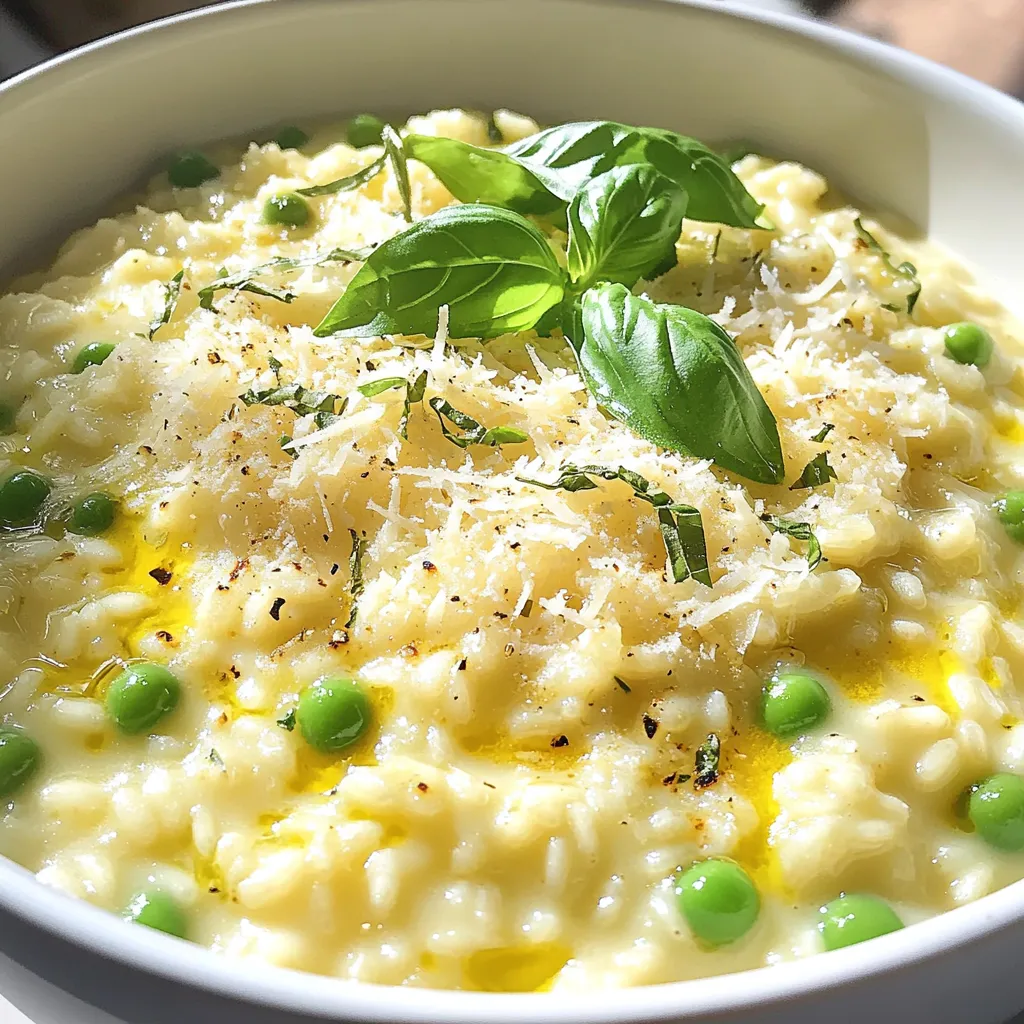
Welcome to the world of one-pot cooking with my Creamy Parmesan Risotto with Peas! This dish is comfort food made

Here’s what you will need for the Warm Cranberry Ginger Mocktail Spritzer: - 2 cups cranberry juice (100% pure) - 1 tablespoon fresh ginger, grated - 1/4 cup honey or agave syrup - 1 cup sparkling water - Juice of 1 lemon - Fresh cranberries and ginger slices for garnish - Mint leaves for garnish When choosing your cranberry juice, pick a brand with no added sugars. Pure juice gives the best flavor. Fresh ginger adds a nice kick, so don’t skip it! For sweetness, you can use honey or agave syrup. Adjust the amount based on your taste. If you prefer a tangy drink, fresh lemon juice is key. The garnishes make this drink special. Fresh cranberries and ginger slices look stunning. A sprig of mint adds a lovely aroma. Gather these ingredients, and you’re ready to create a fun drink. Let’s get started! Start by gathering your ingredients. You need cranberry juice, fresh ginger, and honey or agave syrup. In a medium saucepan, combine 2 cups of cranberry juice, 1 tablespoon of grated ginger, and 1/4 cup of honey. Stir these together well. This mix will be the base of your mocktail. Now, place the saucepan over medium heat. Stir the mixture often. Heat it until it is warm, which will take about 5 to 7 minutes. Be careful not to let it boil. Boiling can change the flavors. Once warmed, take it off the heat and add the juice of 1 lemon. This adds a nice zing. Taste it to see if you want to adjust the sweetness. Next, it's time to serve. Pour about 2/3 of the warm cranberry-ginger mix into each glass. Then, top each glass with sparkling water for that fizzy touch. Garnish your drink with fresh cranberries, slices of ginger, and a sprig of mint. This makes it look pretty and festive! To make your drink sweet, use honey or agave syrup. Honey gives a rich flavor while agave is milder. Start with the recommended 1/4 cup. After heating, taste the mix. If it’s too tart, add more sweetener. Remember, you control the taste. Serve this mocktail warm but not boiling. Heat the mix over medium heat until warm. Stir gently while heating to keep the flavors mixing. If it’s too hot, let it cool for a minute. Drink it warm to enjoy the ginger spice fully. Presentation matters! Use clear glasses so everyone sees the bright color. Garnish with fresh cranberries and ginger slices. Add a mint leaf for a pop of green. For a fun touch, rim the glasses with sugar. This makes your drink look special and festive! {{image_2}} You can enhance your Warm Cranberry Ginger Mocktail Spritzer by adding herbs. Fresh herbs like rosemary or thyme bring unique tastes. Just add a few sprigs while heating the juice. You can also muddle some mint leaves in the glass for a cool twist. This adds a nice aroma and fresh flavor to your drink. If you want to change the sweetness, try different sweeteners. Maple syrup or coconut sugar can replace honey or agave. Each sweetener offers a different flavor profile. For a sugar-free option, use stevia or monk fruit. Adjust the amount to fit your taste. This way, you can enjoy the spritzer while keeping it healthy. For those who love spice, think about adding more flavors. A pinch of cinnamon or nutmeg can add warmth. You can also try a dash of cayenne pepper for a kick. Just be careful with the amount; a little goes a long way. This spicy twist will make your mocktail stand out and impress your friends. To store leftover Warm Cranberry Ginger Mocktail Spritzer, let it cool first. Pour the leftover drink into a clean glass jar or container. Make sure to seal it tightly. Store it in the fridge for up to three days. When you want to enjoy your mocktail again, pour it into a saucepan. Heat it over low to medium heat. Stir gently to mix the flavors. Avoid boiling, as this can change the taste. Warm it just until you feel steam rising. Cranberry juice lasts about a week in the fridge once opened. Fresh ginger can stay fresh for two to three weeks. Honey or agave syrup keeps well for months. Fresh cranberries should be used within a week. Mint leaves are best used within a few days for bright flavor. Yes, you can prepare the cranberry-ginger mixture in advance. Just follow the recipe until step 3. You can store it in the fridge for up to three days. When you are ready to serve, heat it gently on the stove. Then, add the sparkling water just before serving. This keeps the fizz fresh and fun. If you want a different twist, try using club soda or tonic water. Both add a nice fizz. For a sweeter option, go for lemon-lime soda. Just remember that this will change the sweetness of your drink. Adjust the honey or agave syrup accordingly. To make your mocktail really pop, think about adding some fun garnishes. Use colorful fresh cranberries and slices of ginger. A sprig of mint adds a bright touch too. You can also rim your glasses with sugar or edible glitter. This adds sparkle and charm to your drink. This blog post shared a simple and tasty mocktail recipe. You learned about the key ingredients, like cranberry juice and fresh ginger, and how to prepare them. I offered tips for adjusting sweetness and serving well. Variations help you customize your drink, while storage info ensures freshness. In short, this mocktail is easy to make and fun to serve. Enjoy making it for yourself and your friends!

Warm Cranberry Ginger Mocktail Spritzer Recipe Delight

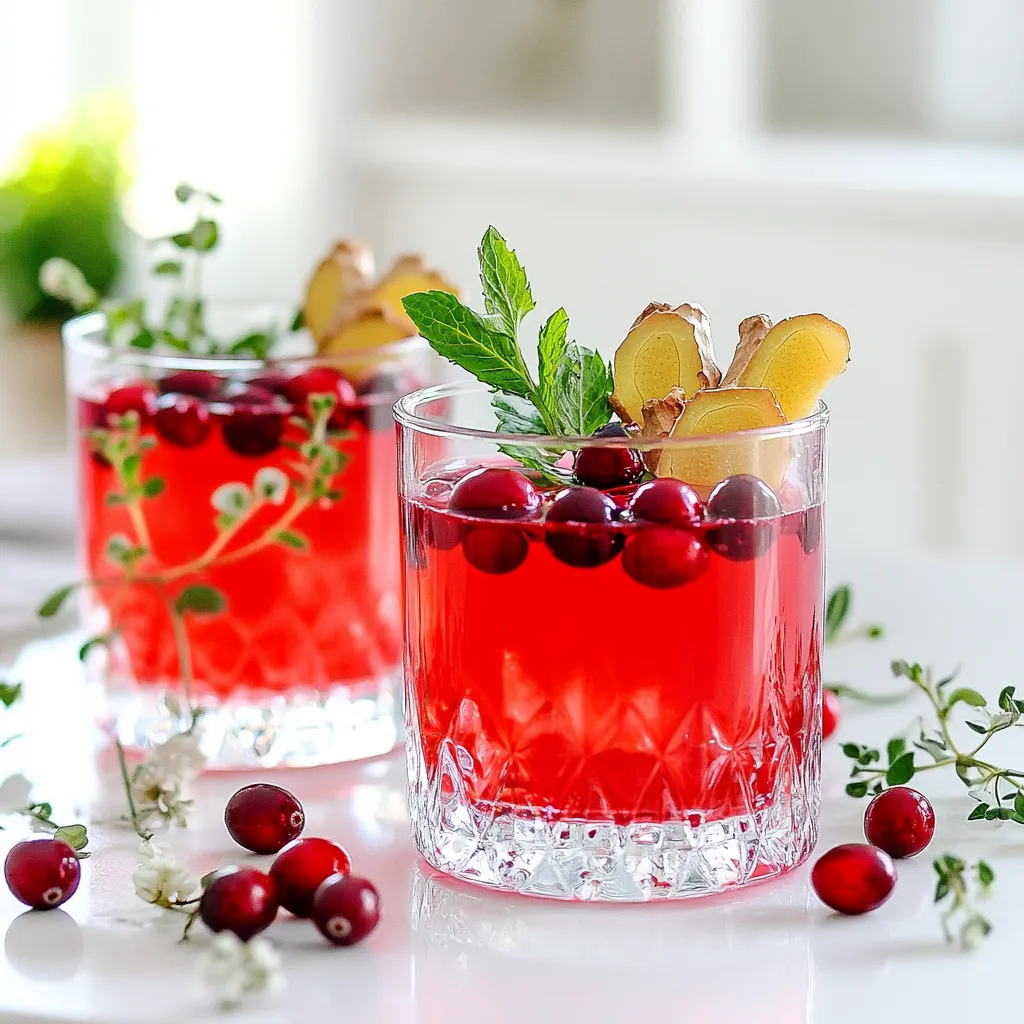
Welcome to my cozy kitchen! Today, I’m excited to share a delightful warm cranberry ginger mocktail spritzer that brightens up

Older posts
Newer posts
← Previous Page1 … Page7 Page8 Page9 … Page144 Next →

dsad

© 2025 So Yum Recipes • Built with GeneratePress

Our Policies

  • Copyright Policy
  • Cookie Policy
  • GDPR Policy
  • Privacy Policy
  • Disclaimer
  • Terms Of Use

More Information

  • Home
  • About
  • Contact
  • Appetizers
  • Dessert
  • Dinner
  • Drinks
©2025, So Yum Recipes About Back To Top