![The Mediterranean Quinoa Salad shines with fresh, vibrant ingredients. Here’s what you need: - 1 cup quinoa (rinsed) - 2 cups vegetable broth or water - 1 cup cherry tomatoes, halved - 1 cucumber, diced - 1 red bell pepper, diced - 1/2 red onion, finely chopped - 1/2 cup Kalamata olives, pitted and sliced - 1/2 cup feta cheese, crumbled - 1/4 cup fresh parsley, chopped - 1/4 cup olive oil - 2 tablespoons lemon juice - 1 teaspoon dried oregano - Salt and pepper to taste These ingredients make a colorful salad. Each one adds a unique flavor and texture. Quinoa is a superfood. It is high in protein and fiber. This grain keeps you full and helps digestion. Tomatoes are rich in vitamins C and K. They also contain antioxidants. They help fight inflammation and boost skin health. Cucumbers are hydrating and low in calories. They help you stay refreshed and cool. Red bell peppers are packed with vitamin A and C. They support your immune system and skin. Red onions add flavor and contain quercetin. This helps reduce blood pressure and promotes heart health. Kalamata olives offer healthy fats. They support brain health and reduce bad cholesterol. Feta cheese adds creaminess. It contains calcium for strong bones. Parsley is full of vitamins and minerals. It aids in digestion and adds freshness. Olive oil is a healthy fat. It lowers the risk of heart disease. Lemon juice adds brightness and vitamin C. It helps with hydration and digestion. You can easily swap some ingredients for variety. Here are my suggestions: - Quinoa: Use farro or brown rice for a different grain. - Cherry Tomatoes: Substitute with diced regular tomatoes or sun-dried tomatoes. - Cucumber: Try zucchini or bell pepper instead. - Feta Cheese: Use goat cheese or omit for a vegan option. - Olives: Swap Kalamata with green olives for a different flavor. - Fresh Parsley: Replace with cilantro or basil for a fresh twist. Feel free to mix and match based on your taste. Enjoy creating your own version of this salad. For the full recipe, check the earlier section. To make this salad, you start with the quinoa. I recommend using one cup of rinsed quinoa. Rinsing removes the bitter coating. In a medium saucepan, add the quinoa and two cups of vegetable broth or water. Bring this mixture to a boil over medium-high heat. Once it's boiling, reduce the heat to low. Cover the pot and simmer for 15 minutes. The quinoa will be fluffy when done. Remove it from heat and let it sit for an extra five minutes. Fluff the quinoa with a fork and let it cool to room temperature. Now, let’s put the salad together. In a large mixing bowl, combine the cooled quinoa with the colorful veggies. Add one cup of halved cherry tomatoes, one diced cucumber, and one diced red bell pepper. Next, toss in half a finely chopped red onion and half a cup of sliced Kalamata olives. Don’t forget half a cup of crumbled feta cheese and a quarter cup of chopped fresh parsley. This mix gives the salad great flavor and texture. The dressing is simple but adds a lot of taste. In a small bowl, whisk together a quarter cup of olive oil and two tablespoons of lemon juice. Add one teaspoon of dried oregano, along with salt and pepper to taste. Once mixed, pour this dressing over the salad. Gently toss everything to combine. Make sure all the ingredients are well coated. For the best flavor, chill the salad in the refrigerator for at least 30 minutes before serving. This allows the tastes to blend beautifully. For the full recipe, refer to the earlier section. You can prepare your Mediterranean quinoa salad ahead of time. Cook the quinoa the day before. Store it in the fridge until you are ready to mix the salad. You can also chop the veggies in advance. Keep them in a sealed container. This saves time and makes the process easy. When you are ready to serve, mix everything together. Add the dressing just before serving. This keeps the salad fresh and crunchy. To boost the flavor, use fresh herbs. Fresh parsley adds a bright taste. You can also try fresh mint for a twist. Use high-quality olive oil for a rich flavor. Let the salad chill for at least 30 minutes. This allows the flavors to blend well. Taste it before serving. Adjust the salt and pepper to your liking. A squeeze of lemon juice can brighten the dish even more. One common mistake is overcooking the quinoa. This can make it mushy. Always rinse quinoa before cooking. This removes the bitter coating. Another mistake is adding the dressing too early. It can make the salad soggy. Also, don't skip the cooling step. Warm quinoa can wilt the veggies. Lastly, avoid using too much salt in the dressing. You can always add more later. Follow these tips to make your Mediterranean quinoa salad shine. For the full recipe, check the earlier sections. {{image_2}} You can easily make this salad vegetarian or vegan. Simply skip the feta cheese. Instead, use avocado for creaminess. You can also try adding more nuts or seeds for texture. A sprinkle of nutritional yeast adds a cheesy flavor without dairy. Want more protein? You can add chickpeas or black beans. Both options blend well with the flavors. You can also toss in cooked lentils or grilled chicken. For a seafood twist, add shrimp or tuna. These add-ins boost the meal's nutrition. This salad is naturally gluten-free. Quinoa is a great grain choice for those with gluten issues. Just ensure your broth or water is safe. If you're nut-free, skip the nuts and seeds. You can still enjoy a tasty dish without these items. This salad remains fresh and bright, even with these changes. Try the Full Recipe to explore all these variations! After you enjoy your Mediterranean quinoa salad, store any leftovers in an airtight container. This keeps the salad fresh and tasty. Place the container in the fridge. It will stay good for about 3 to 4 days. If you notice any sogginess, add a bit more olive oil or lemon juice before you eat it again. You can freeze quinoa salad, but it may change texture. To freeze, place the salad in a freezer-safe bag. Remove all the air to prevent freezer burn. It can last about 2 to 3 months in the freezer. Thaw it in the fridge overnight before eating. You might want to add fresh veggies and dressing after thawing for better taste. If you want to reheat the salad, warm it gently in a pan. Heat on low, stirring often. This helps keep the flavors. You can also serve it cold or at room temperature. For a fresh touch, add a sprinkle of feta or a drizzle of olive oil before serving. Enjoy it as a side or a light meal. Check the [Full Recipe] for more details on ingredients and preparation. Yes, you can make Mediterranean Quinoa Salad in advance. It tastes even better after sitting in the fridge. The flavors mix well, which enhances the taste. I recommend making it a day ahead. Just store it in an airtight container. This way, you save time and enjoy a quick meal. You can add many vegetables to the salad. Some good choices are: - Spinach - Arugula - Carrots - Zucchini - Bell peppers (any color) Feel free to mix and match. Each vegetable adds its own flavor and nutrients. Use what you have on hand for a unique twist. The salad lasts about 3 to 5 days in the fridge. Keep it in a sealed container. Check for freshness each time you eat it. If it looks or smells off, it's best to toss it. Enjoy your Mediterranean Quinoa Salad fresh for optimal taste! For the complete recipe, check out the Full Recipe. This article covered everything you need to know about Mediterranean quinoa salad. We discussed key ingredients, their health benefits, and substitutions. I shared step-by-step instructions for cooking, mixing, and dressing the salad. Tips and tricks helped you make it ahead and avoid common mistakes. We explored variations for different diets and storage advice to keep it fresh. I hope you feel ready to make a tasty salad that supports your health! Enjoy creating your own version.](https://soyumrecipes.com/wp-content/uploads/2025/05/e9483839-1f45-4007-baf2-81ea34b02d05.webp)
Mediterranean Quinoa Salad Fresh and Flavorful Dish
If you’re craving a vibrant, fresh dish that bursts with flavor, then this Mediterranean Quinoa Salad is for you. You
If you’re craving a vibrant, fresh dish that bursts with flavor, then this Mediterranean Quinoa Salad is for you. You
![To make the best chocolate avocado mousse, you need simple and fresh ingredients. Here’s what you will need: - Ripe avocados - Cocoa powder - Sweeteners (maple syrup or honey) - Almond milk (or any milk of choice) - Vanilla extract - Salt - Optional toppings: Whipped coconut cream, chocolate shavings, fresh berries Using ripe avocados is key. They provide a creamy base and healthy fats. Cocoa powder adds rich chocolate flavor, while sweeteners balance the taste. Almond milk helps achieve the right consistency and keeps it dairy-free. Vanilla extract enhances the flavor, and a pinch of salt brings out all the tastes. For toppings, you can get creative! Whipped coconut cream adds a light touch. Chocolate shavings give extra chocolatey goodness. Fresh berries add a pop of color and freshness. Check out the Full Recipe for the complete details. Enjoy making this delicious treat! 1. Cutting and scooping avocados: Start by slicing the avocados in half. Remove the pits carefully. Use a spoon to scoop out the green flesh. Place the avocado flesh into your blender or food processor. 2. Combining ingredients in the blender: Next, add the cocoa powder, maple syrup, almond milk, vanilla extract, and a pinch of salt. Make sure you measure each ingredient for the best results. 3. Achieving the right texture: Blend the mixture on high speed. Stop occasionally to scrape down the sides. Blend until the mousse is smooth and creamy. This may take about 1-2 minutes. 4. Transferring to serving bowls: Once creamy, scoop the mousse into individual serving bowls or glasses. Make sure to divide it evenly for everyone to enjoy. 1. Refrigeration time: Cover the bowls with plastic wrap or a lid. Chill in the fridge for at least 30 minutes. This helps the flavors blend well and the mousse to set. 2. Suggestions for toppings: Before serving, feel free to add toppings. Whipped coconut cream, chocolate shavings, or fresh berries work great. They add color and extra flavor to your dessert. Enjoy your Chocolate Avocado Mousse as a creamy rich delight! For the full recipe, check the detailed instructions above. To make chocolate avocado mousse smooth, blend well. Start on low speed, then increase. This helps mix the ingredients without splattering. If you see lumps, stop the blender. Use a spatula to scrape down the sides. Blend again until creamy. This step is key for a velvety feel. Taste your mousse as you blend. If it’s not sweet enough, add more maple syrup or honey. Blend again to mix. You want the balance just right. If you prefer, try a bit of agave syrup or stevia for a different twist. Keep tasting until it matches your sweet tooth. For serving, use small bowls or clear glasses. This lets the rich color shine through. Add a dollop of whipped coconut cream on top for a nice touch. You can also sprinkle chocolate shavings or fresh berries for extra flair. Creative plating makes your dessert look gourmet, even at home. For the complete recipe, check out the [Full Recipe]. {{image_2}} You can make your chocolate avocado mousse even better with some fun flavors. Try adding different sweeteners like agave syrup. It gives a nice twist and is great for those who want a change. You can also play with spices. Adding a dash of espresso can boost the chocolate flavor. Or sprinkle in some cinnamon for warmth. Both options make the mousse special and tasty. If you follow a vegan diet, you have options too! Use maple syrup instead of honey to keep it vegan-friendly. For a gluten-free treat, this mousse works perfectly as it has no gluten ingredients. Just ensure your toppings are gluten-free. This way, everyone can enjoy the creamy delight without worry. Toppings can change the whole dish! Fresh fruits like strawberries or raspberries add a bright touch. They look great and taste amazing. You could also sprinkle some nuts or seeds on top for a crunchy bite. Think chopped almonds or sunflower seeds for texture. These choices make your mousse even more fun and enjoyable. Want to try making this mousse? Check out the Full Recipe for all the details! Chocolate avocado mousse is best fresh, but you can store it. It lasts for about three days in the fridge. To keep it fresh, use an airtight container. This prevents the mousse from drying out or absorbing other smells. Yes, you can freeze chocolate avocado mousse! It stays good in the freezer for up to two months. To freeze, put it in a freezer-safe container. Leave some space at the top for expansion. When you want to enjoy it again, take the mousse out. Place it in the fridge for several hours to thaw. After thawing, stir it gently before serving. This helps restore its creamy texture. If you need a quick fix, you can also thaw it in the microwave for a few seconds. Just be careful not to heat it too much! Chocolate avocado mousse has a rich, chocolatey flavor. The cocoa gives a deep taste, while the avocado adds a creamy touch. This mix makes it feel indulgent yet smooth. It’s like eating a chocolate cloud! The texture is velvety and thick. You won’t find any graininess here. It feels luxurious on your tongue. For a great dessert, this mousse beats many traditional options. Yes, avocado mousse is quite healthy! Avocados are full of good fats, vitamins, and fiber. They help keep your heart happy and your skin glowing. You also get vitamins like E, K, and B6. In terms of calories, one serving has about 200 calories. This can vary based on what sweeteners you use. Still, compared to other desserts, it’s a smart choice. To cut calories, swap some ingredients. You can use less maple syrup or honey. Try using a sugar substitute instead. This can drop the calorie count while keeping the taste. Another tip is to reduce your portion sizes. Serving smaller amounts still feels satisfying. Enjoy every bite without guilt! Check out the Full Recipe for more ideas on how to make this dessert fit your needs. This blog post offers a simple and tasty chocolate avocado mousse recipe. You learned about the key ingredients, like ripe avocados and cocoa powder, and how to prepare them step by step. We also shared tips for the perfect texture, sweetness adjustments, and creative presentation ideas. Don’t forget to explore variations for different flavors and dietary needs. Finally, proper storage ensures your mousse stays fresh. Enjoy making this delicious dessert knowing it’s both healthy and easy. Get ready to impress with a delightful treat that everyone will love!](https://soyumrecipes.com/wp-content/uploads/2025/05/20a6122c-f6d4-40c2-8bd9-044f5cb7556a.webp)
Are you ready to enjoy a dessert that’s both rich and healthy? Chocolate Avocado Mousse is a creamy delight that
![- 2 medium sweet potatoes, peeled and diced - 1 can (15 oz) black beans, rinsed and drained - 8 small corn or flour tortillas - 1 tablespoon olive oil - 1 teaspoon cumin - 1 teaspoon smoked paprika - 1/2 teaspoon chili powder - Salt and pepper to taste - 1 avocado, sliced - 1 cup red cabbage, shredded - 1/2 cup fresh cilantro, chopped - 1 lime, cut into wedges - Optional: Hot sauce, for serving Let’s dive into what makes these Sweet Potato Black Bean Tacos so delightful. First, you will need the sweet potatoes; they bring a natural sweetness and creamy texture. Choose medium-sized ones for even cooking. Next, the black beans add protein and fiber. They bring heartiness to the dish. Remember to rinse them well to remove excess salt. This keeps the flavor fresh. For the tortillas, you can use corn or flour. Corn tortillas are gluten-free, while flour tortillas have a soft texture. Choose what you enjoy most. Now, let’s talk spices. Olive oil helps the spices stick to the sweet potatoes. Cumin adds warmth, smoked paprika gives a subtle smokiness, and chili powder brings a little heat. Lastly, the toppings. Avocado adds creaminess, while red cabbage gives a nice crunch. Fresh cilantro adds brightness. Lime wedges will enhance every bite. You’ll find all these ingredients in the [Full Recipe]. Enjoy crafting this vibrant, flavorful meal! - Preheat oven to 425°F (220°C). - Toss sweet potatoes with olive oil, cumin, smoked paprika, chili powder, salt, and pepper. To start, I preheat the oven. This step ensures the sweet potatoes roast perfectly. I gather my sweet potatoes and peel them. Then, I dice them into small cubes. Next, I place them in a large bowl. I drizzle the olive oil over the sweet potatoes. After that, I add cumin, smoked paprika, and chili powder. I season with salt and pepper too. I mix everything well until the sweet potatoes are coated evenly. - Spread on a baking sheet and roast for 25-30 minutes. Now, I spread the sweet potatoes on a baking sheet. I make sure they are in a single layer. This helps them cook evenly. I place the baking sheet in the oven and set a timer for 25 minutes. Halfway through, I flip the sweet potatoes. This step helps them caramelize nicely. When done, they should be tender and slightly golden. - Heat black beans and warm tortillas. - Layer ingredients and serve. While the sweet potatoes roast, I heat the black beans in a small saucepan. I keep it on medium heat until they are warm. I rinse and drain the beans first. Next, I warm the tortillas in a dry skillet. I do this for about 20 seconds on each side. Once everything is ready, I take a tortilla and layer roasted sweet potatoes on it. Then, I add a spoonful of black beans. I finish it off with shredded red cabbage, avocado slices, and fresh cilantro. Finally, I serve with lime wedges and hot sauce for those who like a kick. For the full recipe, check out the details above. To make sweet potatoes soft and tasty, start by cutting them evenly. This helps them cook at the same rate. Toss them in olive oil and spices. I use cumin, smoked paprika, and chili powder for a warm flavor. Roast them at 425°F (220°C) for 25-30 minutes. Flip them halfway through for even cooking. You want them tender and a bit caramelized. This adds sweetness. Warming tortillas is key for tasty tacos. You can use a dry skillet on medium-high heat. Heat each tortilla for about 20 seconds on each side. This makes them soft and easy to fold. Avoid overcooking, or they will tear. You can also wrap them in a damp cloth and microwave for a quick warm-up. This keeps them moist and pliable. Want to spice up your tacos? Try adding lime juice for brightness. You can also mix in garlic powder or onion powder for extra flavor. Fresh herbs like cilantro or parsley add freshness. If you like heat, drizzle hot sauce on top. You could also use different beans, like pinto or kidney beans, for variety. These changes can keep your tacos exciting and new. For the full recipe, check the earlier sections. {{image_2}} To add more protein to your tacos, consider grilled chicken or tofu. Grilled chicken gives a nice smoky flavor. Simply season it with spices similar to the sweet potatoes. For tofu, press it to remove excess water, then cube it. Sauté it with olive oil, cumin, and chili powder until golden. Both options will enhance the dish and keep it filling. You can add many vegetables to enhance the taste. Bell peppers add a sweet crunch when roasted. Corn brings a pop of sweetness and texture. Zucchini or mushrooms can also work well. Just sauté these veggies before adding them to your tacos. They will complement the sweet potatoes and black beans beautifully. If you need to make the tacos gluten-free, use corn tortillas. Check labels for any hidden gluten in processed ingredients. For a nut-free version, skip any nut-based toppings. You can use seeds instead, like pumpkin or sunflower seeds, for crunch. These adjustments ensure everyone can enjoy the meal without worry. To keep your Sweet Potato Black Bean Tacos fresh, store them in an airtight container. This helps prevent any unwanted moisture and keeps them tasty. If you have leftover filling, separate it from the tortillas. The tortillas can become soggy if left together. Refrigerate the tacos for up to three days. For longer storage, you can freeze the filling and tortillas separately. Place them in freezer bags, and they can last for about three months. When it’s time to enjoy your leftovers, reheating is key. The best way to reheat the filling is in a small pot over medium heat. Stir it often until warm. For the tortillas, heat them in a dry skillet. Just a few seconds on each side will help them regain their softness and prevent tearing. Avoid using the microwave, as it can make them chewy. In the fridge, your Sweet Potato Black Bean Tacos will stay fresh for up to three days. If you freeze them, the filling can last about three months. However, for the best taste and texture, enjoy them sooner rather than later. The flavors will shine when you eat them fresh. If you want the full experience, check out the Full Recipe for details on preparation. Yes, you can make these tacos ahead of time. Prepare the sweet potatoes and black beans as instructed. Store them separately in airtight containers. This keeps flavors fresh. You can keep them in the fridge for up to three days. When ready to eat, reheat the sweet potatoes and beans. Warm the tortillas just before serving. This way, the tacos stay tasty and fun to eat. If you want to switch up flavors, try using butternut squash. It has a similar texture and sweetness. You can also use regular potatoes for a different taste. If you want a low-carb option, try cauliflower. It adds a nice twist and is still healthy. Each choice brings its own flavor, so feel free to experiment. Yes, these tacos are very healthy! Sweet potatoes are packed with vitamins. They are high in fiber, which helps digestion. Black beans add extra protein and fiber. Together, they make a filling meal. Using fresh vegetables as toppings adds more nutrients. Overall, this recipe is a great choice for a balanced diet. You will enjoy a meal that is good for your body and taste buds. For the full recipe, check out the details provided! This blog post covered making delicious Sweet Potato Black Bean Tacos. We looked at key ingredients, simple steps, and clever tips for success. Roasting sweet potatoes brings out their natural sweetness, while black beans add protein. You can customize your tacos with various proteins and toppings. In closing, these tacos are both healthy and easy to make. Enjoy your meal prep and feel free to experiment with flavors. Happy cooking!](https://soyumrecipes.com/wp-content/uploads/2025/05/af839ca6-d143-4048-ad90-6272aec49779.webp)
If you’re craving a tasty, healthy meal, look no further! Sweet Potato Black Bean Tacos are a simple yet flavorful
![To make Lemon Herb Grilled Chicken, gather these items: - 4 boneless, skinless chicken breasts - 1/4 cup olive oil - 2 lemons (zested and juiced) - 4 cloves garlic, minced - 2 tablespoons fresh rosemary, chopped - 2 tablespoons fresh thyme, chopped - 1 tablespoon honey - Salt and pepper to taste You will need a few tools for this recipe: - A large bowl for mixing - Whisk for blending the marinade - Grill or grill pan for cooking - Meat thermometer to check doneness - Tongs for handling the chicken Here’s a quick look at the nutrition: - Calories: Approximately 220 per serving - Protein: 30 grams - Carbohydrates: 3 grams - Fat: 10 grams - Fiber: 0 grams This dish is healthy and full of flavor. It’s great for any meal. You can find the [Full Recipe] above for more details on how to prepare it. First, gather all your ingredients. You will need olive oil, lemon zest, lemon juice, minced garlic, chopped rosemary, chopped thyme, honey, salt, and pepper. In a large bowl, combine these items. Whisk them together until they mix well. The marinade should smell fresh and bright. This step is key to making your chicken tasty. Next, take your chicken breasts and place them into the bowl. Make sure each piece is fully coated in the marinade. Cover the bowl with plastic wrap. Refrigerate the chicken for at least one hour. If you want a stronger flavor, marinate for up to four hours. The longer it sits, the more flavor it will soak up. When you're ready to grill, preheat your grill to medium-high heat. Lightly oil the grill grates to stop the chicken from sticking. Remove the chicken from the marinade. Let any extra marinade drip off but do not rinse the chicken. Discard the leftover marinade. Place the chicken on the grill. Cook for about 6-8 minutes on each side. Check if the chicken reaches 165°F (75°C). When done, take it off the grill and let it rest for 5 minutes. Resting helps keep the juices inside. Serve your beautiful Lemon Herb Grilled Chicken. For the full recipe, check out the section above. To make the best marinade, mix oil, lemon zest, juice, garlic, herbs, honey, salt, and pepper. Whisk until smooth. You want every bite to burst with flavor. Always coat the chicken well and let it soak. A minimum of one hour in the fridge works wonders. If you can, marinate for four hours for deeper taste. Grilling chicken at the right temperature is key. Preheat your grill to medium-high heat, around 375°F to 450°F. This heat sears the chicken, locking in moisture and flavor. Use a meat thermometer to check doneness. The chicken should reach 165°F inside. This ensures it is safe to eat and keeps it juicy. To prevent dry chicken, avoid overcooking. Grill for 6-8 minutes on each side. Let the chicken rest for five minutes after grilling. This helps the juices redistribute. Slicing too soon lets all the moisture escape. Serve promptly to enjoy the perfect texture. For more details, check the Full Recipe. {{image_2}} You can change the herbs to suit your taste. Try using basil or parsley. Oregano also works well with lemon. If you want a kick, add some red pepper flakes. For a smoky flavor, use smoked paprika. These swaps keep the dish fresh and fun. You don't have to use a grill. You can bake the chicken instead. Preheat your oven to 400°F (200°C). Place the marinated chicken on a baking sheet. Bake for about 20-25 minutes. You can also pan-sear the chicken in a skillet. Use medium heat and cook for about 6-8 minutes on each side. Each method gives a different texture but tastes just as good. Lemon Herb Grilled Chicken pairs well with many sides. Serve it with a fresh green salad. Grilled vegetables add color and flavor. For a heartier meal, try rice or quinoa. Don't forget to garnish with lemon wedges and fresh herbs. These touches make your meal look and taste amazing. For the full recipe, check out the details above. After you make Lemon Herb Grilled Chicken, cool it down first. Place the chicken in an airtight container. It will stay fresh in the fridge for up to four days. Keep it away from strong-smelling foods to prevent flavor changes. When you're ready to eat, check for any signs of spoilage before reheating. To freeze Lemon Herb Grilled Chicken, let it cool completely. Wrap each piece in plastic wrap or foil. Place the wrapped chicken in a freezer bag. It can last up to three months in the freezer. Make sure to label the bag with the date. This way, you won’t forget when it was made. When you're ready to enjoy leftover grilled chicken, reheat it gently. You can use the oven or a skillet. If using an oven, set it to 350°F (175°C). Heat for 15-20 minutes or until warmed through. If using a skillet, add a little olive oil and warm on medium heat. Cover the skillet to keep moisture in. This will help the chicken stay juicy and tasty. You should marinate the chicken for at least one hour. This gives the flavors time to soak in. For more taste, you can marinate it for up to four hours. Just make sure to keep it in the fridge. Longer marinating helps the chicken stay juicy and flavorful. Yes, you can use chicken thighs. They have more fat, which makes them juicy and tender. Thighs also hold up well on the grill. Just adjust the cooking time since thighs may need a few extra minutes to cook through. Some great sides include grilled vegetables, a fresh green salad, or rice. You might also enjoy some garlic bread or roasted potatoes. These sides bring out the bright flavors of the chicken. They make your meal colorful and tasty. For more ideas, check out the Full Recipe! You learned how to make Lemon Herb Grilled Chicken. We covered ingredients, tools, nutrition, and step-by-step cooking. I shared tips to keep your chicken juicy and variations to fit your taste. Lastly, we discussed storage and answered common questions. Experiment with flavors. Enjoy each bite of your tasty grilled chicken!](https://soyumrecipes.com/wp-content/uploads/2025/05/4ba7039f-fb72-4f51-b5a2-a1ba01347f86.webp)
Grilling can be both simple and delicious, especially with Lemon Herb Grilled Chicken. This easy method packs a fresh flavor
![- 1 large head of cauliflower, cut into florets - 4 tablespoons olive oil - 4 cloves garlic, minced - 1 teaspoon garlic powder - 1 teaspoon onion powder - ½ teaspoon smoked paprika - ½ teaspoon salt - ¼ teaspoon black pepper - ½ cup freshly grated Parmesan cheese - Fresh parsley, chopped (for garnish) Choosing the right cauliflower is key for this dish. Look for a head that is firm and white with no brown spots. The leaves should be fresh and green. A fresh cauliflower has tight florets that feel heavy for its size. For those with dietary needs, you can swap out some ingredients. Use nutritional yeast instead of Parmesan for a vegan option. If you're gluten-free, this recipe is already safe as it contains no gluten. You can also add other herbs like thyme or rosemary for a twist. Try this Garlic Parmesan Roasted Cauliflower recipe for a tasty side. For the full recipe, check out the cooking instructions above. Start by gathering your ingredients. You will need a large head of cauliflower, olive oil, garlic, and spices. This recipe is simple and quick. It takes about 10 minutes to prep. - Preheat the oven to 425°F (220°C): This heat will help the cauliflower get crispy. - Coat cauliflower with olive oil and seasonings: In a big bowl, add the cauliflower florets. Drizzle them with olive oil, then toss to coat. Next, add minced garlic, garlic powder, onion powder, smoked paprika, salt, and black pepper. Mix until all pieces are coated. - Roast cauliflower and add Parmesan: Spread the cauliflower on a lined baking sheet. Roast for 25 minutes, turning halfway. When golden brown, take it out and sprinkle with Parmesan. Return to the oven for 5 more minutes until the cheese melts. Let the cauliflower cool for a few minutes. Garnish with freshly chopped parsley for color. Serve it warm as a tasty side dish or a healthy snack. For more details, check the Full Recipe. Enjoy your flavorful Garlic Parmesan Roasted Cauliflower! To boost flavor, add spices and herbs. For a twist, try chili flakes or Italian seasoning. Both bring warmth and depth. Fresh herbs like thyme or rosemary can add a fragrant touch. Pair your roasted cauliflower with dips and sauces. A creamy ranch or tangy yogurt sauce works well. These dips add contrast and excitement to each bite. To get that perfect roasted texture, ensure your cauliflower florets are cut evenly. This helps them cook at the same rate. Spread them out on the baking sheet in a single layer. Avoid overcrowding. If they’re too close, they’ll steam instead of roast. Flip them halfway through cooking. This step ensures even browning and crispiness. A few common mistakes can ruin your dish. First, don’t skip the olive oil. It helps the cauliflower crisp up nicely. Second, avoid under-seasoning. Be generous with garlic and spices for strong flavor. Lastly, don’t forget the cheese! Adding Parmesan too early can burn it. Follow the [Full Recipe] for best results. {{image_2}} You can change the cheese in this dish for more flavor. Try using mozzarella or gouda. These cheeses melt well and add a creamy touch. If you want a bolder flavor, add aged cheddar or blue cheese. For vegan options, use plant-based cheese. There are many brands that melt nicely. Nutritional yeast is another great choice. It gives a cheesy flavor without dairy. To change the taste, add different spices. Try cumin for warmth or cayenne for heat. You can also mix in Italian herbs like oregano or basil. A sprinkle of lemon zest adds freshness and brightness. Experimenting with flavors keeps this dish exciting. If you want a faster method, use an air fryer. Preheat it to 400°F (200°C) and cook for about 15 minutes. Shake the basket halfway for even cooking. Grilling is another fun option. Toss the cauliflower in olive oil and spices, then skewer them. Grill for 10-12 minutes, turning often. This gives a smoky flavor that pairs well with the garlic and cheese. For the full recipe, you can refer to the earlier section. After you enjoy your Garlic Parmesan Roasted Cauliflower, store any leftovers right away. Place the cooled cauliflower in an airtight container. Keep it in the fridge. It stays fresh for about 3 to 4 days. Make sure to seal it well to avoid moisture. If you want to keep it longer, freezing is a good option. To reheat, use the oven for the best taste. Preheat your oven to 350°F (175°C). Spread the cauliflower on a baking sheet. Heat for about 10 to 15 minutes. This keeps it crispy. You can also use a microwave, but it may lose its crunch. If you use the microwave, heat in short bursts. Check often to avoid overcooking. If you want to freeze Garlic Parmesan Roasted Cauliflower, first let it cool completely. Place it in a freezer-safe bag or container. Remove as much air as possible. It can last up to 3 months in the freezer. When you’re ready to eat it, thaw it in the fridge overnight. Then, reheat it using the oven to regain that lovely texture. You can find the full recipe for making fresh Garlic Parmesan Roasted Cauliflower above. The best dipping sauces for this dish are ranch, garlic aioli, or marinara. Each adds a new taste. You can also try a spicy sriracha mayo for a kick. These sauces balance the flavors of the roasted cauliflower. To make this dish vegan, simply replace Parmesan with a vegan cheese. Nutritional yeast is a great option. It gives a cheesy flavor without dairy. You can also skip the cheese for a lighter version. Yes, you can use frozen cauliflower. Just make sure to thaw it first. Pat it dry to remove excess moisture. This helps achieve that crispy texture you want when roasting. To serve more people, double or triple the ingredients. Ensure your baking sheet has enough space. You may need to roast in batches. This keeps the cauliflower from steaming and makes it crispier. This dish pairs well with grilled chicken, steak, or fish. It also works great as a side with pasta dishes. For a vegetarian option, try it with quinoa salad or rice. You can find the full recipe [here](#). This blog post covered everything you need for Garlic Parmesan Roasted Cauliflower. We explored the key ingredients, tasty tips, and easy cooking steps. I shared ways to enhance flavors and avoid common mistakes. You learned how to store and reheat leftovers effectively. Consider trying variations like different cheeses or cooking methods. Incorporating cauliflower can be fun and healthy. Enjoy creating your dish!](https://soyumrecipes.com/wp-content/uploads/2025/05/bee18c09-3e67-497a-b5ca-6c0a63cc0485.webp)
If you’re looking for a tasty side dish that pleases any crowd, try Garlic Parmesan Roasted Cauliflower. This crispy, savory
![- 4 large bell peppers (any color) - 1 cup cooked quinoa (or rice) - 1 cup black beans, drained and rinsed - 1 cup corn kernels (fresh, frozen, or canned) - 1 cup cherry tomatoes, halved - 1 teaspoon chili powder - ½ teaspoon cumin - 1 cup shredded cheddar cheese - ½ cup crumbled feta cheese - 2 tablespoons olive oil - Salt and pepper to taste - Fresh cilantro, for garnish Each ingredient in this recipe plays a big role in flavor and texture. Bell peppers, with their sweet notes, serve as a colorful base. Quinoa or rice adds a hearty element, making the meal filling. Black beans boost protein and fiber, while corn gives a sweet crunch. Cherry tomatoes add freshness and acidity, balancing the richness of the cheese. Seasoning is key! Chili powder and cumin provide a warm, spicy touch. Cheddar and feta cheese create a creamy, savory contrast. Olive oil enhances the flavors and helps the peppers cook evenly. Don't forget salt and pepper; they elevate every ingredient. For garnish, fresh cilantro adds a pop of color and brightness. This simple herb makes your dish look great and tastes even better. Want the full recipe? Check out the [Full Recipe]. 1. Preheat your oven to 375°F (190°C). 2. Cut the tops off the bell peppers. Remove the seeds and membranes. Place the peppers cut-side up in a baking dish. 3. In a large bowl, mix the cooked quinoa, black beans, corn, cherry tomatoes, chili powder, cumin, half of the cheddar cheese, and half of the feta cheese. Stir until well mixed. Add salt and pepper to taste. 4. Drizzle olive oil over the filled peppers to lightly coat them. 5. Stuff each bell pepper with the quinoa mixture. Pack it gently but firmly. 6. Sprinkle the remaining cheddar and feta cheese on top of each stuffed pepper. 1. Cover the baking dish with aluminum foil. Bake for 25 minutes. 2. Remove the foil and bake for another 10-15 minutes. The peppers should be tender, and the cheese should bubble and turn golden. 3. Once done, take them out of the oven. Let them cool for a few minutes before serving. You can find the full recipe above to guide you through the process. Enjoy your cheesy stuffed bell peppers! How to choose the best bell peppers Pick large bell peppers that feel firm. Look for bright colors like red, yellow, or green. These colors mean the peppers are fresh and sweet. Avoid any that have soft spots or wrinkles. The best bell peppers hold their shape well during cooking. Tips for seasoning and adjusting flavors Start with the basic seasonings in the recipe. Taste as you mix the filling. If it needs more flavor, add more chili powder or cumin. You can also try adding garlic powder or onion powder for depth. Fresh herbs like cilantro or parsley can brighten the dish. Don't forget to balance flavors with a little salt and pepper. Importance of watching cheese for the perfect melt As the peppers bake, keep an eye on the cheese. You want it to melt but not burn. If it browns too quickly, cover the dish with foil. This keeps the heat in and helps the cheese melt evenly. The goal is a gooey, cheesy top that looks inviting. Alternatives for cooking methods (like grilling or air frying) You can grill the stuffed peppers for a smoky flavor. Just wrap them in foil and place them on the grill. Air frying is another great option. It cooks them quickly and gives a nice crisp outside. Adjust the cooking time to about 20-25 minutes at 375°F. Both methods keep the peppers tasty and fun to eat. For the full recipe, check out the details and enjoy making these cheesy stuffed bell peppers! {{image_2}} You can change the filling to match your taste. Try using different grains, like rice or couscous. Each grain adds a unique texture and flavor to the dish. For protein, consider ground turkey, beef, or even tofu. Each option gives a different bite and makes the meal satisfying. For a fresh twist, mix in some herbs or spices. You can also add chopped veggies like zucchini or spinach. This makes the dish colorful and tasty. Experiment with what you have in your kitchen. You may find a new favorite! Choosing the right cheese makes a big difference. Cheddar is a classic choice for stuffing and topping. It melts well and gives a rich flavor. You can also use mozzarella for a gooey texture. Feta adds a tangy twist, giving your peppers a unique kick. If you want dairy-free options, there are great alternatives! Look for plant-based cheeses made from nuts or soy. They melt well and can taste just as good. Always check labels to find the best options for your diet. For the full recipe, be sure to check the details provided earlier. To store stuffed bell peppers in the fridge, let them cool first. Place them in an airtight container. They will stay fresh for about 3 to 5 days. When you want to eat them again, simply take them out. For reheating, use the oven for the best taste. Preheat your oven to 350°F (175°C). Place the peppers in a baking dish. Cover them with foil to keep moisture in. Heat for about 15 to 20 minutes or until they feel warm. To freeze stuffed bell peppers safely, wrap each one in plastic wrap. Then, place them in a freezer bag or container. They can last up to 3 months in the freezer. When you want to eat them later, take the peppers out of the freezer. Thaw them in the fridge for 24 hours before reheating. For reheating, you can use the oven again. Set it to 350°F (175°C) and bake for 20 to 25 minutes. This keeps them tasty and fresh. For the full recipe, check out the details above. Enjoy your cheesy stuffed bell peppers! Yes, you can prepare cheesy stuffed bell peppers ahead of time. Just stuff the peppers and cover them tightly. Place them in the fridge for a day or two. When ready to bake, you can cook them straight from the fridge. Just add a few extra minutes to the baking time. You can use rice instead of quinoa. Brown rice or white rice works well. Other good options include couscous or even lentils. Each will add a unique flavor and texture to your stuffed peppers. To add heat, mix in chopped jalapeños or a dash of hot sauce to the filling. You can also use spicy cheese, like pepper jack, instead of regular cheddar. These small changes will give your dish a nice kick. Cheesy stuffed bell peppers can be healthy. They are packed with veggies and protein from beans or meat. If you use whole grains like quinoa, you also get great fiber. Just watch the cheese and oil to keep them lighter. Overall, they make a balanced meal. You now have a complete guide to making cheesy stuffed bell peppers. We covered ingredients, preparation steps, cooking techniques, and storage tips. You learned how to choose the best peppers and adjust the flavors to your liking. Explore variations with different grains, proteins, and cheeses. Remember, these peppers are versatile and easy to make. Enjoy your cooking, and don’t hesitate to experiment! Your taste buds will thank you for the delicious meals ahead.](https://soyumrecipes.com/wp-content/uploads/2025/05/b36fb578-a34c-4c36-b38a-86483a411d21.webp)
Are you ready for a meal that’s both fun and easy? Cheesy stuffed bell peppers are the answer! This dish
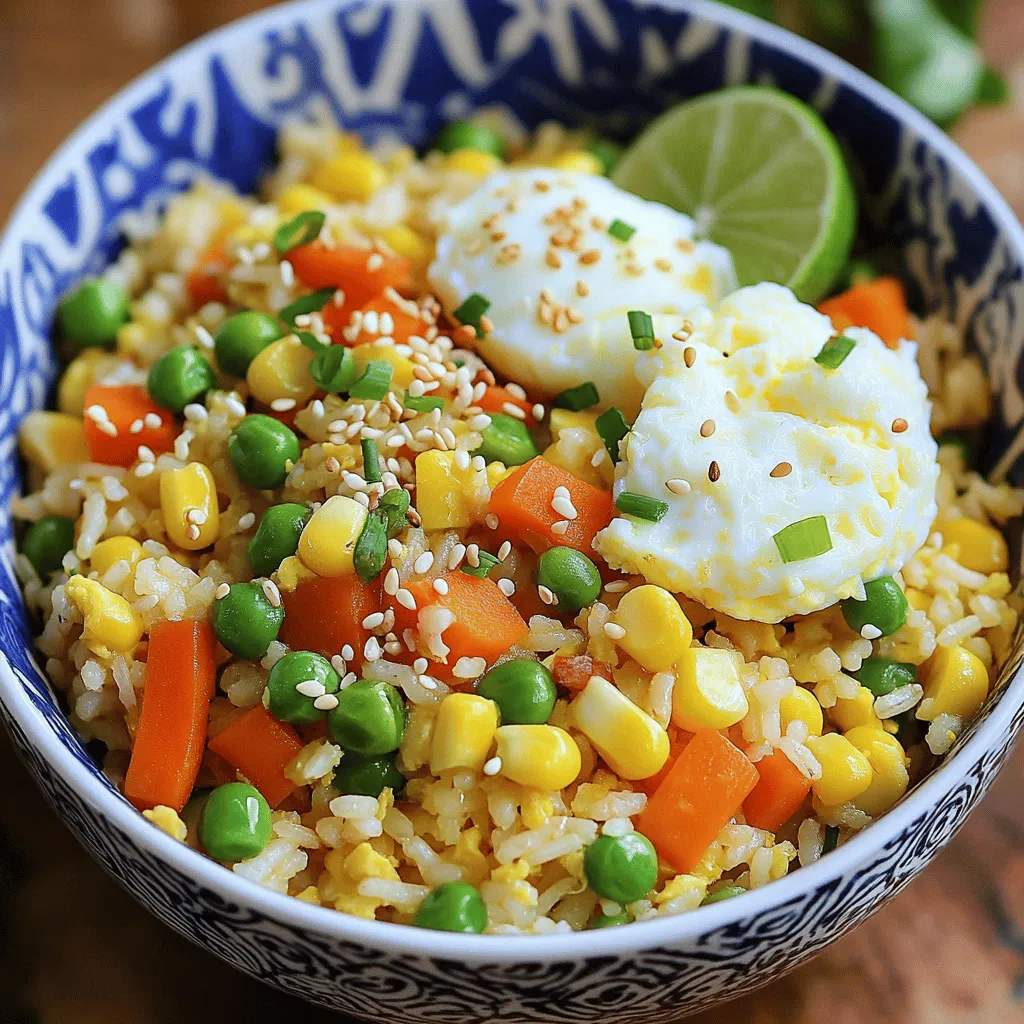
Looking for a delicious meal that’s quick to whip up? You’re in the right place! My Easy Vegetable Fried Rice
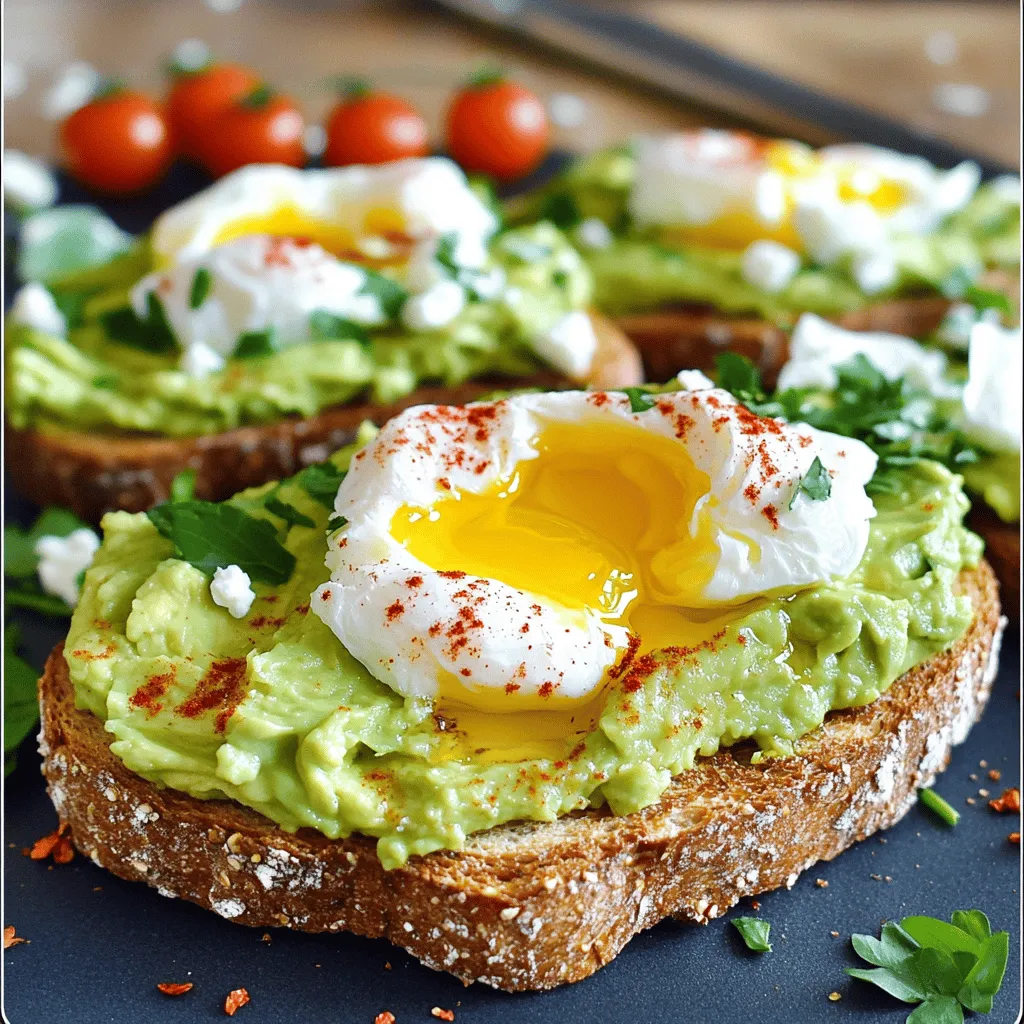
Are you ready to elevate your breakfast game? This Savory Avocado Toast with Poached Egg recipe is your ticket to
![For a tasty Coconut Lime Chicken, you need just a few main ingredients. Here’s what you will need: - 4 boneless, skinless chicken breasts - 1 can (13.5 oz) coconut milk - 2 limes (juice and zest) - 2 tablespoons honey - 3 cloves garlic, minced - 1 tablespoon fresh ginger, grated - 1 teaspoon ground cumin - 1 teaspoon paprika - Salt and pepper to taste - Fresh cilantro for garnish The chicken breasts are the star here. They should be fresh and plump for the best results. The coconut milk adds richness, while lime gives a bright, tangy flavor. Honey balances the taste and keeps the chicken moist. Garlic and ginger add depth, making every bite special. You can switch things up with some optional ingredients. Here are a few ideas: - Different herbs: Try fresh basil or mint for a twist. These can enhance the dish and add a unique taste. - Spice adjustments: If you like heat, add a pinch of cayenne. For a smoky flavor, think about using smoked paprika. Feel free to get creative! Mixing and matching flavors can make your Coconut Lime Chicken even more exciting. For the full recipe, check out the complete guide. To start, mix the marinade essentials in a large bowl. Combine the coconut milk, lime juice, lime zest, honey, minced garlic, grated ginger, cumin, paprika, salt, and pepper. Whisk these ingredients until they blend well. This mix gives the chicken its rich flavor. For maximum flavor absorption, let the chicken sit in the marinade. Cover it and refrigerate for at least 1 hour. If you have time, let it marinate for up to 4 hours. This extra time allows the chicken to soak up all the tasty flavors. Next, it's time to cook the chicken. Preheat your grill or skillet over medium-high heat. After removing the chicken from the marinade, let the excess drip off. You can save the marinade to use later. If you grill the chicken, cook it for about 6-7 minutes on each side. Aim for an internal temperature of 165°F (75°C) to ensure it's fully cooked. If you prefer a skillet, you can use the same cooking time. The key is to achieve a nice golden brown on both sides. Once the chicken is cooked, take it off the grill and let it rest for a few minutes. This resting period helps keep the chicken juicy. After resting, slice the chicken into pieces. Finally, drizzle the thickened marinade over the chicken slices. This adds more flavor and makes the dish look appealing. Garnish with fresh cilantro for a burst of color. Enjoy your delicious Coconut Lime Chicken! For the complete recipe, check out the [Full Recipe]. Over-marinating tips: Marinating chicken can add great flavor. However, too much time in the marinade can make the chicken mushy. I suggest marinating for 1 to 4 hours. If you go over 4 hours, the texture may change. Trust me, less is more when it comes to marinating. Cooking temperature misconceptions: Many cooks think higher heat means faster cooking. This is not true. Cooking chicken on medium heat helps it cook evenly. Aim for 165°F (75°C) inside. A meat thermometer is your best friend here. Once you reach this temperature, the chicken is safe to eat. Suggested side dishes: Coconut lime chicken pairs well with rice or a fresh salad. Fluffy rice soaks up the sauce. A crisp salad adds texture and freshness. You can even add mango or avocado for a tropical twist. Cooking tips for juiciness: To keep your chicken juicy, let it rest after cooking. This helps the juices settle back in. Slicing too soon can cause the juices to run out. After resting, drizzle the reduced marinade over the chicken for extra flavor. This step makes a big difference! You can find the full recipe [here](#). {{image_2}} You can swap chicken for other proteins. Shrimp works great with the same marinade. Just marinate for 30 minutes. Grill or sauté shrimp for about 3-4 minutes per side. Tofu is another tasty choice. Use firm tofu, and press it to remove extra moisture. Cut it into cubes, marinate, and grill or pan-fry until golden. These options keep the dish fresh and fun. If you need gluten-free options, this recipe is already safe. Just check your honey and spices to ensure they are gluten-free. For dairy-free, the coconut milk provides a rich base. You can also use almond or soy milk if you prefer. These swaps help everyone enjoy this meal without worry. Want to add more tropical flair? Try adding pineapple or mango chunks to the marinade. These fruits add sweetness and a nice bite. You can also toss in some chopped jalapeños for heat. Fresh herbs like mint or basil can give the dish an extra layer of flavor. Get creative and make this Coconut Lime Chicken your own! For the full recipe, check out the details above. After enjoying your Coconut Lime Chicken, store any leftovers in the fridge. Use an airtight container. This keeps the chicken fresh for up to three days. For best taste, chill the chicken within two hours of cooking. Ensure it cools down a bit before sealing it. If you want to store it longer, freeze the chicken. Wrap it tightly in plastic wrap, then place it in a freezer bag. It can last up to three months in the freezer. Reheating chicken can be tricky. You want it warm but not dry. To keep the moisture, use the microwave. Place the chicken on a microwave-safe plate. Cover it with a damp paper towel. Heat it in short bursts, checking often. This helps steam the chicken. Another great option is the oven. Preheat it to 350°F (175°C). Place the chicken in a baking dish. Add a splash of coconut milk or broth to the dish. Cover it with foil. Bake for about 15 minutes or until heated through. This method helps the chicken stay juicy and flavorful. For quick reheating, you can also use a skillet. Heat it over medium heat. Add a bit of oil or butter to the pan. Cook the chicken for just a few minutes on each side. This method gives a nice crisp to the outside while keeping the inside moist. By following these tips, you can enjoy your Coconut Lime Chicken even on day two! Yes, you can marinate the chicken overnight. This gives the chicken more flavor. If you choose to marinate longer, it can become very tender. Just be careful not to overdo it. The acid from the lime juice can change the chicken's texture if left too long. A good rule is to marinate for 12 hours at most. You have many tasty options for sides. Here are some ideas: - Fluffy rice or quinoa - Steamed vegetables like broccoli or green beans - A fresh salad with mixed greens - Grilled corn on the cob - Tropical fruits like mango or pineapple - Light beverages like coconut water or a lime soda These sides make a colorful plate and add more flavor. To check if the chicken is cooked, use a meat thermometer. The safe internal temperature is 165°F (75°C). Insert the thermometer into the thickest part of the chicken. If you don’t have one, cut the chicken in the middle. The meat should be white with no pink. Juices should run clear, too. Let the chicken rest for a few minutes after cooking. This keeps it juicy. For more tips, see the Full Recipe. Coconut Lime Chicken is a tasty dish that you can easily make. We discussed main and optional ingredients, plus tips for flavor. I shared step-by-step instructions, cooking methods, and how to avoid common mistakes. We also explored variations for dietary needs and discussed storage tips. Remember, this dish is flexible; feel free to experiment with flavors and sides. Enjoying a delicious, homemade meal is rewarding. Don’t hesitate to try this recipe and make it your own!](https://soyumrecipes.com/wp-content/uploads/2025/04/2448a00c-65be-41b1-b275-319157058407.webp)
If you’re craving a burst of tropical flavor, this Coconut Lime Chicken recipe is for you! With simple ingredients and
![- 1 cup all-purpose flour (heat-treated for safety) - 1/2 cup brown sugar, packed - 1/4 cup granulated sugar - 1/2 cup unsalted butter, softened - 1 teaspoon vanilla extract - 2 tablespoons milk (or dairy-free alternative) - 1/2 cup mini chocolate chips - 1/2 cup chopped nuts (walnuts or pecans) - A pinch of salt To make a great Chocolate Chip Cookie Dough Dip, you need simple ingredients. Each one plays a key role in creating the perfect taste and texture. First, heat-treat the flour for safety. This step removes any harmful bacteria. You can do this by baking the flour at 350°F for about five minutes. Next, the brown sugar adds moisture and a deep flavor. The granulated sugar gives a nice sweetness. Together, they make the dip taste like real cookie dough. Butter is crucial. It keeps the dip creamy and smooth. Make sure it's softened. This makes it easy to mix. Vanilla extract adds a warm, sweet note. Milk helps to blend everything together. You can use dairy-free milk if you prefer. Mini chocolate chips provide that classic cookie flavor. They melt slightly but keep their shape. Chopped nuts add crunch. You can use walnuts or pecans, depending on your taste. Lastly, a pinch of salt balances the sweetness. It brings out all the flavors. With these ingredients ready, you can create a fun and tasty dip. Refer to the [Full Recipe] for detailed steps and enjoy a delicious treat! 1. Start by creaming together the softened butter, brown sugar, and granulated sugar. Use an electric mixer for a light and fluffy mix. This step is key for a smooth dip. 2. Next, mix in the vanilla extract and milk. This adds flavor and creaminess to the dip. 3. Gradually sift in the heat-treated flour and salt. Mixing on low speed helps combine everything without making a mess. 1. Now, it’s time to fold in the mini chocolate chips and chopped nuts. Use a spatula to ensure they spread evenly throughout the dip. 2. Transfer the mixture to a bowl. Cover it with plastic wrap and chill in the fridge for at least 30 minutes. Chilling helps the flavors meld better. 1. Serve the dip chilled. It pairs well with graham crackers, sliced fruits, or pretzel sticks. Each option adds a nice crunch to the creamy dip. 2. Feel free to get creative! You can also use cookies or rice cakes for fun twists. Enjoy making this easy and fun snack! For the full recipe, check the details above. To make your dip just right, tweak the sweetness to match your taste. If you like things sweeter, add a touch more sugar. Also, chilling the dip helps the flavors blend better. Let it rest in the fridge for at least 30 minutes before serving. This wait makes a big difference! Using a hand mixer makes creaming the butter and sugars much easier. You want that light and fluffy texture. Don’t forget to heat-treat your flour for safety. Just spread it on a baking sheet and bake at 350°F (175°C) for five minutes. This step keeps your dip safe to eat. When it’s party time, get creative with how you serve your dip! You can use cute bowls or even mini jars. Serve it with graham crackers, sliced fruits, or pretzel sticks. Each bite will be a fun mix of flavors! For a twist, try adding toppings like whipped cream or more chocolate chips for an extra treat. For the full recipe, check out the details above! {{image_2}} You can make this dip even more fun by playing with flavors. Try adding different types of chocolate. Dark chocolate gives a rich taste, while white chocolate adds sweetness. You can also mix in some peanut butter chips for a nutty twist. Don't forget to switch up the nuts! Instead of walnuts or pecans, consider coconut flakes or crushed cookies. These add texture and extra flavor. If you want to make this dip gluten-free, you can use alternative flour like almond or oat flour. This way, everyone can enjoy it! For a vegan version, swap out the butter and milk with plant-based alternatives. Coconut oil works well for butter, and almond or oat milk is great for the milk. These changes keep the dip creamy and delicious while meeting dietary needs. For the full recipe, check out the [Full Recipe]. To keep your chocolate chip cookie dough dip fresh, store it in an airtight container. Make sure to cover the container tightly. You can keep it in the fridge for up to three days. If you notice it getting a bit dry, add a splash of milk to revive the creaminess. Yes, you can freeze chocolate chip cookie dough dip! Just place it in a freezer-safe container or bag. Be sure to seal it well to avoid freezer burn. When you're ready to enjoy it, take it out and let it thaw in the fridge overnight. This way, the dip will regain its smooth texture, making it perfect for dipping again. For the best taste, enjoy your dip within a week if stored in the fridge. While it can last longer, the flavors might fade. If you notice any odd smells or changes in texture, it's best to toss it. Always trust your senses; they are your best guide when enjoying this tasty treat! Chocolate chip cookie dough dip is a fun, creamy snack. It tastes just like cookie dough but is safe to eat. You can enjoy it with many dippers. Kids and adults love this treat. It’s rich and sweet, making it perfect for parties or movie nights. To make the dip less sweet, try these tips: - Use less brown sugar or granulated sugar. - Add a pinch of salt to balance the flavors. - Mix in plain Greek yogurt for a tangy touch. These steps help create a better balance. Yes, the dip is safe to eat raw. The key is using heat-treated flour. This process kills any harmful bacteria. You can buy heat-treated flour or make it at home. Just bake regular flour at a low temperature to make it safe. Always check the ingredients to ensure safety. You have many fun options to dip in this treat: - Graham crackers for a crunchy bite. - Sliced fruits like apples or bananas for a fresh taste. - Pretzel sticks for a sweet-salty combo. Feel free to get creative with your dippers! Yes, you can make this recipe in advance. Prepare the dip and chill it in the fridge. It’s best to let it sit for at least 30 minutes. This will help the flavors blend well. You can store it for up to three days in the fridge. Just cover it tightly with plastic wrap. Enjoy it fresh when you’re ready! For the full recipe, check out the section above. This blog post covered the fun of making Chocolate Chip Cookie Dough Dip. We went through the simple ingredients, the easy steps to prepare it, and tasty serving suggestions. I shared tips to enhance flavors and variations for all diets. Remember, you can chill the dip for better taste and store leftovers in the fridge or freezer. Making this treat can bring joy to any gathering. Enjoy creating this sweet dip, and don't hesitate to try new twists on the classic recipe!](https://soyumrecipes.com/wp-content/uploads/2025/04/1d187225-0d74-4ff7-8488-64bf71e66d93.webp)
If you love cookie dough, you’re in for a treat! This Chocolate Chip Cookie Dough Dip is the perfect blend
