Skip to content
DisclaimerTerms Of UseGDPR PolicyCookie Policy

So Yum Recipes

  • Home
  • Drinks
  • Appetizers
  • Dinner
  • Dessert
  • About
  • Contact
  • Privacy Policy
DisclaimerTerms Of UseGDPR PolicyCookie Policy

Chloe

To make this delightful chocolate avocado mousse, you need a few simple ingredients. Here’s what you will use: - 2 ripe avocados, pitted and peeled - 1/2 cup unsweetened cocoa powder - 1/3 cup pure maple syrup (or honey) - 1/4 cup almond milk (or any milk of choice) - 1 teaspoon vanilla extract - A pinch of sea salt - Fresh berries and mint leaves for garnish The ripe avocados are the star of the show. They give the mousse its creamy texture. Cocoa powder adds the rich chocolate flavor. The maple syrup or honey gives sweetness. Almond milk helps blend it all smoothly. A touch of vanilla adds a nice aroma. Avocados are not just tasty. They are also good for you! They are full of healthy fats that help your heart. These fats can lower bad cholesterol. Avocados also have fiber, which helps with digestion. They are rich in vitamins like C, E, and K. Eating avocados can help keep your skin and eyes healthy. This mousse lets you enjoy dessert while getting all those great benefits. You can choose different sweeteners for your mousse. The recipe calls for maple syrup, but honey works too. If you prefer, you can use agave syrup or stevia. Just remember, some sweeteners are sweeter than others. You might need to adjust the amount. Start with less and add more to taste. This way, you can customize the sweetness to your liking. To make this mousse, start by gathering your ingredients. You will need: - 2 ripe avocados, pitted and peeled - 1/2 cup unsweetened cocoa powder - 1/3 cup pure maple syrup (or honey) - 1/4 cup almond milk (or any milk of choice) - 1 teaspoon vanilla extract - A pinch of sea salt Ensure your avocados are ripe. They should feel soft but not mushy when you press them gently. This is key for a smooth mousse. Now, it’s time to blend! In a blender or food processor, add the ripe avocados, cocoa powder, maple syrup, almond milk, vanilla extract, and sea salt. Blend everything until smooth and creamy. You might need to stop and scrape down the sides. This helps mix everything well. After blending, taste your mousse. If you want it sweeter, add a bit more maple syrup or honey. Blend again until it’s just right. Once you have a velvety mixture, transfer it into serving cups or bowls. Refrigerate the mousse for at least 30 minutes. This helps it set and chill. When it’s ready, serve it cold. For a pretty touch, add fresh berries and mint leaves on top. You can also layer the mousse with crushed graham crackers or granola for some crunch. This Chocolate Avocado Mousse is not just a treat; it's a delightfully creamy dessert that you can enjoy without guilt. You can find the Full Recipe to help you repeat this success! To get that silky, smooth texture, use ripe avocados. They should feel soft but not mushy. Blend all ingredients until they are completely smooth. If it seems too thick, add a splash of almond milk. This will help create the right mix. Remember to scrape the sides of the blender often. This ensures everything blends evenly and gives you a creamy mousse. Taste your mousse after blending. If it's not sweet enough for you, add more maple syrup or honey. Start with a small amount and blend again. You can always add more sweetness, but you can't take it out. This lets you control how sweet your mousse gets. Each person has a different preference, so adjust it to fit your taste. Presentation is key for any dessert. Serve the mousse in clear cups to show off its rich color. Add fresh berries and mint leaves on top for a pop of color. You can also layer the mousse with crushed graham crackers or granola. This adds crunch and makes it look even better. A little creativity goes a long way in making your dessert shine. For the full recipe, check out the details above! {{image_2}} You can easily make this mousse dairy-free and vegan. Use almond milk or coconut milk instead of regular milk. Maple syrup is a great choice for sweetness, as it is plant-based. This way, you get a creamy texture without using any dairy. The mousse still tastes rich and satisfying. Want to switch up the flavor? You can infuse your mousse with mint or coffee. Add a few sprigs of fresh mint leaves to the blender. Blend until smooth for a refreshing twist. For a coffee flavor, mix in a tablespoon of instant coffee or espresso powder. This gives the mousse a nice depth and warmth. Get creative with mix-ins and toppings! You can stir in some chocolate chips or chopped nuts for a fun texture. Fresh berries like strawberries or raspberries make a great topping. They add a burst of color and flavor. Don’t forget to sprinkle some crushed graham crackers or granola for added crunch. Each bite will be a delight! For the full recipe, check out the details above. To keep the mousse fresh, cover it tightly with plastic wrap. You can also use an airtight container. This helps prevent air from drying it out. Make sure to store it in the fridge right after serving. The mousse lasts about 3 to 5 days in the fridge. After that, it may lose its creamy texture. Always check for any signs of spoilage, like an off smell or change in color. You can freeze chocolate avocado mousse, but the texture may change. It can become grainy after thawing. If you want to freeze it, place it in a freezer-safe container. Make sure to leave space for expansion. Try to use it within 1 month for best quality. Yes, you can use other sweeteners. Agave syrup works well. You can also use granulated sugar or coconut sugar. Just remember to adjust the amount to taste. Each sweetener has its own level of sweetness. Start small and add more if needed. To ripen avocados fast, place them in a paper bag. This traps ethylene gas, which speeds up ripening. You can add an apple or banana for extra help. Check them daily. Once they are soft, they are ready to use. Yes, Chocolate Avocado Mousse is healthy! It has healthy fats from avocados. These fats can help keep your heart healthy. This dessert also has fiber, which is good for digestion. Plus, it’s lower in sugar than many other desserts. You can find the full recipe to enjoy this tasty treat! You now know how to make a great avocado mousse. We covered key ingredients, from avocados to sweeteners. I shared step-by-step instructions for blending and chilling. Tips for perfect consistency and decoration can help wow your guests. You even learned about fun variations, storage tips, and answers to common questions. Remember, this mousse is healthy and tasty! Enjoy your delicious creation and impress everyone with your skills.

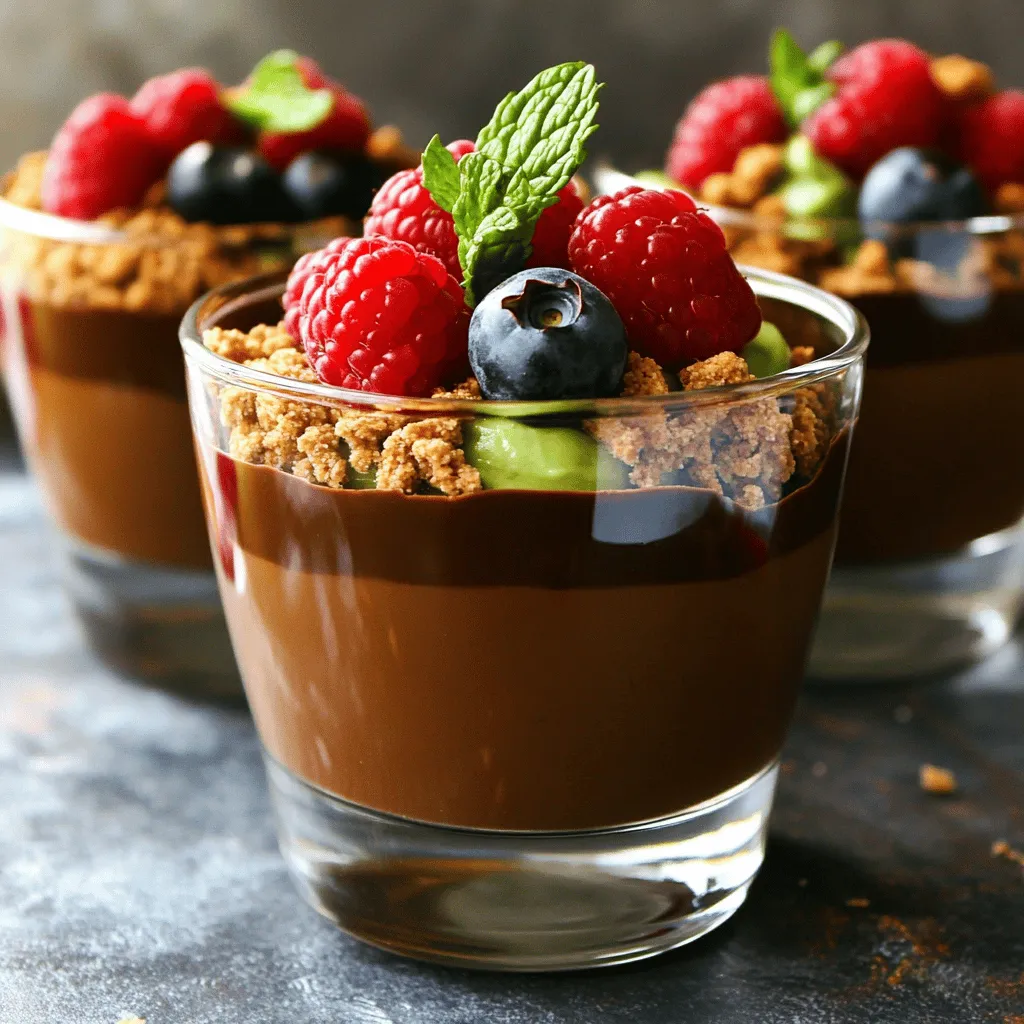
Chocolate Avocado Mousse Delightfully Creamy Treat

Are you ready to enjoy a dessert that’s both rich and healthy? My Chocolate Avocado Mousse will blow your mind!

Here is what you need to make savory avocado toast with feta and tomatoes: - 2 ripe avocados - 1 cup cherry tomatoes, halved - 1/2 cup crumbled feta cheese - 1 tablespoon olive oil - 1 tablespoon balsamic vinegar - 1 teaspoon dried oregano - Salt and pepper to taste - 4 slices of whole-grain bread - Fresh basil leaves for garnish (optional) Using fresh ingredients makes the most difference in flavor. Choose ripe avocados for a creamy texture. The tomatoes should be bright and juicy, adding a pop of color. Feta cheese brings saltiness and a tangy bite that balances the creamy avocado. Whole-grain bread adds a nutty flavor and a nice crunch. Gathering these ingredients will set you up for success in making a delicious and visually appealing dish. I recommend using high-quality olive oil and balsamic vinegar for the best taste. If you want to add a personal touch, consider fresh herbs like basil or cilantro for garnish. For the full recipe, follow these simple steps to create a meal that is both satisfying and nourishing. To start, I toast whole-grain bread for this recipe. Use a toaster or a grill. Aim for a golden brown color. This creates a nice, crispy base for the toppings. For the perfect crispness, keep an eye on the bread. Don't let it burn! You want it crunchy but not too dark. Next, we make the avocado spread. I take two ripe avocados and cut them in half. Scoop out the green flesh into a bowl. Use a fork to mash it up until it's creamy. Be gentle; you want a smooth texture. To enhance the flavor, add a pinch of salt and pepper. I also mix in half of the dried oregano. This adds a lovely taste to the spread. Now it's time to assemble the toast! Start by spreading a generous layer of the avocado mixture on each slice of toast. Make sure to cover it well. Then, layer the cherry tomatoes on top. I like to ensure an even distribution for color and taste. Finally, sprinkle crumbled feta cheese over the tomatoes. This adds a nice contrast to the creamy avocado and juicy tomatoes. If you want, garnish with fresh basil leaves for extra flavor. For the full recipe, check out the [Full Recipe]. Enjoy your savory avocado toast with feta and tomatoes! To make your avocado toast truly shine, use the right seasonings. Start with salt and pepper; they elevate the taste. A dash of lemon juice adds brightness and helps prevent browning. Mix in some crushed red pepper for a subtle kick. Balancing flavors is key too. Creamy avocado pairs well with tangy feta and sweet cherry tomatoes. Aim for a mix that excites your taste buds. Garnishing your toast makes it more appealing. Fresh basil leaves add color and aroma. You can place whole leaves on top or chop them for a sprinkle. For a striking plate, use colorful cherry tomatoes. Arrange them in a circle or scatter them evenly. Use a drizzle of balsamic reduction for a gourmet touch. This not only enhances the look but adds flavor too. A few common mistakes can ruin your toast. First, don’t over-mash your avocado. Leave some small chunks for texture. Using the wrong tomatoes can also affect taste. Choose ripe cherry tomatoes for sweetness. Avoid bland or mealy tomatoes; they won’t provide the flavor you want. With these tips, your avocado toast will be a delicious hit! {{image_2}} You can easily change the flavors in your avocado toast. Adding spices or herbs can bring a new twist. I like to sprinkle chili flakes for some heat. Fresh cilantro also adds a bright taste. If you want to switch up the cheese, consider using goat cheese instead of feta. It has a creamy texture that pairs well with the other ingredients. For those who need gluten-free options, try gluten-free bread. There are many brands available that taste great. If you're looking for vegan substitutes, you can use a plant-based feta. It mimics the texture and flavor of traditional feta well. This way, you can enjoy the dish without dairy. Using seasonal vegetables can freshen up your toast. Try adding sliced radishes in the spring or roasted squash in the fall. You can also adapt this recipe for holidays or events. For a festive touch, add pomegranate seeds during winter celebrations. They add color and a burst of flavor. For the complete details and steps, check the Full Recipe. To keep your avocado toast fresh, store it in an airtight container. This helps prevent the bread from getting soggy. If you have leftover avocado spread, cover it tightly with plastic wrap. This reduces air exposure and slows browning. For the cherry tomatoes, keep them in a separate container. This keeps their flavor intact. When you want to enjoy leftover toast, use a toaster or an oven. A toaster brings back that crispy texture. Preheat your oven to 350°F (175°C) for about 5 to 10 minutes. This method keeps the toast from becoming rubbery. Avoid the microwave, as it often makes bread chewy. The avocado spread lasts about 1 to 2 days in the fridge. However, it's best when fresh. Whole-grain bread can stay fresh for about a week. Check for mold or a stale smell; these are signs of spoilage. Cherry tomatoes can last up to a week in the fridge. If they become mushy or change color, it's time to toss them. Always trust your senses! Enjoying fresh ingredients makes a big difference in taste. For the full recipe, check the section above! Yes, you can prepare some parts in advance. You can mash the avocados and store them. Keep the mashed avocado in an airtight container. Add a splash of lemon juice to stop browning. You can also mix the cherry tomatoes with oil and vinegar a few hours early. Toast the bread just before serving for the best taste. Whole-grain bread is my top pick. It adds a nice crunch and flavor. You can also use sourdough or rye bread. These types hold the toppings well without getting soggy. Choose a bread you love for the best experience. You can add extras to make it special. Try a sprinkle of chili flakes for heat. A drizzle of honey balances the flavors nicely. You can also serve it with a side of poached eggs for protein. Fresh herbs, like cilantro or chives, add a nice touch, too. This blog post provided a clear guide to making delicious avocado toast. You learned the key ingredients, step-by-step instructions, and tips for great flavor. We covered variations and storage ideas to keep your toast fresh. Remember, using the right ingredients and techniques makes all the difference. Try your unique twist on this dish and enjoy! Your perfect avocado toast awaits, and with these tips, you can impress anyone who joins you for a meal. Happy cooking!

Savory Avocado Toast with Feta and Tomatoes Recipe

Welcome to a delicious twist on a classic! My Savory Avocado Toast with Feta and Tomatoes combines creamy avocados, tangy

- 1 cup rolled oats - 1 ripe banana - 1 cup milk (or plant-based milk) - 1 large egg - 1 teaspoon baking powder - 1 teaspoon vanilla extract - 1/2 teaspoon cinnamon - Pinch of salt - Coconut oil or butter for cooking - Maple syrup and fresh fruits for serving These ingredients make Banana Oatmeal Pancakes both easy and healthy. The rolled oats give the pancakes a nice texture and keep you full. The ripe banana adds natural sweetness. You can use any milk you like, dairy or plant-based. The egg binds the mix together and adds protein. Baking powder helps the pancakes rise, while vanilla and cinnamon add great flavor. A bit of salt balances the taste. Finally, cooking with coconut oil or butter gives a lovely finish. Each serving has about 150 calories. They offer a good balance of nutrients. - Carbohydrates: 27 grams - Protein: 5 grams - Fats: 4 grams This breakdown shows that these pancakes are filling and nutritious. You get energy from the carbs, while the protein helps with muscle. Plus, they have healthy fats from the oil or butter. Enjoy these pancakes for breakfast or a snack! To start, grab your blender. Add these ingredients: - 1 cup rolled oats - 1 ripe banana - 1 cup milk (or plant-based milk) - 1 large egg - 1 teaspoon baking powder - 1 teaspoon vanilla extract - 1/2 teaspoon cinnamon - A pinch of salt Blend until smooth. This should take about 30 seconds. You want a thick batter, so don't rush it. If the batter feels too thin, add a bit more oats. Let the batter rest for 5-10 minutes. This helps it thicken up nicely. While your batter rests, heat a skillet over medium heat. Add a small amount of coconut oil or butter to coat the pan. Once hot, pour about 1/4 cup of the batter for each pancake. Cook for 3-4 minutes. Look for bubbles on the top and edges that seem set. This means it's time to flip! Cook the other side for 2-3 minutes until golden brown. Now comes the fun part—serving! Stack the pancakes high on a plate. Drizzle with maple syrup for sweetness. Add slices of fresh banana on top for a tasty touch. A sprinkle of cinnamon gives a nice finish. Feel free to add berries on the side for a pop of color. Enjoy your delicious Banana Oatmeal Pancakes! You can find the full recipe above. To ensure even cooking for all pancakes, use a hot skillet. Preheat it for a few minutes before pouring in the batter. This helps the pancakes cook through without burning. When you pour the batter, use about 1/4 cup for each pancake. This size cooks well and gives you a nice round shape. To prevent sticking, use coconut oil or butter to coat the skillet. Just a thin layer will do. If the pancakes stick, your skillet may not be hot enough. Adjust the heat as needed. If you want dairy-free options, use plant-based milk. Almond, soy, or oat milk work great. They blend well and keep the pancakes tasty. For a vegan option, swap the egg for a flaxseed meal. Mix 1 tablespoon of flaxseed with 2.5 tablespoons of water. Let it sit for a few minutes until it thickens. To enhance the taste, try adding spices like nutmeg or ginger. A bit of vanilla extract also adds a nice touch. You can also mix in chocolate chips or nuts for extra crunch. These additions make the pancakes even more delightful. {{image_2}} You can make these pancakes even more fun! Try adding fresh berries, like blueberries or strawberries, for a burst of flavor. You could also mix in some chocolate chips for a sweet treat. If you want to get creative, experiment with spices. Nutmeg or cardamom can give your pancakes a warm, cozy taste. Just a pinch can change everything! Want to make them healthier? Try adding protein powder to the batter. This will boost the protein and keep you full longer. You can also swap regular oats for whole grain ones. Whole grains add more fiber and nutrients, making your meal even better. Think outside the box when serving! You can create a Banana Oatmeal Pancake breakfast bowl. Stack pancakes and add yogurt, fruits, and nuts on top. Or, make pancake sandwiches. Just add a layer of nut butter or jam between two pancakes. These fun ideas will make breakfast exciting! For the full recipe, check out the details above. To store leftover pancakes, let them cool first. Place them in a flat container. You can use parchment paper between each pancake. This prevents them from sticking together. Cover the container tightly with a lid. Store it in the fridge for up to three days. For longer storage, you can freeze the pancakes. Place them in a freezer-safe bag. Be sure to remove as much air as possible. This helps prevent freezer burn. To reheat pancakes, you have two good options: the microwave or the skillet. If you use the microwave, place a pancake on a plate. Cover it with a damp paper towel. Heat for about 20-30 seconds. This keeps the pancake soft. If you prefer a skillet, heat it over low heat. Add a tiny bit of butter or oil. Place the pancake in the skillet for about one minute on each side. This method gives you a nice, warm, and slightly crispy pancake. Banana oatmeal pancakes last about three days in the fridge. They can stay fresh for about two months in the freezer. Always check for signs of spoilage like strange smells or colors. If you notice these, it's best to discard them. Enjoy your pancakes fresh, or store them for quick meals later! To make these pancakes gluten-free, choose certified gluten-free oats. Regular oats may have gluten due to cross-contamination. You can also use almond flour or coconut flour as a substitute for rolled oats. Adjust the liquid in your batter since these flours absorb more moisture. Yes, you can make these pancakes vegan. Replace the egg with one tablespoon of ground flaxseed mixed with three tablespoons of water. Let this mix sit for five minutes to thicken. Use almond milk or oat milk instead of regular milk for a dairy-free option. To ensure fluffiness, avoid over-mixing the batter. Blend until smooth, but leave some small lumps. Make sure your baking powder is fresh; old baking powder can lead to flat pancakes. Flip pancakes when you see bubbles forming on the surface. You can use quick oats, but they will change the texture. Quick oats create a smoother batter and thinner pancakes. Rolled oats give a heartier bite and thicker pancakes. If you use quick oats, blend them for a shorter time to keep some texture. Yes, letting the batter rest is important. It allows the oats to soak up moisture, making the pancakes softer. Resting for 5 to 10 minutes helps improve the texture and cooking. This step also enhances the flavors as they meld together. These banana oatmeal pancakes are simple and fun to make. We covered the key ingredients, step-by-step instructions, and tasty variations. You can easily swap ingredients for your needs and store leftovers too. Enjoy creating these healthy and delicious pancakes for breakfast. They not only taste great but also nourish your body. Try them out and make them your own! Happy cooking!

Banana Oatmeal Pancakes Easy and Healthy Recipe

Start your morning right with my easy and healthy Banana Oatmeal Pancakes! Packed with flavor and nutrition, these pancakes are

- 2 lbs baby potatoes, halved - 4 cloves garlic, minced - 3 tablespoons olive oil - 1 teaspoon dried rosemary - 1 teaspoon dried thyme - 1 teaspoon paprika - Salt and pepper to taste - Fresh parsley, chopped (for garnish) Gathering the right ingredients is key to making Garlic Herb Roasted Potatoes. Start with baby potatoes, as their small size ensures even cooking. Halving them allows for a crispy outside and soft inside. You will need four cloves of garlic, minced finely. Garlic adds a rich, savory flavor that pairs well with potatoes. Next, grab three tablespoons of olive oil. This oil helps the spices stick and gives a nice crisp to the potatoes. For spices, you will use one teaspoon each of dried rosemary, dried thyme, and paprika. These herbs bring warmth and depth. Don't forget salt and pepper—they enhance all the other flavors. Lastly, fresh parsley is perfect for garnishing. It adds a pop of color and freshness. Now you are ready to create a delicious dish! For the full recipe, refer to the details above. First, preheat your oven to 425°F (220°C). This step is key for crispy potatoes. Next, grab a large mixing bowl. In it, combine the halved baby potatoes, minced garlic, and olive oil. Then, add the dried rosemary, dried thyme, paprika, salt, and pepper. Toss everything well until the potatoes are fully coated. This coating helps to infuse the flavors. Now, spread the seasoned potatoes in a single layer on a large baking sheet. Make sure they aren’t crowded. This allows them to roast evenly. Place the baking sheet in your preheated oven. Roast for about 25-30 minutes. Halfway through, flip the potatoes to ensure they cook evenly. You want them golden brown and crispy, so keep an eye on them! Once done, remove the baking sheet from the oven. Let the potatoes cool for a couple of minutes. This cooling time helps them firm up a bit. Before serving, garnish with freshly chopped parsley. This adds a bright touch and enhances the dish's look. Enjoy your Garlic Herb Roasted Potatoes! For more details, check out the Full Recipe. To get the best roast, set your oven to 425°F (220°C). This hot temperature cooks the potatoes well. It helps them get golden and crispy. To make sure they are crispy, spread the potatoes out in one layer. Avoid crowding the pan. Flip them halfway through cooking. This ensures even browning all around. You can boost the flavor with herbs and spices. I love using dried rosemary and thyme. They add a lovely taste to the garlic. You can also try adding some fresh herbs if you have them. Adjust the salt and pepper to your liking. Start with a little and taste as you go. You can always add more! When serving, use a nice platter to show off the potatoes. Drizzle a bit more olive oil on top for shine. A sprinkle of fresh parsley gives a great pop of color. You can also add lemon zest for a fresh touch. This makes your dish look as good as it tastes! For the full recipe, check out the details provided. {{image_2}} You can change up the potatoes for this dish. Try using red potatoes or Yukon Golds. Each type gives a unique flavor and texture. You can also use sweet potatoes for a twist. For herbs, rosemary and thyme are great, but feel free to mix it up. Oregano, basil, or even dill can add a new taste. You can also add spices, like cumin or chili powder, for some heat. If you want a quicker method, use an air fryer. Set it at 400°F (200°C). Cook the potatoes for about 15-20 minutes. Shake the basket halfway through for even cooking. Grilling is another fun option. Just skewer the potatoes and grill them over medium heat. Cook for 15-20 minutes, turning often, until they are tender and have nice grill marks. Garlic Herb Roasted Potatoes go well with many dishes. They pair nicely with grilled chicken or steak. You can also serve them alongside roasted veggies or fish for a complete meal. You can make these potatoes a main dish too. Just add some cheese or a rich sauce on top. Serve them with a fresh salad to balance the meal. For the complete recipe, check out the Full Recipe section. To keep your Garlic Herb Roasted Potatoes fresh, use airtight containers. Glass or plastic containers work well. Store them in the fridge for up to four days. Make sure they cool down before sealing them. This helps avoid sogginess. When it's time to enjoy leftovers, you have options. The best way is to reheat in the oven. Set your oven to 350°F (175°C). Place the potatoes on a baking sheet and heat for about 10-15 minutes. This helps restore their crispy texture. You can also use a microwave, but they may get soft. If you do, heat them in short bursts to keep some crunch. Can you freeze Garlic Herb Roasted Potatoes? Yes, you can! To freeze, let them cool completely and then place them in freezer bags. Remove as much air as you can to prevent freezer burn. They will last for about three months in the freezer. When you want to eat them, thaw in the fridge overnight. Then, reheat in the oven for the best results. You should roast Garlic Herb Potatoes for 25 to 30 minutes. This time helps them become golden and crispy. I recommend flipping them halfway through. This ensures even cooking and a nice texture. Keep an eye on them, as oven times can vary. If you notice they need more time, let them roast a few minutes longer. Yes, you can use other types of potatoes. Red, white, or Yukon Gold potatoes all work well. Each type adds a unique flavor and texture. Just cut them into similar sizes for even cooking. Baby potatoes are great for their creaminess and small size. Experiment with what you have on hand! Garlic Herb Roasted Potatoes pair well with many dishes. They make a great side with grilled chicken or steak. You can also serve them with roasted vegetables for a veggie feast. If you want a lighter meal, try them with a fresh salad. They add a lovely crunch and flavor to any plate. For more ideas, check out the Full Recipe for inspiration! In this blog post, we explored how to make Garlic Herb Roasted Potatoes. We covered essential ingredients, step-by-step instructions, tips for perfect roasting, and fun variations. You'll enjoy this dish with many meals. Remember, you can swap ingredients and adjust flavors to fit your taste. Proper storage extends the life of your leftovers, so use what you learned. Now, get cooking and enjoy your tasty creation!

Garlic Herb Roasted Potatoes Flavored and Simple Dish

Looking for a delicious side dish that’s both simple and flavorful? Garlic Herb Roasted Potatoes are the answer! In this

To make this dish, you'll need the following main ingredients: - 1 lb (450 g) boneless, skinless chicken thighs - 3 tablespoons honey - 3 tablespoons soy sauce - 4 cloves garlic, minced - 1 tablespoon fresh ginger, grated - 1-2 teaspoons red chili flakes (adjust to taste) - 2 tablespoons olive oil - Salt and pepper to taste These ingredients create a perfect blend of sweet and spicy flavors. The chicken thighs are juicy and tender, while the honey adds a rich sweetness. The soy sauce gives umami depth, and garlic and ginger bring a fresh kick. Enhance your dish with these garnishes and sides: - 2 green onions, sliced (for garnish) - Sesame seeds (for garnish) You can also serve the chicken with rice or stir-fried vegetables. These sides soak up the tasty glaze and balance the dish well. If you need alternatives, consider these options: - Chicken Breasts: Use these for a leaner cut. - Maple Syrup: Swap this for honey if needed. - Coconut Aminos: A great soy sauce alternative if you want a gluten-free option. These substitutions will still keep your dish delicious and flavorful. Using different ingredients allows you to customize your meal to your liking. For the full recipe, check out the details above. To start, you will need to mix the marinade. Grab a medium bowl and add the honey, soy sauce, minced garlic, grated ginger, and red chili flakes. This mix gives the chicken a sweet and spicy kick. Don't forget to add a pinch of salt and pepper. Next, take the chicken thighs and place them in the bowl. Make sure they are well coated in the marinade. Cover the bowl and put it in the fridge. Let it sit for at least 30 minutes. If you have more time, let it marinate for up to 2 hours for a richer flavor. Now it’s time to cook. Heat 2 tablespoons of olive oil in a large skillet over medium-high heat. Once the oil is hot, take the chicken out of the marinade. Set aside the marinade for later. Place the chicken in the skillet. Sear the chicken for about 4-5 minutes on each side. Look for a golden brown color and ensure it is cooked through. This step gives the chicken a nice crust and locks in the flavors. When the chicken is cooked, reduce the heat to medium. Pour the reserved marinade into the skillet. Let it simmer for about 5 minutes. Stir occasionally until it thickens a bit and glazes the chicken. This glaze adds a sticky, sweet finish to the dish. Once done, remove the skillet from heat. Transfer the chicken to a cutting board and let it rest for a few minutes. Slice the chicken and drizzle any remaining glaze over the slices. For the final touch, plate it up and sprinkle with sliced green onions and sesame seeds. Your Spicy Honey Garlic Chicken is now ready to enjoy! For more details, check out the Full Recipe. To marinate chicken well, mix honey, soy sauce, minced garlic, and ginger in a bowl. Add red chili flakes for heat. Use salt and pepper to taste. Make sure to coat the chicken thighs evenly. Cover and refrigerate for at least 30 minutes. If time allows, marinate up to 2 hours for even deeper flavor. The longer you marinate, the more the flavors soak in. For a thick and shiny glaze, reserve some of the marinade. Sear the chicken first, then pour in the reserved marinade. Let it simmer on medium heat. Stir occasionally for about 5 minutes. This helps it reduce and thicken. You want it to coat the chicken nicely. If you want a thicker glaze, you can simmer a bit longer. Just watch it so it doesn’t burn. Serve Spicy Honey Garlic Chicken over rice or quinoa. It pairs well with steamed veggies like broccoli or snap peas. You can also add a fresh salad for crunch. For a fun twist, try it in a wrap with crunchy veggies. Don’t forget to sprinkle sliced green onions and sesame seeds on top for a burst of flavor. For a complete meal, add a side of garlic bread or a light soup. Explore these ideas to make your meal even more enjoyable! {{image_2}} You can add vegetables to your spicy honey garlic chicken to make it a full meal. Try bell peppers, broccoli, or snap peas. Cut them into bite-sized pieces. Add them to the skillet when you sear the chicken. They will cook quickly and soak up the tasty sauce. You can also serve the chicken over a bed of steamed rice with veggies on the side. Adjusting spice levels is easy with this recipe. If you want more heat, add more red chili flakes. If you prefer it milder, cut back on the flakes. You can also use fresh chili peppers for a different flavor. Experiment with different amounts until you find what you like best. Remember, you can always add more spice later if needed! You can cook spicy honey garlic chicken in many ways. Grilling gives it a smoky flavor. Just marinate the chicken as usual, then grill over medium heat for about 6-7 minutes per side. Baking is another option. Preheat your oven to 400°F (200°C). Place the marinated chicken on a baking sheet and cook for 20-25 minutes. Check the internal temperature to ensure it’s safe to eat. Each method will give you a unique taste and texture. For the full recipe, refer to the earlier section. To store leftover Spicy Honey Garlic Chicken, place it in an airtight container. Make sure the chicken cools down first. You can keep it in the fridge for up to 3 days. If you want to keep it longer, freezing is a great option. Just remember to separate the chicken pieces to avoid sticking. When reheating your chicken, use a skillet for the best results. Heat it over medium heat. Add a splash of water or broth to keep it moist. You can also cover the skillet to trap steam. This method helps keep the chicken tender and juicy. If you prefer the microwave, use a low power setting. Heat in short bursts to avoid drying it out. For freezing, wrap each piece of chicken in plastic wrap. Then, place it in a freezer bag. Remove as much air as possible before sealing. You can freeze it for up to 3 months. When ready to eat, thaw overnight in the fridge. Reheat it as described above for a tasty meal any time! Enjoy your delicious Spicy Honey Garlic Chicken from the [Full Recipe]. You can use maple syrup or agave nectar instead of honey. Both options add sweetness. They also blend well in the marinade. If you want a different taste, try brown sugar. Just mix it with a little water to make it liquid. Yes, you can make this dish ahead of time. Marinate the chicken earlier in the day or even the night before. This allows the flavors to deepen. Cook the chicken and store it in the fridge. It stays tasty for up to three days. Serve Spicy Honey Garlic Chicken with rice or quinoa. They soak up the sauce well. Steamed broccoli or green beans add color and crunch. A fresh salad also pairs nicely. You can keep it simple or get creative with sides. For more ideas, check the Full Recipe. This article has covered how to make Spicy Honey Garlic Chicken. We looked at the ingredients, cooking steps, and storage tips. You can tweak recipes with different veggies or spice levels. My final thoughts: this dish is fun to make and tastes great. It’s perfect for any meal. Remember, with practice, you can make it even better each time. Enjoy putting your twist on this tasty dish!

Spicy Honey Garlic Chicken Tasty and Easy Recipe

Get ready to spice up your dinner with my easy Spicy Honey Garlic Chicken recipe! This dish combines sweet honey

To make delicious lemon blueberry muffins, you need these simple ingredients: - 1 ½ cups all-purpose flour - 1 cup fresh blueberries (or frozen) - ½ cup granulated sugar - 2 teaspoons baking powder - ½ teaspoon baking soda - ½ teaspoon salt - 1 large egg - ½ cup plain Greek yogurt - ⅓ cup vegetable oil - 2 tablespoons fresh lemon juice - Zest of 1 lemon - 1 teaspoon vanilla extract Using fresh ingredients makes a big difference. The blueberries give a sweet burst, while the lemon adds a bright zing. I recommend using Greek yogurt for added moisture. It helps keep the muffins soft and fluffy. When you gather your ingredients, take a moment to appreciate them. Fresh blueberries are not only tasty; they are also packed with nutrients. The lemon zest is key for flavor. It brings out the freshness in each bite. For the best results, measure your ingredients accurately. This ensures your muffins rise perfectly and have a great texture. Now that you have your ingredients ready, you can follow the full recipe to create these tasty treats! 1. Preheat your oven to 375°F (190°C). This helps the muffins bake evenly. 2. Line a muffin tin with paper liners or grease it with cooking spray. 3. In a medium bowl, mix the dry ingredients: flour, sugar, baking powder, baking soda, and salt. 4. In a separate large bowl, combine the wet ingredients: egg, Greek yogurt, vegetable oil, lemon juice, lemon zest, and vanilla extract. Mix until smooth. 1. Gradually add the dry ingredients to the wet mix. Stir gently until just combined. 2. Be careful not to overmix; the batter should look slightly lumpy. 3. Gently fold in the blueberries using a spatula. This ensures they spread evenly. 1. Spoon the muffin batter into each muffin cup, filling them about ¾ full. 2. Bake for 18-22 minutes. A toothpick should come out clean from the center of a muffin. 3. After baking, let the muffins cool in the pan for about 5 minutes. 4. Transfer them to a wire rack to cool completely. For the complete recipe, check the Full Recipe section. Enjoy your baking journey! To avoid overmixing the batter, mix gently. Stir until the dry ingredients are just combined with the wet. Lumpy batter is okay. Overmixing makes muffins tough. For even baking, place the muffin tin in the center of your oven. This allows hot air to flow around the muffins. Rotate the tin halfway through baking for best results. You can add a pinch of cinnamon for warmth. A dash of nutmeg also works well. Try using brown sugar instead of white for a richer taste. For toppings, a lemon glaze adds a touch of sweetness. A sprinkle of powdered sugar looks nice too. Fresh lemon zest on top gives a bright finish. To serve, place muffins on a pretty plate. A light dusting of powdered sugar makes them look fancy. Add a few fresh blueberries as a garnish for color. Pair your muffins with hot tea or fresh coffee. A tall glass of cold milk also works well. These drinks balance the muffins' sweet and tart flavors. {{image_2}} You can make your lemon blueberry muffins even better! Try adding nuts or seeds. Chopped walnuts or sunflower seeds add a nice crunch. You can also use different fruits or extracts. Try raspberries or strawberries for a twist. Almond or coconut extract can give a new flavor. If you need gluten-free muffins, you can swap all-purpose flour with gluten-free flour. This keeps the muffins soft and moist. For vegan muffins, replace the egg with a flaxseed mixture. Mix one tablespoon of flaxseed with three tablespoons of water. Let it sit for a few minutes until it thickens. You can also use plant-based yogurt instead of Greek yogurt. You can make mini muffins or regular-sized muffins. Mini muffins are great for snacks or parties. They bake quicker too, usually around 12-15 minutes. Regular muffins take about 18-22 minutes. Check them with a toothpick to see if they're done. Adjusting the baking time helps you get the perfect muffin size. To keep your lemon blueberry muffins fresh, use an airtight container. This helps maintain moisture and flavor. You can also wrap them in plastic wrap before placing them in the container. For longer storage, consider freezing them. Place the muffins in a freezer-safe bag. Remove as much air as possible before sealing. This prevents freezer burn and keeps them tasty. At room temperature, these muffins last about 2 to 3 days. Store them in a cool, dry place to avoid moisture. If you place them in the fridge, they can last up to a week. However, refrigeration can make them a bit dry. Freezing is a better option for longer storage. When frozen, they can last for up to 3 months. To reheat your muffins, use the oven for best results. Preheat the oven to 350°F (175°C). Place the muffins on a baking sheet and warm them for about 10 minutes. This keeps them soft and fluffy. If you’re in a hurry, you can use the microwave. Heat each muffin for 15 to 20 seconds. Add a small cup of water in the microwave to keep the muffins moist. How can I make my muffins more moist? To make your muffins moist, use Greek yogurt and don’t overmix the batter. You can also add more blueberries for extra moisture. If you want, try adding a splash more oil. This will add fat, which keeps your muffins soft. Can I substitute Greek yogurt with something else? Yes, you can use sour cream or buttermilk instead of Greek yogurt. Both options will add moisture. If you want a dairy-free option, try unsweetened almond milk with a splash of lemon juice. This will mimic the tang of yogurt. How do I know when my muffins are done baking? Check your muffins after 18 minutes. Insert a toothpick into the center. If it comes out clean, the muffins are done. If there is wet batter on the toothpick, bake for a few more minutes. Can I double the recipe? Sure! Doubling the recipe works well. Just make sure to use a larger bowl for mixing. You may also need to bake in batches if your oven has limited space. How can I adjust the sweetness level? To adjust sweetness, reduce the sugar in the recipe. If you prefer sweeter muffins, add a bit more sugar. You can also mix in a little honey or maple syrup for a different flavor. Caloric content per muffin Each muffin has about 180 calories. This can vary based on your ingredient choices and portion sizes. Health benefits of ingredients used Blueberries are rich in antioxidants. They help boost your immune system. Greek yogurt adds protein and probiotics, which support digestion. Lemon juice provides vitamin C, good for skin health. This blog post guides you through making delicious blueberry muffins. You learned about the right ingredients, step-by-step instructions, and useful tips for baking. We explored fun variations and storage methods to keep your muffins fresh. With these insights, you can confidently bake muffins that everyone will love. Enjoy sharing your tasty treats and experimenting with flavors. Happy baking!

Lemon Blueberry Muffins Tasty and Easy Recipe

Are you craving a sweet treat that bursts with flavor? Look no further! This easy recipe for Lemon Blueberry Muffins

To make Mango Coconut Chia Pudding, you will need: - 1 cup coconut milk (or almond milk) - 1/2 cup mango puree (fresh or canned) - 1/4 cup chia seeds - 2 tablespoons maple syrup (or honey) - 1/2 teaspoon vanilla extract - Pinch of sea salt - Fresh mango slices for topping - Toasted coconut flakes for garnish You can swap coconut milk for almond milk if you prefer. This change will give you a nutty flavor instead. Maple syrup can be replaced with honey for a different sweetness. If you want a vegan option, stick with maple syrup. You can also use any fruit puree in place of mango. Try peach or berry for a fun twist. Chia seeds are a superfood. They have fiber, protein, and omega-3 fatty acids. These nutrients help digestion and heart health. Coconut milk adds healthy fats, which can boost energy. It also contains vitamins and minerals. Mango is rich in vitamins A and C, which support your immune system. This pudding is not just tasty; it is also good for you! To start, grab a mixing bowl. Add 1 cup of coconut milk. You can also use almond milk if you prefer. Next, pour in 1/2 cup of mango puree. You can use fresh mango or canned. Add 2 tablespoons of maple syrup to sweeten it. If you like, you can swap this for honey. Now, add 1/2 teaspoon of vanilla extract. Finally, sprinkle in a pinch of sea salt. Mix everything well until smooth. Now it's time to add the chia seeds. Measure out 1/4 cup of chia seeds and stir them in. Make sure they spread evenly in the mixture. This step is key for a great texture. After mixing, cover the bowl with plastic wrap or transfer it to a jar. Place it in the fridge. You should let it chill for at least 4 hours, but overnight is best. This time allows the chia seeds to soak up the liquid. They will swell and create a thick pudding. Once it's set, give the pudding a stir. If it feels too thick, add a splash of coconut milk. This will help you reach your desired consistency. When ready to serve, take bowls or clear glasses. Spoon the chia pudding into them, showing off those beautiful layers. For a tasty touch, top with fresh mango slices. Add a sprinkle of toasted coconut flakes for crunch. You can even drizzle extra mango puree on top for flair. This makes your dish look even more inviting. Enjoy your Mango Coconut Chia Pudding as a sweet snack or a healthy breakfast! For the complete recipe, check the Full Recipe section. To get the right texture for your mango coconut chia pudding, use enough chia seeds. I suggest 1/4 cup of chia seeds for every cup of liquid. This mix absorbs liquid and turns thick. If your pudding is too thick, add a bit more coconut milk. Stir it well to mix. Let it chill for at least four hours, or overnight for the best results. This time helps the chia seeds expand fully and create a nice pudding. Want to boost the taste? Consider adding a splash of lime juice or zest. This adds a fun twist to the sweet mango. You can also try using a different milk, like almond milk, for a nutty flavor. If you like it sweeter, adjust the maple syrup or honey to your taste. A dash of cinnamon or cardamom can also bring new warmth to the dish. Experimenting with flavors makes this pudding even more fun. Presentation matters! Serve your pudding in clear glasses or bowls. This way, guests can see the bright layers. Top it with fresh mango slices and sprinkle toasted coconut flakes on top. For a fancy touch, drizzle extra mango puree over the top. You can also add mint leaves for a pop of color. These simple tricks make your dish look as amazing as it tastes. For the full recipe, check the complete article. {{image_2}} You can change the taste of your mango coconut chia pudding easily. Try a berry chia pudding by adding mixed berries instead of mango. Blend fresh strawberries, blueberries, or raspberries into your coconut milk. This creates a colorful and tasty treat. For a tropical fusion, add pineapple to the mix. The sweet and tangy flavor will brighten your dish. You can also use different fruits to make unique flavors. Experiment with bananas, peaches, or even kiwi. Each fruit brings a new twist to your pudding. Mango coconut chia pudding can fit into many diets. To make it vegan, use maple syrup instead of honey. Coconut milk is already dairy-free, making it perfect for vegans. If you want a low-calorie option, use unsweetened almond milk. You can skip the sweetener or use a low-calorie alternative like stevia. These changes keep the pudding healthy and nutritious without losing flavor. Toppings can make your pudding exciting. Fresh mango slices add a juicy touch. You can also sprinkle toasted coconut flakes for crunch. Nuts like almonds or walnuts give a satisfying bite. For extra sweetness, drizzle honey or agave syrup on top. If you want a bit of spice, try sprinkling cinnamon or nutmeg. Each topping adds a new layer of flavor and texture. Get creative and find your perfect combination! To keep your mango coconut chia pudding fresh, always store it in an airtight container. This helps prevent odors from mixing with your pudding. You should place it in the fridge right after making it. Chia pudding firms up as it chills, so letting it sit overnight is best. If you want, you can also separate toppings from the pudding to keep them fresh. You can freeze your mango coconut chia pudding, but it may change in texture. To freeze, pour the pudding into a freezer-safe container, leaving space for expansion. Seal it tightly. When you're ready to enjoy it, thaw it in the fridge overnight. Stir it well after thawing, and add a little coconut milk if needed to restore creaminess. Mango coconut chia pudding lasts about 5 days in the fridge. It may last longer, but the taste and texture are best within this time. Always check for any off smells or changes in texture before eating. If you freeze it, it can last for up to 3 months. Just remember, the quality might not be as good after freezing. Enjoy your delicious treat! For the full recipe, check the main article. Chia seeds are tiny seeds from the Salvia hispanica plant. They are rich in fiber, protein, and healthy fats. Eating chia seeds can help with digestion and keep you full longer. They also provide omega-3 fatty acids, which are good for heart health. Plus, they are full of antioxidants that fight free radicals in your body. Yes, you can use fresh mango! Just peel and chop ripe mangoes. Blend them until smooth to make mango puree. This will give your pudding a fresher taste. Fresh mango adds a nice texture and bright flavor to the dish. You can adjust the sweetness by adding more maple syrup if needed. Absolutely! Mango coconut chia pudding is great for meal prep. You can make it in advance and store it in the fridge. It stays fresh for up to five days. Just keep it in an airtight container. This makes it easy to grab for breakfast or a snack. You can prepare a few jars at once for quick meals. To make a larger batch, simply double or triple the ingredients. Use a bigger mixing bowl and adjust the chilling time. Make sure to stir well to mix all the chia seeds evenly. A larger batch works well for parties or family gatherings. You can also layer the pudding in a big glass bowl for serving. For the full recipe, check the earlier section. In this blog post, we covered the key ingredients and their benefits, step-by-step instructions, and tips for perfect consistency and flavor. We also explored fun variations and best practices for storage. Remember, mango coconut chia pudding is easy to make and good for you. Feel free to experiment with flavors and toppings. With these tips, you can create delicious, healthy treats that last. Enjoy your pudding journey!

Mango Coconut Chia Pudding Delicious and Nutritious Treat

Are you ready to enjoy a healthy and tasty treat? Mango Coconut Chia Pudding is not just delicious; it’s packed

To make pumpkin spice overnight oats, you need these key items: - 1 cup rolled oats - 1 cup almond milk (or milk of choice) - 1/2 cup pure pumpkin puree - 2 tablespoons maple syrup (or honey) - 1 teaspoon pumpkin pie spice - 1/2 teaspoon vanilla extract - Pinch of salt These ingredients form the base of your dish. They blend together to create a creamy and flavorful treat. Adding a few extras can enhance your oats: - 1/4 cup Greek yogurt (for creaminess) - 1/4 cup chopped nuts (like pecans or walnuts) - 2 tablespoons dried cranberries or raisins These optional items can add texture and sweetness. They make your oats more interesting and delicious. You can easily swap ingredients based on what you have: - Use any milk you like instead of almond milk. - Substitute pumpkin puree with sweet potato puree for a twist. - Maple syrup can be replaced with agave or honey. These substitutions allow you to customize your oats. Feel free to get creative with flavors and textures. For the complete recipe, check out the Full Recipe. 1. First, take a mixing bowl and put in 1 cup of rolled oats. 2. Pour in 1 cup of almond milk. Stir well so the oats soak up the milk. 3. Next, add 1/2 cup of pure pumpkin puree to the bowl. 4. If you want a creamier texture, mix in 1/4 cup of Greek yogurt. 5. Add 2 tablespoons of maple syrup (or honey) for sweetness. 6. Sprinkle in 1 teaspoon of pumpkin pie spice and 1/2 teaspoon of vanilla extract. 7. Don’t forget a pinch of salt to balance the flavors. 8. Mix everything well until it’s smooth and creamy. 9. Now, transfer the mixture into mason jars or airtight containers. 10. Leave some space at the top for your toppings. 11. Top each jar with 1/4 cup of chopped nuts and 2 tablespoons of dried cranberries. 12. Seal the jars and put them in the fridge. Let them chill overnight or for at least 4 hours. In the morning, take the jars out of the fridge. Stir the oats to mix everything again. If you like, add a splash of almond milk to make it creamier. You can eat them cold or warm them in the microwave for one minute. For a nice touch, sprinkle some extra pumpkin pie spice on top. A dollop of yogurt can add creaminess too. If you want to impress, add a cinnamon stick in each jar for decoration. - Use fresh, high-quality ingredients for the best taste. - Adjust the sweetness to your liking by adding more or less maple syrup. - For a thicker texture, use less almond milk. For a runnier texture, add more. - Make sure to keep them sealed in the fridge to stay fresh. - Experiment with different nuts or fruits for fun flavors. You can find the full recipe above for a detailed guide. Enjoy your pumpkin spice overnight oats! To make the best pumpkin spice overnight oats, follow these tips: - Use rolled oats for the best texture. They soak up liquid well. - Mix your ingredients in a bowl. This ensures even flavor. - Choose a jar with a tight lid. This keeps your oats fresh. - Let your oats sit overnight. This helps them soften and absorb flavors. Avoid these common mistakes for perfect oats: - Don’t skip the salt. A pinch enhances the flavors. - Avoid using instant oats. They can turn mushy and lose texture. - Don’t add too much liquid. Oats need the right balance to thicken. - Skip the toppings until serving. This keeps them crunchy and fresh. For creamy and thick overnight oats, try these methods: - Add Greek yogurt for creaminess. It makes the oats richer. - Use less almond milk if you want thicker oats. Adjust to your taste. - Stir the oats before serving. This redistributes the ingredients and texture. - If needed, add a splash of milk in the morning. This helps if they seem too thick. Follow these tips, and you’ll enjoy delicious pumpkin spice overnight oats every time! For the full recipe, check the [Full Recipe]. {{image_2}} Pumpkin spice overnight oats shine in the fall. You can swap the pumpkin puree for mashed banana in spring. In summer, fresh berries add a sweet twist. For winter, try adding cocoa powder for a chocolate flavor. Each season brings new tastes to explore. To make this recipe nut-free, use oat milk instead of almond milk. You can also skip the nuts on top to avoid allergens. For a dairy-free option, use coconut yogurt instead of Greek yogurt. This keeps the creaminess without dairy. Toppings can change your oats completely. Add a scoop of nut butter for extra protein. You can sprinkle on chia seeds for a health boost. Fresh fruit like apples or pears brings a crunchy bite. If you want more sweetness, drizzle honey or maple syrup on top. Enjoy experimenting with flavors! For the full recipe, check out the ingredients and instructions above. Pumpkin spice overnight oats can last in the fridge for up to five days. After you make them, seal the jar tight and store it in the fridge. This way, they stay fresh and tasty. If you see any signs of spoilage, like a bad smell or change in color, it's best to toss them out. I recommend using glass mason jars or airtight containers for storing your oats. Glass jars keep flavors locked in and are easy to clean. Make sure you leave some space at the top so you can add your toppings later. If you stack containers, choose ones that fit well together. You can freeze pumpkin spice overnight oats for up to three months. Just prepare the oats as usual and fill freezer-safe containers. Leave a bit of space at the top for the oats to expand. When you're ready to eat, move the jar to the fridge overnight to thaw. They will taste great after thawing, but you may need to mix in a splash of almond milk for the best texture. Yes, you can use quick oats. They will cook faster and soften more. The texture may be creamier, so adjust your liquid a bit. Quick oats absorb liquid quickly, so keep an eye on how thick they become. To make them vegan, simply replace Greek yogurt with a plant-based yogurt. You can also use maple syrup for sweetness. Make sure your milk is non-dairy like almond or oat milk. This way, you keep all the great flavors without any animal products. Absolutely! You can prepare them in advance. Just make them in jars or containers. Store them in the fridge for up to five days. This makes breakfast easy and quick throughout the week. You can add fresh fruit like bananas or apples. Try chia seeds for extra nutrients. A drizzle of nut butter adds creaminess and flavor. Experiment with what you like best! Yes, any milk works! Almond, soy, oat, or even coconut milk can be used. Just choose the kind you enjoy most. Each type will give a different taste, so feel free to explore. To reduce sweetness, cut back on maple syrup or honey. You can use just a tablespoon or skip it altogether. The pumpkin puree and spices add flavor without too much sweetness. Yes, you can! If you like warm oats, just pop them in the microwave for a minute. Stir well and enjoy a cozy breakfast. You can make your own! Mix cinnamon, nutmeg, and ginger for a great substitute. Use about 1 teaspoon of this blend in your oats. It will still taste delicious! For a full recipe, check out the complete instructions and ingredients list. We covered all you need for making overnight oats. You learned about essential ingredients, easy prep steps, and tips for perfect texture. We explored tasty variations and smart storage methods. Now, you can enjoy this healthy, quick breakfast. Remember, you can mix flavors and personalize each bowl. Keep experimenting until you find your favorite combos. Your mornings will never be the same! Make these oats a part of your daily routine for fun and nutrition.

Pumpkin Spice Overnight Oats Simple and Tasty Recipe

Are you ready to enjoy a cozy fall treat any time of year? My Pumpkin Spice Overnight Oats recipe is

- 1 large head of cauliflower - 1 cup all-purpose flour - 1 teaspoon garlic powder - 1 teaspoon onion powder - 1 teaspoon smoked paprika - 1 cup water or plant-based milk - 1 cup buffalo sauce - 2 tablespoons olive oil - Salt and pepper to taste - Fresh parsley for garnish - Optional: Celery sticks and ranch or blue cheese dressing Buffalo Cauliflower Bites start with a large head of cauliflower. Cut it into bite-sized florets. This gives you the perfect size for coating and baking. Next, combine flour with garlic powder, onion powder, and smoked paprika for flavor. Add in water or plant-based milk to make a batter. You want this batter thick enough to coat the cauliflower but not too runny. For the buffalo sauce, you can use your favorite brand or make your own. Mixing it with olive oil adds richness. Don’t forget salt and pepper for seasoning! Fresh parsley at the end adds a nice color. If you like, serve with celery sticks and ranch or blue cheese dressing for dipping. This recipe is all about bold flavors and simple steps. You can find the full recipe to guide you through every detail. - Preheat your oven to 450°F (230°C) and line a baking sheet with parchment paper. - In a large bowl, whisk together the flour, garlic powder, onion powder, smoked paprika, salt, and pepper. - Gradually mix in the water or plant-based milk until smooth. The batter should be thick. - Dip each cauliflower floret into the batter, coating it fully. Place them on the baking sheet. - Bake the cauliflower bites for 20 minutes or until golden brown and crispy. - In another bowl, mix buffalo sauce with olive oil, adjusting spice to your taste. - Drizzle the sauce over the baked cauliflower and toss to coat. - Return the bites to the oven and bake for another 10 minutes to set the sauce. To get that perfect crunch, start with cold water or plant-based milk. Cold liquid helps the batter stick better. This gives you a crispy bite. Make sure to coat each floret evenly. You want just enough batter, so it isn't dripping. Too much makes them soggy. Buffalo sauce is key to great flavor. Adjust the spice to fit your taste. If you like it hot, add more sauce. For less heat, use less. You can also add extra seasonings. Try smoked paprika or a bit of cayenne pepper. These add depth and make the flavors pop. How you serve your Buffalo Cauliflower Bites matters. Arrange them on a nice platter. Add celery sticks around the edges for a pop of color. A small bowl of ranch or blue cheese dressing looks great too. This adds a nice touch and makes it easy to dip. For a final flourish, sprinkle fresh parsley on top. This makes your dish look even more inviting. For the full recipe, check the details above. {{image_2}} You can switch up the flavor of your Buffalo Cauliflower Bites. Instead of buffalo sauce, try different wing sauces. BBQ sauce adds a sweet twist. Garlic Parmesan sauce gives a rich and creamy taste. You can even make your own buffalo sauce. Mix hot sauce with butter and a little vinegar. Adjust the heat level to your liking. If you want a gluten-free version, you can easily swap the flour. Use almond flour or chickpea flour. Both work well in this recipe. You can also try ground oats for a nice texture. This way, everyone can enjoy the bites without worry. Feel free to add more veggies to your bites. Broccoli and zucchini are great options. They cook well and add extra color. You can mix and match your veggies based on what you like. Just cut them into similar sizes to ensure even cooking. This makes your dish more colorful and fun! To keep your Buffalo Cauliflower Bites fresh, store them in an airtight container. This helps prevent moisture loss. You can refrigerate them for up to three days. If you want to keep them longer, consider freezing them. They will last for about a month in the freezer. Just remember to let them cool completely before packing them away. For the best taste and texture, I recommend using an oven or air fryer. Preheat them to 375°F (190°C). Place the bites in a single layer and heat for about 10 minutes. This method keeps them crispy. If you use a microwave, they may become soggy. So, avoid that if you can. Enjoy your tasty leftovers just like the first time! Yes, you can prepare Buffalo Cauliflower Bites in advance. First, bake the cauliflower bites as directed in the full recipe. After baking, let them cool down. Place the bites in an airtight container. You can store them in the fridge for up to three days. When you’re ready to serve, reheat them in the oven at 375°F for about 10 minutes. This will help keep them crispy. Absolutely! Buffalo Cauliflower Bites are vegan-friendly. The main ingredients are cauliflower, flour, and plant-based milk. You can use your favorite plant-based milk or water for the batter. For the buffalo sauce, ensure that it does not contain any dairy. Most sauces are vegan, but double-check the label to be safe. Serve Buffalo Cauliflower Bites hot for the best taste. Arrange them on a platter for a fun presentation. I love to pair them with celery sticks for crunch. For dipping, ranch or blue cheese dressing works great. You can even offer a mix of both for guests to choose. These bites also go well with a side of fresh veggies to balance the spice. This blog post covered how to make delicious Buffalo Cauliflower Bites. We discussed the key ingredients, step-by-step instructions, and tips for a crispy outcome. You learned about variations to suit your taste and storage methods for leftovers. Buffalo Cauliflower Bites are great for any occasion. With a bit of creativity, you can customize them. Enjoy this dish with friends or family. Dive into this flavor-packed recipe, and make it your own!

Buffalo Cauliflower Bites Flavorful Veggie Delight

Are you ready to spice up your snack game? Buffalo Cauliflower Bites are a tasty, fun way to enjoy veggies!

- 1 sheet of puff pastry, thawed - 4 large onions, thinly sliced - 2 tablespoons olive oil - 1 tablespoon balsamic vinegar - 1 teaspoon sugar - 6 oz goat cheese, crumbled - 1 teaspoon fresh thyme leaves - Salt and pepper to taste - 1 egg, beaten (for egg wash) - Fresh arugula for garnish (optional) - Tart pan - Large skillet - Rolling pin - Oven - Measuring cups and spoons To make this tart, you need a few simple items. The main thing is a sheet of puff pastry. You can find it in the freezer section of your store. Make sure to thaw it before use. You will use four large onions. Thinly slicing them is key. This helps the onions cook evenly. Olive oil will help caramelize the onions. Balsamic vinegar adds a nice sweet and tangy flavor. Sugar helps the onions caramelize more quickly. Goat cheese gives a creamy texture and a tangy taste. Fresh thyme leaves add a great herb flavor. Salt and pepper will bring everything together. Lastly, an egg wash makes the edges golden and pretty. Fresh arugula is optional but adds a nice touch when you serve the tart. Gather all your ingredients, and you're ready to create this delicious Caramelized Onion and Goat Cheese Tart. Remember to check out the Full Recipe for detailed steps! - Preheat the oven to 400°F (200°C). - Thaw the puff pastry and roll it out to fit the tart pan. - Heat olive oil in a skillet and add sliced onions. - Cook until softened and caramelized, adding balsamic vinegar and sugar. I love the rich flavor of caramelized onions. Start by heating the olive oil in your skillet. Make sure it's hot, but not smoking. Add the sliced onions and gently stir. You want them to soften and turn golden brown. This can take about 15 to 20 minutes. Once the onions look golden, add the balsamic vinegar and sugar. This mix brings out the sweetness. Stir well and season with salt and pepper. Cook for another 5 minutes. After that, take them off the heat and let them cool a bit. - Spread caramelized onions on the pastry. - Top with crumbled goat cheese and thyme leaves. - Brush edges with beaten egg and bake. Now comes the fun part—assembling the tart! Roll out your puff pastry until it fits your tart pan. Press it down, then prick the bottom with a fork. This step stops it from bubbling up as it bakes. Next, spread those sweet, caramelized onions evenly over the pastry. Crumble goat cheese on top for a tangy bite. Finish it off with fresh thyme leaves for a lovely aroma. Take your beaten egg and brush it along the edges of the pastry. This will give it a beautiful golden color when baked. Pop it in the oven for 25 to 30 minutes. Keep an eye on it; you want it golden brown and puffed! If you want the full recipe, check it out for more details. Enjoy your delicious creation! To make great caramelized onions, use a mix of yellow and red onions. This mix gives a nice depth of flavor. Stir occasionally but not constantly. This lets the sugars develop and brown nicely. When rolling out puff pastry, don’t overwork the dough. Overworking can make it tough. Prick the bottom with a fork to prevent bubbling. This keeps your tart flat and easy to slice. Arrange the tart on a wooden board for a rustic look. This adds charm to your dish. Garnish with fresh arugula for a pop of color. Serve at room temperature for the best flavor. You can find the full recipe for more details on this tart. {{image_2}} You can play with the cheese in this tart. Try using ricotta or feta cheese instead of goat cheese. Each brings a new flavor. If you want a smoky taste, add cooked bacon or sautéed mushrooms. These ingredients boost the flavor and make the tart more filling. Herbs can change the taste of your tart. If you prefer a different flavor, switch thyme with rosemary or oregano. Both herbs provide unique tastes and pair well with onions and cheese. Make your tart even better by adding seasonal vegetables. Zucchini and bell peppers are great choices. They add color and nutrients. Plus, you can use whatever is fresh at the market. Enjoy exploring new flavors! For the full recipe, check out the details above. Allow the tart to cool completely before storing it. Use an airtight container to keep it fresh. This helps maintain flavor and texture for later. Reheat the tart in the oven at 350°F (175°C). This method ensures a crispy crust and warm filling. Avoid using the microwave, as it can make the tart soggy. You can freeze the unbaked tart assembled for later baking. Wrap it tightly in plastic wrap, then place it in a freezer bag. When you're ready, bake it straight from the freezer at 400°F (200°C). Enjoy the deliciousness with minimal effort! For the complete recipe, check the Full Recipe section. Yes, store-bought caramelized onions can save time. They are a great option if you're busy. However, making them at home offers a richer flavor. You can control the sweetness and seasoning this way. Bake at a high temperature and ensure the bottom is pricked. This helps steam escape. Pricking prevents the crust from puffing up too much. A crispy tart is all about the preparation. Pair with a fresh salad or light soup for a complete meal. A simple green salad complements the rich flavors. A light soup can balance the tart’s creaminess. It can last 3-4 days in the refrigerator when stored properly. Make sure to cover it well. This keeps the flavors fresh and the crust from getting soggy. Yes, you can prepare it a day ahead and reheat before serving. This is perfect for gatherings. Just store it in the fridge and warm it up when ready to enjoy. For the full recipe, check out the instructions above. You now have a clear path to making a delicious Caramelized Onion and Goat Cheese Tart. We covered all the key ingredients and tools. Following the step-by-step instructions will help you achieve perfectly caramelized onions and a flaky crust. Remember to experiment with variations to fit your taste. Proper storage will keep leftovers fresh. This dish is perfect for any occasion, making it easy to impress friends and family. Enjoy your cooking adventure and serve this delightful tart with pride!

Caramelized Onion and Goat Cheese Tart Delight

Are you ready to impress your friends with a delicious Caramelized Onion and Goat Cheese Tart? This savory dish combines

Older posts
Newer posts
← Previous Page1 … Page69 Page70 Page71 … Page83 Next →

dsad

© 2025 So Yum Recipes • Built with GeneratePress

Our Policies

  • Copyright Policy
  • Cookie Policy
  • GDPR Policy
  • Privacy Policy
  • Disclaimer
  • Terms Of Use

More Information

  • Home
  • About
  • Contact
  • Appetizers
  • Dessert
  • Dinner
  • Drinks
©2025, So Yum Recipes About Back To Top