Pumpkin Chocolate Marble Loaf Irresistible Recipe
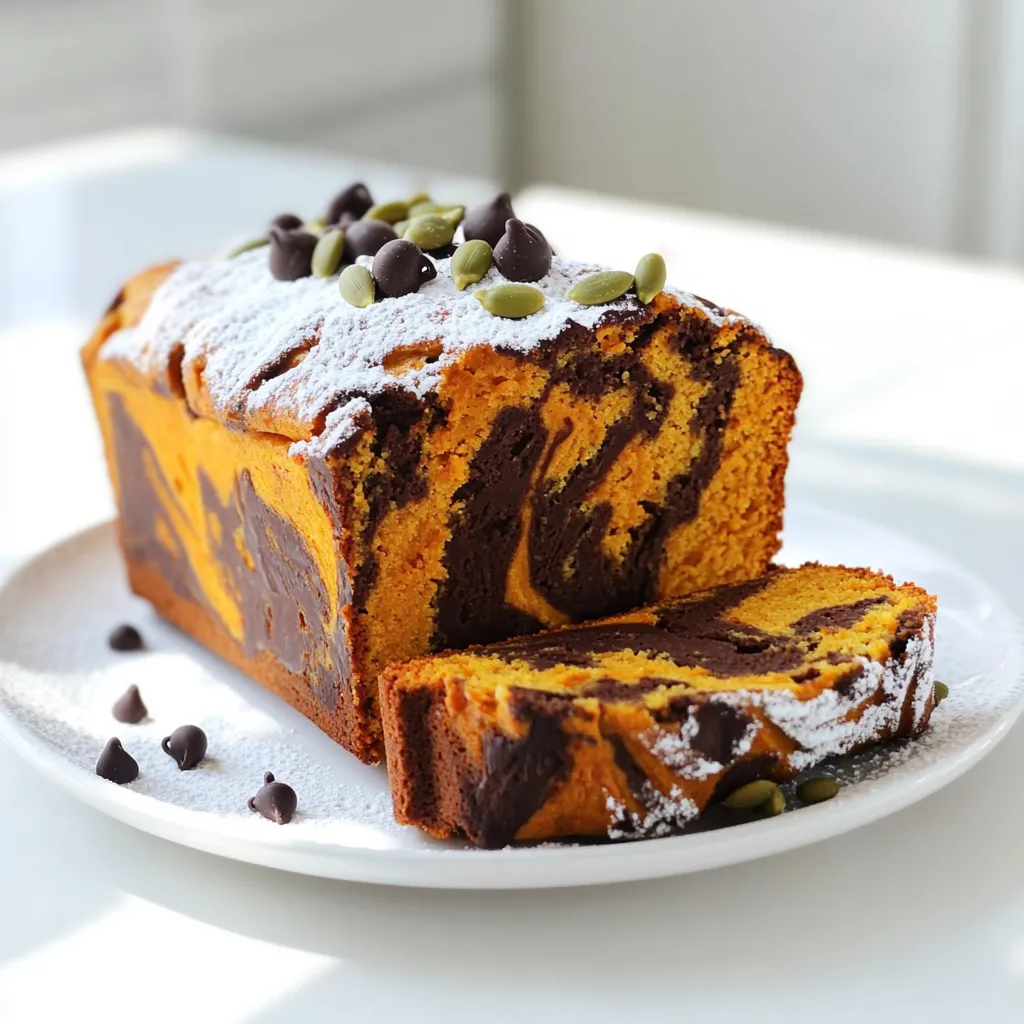
Are you ready to bake something special? My Pumpkin Chocolate Marble Loaf is a fun treat that mixes warm pumpkin
Are you ready to bake something special? My Pumpkin Chocolate Marble Loaf is a fun treat that mixes warm pumpkin
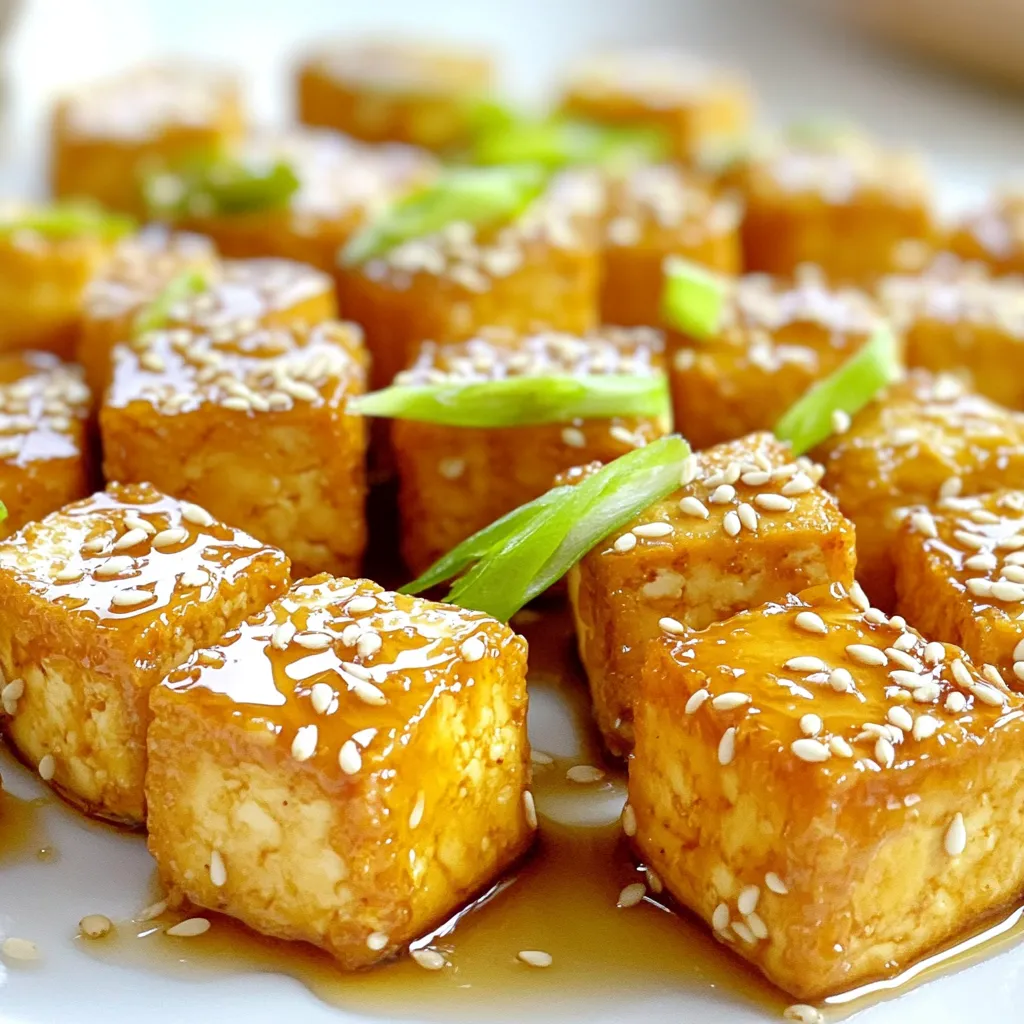
Are you ready to enjoy a tasty and healthy snack? These Honey Garlic Tofu Bites made in the air fryer
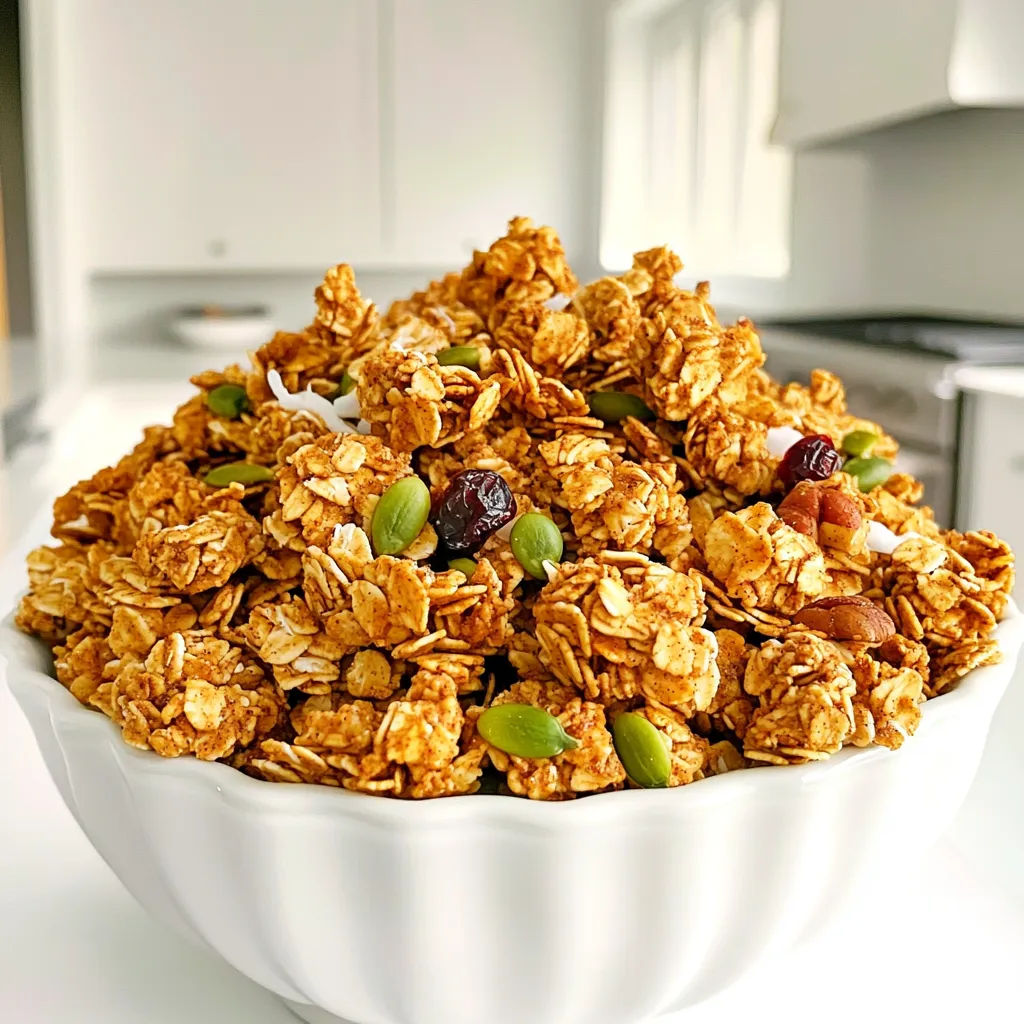
Love the cozy taste of fall? You’re in for a treat! My Pumpkin Spice Granola Clusters Slow Cooker Delight is

Craving a sweet fall treat? These Apple Cider Donuts covered in cinnamon sugar are your answer! With a soft, cake-like
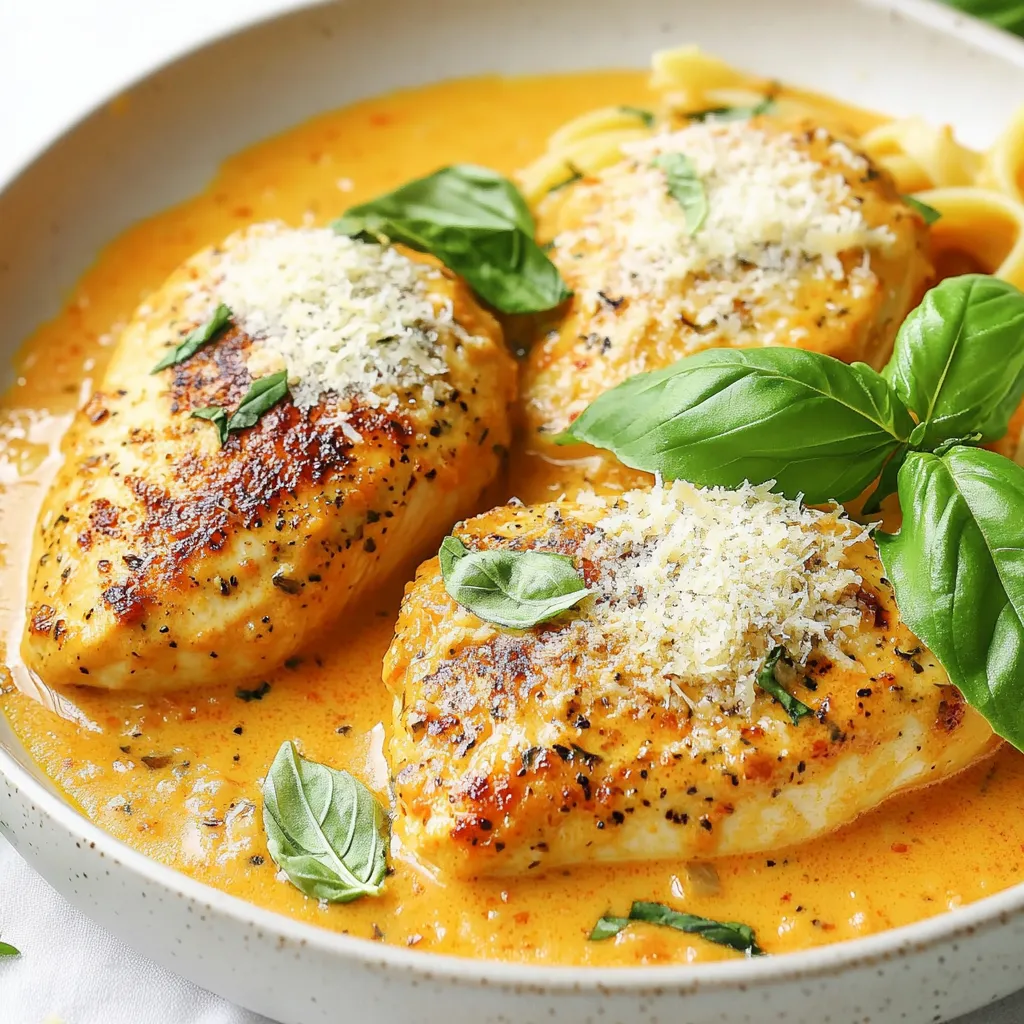
Are you ready to cook up an easy and tasty meal? My Creamy Tomato Parmesan Chicken One Pot Delight is
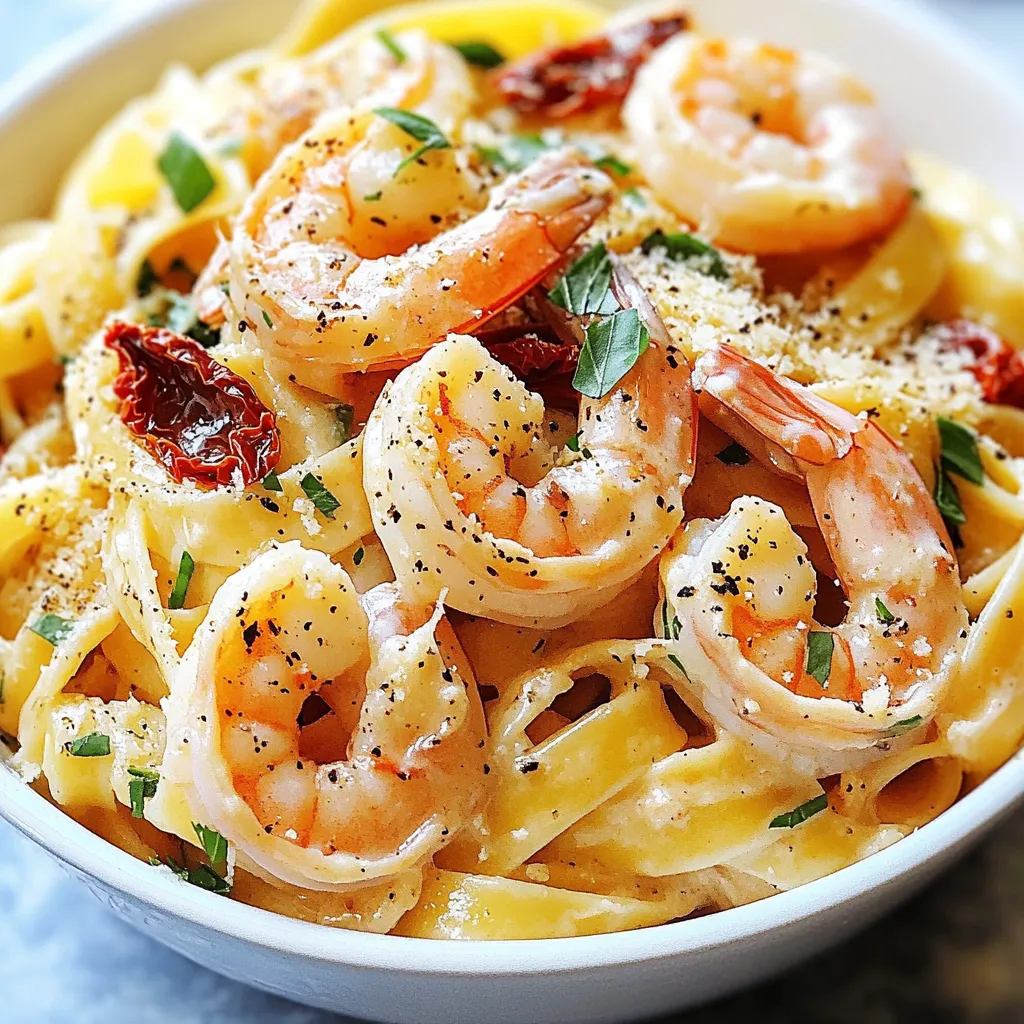
Are you ready to impress with a dish that’s as delightful as it sounds? Marry Me Shrimp Pasta combines rich
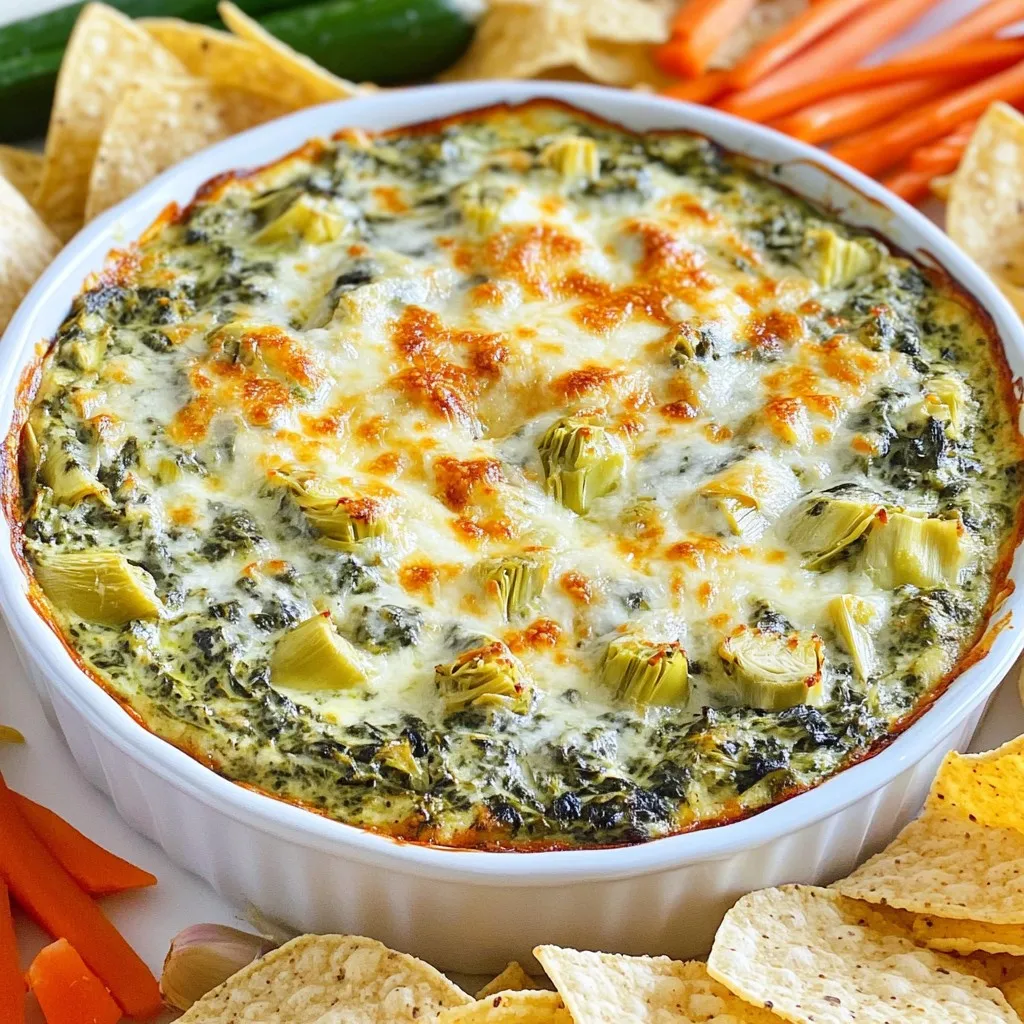
If you’re looking for a crowd-pleasing appetizer that’s simple to make, you’re in the right place. My Cheesy Spinach Artichoke
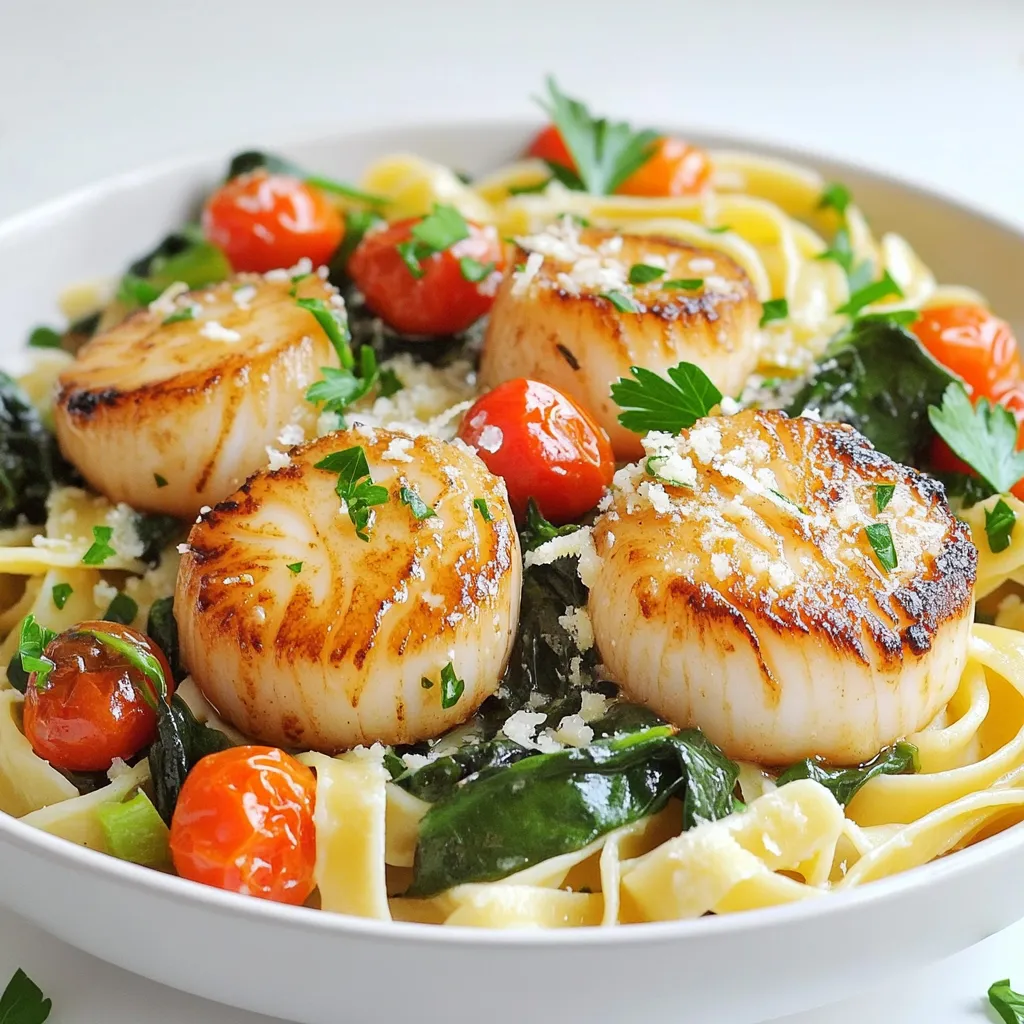
Are you ready to impress your taste buds with a dish that’s simple yet luxurious? Garlic Butter Scallops with Pasta
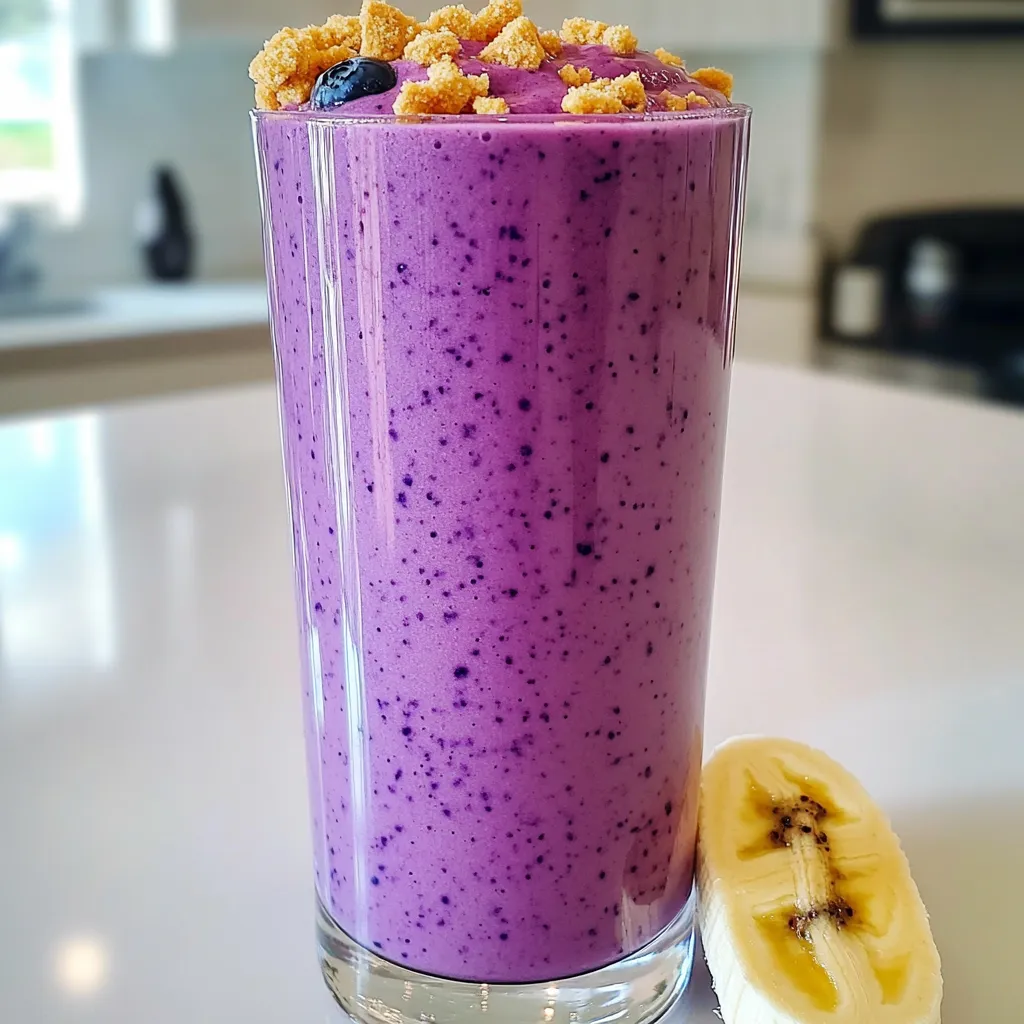
Are you ready to treat yourself to a delicious and healthy drink? The Blueberry Cheesecake Smoothie Protein Delight packs all
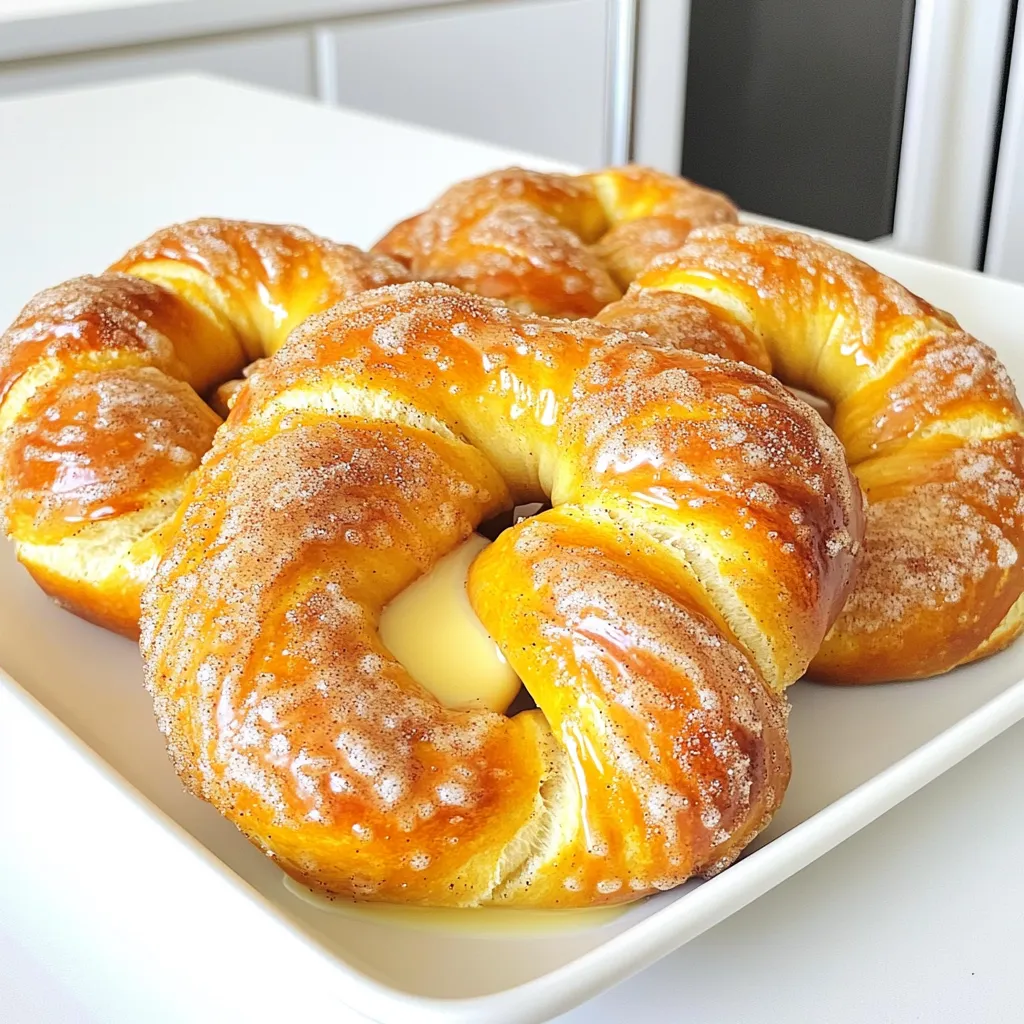
Imagine biting into a warm, soft pretzel coated in sweet cinnamon sugar. That’s the joy of bakery-style cinnamon sugar pretzels!
