Skip to content
DisclaimerTerms Of UseGDPR PolicyCookie Policy

So Yum Recipes

  • Home
  • Drinks
  • Appetizers
  • Dinner
  • Dessert
  • About
  • Contact
  • Privacy Policy
DisclaimerTerms Of UseGDPR PolicyCookie Policy

Chloe

- 4 chicken thighs, bone-in and skin-on - 1/4 cup honey - 1/4 cup Dijon mustard - 2 tablespoons apple cider vinegar - 2 cloves garlic, minced - 1 teaspoon smoked paprika - 1 teaspoon salt - 1/2 teaspoon black pepper - 2 tablespoons olive oil - Fresh thyme sprigs for garnish You need these simple ingredients for honey mustard chicken thighs. Each item brings its own flavor. The chicken thighs give you juicy meat and crispy skin. Honey adds sweetness, while Dijon mustard provides a nice tang. Apple cider vinegar enhances the sauce's flavor. Garlic adds depth with its strong taste, and smoked paprika brings warmth. Salt and pepper season the dish just right. Olive oil helps the chicken brown beautifully. Fresh thyme adds a nice herbal note for garnish. - Additional spices for flavor - Alternative sweeteners Feel free to experiment with optional ingredients. You can add spices like cayenne for heat or rosemary for a fresh taste. If you want to adjust the sweetness, try maple syrup or agave nectar. Each choice can create a new twist on this classic dish. This flexibility makes it fun and exciting to cook. Don't forget to check the [Full Recipe] for detailed steps! - Preheat the oven to 400°F (200°C). - In a bowl, whisk together the honey, Dijon mustard, apple cider vinegar, minced garlic, smoked paprika, salt, and black pepper. Mix until it is smooth and creamy. This sauce is the star of the dish. - Pat the chicken thighs dry with paper towels. This will help them get crispy. - Heat 2 tablespoons of olive oil in an oven-safe skillet over medium-high heat. - Once the oil is hot, place the chicken thighs skin-side down in the skillet. - Sear the chicken for about 5-7 minutes. You want the skin to be golden brown and crispy. - Flip the chicken thighs over and pour the honey mustard sauce over them. Make sure they are well coated. - Transfer the skillet to your preheated oven. Bake for about 25-30 minutes. The chicken should reach an internal temperature of 165°F (74°C). - Once done, take the skillet out of the oven. Let the chicken rest for 5 minutes. This helps keep it juicy. - Drizzle some of the sauce from the skillet over the thighs before serving. - Garnish with fresh thyme sprigs for added flavor and a nice look. You can find the full recipe for this delicious dish to make it easily at home. Enjoy your meal! To get crispy skin on chicken thighs, start by drying them well with paper towels. This helps the skin brown nicely. Use medium-high heat when searing the thighs. Place them skin-side down in a hot skillet. Cook for about 5-7 minutes until the skin is golden brown. This step adds flavor and texture. Ensure your chicken is cooked thoroughly by using a meat thermometer. The internal temperature should reach 165°F (74°C). This guarantees the chicken is safe to eat. After baking, let the chicken rest for 5 minutes. This keeps the juices inside and makes the meat tender. Adjust the sweetness or tanginess of the sauce to fit your taste. If you like it sweeter, add more honey. For more tang, increase the apple cider vinegar. Taste as you mix to find the perfect balance for you. When coating the chicken, pour the sauce evenly over the thighs. Make sure each piece is well covered. This helps the flavors soak in while cooking. Use a spoon to drizzle extra sauce over the thighs when serving. It adds a nice touch and enhances the dish. For the full recipe, check out the details above. {{image_2}} You can play with the mustard type in this recipe. Dijon mustard gives a nice kick, but you can also try yellow mustard or whole grain mustard. Each type brings its own flavor. If you want a milder taste, yellow mustard works well. Whole grain mustard adds texture and depth. You might also swap chicken thighs for chicken breasts. Chicken breasts cook faster and are leaner. Just be careful not to overcook them. They can dry out more quickly than thighs. Adjust the cooking time to suit the breasts. Adding herbs and spices can make a big difference. Fresh herbs like rosemary or parsley can brighten up the dish. You can also use dried herbs such as oregano or thyme. A pinch of red pepper flakes adds heat if you like spice. You can modify the sauce for different flavors too. Try adding soy sauce for a savory twist. A splash of orange juice can give a sweet and zesty note. Experiment with what you have on hand to keep it fresh and exciting. For the full recipe, check out the details above. To store honey mustard chicken thighs, let them cool first. Place the chicken in an airtight container. This way, it stays fresh longer. You can keep it in the fridge for up to 3 days. When you want to eat it again, just reheat gently. If you have leftovers, freezing is a great option. Wrap each chicken thigh tightly in plastic wrap. Then, place them in a freezer bag. This helps to keep the flavor and moisture. You can freeze them for up to 3 months. When you're ready to enjoy, take the chicken out of the freezer. Let it thaw in the fridge overnight. To reheat, place it in a preheated oven at 350°F (175°C) for about 20-25 minutes. This will help keep it juicy and tasty. Can I use boneless chicken thighs for this recipe? Yes, you can use boneless chicken thighs. They cook faster than bone-in thighs. Watch the cooking time closely. Boneless thighs should reach 165°F (74°C) quickly. How can I tell when the chicken is fully cooked? Use a meat thermometer. Insert it into the thickest part of the thigh. It should read 165°F (74°C). The juices should run clear, not pink. What sides pair well with honey mustard chicken thighs? I love serving honey mustard chicken with: - Roasted vegetables - Garlic mashed potatoes - Steamed green beans - A fresh garden salad Can this recipe be made on the grill? Yes, grilling is a great option! Preheat your grill to medium heat. Marinate the chicken in the honey mustard sauce for at least 30 minutes. Grill for 6-8 minutes on each side until cooked through. How to adapt this recipe for an air fryer? To use an air fryer, preheat it to 375°F (190°C). Coat the chicken thighs with the sauce. Place them in the air fryer basket. Cook for about 20-25 minutes or until they reach 165°F (74°C). Enjoy the crispy skin! For the full recipe, check out the detailed cooking steps provided earlier. This recipe for honey mustard chicken thighs is simple and tasty. We covered the ingredients, preparation steps, and cooking tips that ensure success. You can vary flavors easily or store leftovers for later. Remember, cooking can be fun and creative! Whether you use chicken thighs or try new spices, enjoy making this dish. With easy steps and twists, you can impress family and friends. Happy cooking!

Honey Mustard Chicken Thighs Easy and Flavorful Meal

Looking for a quick and tasty dinner? Honey Mustard Chicken Thighs are the answer! This easy meal is packed with

- 1 lb ground beef - 2 cups rotini pasta - 1 medium onion, chopped - 3 cloves garlic, minced The main ingredients create the base of this dish. Ground beef adds protein and flavor. Rotini pasta holds sauce well and gives a fun twist. Chopped onion adds sweetness, while minced garlic brings a savory touch. - 2 cups beef broth - 1 cup milk - 1 cup shredded cheddar cheese - 1 tablespoon ketchup - 1 tablespoon mustard - 1 teaspoon Worcestershire sauce The additional ingredients boost taste and creaminess. Beef broth adds depth. Milk makes the dish rich and creamy. Cheddar cheese melts into gooey goodness. Ketchup, mustard, and Worcestershire sauce mix to give that classic cheeseburger flavor. - Chopped pickles - Green onions Garnishes add a fresh touch. Chopped pickles give crunch and tartness. Green onions offer color and a mild onion flavor. Add these to elevate your dish even more. For the full recipe, check out the details and instructions. Enjoy your cooking! How to brown the ground beef Start by heating a large pot over medium heat. Add 1 pound of ground beef. Use a spatula to break it apart. Cook until it turns brown, about 5-7 minutes. Drain any extra fat if needed. This step adds flavor to your pasta. Sautéing the onion and garlic Next, add 1 chopped onion and 3 minced garlic cloves to the pot. Cook for 3-4 minutes. Stir often until the onion is soft and clear. This step builds a nice base for your dish. Combining ingredients and bringing to a simmer Now, it’s time to add more ingredients. Pour in 2 cups of beef broth and 1 cup of milk. Add 1 tablespoon of ketchup, 1 tablespoon of mustard, and 1 teaspoon of Worcestershire sauce. Stir well and bring the mix to a simmer. This will create a rich sauce. Adding rotini pasta and cooking time Once simmering, add 2 cups of rotini pasta to the pot. Mix everything together. Cover the pot and let it cook for 10-12 minutes. Stir occasionally to stop the pasta from sticking. Cook until the pasta is tender. How to melt the cheddar cheese After cooking, take the pot off the heat. Add 1 cup of shredded cheddar cheese. Stir until the cheese melts and becomes creamy. This makes your dish rich and cheesy. Seasoning to taste Finally, season with salt and pepper. Taste the pasta and adjust if needed. You can also add chopped pickles and green onions on top as a fun garnish. Enjoy your One Pot Cheeseburger Pasta! For the full recipe, check the details above. To prevent pasta from sticking, stir it well as it cooks. Use a large pot to give the pasta room to move. If the pasta sticks, try adding a splash of oil or more liquid. If your sauce is too thick, add more beef broth or milk. This will help create a creamy texture. For a thicker sauce, let it simmer longer to reduce the liquid. Adding spices can boost the flavor of your dish. Try garlic powder, onion powder, or paprika for a fun twist. You can also include Italian seasoning or crushed red pepper for some heat. For toppings, consider adding chopped pickles or green onions. These add crunch and a fresh taste. You can also sprinkle extra cheese on top before serving for a cheesy finish. One common mistake is overcooking the pasta. This can make it mushy. To avoid this, check for doneness a minute or two before the suggested cooking time. Another mistake is forgetting to drain excess fat from the beef. Too much fat can make your dish greasy. Drain it before adding the other ingredients for a balanced taste. For the full recipe, check out the recipe section. {{image_2}} You can easily change the meat in this recipe. Ground turkey or chicken works well. These leaner meats add less fat but keep the dish tasty. You can also use plant-based ground meat if you want a meatless option. If you need gluten-free pasta, there are great choices. Look for brown rice or chickpea pasta. They cook nicely and taste good in this dish. You can make a vegetarian version too. Simply skip the meat and add more veggies. Mushrooms, bell peppers, or zucchini add flavor and texture. For a dairy-free version, choose plant-based milk and cheese. Almond milk or oat milk can replace regular milk. Nutritional yeast can give a cheesy flavor without dairy. Changing the cheese can enhance the taste. Try mozzarella for a milder flavor or pepper jack for some spice. Adding vegetables boosts nutrition and flavor. Spinach, peas, or broccoli mix well into the pasta. They add color and extra vitamins to your meal. For the full recipe, check out the details above. To store your cheeseburger pasta, wait until it cools down. Then, scoop it into an airtight container. Proper storage helps keep it fresh. You can keep it in the fridge for about 3 to 5 days. If you want it to last longer, freezing is a great choice. When it's time to eat, you need to reheat the pasta. The best way is to use a pot on low heat. Add a splash of milk or broth to keep it moist. Stir often to avoid burning. If you use the microwave, heat it in short bursts. Stir between each burst for even warming. To freeze your cheeseburger pasta, let it cool first. Then, put it in a freezer-safe bag or container. Make sure to remove as much air as possible. This helps prevent freezer burn. It can stay frozen for up to 3 months. When you're ready to eat, thaw it overnight in the fridge. Reheat it slowly on the stove, adding a bit of liquid to keep it creamy. Enjoy your tasty meal again! For the full recipe, check out the details above. How do I make One Pot Cheeseburger Pasta ahead of time? You can make this dish ahead of time. Cook the pasta, then let it cool. Store it in the fridge in an airtight container. When ready to eat, reheat it on the stove. Add a splash of milk to keep it creamy. Can I use different types of pasta? Yes, you can switch the pasta type. Penne, fusilli, or even spaghetti work well. Just adjust the cooking time based on the pasta you choose. What to serve with cheeseburger pasta? This meal pairs well with a simple salad. Try a green salad with lettuce, tomatoes, and cucumbers. You can also serve it with garlic bread for a heartier meal. Can I make this dish spicy? Absolutely! Add red pepper flakes or diced jalapeños for heat. You can also use spicy mustard instead of regular mustard. This adds a nice kick to the dish. Is this recipe healthy? This recipe can be balanced. Ground beef offers protein, while pasta gives carbs. You can use whole wheat pasta for more fiber. Adding veggies boosts the nutrition too. Can I modify it for specific dietary needs? Yes, you can make it fit your needs. Use lean ground turkey for less fat. For gluten-free, choose gluten-free pasta. You can also make it vegetarian by using lentils instead of meat. This article detailed the process of making One Pot Cheeseburger Pasta. We covered the main and additional ingredients, preparation steps, and cooking tips. You learned how to store leftovers and suggested variations for different diets. Remember, cooking is about trial and fun, so don’t be afraid to mix things up. Enjoy your meal, and make it yours! Keep experimenting to find your perfect flavor blend.

One Pot Cheeseburger Pasta Quick and Tasty Meal

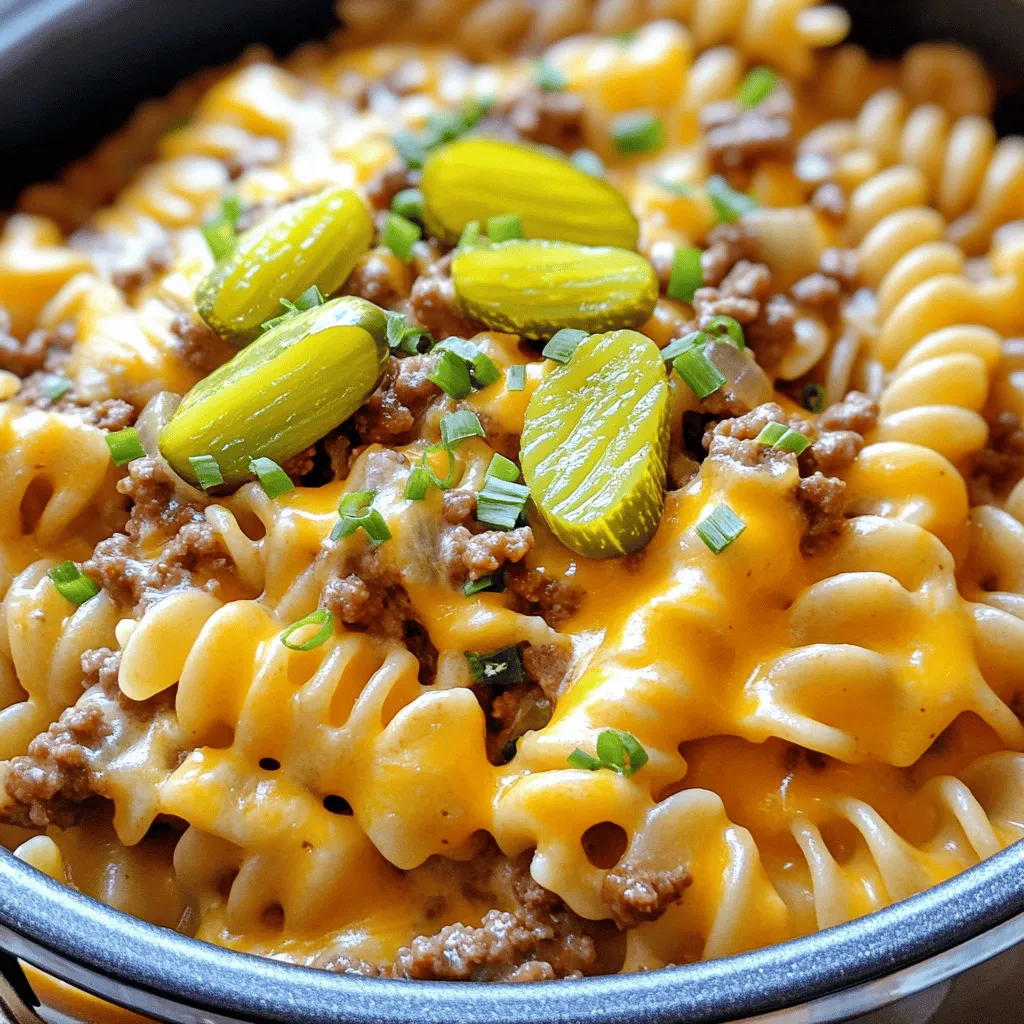
If you crave a quick and tasty meal, One Pot Cheeseburger Pasta hits the spot! This dish combines all the

- 12 large pasta shells - 2 cups cooked chicken, shredded - 1 cup ricotta cheese - 1 cup mozzarella cheese, shredded - 1/2 cup grated Parmesan cheese - 2 cups Alfredo sauce (store-bought or homemade) These main ingredients come together to create a rich and creamy dish. The pasta shells hold the filling well and make each bite a delight. Shredded chicken adds protein, while the cheeses bring a creamy texture. You can use store-bought Alfredo sauce for ease or make your own from scratch for added flavor. - 1 teaspoon garlic powder - 1 teaspoon onion powder - Salt and pepper to taste - Fresh parsley, chopped (for garnish) Seasonings are key in this recipe. Garlic and onion powder enhance the filling's taste without overpowering it. Adjust the salt and pepper to your liking. Fresh parsley adds a pop of color and freshness when you serve the dish. Feel free to explore the [Full Recipe] for detailed steps on how to put it all together! 1. Preheating the oven: Start by setting your oven to 375°F (190°C). This helps the dish cook evenly. 2. Cooking the pasta shells: Boil water in a large pot. Add the pasta shells and cook them as the package says, until they are al dente. This means they should still have a little firmness. Once they’re done, drain the shells and set them aside. 1. Combining shredded chicken and cheese mixture: In a big bowl, mix together 2 cups of shredded chicken, 1 cup of ricotta cheese, half of the mozzarella cheese, and 1/2 cup of grated Parmesan cheese. 2. Seasoning the filling: Add 1 teaspoon of garlic powder, 1 teaspoon of onion powder, and salt and pepper to taste. Stir well. This mix will create a tasty filling for the shells. 1. Filling the pasta shells: Take a spoonful of the chicken and cheese mixture. Carefully stuff each shell with the filling. 2. Spreading Alfredo sauce in the baking dish: In a 9x13 inch baking dish, pour 1 cup of Alfredo sauce on the bottom. This keeps the shells from sticking and adds flavor. 3. Baking techniques: Place the stuffed shells in the dish, filling side up. Pour the rest of the Alfredo sauce over the shells. Top with the remaining mozzarella cheese. Cover the dish with aluminum foil and bake for 25 minutes. After that, take off the foil and bake for 10 more minutes. The cheese should be bubbly and golden. This process makes a creamy and delicious meal. You can find the full recipe in the earlier section. Enjoy every bite! To avoid overcooked pasta, cook the shells until they are al dente. This means they should be firm but not hard. Check the package for time and start testing a minute before it ends. Drain the shells gently and rinse them with cold water. This stops the cooking and helps keep their shape. To ensure a creamy texture, use a good Alfredo sauce. Mix in some of the sauce with the filling. This keeps the inside nice and moist. When you pour sauce over the stuffed shells, make sure it covers all the pasta. This helps the shells stay creamy while they bake. For proper storage, keep leftovers in airtight containers. This keeps them fresh longer. Place the container in the fridge right after the meal. They stay good for about three to four days. For reheating, the oven works best. Preheat it to 350°F (175°C). Place the stuffed shells in a baking dish and cover them with foil. Heat for about 20 minutes. If you want a crispy top, remove the foil for the last five minutes. Adding vegetables can make the dish more colorful and healthy. Spinach, mushrooms, or bell peppers work great. Just sauté them a bit before mixing them into the filling. You can also use different sauces. Try a marinara sauce for a twist. You can blend Alfredo sauce with pesto for a fresh flavor. Experiment and find what you love! {{image_2}} You can switch up the protein in Chicken Alfredo Stuffed Shells. Using rotisserie chicken saves time and adds great flavor. Just shred the chicken and mix it into the filling. If you prefer a vegetarian dish, try using cooked spinach or mushrooms. Both options keep the dish hearty and satisfying. Enhancing flavors can elevate your stuffed shells. Adding spices like cayenne gives a gentle kick. Italian herbs can add warmth and depth. For a burst of flavor, incorporate sun-dried tomatoes. They add a sweet and tangy profile that pairs well with the creamy Alfredo sauce. If you need gluten-free options, use gluten-free pasta shells. They work just as well and keep the dish delicious. For those avoiding dairy, try plant-based cheese alternatives. They melt nicely and still provide that creamy texture we love. For the full recipe, check out the detailed steps and ingredients listed above. To keep your Chicken Alfredo Stuffed Shells fresh, use airtight containers. This helps to prevent air from getting in, which can cause spoilage. Store them in the fridge for up to three days. Make sure the shells are completely cool before sealing them. This helps avoid extra moisture, which can lead to sogginess. If you want to save some for later, freezing is a great option. For best results, freeze the shells before baking. Place them in a single layer on a baking sheet until they freeze. Then, transfer them to a freezer-safe bag or container. This method stops the shells from sticking together. Chicken Alfredo Stuffed Shells can last for up to three months in the freezer. When you’re ready to eat them, thaw the shells overnight in the fridge. This makes sure they warm evenly. After thawing, bake them in the oven until heated through. You can follow the cooking instructions from the Full Recipe for the best results. Enjoy your creamy meal anytime! Chicken Alfredo Stuffed Shells last about 3 to 5 days in the fridge. Store them in an airtight container to keep them fresh. Make sure the shells cool down before sealing. If you want to enjoy these later, label the container with the date. This way, you won't lose track of how long they've been stored. Yes, you can prepare Chicken Alfredo Stuffed Shells ahead of time. Assemble the shells and place them in a baking dish. Cover with foil and store in the fridge for up to 24 hours. Just remember to add a few extra minutes to the baking time if they are cold from the fridge. This makes dinner easy and quick, even on busy nights. For side dishes, consider a simple green salad or garlic bread. A fresh Caesar salad adds a nice crunch. If you want something warm, steamed broccoli pairs well. For drinks, a light white wine like Pinot Grigio works great. You can also serve lemonade for a refreshing non-alcoholic option. To make Chicken Alfredo Sauce from scratch, you need just a few ingredients: - 1 cup heavy cream - 1/2 cup grated Parmesan cheese - 2 tablespoons butter - 1 clove garlic, minced - Salt and pepper to taste In a saucepan, melt the butter over low heat. Add minced garlic and cook for about 1 minute. Then, pour in the heavy cream. Stir in the Parmesan cheese and mix until smooth. Season with salt and pepper. Cook until the sauce thickens slightly. This simple homemade sauce adds a rich flavor to your stuffed shells. For the full recipe, check this [Full Recipe]. In this blog post, we covered how to make Chicken Alfredo Stuffed Shells. You learned about the main ingredients, seasonings, and step-by-step instructions. Tips for cooking and storing the dish were shared, along with variations and FAQs. Take these ideas and make your own great dish. Enjoy your cooking, and share these tasty shells with friends and family! Happy cooking!

Chicken Alfredo Stuffed Shells Easy and Creamy Recipe

Are you ready to impress your family with a meal that combines comfort and flavor? Chicken Alfredo Stuffed Shells are

To make Sweet Chili Chicken Stir Fry, gather these fresh ingredients: - 1 lb (450g) boneless chicken breast, sliced into thin strips - 2 tablespoons vegetable oil - 1 red bell pepper, sliced - 1 yellow bell pepper, sliced - 1 cup broccoli florets - 1 carrot, julienned - 3 cloves garlic, minced - 1 tablespoon fresh ginger, grated - 1/4 cup sweet chili sauce - 2 tablespoons soy sauce - 1 tablespoon rice vinegar - 1 teaspoon sesame oil - Salt and pepper to taste - 2 green onions, chopped (for garnish) - Cooked jasmine rice (for serving) Using fresh ingredients makes a big difference in flavor. Fresh chicken and veggies taste better. They also hold more nutrients. However, frozen options work too. They save time and reduce waste. Just ensure to thaw them properly before cooking. You can swap out some ingredients if needed: - Use turkey instead of chicken for a lighter option. - Try snap peas or asparagus instead of broccoli for variety. - If you don’t have sweet chili sauce, mix honey with hot sauce. - Use coconut aminos instead of soy sauce for a gluten-free option. These substitutions keep the dish tasty while making it your own. For the full recipe, check out the complete instructions. Start with 1 pound of boneless chicken breast. Slice it into thin strips. This helps it cook quickly. Heat 1 tablespoon of vegetable oil in a skillet over medium-high heat. Add the chicken strips to the pan. Cook them for about 5 to 7 minutes. Stir until they turn brown and are no longer pink inside. Once done, take the chicken out and set it aside. In the same skillet, pour in the other tablespoon of vegetable oil. Add 3 cloves of minced garlic and 1 tablespoon of grated ginger. Sauté them for 30 seconds until you smell the aroma. Next, toss in 1 sliced red bell pepper, 1 sliced yellow bell pepper, 1 cup of broccoli florets, and 1 julienned carrot. Stir-fry the veggies for 4 to 5 minutes. You want them tender but still crisp. Now it’s time to bring it all together! Return the cooked chicken to the skillet with your veggies. In a small bowl, mix together 1/4 cup of sweet chili sauce, 2 tablespoons of soy sauce, 1 tablespoon of rice vinegar, and 1 teaspoon of sesame oil. Pour this sauce over the stir-fry. Toss everything to coat well. Cook for another 2 to 3 minutes until the sauce is hot. Season with salt and pepper to taste. Serve over jasmine rice and garnish with chopped green onions. Enjoy your meal! For the full recipe, be sure to check out the details above! To make your Sweet Chili Chicken Stir Fry shine, focus on high heat. Use a large skillet or wok. This helps you get that nice sear on the chicken. Cut your chicken into thin strips. This ensures quick cooking and even flavor. When you add garlic and ginger, do so for just 30 seconds. This brings out their best flavors without burning them. Lastly, make sure to toss the ingredients well. This coats everything with that tasty sauce. One mistake is overcrowding the pan. If you add too much chicken at once, it will steam instead of sear. This makes it less tasty. Another common mistake is not prepping your ingredients first. Have everything ready to go. This way, you cook faster and keep the stir-fry crisp. Lastly, don't skip the seasoning. Salt and pepper are key to bringing out all the flavors. To change the spice level, start with the sweet chili sauce. You can use less if you want it milder. For more heat, add red pepper flakes or sriracha. Mix these in with your sauce at the end. Taste as you go. This way, you can find the perfect balance for your taste. Remember, you can always add more spice, but you can't take it out! If you want a sweeter flavor, add a little honey or sugar. This creates a nice contrast to the heat. {{image_2}} You can easily change the meat in this dish. Try shrimp or tofu for a twist. Both options cook fast and soak up flavor well. If you prefer beef, use thinly sliced flank steak. For pork lovers, use tenderloin slices. Each swap keeps the dish light and tasty. To make this dish vegetarian or vegan, use tofu or tempeh. Both options are protein-rich and will absorb the sweet chili sauce. Make sure to press tofu first, so it holds its shape. You can also add chickpeas for extra protein and texture. This way, you still enjoy a filling meal without meat. Feel free to mix up the veggies in your stir fry. Snap peas, mushrooms, or zucchini work great. You can also add baby corn or snow peas for crunch. The key is to choose colorful vegetables. They not only taste good but also make your meal look amazing. Remember, cooking them until just tender keeps them crisp and bright. For the full recipe, check out the complete guide above. Storing leftovers from your sweet chili chicken stir fry is easy. Let the stir fry cool down first. Then, place it in an airtight container. This keeps it fresh in the fridge for up to three days. To keep flavors strong, avoid adding rice to the stir fry when storing. Store rice separately. You can freeze sweet chili chicken stir fry for longer storage. Use freezer-safe containers or bags. Be sure to remove as much air as possible. This helps prevent freezer burn. It can last up to three months in the freezer. When you're ready to eat, thaw it in the fridge overnight. Reheating your sweet chili chicken stir fry is simple. You can use a stove or a microwave. To reheat on the stove, add a little oil to a pan. Heat over medium until warm, stirring often. If using a microwave, place the stir fry in a microwave-safe dish. Cover it and heat for 1-2 minutes. Stir halfway through for even heating. Always check the temperature before serving. Make sure it is hot throughout. For the full recipe, check the earlier section. Sweet chili sauce is a sweet and spicy sauce. It mixes sugar, chili, and vinegar. You can find it in most stores. The sauce adds flavor and a bit of heat to dishes. I love using it in stir-fries. It makes any meal taste gourmet. Yes, you can prepare Sweet Chili Chicken Stir Fry ahead of time. Cook the chicken and veggies, then cool them. Store in an airtight container in the fridge. When you're ready to eat, just reheat it in a pan. This saves time on busy nights. A few great side dishes complement this stir fry. Here are my favorites: - Steamed jasmine rice - Fried rice with peas and eggs - A fresh cucumber salad - Crunchy spring rolls These sides add variety and texture to your meal. To adjust sweetness, try these tips: - Add more sweet chili sauce for a sweeter flavor. - Mix in a bit of honey or sugar if you prefer more sweetness. - Use less sweet chili sauce for a less sweet dish. Taste as you go to find your perfect balance. In this post, we explored the key ingredients for Sweet Chili Chicken Stir Fry, including fresh versus frozen options and substitutions. I shared step-by-step cooking instructions and tips for maximizing flavor while avoiding common mistakes. We also discussed variations like protein swaps and veggie combos, along with storage tips for leftovers. This dish is fun and flexible, making it perfect for any meal. With a bit of creativity, you can enjoy a stir fry that fits your taste. Try it out and enjoy!

Sweet Chili Chicken Stir Fry Quick and Healthy Meal

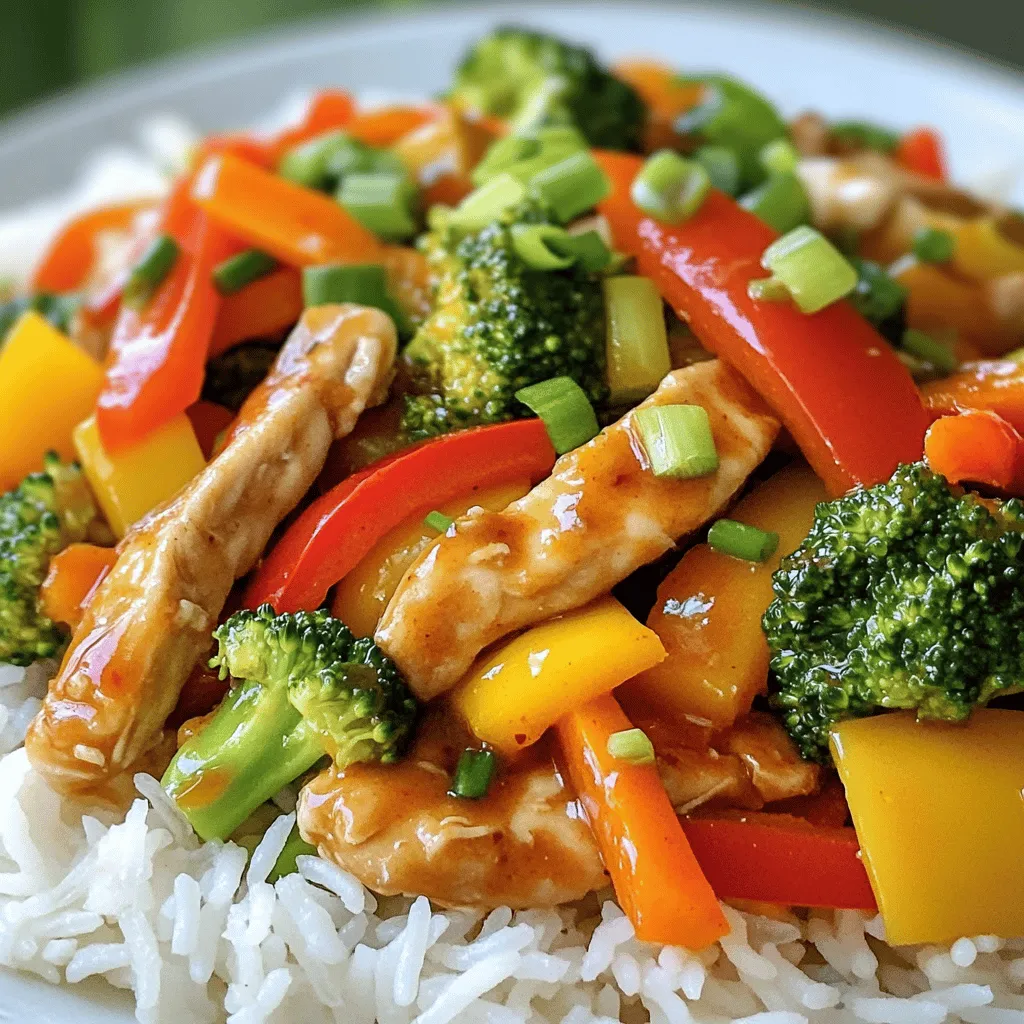
Looking for a quick, healthy meal that’s bursting with flavor? Sweet Chili Chicken Stir Fry is your answer! This dish

For this dish, I love using ground meat options like: - 1 pound ground turkey (or beef) - 1 can (15 oz) black beans, rinsed and drained - 1 can (11 oz) corn, drained - 1 packet taco seasoning - 1 can (10 oz) diced tomatoes with green chilies - 4 cups tortilla chips - 2 cups shredded cheese (a blend of cheddar and Monterey Jack) - 1/2 cup sliced jalapeños (fresh or pickled) These ingredients create a hearty base that packs a punch. To make it your own, consider adding: - 1 avocado, diced - 1/2 cup sour cream - Chopped fresh cilantro for garnish These toppings add freshness and creaminess. You can mix and match based on your taste. When making this casserole, choose fresh ingredients when possible. Fresh meat and veggies enhance flavor. Canned items are fine, but check for low sodium options. Good seasoning is key. Use the right cheese blend for the best melted texture. A mix of sharp cheddar and Monterey Jack works great. It gives that gooey, cheesy goodness everyone loves. Using high-quality ingredients makes a big difference in taste. So, don’t skip this step. For the full recipe, check out the complete details! First, preheat your oven to 350°F (175°C). In a large skillet, cook 1 pound of ground turkey or beef over medium heat. Make sure the meat is browned and no longer pink. If there is extra fat, drain it away. This step keeps your casserole from being greasy. Next, mix in the taco seasoning, diced tomatoes with green chilies, black beans, and corn. Stir everything well and let it simmer for about 5 minutes. This lets the flavors come together nicely. Always taste and add salt and pepper if needed. Now it’s time to layer your casserole. In a greased 9x13 inch casserole dish, start with half of the tortilla chips. Spread them evenly across the bottom. This creates a solid base. Then, spoon half of the meat mixture over the chips and sprinkle half of the cheese on top. This layering helps all the flavors mix as it cooks. Repeat these steps with the remaining tortilla chips, meat mixture, and cheese. Finish with sliced jalapeños on top for a kick. Place your casserole in the preheated oven. Bake it for 20-25 minutes. You want the cheese to be bubbly and golden. Once done, take it out and let it cool slightly. This cooling time makes it easier to serve. Top your casserole with diced avocado, sour cream, and fresh cilantro for a fresh touch. These toppings add great flavor and color. For the full recipe, refer to the previous section. Enjoy your delicious Loaded Nacho Casserole! When making a casserole, avoid overcooking the meat. It can dry out. Use a meat thermometer to check if the meat reaches 165°F. For layered casseroles, grease the dish well. This helps with easy serving. Watch the layers, too! Start with chips, then meat, and cheese. Repeat until you finish. To boost flavor, try adding spices. A pinch of cayenne or chili powder works great. Fresh herbs can elevate your dish. Use chopped cilantro or green onions. Fresh ingredients always taste better. They add brightness and crunch to your casserole. Serve your Loaded Nacho Casserole with a side salad. A simple mixed greens salad pairs well. You can also offer guacamole on the side. For drinks, try a light beer or sparkling water. They balance the flavors in your dish. If you want something sweeter, serve with fruit juice. For the Full Recipe, refer back to the earlier sections. {{image_2}} You can easily switch some ingredients in the Loaded Nacho Casserole to make it vegetarian or vegan. For protein, try using beans instead of meat. Black beans work great, but you can also use pinto or kidney beans. They add a nice texture and flavor. If you want cheese, look for plant-based cheese options. Many brands now make vegan cheese that melts well. Nutritional yeast is another great choice. It has a cheesy taste and is packed with nutrients. You can make your casserole unique by adding local spices or ingredients. For example, if you love Tex-Mex flavors, try adding cumin or smoked paprika. Both spices will give your dish a nice kick. You can also create classic spins on the loaded nacho theme. Think about adding barbecue sauce for a smoky twist. Or use green chili sauce for a more southwestern flair. Each change brings new flavors to the table. You can serve Loaded Nacho Casserole in different ways. One fun style is to make individual servings. Use small ramekins and layer the ingredients like the full dish. This way, each person gets their own portion. If you want to turn this casserole into a dip or appetizer, it’s easy. Just make the casserole as usual, then serve it warm with tortilla chips. It’s perfect for parties or game days. For more details on making this delicious dish, check out the Full Recipe. After you enjoy your Loaded Nacho Casserole, store any leftovers properly. First, let it cool to room temperature. Then, place it in an airtight container. You can keep it in the fridge for up to four days. If you want to save it for longer, freeze it. It will last up to three months in the freezer. Just make sure to label your container with the date. When you’re ready to enjoy your leftovers, reheating them right is key. The best method is to use the oven. Preheat your oven to 350°F (175°C), then cover the casserole with foil. This keeps it moist. Bake for about 15 to 20 minutes, until hot. If you want it crispy, remove the foil for the last five minutes. Avoid using the microwave if you can. It can make the dish soggy. If you want to make life easier, consider meal prepping. You can prepare your Loaded Nacho Casserole ahead of time. Just follow the recipe and store it in the fridge before baking. Then, bake it fresh when you’re ready. For freezing, portion out the casserole into smaller containers. This way, you can grab just what you need later. It’s a great way to save time and still enjoy a tasty meal. For the full recipe, check out the detailed instructions above. To add heat to your Loaded Nacho Casserole, try a few spices. You can mix in cayenne pepper or crushed red pepper flakes. Adding fresh jalapeños boosts the spice level too. If you want even more heat, choose hot taco seasoning instead of mild. For a smoky flavor, try adding chipotle powder. Remember to start with a small amount and taste as you go. This way, you can adjust the heat to your liking. Absolutely! You can use any cheese you love. Cheddar is a classic choice, but Monterey Jack adds creaminess. Pepper Jack gives a spicy kick. If you prefer a milder taste, use mozzarella or gouda. Mixing cheeses can create great flavors. Just make sure to shred the cheese for even melting. Feel free to get creative with your cheese blend! To make this dish more kid-friendly, consider a few simple tweaks. Cut the spice down by using mild taco seasoning and fewer jalapeños. Offer toppings like sour cream, diced avocado, or fresh cilantro on the side. Kids love to customize their dishes! Serve with a side of fresh fruit or a simple salad. This adds color and nutrition to the meal. Kids will enjoy making their own plates. Yes, you can prep this casserole ahead. Assemble the layers and cover the dish with foil. Store it in the fridge for up to a day before baking. When ready to cook, just bake it straight from the fridge. You may need to add a few extra minutes to the baking time. This makes it easy for meal planning! You can also freeze it for later use. Just thaw it overnight in the fridge before baking. Loaded Nacho Casserole is simple and fun. We covered key ingredients, from meats to toppings. You can customize it with fresh herbs and extra toppings. I shared step-by-step instructions for cooking and layering. Cooking tips help you avoid mistakes and enhance flavor. Explore variations like vegetarian options and regional twists. Lastly, proper storage keeps leftovers fresh. Enjoy making this tasty dish for any meal. Each bite is sure to delight everyone at your table. Let's get cooking!

Loaded Nacho Casserole Flavorful and Easy Delight

Ready to bring some excitement to your dinner table? My Loaded Nacho Casserole is the perfect mix of flavor and

- 1 ½ cups all-purpose flour - ½ cup granulated sugar - 2 tablespoons poppy seeds - 1 teaspoon baking powder - ½ teaspoon baking soda - ¼ teaspoon salt - ½ cup unsalted butter, softened - 2 large eggs - 1 tablespoon lemon zest - ½ cup plain Greek yogurt - ¼ cup fresh lemon juice These ingredients make the bread light and full of flavor. The all-purpose flour gives the bread a nice structure. Granulated sugar adds sweetness, while poppy seeds give crunch and a unique taste. Baking powder and baking soda help it rise, making the bread fluffy. Salt balances the sweetness, and softened butter adds moisture. Eggs bring richness, and lemon zest and juice add that bright, zesty flavor we all love. Greek yogurt keeps the bread moist and adds a slight tang. - Glaze options (e.g., lemon icing) - Garnish suggestions (e.g., lemon slices, extra poppy seeds) You can make it even better with a glaze. A simple lemon icing on top adds sweetness and shine. Garnishing with lemon slices or extra poppy seeds makes it pretty and tasty. These little touches can make your Lemon Poppy Seed Bread look like a bakery treat. For the complete details, check out the Full Recipe. First, preheat your oven to 350°F (175°C). This step is key for even baking. Next, you need to prepare your loaf pan. Grease and flour a 9x5-inch loaf pan. Alternatively, you can line it with parchment paper. This makes it easy to remove the bread later. In a large mixing bowl, combine the following dry ingredients: - 1 ½ cups all-purpose flour - ½ cup granulated sugar - 2 tablespoons poppy seeds - 1 teaspoon baking powder - ½ teaspoon baking soda - ¼ teaspoon salt Whisk these together until well mixed. This blend adds flavor and helps the bread rise. In another bowl, cream together: - ½ cup unsalted butter, softened - 2 large eggs Mix these until light and fluffy. Then, add in: - 1 tablespoon lemon zest - ½ cup plain Greek yogurt - ¼ cup fresh lemon juice Stir until everything is well blended. The lemon zest and juice really brighten the flavor. Now, gradually mix the dry ingredients into the wet ingredients. Stir gently until just combined. Be careful not to overmix! A few lumps are okay. Overmixing can lead to dense bread, and we want it light and fluffy. Pour the batter into your prepared loaf pan. Smooth the top with a spatula. Bake in your preheated oven for 50-60 minutes. To check if it's done, insert a toothpick into the center. If it comes out clean, your bread is ready. Enjoy the aroma as it bakes! For the complete recipe, you can check the Full Recipe. To get the best texture in your lemon poppy seed bread, avoid dryness. Use room temperature ingredients like butter and eggs. Cold ingredients can lead to a dense loaf. Also, measure flour correctly. Too much flour can make the bread dry. To ensure accuracy, spoon flour into the measuring cup and level it off. Mixing the batter too much can ruin your bread. Stir just until you see no dry flour. Small lumps are perfectly fine. Also, check your oven's temperature. An oven that’s too hot can burn the bread outside while leaving it raw inside. Use an oven thermometer to be sure. For a clean cut, use a serrated knife. Slice the bread after it cools completely. This helps keep the bread from squishing. Serve your slices on a bright platter, adding lemon slices and a sprinkle of poppy seeds for flair. Lemon poppy seed bread pairs wonderfully with tea or coffee, making it a delightful treat for any time of day. For the full experience, check out the Full Recipe. {{image_2}} You can boost the taste of lemon poppy seed bread in fun ways. Adding zests from lime or orange brings a fresh twist. These bright flavors mix well with the lemon, adding depth. You can also fold in berries like blueberries or raspberries. They add color and a sweet pop to each bite. Nuts like almonds or walnuts give a nice crunch too. Just be sure to chop them small for even mixing. If you want a lighter loaf, try swapping Greek yogurt for applesauce. This change keeps moisture while cutting calories. You can also use whole wheat flour instead of all-purpose flour. It adds fiber and a heartier taste. Just remember that whole wheat flour can make the bread a bit denser. For a gluten-free version, look for flour blends that include rice or almond flour. These blends often mimic the texture of regular flour. You may need to add a bit of xanthan gum to help the bread rise well. Adjust the liquid in the recipe as needed, since gluten-free flours can absorb more. Enjoy the same deliciousness without the gluten! For all these variations, you can use the Full Recipe as your base and let your creativity shine. Lemon poppy seed bread is best stored at room temperature for short periods. Wrap it tightly in plastic wrap or foil. This keeps it fresh and moist. Place it in a cool, dry spot. It can stay good for about 2-3 days. If you notice any mold, discard it right away. If you want to keep the bread fresh longer, refrigerate it. Slice the bread first for easier storage. Use an airtight container or wrap it well. This method can extend its life to about a week. The cool air helps prevent spoilage. However, the bread may dry out a bit. You can warm slices in the microwave for a few seconds to refresh them. Freezing is a great way to store lemon poppy seed bread. First, let it cool completely. Wrap the whole loaf or individual slices tightly in plastic wrap. Then, place them in a freezer bag. Make sure to remove excess air. This keeps the bread tasty for up to three months. To thaw, simply take out a slice and leave it at room temperature for about an hour. You can also use the microwave. Just warm it for 10-15 seconds. Enjoy your bread anytime with these simple storage tips! For the full recipe, check out the details above. Lemon Poppy Seed Bread lasts about 3 to 5 days at room temperature. Store it in an airtight container to keep it fresh. If you place it in the fridge, it can last up to 1 week. Always check for mold or an off smell before eating. Yes, you can use different flours! If you want a gluten-free version, try a gluten-free flour blend. Whole wheat flour can also work, but it may change the texture. You can even use almond flour for a nutty flavor. Each flour choice will give a unique taste and look! Lemon Poppy Seed Bread pairs well with many drinks and spreads. You can serve it with a cup of tea or coffee. Cream cheese or lemon curd spreads add a nice touch. Fresh fruit, like berries, also complements its zesty flavor. Yes, you can make this bread without eggs! Use flaxseed meal or chia seeds as a substitute. Mix 1 tablespoon of flaxseed or chia with 3 tablespoons of water and let it sit for a few minutes. Applesauce or mashed bananas also work well as egg replacements. Lemon poppy seed bread is simple to make and delicious. We covered key ingredients, step-by-step instructions, and thoughtful tips. Remember to mix well but avoid overmixing. Feel free to get creative with flavors and garnishes. Store your bread properly to keep it fresh. Enjoy it with drinks or as a snack. With practice, you'll master this recipe and impress everyone. Now, it's time to bake!

Lemon Poppy Seed Bread Simple and Flavorful Recipe

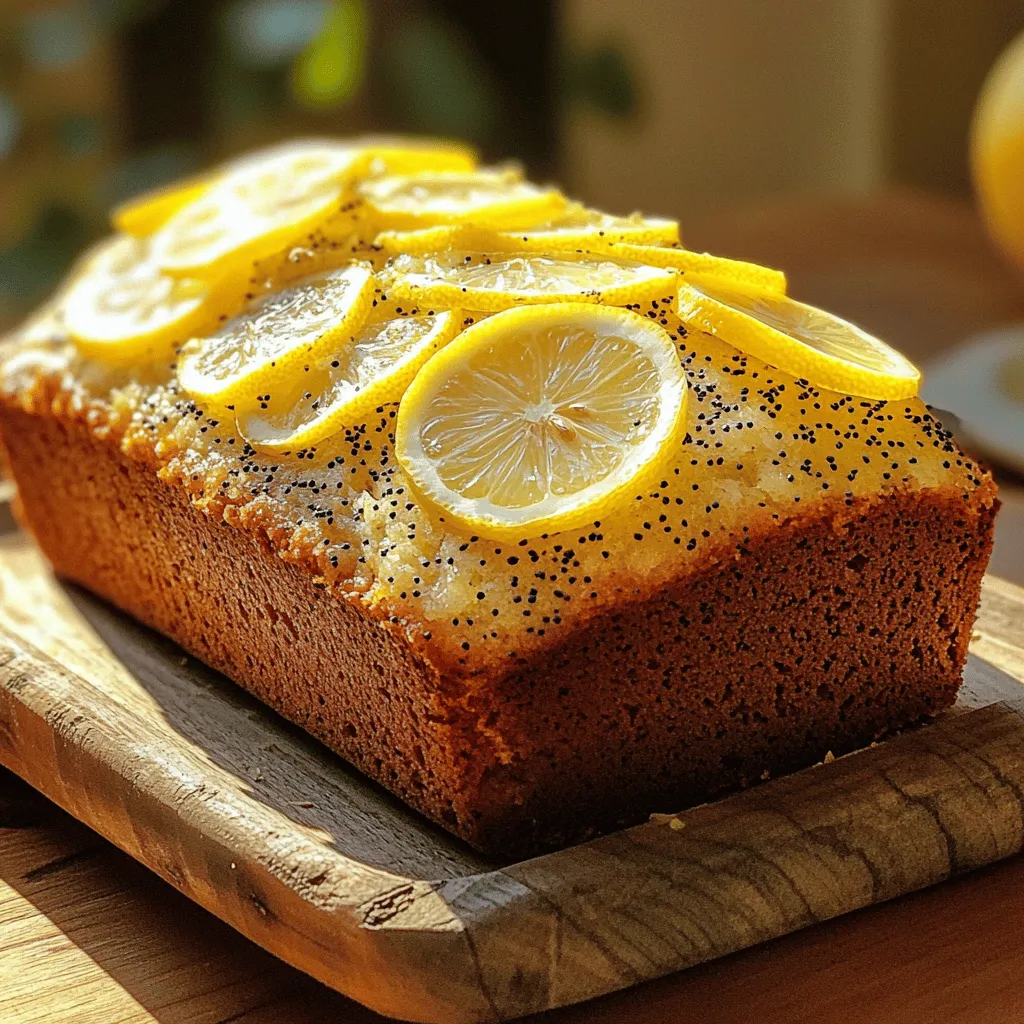
Are you ready to delight your taste buds with a bright and zesty treat? Lemon Poppy Seed Bread is easy

For Easy Skillet Lasagna, you will need: - 9 oz. lasagna noodles, broken into pieces - 1 lb. ground beef or turkey - 1 medium onion, chopped - 2 cloves garlic, minced - 24 oz. marinara sauce - 1 cup ricotta cheese - 1 ½ cups shredded mozzarella cheese - ½ cup grated Parmesan cheese - 1 tsp dried oregano - Salt and pepper to taste - Fresh basil leaves for garnish (optional) You can customize this dish by adding fresh spinach or mushrooms. You might also try using different types of cheese for a unique twist. Each serving of Easy Skillet Lasagna has about 450 calories. This dish offers key nutrients, including protein from the meat and cheese. It also provides calcium and iron. If you want a lighter meal, consider using ground turkey or a meat substitute. To start, I prepare the ground beef or turkey. I heat a large skillet over medium heat. Then, I add the meat and cook it until browned. This takes about 5-7 minutes. I break up the meat with a spatula as it cooks. If there’s excess fat, I drain it. Next, I sauté the onions and garlic. I add the chopped onion and minced garlic to the skillet. I let them cook for 3-4 minutes. The onion should become soft and clear during this time. This step adds great flavor to the dish. Now, I combine the ingredients and cook the noodles. I stir in the broken lasagna noodles and marinara sauce. I also add oregano, salt, and pepper for taste. Then, I pour in 2 cups of water, making sure the noodles are covered. I raise the heat and bring it to a boil. Once boiling, I reduce the heat to low. I cover the skillet and let it simmer for about 15-20 minutes. I stir it occasionally to keep everything mixed. This helps the noodles cook evenly, which is key for a great lasagna. For the best results, I suggest simmering for 15-20 minutes. This time lets the noodles soak up the flavors and become tender. It’s important to stir often. This keeps the noodles from sticking to the bottom of the pan. To ensure the noodles cook evenly, check the liquid levels. If it looks dry, add a bit more water. You want the noodles to be submerged while cooking. This makes sure they are soft and ready for the next steps. After the noodles are tender, I add the ricotta cheese on top. Then, I sprinkle the mozzarella and Parmesan cheese over it. I cover the skillet again and let it cook for another 3-5 minutes. This melts the cheese, creating a tasty and bubbly topping. With these steps, you will have a delicious Easy Skillet Lasagna ready to enjoy! For the full recipe, check out the details above. To keep your skillet lasagna from sticking, use a non-stick skillet. If you don't have one, add a bit of olive oil before cooking. This helps the food slide right off. Stir often, especially when the noodles cook. This way, they won’t stick to the bottom. Adjusting seasoning is key to making this dish your own. Start with the basic salt and pepper. Taste as you cook, and add more if needed. If you love spice, try adding red pepper flakes or Italian herbs. A common mistake is overcooking or undercooking the noodles. If you cook them too long, they turn mushy. If you don't cook them enough, they stay hard. Keep an eye on the timer and stir often. Another mistake is skipping an ingredient or cooking method that adds flavor. Don’t skip the garlic or onion; they bring amazing taste. You can also add fresh herbs for a burst of flavor. Every step counts in achieving a great dish. For more tips, check out the Full Recipe. {{image_2}} You can switch the ground beef for turkey or chicken. These meats are leaner and can make the dish lighter. If you want a plant-based option, try lentils or mushrooms. They add great flavor and texture. You can also mix in fresh spinach or zucchini for added nutrients. These veggies blend well with the noodles and sauce. To boost flavor, add spices like red pepper flakes or Italian seasoning. Fresh herbs like basil and parsley can brighten the dish. You can also try different cheeses. Swap ricotta for cottage cheese for a lighter taste. Use provolone or gouda instead of mozzarella for a twist. Each change can make this recipe feel new and exciting. Check out the Full Recipe for more ideas. To keep your Easy Skillet Lasagna fresh, follow these steps: - Refrigerate: Let the dish cool down first. Then, place it in an airtight container. This keeps moisture in and prevents drying. - Freeze: For longer storage, freeze in a freezer-safe container. Leave some space for expansion as it freezes. Using glass or BPA-free plastic containers works best. They help maintain freshness and flavor. Always label your containers with the date. This helps you keep track of how long they have been stored. To enjoy your leftovers, reheating is key. Here’s how to do it right: - Microwave: Place a portion in a microwave-safe dish. Cover it with a damp paper towel to keep moisture. Heat for 1-2 minutes. Stir halfway through for even warmth. - Stovetop: For a stovetop method, add a splash of water or marinara sauce to a skillet. Heat over low heat, stirring gently. This helps the dish warm without drying out. Both methods are quick and easy. They keep the lasagna tasty and moist. Enjoy your meal again with these simple steps! Can I make this dish in advance? Yes, you can make this dish in advance. Just cook it and let it cool. Then, store it in an airtight container in the fridge. You can reheat it later for an easy meal. How can I make it healthier? To make it healthier, use ground turkey instead of beef. You can add more veggies, like spinach or zucchini, for extra nutrients. Choose whole grain noodles for more fiber. Is it suitable for meal prep? Yes, this dish is great for meal prep. You can divide it into portions and store them in the fridge or freezer. It stays tasty and is easy to reheat. What to do if the noodles are too firm? If the noodles are too firm, add a bit more water. Cover the skillet and let it simmer longer. This helps the noodles cook fully and become tender. How to fix a lack of flavor? If the dish lacks flavor, you can add more salt or herbs. Fresh basil or extra oregano can boost the taste. A splash of balsamic vinegar can also add depth. Substitutions for missing ingredients? If you're missing something, there are easy swaps. Use cottage cheese instead of ricotta. You can also use any marinara sauce you have on hand. Be creative with what’s in your kitchen! Easy Skillet Lasagna combines simple ingredients and quick steps for a tasty dish. I shared key information on making this meal, from tips for cooking to variations for different tastes. Remember, avoiding common mistakes will help you get great results every time. You can customize it to fit your diet and enjoy leftovers easily. Follow the tips provided to make your cooking not just easy but fun and delicious! This dish is a winner for any night of the week.

Easy Skillet Lasagna Quick and Flavorful Dinner Recipe

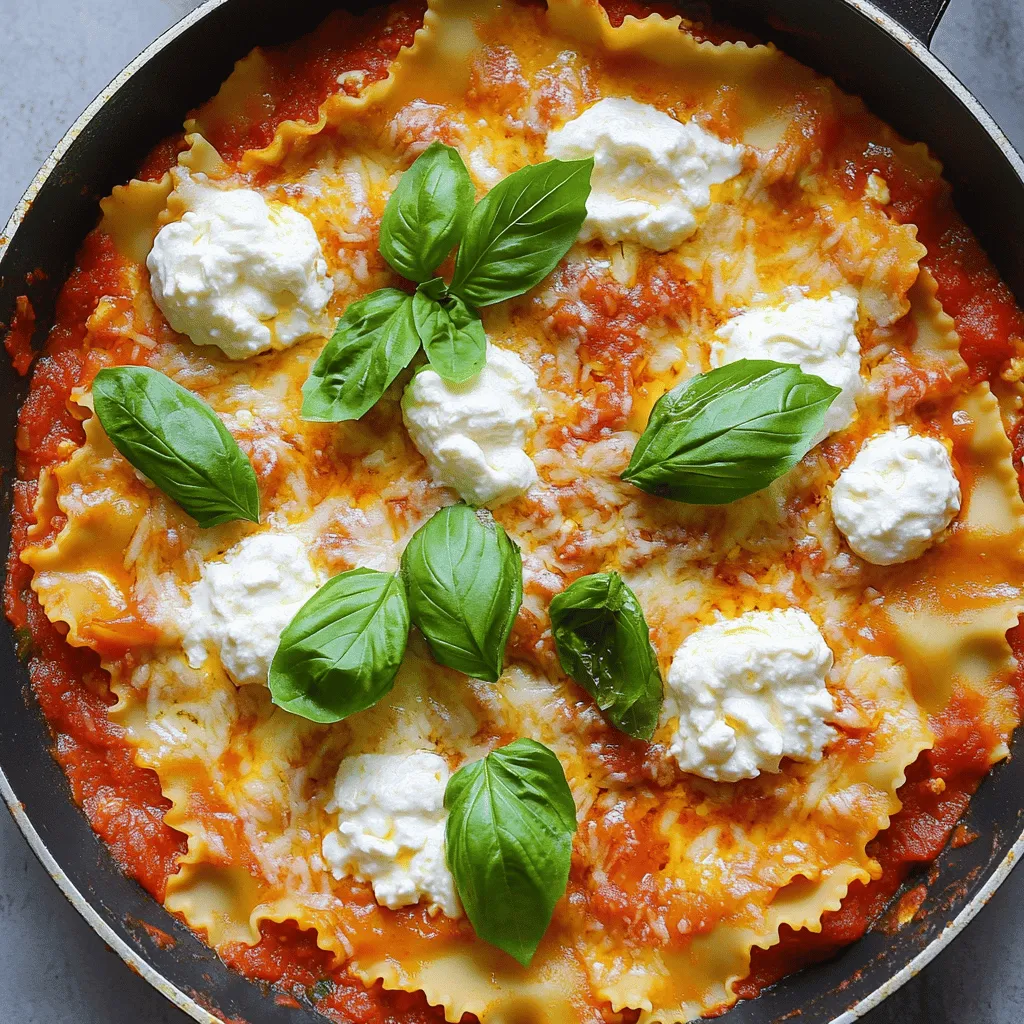
Looking for a quick and tasty dinner? You’ve come to the right place! My Easy Skillet Lasagna combines all the

To make these delicious chocolate chip cookie bars, you will need the following ingredients: - 2 1/4 cups all-purpose flour - 1 teaspoon baking soda - 1 teaspoon salt - 1 cup (2 sticks) unsalted butter, softened - 3/4 cup brown sugar, packed - 3/4 cup granulated sugar - 1 tablespoon vanilla extract - 2 large eggs - 2 cups semi-sweet chocolate chips - 1/2 cup chopped nuts (walnuts or pecans, optional) - Sea salt for sprinkling You can also consider adding some optional ingredients. For a fun twist, try using different types of chocolate chips. You can mix in dark chocolate or white chocolate chips for added flavor. If you like a bit of crunch, add chopped nuts like walnuts or pecans. Just remember, if you choose to add nuts, mix them in gently at the end. A sprinkle of sea salt on top will give your bars an extra flavor pop. This simple ingredient list makes it easy for you to bake these treats at home. You can find the full recipe above to guide you step by step. Enjoy preparing these delightful cookie bars! 1. First, preheat your oven to 350°F (175°C). This step is key for even baking. 2. Next, grease a 9x13 inch baking pan. You can also line it with parchment paper. This makes it easier to remove the bars later. 3. In a medium bowl, whisk together 2 1/4 cups of all-purpose flour, 1 teaspoon of baking soda, and 1 teaspoon of salt. Set this bowl aside. 4. In a large mixing bowl, beat 1 cup of softened butter, 3/4 cup of brown sugar, and 3/4 cup of granulated sugar together. Mix until creamy, which takes about 2-3 minutes. 5. Now, add 1 tablespoon of vanilla extract and 2 large eggs. Mix well after adding each egg. This helps create a smooth batter. 6. Gradually add the dry mix to the wet mix. Stir until just combined. Be careful not to overmix. This keeps the bars soft and chewy. 7. Gently fold in 2 cups of semi-sweet chocolate chips and optional 1/2 cup of chopped nuts. Make sure they are evenly spread throughout the dough. 8. Spread the cookie dough evenly in the prepared pan. Use a spatula to smooth the top. 9. Sprinkle a small pinch of sea salt over the top for an extra flavor boost. 10. Bake in the preheated oven for 25-30 minutes. Check for doneness by inserting a toothpick in the center. It should come out with a few moist crumbs, not wet batter. 11. Let the cookie bars cool in the pan for about 10-15 minutes. After that, transfer them to a wire rack to cool completely. 12. Once cooled, cut them into squares or rectangles and enjoy your delicious cookie bars! To bake the best chocolate chip cookie bars, avoid common mistakes. One mistake is overmixing the dough. This can make your bars tough. Mix just until the dry and wet ingredients blend. Another mistake is not measuring your flour correctly. Too much flour leads to dry bars. Use the spoon-and-level method to measure. Spoon flour into your measuring cup and level it off with a knife. To achieve the perfect texture, use room-temperature butter. Softened butter helps create a creamy mix. If your butter is too cold, it won’t mix well. Also, bake until the edges are golden brown. The center should have a few moist crumbs when tested with a toothpick. Want to boost the flavor of your cookie bars? You can use different types of chocolate. Try dark chocolate or milk chocolate for variety. Adding extracts is another great idea. Almond extract gives a unique twist. You can also add a sprinkle of sea salt on top. This enhances the sweet chocolate flavor. For more texture, consider adding nuts. Walnuts or pecans add crunch and flavor. You can also mix in dried fruits like cranberries or cherries for a fresh taste. {{image_2}} To make gluten-free cookie bars, swap all-purpose flour for gluten-free flour blends. These blends often contain rice flour, potato starch, and tapioca flour. You can also try almond flour or coconut flour, but adjust the liquid in the recipe. A good rule is to use less liquid for almond flour. For gluten-free baking, add a binding agent. Use 1 tablespoon of ground flaxseed mixed with 3 tablespoons of water as a substitute for eggs. This mix helps hold the bars together. For vegan cookie bars, replace eggs with flax eggs. Combine 1 tablespoon of ground flaxseed with 3 tablespoons of water. Let it sit for about 5 minutes until it thickens. Instead of butter, use coconut oil or vegan butter. Both provide a rich taste and texture. If you want to add a hint of flavor, use a dash of almond milk or oat milk. You can add fun flavors to your cookie bars. Try mixing in dried fruits, like cranberries or raisins. Chopped nuts, like almonds or pecans, also work great. For a festive touch, add spices like cinnamon or nutmeg. Around the holidays, consider mixing in white chocolate chips or peppermint pieces for a seasonal twist. For the full recipe, check out the details above. Enjoy baking! To keep your chocolate chip cookie bars fresh, use an airtight container. This method keeps moisture in and air out. You can store the cookie bars at room temperature for about 3 to 4 days. If you want them to last longer, place them in the fridge. They will stay fresh there for up to a week. Just remember, cold storage can change the texture slightly, making them a bit firmer. If you want to enjoy these bars later, freezing is a great option. First, let the cookie bars cool completely. Then, cut them into squares. Wrap each piece tightly in plastic wrap. Place the wrapped bars in a freezer-safe bag or container. They can last in the freezer for about 2 to 3 months. When you're ready to eat them, take out what you need. Thaw the bars at room temperature for about an hour. You can also warm them in the microwave for a few seconds. Freezing may change the texture a bit. They might not be as soft as when fresh, but they'll still taste great! How long do chocolate chip cookie bars last? Chocolate chip cookie bars can last up to a week when stored correctly. Keep them in an airtight container at room temperature. If you want them to last longer, you can refrigerate them. They may stay fresh for about two weeks in the fridge. Can I use frozen cookie dough for this recipe? Yes, you can use frozen cookie dough! Just let it thaw in the fridge overnight before using it. If you have a store-bought dough, check the package for any specific instructions. It may affect the baking time slightly, so keep an eye on them. Why are my cookie bars too dry? Dry cookie bars often happen due to too much flour or overbaking. Make sure to measure flour correctly. Use the spoon and level method instead of packing it down. Also, check your oven timer. If you bake them too long, they will dry out. What to do if the bars are undercooked? If your bars are undercooked, put them back in the oven right away. Bake them for an additional 5 to 10 minutes. Check often to ensure they don't overbake. The edges should look golden brown, and the center should look set. In this blog post, I shared how to make tasty cookie bars. We covered all the key ingredients, detailed steps for mixing and baking, and expert tips to avoid common mistakes. You also learned about variations for gluten-free and vegan options, plus fun flavor twists. Storing your cookie bars properly can keep them fresh and delicious. Remember, small changes can lead to great results. Enjoy baking and experimenting with your cookie bars!

Chocolate Chip Cookie Bars Delicious and Easy Recipe

Looking for a quick and tasty treat? My Chocolate Chip Cookie Bars recipe is your answer! In just a few

- 2 boneless, skinless chicken breasts - 1 cup quinoa, rinsed - 1 can black beans, rinsed and drained - 1 cup corn, fresh or frozen - 1 red bell pepper, diced - 1 avocado, sliced - 1 cup cherry tomatoes, halved - 1 tablespoon olive oil The chicken breasts are the star of the dish. They provide a lean protein base. I always recommend using high-quality chicken for the best flavor. Quinoa is a great grain that adds texture and nutrition. Black beans give a hearty feel and boost protein. Fresh vegetables, like corn and bell pepper, add color and crunch. Avocado and cherry tomatoes are perfect toppings to make each bite fresh and tasty. - 1 teaspoon cumin - 1 teaspoon chili powder - Salt and pepper to taste - Juice of 1 lime - Fresh cilantro for garnish Cumin and chili powder bring warmth and depth. They give the chicken a nice kick. Salt and pepper are simple but essential for flavor. The lime juice adds a bright finish that balances the dish. Fresh cilantro adds a pop of flavor and color, making it feel special. - Avocado and cherry tomatoes - Lime wedges These garnishes can make your bowl look and taste even better. Slicing an avocado adds creaminess. Halved cherry tomatoes add sweetness and freshness. Lime wedges are great for squeezing over the top, giving an extra zing. Personalize your bowl with these garnishes to suit your taste. For the complete recipe, check the Full Recipe. To cook quinoa, rinse it well. This removes the bitter coating called saponin. In a medium pot, combine the rinsed quinoa and vegetable broth. Bring it to a boil. Cover the pot and reduce the heat to low. Cook for about 15 minutes or until the quinoa is fluffy. You want all the broth to be absorbed. Fluff it with a fork before serving. Tips for fluffy quinoa: - Use a 2:1 ratio of liquid to quinoa. - Avoid stirring while it cooks. - Let it sit covered for 5 minutes after cooking. While the quinoa cooks, heat olive oil in a skillet over medium heat. Season the chicken breasts with cumin, chili powder, salt, and pepper. This adds great flavor. Place the chicken in the skillet. Cook for 6-7 minutes on each side until it is golden and cooked through. The chicken should reach an internal temperature of 165°F (75°C). Let it rest for a few minutes before slicing. This keeps it juicy. In the same skillet, add diced red bell pepper and corn. Sauté them for about 3-4 minutes. You want the bell pepper to be tender but still crisp. This adds color and nutrition to your bowl. The quick cooking keeps the vegetables fresh. Always pay attention to cooking times. Overcooking can make veggies mushy. Now, you're ready to assemble your Healthy Chicken Burrito Bowls! For the full recipe, check the previous section. Enjoy your cooking! To make your Healthy Chicken Burrito Bowls easier, prep ahead of time. Start by washing and chopping your veggies. Dice the red bell pepper and slice the avocado. Store them in airtight containers. Cook the quinoa in advance and keep it in the fridge. You can also cook the chicken earlier in the week. Slice it and store it in a separate container. This way, when you’re ready to eat, you can assemble your bowl quickly. To add more flavor, consider these spices: smoked paprika, garlic powder, or onion powder. You can mix these with your chicken seasoning. For a kick, add jalapeños or hot sauce. Pair your burrito bowl with a side of tortilla chips or a fresh salad. This will create a more filling meal. You can also serve it with a dollop of Greek yogurt or a sprinkle of cheese for extra creaminess. Serve your burrito bowls in colorful dishes. This makes your meal look more inviting. Layer the ingredients nicely. Start with a base of quinoa, then add the chicken, beans, and veggies on top. Finish with avocado and tomatoes. The colors of the food will pop, making it more appetizing. Don’t forget to garnish with fresh cilantro and a lime wedge. A well-presented bowl enhances the eating experience. For full details, check the Full Recipe. {{image_2}} You can switch out chicken for other proteins. Tofu or beef works great! If you want a plant-based option, try jackfruit. For beans, black beans are classic, but you can use pinto or kidney beans. Quinoa is healthy, but brown rice or farro adds nice texture. Mix it up to find your perfect bowl! To change the flavor, add new spices. Paprika, garlic powder, or oregano can give a fresh taste. You can also use fresh herbs like basil or parsley. Want some heat? Add hot sauce or jalapeños to spice things up! Just a few slices can make your bowl exciting and bold. If you're vegan, you can easily make this dish plant-based. Swap chicken for grilled veggies or tofu. For gluten-free options, stick with quinoa and beans. If you're watching carbs, skip the beans and use extra veggies. You can still enjoy a tasty and filling burrito bowl without the carbs! To store leftovers, use airtight containers. This keeps them fresh and safe. You can keep your Healthy Chicken Burrito Bowls in the fridge for about three to four days. Make sure to cool them down before sealing. This helps prevent moisture buildup. For freezing, divide the burrito bowls into single portions. Use freezer-safe containers or bags. Remove as much air as possible to avoid freezer burn. They can last for up to three months in the freezer. To thaw, place the bowl in the fridge overnight. This way, the food stays safe and tasty. When reheating, use the microwave or stovetop. If using a microwave, cover the bowl with a damp paper towel. This keeps moisture in and prevents drying out. If using the stovetop, add a splash of water and heat on low. Always check that the food reaches 165°F (75°C) to ensure safety. To make Healthy Chicken Burrito Bowls, follow these simple steps: 1. Cook the Quinoa: Rinse 1 cup of quinoa. Boil it in 2 cups of vegetable broth. Cover and simmer for 15 minutes until fluffy. 2. Prepare the Chicken: Season 2 chicken breasts with cumin, chili powder, salt, and pepper. Cook them in a skillet with olive oil for about 6-7 minutes on each side. Ensure they reach 165°F. 3. Sauté the Vegetables: In the same skillet, add diced red bell pepper and corn. Sauté for 3-4 minutes until tender. 4. Assemble the Bowls: Start with quinoa in each bowl. Top with sliced chicken, black beans, sautéed vegetables, avocado, and cherry tomatoes. 5. Add Final Touches: Squeeze lime juice over the bowls and garnish with cilantro. For more details, check the Full Recipe. Yes, you can use brown rice instead of quinoa. Here are the pros and cons: - Brown Rice Pros: - Chewy texture adds heartiness. - Good source of fiber. - Brown Rice Cons: - Takes longer to cook. - Slightly higher in carbs. Quinoa cooks faster and has more protein. Choose based on your taste and time. To enhance flavor in your burrito bowls, consider these sauces: - Salsa: Fresh or jarred, adds zest. - Guacamole: Creamy and rich. - Greek Yogurt: A tangy alternative to sour cream. - Chipotle Sauce: Adds a smoky kick. Balance flavors by mixing spicy and creamy sauces. This makes each bite exciting! In this post, we covered how to make healthy chicken burrito bowls. We explored main ingredients, cooking techniques, and tips for flavor. Each step helps you create a tasty meal. Remember, you can change proteins and spices to fit your taste. Store leftovers safely and reheat well for future meals. Enjoy your cooking journey, and don’t forget to get creative! A bowl of flavors awaits you, so dive in!

Healthy Chicken Burrito Bowls Packed with Flavor

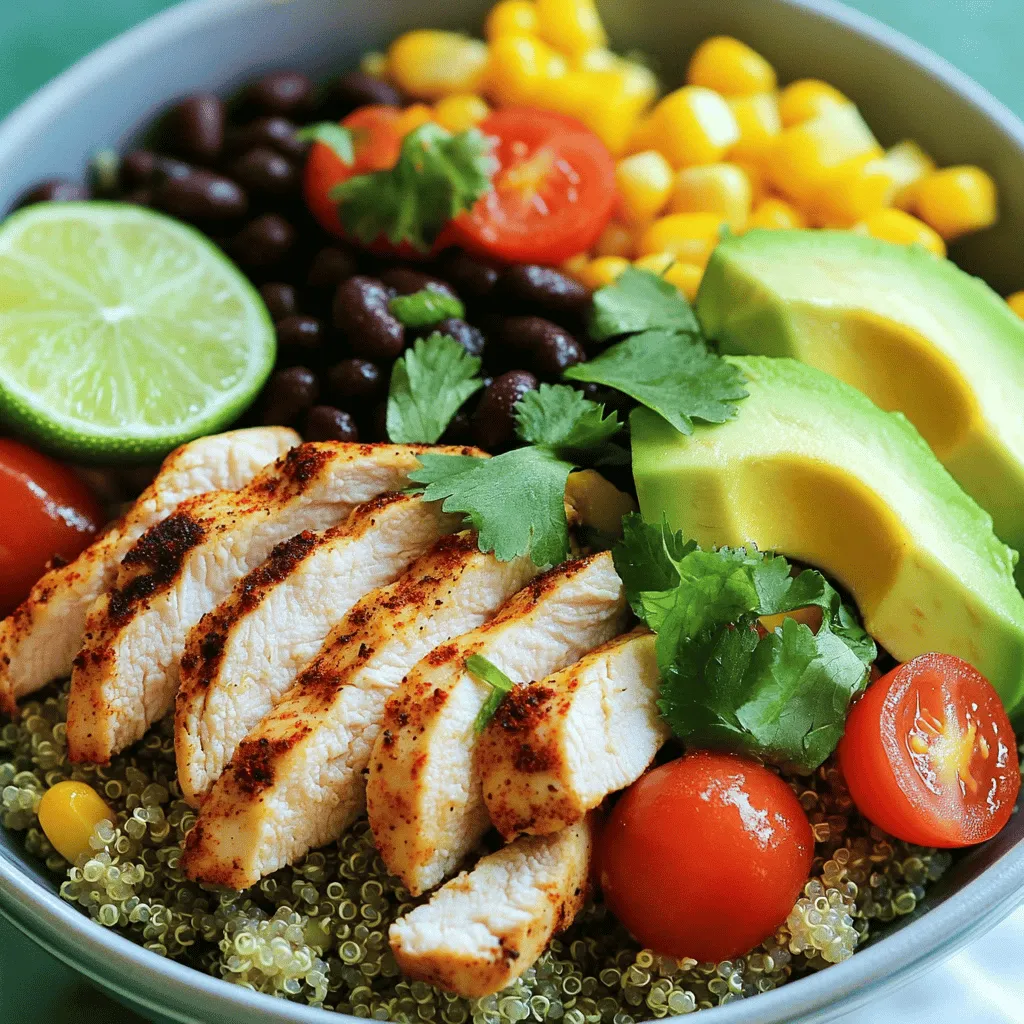
Looking for a meal that’s both healthy and bursting with flavor? You’ve found it! These Healthy Chicken Burrito Bowls are

- 4 chicken thighs, skinless and boneless - 1/2 cup soy sauce (low sodium) - 1/4 cup honey - 2 tablespoons rice vinegar - 2 tablespoons freshly grated ginger - 2 cloves garlic, minced - 1 tablespoon sesame oil - 1 tablespoon cornstarch mixed with 2 tablespoons water (for thickening) - 1/4 cup sliced green onions (for garnish) - Sesame seeds (for garnish) This dish shines with its juicy chicken and rich teriyaki flavor. Using chicken thighs keeps the meat tender. I prefer low-sodium soy sauce to control the saltiness. Honey gives the dish a sweet twist. Rice vinegar adds a nice tang. Fresh ginger brings warmth, and garlic adds depth. The sesame oil adds a nutty aroma. Cornstarch thickens the sauce for a glossy finish. For garnishing, I love fresh green onions and sesame seeds. They add color and texture. This combination creates a delightful and flavorful meal. Check out the Full Recipe for all the details! 1. Preheat your oven to 400°F (200°C). This step is key for even cooking. 2. Prepare a baking dish by lightly greasing it. This helps the chicken not stick. 3. In a medium bowl, whisk together the teriyaki sauce ingredients. Combine 1/2 cup soy sauce, 1/4 cup honey, 2 tablespoons rice vinegar, 2 tablespoons grated ginger, 2 minced garlic cloves, and 1 tablespoon sesame oil. Mix until it’s smooth and well blended. 1. Place the chicken thighs in your baking dish. Pour the teriyaki sauce over the chicken. Make sure each piece is coated. 2. Cover the baking dish with aluminum foil. This keeps moisture in while baking. 3. Bake the chicken for 25 minutes. This ensures the chicken cooks through. 4. Remove the foil and bake for another 15 minutes. This step lets the sauce caramelize and adds flavor. 5. While the chicken finishes, take the remaining sauce and pour it into a saucepan. Heat it over medium heat until it simmers. 6. Stir in the cornstarch mixture and cook for 2-3 minutes. This will thicken the sauce nicely. 1. Once the chicken is done, take it out of the oven. Let it rest for a few minutes before slicing. 2. Drizzle the thickened sauce over the chicken. This adds extra flavor. 3. Garnish with sliced green onions and sesame seeds for a nice touch. Enjoy your delicious meal! For more details, check out the Full Recipe for Baked Teriyaki Chicken. To bake chicken perfectly, set your oven to 400°F. This temperature cooks the chicken evenly. Use skinless, boneless chicken thighs for the best results. They stay juicy and tender. Place the chicken in a baking dish and cover it with foil. This helps trap moisture while baking. After 25 minutes, remove the foil. Let the sauce caramelize for 15 more minutes. This adds flavor and color. For juiciness, marinate the chicken in the teriyaki sauce. I recommend letting it soak for at least 30 minutes. If you have time, marinate overnight in the fridge. This gives the chicken a deep flavor. Always use fresh ingredients for the best taste. Grate fresh ginger and mince fresh garlic. These add a vibrant flavor to the sauce. If you like some heat, add a pinch of red pepper flakes or sriracha. This gives the dish an exciting kick. You can also try adding pineapple juice for a sweet twist. Plating is key to making your dish appealing. Slice the chicken after it rests. This helps keep the juices inside. Arrange the pieces on a clean plate. Drizzle the thickened teriyaki sauce over the top. Sprinkle green onions and sesame seeds for a nice touch. For side dishes, steamed rice or stir-fried veggies work well. They complement the flavors of the teriyaki chicken. Enjoy this savory baked teriyaki chicken, and don't forget to check the Full Recipe for full details! {{image_2}} You can change some ingredients in the teriyaki sauce. If you want a different sweet taste, try maple syrup or agave syrup. Both can add a nice twist. If you do not have chicken thighs, you can use chicken breasts or even tofu for a vegetarian option. Each protein brings its own flavor and texture. Adding pineapple can give your dish a bright, tropical taste. Just chop some fresh pineapple and mix it in with the chicken before baking. If you like spicy food, add a bit of sriracha or chili flakes to the sauce. This will give your teriyaki chicken a nice kick! For gluten-free diets, use tamari instead of soy sauce. It has the same flavor but is safe for those avoiding gluten. If you are on a low-carb diet, skip the honey and use a sugar-free sweetener instead. This keeps the dish tasty without the extra carbs. Explore these variations to find your perfect baked teriyaki chicken! For the full recipe, check out the details above. After enjoying your baked teriyaki chicken, store leftovers safely. First, let the chicken cool down. Then, place it in an airtight container. Refrigerate within two hours of cooking. The chicken stays fresh for up to three days. To keep it flavorful, try to separate the chicken from the sauce. This way, it won't get too soggy. If you want to save some for later, freezing is a great option. Wrap the cooled chicken tightly in plastic wrap or aluminum foil. Then, place it in a freezer-safe bag. Remove as much air as possible. This helps prevent freezer burn. You can freeze baked teriyaki chicken for up to three months. When you're ready to eat it, move it to the fridge overnight to thaw. Reheating your chicken properly keeps it moist and tasty. The best method is to use the oven. Preheat the oven to 350°F (175°C). Place the chicken in a baking dish and cover it with foil. Heat for about 15-20 minutes. You can also add a splash of water or sauce to help keep it juicy. If you’re in a hurry, you can use the microwave. Just cover it and heat in short bursts, checking often to avoid drying it out. Enjoy your meal again! To ensure your chicken is safe to eat, check its internal temperature. Use a meat thermometer to measure the thickest part of the chicken. The safe cooking temperature for chicken is 165°F (75°C). This ensures the meat is juicy and safe. When cooking baked teriyaki chicken, follow these steps: - Preheat your oven to 400°F (200°C). - Bake covered for 25 minutes, then uncovered for 15 minutes. - Check the temperature after baking to confirm doneness. Yes, you can easily swap chicken for other meats. Here are some options: - Pork: Use pork tenderloin or chops for a different flavor. - Beef: Thin strips of beef work well in teriyaki sauce. - Tofu: Firm tofu is a great vegetarian option. Just ensure it is pressed to remove excess water. Adjust cooking times based on the meat you choose. Pair your baked teriyaki chicken with many tasty side dishes. Here are some ideas: - Steamed rice: White or brown rice absorbs the teriyaki sauce well. - Vegetables: Broccoli, green beans, or stir-fried veggies add color and nutrition. - Salad: A fresh salad with a light dressing complements the rich flavors. These sides create a balanced and delicious meal. For the full recipe, visit the [Full Recipe]. In this post, we covered how to make flavorful teriyaki chicken. We explored key ingredients like chicken thighs, soy sauce, and honey. I provided simple steps for preparation and cooking, along with tips for juiciness. We discussed variations and substitutions to suit different tastes, plus storage and reheating advice. Teriyaki chicken is easy to make and delicious. Try it yourself to impress your friends and family. You’ll enjoy the flavors and the joy of cooking!

Baked Teriyaki Chicken Juicy and Flavorful Dish

If you crave a delicious, juicy meal that’s easy to make, you’re in the right place! Baked Teriyaki Chicken combines

Older posts
Newer posts
← Previous Page1 … Page47 Page48 Page49 … Page90 Next →

dsad

© 2025 So Yum Recipes • Built with GeneratePress

Our Policies

  • Copyright Policy
  • Cookie Policy
  • GDPR Policy
  • Privacy Policy
  • Disclaimer
  • Terms Of Use

More Information

  • Home
  • About
  • Contact
  • Appetizers
  • Dessert
  • Dinner
  • Drinks
©2025, So Yum Recipes About Back To Top