Skip to content
DisclaimerTerms Of UseGDPR PolicyCookie Policy

So Yum Recipes

  • Home
  • Drinks
  • Appetizers
  • Dinner
  • Dessert
  • About
  • Contact
  • Privacy Policy
DisclaimerTerms Of UseGDPR PolicyCookie Policy

Chloe

To make a great S'mores dip, you need a few key ingredients: - 1 cup semi-sweet chocolate chips - 1 cup mini marshmallows - 1/4 cup heavy cream - 1 teaspoon vanilla extract - 1/2 teaspoon sea salt - Graham crackers for dipping These main ingredients create a rich and gooey treat that everyone loves. The semi-sweet chocolate gives a deep flavor, while the mini marshmallows add sweetness and a fluffy texture. Heavy cream makes the dip smooth, and vanilla extract enhances the taste. A pinch of sea salt balances the sweetness perfectly. You can add these for extra fun: - Extra melted chocolate - Caramel sauce - Crushed graham crackers These toppings allow you to get creative. Drizzling melted chocolate or caramel sauce makes the dip look fancy. Crushed graham crackers on top add a nice crunch. Feel free to mix and match your toppings to make your S'mores dip even better! For the full recipe, check the section above. - Preheat the oven to 350°F (175°C). - In an 8-inch oven-safe skillet, combine 1 cup of semi-sweet chocolate chips and 1/4 cup of heavy cream. Stir to mix well. - Place the dish in the oven and bake for 5-7 minutes until the chocolate is melted and glossy. - Remove the dish from the oven. Stir the mixture until smooth. Add 1 teaspoon of vanilla extract and 1/2 teaspoon of sea salt, mixing well. - Add 1 cup of mini marshmallows on top of the melted chocolate. Spread them evenly. - Return the dish to the oven and bake for an additional 3-5 minutes until the marshmallows are puffed and golden. - Carefully take the skillet out of the oven. Let it cool for a couple of minutes before serving. Serve this delicious dip with graham crackers for dipping. Enjoy the sweet and warm flavors! For the full recipe, check out the details above. To make the best S'mores dip, start with the right chocolate chips. I recommend using semi-sweet chocolate chips. They melt well and give a rich taste. You can also try dark chocolate for a deeper flavor. Just remember, the quality of chocolate counts. When melting chocolate, stirring is key. Start by gently mixing the chocolate and cream together. Use a spatula to blend them smoothly. Stirring helps prevent any lumps. Keep stirring until the mix is glossy and smooth. This step makes your dip creamy and delightful. For dipping, graham crackers are a must. I love using the classic honey-flavored ones. They add sweetness and crunch. You can also try chocolate or cinnamon graham crackers for a fun twist. To make it even more exciting, add fresh fruits or pretzels for dipping. Sliced strawberries or bananas work great with the gooey dip. Pretzels add a salty crunch that pairs well. Mix and match to find your favorite combo! {{image_2}} You can make S'mores dip more fun by adding flavors. One great idea is to add peanut butter. Just mix in a half cup of creamy peanut butter with the chocolate and cream. This gives the dip a nutty twist that is hard to resist. You can also use different types of chocolate. Try dark chocolate or white chocolate for new tastes. Each option brings a unique flavor, making each dip special. If you want to make S'mores dip for everyone, consider dietary needs. For gluten-free eaters, you can use gluten-free graham crackers. Many brands offer tasty options that work well. If you're making it vegan, look for vegan marshmallows. These alternatives let everyone enjoy the dip without worry. You can still get that sweet, gooey taste everyone loves. For the full recipe, check out the S'mores Dip Delight. To store leftover S'mores dip, let it cool first. Then, cover it tightly with plastic wrap or a lid. Place it in the fridge. It will keep well for 3 to 5 days. When you're ready to eat it again, simply reheat it. Warm it in the oven at 350°F (175°C) for about 10 minutes. You can also use the microwave. Heat it in short bursts, stirring in between. This helps keep the dip creamy and smooth. Yes, you can freeze S'mores dip! To do this, let it cool completely. Then, place it in an airtight container. It can last up to 3 months in the freezer. When you want to enjoy it again, thaw it in the fridge overnight. Reheat it gently in the oven or microwave. To maintain flavor when storing, ensure you use fresh ingredients. This helps the dip taste great even after freezing. Avoid leaving it out at room temperature for long. This keeps it safe and delicious for you to enjoy later. How do I know when the S'mores dip is done? You know your S'mores dip is done when the chocolate is melted and glossy. The mini marshmallows should be puffed and golden. This usually takes about 8-12 minutes in total. Can I make S'mores dip in a microwave? Yes, you can make S'mores dip in a microwave! Combine the chocolate chips and heavy cream in a microwave-safe bowl. Heat for about 30 seconds, then stir. Repeat until melted. Add the marshmallows and microwave for another 30 seconds, or until puffed. What's the best way to serve S'mores dip at a party? Serve your S'mores dip in a warm dish right from the oven or microwave. Place graham crackers around the dip for easy access. You can also add some extra melted chocolate on top for a fun touch! How to make S'mores dip without an oven? You can make S'mores dip on the stovetop! Melt the chocolate and heavy cream in a saucepan over low heat. Stir frequently until smooth. Top with marshmallows and cover. Cook for a few minutes until the marshmallows puff up. What can I substitute for heavy cream in this recipe? If you need a substitute for heavy cream, use coconut cream or a mix of milk and butter. For a lighter option, try whole milk or half-and-half, but the dip may be less rich. For more details on making this delightful treat, check out the Full Recipe! S'mores dip is a delight. We covered its ingredients, steps, tips, and fun variations. Start with chocolate chips, marshmallows, and cream. Bake to a gooey finish, then enjoy with graham crackers or fruits. Don't forget to try adding peanut butter or gluten-free crackers. Storing is simple for both short and long-term. Follow the tips for the best taste and ease. Now you're ready to make this treat anytime! Make every gathering special with your tasty S'mores dip. Enjoy creating a fun dessert everyone will love.

S’mores Dip Delightful Treat for Any Occasion

If you crave the sweet, gooey goodness of s’mores but want a twist, you’ve landed in the right place! S’mores

- 1 pound fresh green beans, trimmed - 4 tablespoons unsalted butter - 4 cloves garlic, minced - 1 teaspoon salt - ½ teaspoon black pepper - ¼ teaspoon red pepper flakes (optional) - 1 tablespoon lemon juice - Zest of 1 lemon - 2 tablespoons toasted almonds, chopped (for garnish) Fresh green beans are the star of this dish. They bring a crisp texture and a bright color. You can find them in any grocery store, usually in the produce section. Next, we use unsalted butter to create a rich, savory flavor. The garlic adds a wonderful aroma and taste. For seasoning, I like to keep it simple. Salt and black pepper enhance the natural flavor of the beans. If you want a little heat, add red pepper flakes. This option is great for those who enjoy a spicy kick. If you're feeling adventurous, you can add some optional ingredients. A splash of lemon juice brightens the dish. The zest adds even more flavor. Finally, toasted almonds give a lovely crunch and additional flavor. For the complete recipe, check out the Full Recipe. - Bring a large pot of salted water to a boil. - Blanch the green beans. To start, fill a large pot with water and add a good amount of salt. This step helps the green beans keep their bright color and adds flavor. Once the water boils, it’s time to add the green beans. Blanch them for about 3-4 minutes. You want them bright green and tender-crisp. After blanching, grab a slotted spoon and move the beans into a bowl of ice water. This cools them down fast and stops the cooking. Let them sit for a few minutes, then drain and set aside. - Melt butter and sauté garlic. - Add green beans and seasonings. Next, grab a large skillet and melt 4 tablespoons of unsalted butter over medium heat. Once it melts and bubbles, add the 4 cloves of minced garlic. Stir it for about a minute, but don’t let it brown. You want the garlic to smell great, not burnt. Now, it’s time for the blanched green beans. Toss them in the skillet and mix well. Season with 1 teaspoon of salt, ½ teaspoon of black pepper, and if you like heat, add ¼ teaspoon of red pepper flakes. Sauté everything together for another 2-3 minutes until the beans are hot and coated in that delicious garlic butter. - Drizzle with lemon juice and zest. - Garnish with toasted almonds. Remove the skillet from heat. Drizzle 1 tablespoon of lemon juice over the green beans, and add the zest of one lemon. Toss everything again to mix the flavors well. For the final touch, transfer the green beans to a serving platter and sprinkle on 2 tablespoons of chopped toasted almonds. These add a nice crunch and flavor. For the full recipe, you can find it above. Enjoy your simple and savory garlic butter green beans! To get bright green and crisp green beans, you must blanch them. Start by bringing a large pot of salted water to a boil. Once it boils, add the trimmed green beans. Cook them for about 3-4 minutes. You want them tender but still firm. After that, transfer them quickly to a bowl of ice water. This stops the cooking. It keeps the beans vibrant and crunchy. When cooking garlic, keep a close eye on it. Add minced garlic to the melted butter and stir it constantly. Cook for just about one minute until you smell that lovely aroma. If you let the garlic brown, it can turn bitter and strong. You want to keep the flavor mild and sweet, to complement the green beans. Garlic butter green beans make a great side dish. They pair well with grilled meats like chicken, steak, or fish. You can also serve them with rice or pasta for a complete meal. They add a nice crunch and flavor that everyone will love. For dinner parties, they look beautiful on a platter, especially with the toasted almonds on top. Check out the Full Recipe for more details! {{image_2}} You can easily switch green beans for other veggies. Asparagus works great. Just trim the ends and cook the same way. Broccoli is another fantastic option. Cut it into bite-sized pieces and blanch it. Both veggies soak up the garlic butter flavor well. Want to spice things up? Try adding fresh herbs. Basil and thyme give a nice touch. You can also add a pinch of cayenne for heat. If you like a hint of sweetness, mix in a bit of honey. These small changes make the dish pop with taste. Looking for a vegan option? Swap the butter for olive oil or vegan butter. This keeps it rich and flavorful. For a nut-free version, just skip the almonds. The dish still tastes amazing without them. These adjustments let everyone enjoy this dish. For the full recipe of Garlic Butter Green Beans, check out the earlier section. After making Garlic Butter Green Beans, let them cool to room temperature. Place the leftover beans in an airtight container. Store them in the fridge for up to three days. This keeps them fresh and tasty. When you want to enjoy them again, just take them out and warm them up. You can freeze Garlic Butter Green Beans for later use. First, let them cool completely. Then, place them in a freezer-safe bag. Squeeze out as much air as you can and seal it tight. They can stay in the freezer for up to three months. When you are ready to eat, thaw them in the fridge overnight. Reheat in a skillet or microwave until warm. Garlic Butter Green Beans stay fresh in the fridge for about three days. If you freeze them, they can last up to three months. Always check for any off smells or changes in texture. If they do not smell right, it is best to toss them. To keep them tasting great, use them within these time frames. For the full recipe, check the earlier section. To make Garlic Butter Green Beans, follow these steps: 1. Boil Water: Start by bringing a large pot of salted water to a boil. 2. Blanch Beans: Add 1 pound of trimmed green beans and blanch them for 3-4 minutes until they turn bright green and are tender but still crisp. 3. Ice Bath: Use a slotted spoon to transfer the beans into a bowl of ice water. This stops the cooking. Let them cool, then drain. 4. Melt Butter: In a skillet, melt 4 tablespoons of unsalted butter over medium heat. 5. Sauté Garlic: Add 4 minced cloves of garlic and stir for about 1 minute. Avoid browning the garlic. 6. Add Beans: Toss in the blanched green beans and coat them in the garlic butter. 7. Season: Sprinkle with 1 teaspoon of salt, ½ teaspoon of black pepper, and ¼ teaspoon of red pepper flakes if you like heat. Sauté for another 2-3 minutes. 8. Finish: Drizzle with 1 tablespoon of lemon juice and the zest of 1 lemon. Toss to mix. 9. Serve: Transfer to a platter and top with 2 tablespoons of chopped toasted almonds for garnish. You can find the Full Recipe for more detailed steps. Yes, you can use frozen green beans. They can be a great time-saver. However, frozen beans may need a bit more cooking time. - Cooking Tip: Do not thaw them before cooking. Just add them to boiling water for about 5-7 minutes. - Flavor Note: Since frozen beans may lose some crunch, ensure you sauté them longer in the garlic butter to enhance the flavor. The best way to reheat Garlic Butter Green Beans is on the stove. This method keeps them crisp. - Stovetop Method: Place the beans in a skillet over medium heat. Stir often for about 3-5 minutes until heated through. - Microwave Method: If you use a microwave, heat them in short bursts of 30 seconds. Stir in between to avoid overcooking. These reheating methods help retain the flavor and texture of this simple and savory dish. This blog post provided a simple guide for making Garlic Butter Green Beans. We covered the main ingredients, cooking steps, and tips for perfect blanched beans. You also learned about variations, storage options, and answers to common questions. For a fresh side dish, these green beans offer great taste and easy prep. Enjoy experimenting with flavors and get creative with your ingredients. This recipe can fit any meal, making your dining experience more enjoyable.

Garlic Butter Green Beans Simple and Savory Dish

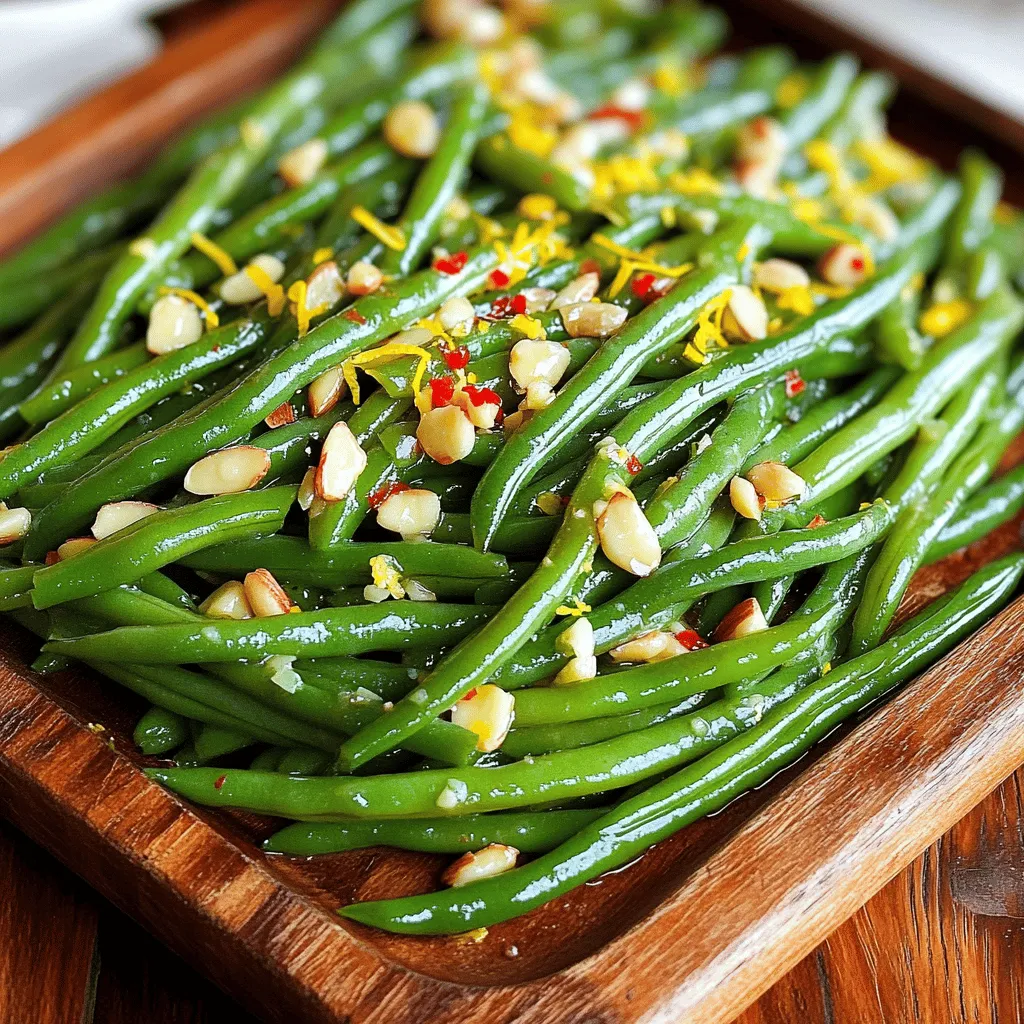
If you’re seeking a quick and tasty side dish, Garlic Butter Green Beans are a must-try! This simple recipe combines

To make oven roasted sweet potatoes, you need these simple ingredients: - 4 medium sweet potatoes, peeled and cut into 1-inch cubes - 3 tablespoons olive oil - 1 teaspoon garlic powder - 1 teaspoon onion powder - 1 teaspoon smoked paprika - ½ teaspoon cayenne pepper (optional, for heat) - 2 teaspoons dried rosemary - 2 teaspoons dried thyme - Salt and pepper to taste - Fresh parsley, chopped for garnish You can add your favorite herbs and spices to boost the flavor. Here are some great options: - Cinnamon for a sweet twist - Chili powder for extra spice - Cumin for a warm, earthy taste - Fresh herbs like thyme or rosemary for brightness Mix and match these to find your perfect blend! Choose firm, smooth sweet potatoes for the best results. Look for ones that are: - Free of blemishes and soft spots - Uniform in size for even cooking - Bright orange flesh for sweet flavor These tips help you pick the best sweet potatoes for roasting. The right choice makes a big difference in taste and texture. For the full recipe, check the detailed instructions above! First, gather all the ingredients. You need sweet potatoes, olive oil, and spices. Peel the sweet potatoes and cut them into 1-inch cubes. This size helps them cook evenly. Next, take a large mixing bowl and add the sweet potatoes. Pour in three tablespoons of olive oil. Then, add garlic powder, onion powder, smoked paprika, and optional cayenne pepper for heat. Add two teaspoons each of dried rosemary and thyme. Finally, season with salt and pepper to taste. Mix everything well to coat the sweet potatoes evenly. Now, preheat your oven to 425°F (220°C). While it heats, line a large baking sheet with parchment paper. This makes cleanup easy later. Spread the sweet potato cubes in a single layer on the baking sheet. Make sure they don’t overlap; this helps them roast well. Bake for 25-30 minutes. Flip them halfway through cooking. This ensures even browning and crispiness. You want the sweet potatoes to turn golden brown and crispy on the edges. When done, remove them from the oven and let them cool for a few minutes. To get that perfect crisp, space the sweet potatoes well on the baking sheet. If they are too close, they will steam instead of roast. Another tip is to use a high oven temperature. This helps create a nice crust. If you want extra crispiness, try soaking the cubed sweet potatoes in cold water for about 30 minutes before baking. This removes some starch and helps them crisp up. These tips will help you create crispy, flavorful sweet potatoes every time. For the full recipe, check the details above. To make oven roasted sweet potatoes shine, follow these simple tips: - Choose the right size: Cut sweet potatoes into 1-inch cubes. This size helps them cook evenly. - Use fresh herbs: Fresh rosemary and thyme can boost flavor. They add a nice touch. - Get the right heat: Preheat your oven to 425°F. A hot oven gives a crispy finish. - Don't overcrowd the pan: Spread the sweet potatoes out. This allows them to roast, not steam. When cooking sweet potatoes, be aware of these common pitfalls: - Skipping the oil: Oil helps the sweet potatoes crisp up. Without it, they can turn mushy. - Not seasoning enough: Sweet potatoes need flavor. Don't be shy with spices! - Ignoring cook time: Overcooked sweet potatoes can become dry. Keep an eye on them. Adjusting seasonings can make your dish just right. Here’s how to do it: - Taste as you go: If you want more flavor, add more garlic or paprika. - Add heat: If you like spice, sprinkle in more cayenne pepper. Start small. - Fresh herbs at the end: Add parsley after cooking. It gives a fresh pop and brightens the dish. For a full recipe, check out the Crispy Herb-Infused Oven Roasted Sweet Potatoes . {{image_2}} You can change the flavor of your oven roasted sweet potatoes easily. Want a sweet version? Add brown sugar and cinnamon. This mix gives a warm, cozy taste. Try using maple syrup too for a sweet glaze. For a spicy kick, mix in chili powder or cumin. These flavors bring out the natural sweetness of the potatoes. Mixing in other veggies can enhance your dish. Carrots and bell peppers work well with sweet potatoes. Cut them into similar sizes for even cooking. You can also add red onion for a nice bite. Just toss them with the sweet potatoes and follow the same cooking steps. This mix brings color and taste to your plate. You don’t have to stick to the usual spices. Try using fresh herbs like basil or cilantro for a fresh twist. Lemon zest can add brightness to the dish. For a smoky flavor, use liquid smoke instead of smoked paprika. These changes make your oven roasted sweet potatoes unique and fun. For the full recipe, check out the details above. You can store leftover sweet potatoes in an airtight container. Make sure they are cool before sealing. Place them in the fridge. They will stay good for about 3 to 5 days. If you want to keep them longer, freezing is a great option. To reheat, you have a few options. The best way is to use the oven. Preheat your oven to 350°F (175°C). Spread the sweet potatoes on a baking sheet. Heat for about 10 to 15 minutes. You can also use a microwave. Place them in a safe dish and cover with a damp paper towel. Heat for about 1 to 2 minutes. Check and stir halfway through heating. To freeze sweet potatoes, start by cooling them completely. Place them in a single layer on a baking sheet. Freeze for 1 to 2 hours until firm. Then transfer them to a freezer bag. Remove as much air as possible before sealing. They will last for up to 3 months in the freezer. When you're ready to use them, you can roast them straight from frozen. Follow the full recipe for the best results. Yes, you can prepare oven roasted sweet potatoes ahead. Cook them as usual and let them cool. Store them in an airtight container in the fridge for up to three days. When you're ready to eat, just reheat them in the oven for about 10-15 minutes at 350°F (175°C). This keeps them crispy and tasty. Roasted sweet potatoes are very versatile. You can serve them as a side dish with grilled chicken or fish. They also pair well with salads. Try adding them to a grain bowl with quinoa and greens. For a sweet twist, drizzle honey or maple syrup on top. You can even mash them and add butter for a cozy dish. To check if your sweet potatoes are done, look for a golden brown color. They should be crispy on the edges. You can also poke them with a fork. If the fork goes in easily, they are ready. Keep an eye on them while baking to avoid burning. Oven roasted sweet potatoes are easy and tasty. We covered all you need to know. From choosing the right sweet potatoes to ensuring they’re crispy, each step matters. Remember, avoid common mistakes and adjust seasonings to fit your taste. Try different flavors and add veggies for variety. Store leftovers properly, so they stay fresh. With these tips, you can enjoy sweet potatoes anytime. Happy cooking, and may your dishes always turn out great!

Oven Roasted Sweet Potatoes Flavorful and Easy Dish

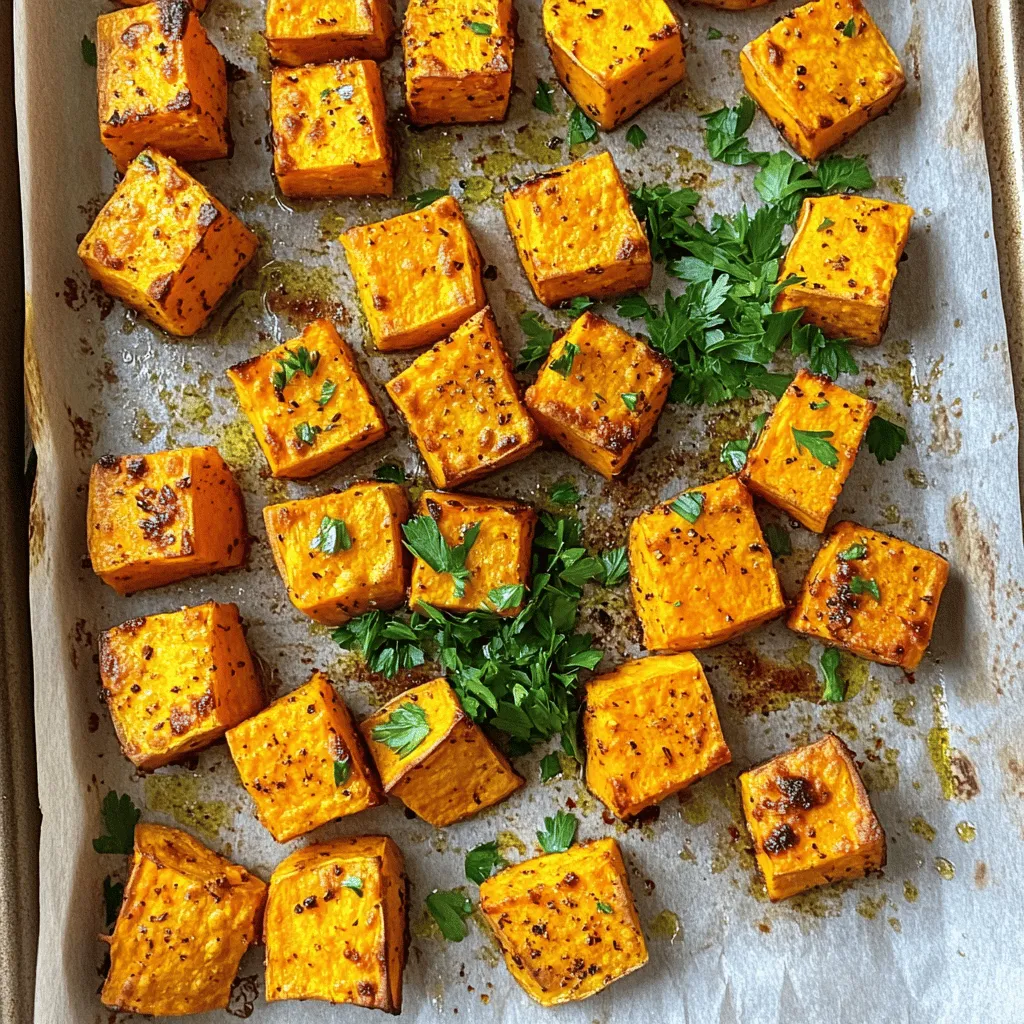
If you’re searching for a simple yet delicious side dish, look no further! Oven roasted sweet potatoes are full of

To make Easy Sheet Pan Salmon, gather these ingredients: - 4 salmon fillets - 1 lemon, thinly sliced - 2 cups asparagus, trimmed - 1 cup cherry tomatoes, halved - 3 tablespoons olive oil - 2 teaspoons garlic powder - 1 teaspoon smoked paprika - Salt and pepper to taste - Fresh parsley, chopped for garnish You can add more flavor if you wish. Here are a few ideas: - Fresh herbs like dill or thyme - A splash of soy sauce for umami - Red pepper flakes for some heat - Capers for a briny bite When choosing salmon, look for bright, shiny skin. The flesh should be firm and moist. Avoid any fish with a strong fishy smell. Fresh salmon should smell like the ocean. If you can, buy wild-caught salmon. It often tastes better and is healthier. Check the color, too. Deep pink or red is best. If the salmon is dull, it may not be fresh. Start by gathering your salmon and veggies. Use fresh salmon fillets for the best taste. Trim the asparagus and cut the cherry tomatoes in half. This helps them cook evenly. Line your sheet pan with parchment paper. It makes cleanup quick and easy. Place the salmon in the center of the pan. Spread the asparagus and tomatoes around the salmon. In a small bowl, mix olive oil, garlic powder, smoked paprika, salt, and pepper. This blend adds great flavor. Use a brush to spread the mixture over the salmon. Be generous! Drizzle any leftover oil over the vegetables. Finally, top each salmon fillet with a slice of lemon. This adds a bright taste. Preheat your oven to 400°F (200°C). This temperature cooks the salmon just right. Roast everything for about 15-20 minutes. The salmon should be pink and flake easily with a fork. To check, insert a fork into the thickest part. Once done, remove from the oven and sprinkle with fresh parsley. Enjoy your meal! For the complete recipe, refer to the Full Recipe. To keep your salmon moist, use fresh fillets. Fresh fish tastes better and cooks evenly. Brush the salmon with olive oil before baking. This adds flavor and helps retain moisture. Avoid overcooking the salmon. Cook it just until it flakes easily with a fork. This usually takes about 15-20 minutes at 400°F (200°C). You can also cover the salmon with foil for the first half of cooking. This steams the fish and keeps it juicy. For crisp-tender vegetables, choose the right ones. Asparagus and cherry tomatoes work great. Cut them into even pieces for uniform cooking. Toss the veggies in olive oil before baking. This helps them roast nicely. Spread the vegetables out in a single layer on the sheet pan. This allows them to cook evenly without steaming. Keep an eye on them, as they may cook faster than the salmon. Remove them when they are vibrant in color and tender to the bite. One common mistake is overcrowding the pan. When you pack too much on one sheet, food steams instead of roasts. This leads to soggy veggies and fish. Another mistake is not seasoning enough. A good amount of salt and pepper enhances flavor. Lastly, do not skip preheating the oven. If the oven isn’t hot enough, cooking times will vary. Follow the Full Recipe closely, and you’ll avoid these pitfalls. Enjoy your meal! {{image_2}} You can change up the veggies in this dish. Try using broccoli, bell peppers, or zucchini. These vegetables roast well and add great flavor. Just remember to cut them into similar sizes. This helps them cook evenly with the salmon. Carrots or snap peas also work well if you want a bit of crunch. Each choice adds color and taste to your meal. While the recipe uses garlic powder and smoked paprika, you can mix it up. Try a blend of lemon zest and dill for a fresh taste. Or use chili powder and cumin for a kick. If you love Asian flavors, mix soy sauce and ginger. The options are endless! Experimenting with spices keeps the dish exciting and new. To make this sheet pan salmon low-carb, focus on the veggies. Stick to non-starchy options like spinach, zucchini, or cauliflower. Remove any high-carb vegetables like potatoes or corn. You can also replace olive oil with avocado oil for added health benefits. This keeps the meal tasty and fits your diet plan. Enjoy healthy meals without sacrificing flavor. For the full recipe, check out the Easy Sheet Pan Salmon . To store leftover Easy Sheet Pan Salmon, let it cool first. Place the salmon and veggies in an airtight container. This helps keep them fresh. You can also separate the salmon from the vegetables if you prefer. Store it in the fridge for up to three days. Reheating salmon can be tricky. To keep it tasty, use the oven. Preheat it to 275°F (135°C). Place the salmon on a baking sheet. Cover it with foil to prevent drying out. Heat for about 15 minutes. This warms it without losing flavor. You can also use a microwave. But be careful, as it may dry out the fish. Heat in short bursts, checking often. Freezing is a great option for meal prep. To freeze your Easy Sheet Pan Salmon, wrap each piece in plastic wrap. Then, place them in a freezer bag. Remove as much air as you can. This helps avoid freezer burn. You can freeze salmon for up to three months. When ready to eat, thaw it in the fridge overnight. This keeps it safe and tasty. The best way to tell if salmon is cooked is to check its color and texture. Cooked salmon changes from a bright pink to a lighter, opaque pink. Use a fork to see if it flakes easily. If it does, your salmon is ready! An instant-read thermometer can help too. Aim for an internal temperature of 145°F (63°C). This ensures it is safe and delicious. Yes, you can use frozen salmon for this recipe! Just keep a few things in mind. First, thaw the salmon before cooking. You can leave it in the fridge overnight or use a quick cold-water method. Be sure to pat it dry with paper towels before seasoning. This helps the seasoning stick and prevents excess water from steaming the fish. Sheet pan salmon pairs well with many sides. Here are some ideas: - Rice or quinoa for a filling base - A fresh salad for a light touch - Roasted or steamed vegetables for extra color - Mashed potatoes for comfort food vibes These options add flavor and make your meal more complete. Yes, this Easy Sheet Pan Salmon is a healthy choice! Salmon is rich in omega-3 fatty acids, which are great for heart health. The vegetables add fiber and vitamins. Olive oil provides healthy fats too. This meal is low in carbs and high in nutrients, making it a smart option for any diet. Enjoy knowing you are serving a dish that is both tasty and good for you! In this post, we explored how to make Easy Sheet Pan Salmon. We covered ingredients, cooking steps, and tips for moist salmon. I shared ways to add flavor and avoid common mistakes. You learned about variations, storage, and reheating methods. Remember, you can adapt this dish to fit your taste. Whether you are new to cooking or seasoned, you can enjoy this simple recipe. Cooking can be fun and rewarding. So, let’s get started and make some tasty salmon!

Easy Sheet Pan Salmon Quick and Flavorful Recipe

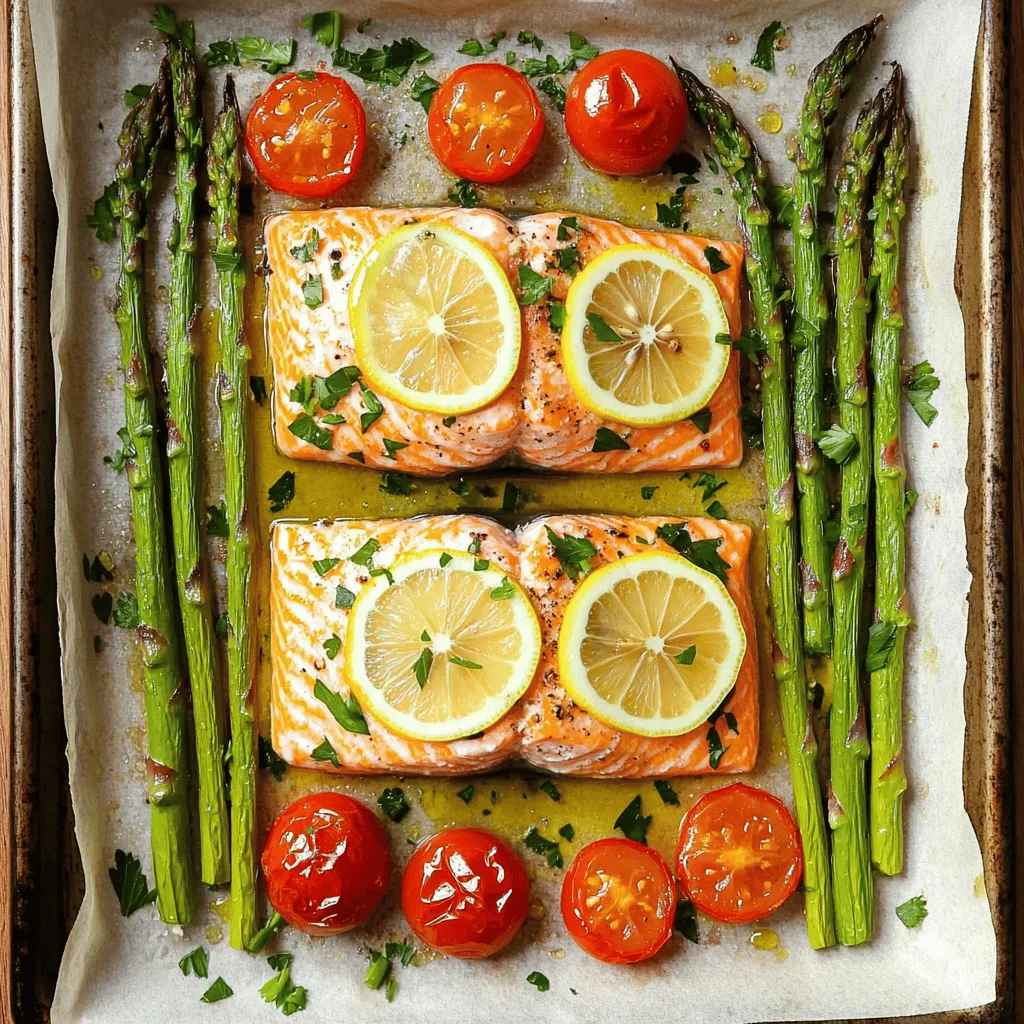
Are you looking for a quick and tasty dinner option? You’ve come to the right place! This Easy Sheet Pan

To make a creamy broccoli cheddar soup, gather these key ingredients: - 1 tablespoon olive oil - 1 medium onion, finely chopped - 2 cloves garlic, minced - 4 cups fresh broccoli florets - 2 medium carrots, diced - 4 cups vegetable broth - 1 cup heavy cream (or coconut cream for a lighter version) - 2 cups sharp cheddar cheese, shredded - 1 teaspoon Dijon mustard - Salt and pepper to taste - Optional: Croutons for garnish Choosing fresh ingredients makes a big difference in taste. Look for bright green broccoli with firm florets. The carrots should feel crisp and snap easily. For the best flavor, use sharp cheddar cheese. It adds depth and richness to the soup. Fresh garlic and onions will provide a strong base flavor that enhances the whole dish. You can adapt this recipe to fit your needs. If you want to make it lighter, use coconut cream instead of heavy cream. You can also swap vegetable broth for chicken broth for a heartier flavor. If you're short on time, frozen broccoli works well too. Just add it directly to the pot and adjust cooking time slightly. For a vegan option, use plant-based cheese and cream. Start by gathering your ingredients. You need: - 1 tablespoon olive oil - 1 medium onion, finely chopped - 2 cloves garlic, minced - 4 cups fresh broccoli florets - 2 medium carrots, diced - 4 cups vegetable broth - 1 cup heavy cream (or coconut cream for a lighter version) - 2 cups sharp cheddar cheese, shredded - 1 teaspoon Dijon mustard - Salt and pepper to taste - Optional: Croutons for garnish Next, chop the onion and mince the garlic. This helps build flavor. Dice the carrots into small pieces. You want them to cook evenly with the broccoli. Heat the olive oil in a large pot over medium heat. Add the chopped onion and sauté for 3-4 minutes. Stir until the onion softens and turns translucent. Then, add the minced garlic and cook for one more minute. This step fills the pot with a lovely aroma. Now, add the broccoli florets and diced carrots. Stir them well and sauté for another 3-5 minutes. This step adds depth to the soup's flavor. Pour in the vegetable broth and bring it to a boil. Once boiling, lower the heat and let it simmer for 15-20 minutes. Cook until the vegetables are tender. After cooking, it’s time to blend. Use an immersion blender to puree the mixture until smooth. If you don’t have one, transfer it to a blender in batches. Be careful with hot soup! Return the blended soup to the pot over low heat. Next, stir in the heavy cream and Dijon mustard, mixing well. Gradually add in the shredded cheddar cheese. Stir until it melts and the soup becomes creamy. Season with salt and pepper to taste. For smooth soup, an immersion blender works best. It keeps the soup hot while blending. If you use a regular blender, let the soup cool slightly. This prevents hot splashes that can burn you. If you want a thicker soup, blend longer. For a thinner texture, add more broth. Adjust the seasoning last to ensure the best flavor. Enjoy your creamy broccoli cheddar soup hot, and feel free to garnish with croutons if you like! You can find the Full Recipe for more details on this delightful dish. To make your creamy broccoli cheddar soup pop, use fresh ingredients. Fresh broccoli gives a bright taste. A splash of lemon juice can lift the flavors too. Adding herbs like thyme or parsley also works well. You can even toss in a dash of hot sauce for a fun twist. This little kick can surprise your taste buds. If you want a thicker soup, there are easy tricks. First, blend more of the broccoli and carrots until smooth. This adds body without extra flour or cream. You can also mix in a bit of cornstarch. Just mix it with cold water first, then stir it into the soup. Let it simmer for a few minutes to thicken. Serving your soup can be fun! You can add croutons for a nice crunch. A sprinkle of extra cheese on top makes it look great. Try pairing it with warm bread or a simple salad. This soup also works well in a bread bowl, making it a meal on its own. For a complete experience, check out the Full Recipe for more ideas. {{image_2}} You can boost the flavor of your creamy broccoli cheddar soup by adding proteins. Cooked chicken adds heartiness. Simply shred or chop it into bite-sized pieces before stirring it in. For a smoky twist, add crispy bacon bits. The crunch and saltiness of bacon make the soup more enjoyable. You can also use diced ham for a different taste. To make this soup vegan and dairy-free, swap the heavy cream for coconut cream. It adds a nice creaminess and a hint of sweetness. Use nutritional yeast instead of cheese. It offers a cheesy flavor without dairy. For the broth, stick with vegetable broth to keep it plant-based. You can also add beans for extra protein and texture. If you enjoy a little kick, adding heat is simple. You can mix in red pepper flakes or a dash of hot sauce. Both options will enhance the soup's flavor without overpowering it. For a more complex spice, try adding a pinch of cayenne pepper. Adjust the amount based on your heat preference. Enjoy the warmth that spices bring to your creamy broccoli cheddar soup. You can find the full recipe [here](#). To store your creamy broccoli cheddar soup, first let it cool completely. This helps avoid condensation in the container. Use an airtight container to keep the soup fresh. It will last in the fridge for about three to four days. When you want to eat it, just take it out and check for any signs of spoilage. If it smells fine, you are good to go. If you want to save some for later, freezing is a great option. Pour the cooled soup into freezer-safe bags or containers. Leave some space at the top, as soup expands when frozen. Make sure to label the containers with the date. You can freeze it for up to three months. When ready to eat, just thaw it overnight in the fridge or use the microwave. To reheat, you can use a pot on the stove or a microwave. If using the stove, warm it on low heat and stir often. This helps it heat evenly. For the microwave, heat in short bursts, stirring in between. If the soup is too thick after freezing, add a splash of broth or water to get the right creaminess. Enjoy your soup just as you made it! For the full recipe, check the earlier section. Yes, you can use frozen broccoli. It makes cooking easier and saves time. Frozen broccoli is often picked at its peak. This helps keep its flavor and nutrients. Just add it to the pot with the other veggies. You may need to cook it a few more minutes to ensure it's tender. To make the soup healthier, consider these tips: - Use low-fat cream instead of heavy cream. - Add more veggies like spinach or kale for extra nutrients. - Use whole grain bread for croutons. - Cut back on cheese or use a reduced-fat cheese option. These changes keep the taste but lower the calories. Creamy broccoli cheddar soup pairs well with many sides. Here are some ideas: - A fresh green salad adds crunch and color. - A slice of crusty bread is perfect for dipping. - Grilled cheese sandwiches make a classic combo. - For a heartier meal, try serving it with a side of quiche. For the full recipe, check out the Broccoli Cheddar Bliss Soup section. Enjoy experimenting with what you like best! This post covered the key steps to make creamy broccoli cheddar soup. We explored the right ingredients, cooking tips, and ways to enhance flavor. You can make it your own by adding proteins or adjusting for dietary needs. Store leftovers in your fridge or freezer for future meals. With these simple steps and tips, you can create a delicious soup that warms your soul. Enjoy your cooking journey and savor each bowl!

Creamy Broccoli Cheddar Soup Flavorful and Satisfying

Are you ready to warm up with a bowl of creamy broccoli cheddar soup? This dish is rich, cheesy, and

- 6 large eggs - 3 tablespoons mayonnaise - 1 teaspoon Dijon mustard - 1 teaspoon apple cider vinegar - Salt and pepper to taste - 1/4 teaspoon smoked paprika (plus extra for garnish) - Fresh chives or parsley for garnish When measuring ingredients, use a standard measuring spoon. Level off each spoonful for accuracy. For the mayonnaise, a heaping spoon is fine if you like a creamier filling. If you prefer a tangier taste, add a splash more of apple cider vinegar. Use fresh eggs for the best flavor and color. Older eggs tend to peel more easily after boiling. Garnishing your deviled eggs can make them pop! Here are some fun ideas: - Smoked paprika gives a nice color and smoky taste. - Fresh chives or parsley add a green touch and fresh flavor. - Capers or pickles can give a salty bite. - Bacon bits add crunch and a savory flavor. You can mix and match these garnishes to suit your taste. Get creative and have fun! For the full recipe, check out the Devilishly Delicious Deviled Eggs. Start with six large eggs. Place them in a pot and cover with cold water. Turn the heat to medium-high and bring the water to a boil. Once boiling, cover the pot and remove it from the heat. Let the eggs sit for 12 minutes. This process helps cook the eggs evenly. After 12 minutes, move the eggs to a bowl of ice water. Let them cool for about 5 minutes. This step makes peeling easier. When you peel the eggs, do it under running water. This method helps remove the shell without damaging the egg. Pat the eggs dry with a paper towel. Next, slice the eggs in half lengthwise. Gently scoop out the yolks into a mixing bowl. Add three tablespoons of mayonnaise to the yolks. Then, mix in one teaspoon of Dijon mustard and one teaspoon of apple cider vinegar. Season with salt and pepper to taste. To add some flair, sprinkle in 1/4 teaspoon of smoked paprika. Use a fork to mash everything together. Keep mixing until the filling is smooth and creamy. This step is key for great flavor and texture. Now it’s time to fill the egg whites. Use a spoon or a piping bag to add the yolk mixture. Make sure to fill each egg half generously. This makes them look nice and appetizing. For the final touch, sprinkle a little extra smoked paprika on top. Chop fresh chives or parsley for garnish. This adds color and freshness. Your deviled eggs are now ready to serve! For the full recipe, check the earlier section. To get the best hard-boiled eggs, start with older eggs. Fresh eggs are hard to peel. Place your eggs in a pot and cover them with cold water. Bring this water to a boil over medium-high heat. Once boiling, cover the pot and take it off the heat. Let the eggs sit for 12 minutes. This method cooks the eggs evenly and keeps the yolks bright yellow. One common mistake is cooking the eggs for too long. Overcooked eggs turn green around the yolk. This happens when they sit too long in hot water. Also, avoid peeling eggs right after cooking. Letting them cool in ice water for 5 minutes makes peeling easier. Lastly, don’t skip the seasoning. A pinch of salt and pepper will enhance the flavors. For a creamy filling, use good-quality mayonnaise. I recommend about 3 tablespoons for six eggs. Mix the yolks with the mayo, mustard, and vinegar until smooth. You want a thick, spreadable texture. If it's too thick, add a tiny bit of water. A dash of smoked paprika adds a nice depth of flavor too. For a fun touch, use a piping bag to fill the egg whites. This makes a pretty presentation. For the full recipe, refer to the link. {{image_2}} To add some heat, try spicy deviled eggs. Simply mix in a bit of hot sauce or cayenne pepper. You can start with just a pinch and adjust to your taste. This variation gives a nice kick without being overwhelming. You can also top these eggs with sliced jalapeños for extra spice. Avocado deviled eggs are creamy and rich. Instead of using all mayonnaise, substitute half with ripe avocado. This adds a fresh flavor and a beautiful green color. Mash the avocado with the yolks and mix in lime juice for a tangy twist. This version is perfect for those looking for a healthier option. For a savory twist, try bacon and cheddar deviled eggs. Add crumbled crispy bacon and shredded cheddar cheese to the egg yolk mixture. This version is great for serving at parties or gatherings. The smoky flavor from the bacon pairs well with the creamy filling. Top with extra bacon bits for a crunchy finish. You can find the full recipe for classic deviled eggs, which serves as a fantastic base for these variations. To keep your deviled eggs fresh, place them in an airtight container. Line the bottom with a paper towel. This helps absorb any moisture. Lay the eggs on the towel. Cover the eggs with another layer of paper towel. Seal the container tightly. You can also cover the eggs with plastic wrap. Deviled eggs stay fresh for about 3 to 4 days in the fridge. Keep an eye on the smell or appearance. If they look or smell off, discard them. Always store them in the fridge until you’re ready to eat. Deviled eggs are best eaten cold and do not reheat well. If you have leftovers, you can use them in salads or sandwiches. Just chop them up and mix with your favorite ingredients. Try adding them to a potato salad for extra flavor! For more tips on making deviled eggs, check the Full Recipe section. The best way to hard-boil eggs is simple. Start with cold eggs and place them in a pot. Cover the eggs with cold water. Make sure the water is at least an inch above the eggs. Turn the heat to medium-high and bring the water to a boil. Once the water boils, cover the pot and take it off the heat. Let the eggs sit for 12 minutes. After that, move them to ice water for about 5 minutes. This method makes peeling easy and keeps the eggs tender. Yes, you can make deviled eggs ahead of time. Prepare the eggs and the filling, then store them separately. Place the egg whites in one container and the yolk filling in another. Cover them tightly with plastic wrap or a lid. When you are ready to serve, just fill the egg whites with the yolk mixture. This way, they stay fresh and look great. To prevent a runny filling, use the right amount of mayonnaise. Start with 3 tablespoons, as noted in the full recipe. If your filling is too thin, add more mashed yolk. You can also add a bit of mustard or vinegar slowly until you reach your desired texture. Mixing the yolks well helps to create a creamy filling without being runny. In this post, we explored how to make great deviled eggs. We covered key ingredients, preparation steps, and tips for perfect results. I shared variations to add fun twists, like spicy or avocado options. Proper storage was also discussed, ensuring you keep them fresh. Now you can enjoy deviled eggs that impress at any gathering. Keep trying new flavors and techniques. Your deviled eggs will always be a hit!

Classic Deviled Eggs Flavorful and Easy Recipe Guide

Do you love easy, tasty snacks? Classic deviled eggs are a perfect choice! This guide shows you how to make

- 1 ½ cups all-purpose flour - ½ cup granulated sugar - 2 teaspoons baking powder - ½ teaspoon baking soda - ½ teaspoon salt - 1 teaspoon ground cinnamon - 1 large egg - ½ cup milk - ⅓ cup unsalted butter, melted - 1 teaspoon vanilla extract - ¼ cup granulated sugar (for coating) - 1 tablespoon ground cinnamon (for coating) These ingredients are key to making your cinnamon sugar donut muffins truly delicious. The all-purpose flour gives the muffins structure. Granulated sugar adds sweetness, while baking powder and baking soda help them rise. Salt and cinnamon enhance flavor. You need a large egg to bind everything together. Milk keeps the muffins moist, and melted butter adds rich flavor. Vanilla extract rounds out the taste. The cinnamon-sugar coating is what makes these muffins irresistible. For the best results, measure your ingredients accurately. Use fresh spices for the best flavor. If you want to dive deeper, check out the Full Recipe for more tips. 1. Preheat the oven and prepare the muffin tin: Start by preheating your oven to 350°F (175°C). This step is key for even baking. Grease a standard 12-cup muffin tin or line it with muffin liners. This keeps the muffins from sticking. 2. Mix dry ingredients in a bowl: In a large mixing bowl, whisk together the dry ingredients. Combine 1 ½ cups all-purpose flour, ½ cup granulated sugar, 2 teaspoons baking powder, ½ teaspoon baking soda, ½ teaspoon salt, and 1 teaspoon ground cinnamon. Make sure they are well mixed. 3. Combine wet ingredients in a separate bowl: In another bowl, beat 1 large egg. Then add ½ cup milk, ⅓ cup melted unsalted butter, and 1 teaspoon vanilla extract. Stir until everything is fully combined. 4. Combine wet and dry ingredients without over-mixing: Pour the wet mixture into the dry ingredients. Gently mix until just combined; it’s okay if there are a few lumps. Over-mixing can make the muffins tough, and we want them soft. 1. Fill the muffin cups: Using a spoon or an ice cream scoop, fill each muffin cup about 2/3 full with your batter. This allows space for the muffins to rise. 2. Baking time and checking for doneness: Bake the muffins in the preheated oven for 15-18 minutes. To check if they are done, insert a toothpick into the center of a muffin. If it comes out clean, they are ready. 1. Prepare cinnamon-sugar mixture: While the muffins bake, mix ¼ cup granulated sugar and 1 tablespoon ground cinnamon in a shallow bowl. This coating adds a sweet and spicy touch. 2. Cool and coat muffins in cinnamon-sugar: Once the muffins are done, let them cool in the tin for about 5 minutes. Then, carefully remove each muffin and roll it in the cinnamon-sugar mixture until fully coated. This step makes them even more irresistible. Enjoy the full recipe for making these delightful Cinnamon Sugar Donut Muffins! To make the best cinnamon sugar donut muffins, avoid common baking mistakes. Always measure your flour correctly. Too much flour makes muffins dense. Use a spoon to fill your measuring cup, then level it off with a knife. This method ensures you use the right amount. Moisture is key for fluffy muffins. Make sure you don’t over-mix the batter. Mix just until the dry and wet ingredients blend. A few lumps are fine. This helps keep the muffins light and airy. Pair your cinnamon sugar donut muffins with a hot cup of coffee or tea. The warm flavors work well together. For a special touch, serve them with a side of whipped cream or a scoop of vanilla ice cream. This adds a fun twist and makes it feel like dessert. When presenting your muffins, arrange them on a colorful platter. Sprinkle some extra cinnamon sugar on top for a lovely finish. You can also add fresh fruit around the muffins for a pop of color. These little details make your treats look even more inviting. For the full recipe, check out the [Full Recipe]. Enjoy your baking! {{image_2}} You can make cinnamon sugar donut muffins even more fun by adding chocolate chips or nuts. Chocolate chips give a sweet surprise in every bite. Use semi-sweet or dark chocolate for a richer taste. Nuts add crunch and flavor. Walnuts or pecans work well. Just stir in about ½ cup of your choice before baking. You can also play with spices. Try adding nutmeg or cardamom for a new twist. These spices blend well with cinnamon. They add warmth and depth to the muffins. Experiment with different combinations to find your favorite flavor! If you need gluten-free options, you can swap the all-purpose flour for a gluten-free blend. Look for a blend that includes xanthan gum for better texture. This way, everyone can enjoy these tasty muffins. For vegan options, replace the egg with a flax egg. Mix 1 tablespoon of ground flaxseed with 2.5 tablespoons of water. Let it sit for a few minutes to thicken. Use almond milk or soy milk instead of regular milk. Replace the butter with coconut oil or vegan butter. These changes keep the muffins moist and delicious! You can find the full recipe for these cinnamon sugar donut muffins to try out all these variations. Enjoy creating your perfect treat! To keep your cinnamon sugar donut muffins fresh, store them in a cool place. The best temperature is room temperature. Avoid direct sunlight or heat. Use an airtight container to seal in moisture. A plastic storage bag works well too. If you have leftover muffins, just place them in the container without stacking. This keeps them nice and fluffy. These muffins stay fresh for about three days at room temperature. If you want to keep them longer, freezing is a great option. To freeze, wrap each muffin in plastic wrap. Then place them in a freezer bag. They can stay fresh for up to three months. When you are ready to eat, just thaw them at room temperature or heat them in the oven. For the full recipe of cinnamon sugar donut muffins, check the previous sections. Enjoy these tasty treats! Can I use whole wheat flour instead of all-purpose flour? Yes, you can use whole wheat flour. It will change the texture. The muffins may be denser but still tasty. How do I know when my muffins are fully baked? Check with a toothpick. Insert it into the center of a muffin. If it comes out clean, the muffins are done. Can I make the batter ahead of time? You can prepare the batter ahead of time. Just store it in the fridge. It’s best to bake it within 24 hours for freshness. What makes these muffins different from regular donuts? These muffins are baked, not fried. They have a lighter texture and are easier to make. You still get that classic donut taste. How should I reheat muffins for the best flavor? Reheat muffins in the oven or microwave. For the oven, set it to 350°F. Heat for about 5 minutes. This keeps them warm and soft. To sum up, we explored the making of cinnamon sugar donut muffins. We covered the ingredients, step-by-step instructions, storage tips, and fun variations. You now know how to mix, bake, and coat these treats for great taste. Keep in mind the tips for perfect muffins and ways to make them your own. Enjoy baking and sharing these delicious muffins with friends and family. You’ve got this!

Cinnamon Sugar Donut Muffins Irresistible Treat Recipe

Are you ready to bake a treat that will make your taste buds dance? These Cinnamon Sugar Donut Muffins are

- 1 large head of broccoli, cut into florets - 4 cloves of garlic, minced - 3 tablespoons olive oil - 1 teaspoon lemon juice - 1/2 cup grated Parmesan cheese - 1/2 teaspoon red pepper flakes (optional) - Salt and pepper to taste - Fresh parsley, chopped (for garnish) Roasted Garlic Parmesan Broccoli is both tasty and healthy. A serving has about 150 calories. It has 10 grams of fat, 6 grams of carbs, and 6 grams of protein. Broccoli is full of vitamins. It helps boost your immune system and is good for your heart. Garlic adds flavor and may lower blood pressure. Using fresh ingredients makes this dish even better. The garlic gives a rich taste, while the Parmesan adds creaminess. This dish is not only delicious but also a smart choice for your meals. For the full recipe, check out [Full Recipe]. 1. Preheat your oven to 425°F (220°C). This high heat helps make the broccoli crisp. 2. Prepare the broccoli by cutting a large head into florets. You want bite-sized pieces. 3. Mince four cloves of garlic. This adds a strong, tasty flavor. 4. Mix the broccoli and garlic in a large bowl. Add three tablespoons of olive oil, one teaspoon of lemon juice, and salt and pepper to taste. Toss well until the broccoli is coated. 1. Arrange the broccoli on a baking sheet. Spread it out in a single layer. This helps it roast evenly. 2. Roast in the oven for 15-20 minutes. You should see the edges crisp and the broccoli tender. Keep an eye on it to avoid burning. 1. Add the Parmesan cheese right after removing the baking sheet from the oven. Use half a cup of grated cheese. 2. Return it to the oven for another 2-3 minutes. You want the cheese to melt and turn golden. 3. Garnish with fresh parsley before serving. This adds color and a fresh taste. For the full recipe, check the earlier sections for precise measurements and tips. To get crispy broccoli, use a hot oven. Set it to 425°F (220°C). Spread the florets evenly on the baking sheet. Don’t crowd them; give them space to breathe. This helps them roast well and become crispy. Keep an eye on the time. Roasting should take about 15-20 minutes. Watch for browning at the edges. This shows they are done. Overcooking can make them mushy, so check often. Want to kick up the flavor? Try adding smoked paprika or garlic powder. Both add depth without too much fuss. If you prefer heat, mix in more red pepper flakes. For a milder taste, skip the flakes and focus on lemon zest. A squeeze of fresh lemon juice can brighten the dish, too. You can even add a pinch of herbs like thyme or oregano for extra flavor. Make your dish look as good as it tastes. Use a large white plate or bowl to serve. The bright green broccoli pops against the white background. Arrange the broccoli in a circular pattern for a nice look. Sprinkle a bit of extra Parmesan on top for flair. To elevate the dish, serve it with grilled chicken or fish. A side of rice or quinoa pairs well too. This makes it a complete meal that looks great on any table. {{image_2}} To make this dish vegan, skip the Parmesan cheese. Instead, try nutritional yeast. It gives a cheesy taste without dairy. If you want more creaminess, use cashew cheese. It blends well and adds richness. You can swap broccoli for other veggies like cauliflower or Brussels sprouts. Just cut them to similar sizes. For extra crunch, add nuts or seeds. Almonds or sunflower seeds work great here. They add texture and flavor. If you want a quicker method, sauté the broccoli on the stovetop. Heat olive oil in a pan and cook for about 5-7 minutes. Stir often until tender. You can also grill the broccoli for a smoky flavor. Just toss it on the grill for about 10 minutes. Enjoy the outdoors and the tasty result! To keep Roasted Garlic Parmesan Broccoli fresh, store leftovers right away. Let it cool to room temperature first. Place it in an airtight container. This helps keep moisture in and prevents drying out. Glass or plastic containers work well. Make sure they seal tightly. When you want to eat leftovers, reheating is key. The oven is the best method. Preheat your oven to 350°F (175°C). Place the broccoli on a baking sheet. Heat for about 10 minutes. This helps keep the texture nice. You can also use the microwave. Just heat for 1-2 minutes. Stir halfway to avoid hot spots. Can you freeze Roasted Garlic Parmesan Broccoli? Yes, you can! To freeze, first cool the broccoli completely. Place it in freezer bags, removing as much air as possible. Seal well and label them. When you want to eat it, thaw in the fridge overnight. To reheat, use the oven for the best taste. Enjoy your flavorful dish later! For the complete recipe, check the Full Recipe. How long to roast broccoli for best results? Roast broccoli at 425°F (220°C) for 15-20 minutes. This timing gives it a tender bite and crispy edges. Keep an eye on it. Broccoli can go from perfect to overcooked fast. Can I use frozen broccoli instead of fresh? Yes, you can use frozen broccoli. Just remember, frozen broccoli cooks faster. Adjust your roasting time to about 10-15 minutes. Make sure to thaw it first, so it cooks evenly. Is broccoli healthy to eat every day? Broccoli is very healthy. It is low in calories and packed with vitamins. Eating it daily can support your immune system and provide fiber. What are the benefits of garlic in cooking? Garlic is more than just tasty. It has health benefits too! Garlic can boost your immune system and lower blood pressure. Plus, it adds depth to many dishes, making them more flavorful. What to serve with Roasted Garlic Parmesan Broccoli? This dish pairs well with chicken, fish, or pasta. You can also serve it with grains like quinoa or rice. The flavors complement many proteins. Can children enjoy this dish as well? Absolutely! Kids usually love cheesy foods. The roasted garlic gives a mild flavor that works well for young taste buds. It’s a great way to get them to eat their veggies! Roasting garlic Parmesan broccoli is easy and tasty. You've learned about the main ingredients, like fresh broccoli and garlic, and how to prepare and roast them. We covered tips to get perfect crispiness and ways to enhance flavors. You can even swap ingredients or try different cooking methods. Remember, this dish is not only delicious but also packed with health benefits. Enjoy it fresh or store leftovers for another meal. Try it with your favorite foods, and share it with family. Happy cooking!

Roasted Garlic Parmesan Broccoli Simple Flavor Boost

Are you ready to transform your vegetables into a tasty masterpiece? Roasted Garlic Parmesan Broccoli is a simple dish that

- 4 large eggs - 1 ripe avocado - 2 tablespoons Greek yogurt - 1 tablespoon Dijon mustard - 1 tablespoon fresh lemon juice - 1/4 teaspoon garlic powder - 1/4 teaspoon smoked paprika - Salt and pepper to taste - 1/4 cup red bell pepper, finely diced - 1/4 cup green onions, sliced - Fresh cilantro for garnish Alternatives to Greek yogurt You can use sour cream or plant-based yogurt. Both add creaminess. Different types of mustard Try yellow mustard or whole grain mustard. Each offers a unique taste. Options for seasoning For a spicy kick, use cayenne pepper. You can also add fresh herbs for extra flavor. To boil eggs perfectly, start with a medium saucepan. Place the eggs in the pan and cover them with water. Bring the water to a boil over medium heat. When it starts to boil, cover the pot, turn off the heat, and let the eggs sit. This method gives you eggs that are firm but not overcooked. Let them sit for about 10-12 minutes. Next, cool the eggs in an ice bath. Fill a large bowl with cold water and ice cubes. After the time is up, gently transfer the eggs into the ice bath. Let them cool for about 5 minutes. Cooling them fast makes them easy to peel without tearing. Now, let’s mash the avocado correctly. Take your ripe avocado and cut it in half. Remove the pit and scoop the flesh into a mixing bowl. Use a fork to mash it until it’s smooth but still has some small chunks. This texture adds a nice bite to your salad. Next, we add flavors and seasoning. Mix in 2 tablespoons of Greek yogurt, 1 tablespoon of Dijon mustard, and 1 tablespoon of fresh lemon juice. Then sprinkle in 1/4 teaspoon each of garlic powder and smoked paprika. Don’t forget salt and pepper to taste. Stir until everything blends well. Now it’s time to fold in the eggs and veggies. First, peel and chop the cooled eggs into small pieces. Add them to the avocado mixture, along with 1/4 cup each of finely diced red bell pepper and sliced green onions. Gently mix everything together. Be careful not to break the eggs too much; you want some nice chunks. Here are some tips for maintaining texture: Use a folding motion when you mix. This keeps the eggs whole and fluffy. Taste the salad and adjust the seasoning with more salt, pepper, or lemon juice if you want. For a full experience, check out the [Full Recipe]. Enjoy your creamy and flavorful avocado egg salad! To pick a great avocado, look for one that feels slightly soft when you press it. The skin should be dark green or black. Avoid avocados with large dents or brown spots. If you find one that is not ripe, leave it out at room temperature for a few days. Once ripe, store it in the fridge to keep it fresh for longer. One common mistake is over-mashing the avocado. You want a creamy texture but still some chunks. If you mash it too much, it will become a puree. Another mistake is not seasoning enough. Taste your salad after mixing. Add a little salt and pepper to enhance the flavors. You can also add more lemon juice for a zesty kick. For a delightful meal, serve the avocado egg salad on whole-grain toast or in a wrap. You can also place it on a bed of greens for a fresh salad. Try adding sliced tomatoes or cucumber for extra crunch. Garnish with fresh cilantro for a lovely finish. This dish is perfect for lunch or a light dinner. Enjoy it with your favorite chips or crackers for a tasty bite! {{image_2}} You can add different veggies to your avocado egg salad. Try chopped celery for a nice crunch. Diced cucumber gives a fresh taste. Even sweet corn can add a lovely sweetness. For protein, consider adding shredded chicken or canned tuna. These options make the salad heartier and more filling. To make this salad vegan, replace the eggs with chickpeas. Mash them well to mimic the texture of eggs. Use a vegan yogurt instead of Greek yogurt for creaminess. For vegetarian eaters, this is a great option. If you need a gluten-free version, the salad is naturally gluten-free. Just check your mustard and any added dressings to ensure they are gluten-free. To elevate the taste, consider adding spices or herbs. A bit of cumin can add warmth, while dill brings a nice freshness. You can also mix in different dressings. Try a bit of sriracha for heat or a splash of balsamic vinegar for tang. Each of these changes brings a new twist to the classic avocado egg salad. To keep your avocado egg salad fresh, use airtight containers. Glass or plastic containers work well. Make sure the lid seals tightly to prevent air from getting in. Store it in the fridge. It stays good for about 3 days. After this time, the avocado may turn brown and lose flavor. You should not reheat avocado egg salad. The avocado will change texture and taste. Instead, you can refresh it. Add a squeeze of lemon juice and mix gently. This helps brighten the flavors and keeps it tasty. Avocado egg salad is not suitable for freezing. When thawed, the texture of the avocado will get mushy. If you want to freeze it, try leaving out the avocado. You can mix it in fresh when you thaw the rest. This way, you will keep the nice texture and taste. Avocado egg salad lasts about 2 to 3 days in the fridge. Make sure to store it in an airtight container. This keeps it fresh and tasty for a few days. If you notice browning, just mix it well before serving. Yes, you can make avocado egg salad ahead of time. It is best to prepare it a day in advance. This allows the flavors to mix well. However, try to add the avocado just before serving. This prevents browning and keeps it looking fresh. Avocado egg salad pairs well with many sides. Here are some great options: - Toasted whole-grain bread - Fresh greens or mixed salad - Crunchy vegetable sticks like carrots and celery - Tortilla chips for a fun crunch - Sliced cucumbers topped with salt and pepper You can find the full detailed recipe for Avocado Egg Salad Fiesta 🥑🥚 [here](#). This blog post covered all you need to know about making avocado egg salad. You learned about key ingredients, substitutions, and step-by-step instructions. I shared tips to avoid common mistakes and ideas for serving. Remember, you can customize this dish with different veggies or proteins. Proper storage is also key to keeping it fresh. With all this info, you're ready to craft a delicious avocado egg salad. Enjoy creating and sharing this tasty treat!

Avocado Egg Salad Quick and Tasty Meal Idea

Looking for a quick and tasty meal idea? This Avocado Egg Salad is your answer! Packed with protein and flavor,

- Salmon fillets - Olive oil - Garlic - Lemons Salmon fillets are the star of this dish. They are rich in omega-3 fatty acids and offer a delicate taste. Choose fillets about 6 oz each for the best results. Olive oil adds healthy fats and enhances flavor. Garlic gives a strong, savory kick that pairs perfectly with the fish. Fresh lemons provide a bright, zesty flavor that elevates the dish. - Honey - Dried or fresh dill - Salt and pepper - Lemon slices and fresh parsley Honey adds a touch of sweetness that balances the tang of the lemons. Dill brings a fresh herbal note that complements the salmon. Salt and pepper are essential for enhancing all the flavors. Finally, lemon slices and parsley make the dish look beautiful and inviting. For the full recipe, check out the detailed instructions to create this easy lemon garlic salmon dish. 1. Preheat your oven to 375°F (190°C). This helps the salmon cook evenly. 2. In a small bowl, whisk together the olive oil, minced garlic, lemon juice, lemon zest, honey, dill, salt, and pepper. Mix until smooth. This marinade gives the salmon a bright and fresh flavor. 1. Place the salmon fillets in a greased baking dish, skin-side down. This helps keep the fish moist. 2. Pour the lemon garlic mixture over the salmon. Make sure every fillet is well coated. 3. Let the salmon marinate for about 15-20 minutes at room temperature. This step allows the flavors to soak in. 4. Bake the salmon in the preheated oven for 15-20 minutes. The fish should flake easily with a fork and reach an internal temperature of 145°F (63°C). 5. For a crispy finish, switch your oven to broil for the last 2-3 minutes. Watch it closely to avoid burning. - Pair the salmon with sides like steamed veggies or rice. These balance the meal well. - For plating, garnish with fresh parsley and lemon slices. This makes the dish look vibrant and inviting. Try this recipe for a quick, tasty dinner that impresses! Check the Full Recipe for more details. When you pick salmon, look for bright and moist flesh. Fresh salmon should have a clean smell, not a fishy one. The skin should be shiny and intact, with no browning. You can ask your fishmonger about sourcing. Sustainable salmon is often labeled, so look for those tags. Buying local is a great option too. This way, you support local fishers and reduce your carbon footprint. The best way to cook salmon is at 375°F (190°C). Bake it for 15-20 minutes. This timing helps the salmon stay moist and flaky. To check if it’s done, see if it flakes easily with a fork. It should reach 145°F (63°C) inside. Avoid cooking it too long, as it can dry out. If you like a crispy top, broil for the last 2-3 minutes. Just keep an eye on it to prevent burning. You can add more herbs and spices to the dish. Try fresh thyme, basil, or even a pinch of red pepper flakes for some heat. These can take your salmon to the next level. Balancing acidity and richness is key. The lemon juice brings brightness, while olive oil adds richness. If you feel it needs more zing, add a splash of vinegar or a bit of zest. This will keep your dish vibrant and delicious. For the full recipe, check out the Luscious Lemon Garlic Salmon. {{image_2}} You can swap salmon for other fish like trout or cod. These fish have a mild taste and cook well with lemon and garlic. This change keeps the dish fresh and exciting. If you want a vegan option, try using tofu or tempeh. These ingredients absorb flavors well. Marinate them in the same lemon garlic mix for a tasty plant-based dish. Grilling adds a lovely smoky flavor to your salmon. Use a grill pan or an outdoor grill. Preheat the grill, then cook the salmon for about 5-7 minutes per side. Make sure to oil the grill to prevent sticking. Baking is a simple method and works great for busy cooks. Follow the baking instructions in the Full Recipe. The oven evenly cooks the salmon and keeps it moist. For a crispy finish, pan-searing is fantastic. Heat oil in a skillet over medium-high heat. Sear the salmon skin-side down for 4-5 minutes. Flip and cook for another 3-4 minutes. This method gives you a delicious crust. You can serve lemon garlic salmon with a fresh salad. A mix of greens, cucumber, and cherry tomatoes works well. Drizzle with a light vinaigrette to enhance the flavors. Pasta is another great pairing. Toss cooked pasta with olive oil, garlic, and lemon juice. Add the salmon on top for a hearty meal. If you prefer rice, serve the salmon over jasmine or brown rice. This adds a filling, wholesome element to your dish. For an international twist, add soy sauce and ginger for an Asian flair. You can also try a Mediterranean touch with olives and capers. These variations keep your meals interesting and flavorful. After enjoying your lemon garlic salmon, store any leftovers right away. Let the salmon cool first. Place it in an airtight container. This keeps the salmon fresh and tasty. You can refrigerate it for up to three days. If you want to keep it longer, freeze it. Wrap the salmon in plastic wrap, then in foil. This step helps prevent freezer burn. To reheat your salmon without drying it out, use the oven or a skillet. Preheat your oven to 275°F (135°C). Place the salmon on a baking tray. Cover it with foil to hold in moisture. Heat for about 15 minutes. If using a skillet, add a small splash of water or broth. Cover it and heat on low for about 5 minutes. Both methods help keep the salmon tender. Salmon lasts for different times in the fridge and freezer. In the fridge, it stays good for about three days. If frozen, it can last up to three months. Write the date on the container. This way, you know when to use it. Always check for any off smells or changes in color before eating. Keeping track of time ensures you enjoy your salmon at its best. Look for a few signs to know if your salmon is cooked. First, the fish should change from a bright pink to a light pink color. Second, it should flake easily with a fork. Finally, use a meat thermometer to check for an internal temperature of 145°F (63°C). This ensures the salmon is safe to eat. Yes, you can prepare lemon garlic salmon ahead of time. Marinate the salmon fillets in the lemon garlic mixture for up to two hours in the fridge. If you want to save time, you can also mix the marinade and store it in the fridge. Just add it to the salmon when you're ready to cook. You can serve lemon garlic salmon with many tasty sides. Here are some popular options: - Steamed asparagus - Roasted broccoli - Garlic mashed potatoes - Quinoa salad - Rice pilaf These sides will enhance the meal and provide a balanced plate. For more details, check out the Full Recipe for perfect pairings. In this post, we explored how to make lemon garlic salmon. We covered the main ingredients, cooking steps, and tips for best results. I shared ideas for side dishes and how to store leftovers. Remember, fresh salmon and good seasoning make all the difference. Try different methods and variations for fun meals. Enjoy cooking and experimenting!

Easy Lemon Garlic Salmon Flavorful and Simple Recipe

Looking for a simple yet delicious dinner? You’ve found it! This Easy Lemon Garlic Salmon recipe shines with vibrant flavors

Older posts
Newer posts
← Previous Page1 … Page43 Page44 Page45 … Page91 Next →

dsad

© 2025 So Yum Recipes • Built with GeneratePress

Our Policies

  • Copyright Policy
  • Cookie Policy
  • GDPR Policy
  • Privacy Policy
  • Disclaimer
  • Terms Of Use

More Information

  • Home
  • About
  • Contact
  • Appetizers
  • Dessert
  • Dinner
  • Drinks
©2025, So Yum Recipes About Back To Top