Skip to content
DisclaimerTerms Of UseGDPR PolicyCookie Policy

So Yum Recipes

  • Home
  • Drinks
  • Appetizers
  • Dinner
  • Dessert
  • About
  • Contact
  • Privacy Policy
DisclaimerTerms Of UseGDPR PolicyCookie Policy

Chloe

- 2 cups cooked chicken, shredded - 1 can (15 oz) black beans, drained and rinsed - 1 can (10 oz) enchilada sauce (red or green) - 1 cup corn kernels (fresh, frozen, or canned) - 1 cup diced bell peppers (any color) - 1 medium onion, chopped - 2 cups shredded cheese (cheddar and Monterey Jack blend) - 8-10 corn tortillas, torn into pieces - 1 tablespoon cumin - 1 tablespoon chili powder - 1 teaspoon garlic powder - Salt and pepper to taste - Fresh cilantro for garnish (optional) - Sour cream for serving (optional) The main star of this dish is the shredded chicken. It gives the casserole its heartiness. You can use rotisserie chicken for quick prep. Black beans add protein and fiber, making the dish filling. Corn adds sweetness and texture, while the bell peppers bring color and crunch. The enchilada sauce is key to flavor. Choose red for a rich taste or green for a fresh kick. Cheese melts beautifully, creating a gooey topping. I love using a blend of cheddar and Monterey Jack for a balanced flavor. Tortillas act as the layers, soaking up all the tasty sauce. If you don't have cooked chicken, try ground turkey or beef. You can swap black beans for pinto beans or even kidney beans. For a dairy-free option, use vegan cheese or skip the cheese altogether. If you prefer, you can use flour tortillas instead of corn. Fresh cilantro adds a nice touch, but if you don't like it, skip it! Sour cream is optional but adds creaminess. You could use Greek yogurt as a healthier alternative. Making Chicken Enchilada Casserole is simple and fun. First, gather your ingredients. You will need cooked chicken, black beans, enchilada sauce, corn, bell peppers, onion, cheese, corn tortillas, and spices. This dish takes about 15 minutes to prep and 50 minutes to cook. 1. Preheat Oven: Start by preheating your oven to 350°F (175°C). This step is key for even cooking. 2. Sauté Vegetables: Heat a drizzle of oil in a large skillet over medium heat. Add the chopped onion and bell peppers. Sauté them for about 5-7 minutes until they soften. 3. Combine Ingredients: In a large mixing bowl, mix the shredded chicken, black beans, corn, sautéed vegetables, 1 cup of enchilada sauce, cumin, chili powder, garlic powder, and salt and pepper. Make sure everything is well combined. 4. Layering: Grease a 9x13 inch baking dish. Spread a thin layer of enchilada sauce on the bottom. Layer half of the torn corn tortillas over the sauce. Add half of the chicken mixture on top, then sprinkle with 1 cup of cheese. Repeat with the remaining tortillas, chicken mixture, and finish with another cup of cheese and the rest of the enchilada sauce. 5. Bake: Cover the dish with aluminum foil and bake for 25 minutes. After that, remove the foil. Bake for an additional 10-15 minutes until the cheese is bubbly and golden. 6. Cool and Serve: Let the casserole cool for a few minutes before serving. Garnish it with fresh cilantro and offer sour cream on the side. For a clear visual guide, I suggest checking out cooking videos on platforms like YouTube. These videos can show you the steps in action, making it easier to follow along. Seeing the layering and cooking process can boost your confidence in making this delicious casserole. You can find a great video by searching for "Chicken Enchilada Casserole recipe." To make your Chicken Enchilada Casserole shine, focus on fresh ingredients. Use homemade or high-quality enchilada sauce. This adds rich flavor. Shredded chicken works best when it's juicy and tender. If you have leftover rotisserie chicken, it saves time and adds great taste. Layering is key! Spread sauce evenly for each layer. This helps keep everything moist. Mix different cheeses for a fun twist. Try adding pepper jack for spice! One common mistake is overcooking the casserole. Keep an eye on the time. Bake until bubbly and golden, but do not let it dry out. Another mistake is skimping on seasoning. Use salt, pepper, and spices generously. Taste as you mix! Avoid using large tortilla pieces. Torn pieces help the layers stay together. Lastly, don’t forget to let it cool before serving. This helps the layers set nicely. Serve the casserole hot from the oven. A nice side salad pairs well. Offer sour cream and fresh cilantro on the side. These add coolness and brightness. You can also serve with tortilla chips for crunch. For a fun twist, let everyone build their own plate. Offer extra toppings like jalapeños, avocado, or diced tomatoes. This makes dinner more interactive and fun! For the full recipe, check out the [Full Recipe]. {{image_2}} To make a vegetarian version, swap the chicken with extra beans or tofu. You can use black beans or pinto beans for protein. For a vegan option, choose a plant-based cheese. You can also skip the cheese and use avocado instead. This keeps the dish creamy and flavorful without dairy. If you like heat, add diced jalapeños to the mix. You can also use spicy enchilada sauce. For a milder dish, use sweet bell peppers and a mild sauce. Adjust spices based on your family’s taste. You can even serve hot sauce on the side for those who want more kick. You can make this casserole in a slow cooker or an instant pot. For the slow cooker, layer your ingredients as usual and cook on low for 4-6 hours. For the instant pot, use the sauté function for vegetables, then add everything and pressure cook for 10 minutes. Both methods keep the flavors rich and tasty. For the full recipe, check out the details above. To keep your chicken enchilada casserole fresh, store it in an airtight container. Make sure it cools completely before sealing. This helps prevent moisture build-up. You can keep it in the fridge for up to three days. If you want to keep it longer, freezing is a great option. When you're ready to enjoy leftovers, preheat your oven to 350°F (175°C). Place the casserole in a baking dish and cover it with foil. Heat for about 20-25 minutes. This helps keep the cheese from burning. You can also microwave individual portions for a quicker meal. Just make sure to cover them to avoid drying out. If you want to freeze your chicken enchilada casserole, it’s best to do this before baking. Assemble the casserole as per the full recipe, then wrap it tightly in plastic wrap and foil. This keeps it fresh for up to three months. When you’re ready to eat, let it thaw in the fridge overnight before baking it at 350°F (175°C) for about 40-50 minutes. Enjoy a quick, tasty meal anytime! To make Chicken Enchilada Casserole, follow these steps: 1. Preheat your oven to 350°F (175°C). 2. Sauté a chopped onion and bell peppers in a skillet for 5-7 minutes. 3. Mix cooked chicken, black beans, corn, sautéed veggies, and spices in a bowl. 4. Layer enchilada sauce, torn tortillas, chicken mix, and cheese in a baking dish. 5. Cover and bake for 25 minutes. Then bake uncovered for 10-15 more minutes. 6. Cool for a few minutes, garnish with cilantro, and serve with sour cream if you wish. This process creates a warm, cheesy delight that brings joy to dinner time. For the full details, check the Full Recipe. The best cheese for Chicken Enchilada Casserole is a blend of cheddar and Monterey Jack. This mix melts well and adds a rich flavor. Cheddar gives a sharp taste, while Monterey Jack adds creaminess. You can also try pepper jack for a spicy kick. Feel free to mix in other cheeses like queso blanco for extra depth. Yes, you can prepare Chicken Enchilada Casserole ahead of time. Assemble it completely, then cover and refrigerate for up to 24 hours. When ready to cook, bake it straight from the fridge. You may need to add a few extra minutes to the baking time. This makes it perfect for busy days or family gatherings. This post covered key ingredients for Chicken Enchilada Casserole and how to use them. I shared step-by-step cooking instructions and tips for success. I also included variations and storage advice. Remember, small changes can make a big difference in flavor. Always use trusted recipes and techniques to get the best results. Enjoy making your casserole, and don’t forget to share your creations!

Chicken Enchilada Casserole Easy Family Dinner Idea

Looking for an easy family dinner? You’re in the right place! My Chicken Enchilada Casserole is a tasty, simple dish

- 4 medium-sized apples (Fuji or Honeycrisp recommended) - 1 cup granola - 1 cup caramel sauce (store-bought or homemade) - ½ cup mini chocolate chips - ½ cup chopped nuts (pecans or walnuts) - ¼ cup shredded coconut (optional) - Whipped cream (optional for drizzling) - Cinnamon (optional for dusting) To create the best caramel apple nachos, start with fresh, crunchy apples. I love using Fuji or Honeycrisp apples. They are sweet and crisp, which makes them perfect for this dish. You also need granola for a nice crunch. It adds texture and flavor. Next, caramel sauce is a must. You can buy it at the store or make your own if you prefer. Either way, it brings that sweet, gooey goodness. Mini chocolate chips and chopped nuts add extra layers of flavor. I like pecans or walnuts for their nutty taste. If you want a fun twist, try adding shredded coconut. It gives a tropical vibe and pairs well with apples. Don’t forget whipped cream! A drizzle on top makes everything feel extra special. Finally, a sprinkle of cinnamon can enhance the flavor. All these ingredients come together to make a fun and tasty dessert. You can find the full recipe for caramel apple nachos to get started. Enjoy making this treat! First, wash the apples under cold water. This removes dirt and wax. Then, core the apples to remove the seeds. Next, slice the apples into thin wedges. Aim for slices that are about a quarter-inch thick. This size helps them hold their shape and makes them easy to eat. Now, it’s time to set the stage! Arrange the apple slices on a large platter. Make sure to spread them out nicely. This will help you add toppings later. After that, sprinkle the granola over the apple slices. Cover as much of the apples as you can. The granola adds a nice crunch. Let’s make these nachos even better! Start by drizzling warm caramel sauce over the apples and granola. If your caramel is thick, warm it in the microwave for 10-15 seconds. This makes it easy to drizzle. Next, sprinkle mini chocolate chips on top. Then, add your choice of chopped nuts. Pecans or walnuts work well. If you like coconut, sprinkle some shredded coconut too. For a special touch, drizzle some whipped cream over the nachos. You can also dust a bit of cinnamon on top. This adds a warm flavor. Serve your caramel apple nachos right away. They are best when fresh and crispy. You can use skewers or forks for easy picking. Enjoy this fun dessert! For the complete recipe, check out the Full Recipe. When making caramel apple nachos, I recommend using sweet or tart apples. Fuji or Honeycrisp apples work great. They are crunchy and juicy, giving your nachos a fantastic base. If you want a bit of tartness, Granny Smith apples add a nice contrast. Mix and match different varieties for extra flavor and texture. You can use either store-bought or homemade caramel sauce. Store-bought saves time and works well in a pinch. Look for high-quality brands with natural ingredients. If you want to try making it at home, it's fun and allows you to control the flavor. A simple mix of sugar, butter, and cream creates a rich sauce. Just remember to watch it closely while it cooks! Serving caramel apple nachos can be fun and creative. I like to arrange them on a large platter for everyone to share. You can also serve them in individual bowls, which adds a personal touch. Top each serving with whipped cream and a sprinkle of cinnamon for added flair. Encourage guests to mix in their favorite toppings, like mini chocolate chips or nuts. Enjoy these nachos warm for the best taste! You can find the full recipe in the earlier sections. {{image_2}} You can make your caramel apple nachos even more fun by adding extra toppings. Dried fruits like raisins or cranberries bring a nice chewiness. You can also sprinkle some cinnamon or nutmeg for warmth. Want a twist? Try drizzling some peanut butter or chocolate sauce on top. It adds richness and depth. The key is to mix textures and flavors. So, experiment and have fun with it! If you need gluten-free options, choose gluten-free granola. Many brands offer this now. For nut-free, skip the nuts or use seeds like sunflower seeds. You can keep the flavor while adjusting to fit your needs. Always check labels to ensure safety, especially for allergies. Everyone should enjoy this treat, no matter their dietary needs. Seasonal flavors can spice up your caramel apple nachos. In fall, add pumpkin spice to your caramel sauce for a warm flavor. For winter holidays, mix in crushed peppermint or use eggnog-flavored sauce. In spring, fresh berries can brighten up the dish. Each season brings new ideas, so let your creativity flow. This keeps your dessert exciting and fresh all year round! To keep your caramel apple nachos fresh, store them in an airtight container. Make sure to separate the apples from the toppings. This helps prevent the apples from getting soggy. If you have leftover caramel sauce, store it in a separate container in the fridge too. Keeping everything separate maintains the texture and taste. If you want to enjoy leftovers, be careful when reheating. Warm the caramel sauce in the microwave for about 10-15 seconds. This will make it easy to drizzle again. For the apples, try enjoying them cold for the best crunch. If you want warm apples, heat them gently in the microwave for a few seconds, but don’t overdo it. When stored properly, sliced apples will stay fresh for about 1-2 days. The granola and toppings can last longer, but they may lose their crunch. To enjoy the best flavors and textures, eat your caramel apple nachos within 24 hours. Making them fresh each time gives you the best taste! You can prepare parts of caramel apple nachos ahead. Slice the apples and store them in a bag with lemon juice. This keeps them fresh and bright. You can also mix the granola and toppings in separate bowls. Just wait to assemble everything until you are ready to serve. This helps keep the apples crisp and tasty. If you want a twist, try using chocolate sauce or peanut butter instead of caramel. You can also use fruit dips like yogurt or a creamy vanilla frosting. These options add flavor and fun. Each choice brings a new taste to your nachos. Caramel apple nachos can be a fun snack, but they are not the healthiest option. Apples are good for you, but the caramel and toppings add sugar and fat. You can make them healthier by using less caramel and adding more nuts or seeds. This way, you keep the crunch and flavor while making a better choice. Caramel apple nachos are simple and fun to make. We covered the tasty ingredients, easy steps, and unique variations. You can choose the best apples, adjust toppings, and store leftovers well. This dish is perfect for sharing and can fit any season. Dive into your creativity and enjoy these delicious snacks. With just a few ingredients, you'll impress everyone. Make this treat your own and savor each bite. Enjoy your culinary adventure!

Caramel Apple Nachos Tasty and Fun Dessert Idea

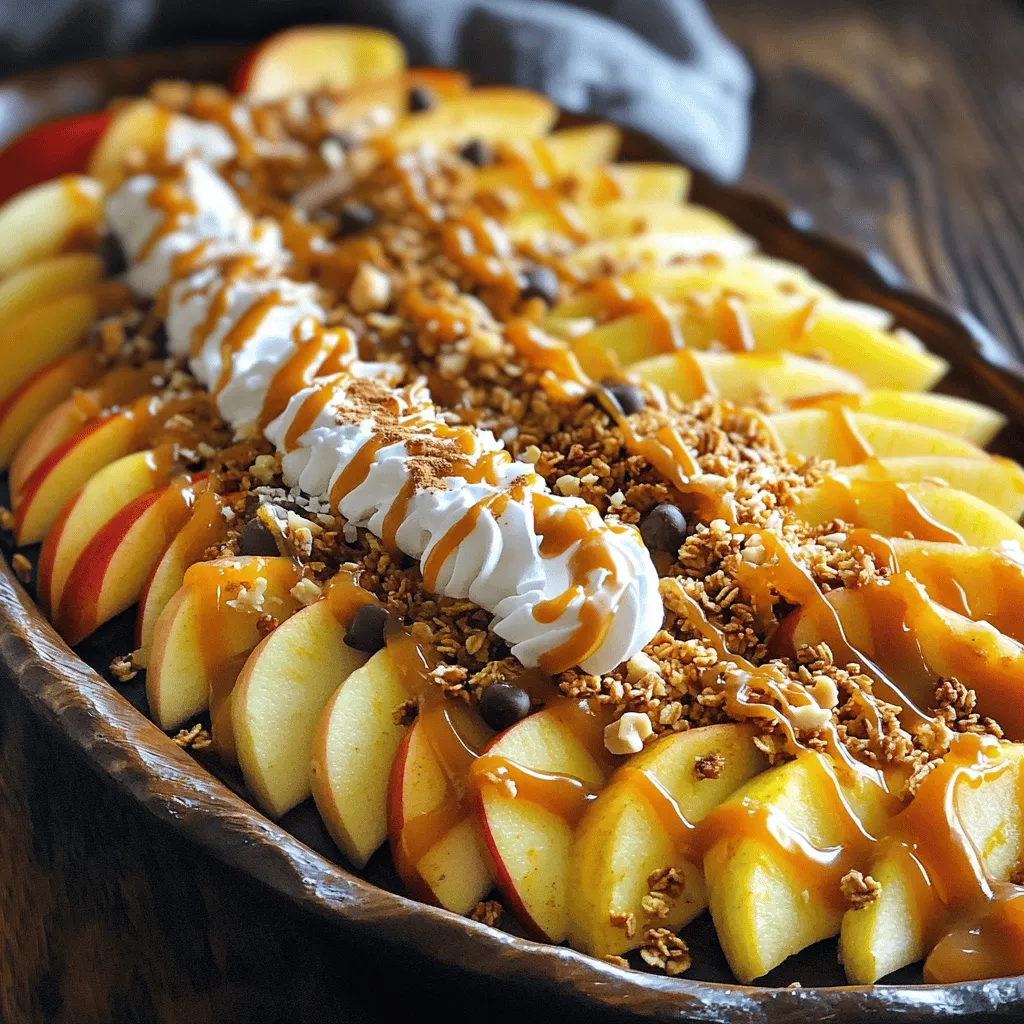
Looking for a fun and tasty dessert? Caramel Apple Nachos are just the thing! This sweet treat mixes fresh apples,

To make Chili Garlic Noodles, you need simple and fresh ingredients. Here’s what you will need: - 200g noodles (your choice: egg, rice, or wheat) - 3 tablespoons vegetable oil - 6 cloves garlic, minced - 2-3 tablespoons chili paste (adjust based on spice tolerance) - 1 tablespoon soy sauce - 1 tablespoon sesame oil - 1 tablespoon rice vinegar - 1 tablespoon sugar - 1 bell pepper, thinly sliced - 2 green onions, sliced - Salt to taste - Sesame seeds for garnish These ingredients blend perfectly to create a dish full of flavor. Each one plays a key role in building the taste and texture. You can change up the noodles based on your taste. For example, use: - Rice noodles for a gluten-free option - Egg noodles for a richer flavor - Wheat noodles for a classic touch For chili paste, try different types like sambal oelek or gochujang. Each will give a unique flavor profile. Adjust the amount of chili paste to fit your spice level. Garnishes make your dish look and taste better. Here are a few ideas: - Fresh cilantro for a burst of freshness - Chopped peanuts for crunch - Lime wedges for a zesty twist These add-ins can elevate your meal and make it even more appealing. Enjoy experimenting with different combinations to find your perfect bowl of Chili Garlic Noodles! For the complete process, refer to the Full Recipe. First, boil a large pot of salted water. Add your noodles and cook them until they are al dente. Usually, this takes about 4 to 6 minutes, but check the package for exact times. Once cooked, drain the noodles and rinse them with cold water. This stops the cooking and keeps them firm. Set the noodles aside for later. In a small bowl, mix the chili paste, soy sauce, sesame oil, rice vinegar, and sugar. Use a whisk to combine until smooth. Taste the sauce and adjust it if needed. You can add more chili paste for heat or sugar for sweetness. This sauce is key to bringing bold flavors to your dish. Heat vegetable oil in a large skillet or wok over medium heat. Add minced garlic and sauté it for about 30 seconds until it smells great. Be careful not to let it burn. Next, toss in the sliced bell pepper. Cook for 2 to 3 minutes until it softens a bit. Now, add the cooked noodles to the skillet along with the sauce. Gently toss everything together so the noodles are well coated. Stir in the green onions and a pinch of salt. Cook for 2 to 3 more minutes until everything is hot. Now you have a delicious meal! For full details, check the Full Recipe. To cook perfect noodles, start with a big pot. Fill it with water and add salt. Boil it well before adding your noodles. Stir them often to keep them from sticking. Cook until they are just right, or al dente. Drain the noodles and rinse them with cold water. This stops the cooking and keeps them firm. If you love heat, add more chili paste. Start with two tablespoons and taste. You can always add more, but you can't take it out. For a milder dish, use less chili paste. You can also mix in some sugar to balance the heat. If your dish is too spicy, add more noodles or veggies. Presentation is key to a great meal. Serve the noodles in a large bowl or dish. Use tongs to twirl the noodles into a nest. Top them with extra green onions and sesame seeds. A drizzle of chili oil adds a pop of color and flavor. You can also place a lime wedge on the side for a fresh touch. For the full recipe, check the earlier section. {{image_2}} You can easily make this dish vegetarian or vegan. Start with plant-based noodles like rice or wheat. For protein, add tofu or tempeh. Simply sauté them until golden, then toss with the noodles. You can also add more veggies, like broccoli or carrots, to boost flavor and nutrition. This meal stays bright and tasty while being meat-free. If you love heat, try adding more chili paste or fresh chilies. You can also use different types of chili sauces. Sriracha or sambal oelek can spice things up. For an extra kick, toss in some red pepper flakes when cooking the garlic. This will give your noodles a fiery touch. For a gluten-free version, choose rice noodles or gluten-free pasta. Always check the labels to ensure they meet your needs. You can also use spiralized veggies like zucchini or sweet potatoes as a fun alternative. These options keep the dish light and fresh, while still being super delicious. For a full recipe, check out the complete guide on Chili Garlic Noodles. To keep your leftover chili garlic noodles fresh, store them in an airtight container. Make sure to cool the noodles to room temperature before sealing. Place them in the fridge, where they can last for up to three days. If you want to enjoy them later, try not to add the sauce until you reheat. When you are ready to eat your leftover noodles, reheat them in a skillet. Add a splash of water or soy sauce to keep them moist. Heat over medium heat, stirring gently. This method warms the noodles evenly without drying them out. You can also use a microwave. Just cover them to retain moisture and heat in short bursts. If you want to save your chili garlic noodles for a longer time, freezing is a great option. First, let the noodles cool completely. Then, place them in a freezer-safe container or bag. Make sure to remove as much air as possible. Frozen noodles can last for up to three months. When you are ready to eat, thaw them in the fridge overnight before reheating. For the best taste, add fresh veggies or sauce during reheating. You can find the full recipe in the article. You can use any noodle you like! My favorites are egg noodles and rice noodles. They soak up the sauce well. Wheat noodles also work great. Choose what you enjoy most. Yes, you can skip the garlic. Try using shallots or ginger instead for flavor. Both add a nice taste without the garlic punch. You can also add more veggies for depth. To make Chili Garlic Noodles milder, use less chili paste. Start with just a teaspoon. You can also add a touch of honey for sweetness. Serve with extra veggies like carrots or peas to balance the spice. For the best Chili Garlic Noodles, check local Asian restaurants. Many offer their own twist on this dish. You can also explore food delivery apps for nearby options. Don't forget to read reviews to find the top spots! For a homemade version, you can follow the Full Recipe. Chili Garlic Noodles are easy and fun to make, as we explored. We covered essential ingredients and variations to suit your taste. The step-by-step instructions guide you from preparing noodles to making the garlic chili sauce. Cooking tips enhance your dish, while variations offer options for everyone. Remember to store leftovers properly to keep flavors fresh. With the right ingredients and techniques, you can enjoy a tasty meal at home. Experiment and have fun making your own version of this dish!

Chili Garlic Noodles Flavorful and Easy Meal Recipe

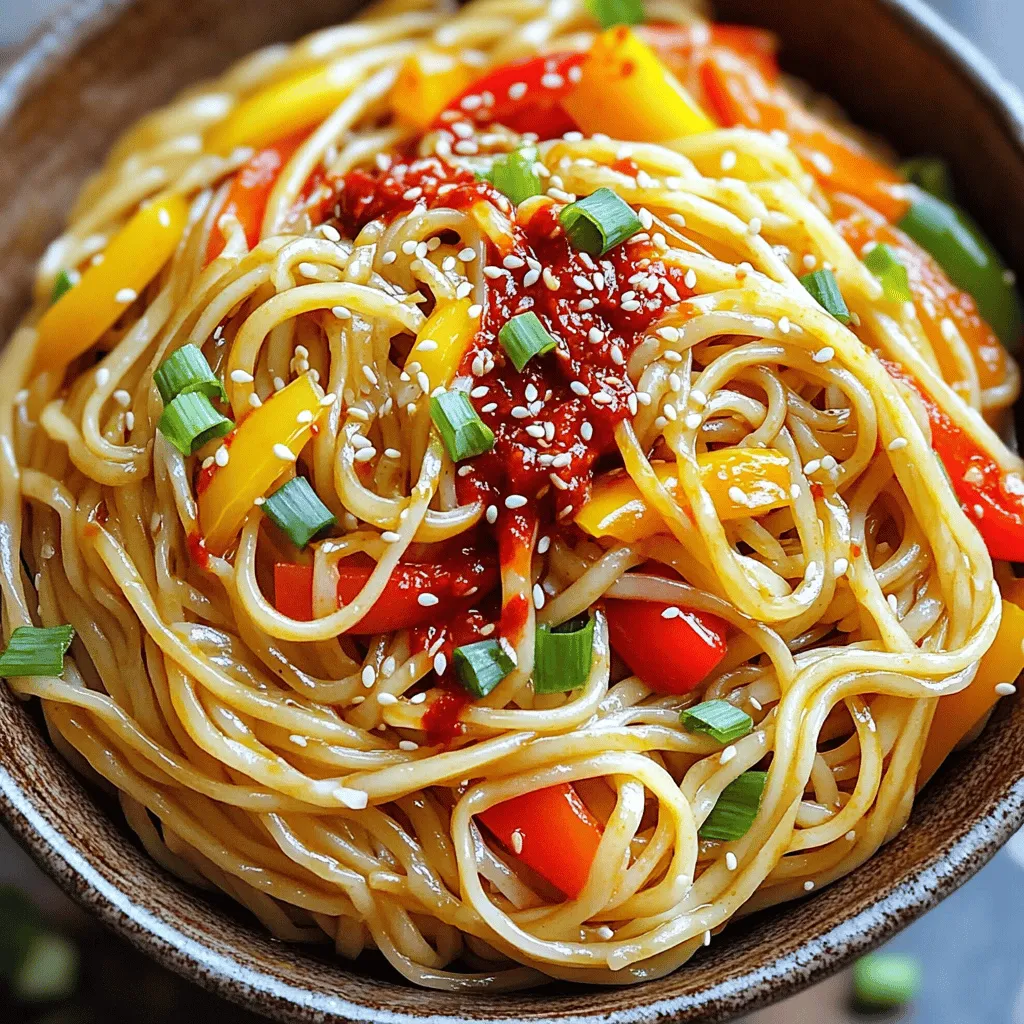
Are you ready to spice up your dinner? Chili Garlic Noodles are a quick and tasty meal everyone will love.

Start by making the glaze. In a small bowl, whisk together the following ingredients until smooth: - 1/4 cup honey - 2 tablespoons Sriracha sauce - 2 tablespoons soy sauce (low sodium) - 1 tablespoon sesame oil - 2 garlic cloves, minced - 1 teaspoon fresh ginger, grated This blend of sweet and spicy adds great depth. Next, preheat your oven to 400°F (200°C). Line a baking sheet with parchment paper. This helps with easy cleanup. Place the salmon fillets on the sheet. Season each fillet lightly with salt and pepper. Then, brush the Sriracha honey glaze generously over them. Make sure to save a little glaze for later. Now, bake the salmon in your preheated oven for about 12-15 minutes. You want the fish to flake easily with a fork. For an extra touch, broil the salmon for 2 minutes at the end. This caramelizes the glaze and adds a nice texture. Once done, remove the salmon from the oven and drizzle the reserved glaze over the top. This boosts the flavor even more. Enjoy your Sriracha honey glazed salmon! For the full recipe, check the recipe section. For Sriracha honey glazed salmon, baking takes about 12-15 minutes. Start by preheating your oven to 400°F (200°C). Place salmon on a lined baking sheet and season with salt and pepper. To check if it’s done, use a fork. If the salmon flakes easily, it’s ready. You can also broil it for 2 minutes for a nice caramel finish. To boost the flavor, try adding spices like smoked paprika or chili powder. Fresh herbs like cilantro or parsley can also brighten the dish. If you want a little more zing, squeeze fresh lime juice over the salmon before serving. Each addition gives a unique twist to the glaze. Garnishing makes your dish pop. Use sliced green onions and sesame seeds for a nice contrast. You can also add a few slices of lime for color. Fresh herbs like cilantro or basil add a lovely touch too. These garnishes not only look great but also enhance the overall flavor. Enjoy the process of making your dish as beautiful as it is tasty! {{image_2}} If you want to switch up the protein, you can use chicken or tofu. Chicken thighs or breasts work well. Simply adjust cooking time to ensure they cook through. For a vegan option, tofu absorbs the flavors nicely. Press the tofu to remove extra moisture and cut it into thick slices. This will help the glaze stick better. You can easily change the spice level of the glaze. For less heat, reduce the Sriracha. Start with one tablespoon and taste as you go. To make it sweeter, add more honey. You can also add a splash of lime juice for a tangy kick. This adds a nice twist to the flavor. This dish pairs well with a variety of sides. Steamed rice is a great choice. It soaks up the glaze perfectly. You can also serve it with roasted vegetables for a healthy touch. Another option is a fresh salad with a light dressing. This keeps the meal balanced and bright. Try these ideas to enhance the Sriracha honey glazed salmon experience. For the full recipe, you can refer back to it anytime. To store leftovers, let the salmon cool first. Place it in an airtight container. Keep it in the fridge for up to three days. This helps keep it fresh and tasty. Make sure to seal it well to prevent odors from other foods. When ready to eat, you can enjoy it cold or reheat it. You can freeze cooked salmon for later use. Wrap each piece in plastic wrap tightly. Then, place the wrapped salmon in a freezer bag or container. This keeps the salmon from getting freezer burn. It can stay in the freezer for up to three months. To thaw, move it to the fridge overnight. This way, the salmon stays moist and tasty. For the best flavor, reheat the salmon gently. You can use an oven set to 350°F (175°C). Place the salmon on a baking sheet and cover it with foil. This keeps it from drying out. Heat for about 10 minutes or until warm. You can also use a microwave. Place the salmon on a microwave-safe plate and cover it with a damp paper towel. Heat in short bursts of 30 seconds. Check often to avoid overcooking. Enjoy your Sriracha honey glazed salmon just like when it was fresh! You can pair this dish with many sides. Here are some ideas: - Steamed rice: White or brown rice works well. - Roasted vegetables: Try broccoli, carrots, or green beans. - Salad: A fresh green salad adds crunch. - Quinoa: This is a healthy grain option. - Noodles: Soy sauce noodles are a great choice. These sides will balance the sweet and spicy flavors of the salmon. Yes, you can make the glaze ahead of time. Just mix the honey, Sriracha, soy sauce, sesame oil, garlic, and ginger in a bowl. Store it in a sealed container in the fridge. It will stay fresh for up to a week. Just give it a good stir before you use it. If you want to reduce the heat, you have options: - Use less Sriracha: Start with one tablespoon instead of two. - Add more honey: This will balance the spice with sweetness. - Mix in soy sauce: This will also tone down the heat. These tips will help you enjoy the dish without too much spice. For the full recipe, check the [Full Recipe]. In this blog post, we covered how to make delicious Sriracha honey glazed salmon. You learned about the key ingredients and step-by-step instructions to prepare and cook it perfectly. We also explored tips for enhancing flavor and options for variations. Lastly, we discussed how to store and reheat leftovers. Try this dish for great taste and easy prep. You can customize it to fit your preferences. Enjoy cooking and impressing your friends and family with your skills!

Sriracha Honey Glazed Salmon Flavorful and Simple Dish

Looking to impress with a delicious meal? Try my Sriracha Honey Glazed Salmon! This simple dish combines sweet and spicy

- 1 lb boneless, skinless chicken thighs - 2 tablespoons soy sauce - 2 tablespoons gochujang (Korean chili paste) - Additional vegetables and toppings The main ingredients give this dish its bold flavor. Chicken thighs work best for their juicy texture. Gochujang adds heat and depth. You can also add veggies like carrots and cucumbers for freshness. - Honey - Sesame oil - Garlic and ginger - Vegetable oil Pantry staples enhance taste and texture. Honey balances the spice of gochujang. Sesame oil adds a nutty taste. Fresh garlic and ginger bring aromatic flavors. Vegetable oil is great for cooking. - Cooked jasmine rice - Sesame seeds - Fresh cilantro and green onions Cooked jasmine rice serves as a perfect base. It absorbs the sauce well. Sesame seeds add a nice crunch. Fresh cilantro and green onions provide a pop of color and flavor. You can find the complete recipe for making these delicious Spicy Korean Chicken Bowls in the [Full Recipe]. To start, gather your marinade ingredients. You will need soy sauce, gochujang, honey, sesame oil, garlic, and ginger. In a large mixing bowl, combine these ingredients. Mix well until they blend together. Next, add the chicken pieces to the bowl, tossing to coat them fully. This step is key. Let the chicken marinate for at least 30 minutes. If you have more time, two hours gives better flavor. Now it's time to cook the chicken. Heat vegetable oil in a large skillet over medium-high heat. Once hot, add the marinated chicken to the skillet. Cook it for about 5-7 minutes. You want it fully cooked and slightly caramelized. After that, take the reserved marinade and pour it into the skillet. Let it simmer for 2-3 minutes. This thickens the sauce and adds great flavor. Now, we can build our bowls. Start with a layer of cooked jasmine rice at the bottom. This rice is fluffy and perfect for soaking up the sauce. Next, top the rice with the spicy chicken. After that, add your vegetables. Use julienned carrots, sliced cucumber, and chopped green onions. These add crunch and color. Finally, garnish your bowl with sesame seeds and fresh cilantro. This creates a beautiful and tasty meal. For the full recipe, refer to the previous section. Marinating the chicken is key for taste. I suggest marinating for at least 30 minutes. For the best flavor, try marinating for up to 2 hours. The longer you marinate, the richer the taste. To control spice levels, you can adjust the gochujang. If you like it milder, use less gochujang. For more heat, add a spoonful more. To cook chicken evenly, cut the pieces into similar sizes. This helps each piece cook through at the same time. Use medium-high heat when cooking. This temperature helps to seal in juices and flavors. For a nice caramelized finish, avoid stirring too much. Let the chicken sit in the pan to develop a golden crust. Pair your spicy chicken with side dishes like pickled vegetables or steamed broccoli. These add freshness and balance the heat. To make it a complete meal, serve the chicken over cooked jasmine rice. Add carrots, cucumbers, and green onions on top for crunch and color. For more flavor, sprinkle sesame seeds and fresh cilantro as a garnish. Enjoy your tasty dish! {{image_2}} You can use chicken breast instead of thighs. Chicken breast is leaner. This change lowers fat but keeps the dish tasty. If you want a plant-based option, try tofu or tempeh. Both soak up flavors well and add a nice texture. You can mix in other vegetables. Bell peppers, snap peas, or broccoli work great. They add color and crunch. For sauces, try adding peanut sauce or teriyaki sauce. These will give your bowl a new twist. You can also add toppings like avocado or radishes for extra flavor. Consider adding nuts or seeds for a crunchy bite. Toasted sesame seeds or chopped peanuts are perfect. You can also try different spices. Adding garlic powder or smoked paprika can change the flavor profile. This way, you create a new dish every time. For the complete recipe, check out the Full Recipe. Store leftovers in an airtight container. This keeps them fresh and tasty. They last up to three days in the fridge. If you want to keep them longer, consider freezing them. To freeze portions, let the chicken cool completely. Then, use freezer-safe bags. Remove as much air as possible. The chicken lasts up to three months in the freezer. When you're ready to eat, thaw it overnight in the fridge. For reheating, place the chicken in a skillet over medium heat. Stir until warmed through. You can also microwave it for 1-2 minutes, checking to avoid overcooking. You can prepare some ingredients in advance. Chop your vegetables like carrots and cucumber the night before. This saves time on busy days. For quick assembly, cook extra rice and chicken. Store them in separate containers. When you’re ready to eat, just combine everything in a bowl. Enjoy your easy meal in minutes. If you don't have gochujang, you can use other chili pastes or sauces. Sriracha is a good option. It has heat but lacks some depth. You can also mix miso paste with hot sauce. This gives a rich flavor. Another choice is a mix of red pepper flakes and soy sauce. Each substitute will change the taste a bit. Yes, this recipe is spicy due to gochujang. However, you can adjust the spice level. If you like mild dishes, use less gochujang. Start with one tablespoon instead of two. Taste the marinated chicken before cooking. You can always add more spice later. Yes, you can make this dish gluten-free. Use gluten-free soy sauce instead of regular soy sauce. Check the gochujang label for gluten-free options. You might also consider tamari as a substitute. It provides a similar flavor without gluten. Enjoy your tasty meal while staying gluten-free! This blog post provided a full recipe for delicious chicken bowls. We covered ingredient details, cooking tips, and storage advice. You learned how to marinate and cook chicken, assemble tasty bowls, and customize flavors. In the end, this meal is simple, fun, and adaptable for everyone. Enjoy experimenting with different proteins and vegetables to create your perfect bowl.

Spicy Korean Chicken Bowls Easy and Tasty Meal

Are you ready to spice up your dinner routine? These Spicy Korean Chicken Bowls are not only easy to make

To make Everything Bagel Cucumber Bites, you need fresh ingredients. Here’s the list: - 2 large cucumbers - 8 oz cream cheese, softened - 1 teaspoon garlic powder - 1 teaspoon onion powder - 1 tablespoon fresh dill, chopped - 1 tablespoon fresh chives, chopped - 2 tablespoons everything bagel seasoning - 1/2 cup cherry tomatoes, halved (for garnish) - Salt and pepper, to taste These ingredients blend together to create a fresh and tasty treat. The cucumbers give a crunchy base. Cream cheese adds a creamy texture. Garlic and onion powder enhance the flavor. Fresh herbs like dill and chives bring brightness. Everything bagel seasoning adds that classic taste. Cherry tomatoes not only look pretty but add a burst of flavor. Make sure your cucumbers are firm and crisp. Softened cream cheese mixes easily with the spices. Using fresh herbs makes a big difference in taste. You can find everything bagel seasoning in most stores. This recipe is not only simple but also quick. You can whip it up in just 15 minutes. Perfect for any gathering or snack time! For the full recipe, check the details above. First, wash the cucumbers under cold water. Make sure to remove any dirt. After washing, slice each cucumber into thick rounds, about 1-inch thick. This size gives the bites a nice crunch. Set the slices aside on a clean plate. Next, grab a mixing bowl. Add the softened cream cheese, garlic powder, onion powder, fresh dill, and fresh chives. Use a fork or spatula to mix everything together until you have a smooth, creamy texture. This mixture is the star of your bites. Taste it and add salt and pepper if needed. Now it’s time to build your bites. Take a cucumber slice and spread a generous layer of the cream cheese mix on top. Use a small spatula or knife for this step. Once you have the cream cheese spread, sprinkle everything bagel seasoning over each slice. The seasoning adds that classic flavor we love. For a pop of color, place a halved cherry tomato on each cucumber bite. Finally, arrange your beautiful cucumber bites on a serving platter for everyone to enjoy. For the full recipe, check the ingredients and steps above. Enjoy your delicious appetizer! Using fresh herbs makes a big difference. Fresh dill and chives bring bright taste. Dried herbs lack the punch of fresh ones. Always choose herbs that are vibrant and green. They add color and a fresh aroma. You can grow your own herbs too. This way, they are always on hand. Fresh herbs can elevate any dish, including these cucumber bites. To make your platter stand out, use a variety of colors. Arrange the cucumber bites in circles or rows. Add fresh herbs around the bites for a pop of green. Use a colorful serving tray to catch the eye. You might also place some cherry tomatoes next to the bites. This adds more color and looks inviting. An appealing platter makes your dish more exciting. If you want a dairy-free option, try using hummus. It has a creamy texture and pairs well with cucumbers. Another option is avocado, which is rich and smooth. You can also use a nut-based cream cheese. These choices keep the flavor while meeting dietary needs. Always taste your spread to ensure it’s seasoned well. {{image_2}} You can make these bites even better by adding toppings. Smoked salmon adds a rich flavor. Simply lay a thin slice on each cucumber bite. If you prefer something creamy, try avocado. Mash it up and spread it on top. Both options bring a new twist to the classic recipe. Want a little heat? You can easily spice things up. Add a sprinkle of red pepper flakes to the cream cheese mix. This will give your bites a nice kick. You could also use spicy cream cheese if you like. Adjust the spice to match your taste. Think about how you serve these bites. Pair them with dips like tzatziki or hummus for extra flavor. You can also serve them on a platter with crackers. This makes a fun and tasty spread for your guests. Get creative and enjoy the different flavors! To store leftover cucumber bites, place them in an airtight container. You want to keep air out to prevent them from getting soggy. Make sure to layer them with parchment paper if you stack them. This keeps the toppings intact and fresh. These cucumber bites can stay fresh in the fridge for about 2 to 3 days. After that, the cucumbers lose their crunch and the cream cheese can spoil. Always check for any signs of spoilage before eating. You usually don’t need to reheat cucumber bites. They taste best cold. If you must reheat, do it gently. Place them in a warm oven for a few minutes. Be careful not to overheat, as this can make the cucumbers limp. Enjoy your Everything Bagel Cucumber Bites straight from the fridge for the best taste. For the full recipe, refer to the earlier section. Yes, you can make these cucumber bites ahead of time. This helps save time for your event. Prepare the cream cheese mixture and slice the cucumbers. Store both in separate containers in the fridge. When you are ready to serve, spread the cream cheese on the cucumber slices and add the seasoning. This keeps everything fresh and tasty. If you don't have everything bagel seasoning, no worries! You can mix garlic powder, onion powder, sesame seeds, and poppy seeds. This will give you a similar flavor. Another option is to use just sesame seeds or even some Italian herbs. Feel free to get creative! Yes, these cucumber bites fit well into a low-carb diet. Cucumbers are low in carbs and high in water. The cream cheese adds some fat, but it’s low in carbs too. Just be mindful of how much seasoning you use. Enjoy these bites without guilt! For the full recipe, check out the detailed instructions above. In this post, I covered how to make delicious everything bagel cucumber bites. You learned about the key ingredients and the easy steps to prepare them. I also shared tips for the best flavor and fun variations to try. Finally, I explained how to store leftovers and answer common questions. These bites are tasty, fresh, and perfect for any gathering. Enjoy making them!

Everything Bagel Cucumber Bites Delightful Appetizer

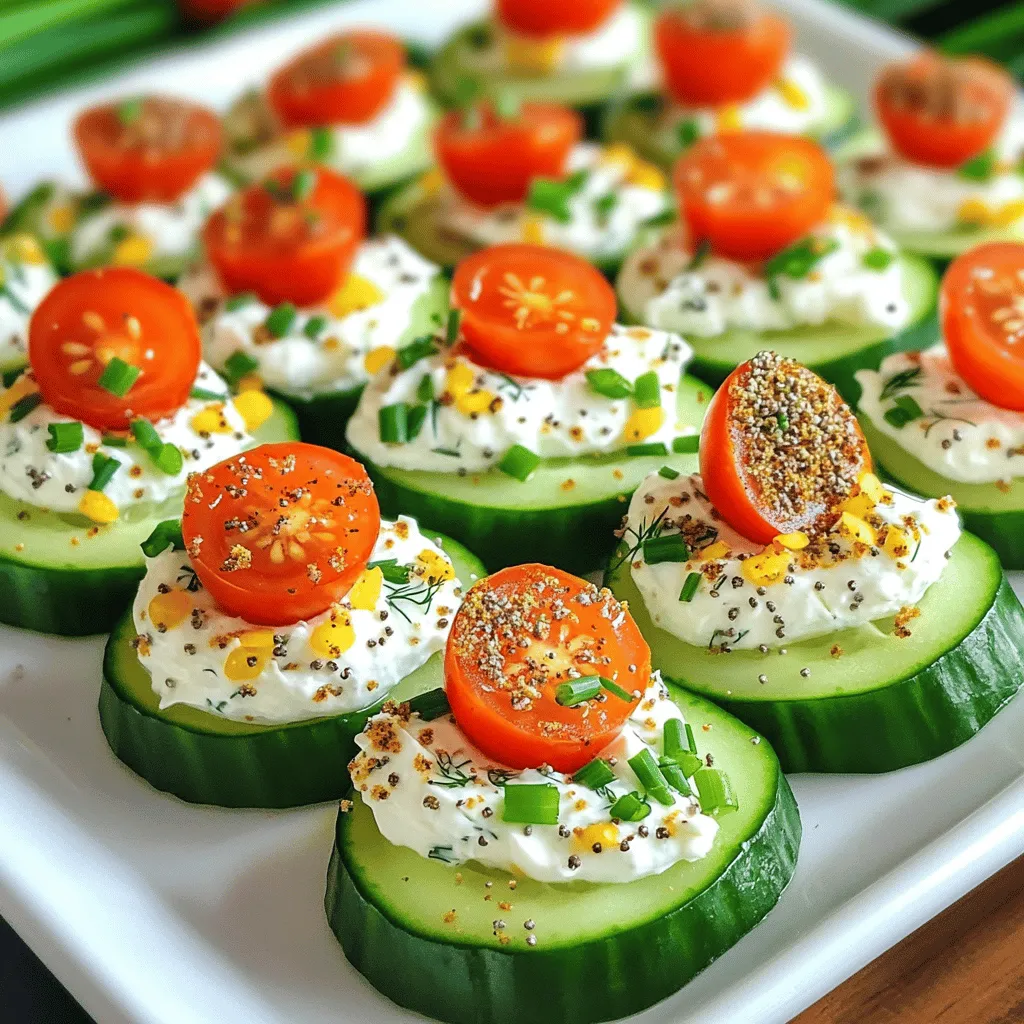
Looking for a tasty and easy appetizer? You’ve come to the right spot! These Everything Bagel Cucumber Bites are fresh,

To make a delicious chocolate chip banana bread, you need a few simple ingredients. Here’s what you'll need: - 3 ripe bananas, mashed - 1/3 cup melted coconut oil - 1/2 cup brown sugar - 1 large egg, beaten - 1 teaspoon vanilla extract - 1 teaspoon baking soda - Pinch of salt - 1 cup all-purpose flour - 1/2 cup semi-sweet chocolate chips - 1/4 teaspoon cinnamon (optional) Using ripe bananas is key. They bring a natural sweetness and moisture. The coconut oil adds a nice richness without being too heavy. Brown sugar gives a deeper flavor than white sugar. You can adjust the chocolate chips to your taste. You might even try dark chocolate for a richer bite! If you love spices, add cinnamon for warmth. This simple list makes creating your banana bread easy and fun. Check out the Full Recipe for more details. 1. Preheat the oven: Set your oven to 350°F (175°C). This temp gives you a nice bake. 2. Grease or line the loaf pan: You can grease a 9x5 inch loaf pan. Or, use parchment paper to line it. This helps the bread not stick. 3. Mash bananas: Take three ripe bananas and mash them in a bowl. Use a fork or potato masher until smooth. 1. Combine wet and dry ingredients: In the bowl, stir in melted coconut oil, brown sugar, beaten egg, and vanilla extract. Mix until creamy and smooth. 2. Avoid over-mixing: Add baking soda and a pinch of salt, then stir. Gently fold in the flour. It is okay if some lumps remain. 1. Pour batter into the pan: Transfer the batter into the prepared loaf pan. Spread it evenly with a spatula. 2. Bake time and checking for doneness: Bake for 55-65 minutes. To check, insert a toothpick in the center. If it comes out clean, your bread is ready! For the full recipe, refer to the main section. Enjoy your tasty chocolate chip banana bread! To make great chocolate chip banana bread, start with ripe bananas. Ripe bananas are sweeter and softer. They help create a moist texture. I recommend using bananas that are brown and spotty. If they are too green, the bread may taste starchy. Next, avoid over-mixing the batter. When you mix, combine the ingredients until just blended. This keeps your banana bread light and fluffy. A few lumps are okay. If you mix too much, the bread can become dense and tough. You can add nuts like walnuts or pecans for extra crunch. They pair well with the soft bananas and chocolate. Adding a touch of cinnamon boosts the flavor too. Just a pinch can make a big difference. If you want to switch things up, try using dark chocolate chips or white chocolate chips instead of semi-sweet. Each type gives a unique taste. You can also mix in dried fruits like raisins or cranberries for added sweetness. For the complete recipe, check out the Full Recipe. {{image_2}} If you want a gluten-free version of chocolate chip banana bread, you can easily swap the all-purpose flour. Use a gluten-free flour blend instead. These blends often combine different flours, like rice or almond, to mimic the texture of regular flour. Make sure to read the package for any extra tips. You might need to add a bit of xanthan gum if your blend doesn't have it. This helps give your bread that nice chewy feel. For a vegan twist, you can replace the egg with flaxseed or chia seed. To do this, mix one tablespoon of ground flaxseed or chia seeds with three tablespoons of water. Let it sit for a few minutes until it gets gooey. You can also use plant-based yogurt or applesauce as an egg substitute. Instead of coconut oil, try using a neutral oil like canola or even applesauce for moisture. Want to jazz up your banana bread? Here are some fun ideas for add-ins: - Nuts: Chopped walnuts or pecans add a nice crunch. - Spices: A pinch of nutmeg or cardamom can give a warm flavor. - Fruits: Dried fruit like raisins or cranberries can add sweetness. - Chips: Swap semi-sweet chocolate chips for dark chocolate or white chocolate. Feel free to mix and match these suggestions to create your perfect flavor! For the full recipe, check out the complete guide. You can store leftover banana bread at room temperature or in the fridge. If you keep it at room temperature, wrap it in plastic wrap. This helps keep it fresh. It lasts about three days this way. If you choose the fridge, it can last up to a week. Just remember, the fridge can dry it out a bit. Freezing banana bread is easy and smart. First, let the bread cool completely. Then, wrap it tightly in plastic wrap. After that, place it in a freezer bag or an airtight container. This keeps out air and moisture. You can freeze banana bread for up to three months. When you want to eat it, just take it out and let it thaw in the fridge overnight. To reheat your banana bread, use the oven for the best taste. Preheat your oven to 350°F (175°C). Place slices on a baking sheet and heat for about 10 minutes. This warms it up and keeps it soft. If you are in a hurry, you can use the microwave. Heat a slice for about 10-15 seconds. Just be careful not to overheat it, or it may become dry. For the full recipe, check out Choco-Banana Bliss Bread. To enhance moisture in your banana bread, use very ripe bananas. They add natural sweetness and moisture. You can also try adding an extra tablespoon of coconut oil. This small change makes a big difference. Lastly, do not over-mix your batter. Mix just until the flour disappears. This helps keep your bread tender. Yes, you can use frozen bananas! Just thaw them before mashing. Make sure to drain any excess water from thawed bananas. This keeps your batter from being too wet. Using frozen bananas is a great way to avoid waste. You can store overripe bananas in the freezer for future baking. If you need ripe bananas fast, place them in a paper bag. The bag keeps ethylene gas close to the fruit, speeding up ripening. You can also bake unripe bananas at 300°F for about 15-20 minutes. This method softens them and brings out their sweetness. Both tricks work well when you need ripe bananas in a pinch. This blog post covered how to make delicious banana bread. You learned about key ingredients, the step-by-step process, and some helpful tips. Remember, using ripe bananas is key for flavor. You have many options, like gluten-free or vegan variations. Don’t forget to store and reheat your bread properly. Enjoy every slice! With practice, your banana bread will impress family and friends. Now, it’s time for you to bake and share your tasty creation!

Chocolate Chip Banana Bread Tasty and Simple Recipe

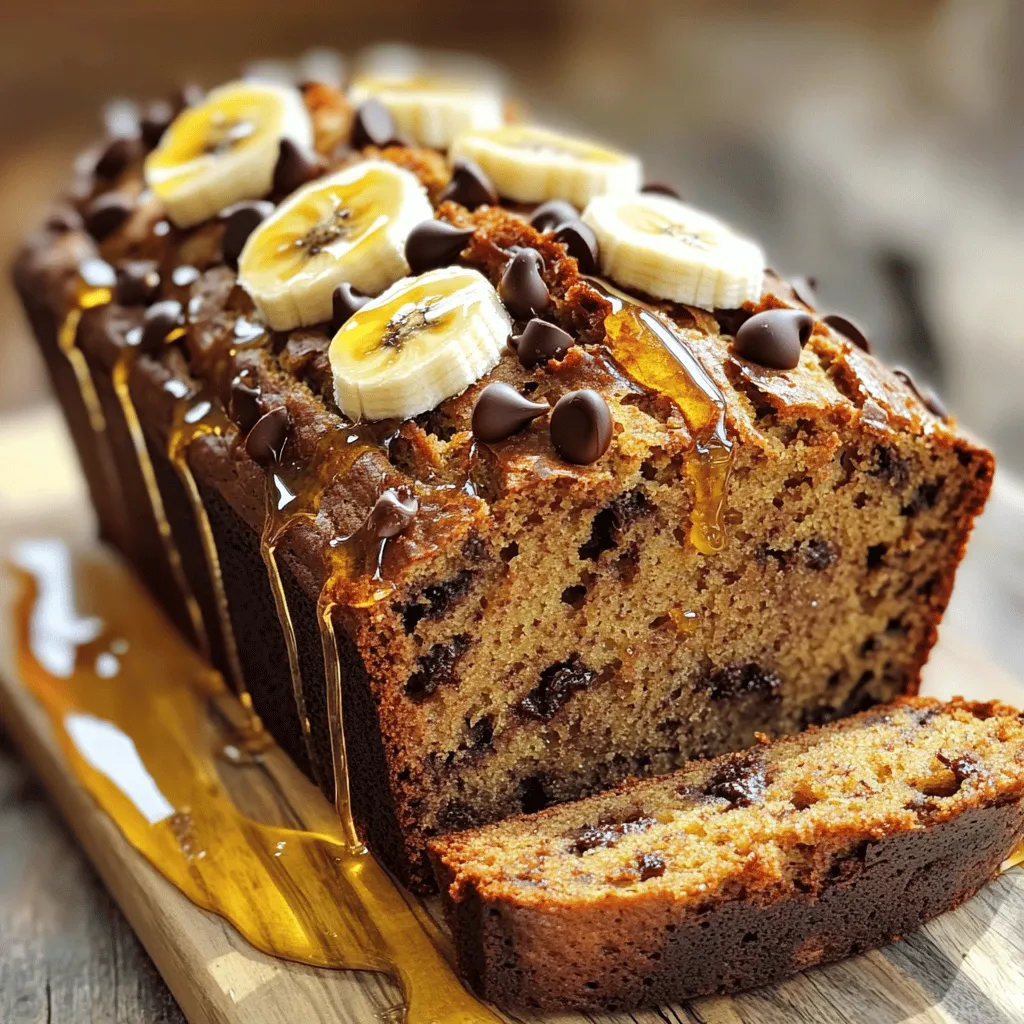
Are you craving something sweet and easy to bake? My Chocolate Chip Banana Bread recipe is your answer! With just

For this tasty salad, gather these key ingredients: - 2 cups cooked chicken breast, shredded - 4 cups mixed greens (spinach, arugula, and romaine) - 1/2 cup cherry tomatoes, halved - 1/4 cup red onion, thinly sliced - 1/2 cucumber, diced - 1/4 cup walnuts, roughly chopped - 1/4 cup feta cheese, crumbled These ingredients form the base of your salad. The chicken adds protein, while the greens bring freshness. The cherry tomatoes and cucumber add crunch and color. Walnuts give a nice nutty flavor, and feta adds creaminess. To make the dressing, you will need: - 1/4 cup honey - 2 tablespoons Dijon mustard - 2 tablespoons apple cider vinegar - 1/4 cup olive oil - Salt and pepper to taste This dressing is simple yet full of flavor. Honey gives it sweetness. Dijon mustard adds a nice tang. The apple cider vinegar provides acidity, while olive oil makes it smooth. Salt and pepper round it all out. You can add these optional ingredients for extra flavor: - Sliced avocado - Fresh herbs like parsley or basil - Dried cranberries or raisins - Grilled corn These extras can change the salad's taste and texture. Avocado adds creaminess. Fresh herbs enhance flavor. Dried fruits give sweetness, while corn adds a touch of sweetness and crunch. Feel free to mix and match based on what you like! For the full recipe, check out the section above. To make the dressing, start by gathering your ingredients. You need honey, Dijon mustard, apple cider vinegar, olive oil, salt, and pepper. In a small bowl, whisk together these items. Mix until the honey and mustard blend well with the oil and vinegar. Taste it and adjust the salt and pepper as needed. This tangy dressing adds a lovely flavor to your salad. Now, it's time to build your salad. In a large bowl, add the shredded chicken. Next, toss in the mixed greens, cherry tomatoes, red onion, cucumber, and walnuts. Mix these ingredients gently. Once everything is combined, drizzle your honey mustard dressing over the salad. Toss again until every piece is coated in that sweet and tangy goodness. Finally, sprinkle the crumbled feta cheese on top for a nice finish. Serve your honey mustard chicken salad right away for the best taste. If you want the flavors to blend more, refrigerate it for about 30 minutes. This makes for a fresh and flavorful meal. Pair it with crusty bread or a side of fruit to complete your dining experience. Enjoy this delicious salad as a light lunch or a satisfying dinner. For the full recipe, check out the recipe section above. To make a great honey mustard dressing, use fresh ingredients. Start with high-quality honey. It adds a rich sweetness. Use Dijon mustard for a nice kick. Combine these with apple cider vinegar for zest. Olive oil gives it a smooth texture. Whisk well until it’s creamy. Taste, then add salt and pepper as needed. This dressing makes the salad shine. For easy shredding, use warm chicken. It pulls apart more easily. You can use two forks or your hands. Just hold one piece steady while you pull. If you want, try a stand mixer with the paddle attachment. It shreds chicken quickly. Aim for bite-sized pieces to mix well in the salad. For a tasty base, mix different greens. Spinach adds softness and nutrients. Arugula brings a peppery punch. Romaine offers a nice crunch. You can mix and match. Try to avoid bitter greens, as they can overpower the dish. Fresh greens enhance the flavors of the honey mustard chicken salad. Each bite should feel fresh and vibrant. For the full recipe, check out the Honey Mustard Chicken Salad. {{image_2}} Fruits can bring a bright twist to your salad. Consider adding sliced apples or pears. They add sweetness and crunch. You can also try berries like strawberries or blueberries. Their tartness pairs well with the honey mustard dressing. Diced mango can add a tropical flair too. Just remember to keep the flavors balanced. Use fruits that you enjoy for a personal touch. If you want to switch up the protein, you have choices. Grilled shrimp or salmon can be a tasty option. They add a nice smoky flavor. If you prefer plant-based protein, try chickpeas or lentils. Both are filling and nutritious. You could also use tofu for a creamy texture. Choose the protein that fits your diet and taste. To make this salad vegetarian, skip the chicken. You can add more beans or nuts instead. For a vegan version, replace the honey with maple syrup. Use vegan feta or skip cheese entirely. You can also enhance the greens with avocado for creaminess. These swaps keep the salad fresh and healthy while fitting your lifestyle. For the complete recipe, check out the Full Recipe section. To keep your Honey Mustard Chicken Salad fresh, store it in an airtight container. This helps keep out air and moisture. If you have dressing left, store it separately. This will prevent the greens from wilting. Use glass or plastic containers that seal well. When stored properly, your salad lasts about 3 to 4 days in the fridge. After that, the quality drops. If you see any changes in color or smell, it's time to toss it. Always trust your senses when it comes to food safety. Reheat the chicken gently if you want it warm. Use a microwave or skillet on low heat. Avoid reheating the salad with greens and dressing together, as this can ruin the taste and texture. Feel free to add fresh greens after reheating the chicken for a nice balance. Enjoy your Honey Mustard Chicken Salad fresh every time! For the full recipe, check out the details provided earlier. Yes, you can use store-bought honey mustard. It saves time and still tastes great. Just remember that store-bought versions may be sweeter. You might need to adjust the amount in your dressing. If you like a stronger flavor, you can add a bit more Dijon mustard. Honey Mustard Chicken Salad is a healthy option. It has lean chicken, fresh greens, and colorful veggies. These ingredients provide protein, vitamins, and fiber. The dressing uses honey and olive oil, which are healthier choices. Just be mindful of the portion size, as the nuts and cheese add extra calories. Yes, you can make this salad in advance. However, I suggest adding the dressing just before serving. If you mix it all together too soon, the greens can become soggy. You can keep the chicken, veggies, and dressing in separate containers. This way, everything stays fresh until you are ready to eat. For the full recipe, check out the details shared above. Honey mustard chicken salad combines simple ingredients for a delightful meal. We covered the main ingredients, dressing options, and how to customize based on your taste. You learned step-by-step instructions for making the salad and perfecting the dressing. The tips and tricks offer ways to enhance flavor and make prep easier. Final thoughts: This salad is flexible, tasty, and quick to prepare. Enjoy making it your own!

Honey Mustard Chicken Salad Fresh and Flavorful Meal

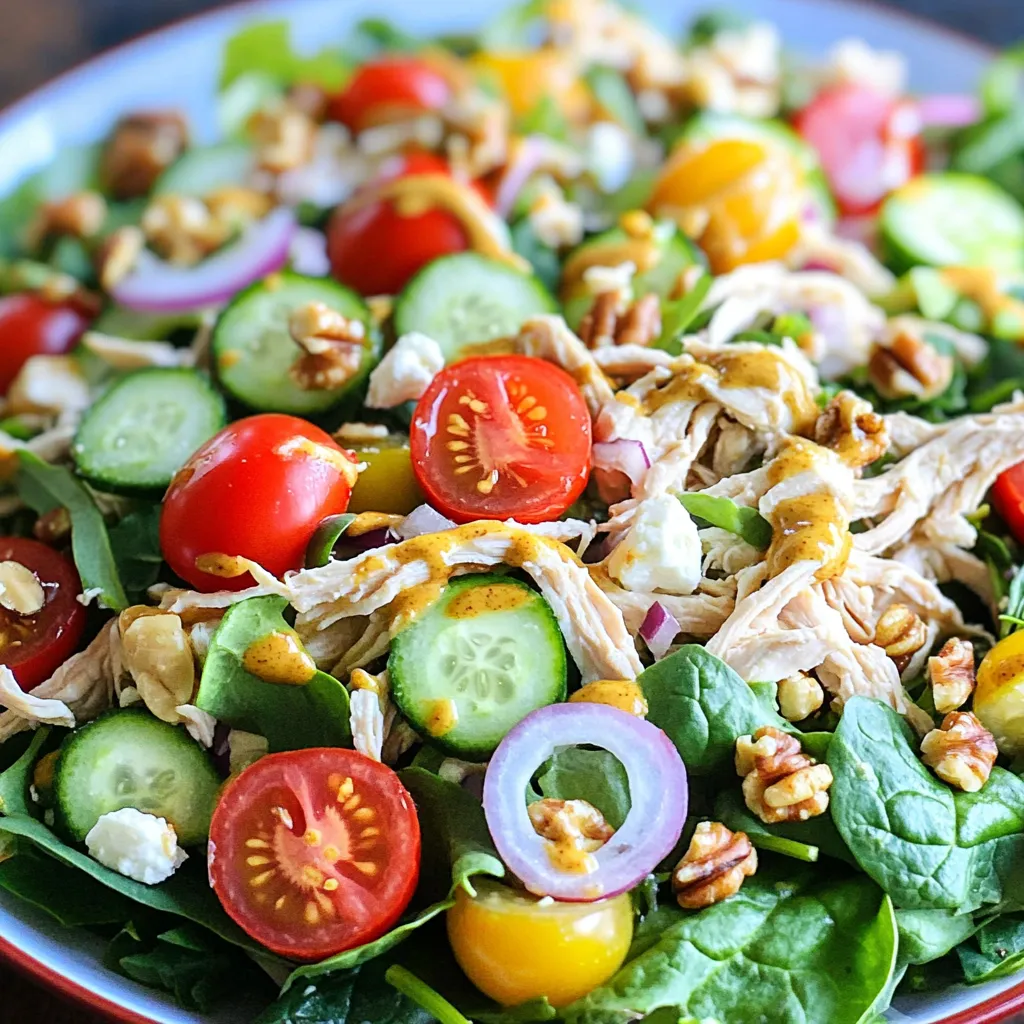
Looking for a fresh and tasty meal? Try my Honey Mustard Chicken Salad! This salad combines tender chicken, crisp greens,

- 2 cups cooked chicken, shredded - 1 can (10 oz) red enchilada sauce - 1 can (15 oz) black beans, rinsed and drained - 1 cup corn (fresh, canned, or frozen) - 2 cups shredded cheddar cheese - 1 medium onion, diced - 1 teaspoon garlic powder - 1 teaspoon cumin - 1 teaspoon chili powder - 6 corn tortillas, cut into quarters - Salt and pepper to taste - Fresh cilantro, for garnish In this recipe, you will see lots of colors and flavors. The cooked chicken is the star, but it plays well with the enchilada sauce. The black beans add protein and a nice texture. The corn brings a touch of sweetness. You can use fresh corn, or canned, or frozen. Each choice works well. The spices like cumin and chili powder give warmth. Diced onion adds a crisp bite. Don't forget the tortillas; they are the glue that holds this dish together. I love cutting them into quarters for easy layering. The shredded cheddar cheese is the final touch. It melts beautifully, creating a gooey top. And for a fresh kick, we add cilantro at the end. This dish is not just tasty; it looks great too. For the full recipe, check out the details above. Feel free to mix and match these ingredients based on what you have. Cooking should be fun and flexible! - Preheat the oven to 350°F (175°C). - Gather your ingredients and tools. You will need a large bowl and a 9x13 inch baking dish. - Start by layering half of the quartered corn tortillas in the dish. - In a large bowl, mix the cooked chicken, enchilada sauce, black beans, corn, diced onion, garlic powder, cumin, and chili powder. Add salt and pepper. - Spread half of this chicken mixture on top of the tortillas. - Sprinkle 1 cup of shredded cheddar cheese over the chicken. - Now, repeat the layers with the rest of the tortillas, chicken mixture, and top it with the last cup of cheese. - Cover the baking dish with foil. Bake it in the oven for 25 minutes. - After 25 minutes, remove the foil. Bake for an additional 10-15 minutes until the cheese is bubbly and golden. - Let it cool for a few minutes before serving. Don't forget to garnish with fresh cilantro! You can find the Full Recipe for more details. To achieve the best cheese texture, I recommend using fresh shredded cheese. Pre-shredded cheese often has anti-caking agents that can affect melt quality. For a creamy and stretchy cheese layer, combine cheddar with a bit of Monterey Jack. Cutting tortillas can be tricky. To make it easy, stack a few tortillas and use a sharp knife. You can also use kitchen scissors for quick cuts. This saves time and gives you even pieces. If you don't have cooked chicken, rotisserie chicken works great. You can also use shredded turkey or even canned chicken in a pinch. For a vegetarian option, try adding sautéed mushrooms or zucchini. You can swap black beans for pinto beans or kidney beans. Different cheeses like pepper jack can add spice. Feel free to mix and match based on what you have at home. This casserole pairs well with a simple green salad. A side of rice or avocado slices also complements the dish. For garnishes, fresh cilantro adds color and flavor. You can also top it with sour cream or sliced jalapeños for a kick. For the full recipe, check out the Easy Chicken Enchilada Casserole. Enjoy the cooking experience! {{image_2}} You can change the protein in this dish. Ground beef or turkey works well. Just cook it first before adding it to the mix. If you prefer a meatless option, use beans or lentils. These ingredients give you a hearty meal without the meat. To spice things up, add jalapeños for heat. You can slice them and mix them in. If you want a unique flavor, try different spices. Smoked paprika or oregano can add depth. Feel free to experiment and find your favorite taste. If you need a gluten-free dish, look for gluten-free tortillas. Many brands offer great options that hold up well. Check the label to ensure they are safe for your diet. This way, everyone can enjoy the casserole without worry. For the full recipe, click here: [Full Recipe]. To refrigerate your leftovers, let the casserole cool down first. Cover the dish tightly with plastic wrap or aluminum foil. You can also transfer it to an airtight container. This helps keep it fresh. When you want to reheat it, preheat your oven to 350°F (175°C). Place the casserole in the oven for about 20-25 minutes. You can also reheat it in the microwave for about 5-7 minutes, stirring halfway through for even heating. If you want to freeze the casserole, follow these steps. First, let it cool completely. Then, cut it into portions. Use freezer-safe containers or heavy-duty freezer bags. Make sure to remove as much air as possible before sealing. This helps prevent freezer burn. The casserole will last for about 2-3 months in the freezer. In the fridge, your Easy Chicken Enchilada Casserole will last about 3-4 days. In the freezer, it can last for 2-3 months. Always check for signs of spoilage. Look for changes in color, texture, or smell. If it seems off, it's best to throw it away. Enjoy safe and tasty meals! For the full recipe, visit the recipe section. Yes, you can prepare this dish in advance. To do this, follow these steps: - Make the chicken mixture as directed. - Layer it in the baking dish. - Cover it tightly with plastic wrap or foil. - Store it in the fridge overnight. When you are ready to bake, just remove the wrap and bake as usual. This makes it easy for busy nights. There are many tasty sides to serve with enchilada casserole. Here are my top suggestions: - Mexican rice: This adds a nice texture. - Refried beans: They make a great pairing. - Guacamole: Fresh and creamy, it balances the dish. - Corn salad: A light and fresh option. These sides will enhance your meal. Absolutely! You can make this casserole as spicy or mild as you like. Here are some ideas: - For a mild version, use less chili powder and omit any hot peppers. - For a spicy kick, add jalapeños or more chili powder. You can even use spicy enchilada sauce for extra heat. Adjust to your taste! Feel free to check out the Full Recipe for more details on this delicious dish. In this blog post, we covered how to make an easy chicken enchilada casserole. You learned about the main and extra ingredients, like chicken, cheese, and spices. I walked you through each step from preparation to baking. I also shared tips, variations, and storage info. You can make this dish your own with different proteins or flavors. Enjoy making this meal; it's sure to please anyone you serve! Remember, cooking is fun and a great way to share time with loved ones.

Easy Chicken Enchilada Casserole Simple and Tasty Meal

Looking for a quick and tasty dinner? This Easy Chicken Enchilada Casserole checks all the boxes. With tender chicken, savory

- 4 boneless, skinless chicken breasts - 1 cup grated Parmesan cheese - 1 cup panko breadcrumbs - 1 teaspoon garlic powder - 1 teaspoon onion powder - 1 teaspoon Italian seasoning - Salt and pepper to taste - 2 large eggs - 1 tablespoon Dijon mustard - Olive oil spray Using the right ingredients makes this recipe shine. I love using fresh chicken breasts for this dish. The Parmesan cheese adds a great salty flavor, while panko breadcrumbs give a nice crunch. The garlic and onion powders bring warmth and depth. Italian seasoning ties everything together, adding a hint of herbs. For binding, I use eggs and Dijon mustard. The mustard not only adds flavor but helps the crust stick. Don’t forget salt and pepper; they make a big difference in taste. Olive oil spray helps the chicken brown nicely in the oven. If you want the full recipe, check out the details above. Cooking with quality ingredients will always lead to a tasty dinner delight! - Preheat the oven to 425°F (220°C). - Line a baking sheet with parchment paper for easy cleanup. - In a shallow bowl, mix the grated Parmesan cheese, panko breadcrumbs, garlic powder, onion powder, Italian seasoning, salt, and pepper. - Stir well until all ingredients blend together nicely. - Pat the chicken breasts dry with paper towels. - Season both sides with salt and pepper. - In another bowl, whisk together the eggs and Dijon mustard. This mixture will be your egg wash. - Dip each chicken breast into the egg wash, covering it evenly. Let any excess drip off. - Next, coat the chicken in the Parmesan breadcrumb mixture. Press gently to ensure the crust sticks well. - Place the coated chicken on the prepared baking sheet. - Lightly spray the tops with olive oil to help them crisp. - Bake for about 20-25 minutes. The chicken should reach an internal temperature of 165°F (75°C) and the crust should look golden. - Once done, take the chicken out and let it rest for a few minutes. This helps keep it juicy. - Garnish with fresh parsley before serving. Follow these steps for a delicious, crispy dinner delight. For the complete cooking process, refer to the Full Recipe. To get a nice crunch, use panko breadcrumbs instead of regular ones. Panko has a lighter texture, which helps create a crispier crust. It absorbs less oil, so it stays crunchy longer. The egg wash is also key. It helps the breadcrumbs stick to the chicken. Whisk the eggs with Dijon mustard for added flavor. Make sure to coat the chicken fully to ensure an even crust. For a great presentation, serve the chicken on a nice platter. Add lemon wedges for color and a fresh taste. A side of salad or steamed vegetables looks lovely and adds balance to the meal. The bright colors will make your dish pop and entice your guests. You can easily boost flavor by adding spices and herbs. Try paprika for a smoky taste or thyme for an earthy note. You can also mix in some cayenne for a spicy kick. Feel free to substitute different cheese varieties too. Pecorino Romano can give a sharper flavor, while mozzarella adds creaminess. Experiment to find your perfect blend of flavors! For the full recipe, check out the detailed instructions above. {{image_2}} You can switch up the chicken type for different flavors. Use thighs or drumsticks instead of breasts. Thighs are juicier and add more flavor. Drumsticks are fun and perfect for dipping. For a vegetarian twist, try eggplant or tofu. Slice them thick, coat them, and bake just like chicken. Both options offer a tasty experience. Feel free to play with flavors in your crust. You can add different herbs and spices to the mix. Try basil, thyme, or paprika for a new taste. If you like zest, add some lemon or lime zest. For heat, sprinkle in red pepper flakes or cayenne. These small changes can make a big difference. You have a few cooking methods to choose from. Oven baking gives a great crispy finish, but air frying is faster. It creates a nice crunch without much oil. You can also grill the chicken for a smoky flavor. Stovetop cooking works too; just use a non-stick pan. Each method offers a unique result, so experiment to find your favorite. For the full experience, check out the Full Recipe for Crispy Parmesan Crusted Chicken! To store your leftovers, let the chicken cool first. Place the chicken in an airtight container. This keeps moisture in and prevents drying out. I recommend using glass or plastic containers with tight-fitting lids. These work best for maintaining flavor and texture. To regain crispiness, use the oven. Preheat it to 375°F (190°C). Place the chicken on a baking sheet. Bake for about 10-15 minutes. This method helps the crust stay crunchy. Avoid using the microwave, as it makes the chicken soggy. If you must use a microwave, try reheating in short bursts and then crisping it back in the oven. You can freeze the chicken both before and after cooking. If freezing before cooking, wrap each piece in plastic wrap and place in a freezer bag. For cooked chicken, allow it to cool completely before freezing. When ready to eat, thaw the chicken in the fridge overnight. To cook from frozen, bake at 375°F (190°C) for about 30-35 minutes. Always check the internal temperature. It should reach 165°F (75°C) to be safe. Bake the chicken for 20-25 minutes at 425°F. This high heat gives a crispy crust. The internal temperature should reach 165°F for safety. Check with a meat thermometer. Rest the chicken for a few minutes before serving. This helps keep it juicy and tender. Yes, you can use regular breadcrumbs. They will change the texture. Panko gives a lighter, crunchier crust. Regular breadcrumbs create a denser texture. The flavor will also differ slightly. If you prefer a softer crust, regular breadcrumbs work well. Many sides complement this dish. Roasted vegetables add color and nutrients. A fresh salad balances the rich flavors. Consider mashed potatoes for a hearty option. For dips, try marinara or garlic aioli. These enhance the chicken's taste and add variety. To keep chicken juicy, avoid overcooking. The right baking time is crucial. After baking, let the chicken rest for five minutes. This allows the juices to redistribute. Pat the chicken dry before coating. This helps the crust stick better and keeps moisture inside. This post covered a simple way to make Crispy Parmesan Crusted Chicken. You learned about essential ingredients, step-by-step baking, and helpful tips for a perfect dish. Remember, using panko gives that extra crunch, while the right seasoning brings out great flavor. Feel free to explore variations, like trying different chicken cuts or adding spices. Properly store leftovers and reheat them to maintain crispiness. Enjoy your cooking and impress everyone with this tasty meal!

Crispy Parmesan Crusted Chicken Tasty Dinner Delight

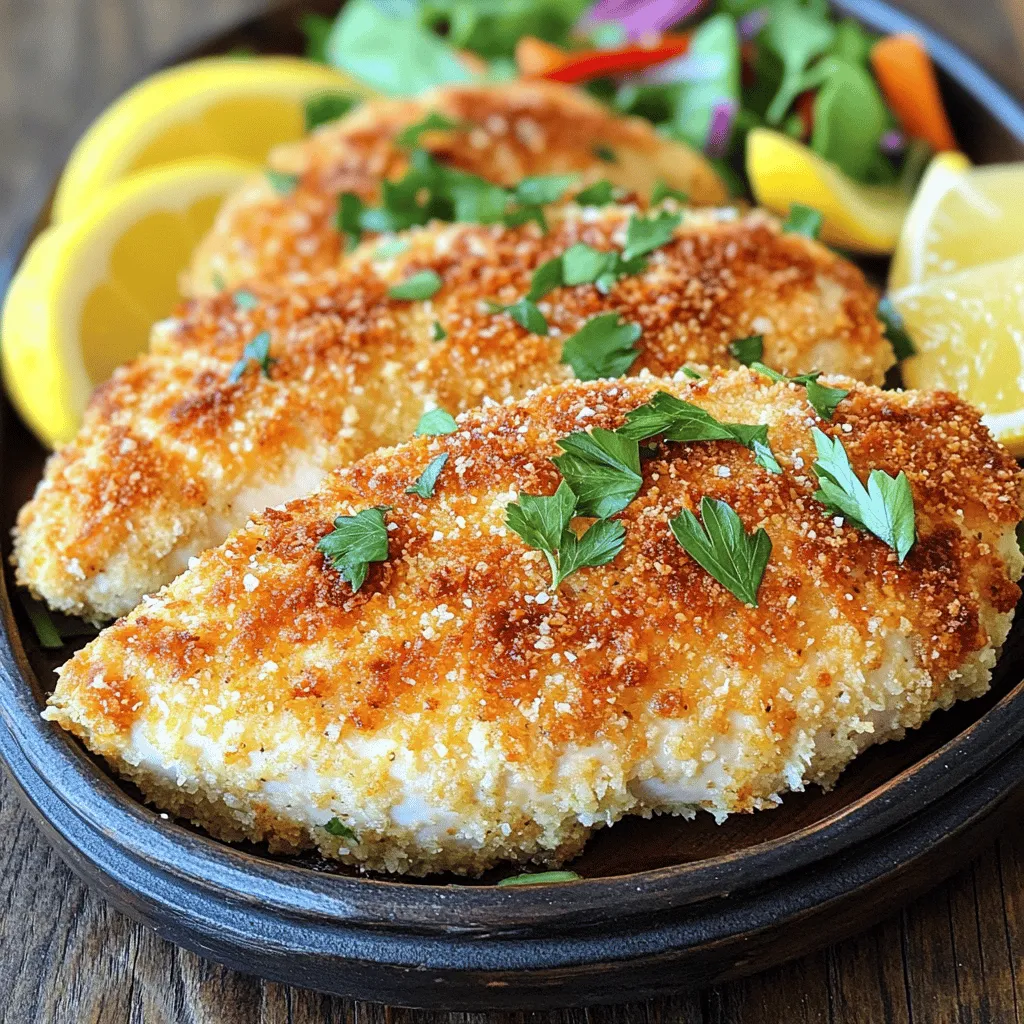
If you’re craving a dinner that’s both crispy and flavorful, look no further! Crispy Parmesan Crusted Chicken is your answer.

Older posts
Newer posts
← Previous Page1 … Page29 Page30 Page31 … Page86 Next →

dsad

© 2025 So Yum Recipes • Built with GeneratePress

Our Policies

  • Copyright Policy
  • Cookie Policy
  • GDPR Policy
  • Privacy Policy
  • Disclaimer
  • Terms Of Use

More Information

  • Home
  • About
  • Contact
  • Appetizers
  • Dessert
  • Dinner
  • Drinks
©2025, So Yum Recipes About Back To Top