Skip to content
DisclaimerTerms Of UseGDPR PolicyCookie Policy

So Yum Recipes

  • Home
  • Drinks
  • Appetizers
  • Dinner
  • Dessert
  • About
  • Contact
  • Privacy Policy
DisclaimerTerms Of UseGDPR PolicyCookie Policy

Chloe

- Sweet potatoes and beans You need 4 medium sweet potatoes and 1 cup of black beans. The sweet potatoes are the star of the dish. They add natural sweetness and a creamy texture. The black beans give you healthy protein and fiber. - Spices and seasonings Use 1 teaspoon of cumin, 1 teaspoon of smoked paprika, and 1/2 teaspoon of garlic powder. These spices bring warmth and depth to your filling. Salt and pepper will enhance the flavors further. - Toppings and garnishes For toppings, gather 1 cup of shredded cheese, 1 diced avocado, and 1/4 cup of fresh cilantro. You can also use lime wedges and Greek yogurt or sour cream for extra creaminess. These toppings add freshness and contrast to the dish. The full recipe will guide you through each step to make the best stuffed sweet potatoes. 1. Preheat the oven and prepare sweet potatoes First, set your oven to 425°F (220°C). While it heats, wash the sweet potatoes well. Use a fork to pierce them several times. This helps steam escape while baking. Place them on a baking sheet lined with parchment paper. 2. Prepare filling ingredients on the stovetop While the sweet potatoes bake, grab a skillet and heat it on medium. Add 1 cup of black beans, 1 cup of corn, and 1 diced red bell pepper. Season this mixture with 1 teaspoon of cumin, 1 teaspoon of smoked paprika, ½ teaspoon of garlic powder, and a pinch of salt and pepper. Cook it for about 5-7 minutes. You want the bell pepper to be tender and everything heated through. 1. Scoop and mix the sweet potato flesh When the sweet potatoes are soft, take them out of the oven. Let them cool for a minute. Cut each sweet potato in half lengthwise. Gently scoop out some flesh from the center, leaving a bit around the edges. 2. Fill the sweet potato skins In a bowl, mix the scooped sweet potato flesh with the black bean mixture and half of the shredded cheese. Stir until well combined. Spoon this filling back into the sweet potato skins. Top them with the rest of the cheese. 1. Bake until cheese is melted Put the stuffed sweet potatoes back in the oven. Bake them for an extra 10 minutes. You want the cheese to melt and bubble. 2. Serve and garnish Take them out of the oven. Top with diced avocado, fresh cilantro, and a squeeze of lime juice. Serve hot with lime wedges and a dollop of Greek yogurt or sour cream if you like. For the full recipe, check the details above. Enjoy your delicious stuffed sweet potatoes! How to ensure sweet potatoes are perfectly baked? To bake sweet potatoes well, start with medium-sized ones. They should be firm and have smooth skin. Wash them and pierce each potato with a fork. This helps steam escape. Bake at 425°F (220°C) for 40 to 45 minutes. They are done when soft and easily pierced with a fork. Best practices for preparing the filling: For the filling, cook the corn, black beans, and bell pepper in a skillet. Heat the pan over medium heat. Add a little oil if needed. Stir in spices like cumin and smoked paprika. This adds great flavor. Cook until the bell pepper is tender. Mix the filling well and combine it with the sweet potato flesh before stuffing. Serving suggestions for stuffed sweet potatoes: Serve the stuffed sweet potatoes on a nice plate. You can put them in the center. Add lime wedges on the side. This gives a fresh look and taste. How to garnish for visual appeal: To make your dish pop, top it with diced avocado and fresh cilantro. These bright colors attract the eye. A squeeze of lime juice adds a nice shine. You may also add Greek yogurt or sour cream for creaminess. It all looks and tastes fantastic! {{image_2}} You can easily make stuffed sweet potatoes fit many diets. For a vegetarian option, simply leave out meat. You can load them up with extra beans, cheese, and veggies. This recipe is already vegetarian-friendly with black beans and corn. For vegan stuffed sweet potatoes, swap cheese for a plant-based alternative. Use cashew cream or avocado to add creaminess. If you need a gluten-free version, you’re in luck! Sweet potatoes are naturally gluten-free. Just make sure any toppings or sauces you use are gluten-free too. This way, everyone can enjoy this tasty dish! Stuffed sweet potatoes are great for mixing flavors. You can add cooked chicken or turkey for a protein boost. Shredded rotisserie chicken works well. Just stir it into the filling mix. You can also play with spices and herbs. Try adding fresh herbs like cilantro or parsley. A pinch of chili powder or cumin can add warmth. Experiment with different flavor combinations to find your favorite! For the full recipe, check out the link above. To store leftover stuffed sweet potatoes, let them cool first. Place them in an airtight container. You can keep them in the fridge for up to four days. Make sure to seal them well to keep out moisture. This helps keep flavors fresh and prevents sogginess. You can also freeze stuffed sweet potatoes. To do this, wrap each one tightly in plastic wrap. Then, place them in a freezer-safe bag. They will stay good for up to three months. When you are ready to eat them, take them out of the freezer. For thawing, move the sweet potatoes from the freezer to the fridge for a few hours or overnight. If you’re in a hurry, you can use the microwave. Heat them on a low setting until they are soft. To reheat, place them in an oven preheated to 350°F (175°C) for about 20 minutes. This helps keep the skin crispy while warming the filling. Enjoy your stuffed sweet potatoes again with full flavor! How long do you bake sweet potatoes? You should bake sweet potatoes for 40-45 minutes at 425°F (220°C). They should feel soft when pierced with a fork. This time ensures they cook evenly and develop a sweet flavor. Can I make stuffed sweet potatoes in advance? Yes, you can prepare stuffed sweet potatoes ahead of time. Bake the sweet potatoes and fill them, then store in the fridge. Reheat them in the oven before serving. This saves time on busy days. What are the best toppings for stuffed sweet potatoes? Some great toppings include diced avocado, fresh cilantro, and lime juice. You can also add Greek yogurt or sour cream for creaminess. These toppings enhance the flavor and add a fresh touch. Nutritional benefits of sweet potatoes Sweet potatoes are rich in vitamins A and C. They provide fiber, which aids digestion. They also contain antioxidants that help keep your body healthy. Eating sweet potatoes can support your overall well-being. Caloric breakdown per serving Each serving of stuffed sweet potatoes has around 350-400 calories. This includes the sweet potato, beans, corn, and cheese. They provide a filling meal without excessive calories, making them a great choice for a balanced diet. This post explored how to make delicious stuffed sweet potatoes. We covered the main ingredients, prep steps, and cooking tips. You learned about variations for diets and flavors. I shared storage tips to keep leftovers fresh. Stuffed sweet potatoes are nutritious and fun to customize. They make a great meal for anyone. Try these tips to create your own healthy version. Enjoy making this dish and sharing it with others!

Stuffed Sweet Potatoes Flavorful and Easy Recipe

Are you ready to create a warm and tasty dish that will impress everyone? Stuffed sweet potatoes are not only

To make Creamy Cauliflower Mac and Cheese, you need simple and fresh ingredients. This dish combines pasta and creamy cheese with healthy cauliflower. You can find the full recipe above. - 1 medium cauliflower head, cut into florets - 8 oz elbow macaroni (or gluten-free pasta) - 2 cups milk (dairy or plant-based) - 2 tablespoons butter - 2 tablespoons all-purpose flour (or gluten-free flour) - 1 cup sharp cheddar cheese, grated - 1/2 cup mozzarella cheese, grated - 1 teaspoon garlic powder - 1/2 teaspoon onion powder - Salt and pepper to taste - 1/4 cup breadcrumbs (optional, for topping) - Fresh parsley, chopped (for garnish) These key ingredients create a rich and creamy sauce. The cauliflower adds a nice texture and nutrition. You can change the recipe to fit your tastes. Here are some fun optional ingredients: - Different cheeses like gouda or parmesan for more flavor. - Cooked bacon or ham for a meaty option. - Spinach or broccoli for extra veggies. - Hot sauce for a spicy kick. These options let you personalize your dish. Try mixing in whatever you love! Start by bringing a large pot of salted water to a boil. Add the cauliflower florets. Cook them for about five minutes. You want them to be just tender. Use a slotted spoon to remove the cauliflower from the pot. Set it aside for later. This step makes sure your cauliflower blends well and adds creaminess. In the same pot, add the elbow macaroni. Cook it according to the package directions until it is al dente. This means it should be firm, not soft. Once done, drain the macaroni and set it aside. Keeping it firm helps it hold up in the dish. Take a medium saucepan and place it over medium heat. Add two tablespoons of butter and let it melt. Once melted, stir in two tablespoons of flour. Cook this mixture for about one minute. This creates a roux, which thickens your sauce. Gradually whisk in two cups of milk. Keep stirring until the mixture thickens. This will take about three to five minutes. Remove the pan from heat and stir in one cup of sharp cheddar cheese and half a cup of mozzarella cheese. Mix until they melt and become creamy. Then add one teaspoon of garlic powder, half a teaspoon of onion powder, salt, and pepper to taste. Next, blend the cooked cauliflower until it is smooth. You can use a food processor or an immersion blender for this. Stir this cauliflower puree into your cheese sauce. Finally, combine the cheese sauce and cooked macaroni in a large bowl. Mix until everything is well combined. For a baked version, preheat your oven to 375°F (190°C). Transfer the mac and cheese to a greased baking dish. Top with breadcrumbs if you like. Bake it for about 20 minutes until it is bubbly and golden. If you choose not to bake, enjoy it right away. Let it cool a bit before serving. Garnish with chopped parsley for a nice touch. This creamy cauliflower mac and cheese recipe is both rich and comforting. For the full recipe, check the ingredients list above. To make your mac and cheese extra creamy, blend the cooked cauliflower well. Use a food processor for a smooth puree. This step adds a rich texture without losing flavor. When you mix the cauliflower with the cheese sauce, stir well until combined. If the sauce seems too thick, add a splash of milk. This will help achieve that perfect creamy consistency. Choosing the right cheese makes a big difference. I suggest using sharp cheddar for its strong flavor. Mozzarella adds a nice stretch and mild taste. You can also try Gruyère or fontina for a unique twist. Mixing different cheeses gives depth to the dish. Feel free to experiment with what you have on hand. Just remember, the more cheese, the creamier it gets! Sometimes, things don’t go as planned. If your sauce becomes grainy, it might be from overheating. Always melt cheese on low heat. If it’s too thick, add more milk a little at a time. For a dry dish, mix in some reserved pasta water. This adds moisture and flavor. If you want a crunch, add breadcrumbs on top and bake. This gives a nice contrast to the creamy texture. {{image_2}} You can enjoy creamy cauliflower mac and cheese in two ways: baked or stovetop. The stovetop version is fast and easy. You mix everything in one pot, which saves time. Just combine the cheese sauce with the macaroni and serve. The baked version adds a crispy top. After mixing in the cheese sauce, transfer it to a baking dish. Sprinkle breadcrumbs on top for crunch. Bake it at 375°F (190°C) for about 20 minutes. This gives a nice golden crust and makes it extra special. You can easily make this dish gluten-free. Use gluten-free elbow macaroni instead of regular pasta. For the roux, swap all-purpose flour with gluten-free flour. This keeps the creamy texture without any gluten. You won’t lose taste or creaminess, making it friendly for everyone. You can boost nutrition by adding protein or veggies. Cooked chicken or turkey can make it hearty. Just stir in diced cooked meat when mixing the cheese sauce and macaroni. For veggies, try adding steamed broccoli or peas. These add color and flavor. You can even sneak in some spinach. This way, you get a balanced meal that is still fun and tasty. For the full recipe, check out the Creamy Cauliflower Mac and Cheese details above. To keep your creamy cauliflower mac and cheese fresh, let it cool down first. Use an airtight container. Place the leftovers in the container and cover it tightly. You can store your dish in the fridge for up to three days. Make sure to label your container with the date, so you know when to eat it. When you're ready to enjoy leftovers, reheating is key. The best way to reheat is in the oven. Preheat your oven to 350°F (175°C). Place the mac and cheese in an oven-safe dish. Add a splash of milk to keep it creamy. Cover it with foil and heat for about 15-20 minutes. You can also use the microwave. Put a serving on a microwave-safe plate. Heat for 1-2 minutes, stirring halfway through. If you want to save some for later, freezing works well too. Let the mac and cheese cool completely before freezing. Use a freezer-safe container and leave some space at the top for expansion. It can last up to two months in the freezer. Label it with the date. When you want to eat it, thaw it in the fridge overnight before reheating. This way, it stays tasty and creamy. Keep these tips in mind to enjoy your creamy cauliflower mac and cheese later! You can find the full recipe here: [Full Recipe](#). Yes, you can use frozen cauliflower. It saves time and is easy to find. Just keep in mind that frozen cauliflower might be softer than fresh. Thaw it first, then steam or microwave it until tender. This helps keep the texture nice in the mac and cheese. To make this dish vegan, swap out the dairy products. Use plant-based milk like almond or oat milk. Replace the butter with vegan butter or olive oil. For cheese, use vegan cheese options. You can also add nutritional yeast for a cheesy flavor without the dairy. If you want to skip cheese, use a mix of nutritional yeast and cashews. Soak raw cashews in water, then blend them until smooth. This gives a creamy texture and flavor. You can also try making a sauce with blended cooked potatoes and carrots for a cheesy taste. This blog post covered how to make a creamy mac and cheese dish using cauliflower. We discussed key ingredients, step-by-step instructions, and tips for the best texture. I shared various options to customize your meal and how to store leftovers properly. Remember, you can swap in proteins or veggies to suit your taste. With these tips, you can create a favorite dish that fits your diet. Now, dive into making your unique version of this mac and cheese. Enjoy your cooking adventure!

Creamy Cauliflower Mac and Cheese Rich Comfort Dish

If you’re craving comfort food that feels rich yet healthy, I have the ideal dish for you: Creamy Cauliflower Mac

To make the perfect pumpkin spice overnight oats, you need the right ingredients. Here’s what you’ll need: - 1 cup rolled oats - 1 cup almond milk (or any milk of your choice) - 1/2 cup canned pumpkin puree - 2 tablespoons maple syrup - 1 teaspoon pumpkin pie spice (or a mix of cinnamon, nutmeg, and ginger) - 1 tablespoon chia seeds - 1/2 teaspoon vanilla extract - Pinch of salt - Optional toppings: chopped walnuts, dried cranberries, or a dollop of yogurt These ingredients create a creamy, rich, and flavorful dish. The oats soak up all the yummy flavors while you sleep, making your morning easy and tasty. The pumpkin puree adds a warm color and a nice kick. Maple syrup gives it sweetness without being overpowering. The chia seeds help thicken the oats and add a bit of crunch. Feel free to get creative with your toppings! I love adding chopped walnuts for crunch or dried cranberries for a sweet bite. A dollop of yogurt can bring creaminess to each spoonful. You can find the full recipe [here]. Enjoy every bite! 1. In a medium bowl, combine the rolled oats, chia seeds, and a pinch of salt. Stir them well to mix. 2. In another bowl, whisk together almond milk, canned pumpkin puree, maple syrup, vanilla extract, and pumpkin pie spice until smooth. This mix adds the yummy pumpkin flavor. 3. Pour the wet mixture over the dry ingredients. Stir until all the oats are well coated. 1. Cover the bowl with a lid or plastic wrap. 2. Place it in the fridge overnight or for at least 4 hours. This soaking time lets the oats absorb the liquid and flavors. 1. In the morning, stir the oats. If they seem too thick, add a splash of milk to adjust the consistency. 2. Serve the oats in bowls or jars. Add your favorite toppings like chopped walnuts, dried cranberries, or even a dollop of yogurt. These toppings add crunch and flavor. Follow this easy guide, and you will enjoy a delicious bowl of pumpkin spice overnight oats! For the full recipe, check out the details above. You can easily change the flavors of your pumpkin spice overnight oats. Here are some fun ideas: - Spice blends: Try adding more cinnamon or nutmeg. You can mix in cardamom for a unique twist. - Sweeteners: If you want less sugar, use honey or agave syrup. For a touch of fun, add brown sugar or coconut sugar. - Add-ins: Toss in some chocolate chips or dried fruit for a sweet surprise. To get that creamy texture, adjust the soaking time. If you like thicker oats, soak them longer. Here’s how: - For creaminess: Soak the oats overnight for the best texture. If you are in a hurry, four hours works too. - Too thick?: In the morning, add a splash of milk. Stir until you reach your desired consistency. Serving your oats can be fun and creative. Here are some tasty pairings: - Toppings: I love adding chopped walnuts for crunch or dried cranberries for sweetness. A dollop of yogurt adds creaminess and protein. - Fruits: Fresh banana or apple slices work great on top. They balance the spices and add freshness. - Serve in jars: Presenting in jars looks pretty and is perfect for grab-and-go breakfasts. For a full recipe, check out the ingredients and instructions. Enjoy! {{image_2}} You can make pumpkin spice overnight oats fit many diets. If you're dairy-free, use almond milk, coconut milk, or oat milk. For gluten-free oats, pick certified gluten-free rolled oats. If you want a vegan option, skip honey and use maple syrup instead. All these choices still give you great taste and texture. Adding fruits and nuts can make your oats even better. You might try sliced bananas, berries, or diced apples. Nuts like pecans or almonds add crunch and healthy fats. You can even mix in dried fruits like raisins or cranberries. Each addition brings new flavors and textures to your bowl. As seasons change, so can your oats. In the fall, add apples or pecans for a cozy twist. In spring, you might like fresh berries or a hint of mint. Experimenting with seasonal ingredients keeps breakfast exciting. These small changes can make a big difference in taste. For the full recipe, check out the link provided. To keep your pumpkin spice overnight oats fresh, follow these tips: - Use an airtight container: This helps prevent moisture loss and keeps flavors intact. - Store in the fridge: Always keep your oats in the refrigerator. - Avoid mixing toppings: Add nuts or fruits just before serving to keep them crunchy. You can store pumpkin spice overnight oats in the fridge for up to five days. After that, they may lose flavor and texture. Always check for any signs of spoilage, like odd smells or changes in color. Yes, you can freeze overnight oats! Here’s how: - Use freezer-safe containers: Make sure they are airtight to avoid freezer burn. - Leave space for expansion: Oats will expand when frozen, so don’t fill the containers too full. - Thaw before eating: Move them to the fridge for a few hours or overnight before serving. Add a splash of milk to revive the texture. For the complete recipe, refer to the Full Recipe section. Overnight oats need to soak for at least 4 hours. This soaking time allows the oats to absorb the liquid and soften. I recommend letting them sit overnight, though. This gives flavors time to blend well together. You will wake up to a creamy and flavorful breakfast. Yes, you can make overnight oats in advance. They store well in the refrigerator. I suggest making a few jars at once for easy meal prep. Just divide the mixture into jars or containers. Seal them tightly and keep them in the fridge. They stay fresh for up to 5 days. This makes your mornings much easier! If you need a substitute for almond milk, several options work well. Here are some good alternatives: - Soy milk - Oat milk - Coconut milk - Cashew milk - Cow's milk Feel free to choose any milk you like. Each will give a unique flavor to your oats. This blog post shared a simple recipe for pumpkin spice overnight oats. You can customize it with different flavors and toppings. Remember, the soaking time affects the creaminess. Keep your oats fresh by storing them properly, and they last up to a week in the fridge. Feel free to experiment with seasonal ingredients. Enjoy your delicious, healthy oats for breakfast! They make meal prep easy and satisfying. Get ready to enjoy a tasty morning with this versatile recipe.

Pumpkin Spice Overnight Oats Easy and Delicious Recipe

Craving a cozy fall breakfast? You’ll love these Pumpkin Spice Overnight Oats! This easy, delicious recipe combines creamy oats with

- 4 salmon fillets (about 6 oz each) - 1/4 cup honey - 3 cloves garlic, minced - 2 tablespoons soy sauce (low sodium) - 1 tablespoon Dijon mustard - 1 tablespoon olive oil - 1 teaspoon fresh ginger, grated - Salt and pepper to taste - Chopped green onions and sesame seeds for garnish Salmon is a great source of protein and healthy fats. It helps your heart and brain. Salmon is rich in omega-3 fatty acids. These fats can lower the risk of heart disease. They also improve brain health. Eating salmon can reduce inflammation in the body. Honey adds natural sweetness and antioxidants. It helps to soothe a sore throat. Garlic is packed with vitamins and minerals. It can boost your immune system. Garlic also has heart health benefits. It may lower blood pressure and cholesterol levels. - Non-stick skillet - Whisk - Measuring cups and spoons - Spatula With these basic tools and tasty ingredients, you are ready to create a delicious Honey Garlic Glazed Salmon dish. For the complete cooking steps, refer to the Full Recipe. To make the honey garlic glaze, start by mixing these ingredients in a small bowl: - 1/4 cup honey - 3 cloves garlic, minced - 2 tablespoons soy sauce (low sodium) - 1 tablespoon Dijon mustard - 1 tablespoon olive oil - 1 teaspoon fresh ginger, grated Whisk them together until smooth. This glaze adds great flavor to your salmon. For the perfect consistency, ensure the honey is warm. This helps it blend better with other ingredients. If it is too thick, you can add a teaspoon of water. Before cooking, season the salmon fillets with salt and pepper on both sides. This step enhances the fish's natural taste. Heat a non-stick skillet over medium-high heat. Make sure it's hot before adding the salmon. Place the fillets skin-side down and cook for about 4-5 minutes. The skin helps keep the fish moist. Afterward, flip the fillets carefully using a spatula. Pour the honey garlic glaze over the salmon. Cook for another 3-4 minutes. Baste the salmon with the glaze while it cooks. This step creates a nice caramelized finish. When serving, garnish the salmon with chopped green onions and sesame seeds. This adds color and crunch. For sides, I recommend serving the salmon on a bed of steamed rice or quinoa. You can pair it with sautéed green vegetables, like broccoli or asparagus. Drizzle extra glaze over the top for a beautiful finish. Try this full recipe to impress your family and friends with a tasty meal! To achieve even cooking, use fillets of similar size. This helps them cook at the same rate. Start by heating your non-stick skillet on medium-high. Place the salmon skin-side down first. This will help crisp the skin. Cook for about 4-5 minutes without moving it. Flip carefully with a spatula. Pour the honey garlic glaze over the salmon and cook for an additional 3-4 minutes. The recommended internal temperature for perfectly cooked salmon is 145°F. Use a meat thermometer to check this. One common mistake is overcooking the salmon. This can make it dry and tough. Always check for doneness with a fork. It should flake easily but remain moist. Under-cooking is also a mistake. Salmon should not be raw in the middle. Another tip is to let the salmon rest after cooking. This allows the juices to redistribute, keeping the fish tender. To store leftovers properly, place them in an airtight container. They can last up to three days in the fridge. For longer storage, you can freeze the salmon. Wrap it tightly in plastic wrap, then place it in a freezer bag. When reheating, use the oven or a skillet. This helps keep the salmon's texture. Avoid using the microwave, as it can make it soggy. {{image_2}} You can switch things up by using maple syrup instead of honey. Maple syrup gives a sweet touch and a unique flavor. It works well with salmon. You might also like to add some spice with crushed red pepper flakes. This adds a little heat to the glaze. A small amount goes a long way, so start with just a pinch. You can choose to bake or grill the salmon. Baking is easier and gives a nice, even cook. Grilling adds a smoky flavor and nice grill marks. If you grill, adjust the cooking time based on how thick the salmon is. Thicker fillets may need a bit more time to cook through. Want to brighten up your dish? Add some citrus notes. A squeeze of lemon or lime before serving can enhance the flavor. You can also incorporate herbs like cilantro or parsley. Fresh herbs add a vibrant touch and help balance the sweetness of the glaze. For the best results, choose herbs that you enjoy. For the full recipe, check out the details above to make your Honey Garlic Glazed Salmon shine at dinner! To keep your honey garlic glazed salmon fresh, place it in an airtight container. Make sure to let it cool first. Store it in the fridge for up to three days. If you want to keep it longer, freezing is a great option. To freeze your salmon, wrap each fillet tightly in plastic wrap. Then, place them in a freezer-safe bag. Remove as much air as you can before sealing. This helps prevent freezer burn. You can freeze the salmon for up to three months. When ready to cook, move the salmon to the fridge for a day to thaw. For reheating, use the oven for best results. Preheat it to 350°F (175°C). Place the salmon on a baking sheet and cover it with foil. Heat for about 15 minutes. This keeps the salmon moist and tasty. Avoid using the microwave as it can make the fish soggy. If you do use it, heat in short bursts at low power. Enjoy your meal just like it was freshly cooked! For the best results, cook salmon based on its thickness and method. Here are some guidelines: - Pan-searing: Cook for 4-5 minutes per side on medium-high heat. - Baking: Bake at 400°F for 12-15 minutes. - Grilling: Grill for about 6-8 minutes, flipping halfway through. Always check for doneness. The salmon should flake easily with a fork. You can pair Honey Garlic Glazed Salmon with many tasty sides. Here are a few ideas: - Steamed rice or quinoa for a filling base. - Sautéed green beans or broccoli for a fresh crunch. - A crisp salad with mixed greens and vinaigrette adds brightness. These sides will complement the sweet and savory flavors of the salmon well. Yes, you can prepare the glaze ahead. Here’s how: - Mix the honey, garlic, soy sauce, Dijon mustard, olive oil, and ginger. - Store it in an airtight container in the fridge for up to three days. This saves time on busy nights. Just give it a stir before using. For the full recipe, check out the section above. This blog post covered how to create a tasty honey garlic glazed salmon. We explored ingredients, health benefits, and important kitchen tools. I shared step-by-step instructions and tips to perfect your dish. Remember, achieving the right cooking temperature is vital for tender salmon. You can also experiment with variations like maple syrup for sweetness. Lastly, proper storage and reheating will keep your leftovers fresh. Enjoy making this simple yet delicious meal that delights the taste buds!

Honey Garlic Glazed Salmon Flavorful Meal for Dinner

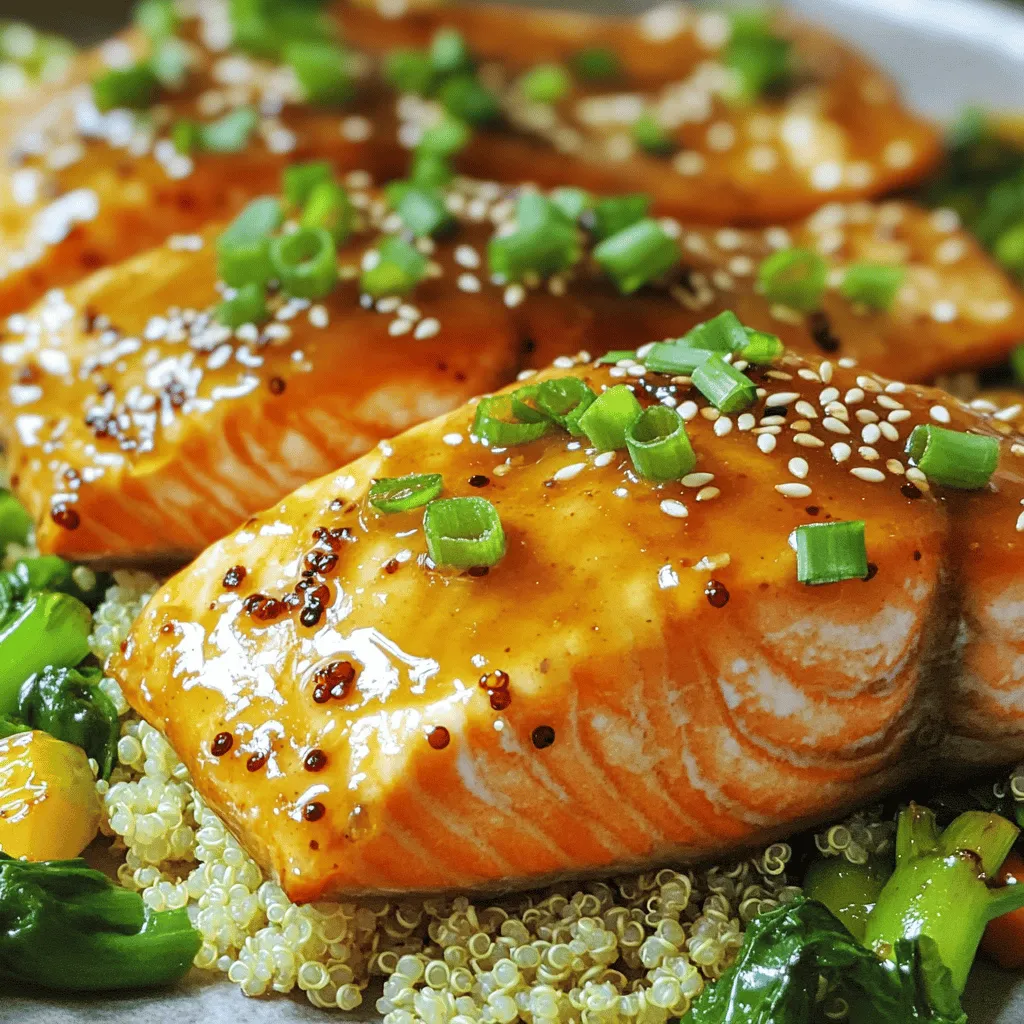
Are you ready to impress at dinner time? Honey Garlic Glazed Salmon is a tasty dish packed with flavor! With

Caprese stuffed avocados are a simple and tasty dish. They mix creamy avocados with fresh, vibrant ingredients. This recipe takes just 10 minutes to make and serves two people. - 2 ripe avocados - 1 cup cherry tomatoes, halved - 1 cup fresh mozzarella balls (bocconcini) - 1/4 cup fresh basil leaves, chopped - 2 tablespoons balsamic glaze - 1 tablespoon olive oil - Salt and pepper to taste You can add extra flavor with optional ingredients. Try adding pine nuts or a sprinkle of chili flakes. If you want a different cheese, use feta or goat cheese. For a vegan option, swap mozzarella with tofu or chickpeas. These changes can make your dish even more special. To start, grab two ripe avocados. Cut each avocado in half lengthwise. Carefully remove the pit with a spoon or knife. Be cautious not to cut yourself. Next, scoop out a little flesh from each half. This step gives you more room for the filling. Set the avocado halves aside on a plate. Now, let’s make the tasty filling. In a mixing bowl, combine one cup of halved cherry tomatoes and one cup of fresh mozzarella balls. Add one-fourth cup of freshly chopped basil leaves. Drizzle one tablespoon of olive oil over this mix. Sprinkle salt and pepper to taste. Gently toss everything together. Make sure all the ingredients blend well. It's time to fill the avocados! Take a spoon and scoop the Caprese mixture into each hollow avocado half. Pack the filling generously. It should look colorful and inviting. To finish, drizzle balsamic glaze over the top. This adds a nice touch and extra flavor. Your Caprese stuffed avocados are now ready to serve! Check the [Full Recipe] for more details. To choose the best avocados, look for ones that feel slightly soft when you press them. The skin should be dark green or black. If it's too firm, it isn't ripe yet. If it feels mushy, it might be overripe. Always check for blemishes or dark spots. These can mean the fruit is bad inside. When mixing your ingredients, cut the cherry tomatoes and mozzarella into small pieces. This helps distribute the flavors evenly. Use a gentle hand when tossing the mixture. You want everything to blend well without crushing the ingredients. Taste as you mix to ensure the seasoning is just right. Adjust salt and pepper to your liking. For a beautiful presentation, place the stuffed avocados on a rustic wooden board. Drizzle some extra balsamic glaze over the top for a shiny finish. Add a few whole basil leaves around the plate for color. You can even sprinkle some flaky sea salt for a nice crunch. These simple touches make your dish look gourmet. For the complete recipe, check out the Full Recipe. {{image_2}} You can easily add protein to your Caprese stuffed avocados. Cooked chicken or shrimp works great. For chicken, use grilled or rotisserie chicken, shredded into small pieces. For shrimp, sauté with a little olive oil and garlic until they turn pink. Mix the protein with the Caprese filling. This adds more flavor and makes the meal heartier. If you want a vegetarian option, try quinoa or chickpeas. Quinoa is a great choice. It adds a nice texture and is healthy. Cook it according to the package. For chickpeas, use canned ones for ease. Rinse and drain them before mixing with tomatoes and mozzarella. Both options boost protein and fiber. To mix things up, try adding pesto or different cheeses. A spoonful of pesto in the filling gives a fresh taste. You can also swap mozzarella for feta or goat cheese. These cheeses bring a tangy flavor that pairs well with avocados. Experiment with flavors to find your favorite combination. For the full recipe, check out the detailed steps above. To store leftover stuffed avocados, wrap them tightly in plastic wrap. This helps to keep air out and prevents browning. Place them in an airtight container for extra protection. Always store them in the fridge. They taste best within 1 to 2 days. I recommend enjoying stuffed avocados fresh. If you need to reheat them, do it gently. Place them in the microwave for about 15 seconds. Check the warmth before adding more time. Avoid overheating, as it can affect the texture and taste. Stored avocados can lose some nutrients over time. Vitamin C and healthy fats are key in fresh avocados. Cherry tomatoes offer vitamins A and C. Mozzarella provides calcium and protein. While stored ingredients may change, they still have good nutritional value when consumed within a few days. Yes, you can prepare the filling ahead of time. Mix the tomatoes, mozzarella, and basil. Store it in a sealed container. However, cut avocados brown quickly. For best taste, fill them just before serving. Caprese stuffed avocados go great with many dishes. Try serving them with grilled chicken or fish. They also pair well with a light salad. A zesty lemon vinaigrette can enhance the flavors. Stuffed avocados last about one day in the fridge. The avocado flesh can brown quickly. If you store them, cover with plastic wrap. This helps keep them fresh a little longer. Enjoy them as soon as possible for the best taste. For the full recipe, check the earlier section! This blog post provided a full recipe for delicious Caprese Stuffed Avocados. We covered key ingredients, tips for preparation, and assembly steps. I shared variations to suit different diets and preferences. You also learned how to store them to keep them fresh. Now, you can easily make this tasty dish at home. Enjoy your cooking and get creative with your ingredients!

Caprese Stuffed Avocados Fresh and Flavorful Delight

Welcome to a fresh twist on a classic treat! Today, I’ll show you how to make Caprese Stuffed Avocados. This

- 1 cup strawberries, hulled and halved - 1 cup orange segments - 1 cup pineapple chunks - 1 cup green grapes, halved - 1 cup blueberries - 1 banana, sliced - Optional: 1 tablespoon honey - Fresh mint leaves for garnish Rainbow Fruit Skewers are all about using bright, fresh fruits. Each fruit brings its own flavor and color, making the skewers fun to eat. You can mix and match fruits, but I love this classic combo. Here’s why each fruit shines: - Strawberries add a sweet and juicy bite. They are a great start. - Oranges bring a zesty taste and bright color. They are full of vitamin C. - Pineapples offer a tropical twist and a sweet tang. They balance the flavors well. - Green grapes are crunchy and refreshing. Halving them makes them easy to eat. - Blueberries add a deep color and burst of sweetness. They are packed with antioxidants. - Bananas are soft and creamy, rounding out the skewers perfectly. You can drizzle honey on top for extra sweetness, but it’s optional. Fresh mint leaves add a nice touch and make it look pretty. You can switch things up with other fruits. Here are some ideas: - Mango for a sweet and tropical flavor. - Kiwi adds a tart kick and vibrant color. - Raspberries for a tangy bite and extra color. To boost nutrition, try adding: - Chia seeds for fiber and omega-3s. - Yogurt for a creamy dip and extra protein. Explore these options to make your Rainbow Fruit Skewers even more exciting! You can find the full recipe at the beginning. Start by washing your fruits under cold water. This step removes dirt and germs. For strawberries, remove the green tops and cut them in half. Peel the banana and slice it into rounds. Cut the pineapple into bite-sized chunks. Halve the grapes and separate the orange segments. To select ripe fruit, look for bright colors. Strawberries should be red, oranges should be firm, and bananas should have a few brown spots. Smell the fruit; ripe fruit often has a sweet scent. Choose fruits that feel heavy for their size, as this often means they are juicy. Grab your wooden or metal skewers. Start by threading a piece of fruit onto the skewer. I like to follow a pattern for a fun look. Begin with a strawberry, then add an orange segment. Next, place a chunk of pineapple, followed by a green grape, a blueberry, and finish with a banana slice. Repeat this pattern, filling each skewer. You can mix the order if you prefer. Just make sure to alternate colors for a vibrant display. This keeps the skewers colorful and exciting. Once the skewers are ready, you can drizzle honey over them for extra sweetness. This step is optional but adds a nice touch. For a fresh aroma, garnish the skewers with mint leaves. They add color and a pop of flavor. When serving, arrange the skewers on a platter. They look amazing at parties or gatherings. You can keep them in the fridge until it’s time to eat. Enjoy your Rainbow Fruit Skewers! For the full recipe, refer back to the ingredients section. When picking fruits, it's best to choose seasonal ones. Seasonal fruits taste better and cost less. For example, strawberries shine in spring, while oranges are best in winter. Visit local markets to find fresh, ripe options. Now, should you go organic? Organic fruits often have fewer chemicals. They can be safer for kids and better for the planet. However, if organic isn't available, don't worry. Just wash your fruits well before using them. This helps remove dirt and pesticides. Serving Rainbow Fruit Skewers can be fun! Use colorful platters to make your skewers pop. A bright, round plate can add flair. You can also arrange your skewers in a jar for a cute look. To make your skewers even prettier, add garnishes. Fresh mint leaves give a nice green touch. You can also sprinkle some edible flowers on top. This adds a fun vibe and makes your treat look fancy. For more tips on making these skewers, check out the Full Recipe. {{image_2}} You can mix up the fruits on your skewers. Think of using mango or kiwi for a fun twist. These fruits add sweet and tart flavors. You can also choose different berries. Strawberries, blueberries, and raspberries work nicely together. This gives you a colorful and tasty mix. When you select exotic fruits, look for ripe ones. Ripe mangoes should feel slightly soft. Kiwi should have a smooth skin. You can also try dragon fruit for its unique look. Mixing fruits gives you a chance to explore new tastes. Creating theme-based skewers can make your treats even more fun. For holidays, use colors that match the season. For example, red and green fruits for Christmas, or bright pastels for Easter. You can also shape fruits for a fun look. Use cookie cutters to create stars or hearts from watermelon or pineapple. Kids love fun shapes and colors. You can let them help with the skewers. This makes it a fun family activity. Get creative with your themes and enjoy the smiles on their faces. For the full recipe, check out the Rainbow Fruit Skewers . To keep your rainbow fruit skewers fresh, always refrigerate them. Place the skewers in a tight container. Cover the top with plastic wrap to keep air out. This helps the fruit stay crisp and juicy. To avoid soggy skewers, do not add honey until serving. If you plan to store them for a while, separate the fruits. This way, each fruit keeps its texture and taste. You can make fruit skewers ahead of time. Prepare the fruits a day before. Store them in the fridge in separate containers. This saves you time on party day. If you have a gathering, assemble the skewers just before serving. This keeps them looking fresh. You can also let friends help with skewering. It makes for a fun activity! For the full recipe of rainbow fruit skewers, check the earlier instructions. Enjoy your colorful and healthy treats! Yes, you can use frozen fruits. Frozen fruits save time and can be just as tasty. They often retain their nutrients. However, keep in mind that they might lose some texture when thawed. Fresh fruits have a crunch and bright flavor. If you want a fun twist, mix both types. This choice adds variety to your skewers. Fruit skewers can last in the fridge for about 2 to 3 days. To keep them fresh, store them in an airtight container. This helps prevent them from drying out. If you notice the fruits getting soft or brown, it’s best to eat them soon. Fresh fruit always tastes best! You can enjoy many sauces with fruit skewers. Creamy yogurt is a great choice. It pairs well with sweet fruits. Chocolate sauce is another popular option. Kids love it, and it adds a fun touch. You might also try honey or a mix of fruit dips. These options make your skewers even more exciting! Absolutely! To make these skewers vegan, skip the honey. Instead, use maple syrup or agave nectar for sweetness. You can also add a drizzle of dairy-free yogurt for creaminess. These swaps keep the flavors bright and fun. You will still enjoy a tasty treat without any animal products. Check out the Full Recipe for more ideas! This blog post shared how to create tasty and colorful fruit skewers. You learned about the best fruits to use and how to cut and thread them. We also discussed making your skewers stand out with fun ideas and ways to store them fresh. In wrapping up, these skewers are fun and easy for everyone. You can mix fruit or pick a theme. Enjoy making these treats at home for gatherings or snacks!

Rainbow Fruit Skewers Colorful and Healthy Treats

Looking for a fun and healthy treat? Rainbow fruit skewers are the perfect choice! Bursting with color and flavor, they

- 1 can (15 oz) chickpeas, drained and rinsed - 2 tablespoons olive oil - 1 tablespoon ground cumin - 1 tablespoon ground coriander - 1 teaspoon smoked paprika - 1 cup cooked quinoa or brown rice - 1 cup cherry tomatoes, halved - 1 cucumber, diced - 1/2 red onion, finely chopped - 1 cup fresh parsley, chopped - 1/2 cup tahini - Juice of 1 lemon - Water as needed for tahini sauce The chickpeas are the star of this dish. They give flavor and protein. I love how easy it is to make them tasty. You simply rinse and drain the chickpeas. Toss them in olive oil and spices. I often use cumin and coriander for warmth. Smoked paprika adds a nice depth. Next, you can prepare your base. I prefer quinoa or brown rice. Both add a nutty flavor. They also give a nice texture. Then, you can add fresh veggies. Cherry tomatoes and cucumbers bring crunch. Red onion adds a bit of zing. Fresh parsley gives a bright touch. Finally, the tahini sauce ties it all together. Just mix tahini with lemon juice. Thin it out with water if needed. This sauce is creamy and rich. It enhances every bite. You can find the full recipe in the article. Enjoy making your Chickpea Shawarma Bowl! - Preheat your oven to 400°F (200°C). - Gather all ingredients for easy access. - In a bowl, mix the rinsed chickpeas with olive oil, cumin, coriander, smoked paprika, turmeric, cayenne pepper, salt, and pepper. Toss well to coat the chickpeas evenly. - Spread the chickpeas on a baking sheet in a single layer. - Roast them in the oven for 20-25 minutes. Stir halfway for even cooking. - While the chickpeas roast, make the tahini sauce. - In a small bowl, whisk tahini, lemon juice, and enough water for a smooth sauce. Add salt to taste. - In bowls, layer cooked quinoa or brown rice as the base. - Top with roasted chickpeas, cherry tomatoes, cucumber, red onion, and parsley. - Drizzle the tahini sauce generously over the top. - Serve with warm, toasted pita bread on the side if you like. For the full recipe, check out the details above. Enjoy your healthy meal! To make your chickpeas shine, focus on spices. You can adjust the cayenne pepper to change the heat. For a milder bowl, use less cayenne. If you like spice, add a bit more. Spice blends can really enhance the flavor. Roasting time is key for texture. Roast the chickpeas for 20 to 25 minutes at 400°F (200°C). Check them halfway through. They should be crispy and golden brown. Keep an eye on them to avoid burning. Getting the tahini sauce right is easy. Start with tahini and lemon juice. Add water slowly until it reaches your desired thickness. You want it smooth and drizzle-able. Adding salt will enhance the taste, so don't skip it. You can create flavor variations for the tahini sauce. Try adding garlic for a punch. A bit of maple syrup can add sweetness. Experiment with herbs like parsley or cilantro for a fresh twist. The way you arrange your bowl matters. Start with the quinoa or rice at the base. Next, add the roasted chickpeas. Then layer on the cherry tomatoes, cucumbers, and onions. This creates a colorful display. Garnishing can take your bowl to the next level. Sprinkle fresh parsley on top for color. A drizzle of tahini sauce adds both flavor and beauty. A few slices of lemon can brighten the dish visually. For the full recipe, check the earlier section! {{image_2}} You can add grilled chicken or tofu for extra protein. Grilled chicken pairs well with the spices. Tofu is a great choice for a vegan option. Marinate tofu for even more flavor. Both options boost the meal's nutrition and taste. Incorporate roasted or sautéed vegetables for more color and flavor. Bell peppers, zucchini, or spinach are great choices. You can also add seasonal vegetables like asparagus in spring or squash in fall. This keeps your meal fresh and exciting. Substituting quinoa for rice makes this dish gluten-free. Quinoa has a nice texture and is full of protein. You can also try gluten-free grains like millet or farro. For low-carb options, use lettuce wraps instead of pita bread. This keeps the meal light and refreshing. You can keep leftover Chickpea Shawarma Bowl in the fridge. Use an airtight container to store it. This helps keep the flavors fresh and prevents spills. Enjoy leftovers within three days for the best taste. When reheating, use a microwave or stovetop. Heat only what you will eat to maintain quality. You can freeze chickpeas and tahini sauce separately. This keeps them fresh for longer. Place the chickpeas in a freezer-safe bag. Squeeze out the air before sealing. For tahini sauce, store it in a jar and leave some space at the top. If you want to freeze assembled bowls, do so without toppings like cucumbers and tomatoes. They are best fresh. Chickpeas can last about three to four days in the fridge. The tahini sauce also lasts about a week. If you freeze them, they can last up to three months. Always check for signs of spoilage. If you see mold or smell something off, it’s best to toss it. Enjoy your Chickpea Shawarma Bowl fresh for the best flavor! A Chickpea Shawarma Bowl is a tasty and healthy meal. It features roasted chickpeas, spices, and fresh veggies. You start with a base of cooked quinoa or brown rice. Then, you add roasted chickpeas seasoned with cumin, coriander, and paprika. Top it off with cherry tomatoes, cucumber, red onion, and parsley. Finally, drizzle a creamy tahini sauce on top for extra flavor. This dish is colorful and packed with nutrition. Yes, you can make parts of this Chickpea Shawarma Bowl ahead of time. Roast the chickpeas and prepare the tahini sauce in advance. Store them in airtight containers in the fridge. The roasted chickpeas stay crispy for days. You can also cook the quinoa or rice ahead of time. Just reheat everything when you're ready to eat. This recipe is perfect for meal prep. You can prepare all the ingredients in bulk. Roast a large batch of chickpeas and cook extra grains. Portion them into containers for easy lunches or dinners. You can mix and match the veggies for variety. This way, you enjoy a fresh meal without spending too much time cooking each day. You can easily adapt this dish for different diets. For a vegan option, this recipe is already vegan-friendly. To make it gluten-free, use quinoa instead of rice. If you have nut allergies, check your tahini for any nut content. You can swap tahini with sunflower seed butter for a nut-free version. Feel free to add or remove veggies to suit your taste and needs. A Chickpea Shawarma Bowl is a simple, tasty dish. We explored the main ingredients, like chickpeas and spices, to create this meal. I shared steps on preparing, cooking, and serving. You can customize it with proteins and veggies that you like. Remember to store leftovers properly so nothing goes to waste. Whether you want a quick meal or to impress guests, this bowl is a winner. Enjoy making it your way!

Chickpea Shawarma Bowl Flavorful and Healthy Meal

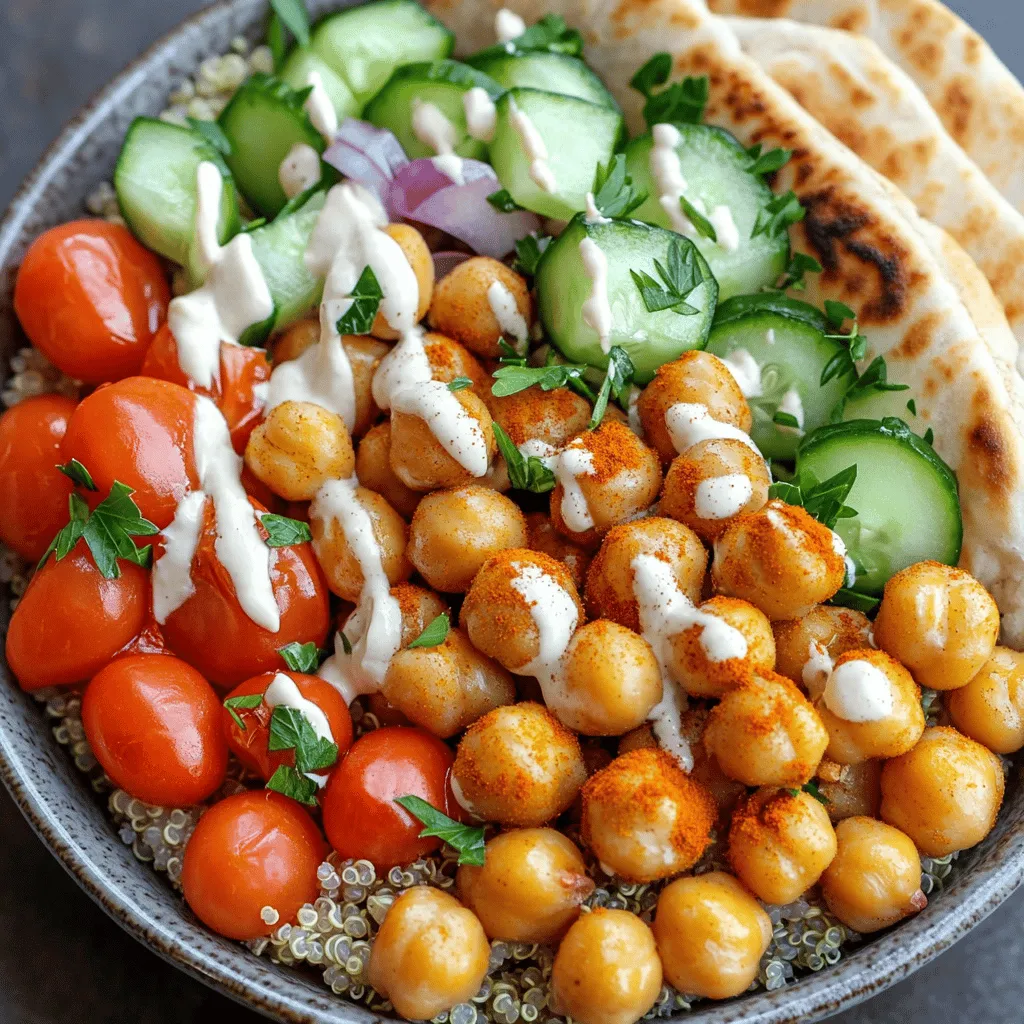
Are you ready to spice up your meal routine with a Chickpea Shawarma Bowl? This dish combines hearty chickpeas, vibrant

Mango chicken salad is a fresh and vibrant dish. It brings together simple, tasty ingredients. This recipe takes only 15 minutes to prep. You can enjoy it as a light meal or a side dish. For this salad, you need: - 2 cups cooked chicken breast, shredded - 1 ripe mango, diced - 1 red bell pepper, diced - 1/2 cucumber, diced - 1/4 cup red onion, finely chopped - 1/4 cup cilantro, chopped - 1/4 cup Greek yogurt - 2 tablespoons lime juice - 1 tablespoon honey - Salt and pepper to taste These ingredients create a colorful mix. The chicken adds protein, while mango brings sweetness. The red bell pepper and cucumber add crunch. The yogurt dressing ties everything together with creaminess. You can customize your salad with these add-ins: - 1/4 teaspoon cumin for a warm flavor - Avocado, for extra creaminess - Chopped nuts, like almonds or cashews, for crunch - Other fruits, like pineapple or strawberries, for added sweetness These options allow you to play with tastes and textures. Don't be afraid to try your own twists! For more details on making this dish, check the full recipe. Start by gathering your ingredients. You need cooked chicken, ripe mango, red bell pepper, cucumber, red onion, and cilantro. Dice the mango, bell pepper, and cucumber into small pieces. Finely chop the red onion and cilantro. Shred the chicken breast if it isn't already. This step takes about 10 minutes and sets you up for a vibrant salad. In a large mixing bowl, combine the shredded chicken, diced mango, bell pepper, cucumber, red onion, and cilantro. Use a spatula to mix gently. Be careful not to mash the mango. You want it to stay chunky for the best texture. This mixture brings bright colors and fresh flavors together. In a small bowl, whisk together Greek yogurt, lime juice, honey, salt, and pepper. If you like, add cumin for an extra kick. The dressing should be smooth and creamy. Pour the dressing over your salad mix. Gently toss the salad until everything is well coated. Taste it and adjust the seasoning if needed. If you can, chill the salad in the fridge for 30 minutes. It helps the flavors meld together beautifully. This process creates a fresh and flavorful mango chicken salad that will impress anyone! For the full recipe, check out the detailed instructions above. To pick the best mango, look for a ripe one. A ripe mango feels slightly soft when you squeeze it. It should have a sweet smell near the stem. The skin color varies, so focus on feel and smell. If you find green mangoes, they may not be ripe enough. Choose ones that are mostly yellow or red. You can also let them ripen at room temperature for a few days. Seasoning is key to making your mango chicken salad pop. Use fresh lime juice for a bright taste. Honey adds a touch of sweetness, balancing the flavors. A pinch of salt and pepper elevates the taste. If you like spice, consider adding cumin. This spice gives depth to the dish. Always taste as you go to adjust the flavors based on your preference. When serving this salad, presentation matters. Use a large bowl for gatherings or individual plates for a personal touch. Garnish with extra cilantro leaves for color. Add slices of fresh mango on the side for a vibrant look. This salad pairs well with tortilla chips or crusty bread. It also makes a great topping for tacos or a filling for wraps. Enjoy your Mango Chicken Salad fresh, and let the flavors shine! {{image_2}} You can add more tropical fruits to make your salad even better. Try diced pineapple for a sweet touch. Kiwi adds a fun color and tang. Papaya gives a creamy texture. Each fruit adds unique flavors to the mix. If you want a different protein, think about using shrimp or grilled tofu. Both options taste great with mango. You can also use canned tuna if you want something quick. These choices keep the salad fresh and exciting. To make this salad vegan, skip the chicken and yogurt. Use chickpeas or black beans instead. They add protein and fiber. For the dressing, mix avocado with lime juice for creaminess. This way, the salad stays tasty and healthy. To keep your mango chicken salad fresh, place it in an airtight container. Make sure to seal it well to prevent air from getting in. Store it in the fridge. It’s best if you eat it within three days. The salad may lose its crunch if stored too long. Freezing mango chicken salad is not ideal. The texture of the mango and chicken changes when frozen. If you must freeze it, leave out the mango and dressing. You can mix them in later. To freeze, use a freezer-safe container and label it with the date. Meal prep makes life easier! Start by cooking extra chicken. Cut your veggies and mango ahead of time. Store them separately in the fridge. When you're ready to eat, mix everything together. This keeps your salad fresh and tasty. Enjoy your mango chicken salad whenever you like with these tips! For the full recipe, check the earlier section. Yes, you can use canned chicken. It saves time and effort. Just drain and shred it. Canned chicken works well in salads. It can still taste good with the right seasoning. However, fresh cooked chicken gives a better texture. Many dressings complement mango chicken salad. A simple vinaigrette works well. You can mix olive oil and vinegar for a light option. A spicy yogurt dressing adds a nice kick. Try a honey mustard dressing for a sweet touch. Each dressing alters the taste in a fun way. Mango chicken salad lasts about three days in the fridge. Store it in an airtight container. Make sure to keep it cool. The flavors blend over time, making it tasty. Just check for freshness before eating. If it looks or smells off, don’t eat it. You now have all the tools to make a tasty mango chicken salad. We reviewed essential ingredients, step-by-step instructions, and helpful tips. Remember, you can customize it with add-ins and variations. Store leftovers properly for later enjoyment. Whether you like it with chicken or prefer plant-based options, the choice is yours. This recipe offers flexibility to fit your taste. Enjoy your mango chicken salad creation and share it with friends!

Mango Chicken Salad Fresh and Flavorful Delight

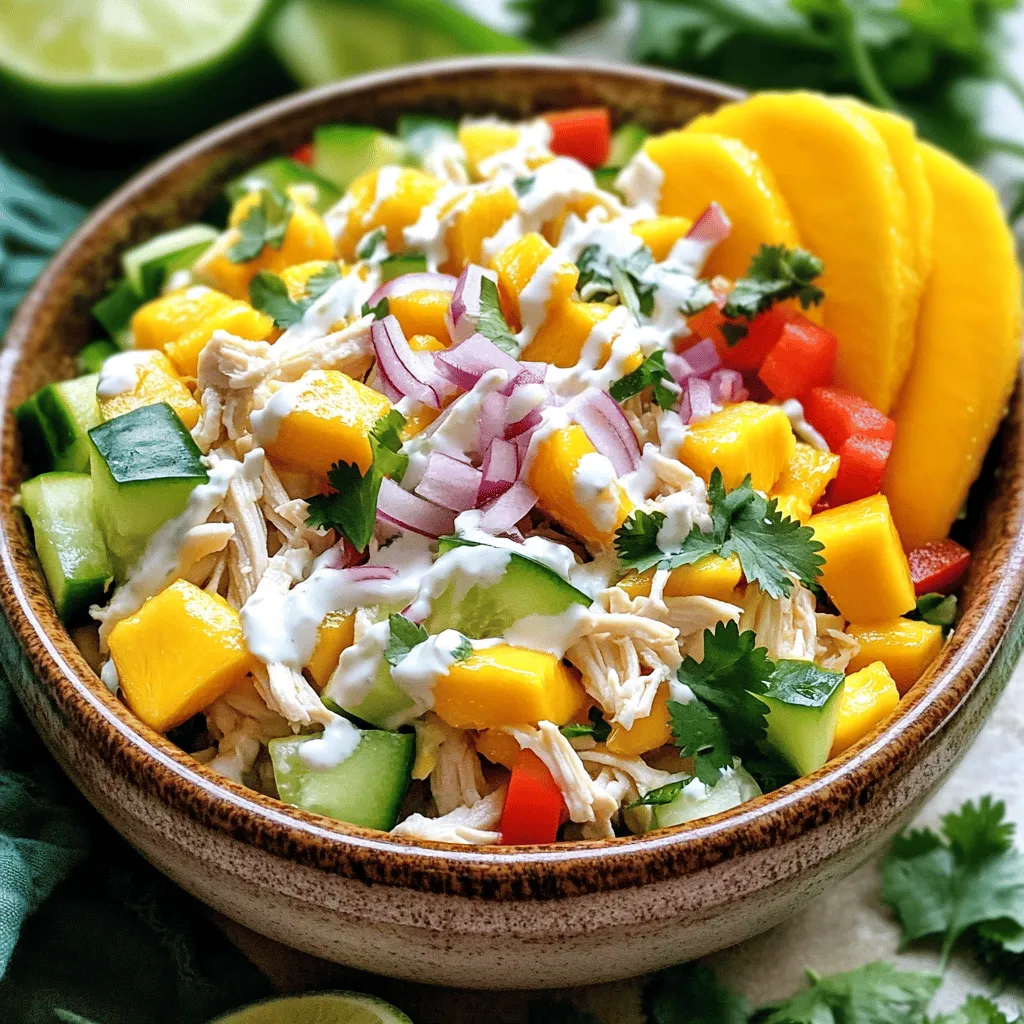
Are you ready for a fresh and tasty meal? My Mango Chicken Salad is just what you need! Packed with

- Whole chicken (4-5 lbs) - Olive oil - Garlic - Lemon The heart of this dish is the whole chicken. A 4-5 pound bird works best. The olive oil adds richness. Garlic gives a strong flavor. Fresh lemons add brightness and zest. - Fresh thyme - Fresh rosemary - Salt - Pepper Fresh herbs make a big difference. Thyme and rosemary bring earthy notes. Use salt and pepper to enhance all flavors. These simple seasonings balance the dish perfectly. - Onion - Potatoes Adding onion and potatoes makes the meal complete. The onion adds sweetness as it roasts. The potatoes soak up all the tasty juices. They turn crispy and golden, adding texture to your plate. For the complete recipe, check out the Full Recipe for more details. First, preheat your oven to 425°F (220°C). This hot temperature helps the chicken cook evenly. While the oven heats, make the marinade. In a small bowl, mix olive oil, minced garlic, lemon juice, thyme, rosemary, salt, and pepper. This mix brings out great flavor. Next, pat the chicken dry with paper towels. This step is key for crispy skin. Place the chicken in a large roasting pan. Now, rub the marinade all over the chicken. Make sure to get it under the skin. This helps the flavors soak in. Once the chicken is coated, it’s time to stuff it. Place quartered onion and lemon slices inside the chicken's cavity. This adds more taste as it cooks. After stuffing, arrange chopped potatoes around the chicken. Drizzle them with olive oil, salt, and pepper. This makes everything tasty. Put the chicken in the preheated oven. Roast it for about 1 hour and 15 minutes. Check that the internal temperature reaches 165°F (74°C). The skin should be golden brown and crispy. After roasting, let the chicken rest for 10-15 minutes. This helps the juices settle. Finally, serve it on a platter, with roasted potatoes beside it. For a nice touch, add fresh parsley for color. For the full recipe, check the details above. To make the chicken extra tasty, you want the marinade under the skin. Start by gently lifting the skin with your fingers. Be careful not to tear it. Use a spoon or your hand to spread the marinade underneath. This helps the flavors soak in as it cooks. The skin keeps the meat juicy while adding a nice crunch. For perfect browning and crispy skin, make sure your oven is hot. Preheat it to 425°F (220°C) before putting the chicken in. Also, pat the chicken dry with paper towels. This removes moisture and helps it brown better. If you want even crispier skin, baste the chicken with its juices halfway through cooking. This adds flavor and keeps it moist. When it's time to serve, presentation matters. Use a large platter for the chicken. Arrange the crispy potatoes around it. For a pop of color, add lemon wedges and fresh herbs on top. This not only looks great but also makes your meal feel special. Serve it with a side salad for a complete dish. Check out the Full Recipe for more tips on making this meal shine! {{image_2}} You can spice up your Lemon Garlic Roasted Chicken by using different herbs. Try basil or oregano instead of thyme. These herbs can give your chicken a fresh twist. Parsley works well too, adding a nice green touch. Mix and match your favorite herbs for a unique flavor. Adding vegetables to the roasting pan can enhance your dish. Carrots and bell peppers make great options. They soak up the chicken's juices and add sweetness. You can also use zucchini or asparagus for a fresh vibe. Just chop them into similar sizes so they cook evenly with the chicken. If you want a change, try cooking your chicken in a slow cooker or on the grill. The slow cooker keeps the meat juicy and tender. Just add your marinade and veggies, then let it cook. Grilling adds a smoky flavor and crispy skin. You’ll want to keep an eye on it to avoid drying out the meat. Each method offers a new way to enjoy this tasty dish. For the full recipe, check out the details above. To store leftover Lemon Garlic Roasted Chicken, first let it cool. Place the chicken in an airtight container. Make sure to cover it tightly. You can keep it in the fridge for up to four days. If you have leftover potatoes, store them in a separate container. This keeps them fresh and tasty. Freezing roasted chicken is simple. Wrap the cooled chicken well in plastic wrap. Then, place it in a freezer bag. Remove as much air as you can. This helps avoid freezer burn. You can freeze it for up to three months. For best results, cut the chicken into pieces before freezing. This makes it easier to defrost later. When you’re ready to enjoy your chicken again, reheating is key. The best way is to use an oven. Preheat the oven to 350°F (175°C). Place the chicken in a baking dish and cover it with foil. This helps keep it moist. Heat for about 20 to 25 minutes. If you want crispy skin, remove the foil for the last five minutes. Enjoy your flavorful meal once more! For detailed steps, check the Full Recipe. To ensure your chicken is cooked, check the internal temperature. Use a meat thermometer and aim for 165°F (74°C). This is the safe temperature for chicken. Look for a few visual signs too. The skin should be golden brown and crispy. If the juices run clear when you cut into the chicken, it's done. If they are pink, it needs more time. Yes, you can use chicken pieces! Adjust the cooking time to about 30 to 45 minutes. Chicken breasts cook faster than thighs or legs. Use the same marinade for flavor. Make sure to check the internal temperature of each piece. The same 165°F (74°C) rule applies here. Lemon Garlic Roasted Chicken goes well with many sides. Here are some great options: - Roasted vegetables like carrots and Brussels sprouts - A fresh green salad with a light vinaigrette - Creamy mashed potatoes or garlic mashed potatoes - Quinoa or rice pilaf for a healthy touch These sides enhance the meal and bring out the flavors of the chicken. You can find the full recipe to create this delicious dish! This blog post outlined how to make a delicious Lemon Garlic Roasted Chicken. We covered the main ingredients, like chicken, olive oil, and herbs. I shared step-by-step instructions, tips for better flavor, and ways to store leftovers. You can also explore variations and adjustments to suit your taste. Cooking can be fun and rewarding. With practice, you'll master this dish and impress your family and friends. Enjoy your cooking journey!

Lemon Garlic Roasted Chicken Simple Flavorful Dish

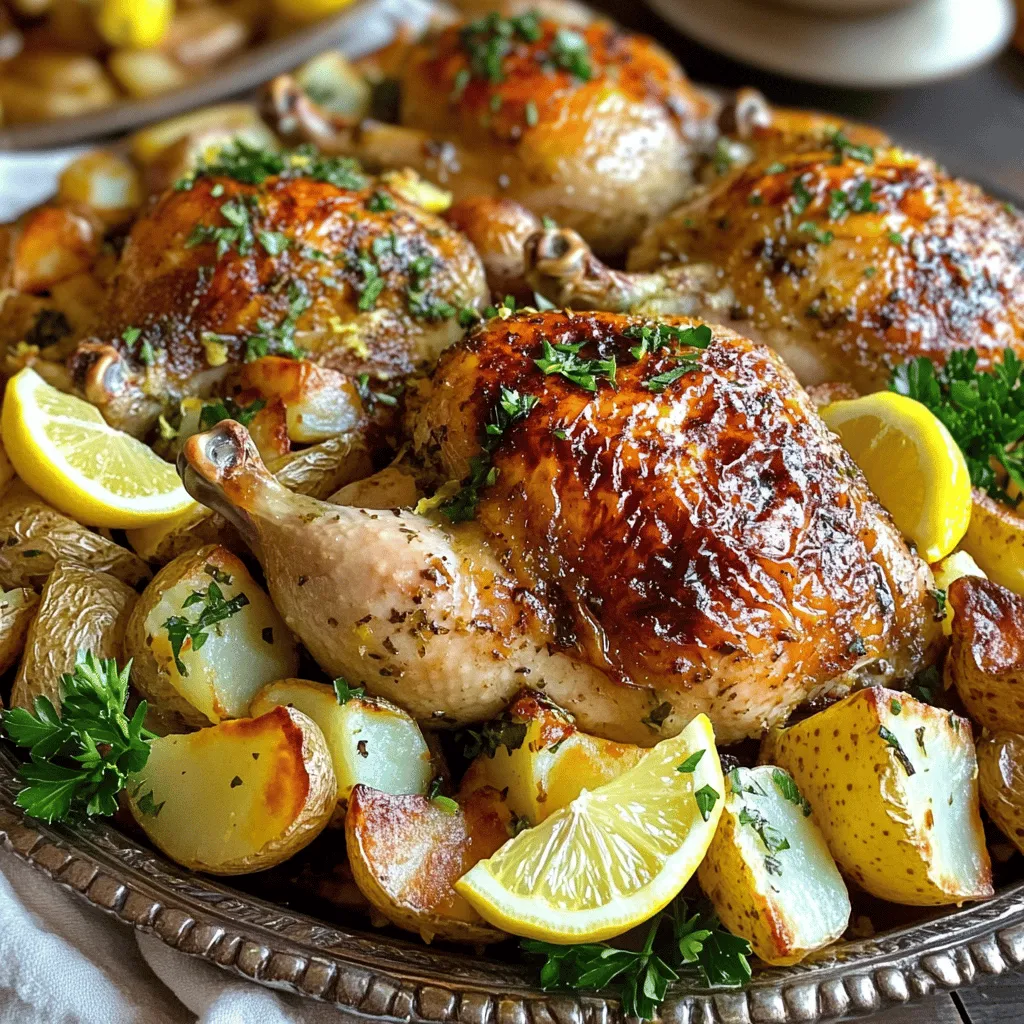
Looking for a simple, flavorful dish that impresses? Try my Lemon Garlic Roasted Chicken! This recipe combines juicy chicken with

- Flatbreads (store-bought or homemade) - Shredded cooked chicken breast - BBQ sauce selection - Shredded mozzarella cheese - Red onion slices - Corn kernels - Fresh cilantro for garnish - Olive oil - Salt and pepper For this BBQ Chicken Flatbread, you need a few simple ingredients. Start with flatbreads. You can buy them or make your own. I love homemade flatbreads for their fresh taste. Next, you need shredded cooked chicken breast. Use leftover chicken or a rotisserie chicken for quick prep. Choose your favorite BBQ sauce. The flavor of the sauce makes a big difference. You can find many brands, so pick one you love. Mozzarella cheese adds creaminess. Shredding it yourself gives you better meltability. Red onion adds a nice crunch and flavor. Slice it thin so it cooks well. Corn kernels bring sweetness. You can use fresh corn or canned corn, depending on what's available. Fresh cilantro is a must for garnish. It adds color and freshness. A drizzle of olive oil helps the flatbreads crisp up in the oven. Finally, don't forget salt and pepper for seasoning. All these ingredients come together to create a tasty meal. Check the [Full Recipe] for more details. - Preheating the oven Start by preheating your oven to 400°F (200°C). This ensures even cooking and a perfect crust. - Mixing chicken with BBQ sauce In a bowl, combine 1 cup of shredded chicken with 1/2 cup of your favorite BBQ sauce. Stir until the chicken is fully coated. - Preparing flatbreads with olive oil Take 2 flatbreads and place them on a baking sheet. Drizzle 1 tablespoon of olive oil on each flatbread. Spread the oil evenly using a brush or the back of a spoon. This step adds flavor and helps the flatbreads crisp up. - Distributing BBQ chicken mixture Evenly distribute the BBQ chicken mixture over the flatbreads. Leave a small border around the edges for a nice crust. - Adding toppings: cheese, onion, corn Sprinkle 1 cup of shredded mozzarella cheese over the chicken. Next, add 1/2 thinly sliced red onion and 1/2 cup of corn kernels on top for extra flavor. - Seasoning the flatbreads Season the flatbreads with salt and pepper to your taste. This small step can make a big difference. - Proper baking time and temperature Place the baking sheet in the preheated oven. Bake the flatbreads for 10-12 minutes. This will melt the cheese and crisp the edges. - Signs that the flatbread is ready Look for the cheese to be melted and bubbly. The edges should be golden brown. This tells you that your flatbreads are ready. - How to slice and present the flatbreads Once out of the oven, let the flatbreads cool slightly. Use a sharp knife to slice them into wedges. Arrange them on a wooden cutting board for a rustic look. - Pairing options (sides or dips) Serve your BBQ chicken flatbread with a small bowl of extra BBQ sauce for dipping. You can also add a fresh salad or crunchy veggies on the side to complete the meal. Enjoy! To make sure your BBQ chicken flatbread cooks evenly, spread the toppings in a thin layer. This allows the heat to reach all parts of the flatbread. If you want extra flavor, mix in some diced jalapeños or smoked paprika with the chicken. These will add a nice kick! For spices, I recommend garlic powder and onion powder. They deepen the taste of the chicken. If you want to change up the recipe, try using ranch dressing instead of BBQ sauce. It gives a creamy twist that many people love! For serving, place the flatbreads on a wooden cutting board. This makes it look rustic and inviting. Add fresh cilantro on top for color. You can also serve a small bowl of BBQ sauce on the side for dipping. This will make your dish even more appealing! {{image_2}} You can change toppings to make your BBQ chicken flatbread unique. Try adding veggies like: - Bell peppers - Mushrooms These add color and flavor. You can also switch up the cheese. Instead of mozzarella, use: - Cheddar - Feta These cheeses give a new taste. Feta adds a salty kick, while cheddar adds richness. If you want to try something new, think about homemade BBQ sauce. Making your own lets you control the flavors. You can mix ingredients like honey, ketchup, and spices. Alternatively, look for unique specialty BBQ sauces. Some may have fruity or spicy notes that can enhance your dish. Flatbreads are versatile. You can choose different types based on your needs. For those who want gluten-free options, look for gluten-free flatbreads at stores. They work well and taste great. If you prefer something healthier, try whole wheat flatbreads. They add extra fiber compared to traditional flatbreads. Each type can change the taste and feel of your meal, so pick what you like best. To keep your BBQ chicken flatbread fresh, store leftovers in an airtight container. It’s best to refrigerate them within two hours of baking. When reheating, place the flatbread in the oven at 350°F (175°C) for about 10 minutes. This method keeps the crust crispy and warm. Avoid using the microwave, as it can make the flatbread soggy. If you want to meal prep, freezing is a great option. Wrap each flatbread tightly in plastic wrap, then place it in a freezer bag. You can freeze flatbreads for up to three months. When you’re ready to eat, thaw them in the fridge overnight. Reheat in the oven at 350°F (175°C) for 10-12 minutes until heated through. The ingredients in your BBQ chicken flatbread have different shelf lives. Cooked chicken lasts about 3-4 days in the fridge. The flatbreads can stay fresh for a week. BBQ sauce can last for months if stored properly. Look out for signs of spoilage, like a bad smell or mold on any ingredient. Always trust your senses when it comes to food safety. How do I make homemade flatbread? To make homemade flatbread, you need flour, water, salt, and a little oil. Mix these ingredients to form a dough. Knead it until smooth. Then, roll the dough into flat circles. Cook them in a hot skillet for a few minutes on each side until they puff up. Can I use raw chicken for this recipe? No, using raw chicken is not safe. Always cook your chicken first before adding it to the flatbread. Cooked chicken keeps the dish safe and tasty. What sauces pair well with BBQ chicken flatbread? Besides BBQ sauce, try ranch dressing or honey mustard. These sauces offer great flavor and balance the BBQ chicken. Hot sauce can also add a fun kick! How many calories are in BBQ chicken flatbread? Each serving of BBQ chicken flatbread has around 300 to 400 calories. This depends on the toppings and portion size you choose. Are there healthy alternatives for this recipe? Yes! Use whole wheat flatbreads for more fiber. You can also add more veggies like peppers and spinach to boost nutrition. Swap regular cheese for a low-fat option too. Can this recipe be made vegan? Yes, make it vegan by using plant-based chicken. Replace cheese with vegan cheese or skip it altogether. Use a vegan BBQ sauce to keep it tasty. How can I make this dish spicier? Add sliced jalapeños or a sprinkle of red pepper flakes. You can also mix some hot sauce into the BBQ sauce for extra heat. Adjust the spice to your liking! BBQ chicken flatbreads are simple to make and delicious. We covered the key ingredients, step-by-step prep, and how to serve them. I shared tips to enhance flavor and variations to customize your dish. Remember, these flatbreads can suit any taste or dietary need. Enjoy the process and feel free to experiment with toppings. Your creativity will lead to tasty results every time. Dive in and share your unique creations with others!

BBQ Chicken Flatbread Tasty and Quick Recipe

Looking for a quick and tasty meal that everyone will love? This BBQ Chicken Flatbread recipe is perfect for you!

Older posts
Newer posts
← Previous Page1 … Page25 Page26 Page27 … Page86 Next →

dsad

© 2025 So Yum Recipes • Built with GeneratePress

Our Policies

  • Copyright Policy
  • Cookie Policy
  • GDPR Policy
  • Privacy Policy
  • Disclaimer
  • Terms Of Use

More Information

  • Home
  • About
  • Contact
  • Appetizers
  • Dessert
  • Dinner
  • Drinks
©2025, So Yum Recipes About Back To Top