Skip to content
DisclaimerTerms Of UseGDPR PolicyCookie Policy

So Yum Recipes

  • Home
  • Drinks
  • Appetizers
  • Dinner
  • Dessert
  • About
  • Contact
  • Privacy Policy
DisclaimerTerms Of UseGDPR PolicyCookie Policy

Chloe

Key Ingredients for the Crust - 1 cup graham cracker crumbs - 1/4 cup unsweetened coconut flakes - 1/2 cup unsalted butter, melted - 1/3 cup granulated sugar The crust gives your Key Lime Pie Bars a nice crunch. Graham cracker crumbs add sweetness and texture. Adding coconut flakes makes the crust even more tasty. Melted butter helps bind the crumbs together. The sugar sweetens the crust just right. Key Ingredients for the Filling - 2 large eggs - 1 cup sweetened condensed milk - 1/2 cup fresh key lime juice - 1 teaspoon vanilla extract - Zest of 2 key limes The filling is where the magic happens. Eggs help set the filling, making it firm. Sweetened condensed milk adds creaminess and sweetness. Fresh key lime juice gives that tangy flavor. Vanilla extract enhances the taste, while lime zest adds a bright note. Toppings and Garnishes - Whipped cream (for topping) - Thin lime slices (for garnish) Whipped cream adds a light and airy touch. It balances the tartness of the bars. Thin lime slices make for a lovely garnish. They add color and a fresh look to each serving. {{ingredient_image_1}} Start by preheating your oven to 350°F (175°C). This heat is perfect for baking. Next, take an 8x8-inch baking dish and line it with parchment paper. Leave some paper hanging over the sides. This will help you lift the bars out later. In a mixing bowl, combine 1 cup of graham cracker crumbs, 1/4 cup of unsweetened coconut flakes, 1/2 cup of melted unsalted butter, and 1/3 cup of granulated sugar. Mix well until the crumbs are moistened. This mixture should look like wet sand. Press it evenly into the bottom of the baking dish to form a crust. Bake it for 10 minutes or until it turns lightly golden. When done, take it out and let it cool slightly. In another bowl, whisk together 2 large eggs, 1 cup of sweetened condensed milk, 1/2 cup of fresh key lime juice, 1 teaspoon of vanilla extract, and the zest of 2 key limes. Mix until the filling is smooth. This mixture brings the tangy flavor we love in key lime pie. Pour the lime filling over the crust, spreading it evenly. Bake in the oven for an additional 15-20 minutes. The filling should be set but still a little jiggly in the center. When the time is up, remove it from the oven. Allow the bars to cool to room temperature. Then, refrigerate them for at least 2 hours. This helps them firm up and enhances the flavor. Once chilled, lift the bars out of the dish using the parchment paper. Cut them into squares. Serve each bar with a dollop of whipped cream on top. Add a thin slice of lime for a nice garnish. Enjoy your tasty and tangy key lime pie bars! To make the crust just right, use fresh graham cracker crumbs. I like to crush whole crackers for the best texture. Adding unsweetened coconut flakes gives it a nice tropical twist. Mix these with melted butter and sugar until moist. Press this mixture firmly into your baking dish. Bake it until golden, about 10 minutes. This step is key for a crunchy base. One common mistake is not letting the crust cool before adding the filling. Make sure it cools slightly; this keeps the filling from sinking. Another mistake is overbaking the filling. You want it to be set but still a bit jiggly in the center. If you bake it too long, it can turn rubbery. Trust me, your taste buds will thank you for this tip. Use a sturdy mixing bowl and a whisk for combining your ingredients. A baking dish lined with parchment paper makes removal easy. A sharp knife or a pizza cutter helps cut the bars into neat squares. Finally, have a zester handy for that fresh lime zest. These tools help make the process smoother and more enjoyable. Pro Tips Chill Before Serving: For the best texture, allow the bars to chill in the refrigerator for at least 2 hours before serving. This helps the filling firm up and enhances the flavors. Fresh Key Limes: If possible, use fresh key limes for the juice and zest. They provide a brighter, more vibrant flavor than bottled lime juice. Perfectly Cut Bars: To get clean cuts, use a sharp knife dipped in hot water. Wipe the knife clean between cuts for neat edges. Variations: Experiment with different toppings like toasted coconut or a sprinkle of graham cracker crumbs for added texture and flavor. {{image_2}} You can add a fun twist to your key lime pie bars by using coconut. Just stir in 1/4 cup of unsweetened coconut flakes into the crust mix. This gives a rich flavor and a tropical touch. The coconut pairs well with the tangy lime. You can also sprinkle some on top for a great look and extra crunch. If you need a gluten-free treat, swap the graham cracker crumbs for gluten-free crust options. Use crushed almond flour or gluten-free cookies. This way, everyone can enjoy these tasty bars. Just ensure that your sweetened condensed milk is gluten-free as well. Get creative with toppings! You can try fresh berries like blueberries or strawberries for a fruity kick. A sprinkle of toasted coconut adds texture. For extra flavor, drizzle some lime zest over the whipped cream. You can even mix in some chopped nuts or chocolate chips into the filling for a unique twist. Each option adds a new layer of flavor to your key lime pie bars. To keep your Key Lime Pie Bars fresh, place them in an airtight container. You can store them in the fridge for up to a week. Make sure to cover them well before placing them in the container. This keeps them from drying out and helps them stay cool and tasty. If you want to save some bars for later, freezing is a great option. Wrap each bar in plastic wrap tightly. Then, place them in a freezer bag or container. You can freeze them for up to three months. When you are ready to eat, just thaw them in the fridge overnight. For the best taste, eat your Key Lime Pie Bars within a week if stored in the fridge. If frozen, try to consume them within three months for the best flavor. After that, they may lose some of their tangy goodness. Remember, freshness is key to enjoying these delicious treats! Yes, you can use regular limes. Key limes are smaller and sweeter. They give a unique flavor that is hard to match. If you use regular limes, the taste will be sharper. You might want to add a little sugar to balance it. The bars are done when they look set. The center should still wiggle a bit, but the edges should be firm. A good test is to gently shake the pan. If the middle jiggles slightly, it’s time to take them out. You can use coconut milk and sugar as a substitute. Mix one cup of coconut milk with 1/3 cup of sugar. Heat it gently until the sugar dissolves. This mix will give a sweet flavor, though it may change the texture slightly. Absolutely! These bars are great when made ahead of time. You can bake them a day before your event. Just store them in the fridge. Let them chill for at least two hours before serving. To cut the bars cleanly, use a sharp knife. Dip the knife in hot water before each cut. Wipe it dry after each slice. This will help you get neat edges. Enjoy the perfect presentation! This blog post covered everything you need for perfect Key Lime Pie Bars. We explored key ingredients, from the crust to the filling and toppings. I shared step-by-step instructions for making and serving these bars. You also learned tips to avoid mistakes and how to store your treats. Finally, I suggested fun variations to keep it fresh. Enjoy making these bars, and don’t hesitate to experiment. Your tasty treats will impress everyone!

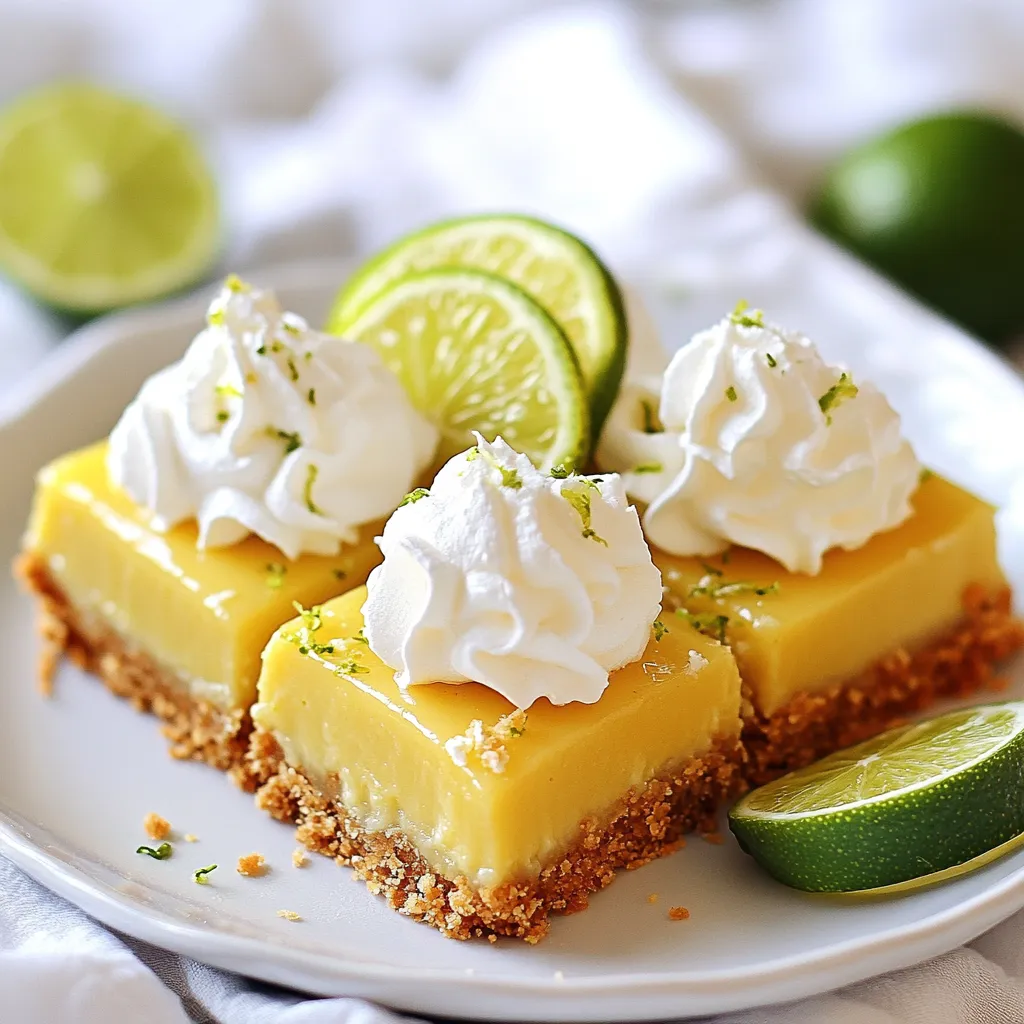
Key Lime Pie Bars Simple and Tangy Dessert Treat

Are you ready to enjoy a treat that’s both simple and zesty? Key Lime Pie Bars combine the tart zing

Making Maple Pecan Granola is easy. Here are the key ingredients you will need: - 3 cups rolled oats - 1 cup pecans, roughly chopped - 1/2 cup almonds, sliced - 1/2 cup pumpkin seeds - 1/2 cup shredded coconut (unsweetened) - 1/2 teaspoon salt - 1 teaspoon cinnamon - 1/2 cup maple syrup - 1/4 cup coconut oil, melted - 1 teaspoon vanilla extract Each ingredient plays a role in the taste and crunch of the granola. The oats serve as the base. Nuts give it a nice crunch and healthy fats. Coconut adds a touch of sweetness. Maple syrup binds everything together and adds a rich flavor. You can customize your granola with optional ingredients. Here are some fun ideas: - 1/2 cup dried cranberries - 1/4 cup chocolate chips - 1/4 cup sunflower seeds - 1/2 teaspoon nutmeg Adding dried cranberries brings a tart bite. Chocolate chips can make it a sweet treat. Sunflower seeds add more crunch and nutrition. Feel free to mix and match! This granola is not just tasty; it is also packed with nutrients. Here’s a quick look at its benefits: - Oats: High in fiber and great for digestion. - Pecans and almonds: Full of healthy fats and protein. - Pumpkin seeds: High in magnesium and zinc. - Coconut: Provides healthy fats and adds flavor. - Maple syrup: A natural sweetener with antioxidants. This granola is a great snack or breakfast option. It fuels your body and keeps you full. So, enjoy every crunchy bite! {{ingredient_image_1}} First, you need to preheat your oven to 350°F (175°C). This step warms the oven and helps the granola cook evenly. Next, grab a large baking sheet and line it with parchment paper. The paper keeps the granola from sticking and makes cleanup easier. In a large mixing bowl, combine the rolled oats, chopped pecans, sliced almonds, pumpkin seeds, shredded coconut, salt, and cinnamon. Stir these dry ingredients well. You want to ensure that the oats and nuts are mixed evenly, so every bite has a great taste. In a separate bowl, whisk together the maple syrup, melted coconut oil, and vanilla extract. Mix until everything is fully combined. This step adds sweetness and moisture to the granola, making it chewy and delicious. Pour the wet mixture over the dry ingredients. Stir well to coat everything evenly. Spread the granola mixture on your prepared baking sheet. Press it down slightly with a spatula. This helps form clusters. Bake it in the oven for 25-30 minutes. Be sure to stir halfway through for even browning. Once it turns golden brown and smells great, take it out. Let it cool completely on the baking sheet. After it cools, add dried cranberries if you want. Store the granola in an airtight container at room temperature for up to two weeks. To make your granola clump together, use these tips. First, mix your dry and wet ingredients well. Make sure every piece of oat gets coated. Second, press down the mixture on the baking sheet. This helps form clusters during baking. Lastly, avoid stirring too much while it cooks. Let it bake without too much fuss. You’ll get nice crunchy chunks that you can enjoy. Adjust the sweetness to fit your taste. If you like it sweeter, add more maple syrup. You can also try honey or agave syrup for a different flavor. For a more nutty taste, increase the pecans or almonds. If you want a hint of spice, add more cinnamon or nutmeg. These small changes can make a big difference in the final taste of your granola. Baking granola takes care and attention. Start by preheating your oven. This helps the granola cook evenly. Use parchment paper for easy cleanup. Spread the mixture evenly on the baking sheet. Bake at 350°F for about 25 to 30 minutes. Stir halfway through to ensure even browning. Watch it closely near the end. It can go from golden to burnt quickly. Once it’s done, let it cool fully. This makes it crunchy and ready for snacking. Pro Tips Use Fresh Ingredients: Always opt for fresh nuts and seeds to enhance the flavor and nutritional value of your granola. Customize the Sweetness: Adjust the amount of maple syrup according to your taste preferences or substitute with honey for a different flavor. Experiment with Spices: Feel free to add other spices like nutmeg or ginger for an extra kick of flavor in your granola. Store Properly: Ensure your granola is completely cooled before storing to maintain its crunchiness. {{image_2}} You can change the nuts and seeds in your granola. Try using walnuts or hazelnuts instead of pecans. These nuts add a different taste and texture. You can also use sunflower seeds or chia seeds for extra crunch and nutrition. Mixing different nuts and seeds keeps it exciting. Adjusting flavors is easy. If you want a sweeter granola, add more maple syrup. A pinch of nutmeg can add warmth. You can also add cocoa powder for a chocolatey twist. If you love spices, try adding cardamom or ginger for a unique flavor. These small changes can make your granola truly your own. Making your granola gluten-free is simple. Use certified gluten-free oats to ensure safety. This way, everyone can enjoy your snack. You can also use gluten-free grains like quinoa or puffed rice. They add a fun crunch and keep your granola light. With these swaps, everyone can share in the tasty goodness. To keep your maple pecan granola fresh, store it in an airtight container. This helps keep moisture out. A glass jar or a plastic container with a good seal works well. Make sure the granola is completely cool before sealing it. If it’s still warm, it can trap steam and make the granola soft. Your homemade granola will stay fresh for about two weeks at room temperature. After that, it may start to lose its crunch. Check for any signs of spoilage, like off smells or mold. If it looks or smells strange, it’s best to toss it out. Freezing granola is a great option if you want to save it for longer. To freeze, place the granola in a freezer-safe bag or container. Make sure to remove as much air as possible. When you are ready to eat it, let it thaw at room temperature. This method helps keep the granola crunchy and tasty for up to three months. Yes, you can. If you want to skip oats, try using puffed rice or quinoa. These options give a nice crunch. They also absorb flavors well. You can mix in nuts and seeds for more texture. Experiment with different grains to find your favorite blend. You can serve granola in many ways. It’s great with yogurt and fresh fruit. You can also add it to smoothie bowls for crunch. For a quick snack, enjoy it straight from the jar. You can even sprinkle it on ice cream for a sweet treat. The options are endless! Homemade granola stays fresh for about two weeks. Keep it in an airtight container at room temperature. If you want to store it longer, consider freezing it. Granola can last up to three months in the freezer. Just remember to let it cool before storing. Enjoy your crunchy snack anytime! To sum up, this blog post covered how to make Maple Pecan Granola. We talked about key ingredients, optional add-ins, and the nutritional benefits. I shared clear steps on how to mix, bake, and cool your granola. You also learned tips for making clusters and adjusting flavor. We explored variations for taste and dietary needs, plus storage tips. Granola is fun to make and versatile. You can enjoy it in many ways. Start your own batch, and enjoy a tasty snack!

Maple Pecan Granola Crunchy and Nutritious Snack

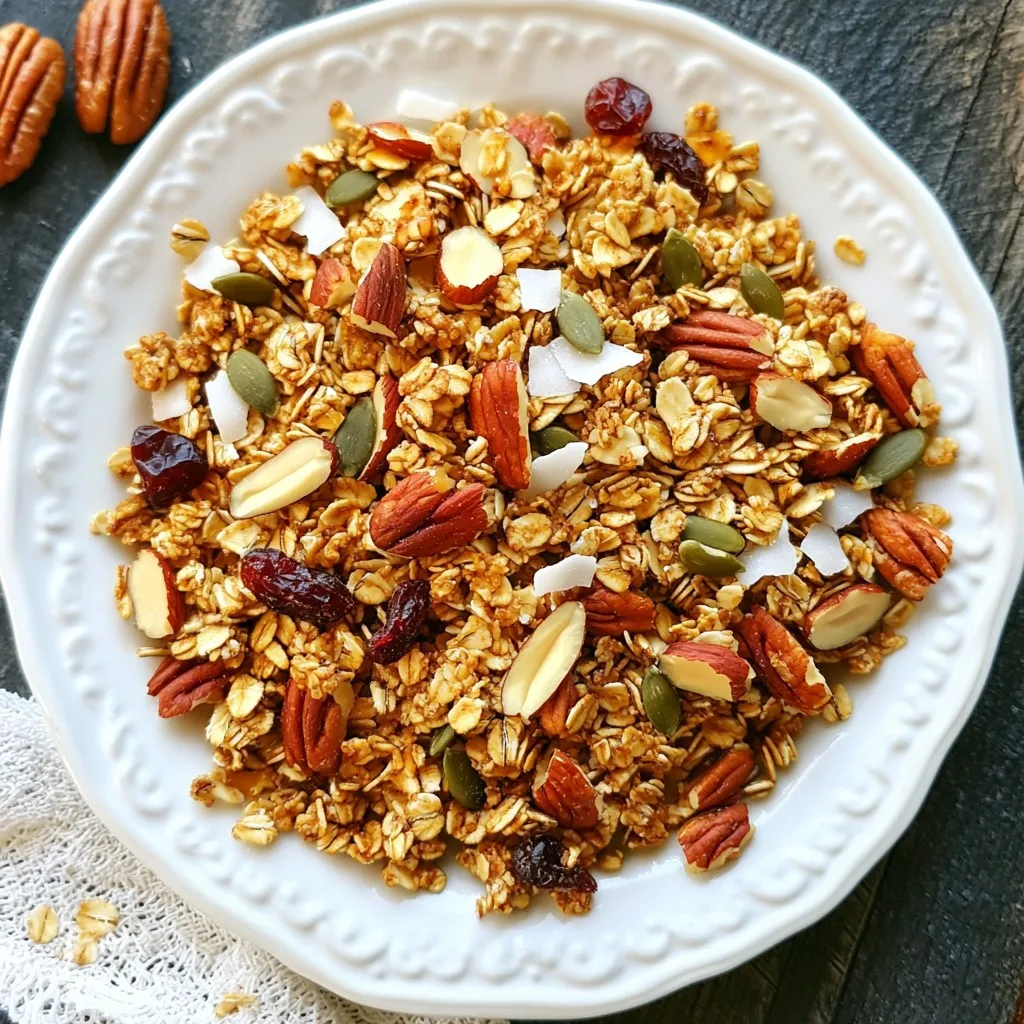
Looking for a tasty and healthy snack? You’ve found it! My Maple Pecan Granola is crunchy, packed with flavor, and

For this dish, I use 1 pound of ground turkey. Ground turkey is lean and cooks quickly. It absorbs flavors well, making it perfect for this meal. You can also use chicken if you prefer. You will need 3 cups of fresh broccoli florets. Fresh broccoli adds color and crunch. It is packed with vitamins and cooks in just a few minutes. You can chop it into bite-sized pieces for easy eating. Here are the key flavor boosters for the recipe: - 2 tablespoons olive oil - 3 cloves garlic, minced - 1 inch fresh ginger, grated - 2 tablespoons soy sauce (or tamari for gluten-free) - 1 tablespoon sesame oil - 1 tablespoon honey or maple syrup - 1 teaspoon red pepper flakes (optional) The olive oil gives a nice base. Garlic and ginger add depth and warmth. Soy sauce brings a salty umami kick. Sesame oil adds a nutty flavor, while honey or maple syrup balances everything out. Red pepper flakes can spice it up if you like heat. {{ingredient_image_1}} Start by heating a large skillet on medium-high heat. Add 2 tablespoons of olive oil. Wait until the oil warms up. This step is important for a nice sear on the turkey. Next, add 1 pound of ground turkey to the skillet. Use a spatula to break it up as it cooks. Stir and cook for about 5 to 7 minutes. The turkey should turn brown and no longer be pink. This step ensures the meat is fully cooked and safe to eat. Once the turkey is cooked, stir in 3 cloves of minced garlic and 1 inch of grated fresh ginger. Cook this mixture for another 1 to 2 minutes. The smell will fill your kitchen and make you hungry. This step adds a burst of flavor to your dish. When picking ground turkey, look for lean options. Aim for 93% lean or higher. This gives rich flavor without too much fat. If you can, buy organic turkey. It often tastes better and is healthier. Always check the color. Fresh turkey should be light pink. Avoid any that looks gray or has a smell. To cook broccoli, start with fresh florets. Wash them well and cut into small pieces. Steam or sauté for bright color and crunch. If you sauté, add them to the skillet with turkey after 3 minutes. Cook until they are bright green and tender. This keeps their nutrients and taste. Avoid overcooking. You want them crisp, not mushy. You can add more fun to your bowls! Try different sauces like teriyaki or peanut sauce. For a kick, use more red pepper flakes. Add nuts for crunch, too. Try cashews or almonds. You can also mix in other veggies, like bell peppers or carrots. This gives more color and taste. Don’t be scared to experiment! Pro Tips Use Fresh Ingredients: Fresh broccoli and ginger will enhance the flavor of the dish significantly compared to frozen or dried alternatives. Adjust Spice Level: Customize the heat by varying the amount of red pepper flakes to suit your taste preference. Meal Prep Friendly: This dish can be made in advance and refrigerated for a quick, healthy meal throughout the week. Garnish for Flavor: Don’t skip the sesame seeds and green onions—they add both flavor and visual appeal to the dish. {{image_2}} To make this dish gluten-free, simply swap regular soy sauce with tamari. Tamari has a similar taste but is safe for those with gluten sensitivities. You can also check labels for other sauces. Always ensure that any added condiments are gluten-free to keep the meal safe. If you prefer a vegetarian dish, replace ground turkey with cooked lentils or chickpeas. These options provide protein and keep the dish hearty. Use the same seasonings and cooking steps. You might also want to add more veggies like bell peppers or mushrooms for extra flavor. To control the heat, adjust the red pepper flakes. For a mild version, skip them entirely. If you love spice, add more flakes or a dash of hot sauce. You can also include fresh chili peppers while cooking for an extra kick. Adjust the flavors to fit your taste! To keep your Ground Turkey Broccoli Bowls fresh, store them in an airtight container. This helps prevent moisture and keeps flavors intact. Place the bowls in the fridge within two hours after cooking. They can stay good for up to four days. Always let them cool slightly before sealing. If you want to freeze your bowls, let them cool completely first. Use freezer-safe containers or bags. Make sure to remove excess air to avoid freezer burn. These bowls can last up to three months in the freezer. When you’re ready to eat, thaw them in the fridge overnight before reheating. To reheat, you can use the microwave or a skillet. For the microwave, heat in 30-second intervals until hot. Stir in between to ensure even heating. If you use a skillet, add a splash of water and cover. Heat over medium until warmed through. Enjoy your meal without losing any taste! Yes, you can use frozen broccoli. Just be sure to thaw it first. Frozen broccoli cooks faster than fresh. Add it to the skillet and stir for about 3 minutes. This helps to keep the broccoli bright and tender. You can prepare the ground turkey mix and cook the broccoli ahead. Store the cooked mix in the fridge. Reheat it when you are ready to eat. You can also cook the rice or quinoa ahead. Keep everything in separate containers. This makes for a quick meal later. Ground turkey broccoli bowls are great on their own. You can serve them over brown rice or quinoa. Add a side of steamed veggies for more color. For extra crunch, sprinkle sesame seeds or green onions on top. If you like spice, serve with chili sauce on the side. This blog post covered ground turkey and fresh broccoli. I shared how to cook them perfectly with simple seasonings. You learned key tips for choosing and preparing ingredients. I also included variations like gluten-free and vegetarian options. Lastly, I offered storage tips to keep your meals fresh. Remember, cooking should be fun. Experiment with flavors and make it your own. Enjoy making healthy dishes that taste great!

Ground Turkey Broccoli Bowls Flavorful and Easy Meal

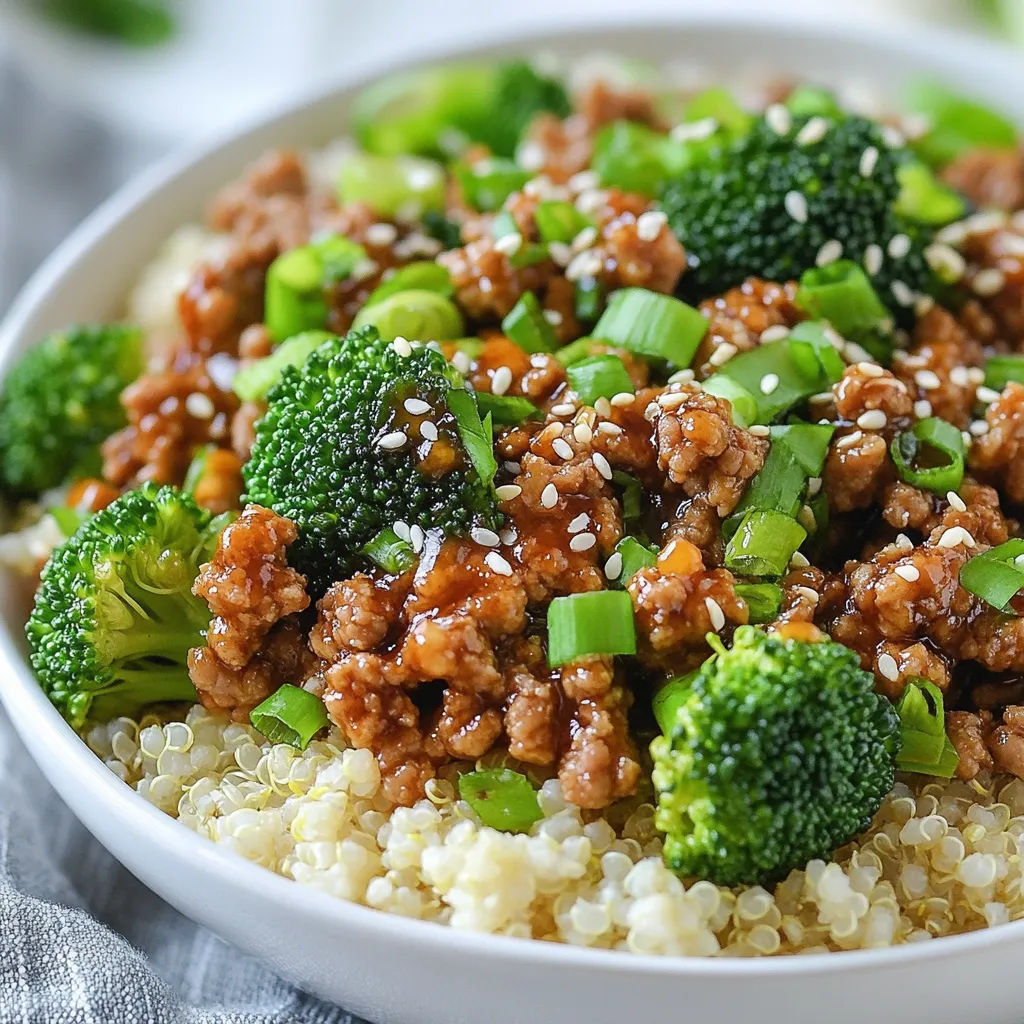
Looking for a tasty, quick meal? Ground Turkey Broccoli Bowls are your answer! Packed with protein and fresh veggies, this

To make this soup, you will need: - 1 lb ground beef - 1/2 cup breadcrumbs - 1/4 cup grated Parmesan cheese - 1 large egg - 2 cloves garlic, minced - 1 tsp Italian seasoning - Salt and pepper to taste - 1 tablespoon olive oil - 1 onion, diced - 1 carrot, diced - 1 celery stalk, diced - 4 cups chicken broth - 1 can (14 oz) diced tomatoes - 1 cup heavy cream - 2 cups fresh spinach These ingredients work together to create a rich and tasty soup. The ground beef forms the meatballs that give the soup its heartiness. The breadcrumbs and cheese help bind the meatballs, making them tender. The fresh veggies like onion, carrot, and celery add a nice crunch and flavor. For flavor, we use: - 1 tsp Italian seasoning - Salt and pepper to taste Italian seasoning adds depth to the meatballs and soup. It brings in herbs like oregano, basil, and thyme. Salt and pepper are essential for balancing the flavors. They help each ingredient shine through in this comforting dish. You can enhance your soup with: - Fresh basil leaves - Additional Parmesan cheese These garnishes not only add color but also boost flavor. Fresh basil gives a bright note that pairs well with the creamy soup. A sprinkle of Parmesan on top adds an extra layer of richness. You can get creative with garnishes to make your soup look even more inviting! {{ingredient_image_1}} To start, gather your ingredients. In a large bowl, mix the ground beef, breadcrumbs, and grated Parmesan cheese. Crack in the egg and add one minced garlic clove. Sprinkle in the Italian seasoning, and season with salt and pepper. Use your hands to mix everything together. Form small meatballs, about one inch in diameter. Place them on a plate as you go. This should make about 20 meatballs. Next, heat the olive oil in a large pot over medium heat. Add the diced onion, carrot, and celery. Cook them for about four to five minutes, stirring often. You want them to soften nicely. After that, add the remaining minced garlic and cook for one more minute. This step builds a great base for your soup. Now, pour in the chicken broth and the diced tomatoes. Bring this mixture to a simmer. Carefully add the meatballs to the pot, making sure they are well submerged. Let them simmer for about 15 minutes. This time allows the meatballs to cook through and flavor the soup. Once the meatballs are done, lower the heat. Gently stir in the heavy cream. This will make your soup rich and creamy. Next, add the fresh spinach and stir until it wilts. This should take about two minutes. Finally, taste your soup. Adjust the seasoning with more salt and pepper if needed. It should be a warm and cozy dish, perfect for sharing. To make juicy meatballs, combine ground beef with care. Mix in breadcrumbs and grated Parmesan. The egg adds moisture. Use your hands to mix gently. Over-mixing makes them tough. Form small balls, about one inch wide. This size helps them cook evenly. Fry them lightly in olive oil for a nice crust. It seals in the juices and gives flavor. If you want a lighter soup, try using half-and-half or whole milk. These options cut down on fat but keep it creamy. You can also use coconut milk for a unique twist. It adds a hint of sweetness. For a real light touch, consider using vegetable broth and skipping cream entirely. This keeps the soup tasty and fresh. Serve the soup hot in deep bowls. Top with fresh basil and more grated Parmesan for extra flavor. Pair it with crusty bread for dipping. A fresh salad on the side also works well. You can enjoy this dish any day. It warms you up and fills you up with joy! Pro Tips Use Fresh Herbs: Fresh basil adds a vibrant flavor to the soup. Consider adding it at the end to preserve its bright taste. Adjust the Creaminess: For a lighter version, substitute half of the heavy cream with low-fat milk. This still keeps the soup creamy while reducing calories. Make Ahead: This soup can be made in advance and stored in the refrigerator for up to three days. Reheat gently before serving. Customize Your Veggies: Feel free to add other vegetables like zucchini or bell peppers for additional flavor and nutrition. {{image_2}} You can easily switch up the meatballs in this soup. Ground turkey or chicken works well. They are leaner options. If you want a vegetarian choice, try using lentils or black beans. You can mash them and mix with breadcrumbs. This gives a nice texture. Each alternative adds a unique flavor to the soup. If you want a dairy-free version, you can replace heavy cream. Use coconut milk or almond milk instead. They add creaminess without dairy. You might want to add a bit of nutritional yeast for a cheesy taste. This keeps the soup rich and full of flavor. Adding vegetables boosts the soup's nutrition. You can toss in diced zucchini, bell peppers, or green beans. These will cook nicely in the broth. For more color, try adding sweet corn or peas. They bring a sweet crunch to the dish. Plus, the more veggies, the better! To store leftover soup, let it cool first. Transfer it to an airtight container. You can store it in the fridge for up to three days. Label the container with the date for easy tracking. This helps you remember when you made it. When reheating, pour the soup into a pot. Heat it on low to medium heat. Stir often to prevent sticking. If the soup seems thick, add a splash of chicken broth. This keeps the soup creamy and tasty. Always check for seasoning before serving. If you want to freeze the soup, use freezer-safe containers. Leave some space at the top for expansion. It can last for up to three months in the freezer. To thaw, place it in the fridge overnight. Reheat it on the stove for the best flavor. Yes, you can make this soup ahead of time. The flavors blend well when it sits. Store it in the fridge for up to three days. Just reheat gently on the stove. If you want to freeze it, do so without the spinach. Add fresh spinach when you reheat. If you need a substitute, try half-and-half or whole milk. You can also use coconut cream for a dairy-free option. Another choice is to mix milk with a little butter. This keeps the soup creamy without the extra fat. Absolutely! To make this soup in a slow cooker, first brown the meatballs in a pan. Then, add the meatballs, vegetables, broth, and tomatoes to the slow cooker. Cook on low for 6-8 hours or high for 3-4 hours. Stir in the cream and spinach before serving. - How to freeze meatballs for later use To freeze meatballs, cook them first and let them cool. Place them in a single layer on a baking sheet. Freeze until solid, then transfer to a freezer bag. They can last for up to three months. Just thaw and add them to your soup when ready! You learned how to make creamy Italian meatball soup from start to finish. We explored key ingredients, cooking steps, and helpful tips for juicy meatballs. You can even try variations to suit your taste. Don’t forget the best ways to store leftovers. This soup warms the heart and satisfies any craving. Enjoy making this dish with loved ones. It's sure to be a hit at your table!

Creamy Italian Meatball Soup Tasty and Hearty Dish

Are you ready to indulge in a bowl of comfort? This Creamy Italian Meatball Soup is not only tasty but

- 3-4 pounds beef chuck roast - 2 tablespoons olive oil - 1 large onion, chopped - 3 cloves garlic, minced - 2 carrots, diced - 2 celery stalks, diced - 1 can (28 ounces) diced tomatoes - 2 cups beef broth - 2 tablespoons tomato paste - 1 tablespoon dried oregano - 1 tablespoon dried rosemary - 1 teaspoon salt - ½ teaspoon black pepper - 2 bay leaves - Fresh basil for garnish For this Tuscan slow cooked beef roast, you need a few key ingredients. First, the beef chuck roast is perfect for slow cooking. It becomes tender and flavorful as it cooks. Olive oil helps to sear the roast, locking in juices. Next, you want fresh vegetables for depth. An onion, garlic, carrots, and celery bring great flavor. The diced tomatoes and beef broth create a rich sauce. Tomato paste adds a nice touch of sweetness and thickness. Seasonings are crucial. Dried oregano and rosemary give that classic Tuscan taste. Salt and pepper enhance all the flavors. Finally, bay leaves add a subtle aroma. Make sure to garnish with fresh basil before serving. It adds a nice pop of color and freshness. Enjoy cooking this delightful meal! {{ingredient_image_1}} First, grab a large skillet. Pour in two tablespoons of olive oil and heat it over medium-high heat. Season your beef chuck roast with salt and black pepper. Once the oil is hot, add the roast to the skillet. Sear it for about 4-5 minutes on each side until it turns brown. This step gives the roast flavor. After searing, take it out and set it aside. In the same skillet, add your chopped onion, diced carrots, and diced celery. Cook these veggies for about 5 minutes. You want them to soften a bit. Next, add three minced garlic cloves and cook for one more minute. This will make your kitchen smell amazing. Now, grab your slow cooker. Start by adding the sautéed vegetables. Then, pour in the can of diced tomatoes, including all the juices. Add two cups of beef broth and two tablespoons of tomato paste. Sprinkle in a tablespoon each of dried oregano and dried rosemary. Don't forget to toss in two bay leaves. Mix everything well. Next, take your seared beef roast and place it into the slow cooker. Make sure it’s as submerged in the liquid as possible. This helps keep the meat moist. Cover the slow cooker with its lid. Set it to low heat. Let it slow cook for about 8-10 hours. This long cooking time helps the flavors blend well. After the cooking time, the roast should be very tender. You can check this by trying to pull it apart with a fork. It should come apart easily. If it does, it’s ready to eat! Adjusting Seasoning to Taste After cooking the roast, taste it. If it needs more flavor, add salt or pepper. You can also mix in a bit of oregano or rosemary. These herbs lift the dish and make it special. Enhancing with Additional Herbs Try adding fresh herbs before serving. Chopped parsley or thyme can give your dish a fresh twist. You can also use basil for a more vibrant taste. Just sprinkle it on right before serving. Understanding Different Cook Settings Slow cookers can vary. On low, cook the beef for 8 to 10 hours. If you're in a hurry, you can cook it on high for 4 to 6 hours. The low setting makes the beef juicy and tender. Checking for Doneness To check if the roast is done, use a fork. If it pulls apart easily, it’s ready. If it's still tough, let it cook a bit longer. Always check before serving to ensure it’s perfect. Pro Tips Choose the Right Cut: Using a beef chuck roast is ideal for slow cooking, as it becomes tender and flavorful when cooked low and slow. Enhance Flavor with Marinade: For an extra depth of flavor, consider marinating the roast overnight in a mixture of red wine, herbs, and olive oil before cooking. Don't Skip the Searing: Searing the roast before adding it to the slow cooker helps to lock in juices and creates a rich flavor base for the dish. Adjust Seasoning to Taste: After shredding the beef, taste the sauce and adjust the seasoning with salt, pepper, or extra herbs as needed for a perfect balance. {{image_2}} You can change the cut of beef used in this recipe. While I love beef chuck roast, you can use brisket or round roast. Both cuts will still get tender with slow cooking. Each cut has a unique flavor and texture. Try different ones to find your favorite. Adding more vegetables can also enhance your dish. Consider using potatoes, bell peppers, or even mushrooms. These veggies add taste and make the meal heartier. Just chop them up and add them to your slow cooker with the other ingredients. Red wine can elevate the flavor of your Tuscan roast. Just add about a cup of red wine to the slow cooker. It gives a rich taste and pairs well with beef. If you do this, reduce the beef broth by half a cup. For extra heat, consider adding spices like red pepper flakes or crushed black pepper. A little heat can balance the richness of the beef and sauce. Just sprinkle in the spices to your liking. Always taste as you go to ensure you get the flavor just right. - Storing Leftovers: Let the roast cool down. Place it in an airtight container. You can store it in the fridge for up to 3 days. Make sure to keep the sauce with it. This helps keep the meat moist. - Reheating Tips: When you want to eat the leftovers, take the roast out of the fridge. Place it in a pot on low heat. Add a splash of beef broth or water to keep it tasty. Stir often until heated through. You can also use the microwave. Just cover it and heat in short bursts. - How to Properly Freeze: If you have more leftovers, freezing is a great option. Let the beef cool completely. Cut it into smaller portions for easier thawing. Use freezer-safe bags or containers. Remove as much air as possible before sealing. Label them with the date. You can freeze it for up to 3 months. - Thawing and Reheating: To thaw, place the frozen roast in the fridge overnight. If you're in a hurry, you can use cold water. Just seal it in a bag and submerge it in cold water. Once thawed, reheat it using the same tips for refrigeration. Enjoy your tasty meal again! What is the best cut of beef for slow cooking? The best cut for slow cooking is beef chuck roast. This cut has a good amount of fat and connective tissue. It becomes tender and juicy when cooked slowly. Other good options include brisket or round roast. These cuts also work well in a slow cooker. Can I make this recipe in a pressure cooker? Yes, you can use a pressure cooker for this recipe. It will save time and still give you tender beef. Sear the roast as you would in the slow cooker. Then, add all the other ingredients and cook on high pressure for about 60-75 minutes. Make sure to let the pressure release naturally. How do I know when the roast is done? You can tell the roast is done when it is tender and pulls apart with a fork. This usually happens after 8-10 hours in a slow cooker. If using a pressure cooker, check after 60-75 minutes. You can also use a meat thermometer; it should read at least 190°F. What sides pair well with Tuscan Roast? Tuscan roast pairs nicely with many sides. You can serve it with creamy mashed potatoes or polenta. Roasted vegetables also complement the dish well. A simple salad with fresh greens adds a nice crunch. Don’t forget some crusty bread to soak up the juices! In this post, we explored the key ingredients for a perfect Tuscan Roast, along with step-by-step instructions. I showed you how to sear the beef and sauté the vegetables for great flavor. We also talked about tips for perfect seasoning and cooking times. Remember, you can make this dish your own with ingredient swaps or add flavor enhancers. Proper storage ensures your leftovers last long. Cooking a great roast is rewarding and easier than you think. Try it out, and enjoy!

Tuscan Slow Cooked Beef Roast Simple and Tasty Meal

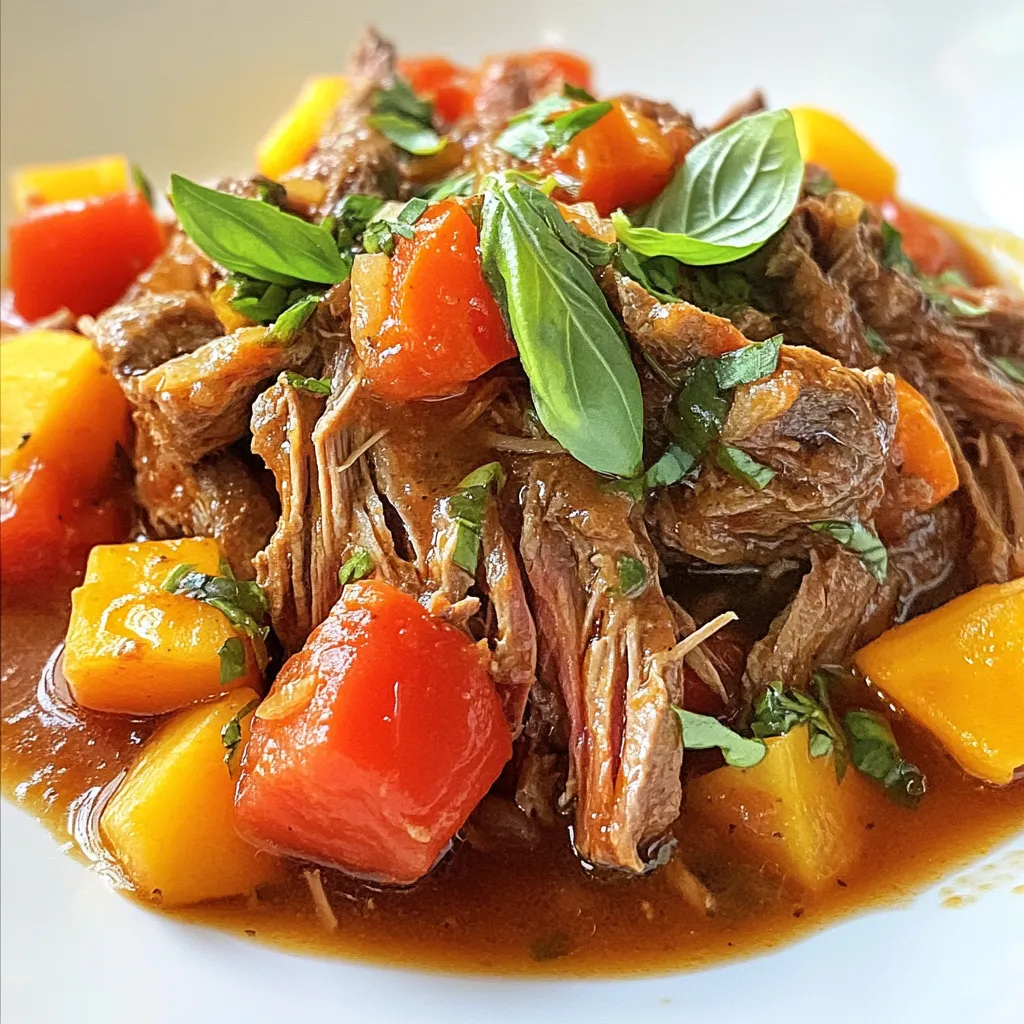
Looking for a simple and tasty meal that warms the heart? You’ve come to the right place! Tuscan Slow Cooked

- 8 oz whole wheat spaghetti - 2 cups fresh spinach, washed and roughly chopped - 2 cups cherry tomatoes, halved - 3 cloves garlic, minced - 1/4 cup olive oil - 1 teaspoon red pepper flakes - 1/2 teaspoon salt - 1/2 teaspoon black pepper - 1/4 cup fresh basil leaves, chopped - Zest of 1 lemon - 1/4 cup Parmesan cheese, grated (optional) To make Spinach Tomato Pasta, you need simple ingredients. Whole wheat spaghetti gives a healthy touch. Fresh spinach adds color and nutrients. Cherry tomatoes bring sweetness and a burst of flavor. Next, we have the aromatics. Garlic adds depth and aroma. Olive oil helps everything blend together. A bit of red pepper flakes gives a kick. Salt and black pepper round out the taste. Garnishes can elevate your dish. Fresh basil adds a fragrant note. Lemon zest brightens flavors and adds freshness. Parmesan cheese is optional but adds richness. You can mix and match these ingredients to suit your taste. Enjoy creating this easy and tasty meal! {{ingredient_image_1}} To start, boil water in a large pot. Add salt to the water for flavor. Once boiling, add 8 ounces of whole wheat spaghetti. Cook it until it is al dente. This usually takes about 8 to 10 minutes. Keep an eye on it so it doesn’t get too soft. After cooking, reserve about 1/2 cup of the pasta water. This water is starchy and helps the sauce stick. Drain the rest of the water and set the spaghetti aside. Next, it’s time to prepare the aromatics. In the same pot, heat 1/4 cup of olive oil over medium heat. Then, add 3 minced garlic cloves. Sauté the garlic for about 1 minute. It should smell great but don’t let it burn. After that, add 2 cups of halved cherry tomatoes. Cook these for about 5 to 7 minutes. You want them to blister and soften. Now, it’s time to combine everything. Add 2 cups of chopped spinach to the pot. Also, sprinkle in 1 teaspoon of red pepper flakes, 1/2 teaspoon of salt, and 1/2 teaspoon of black pepper. Cook this mixture for another 2 to 3 minutes. Stir until the spinach wilts and blends with the garlic and tomatoes. Next, return the drained spaghetti to the pot. Gradually add the reserved pasta water while tossing everything together. This will create a nice sauce. To finish, stir in 1/4 cup of chopped fresh basil and the zest of 1 lemon. If you like, sprinkle some grated Parmesan cheese on top. Enjoy your Spinach Tomato Pasta! Ensuring perfect pasta texture To get that perfect al dente bite, cook the spaghetti in salted water. Follow the package time closely. It’s key to taste the pasta a minute before the time ends. Drain it, but save some pasta water for later. Balancing flavors The key to great taste is layering flavors. Start with the garlic in hot olive oil. Let it sizzle, but don’t burn it. After that, add the tomatoes. Their sweetness will shine as they cook. Finally, add spinach and seasonings to tie everything together. Garnishing for visual appeal Garnishing makes your dish pop! Use fresh basil leaves as a bright touch. A sprinkle of Parmesan cheese adds richness. Drizzle a bit of olive oil for a glossy finish. Serving suggestions Serve the pasta in shallow bowls. This not only looks great but also makes it easier to eat. Pair it with a fresh salad or crusty bread for a complete meal. Overcooking spinach Spinach cooks fast. If you overcook it, it becomes mushy. Add it last and cook just until it wilts. This keeps its vibrant green color and fresh taste. Using insufficient pasta water Pasta water is your friend. It adds starch and helps bind the sauce. If the dish feels dry, slowly add the reserved water until you reach the right consistency. Pro Tips Fresh Spinach: Always use fresh spinach for the best flavor and texture. Wilted spinach can alter the dish's freshness and appeal. Tomato Variety: Using a mix of different cherry tomato varieties can enhance the dish's color and flavor profile. Adjusting Spice: Feel free to adjust the amount of red pepper flakes based on your spice tolerance. Start with less if you prefer a milder dish. Pasta Water: Reserve enough pasta water to achieve the desired sauciness. It contains starch that helps bind the sauce to the pasta. {{image_2}} You can mix up the pasta type to fit your taste. Try penne, fusilli, or gluten-free pasta if you prefer. Different shapes can change the way the sauce sticks. For greens, spinach is great, but you can use kale or arugula. These options add unique flavors and textures. If you like more color, consider bell peppers or zucchini. If you're gluten-free, use gluten-free pasta instead. Many brands make tasty options that work well. Just check the cooking time, as it can differ from regular pasta. For a vegan version, skip the Parmesan cheese. You can use nutritional yeast for a cheesy flavor. Also, be sure to confirm your pasta is egg-free. Want to boost flavor? Adding cooked chicken or shrimp makes this dish heartier. Just sauté the protein before adding the garlic. Herbs and spices can change the taste too. Try oregano, thyme, or even a sprinkle of lemon juice. Fresh herbs like parsley or dill also add great flavor. Mix and match to find your favorite combination! To keep your Spinach Tomato Pasta fresh, follow these tips: - Let the pasta cool down before storing. - Use airtight containers to avoid moisture. - Store in the fridge for up to 3 days. This method helps keep the flavors intact. When it's time to enjoy your leftovers, use these methods: - Heat in the microwave for 1-2 minutes, stirring halfway. - For stove-top reheating, add a splash of water to the pan. - Warm gently over low heat to keep the pasta's texture. These methods help preserve the taste and prevent dryness. If you want to save some for later, follow these steps: - Cool the pasta completely before freezing. - Place in freezer-safe containers or bags. - It can last up to 2 months in the freezer. When you're ready to eat, thaw in the fridge overnight. Reheat as mentioned above for the best results. You can easily make Spinach Tomato Pasta vegetarian by skipping the Parmesan cheese. Instead, use a plant-based cheese or nutritional yeast for a cheesy flavor. The rest of the recipe is already vegetarian-friendly. Just focus on the fresh spinach, cherry tomatoes, and whole wheat spaghetti to create a rich and satisfying meal. Yes, you can use frozen spinach! Just thaw and drain it well before using. Frozen spinach is more watery than fresh, so remove as much moisture as you can. This way, your pasta won't get soggy, and the flavors will stay bright. Spinach Tomato Pasta pairs well with a side salad or garlic bread. A simple mixed greens salad with vinaigrette adds freshness. Garlic bread provides a nice crunch. You could also serve grilled chicken or fish for a heartier meal. Leftovers will stay fresh in the fridge for about 3 to 5 days. Store the pasta in an airtight container to keep it from drying out. If you want to save some for later, you can freeze it too! This blog post covered how to make Spinach Tomato Pasta, exploring its key ingredients, cooking steps, and tips for success. You can enjoy this dish by using fresh whole wheat spaghetti, tender spinach, and ripe cherry tomatoes. Remember to avoid common mistakes, like overcooking spinach. Explore variations to keep the meal exciting, and don’t forget about proper storage techniques. With these insights, you can create a delicious, healthy pasta dish that fits your needs, satisfies your palate, and impresses your guests. Enjoy your cooking adventure!

Spinach Tomato Pasta Quick and Flavorful Meal

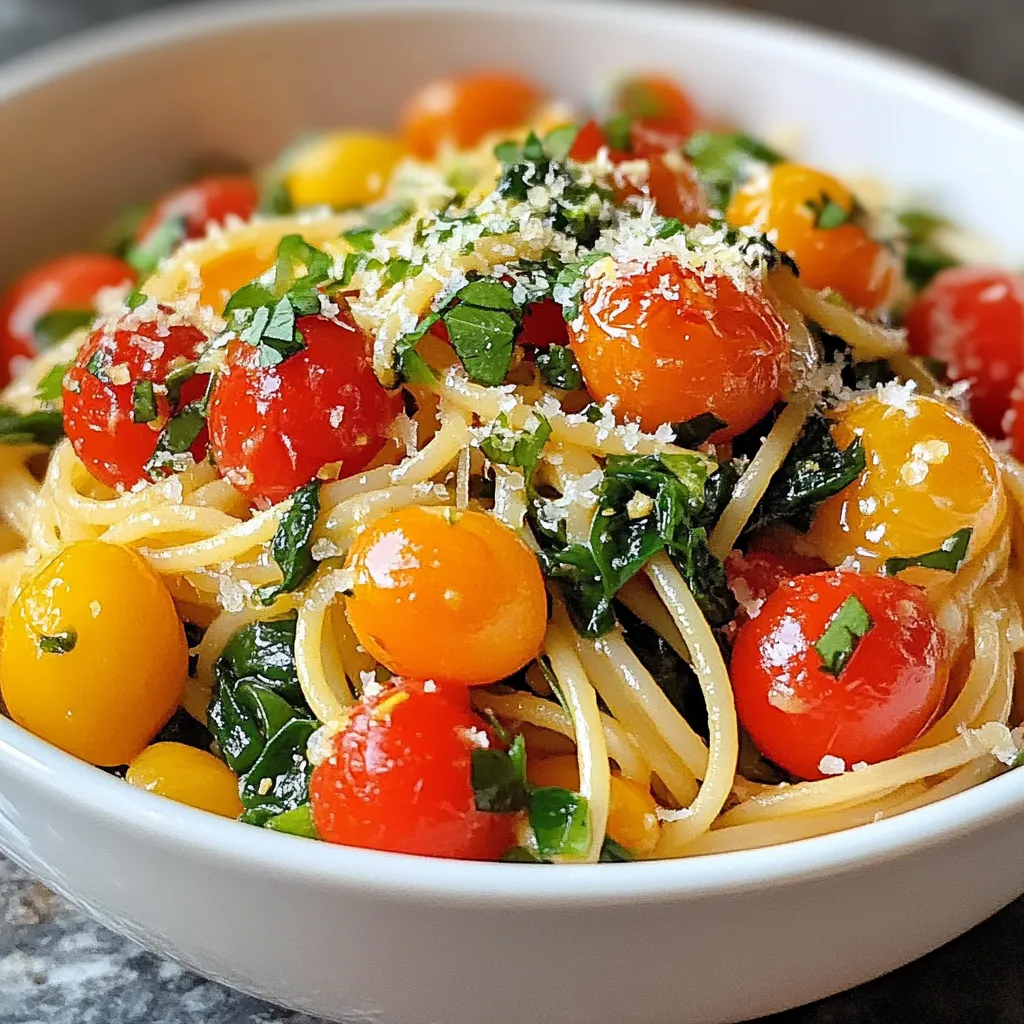
Looking for a quick and tasty meal? Spinach Tomato Pasta is your answer! This vibrant dish combines whole wheat spaghetti,

To make a great chicken pot pie, you need the right ingredients. Here’s what you’ll need: - 2 cups shredded cooked chicken - 1 cup frozen mixed vegetables (peas, carrots, corn) - 1 cup chicken broth - ½ cup milk - 1 teaspoon dried thyme - 1 teaspoon onion powder - Salt and pepper to taste - 1 tablespoon olive oil - 1 tablespoon all-purpose flour - 1 pre-made pie crust (store-bought or homemade) - 1 egg, beaten (for egg wash) Each ingredient plays a key role. The chicken adds protein and flavor. Frozen mixed veggies bring color and nutrients. Chicken broth makes the filling rich and savory. Milk adds creaminess, while thyme and onion powder give depth. Olive oil helps cook the filling evenly, and flour thickens the sauce. The pie crust holds it all together, and the egg wash gives it a golden shine. Choosing the right ingredients makes your pot pie taste amazing. Fresh or high-quality items often lead to better results. So, don’t rush this part. Take time to gather what you need. Enjoy the process of cooking! {{ingredient_image_1}} - Set your oven to 425°F (220°C). - Heat a large skillet over medium heat. Add olive oil once hot. - Add the shredded chicken and frozen mixed vegetables to the skillet. - Pour in the chicken broth and milk. Stir in thyme, onion powder, salt, and pepper. - Sprinkle flour into the mix. Stir until the sauce thickens, about 5-7 minutes. - Roll out the pie crust if needed. Fit it into a 9-inch pie dish. - Pour the chicken filling into the crust. Spread it out evenly. - Cover with a second pie crust. Seal the edges with your fingers or a fork. - Cut a few slits in the top crust for steam to escape. Brush the top with beaten egg. - Bake in the preheated oven for 30-35 minutes. Look for a golden brown crust. - Let the pie cool for about 10 minutes before slicing. Enjoy your warm, comforting meal! To make a great chicken pot pie, focus on the crust first. A flaky crust adds that perfect touch. Use cold butter or shortening and mix it with the flour gently. Don't overwork the dough. Just mix until it comes together. This keeps the crust light and flaky. Next, seasoning is key. Use salt and pepper to taste. Add dried thyme and onion powder to boost flavor. Feel free to experiment with herbs like rosemary or sage. Taste the filling before adding it to the crust to ensure it’s just right. One common mistake is overfilling the pie. The filling expands as it cooks. If there’s too much, it can spill out. Use just enough to fill the pie without overflowing. Another mistake is not letting the filling cool. If you pour hot filling into the crust, it can make the crust soggy. Allow the filling to cool for a few minutes before you pour it in. This helps keep your crust nice and crisp. To make your chicken pot pie look inviting, garnish it well. Fresh herbs like parsley or thyme brighten the dish. A sprinkle on top adds color and flavor. For side dishes, consider a simple salad or roasted vegetables. They add freshness and balance the rich pie. You might even serve it with some crusty bread for dipping. These pair nicely with the warm, creamy filling. Pro Tips Use Leftover Chicken: To save time, use leftover rotisserie chicken or any pre-cooked chicken for this recipe. Thicken Your Filling: If you prefer a thicker filling, add an extra tablespoon of flour and cook it longer to achieve the desired consistency. Customize Vegetables: Feel free to add your favorite vegetables such as green beans or potatoes for a personal touch. Egg Wash Alternatives: For a golden crust, you can use milk or cream instead of an egg wash if you want to keep it vegan. {{image_2}} You can switch up the protein in your pot pie. Try turkey for a twist. For a vegetarian option, use mushrooms or lentils. They add a nice texture. You can also mix different veggies. Instead of frozen mixed vegetables, use fresh carrots, peas, or green beans. This change adds flavor and color. Want to boost the taste? Add minced garlic or fresh herbs like rosemary. These ingredients make the filling fragrant and rich. If you want creamier filling, use heavy cream instead of milk. This gives the pot pie a velvety texture that feels luxurious. Not a fan of traditional crust? Try a biscuit topping. It bakes up fluffy and golden. You can also make a gluten-free crust if you need it. Use almond flour or gluten-free all-purpose flour. These alternatives let everyone enjoy this dish without worry. To keep your chicken pot pie fresh, follow these steps: - Refrigeration guidelines: Store leftovers in an airtight container. They stay good for 3-4 days in the fridge. - Freezing tips for longer storage: For longer storage, freeze the pie. Wrap it tightly in plastic wrap and then in foil. It lasts up to 3 months in the freezer. When reheating your pie, you want it warm and tasty. Here’s how: - Best methods for reheating: Preheat your oven to 350°F (175°C). Place the pie on a baking sheet and cover it with foil. Heat for about 20-25 minutes. - Avoiding sogginess in the crust: To keep the crust crispy, avoid microwaving. The oven method keeps it flaky and delicious. The best chicken for pot pie is cooked chicken. You can use rotisserie chicken for ease. Shredded chicken blends well with the filling. Cubed chicken works too, but it takes longer to cook. Shredding gives a soft texture. It also mixes easily with veggies and sauce. Yes, you can prepare the pie ahead. Just make the filling and let it cool. You can fill the crust and cover it. If you want to freeze it, do so unbaked. Wrap it tightly in plastic wrap. This keeps it fresh for about three months. Check the crust for a golden brown color. It should be firm and flaky. The filling needs to be hot throughout. Use a thermometer to check the center. It should reach 165°F for safety. Let it cool for a bit before serving to avoid burns. In this article, you learned how to make a delicious chicken pot pie from start to finish. We covered essential ingredients and detailed steps, from preheating the oven to serving suggestions. Remember to avoid common mistakes for the best results. You can customize your pie with different flavors and crusts. Enjoy the process and share your tasty creation with family and friends. A well-made chicken pot pie brings comfort and joy to any meal. Happy cooking!

Easy Chicken Pot Pie Comfort Food Made Simple

Are you craving warm comfort food that’s easy to make? Look no further! This Easy Chicken Pot Pie brings all

To make Cajun Chicken Sloppy Joes, you need a few key ingredients: - 1 lb ground chicken - 1 tablespoon olive oil - 1 small onion, diced - 1 green bell pepper, diced - 2 cloves garlic, minced - 1 tablespoon Cajun seasoning - 1 teaspoon smoked paprika - 1 teaspoon Worcestershire sauce (or soy sauce) - 1 cup diced tomatoes (canned or fresh) - 1 tablespoon brown sugar - Salt and pepper to taste - 4 hamburger buns Each ingredient adds its own flavor. Ground chicken is lean and tasty. Olive oil helps cook the veggies. Diced onion and green bell pepper add crunch. Garlic gives a nice kick. Cajun seasoning brings heat, while smoked paprika adds depth. Worcestershire sauce enhances the umami. Tomatoes add moisture, and brown sugar balances the spices. You can make your sloppy Joes even better with these garnishes: - Sliced pickles - Fresh parsley Pickles give a tangy crunch, and parsley adds freshness. These small touches can elevate your dish. If you don't have some ingredients, don't worry! Here are some easy swaps: - Ground turkey or beef can replace ground chicken. - Coconut oil or canola oil can substitute for olive oil. - Any bell pepper works, so use what you have. - If you lack Cajun seasoning, mix paprika, cayenne, and garlic powder. - For a vegan version, try lentils or chickpeas instead of chicken. These swaps keep the recipe flexible while still being delicious. {{ingredient_image_1}} To make Cajun Chicken Sloppy Joes, gather your ingredients first. This makes cooking easy. You need ground chicken, olive oil, onion, bell pepper, garlic, Cajun seasoning, smoked paprika, Worcestershire sauce, diced tomatoes, brown sugar, and hamburger buns. Don't forget salt, pepper, pickles, and parsley for garnish. 1. Heat a large skillet over medium heat. Add one tablespoon of olive oil. 2. Toss in the diced onion and green bell pepper. Sauté them for about 4 to 5 minutes. They should soften nicely. 3. Next, add the minced garlic. Cook for 1 to 2 minutes until you smell its great aroma. 4. Turn up the heat to medium-high. Add the pound of ground chicken to the skillet. Use a spatula to break it apart. Cook until there is no pink left, about 6 to 8 minutes. 5. Sprinkle the Cajun seasoning, smoked paprika, Worcestershire sauce, and brown sugar over the chicken. Mix it all together well. 6. Pour in 1 cup of diced tomatoes. Season with salt and pepper. Stir everything and let it simmer on low heat for 10 minutes. This helps all the flavors blend. 7. While the chicken simmers, toast the hamburger buns until they turn golden brown. 8. Once the chicken mixture is ready, spoon it generously over each toasted bun. Serve your Cajun Chicken Sloppy Joes hot. Add sliced pickles and fresh parsley on top for an extra touch. Enjoy your flavorful dinner delight! To cook the chicken well, use a skillet over medium heat. This heat helps the chicken cook evenly. Break up the chicken as it cooks. You want it to be no longer pink. This should take about 6-8 minutes. Always use a meat thermometer if you want to be sure. The chicken should reach 165°F. To make your dish pop, use fresh ingredients. Fresh garlic and onion add great taste. Cajun seasoning is key; it brings heat and depth. Smoked paprika adds a lovely smoky touch. Don’t forget the brown sugar. It balances the spice with a hint of sweetness. Adding Worcestershire sauce or soy sauce gives a savory kick. One mistake is not cooking the chicken enough. Always check for pink meat. Another mistake is overcooking the veggies. Sauté them just until soft, about 4-5 minutes. Don’t skip the simmering step. Letting the flavors meld for 10 minutes makes a big difference. Lastly, remember to toast the buns. A toasted bun adds crunch and holds the filling better. Pro Tips Use Fresh Ingredients: Fresh vegetables will enhance the flavor and texture of your sloppy joes, making them even more delicious. Customize the Heat: Adjust the amount of Cajun seasoning to your taste. For a milder version, start with less and add more as needed. Let It Simmer: Allow the mixture to simmer longer than the recommended time for a richer flavor as the ingredients meld together. Try Different Toppings: Experiment with toppings like avocado, jalapeños, or cheese to add more texture and flavor to your sloppy joes. {{image_2}} You can spice things up with extra heat. Add more Cajun seasoning or a dash of hot sauce. This will give your sloppy joes a fiery kick. You can also mix in diced jalapeños for extra flavor. Just remember to start small. You can always add more heat, but you cannot take it away. You can make this dish vegetarian or vegan easily. Replace ground chicken with lentils or chopped mushrooms. Both options will give you a hearty texture. Use vegan buns to keep it plant-based. For a richer taste, add some smoked paprika and a bit of soy sauce. This gives the mix a deep flavor without meat. Try serving your sloppy joes on different bases. Instead of buns, use baked sweet potatoes or lettuce wraps. This makes a fun twist and adds more nutrients. You can also serve the chicken mix over rice or quinoa. It’s a great way to enjoy the dish in a new way. Don't forget to top with pickles and parsley, no matter how you serve it! To keep your Cajun Chicken Sloppy Joes fresh, store them in an airtight container. Make sure the mixture cools to room temperature first. Place the container in the fridge and use it within three days. If you want to keep them longer, freezing is a great option. When you're ready to enjoy your leftovers, reheat them in a skillet. Use medium heat and stir often. This helps the chicken mix heat evenly. You can also microwave them in a bowl. Heat in short bursts, stirring in between. This way, your meal stays moist and tasty. To freeze Cajun Chicken Sloppy Joes, let the mixture cool fully first. Then, place it in freezer-safe bags or containers. Squeeze out extra air to prevent freezer burn. Label the bags with the date. They can last for up to three months in the freezer. When ready to eat, thaw in the fridge overnight before reheating. Cajun seasoning is a mix of spices. It often includes paprika, garlic, onion, and pepper. This blend adds a warm, spicy flavor to your dishes. You can buy it at stores or make your own. Combining spices lets you adjust the heat to fit your taste. Yes, you can use other meats. Ground turkey or beef works well in this recipe. You could even use plant-based meat if you prefer a vegetarian option. Just keep the cooking times similar for best results. To make Cajun Chicken Sloppy Joes gluten-free, choose gluten-free buns. Most stores sell these today. Also, check the labels on your Worcestershire or soy sauce for gluten. Many brands offer gluten-free versions, so read carefully. Cajun Chicken Sloppy Joes go well with many sides. Try coleslaw for a crisp, refreshing bite. Sweet potato fries add a sweet touch. A simple green salad can balance the meal too. You could even serve them with chips for a casual feel. We explored the exciting world of Cajun Chicken Sloppy Joes today. You learned about the key ingredients, helpful cooking steps, and tips to ensure success. We also covered tasty variations and best ways to store leftovers. Cajun flavors bring zest to a classic dish, whether you choose to spice it up or go meatless. Feel free to experiment and make it your own. Enjoy this flavorful meal and impress your family and friends!

Cajun Chicken Sloppy Joes Flavorful Dinner Delight

Get ready to spice up your dinner with Cajun Chicken Sloppy Joes! This twist on a classic will tickle your

To make a great strawberry shortcake trifle, you need these fresh items: - 2 cups fresh strawberries, hulled and sliced - 2 tablespoons sugar - 1 cup heavy whipping cream - 1 teaspoon vanilla extract - 1 cup angel food cake, cubed (you can buy this or make it) - 1 cup Greek yogurt (plain or vanilla) These ingredients create a perfect balance of flavors and textures in your trifle. You will need some basic kitchen tools to make this trifle: - Medium mixing bowl - Electric mixer for whipping cream - Trifle bowl or individual serving glasses - Spatula for layering - Knife and cutting board for slicing strawberries These tools will help you prepare and assemble your trifle with ease. For a fancy touch, consider these garnishes: - Extra strawberry slices - Fresh mint leaves These garnishes add color and flavor, making your trifle even more appealing. {{ingredient_image_1}} Start with the fresh strawberries. You need two cups. First, hull them and slice them. Next, place the sliced strawberries in a bowl. Add two tablespoons of sugar and mix well. Let the strawberries sit for about 15 minutes. This step helps draw out their sweet juices. The sugar will make them even sweeter. You will use these juicy strawberries in your trifle. Now, grab another bowl for the cream. Pour in one cup of heavy whipping cream. Add one teaspoon of vanilla extract for flavor. Use an electric mixer to whip the cream. Beat it until you see stiff peaks form. This means the cream holds its shape well. Be careful not to over-whip it. You want it light and fluffy for the trifle layers. It's time to build your trifle! Start with a trifle bowl or individual glasses. Place a layer of cubed angel food cake at the bottom. You need one cup of cake for this step. Next, spoon a layer of those juicy strawberries over the cake. Let some of the strawberry juice drizzle down. Then, add a layer of Greek yogurt on top. You can use plain or vanilla yogurt, one cup total. Finally, spoon a generous layer of whipped cream over the yogurt. Repeat these layers until you run out of ingredients. Finish with a nice dollop of whipped cream on top. For extra flair, chill the trifle for at least 30 minutes. This cooling time helps the flavors blend together nicely. To make great whipped cream, start with cold cream. Use heavy whipping cream, as it whips best. Place your mixing bowl and beaters in the fridge for a bit. This cools them down. When you are ready, pour the cream into the bowl. Add one teaspoon of vanilla extract for flavor. Beat on medium speed until you see soft peaks. Keep going until you see stiff peaks. This means the cream holds its shape well. Be careful not to overwhip. You want it fluffy, not grainy! Layering your trifle is key for a stunning look. Start with a layer of angel food cake cubes. Then, spoon some marinated strawberries over the cake. Let the juices flow down the sides. Next, add Greek yogurt for creaminess. Top it off with a thick layer of whipped cream. Repeat these layers until you reach the top. Finish with whipped cream for a nice look. You can add fresh strawberries and mint leaves on top. This makes your trifle pop! Timing is essential for the best taste. After you assemble the trifle, chill it in the fridge for 30 minutes. This allows the flavors to meld together. The strawberries will soak into the cake, making it moist. The whipped cream and yogurt blend well with the cake and fruit. If you can, let it chill for longer. Overnight is even better! This gives you a rich, delicious treat to enjoy. Pro Tips Use Fresh Strawberries: For the best flavor, opt for ripe, fresh strawberries. They should be bright red and fragrant for maximum sweetness. Chill Your Ingredients: Ensure that your whipped cream and Greek yogurt are chilled before layering. This will help the trifle stay firm and maintain its structure. Alternate Ingredients: Feel free to mix up the layers by adding additional fruits like blueberries or raspberries for a colorful and flavorful twist. Make Ahead: Prepare the trifle a few hours in advance or the night before. It allows the flavors to meld beautifully and saves you time on the day of serving. {{image_2}} You can swap strawberries for other fruits. Try blueberries, raspberries, or peaches. Each fruit brings its own flavor. Blueberries add a sweet burst. Raspberries give a tart kick. Peaches offer a juicy sweetness. Mix and match for fun colors and tastes. Angel food cake is light and fluffy. You can also use pound cake for a denser base. Sponge cake works well, too. Each cake type changes the texture. Pound cake adds richness. Sponge cake gives a soft bite. Experiment with your favorite. Want a lighter option? Use low-fat yogurt instead of heavy cream. Greek yogurt adds protein and creaminess. You can sweeten it with honey or maple syrup. This swap keeps the trifle tasty without added fat. Enjoy a treat that feels good! You can store leftover trifle in the fridge. Use an airtight container to keep it fresh. If you have extra whipped cream, store that separately. This keeps the cream from getting soggy. Enjoy your trifle within three days for the best taste. Always use the freshest strawberries for the best flavor. Check for firmness and bright color when buying. You can also wash and slice them right before use. Keep whipped cream cold until you are ready to serve. This helps maintain its texture and taste. Freezing trifle is not recommended. The layers can separate and change texture. However, you can freeze the whipped cream separately. Use it within a month for best results. Thaw it in the fridge before serving. Always remember, fresh is best for this delightful treat! Yes, you can use frozen strawberries. They work well in this trifle. Just thaw them and drain excess juice. This helps avoid a soggy trifle. Fresh strawberries taste best, but frozen ones are a good option. The trifle can stay in the fridge for up to three days. Store it in an airtight container to keep it fresh. The longer it sits, the softer the cake will get. Enjoy it within this time for the best texture. Yes, you can make the trifle ahead of time. Assemble it a day before serving. This allows the flavors to blend nicely. Just remember to keep it in the fridge until you’re ready to serve. This post covered easy steps to make a tasty trifle. You learned about fresh ingredients, key tools, and optional garnishes. I shared tips for perfect layers and whipped cream. We explored fruity alternatives and cake options for variety. Lastly, you found out how to store leftovers and keep them fresh. Trifles are fun and adaptable. With these tips, you can impress anyone with your dessert skills. Enjoy making your trifle and sharing it with friends!

Strawberry Shortcake Trifle Delightful and Simple Treat

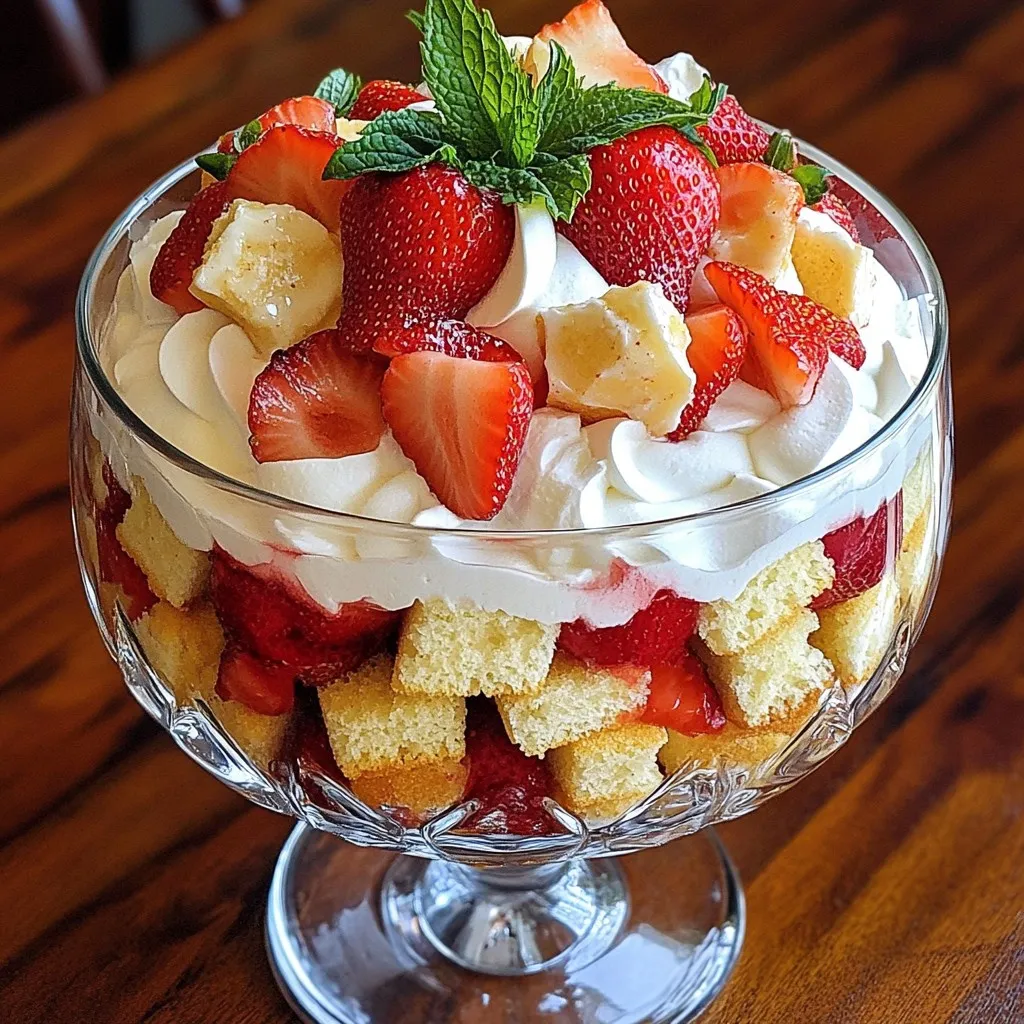
Get ready to impress your family and friends with a Strawberry Shortcake Trifle that’s both delightful and simple. This layered

To make a tasty One Pot Smoked Sausage Dinner, gather these simple ingredients: - 1 lb smoked sausage, sliced - 1 cup bell peppers (red, yellow, and green), diced - 1 medium onion, chopped - 2 cups baby spinach - 2 cloves garlic, minced - 1 cup cherry tomatoes, halved - 1 cup vegetable or chicken broth - 1 cup long-grain rice - 1 teaspoon smoked paprika - 1 teaspoon dried oregano - Salt and pepper to taste - 2 tablespoons olive oil - Fresh parsley, chopped (for garnish) Each ingredient adds to the dish's flavor and texture. The smoked sausage gives a rich taste. Fresh vegetables like bell peppers and tomatoes add color and crunch. The rice absorbs the broth, making it hearty. Using spinach adds a nice pop of green. I love how easy it is to find these ingredients. Most are available at any grocery store. Feel free to adjust the veggies based on what you have. Don't forget the seasonings! Smoked paprika and oregano bring out the best flavors. Get ready to enjoy a meal that is quick, full of flavor, and made in one pot! {{ingredient_image_1}} 1. Sautéing the smoked sausage Start by heating 2 tablespoons of olive oil in a large pot over medium heat. Add 1 pound of sliced smoked sausage. Cook for about 5 minutes or until the sausage turns brown. This step adds great flavor to your dish. 2. Adding and cooking vegetables Next, add 1 chopped onion and 1 cup of diced bell peppers (red, yellow, and green) to the pot. Stir in 2 cloves of minced garlic. Cook for another 4-5 minutes until the veggies soften. The colors will brighten and the smell will be amazing! 3. Combining broth and rice Now, toss in 1 cup of halved cherry tomatoes, 1 teaspoon of smoked paprika, 1 teaspoon of dried oregano, salt, and pepper to taste. Mix everything well. Then, pour in 1 cup of vegetable or chicken broth and add 1 cup of long-grain rice. Stir to combine. 1. Boiling and simmering the mixture Bring your pot to a boil. Once it starts bubbling, reduce the heat to low and cover the pot. Let it simmer for about 20 minutes. The rice will soak up the liquid and flavors. 2. Incorporating baby spinach After 20 minutes, remove the pot from heat. Fold in 2 cups of baby spinach. Stir until the spinach wilts down. This adds a nice pop of color and nutrition. 1. Garnishing with parsley For a fresh touch, sprinkle chopped parsley on top of your dish. This adds flavor and makes it look nice. 2. Plating and presentation tips Serve the one-pot smoked sausage dinner hot. Use shallow bowls for a great look. Pair it with crusty bread for a complete meal. Enjoy! To make rice perfect in a one-pot meal, use long-grain rice. Rinse it before cooking to remove extra starch. This helps keep your rice fluffy. Add the rice after the broth to absorb all the flavors. Stir gently to mix it well but avoid over-stirring. This keeps the grains separate and tender. Adjust seasonings based on your taste. If you like it spicy, add a pinch of cayenne pepper. For a milder dish, stick to salt and pepper. Remember, the smoked sausage adds flavor, so taste as you go. This way, you can make the dish just right for you. Pair your smoked sausage dinner with a simple salad or crusty bread. A fresh green salad adds a nice crunch. Bread is perfect for soaking up the savory broth. You can also serve it with roasted vegetables for extra color and nutrients. To reheat, use the stove or microwave. If using the stove, add a splash of broth to prevent sticking. Heat until warm, stirring gently. In the microwave, cover the dish and heat in short bursts. Stir between intervals for even heating. Enjoy your meal warm and full of flavor! Pro Tips Use high-quality sausage: Opt for a smoked sausage that is made from high-quality meat for the best flavor and texture. Prep your ingredients: Chop all your vegetables and sausage beforehand to make the cooking process smoother and quicker. Don’t skip the seasoning: Adjust the seasoning according to your taste. Adding a pinch of cayenne pepper can give it an extra kick! Let it rest: After cooking, let the dish sit covered for a few minutes before serving to enhance the flavors and allow the rice to firm up slightly. {{image_2}} You can switch up the sausage in this dish for variety. Chicken or turkey sausage works great. These options are leaner and still pack a punch of flavor. Feel free to change the vegetables too. If you don’t have bell peppers, use zucchini or mushrooms. You can also toss in some asparagus or carrots for a crunchy twist. Mixing and matching keeps things fun and fresh. To boost the flavor, add spices or herbs. A pinch of cayenne adds heat. Fresh thyme or basil can also elevate the taste. Switching the broth changes the dish too. Use beef broth for a richer flavor or vegetable broth for a lighter taste. Each option brings a unique twist to your one pot smoked sausage dinner. To keep your one pot smoked sausage dinner fresh, let it cool first. Place leftovers in an airtight container. The dish stays good in the fridge for up to four days. When you want to eat it again, simply reheat on the stove or in the microwave. Make sure to stir it well while heating. This helps keep the flavors even. If you want to save some for later, freezing works great! Divide the meal into portions. Use freezer-safe containers or bags. Be sure to remove as much air as possible. Label each container with the date. The dish will stay good in the freezer for about three months. When you are ready to eat, thaw it in the fridge overnight. Then, reheat it in the pot or microwave until hot all the way through. Enjoy your meal, even after freezing! Yes, you can use brown rice. Keep in mind that brown rice takes longer to cook. You will need to add more liquid and extend the cooking time by about 10-15 minutes. This will ensure the rice is tender and absorbs all the flavors. If you use a slow cooker, it will take about 4-6 hours on low heat. Just add all the ingredients to the slow cooker. Stir well, then cover and let it cook. This method makes the flavors blend nicely, and the dish becomes very tasty. You can replace smoked sausage with chicken sausage or turkey sausage. If you want a vegetarian option, use plant-based sausage. You can also add beans for protein. These options still give you great flavor and make the dish fun and healthy. You learned about making a tasty dish with smoked sausage, fresh veggies, and seasonings. I shared simple steps to prepare and cook the meal. You now know tips for cooking rice and serving it well. I also suggested variations and storage tips for leftovers. Cooking should be fun and easy. With these ideas, you can create your own delicious meals. Try new flavors and enjoy your cooking adventures!

One Pot Smoked Sausage Dinner Quick and Flavorful Meal

Looking for a quick and tasty meal that’ll satisfy the whole family? This One Pot Smoked Sausage Dinner is just

Older posts
Newer posts
← Previous Page1 Page2 Page3 … Page144 Next →

dsad

© 2025 So Yum Recipes • Built with GeneratePress

Our Policies

  • Copyright Policy
  • Cookie Policy
  • GDPR Policy
  • Privacy Policy
  • Disclaimer
  • Terms Of Use

More Information

  • Home
  • About
  • Contact
  • Appetizers
  • Dessert
  • Dinner
  • Drinks
©2025, So Yum Recipes About Back To Top