Skip to content
DisclaimerTerms Of UseGDPR PolicyCookie Policy

So Yum Recipes

  • Home
  • Drinks
  • Appetizers
  • Dinner
  • Dessert
  • About
  • Contact
  • Privacy Policy
DisclaimerTerms Of UseGDPR PolicyCookie Policy

Chloe

For this delightful strawberry shortcake, you need to start with fresh strawberries. Use about 2 cups of strawberries, hulled and sliced. The sugar helps enhance the natural taste of the berries. You’ll want to add 2 tablespoons of granulated sugar. Let them sit together for 30 minutes. This step makes the berries juicy and sweet, perfect for your shortcake. Next, gather your dry ingredients. You will need 2 cups of all-purpose flour. Add 1 tablespoon of baking powder to help the biscuits rise. Finally, include 1/2 teaspoon of salt. The salt adds flavor and balances the sweetness. Mix these ingredients well in a large bowl to ensure they blend nicely. Now, let’s talk about butter and cream. You will need 1/4 cup of unsalted butter, cold and cubed. Cold butter helps create flaky biscuits. Mix the butter into the dry ingredients until it looks like coarse crumbs. For the creamy part, grab 1 cup of heavy cream and 1 teaspoon of vanilla extract. This mixture adds richness to your biscuits. You can also use extra cream for whipping later. This will top your shortcake and make it even better! {{ingredient_image_1}} First, grab your fresh strawberries. You need 2 cups, hulled and sliced. Place them in a bowl. Add 2 tablespoons of granulated sugar to the berries. Toss them gently. This will help the strawberries release their juices. Let them sit for at least 30 minutes. This process is called macerating. You’ll see the strawberries become juicy and sweet. Now, let’s make the biscuit dough. Start by preheating your oven to 425°F (220°C). In a large bowl, whisk together 2 cups of all-purpose flour, 1 tablespoon of baking powder, and 1/2 teaspoon of salt. Next, add 1/4 cup of cold, cubed butter into the flour mix. Use your fingers or a pastry cutter to blend it in. You want the mixture to look like coarse crumbs. In another bowl, mix 1 cup of heavy cream with 1 teaspoon of vanilla extract. Slowly add this to your flour mix. Stir until just combined. Do not overmix; it’s okay if there are a few lumps. Turn the dough out onto a lightly floured surface. Pat it down into a rectangle about 1 inch thick. Now, cut out biscuits using a round cutter or a glass. You should get about 8 biscuits from this dough. Place the biscuits on a baking sheet lined with parchment paper. Bake them in the oven for 12 to 15 minutes. They should be golden brown when done. Once baked, take them out and let them cool slightly. Now it’s time to assemble your shortcakes! Cut each biscuit in half. Layer each half with the macerated strawberries and a dollop of whipped cream. Place the other half of the biscuit on top. You can add more strawberries and whipped cream if you like. Enjoy your fluffy strawberry shortcake! To make fluffy biscuits, start with cold butter. Cold butter helps create steam during baking. This steam lifts the dough, making your biscuits rise and stay light. Mix the butter into the flour until it looks like crumbs. Avoid overmixing the dough; this can make your biscuits tough. Instead, stir just until the flour disappears. Macerating strawberries is simple. Combine sliced strawberries with sugar in a bowl. Toss them gently to coat. Let them sit for at least 30 minutes. This process helps the berries release their sweet juices. The result is a juicy, flavorful filling for your shortcake. You can adjust the sugar based on your taste and berry ripeness. For a beautiful presentation, serve the shortcakes on a nice platter. Layer the biscuits with strawberries and whipped cream. You can also add a sprig of mint on top for color. If you want to impress, garnish with whole strawberries around the edges. This not only looks great but also adds extra flavor. Enjoy your creation with friends or family for a delightful treat. Pro Tips Use Cold Ingredients: Ensure your butter and heavy cream are cold before mixing. This helps create a flaky texture in your biscuits. Don’t Overmix: When combining the dough, mix just until the ingredients are incorporated. Overmixing can lead to tough biscuits. Perfect Biscuit Thickness: Aim for a thickness of about 1 inch when patting out the dough. This ensures a nice rise and fluffy texture. Customize Your Toppings: Feel free to add other fruits like blueberries or raspberries, or even a drizzle of chocolate for a unique twist on the classic shortcake. {{image_2}} You can make a gluten-free version of strawberry shortcake. Use a gluten-free flour blend instead of all-purpose flour. Look for blends that have a mix of rice flour, tapioca flour, and potato starch. These will give you a nice texture. Follow the rest of the recipe just as it is. You will still enjoy that fluffy taste! To make this recipe dairy-free, swap the butter and heavy cream. For butter, you can use coconut oil or a dairy-free spread. Instead of heavy cream, use coconut cream. Chill a can of coconut milk overnight and scoop out the thick part. It will whip up nicely! This gives you a rich flavor without the dairy. You can add fun flavors to your shortcake. Try mixing in lemon zest to the biscuit dough for a bright taste. Almond extract can also be a great addition. Just replace half of the vanilla extract with almond extract. You can even add chocolate chips or nuts to the dough. This will make each bite special and different! To keep your strawberry shortcake fresh, store it in an airtight container. This will help keep the biscuits soft and the strawberries juicy. Place the shortcake in the fridge if you plan to eat it within a few days. If you want to keep it longer, consider freezing it. Freezing is a great option for leftover shortcakes. First, let the shortcakes cool completely. Then, wrap each biscuit in plastic wrap. Place the wrapped shortcakes in a freezer-safe bag or container. This method helps prevent freezer burn. You can freeze them for up to three months. In the refrigerator, the strawberry shortcake stays fresh for about 2 to 3 days. After that, the biscuits may become dry. If you freeze the shortcakes, they will last much longer. When you're ready to eat them, thaw in the fridge overnight. Reheat the biscuits gently in the oven for the best flavor and texture. You can use whole milk or half-and-half. These options will create a lighter version. If you want more creaminess, try using coconut cream. It gives a nice flavor and works well in desserts. Just remember, the texture may change slightly. Yes, you can make the biscuits ahead of time. After you cut the dough, place the biscuits on a baking sheet. Cover them with plastic wrap and refrigerate them. You can bake them the next day for fresh shortcakes. Just add a few minutes to the baking time if they are cold. To keep your shortcake from getting soggy, layer the ingredients correctly. Start with the biscuit, then add the strawberries. Top with whipped cream only before serving. This way, the cream will not soak into the biscuit. You can also serve the strawberries on the side to keep things fresh. This article gives you all you need for making a great strawberry shortcake. We covered fresh ingredients, easy steps, and helpful tips to make your biscuits fluffy. You can even try gluten-free or dairy-free versions. Remember to store your leftovers properly to enjoy later. With these insights, you're ready to create a delicious treat. Make your strawberry shortcake extra special and delight everyone with your skills. Enjoy every bite!

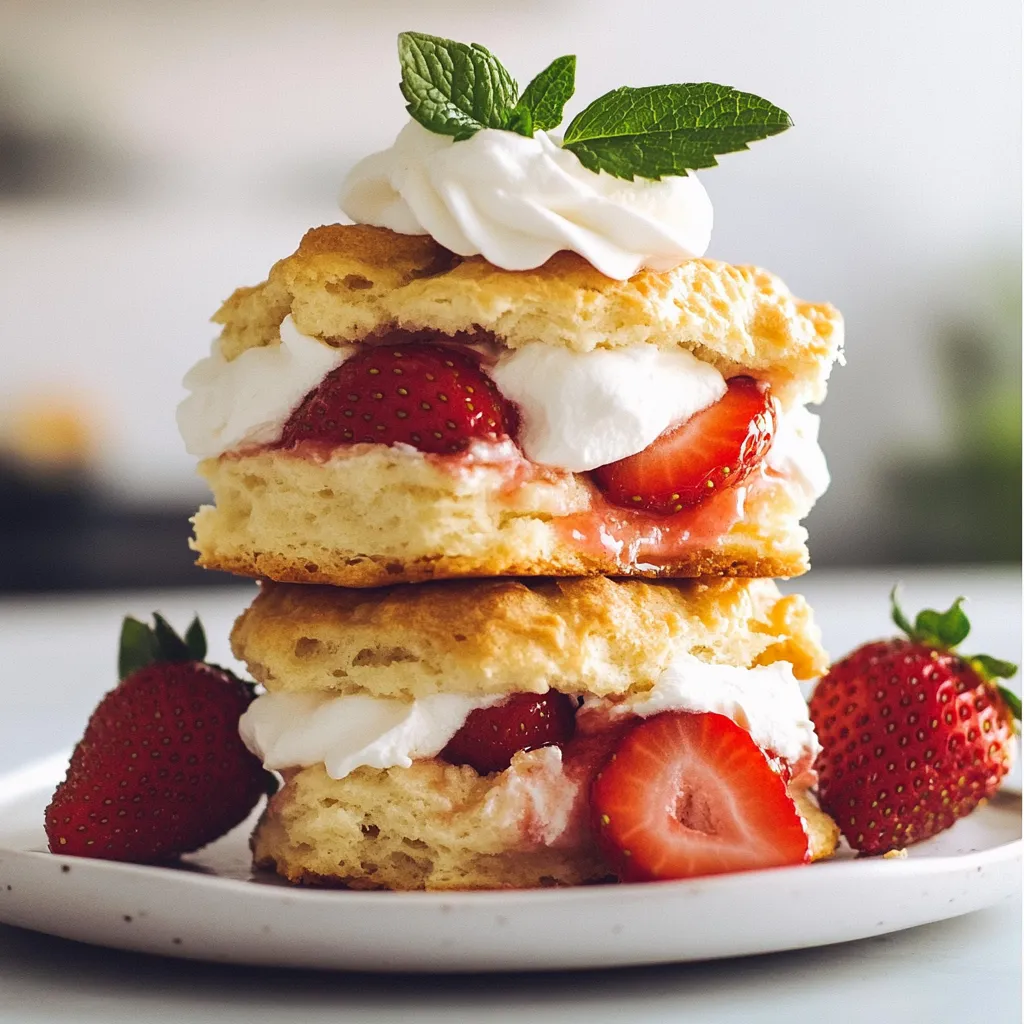
Fluffy Strawberry Shortcake Delightful and Easy Recipe

If you love strawberries, you’ll adore this Fluffy Strawberry Shortcake recipe! I’ll show you how to make a light, tender

To make Crispy Garlic Chicken Fried Rice, gather these essential ingredients: - 2 cups cooked jasmine rice (day-old preferred) - 1 cup boneless chicken breast, diced - 4 cloves garlic, minced - 1 small onion, finely chopped - 1 cup mixed vegetables (peas, carrots, corn) - 3 tablespoons soy sauce - 2 tablespoons oyster sauce (optional) - 1 tablespoon sesame oil - 2 tablespoons vegetable oil - 2 eggs, beaten - Green onions, sliced for garnish - Salt and pepper to taste Day-old rice works best. It dries out slightly, making it easier to fry. If you don’t have day-old rice, spread freshly cooked rice on a tray to cool. This helps reduce moisture. For substitutions, here are some helpful tips: - You can use brown rice instead of jasmine rice for a healthier option. - Chicken breast can be swapped for tofu or shrimp for a different protein. - If you don’t have mixed veggies, use any fresh or frozen veggies you like. - Soy sauce can be replaced with tamari for a gluten-free option. - Instead of oyster sauce, use hoisin sauce for a sweet twist. These swaps keep your dish tasty while fitting your pantry. Enjoy cooking! {{ingredient_image_1}} Start by preparing the chicken. Take one cup of boneless chicken breast, and cut it into small pieces. Season the chicken with a pinch of salt and pepper. Let it sit for a bit to absorb the flavor. Next, it’s time to fry the chicken. Heat one tablespoon of vegetable oil in a large skillet or wok over medium-high heat. Add the seasoned chicken pieces and cook them for about 5 to 7 minutes. You want them golden and crispy. Once done, remove the chicken from the pan and set it aside. Now, let’s sauté the aromatics for flavor. In the same pan, add another tablespoon of vegetable oil. Toss in four minced garlic cloves and one finely chopped small onion. Sauté these for about 2 to 3 minutes. You want the mixture to be fragrant and the onions to look translucent. After that, add in one cup of mixed vegetables, like peas, carrots, and corn. Stir-fry these for an additional 3 to 4 minutes until they are warmed up. Next, we incorporate the rice. Push the veggies to one side of the pan. If needed, add another tablespoon of vegetable oil. Then, add 2 cups of day-old jasmine rice. Break up any clumps and stir-fry the rice for about 5 minutes. This step is key for getting that crispy texture. Now, mix everything together. Add the cooked chicken back into the pan. Pour in three tablespoons of soy sauce and two tablespoons of oyster sauce if you want a richer flavor. Stir well to coat the rice evenly with the sauces. Then, it’s time to add the eggs. Push the fried rice to one side of the pan. Pour two beaten eggs into the empty space. Scramble the eggs until fully cooked, then mix them into the rice. Finally, drizzle one tablespoon of sesame oil over the fried rice. Taste and adjust the seasoning with salt and pepper as needed. Give it one last stir to combine all the flavors. Serve your Crispy Garlic Chicken Fried Rice hot, garnished with sliced green onions on top. Enjoy this tasty dish! To make Crispy Garlic Chicken Fried Rice, start with day-old rice. Fresh rice is too moist. It clumps together and won’t fry well. Day-old rice is dry and firm. This texture helps get that crispy finish. For crispy fried rice, use high heat. A wok or a large skillet works best. Spread the rice in a thin layer. Don’t crowd the pan. Let it sit in the pan for a few minutes before stirring. This way, it gets nice and crispy. Adjust the seasoning to your taste. Soy sauce adds saltiness, while oyster sauce gives depth. Taste as you go. Add a bit of salt or pepper if needed. You want a balance of flavors. If you like it spicy, add some chili flakes or sauce. Experiment with these tips to make your fried rice just right! Pro Tips Use Day-Old Rice: Day-old jasmine rice is ideal for fried rice as it has dried out slightly, making it easier to fry without becoming mushy. High Heat Cooking: Cooking on high heat helps to achieve that desirable crispy texture in both the chicken and the rice. Customize Your Veggies: Feel free to mix and match vegetables based on your preference or what you have on hand for added flavor and nutrition. Garnish for Freshness: Adding fresh green onions at the end brightens up the dish and adds a pop of color and flavor. {{image_2}} You can switch up the recipe to fit your needs or tastes. - Vegetarian options for Crispy Garlic Fried Rice: Use tofu or tempeh instead of chicken. Both options add protein and flavor. You can also use chickpeas for a different twist. - Other protein alternatives: If you prefer beef or shrimp, those work well too. Just adjust your cooking time. Ground turkey or pork also makes a tasty choice. - Adding different vegetables for flavor: Feel free to mix in bell peppers, broccoli, or zucchini. They add color and crunch. Try adding spinach or kale for a healthy boost. These swaps keep the dish exciting and tasty! To store your Crispy Garlic Chicken Fried Rice, follow these steps: - Cool it down: Let the fried rice sit at room temperature for no more than two hours. This helps avoid bacteria growth. - Use airtight containers: Place the rice in containers that seal tightly. This keeps moisture out and helps maintain flavor. - Label and date: Write the date on the container. This way, you know how long it's been stored. When reheating, you want to keep that perfect texture. Here are some tips: - Use a skillet: Heat a little oil in a pan. Add the rice and stir occasionally. This helps it heat evenly and regain some crispiness. - Add a splash of water: If the rice is too dry, add a few drops of water. Cover the pan for a minute to create steam. This helps rehydrate the rice. You can also freeze Crispy Garlic Chicken Fried Rice if you want to save it for later: - Portion it out: Divide the fried rice into meal-sized portions before freezing. This makes it easy to reheat later. - Use freezer bags: Place the rice in freezer-safe bags and squeeze out excess air. This prevents freezer burn. - Store for up to three months: Frozen fried rice keeps well. Just remember to label the bags with the date. Following these storage tips ensures your delicious meal stays fresh and tasty! How long does Crispy Garlic Chicken Fried Rice last in the fridge? Crispy Garlic Chicken Fried Rice can last for about 3 to 4 days in the fridge. Make sure to store it in an airtight container. This keeps it fresh and tasty. The rice may lose some crispness, but the flavor stays great. Can I make this dish in advance? Yes, you can make this dish in advance. Prepare the fried rice, let it cool, and then store it in the fridge. Reheat it when you are ready to eat. To keep it crispy, use a skillet and heat it on medium. What should I serve with Crispy Garlic Chicken Fried Rice? You can serve this dish with a variety of sides. A simple cucumber salad adds crunch. You might also enjoy it with some spring rolls for extra flavor. For a more filling meal, pair it with a hot soup, like miso or egg drop soup. Crispy Garlic Chicken Fried Rice is a tasty and simple dish. We discussed essential ingredients, cooking steps, and how to achieve the perfect texture. You learned about ingredient swaps for different diets and tips for storing leftovers. In closing, this recipe is fun to make and customize. Enjoy making it your way, and share it with friends. You will love how simple ingredients become a delicious meal.

Crispy Garlic Chicken Fried Rice Flavorful Dinner Recipe

If you’re craving a quick and tasty meal, I have just the recipe for you! My Crispy Garlic Chicken Fried

To make stovetop butter chicken, gather these ingredients: - 1 lb (450g) boneless chicken thighs, cut into bite-sized pieces - 3 tablespoons unsalted butter - 1 medium onion, finely chopped - 4 cloves garlic, minced - 1 tablespoon fresh ginger, grated - 1 teaspoon ground cumin - 1 teaspoon ground coriander - 1 teaspoon garam masala - 1 teaspoon turmeric powder - 1/2 teaspoon cayenne pepper (adjust for spice preference) - 1 cup tomato puree - 1 cup coconut milk - Salt to taste - Fresh cilantro, chopped (for garnish) - Cooked basmati rice (for serving) Each ingredient is measured for a perfect balance of flavor. For the chicken, use one pound. The butter should be three tablespoons to ensure richness. One medium onion adds sweetness. You need four cloves of garlic and one tablespoon of ginger for a fragrant base. Use one teaspoon each of cumin, coriander, and garam masala for warmth. One teaspoon of turmeric gives color, while cayenne adds heat, so adjust it to your taste. The tomato puree and coconut milk each measure one cup, creating the sauce. Finally, season with salt and garnish with cilantro. Fresh herbs and spices bring bright flavor. For this recipe, fresh ginger is best. It adds a strong kick. Use fresh cilantro for garnish to enhance the dish. Dried spices like cumin, coriander, and garam masala are perfect here. They pack a punch and mix well in the sauce. Fresh spices work well in marinades, but dried ones are great for cooking. They give longer-lasting flavor in this stovetop butter chicken. {{ingredient_image_1}} Start by gathering all your ingredients. This makes cooking smooth and easy. You need: - 1 lb boneless chicken thighs, cut into bite-sized pieces - 3 tablespoons unsalted butter - 1 medium onion, finely chopped - 4 cloves garlic, minced - 1 tablespoon fresh ginger, grated - 1 teaspoon ground cumin - 1 teaspoon ground coriander - 1 teaspoon garam masala - 1 teaspoon turmeric powder - 1/2 teaspoon cayenne pepper - 1 cup tomato puree - 1 cup coconut milk - Salt to taste - Fresh cilantro, chopped (for garnish) - Cooked basmati rice (for serving) Make sure to wash and chop the chicken and veggies. This will save time when you start cooking. 1. Melt Butter: Use a large skillet. Heat the butter over medium heat until it melts. 2. Sauté Onion: Add the chopped onion. Cook it until it turns soft and clear, about 5 minutes. 3. Add Garlic and Ginger: Stir in the minced garlic and grated ginger. Cook for 1-2 minutes. This step adds a rich aroma. 4. Mix in Spices: Add cumin, coriander, garam masala, turmeric, and cayenne. Stir well and let it cook for 1 minute. This releases the spice flavors. 5. Cook Chicken: Add the chicken pieces. Stir to coat them in the spices. Cook until browned, about 5-7 minutes. 6. Add Tomato Puree: Pour in the tomato puree. Mix well and let it simmer for about 5 minutes. This blends the flavors. 7. Incorporate Coconut Milk: Slowly add the coconut milk. Stir until the sauce is smooth. Lower the heat and simmer for 10-15 minutes. This thickens the sauce and cooks the chicken. 8. Season and Garnish: Taste the sauce and add salt as needed. Remove from heat and sprinkle fresh cilantro on top before serving. To check if the chicken is done, use a meat thermometer. The inside should be at least 165°F (75°C). If you don’t have a thermometer, cut a piece. The meat should be white, not pink. When the chicken is cooked, it will feel firm to the touch. Always ensure it's fully cooked for safety. To boost the taste of butter chicken, adjust the spice levels. Start with the basic spices: cumin, coriander, garam masala, turmeric, and cayenne pepper. If you want more heat, add an extra pinch of cayenne. For a deeper flavor, try adding a little cinnamon or cardamom. Always taste as you go. This way, you can find the right balance for you. One common mistake is overcooking the chicken. Cook it until it is just browned. If you cook it too long, the chicken can become dry. Another mistake is not letting the spices bloom. Always sauté your spices for a minute before adding other ingredients. This helps release their full flavors. Lastly, don’t skip the salt. A pinch can enhance all the flavors in the dish. To make butter chicken kid-friendly, cut back on the cayenne pepper. You can replace it with a pinch of paprika for color without heat. Also, add more coconut milk to make the sauce creamier and milder. Serve the dish with fluffy basmati rice, which kids often enjoy. Add some fresh cilantro on top, and it looks appealing too. Pro Tips Use Fresh Spices: Freshly ground spices can enhance the flavor of your butter chicken significantly. Consider grinding whole spices for maximum taste. Adjust the Heat: Feel free to modify the cayenne pepper according to your spice tolerance. Start with a small amount and increase as needed. Marinate the Chicken: For even more flavor, marinate the chicken in yogurt and spices for a few hours or overnight before cooking. Thicken the Sauce: If you prefer a thicker sauce, let it simmer longer, or add a cornstarch slurry to achieve your desired consistency. {{image_2}} If you want to switch up the protein, try using tofu or paneer. Tofu gives a nice texture and absorbs flavors well. Use firm tofu, cut it into cubes, and sauté it until golden. Paneer adds a creamy bite that blends perfectly with the sauce. Cut it into cubes and add it in the same step as chicken. Both options work great in this dish. You can replace coconut milk for a different creaminess. Greek yogurt is a fantastic choice. It adds tanginess and richness without coconut's sweetness. To use it, mix a cup of Greek yogurt in after the chicken cooks. Make sure to lower the heat first to prevent curdling. Cashew cream is another way to add smoothness. Blend soaked cashews with water until creamy, then stir this in before serving. Adding vegetables makes the dish more colorful and healthy. Spinach is a great choice. Add it just before serving, allowing it to wilt in the sauce. Bell peppers add crunch and sweetness. Slice them and cook with the onions for extra flavor. You can also use peas or carrots for a pop of color. Don’t be afraid to mix in your favorite veggies! Storing your stovetop butter chicken is easy. First, let it cool down to room temperature. Then, place it in an airtight container. Keep it in the fridge for up to four days. Make sure to store it with the sauce to keep the chicken moist. If you want to keep it longer, freezing is a great option. To reheat, you can use the microwave or stovetop. For the microwave, place the chicken in a bowl. Cover it with a microwave-safe lid. Heat it in 30-second intervals until hot. Stir it well to heat evenly. For stovetop, heat it in a skillet over low heat. Add a splash of water or coconut milk to keep it creamy. Stir often until warm. Freezing butter chicken is simple. Portion it into smaller containers. Leave a little space at the top for expansion. You can freeze it for up to three months. When ready to eat, thaw it in the fridge overnight. Reheat as mentioned above. Enjoy the rich flavors even after freezing! Yes, you can make Butter Chicken ahead of time. Cook it fully, then let it cool. Store it in an airtight container in the fridge. It will stay fresh for about three days. When ready to eat, simply reheat on the stovetop or microwave. The flavors will deepen as it sits, making it even tastier! Stovetop Butter Chicken pairs well with several sides. Here are some great options: - Cooked basmati rice - Naan bread - Roti or chapati - Steamed vegetables - Salad with a light dressing Each side will add its unique touch to your meal. You can also drizzle extra sauce over the rice for more flavor. To make Butter Chicken less spicy, you can adjust the cayenne pepper. Start with half or skip it altogether. You can also add more coconut milk to calm the heat. If you like, mix in some Greek yogurt or cream for extra creaminess and mildness. These tweaks will keep your dish flavorful without the spice kick. This blog post provided a clear path to making Butter Chicken. We covered ingredients, preparation, and cooking steps. You learned how to check for doneness and shared tips to optimize flavor. I also shared variations for different diets and storage tips for leftovers. Cooking is fun and rewarding. Follow these steps, and you'll impress your family and friends with a tasty meal. Enjoy your Butter Chicken journey!

Stovetop Butter Chicken Simple and Flavorful Recipe

Discover the rich, creamy goodness of stovetop butter chicken with my simple and flavorful recipe. Perfect for busy weeknights, this

Chickpea Tomato Soup is both easy to make and packed with flavor. Here’s what you need: - Canned chickpeas - Diced tomatoes - Onion - Garlic - Vegetable broth - Spices: ground cumin, smoked paprika, chili powder - Olive oil - Lemon juice - Fresh basil The canned chickpeas are a great source of protein. They add heartiness to the soup. Diced tomatoes bring a rich sweetness and acidity. The onion and garlic add depth to the flavor. For the broth, choose a good-quality vegetable broth. It enhances the soup without overpowering it. The spices are where the magic happens. Ground cumin gives a warm flavor. Smoked paprika adds a nice smokiness. Chili powder gives it a kick, so adjust based on your taste. You will also need olive oil to sauté the onion and garlic. The lemon juice adds brightness at the end. Finally, fresh basil not only garnishes but also adds a fresh aroma. Gather all these ingredients before you start cooking. It helps streamline your cooking process. Now, you're ready to enjoy a hearty bowl of Chickpea Tomato Soup! {{ingredient_image_1}} - Heat olive oil and sauté onion. Start by heating two tablespoons of olive oil in a large saucepan over medium heat. Add one diced medium onion. Sauté it for about five minutes until it is soft and translucent. - Add garlic and spices. Next, stir in two minced cloves of garlic. Cook for one minute until you smell the garlic's nice aroma. Then, add one teaspoon of ground cumin, one teaspoon of smoked paprika, and half a teaspoon of chili powder. Stir well to coat the onions and garlic with the spices. Cook for about thirty seconds to toast them. - Incorporate tomatoes and broth. Pour in one can of diced tomatoes, juice included, and two cups of vegetable broth. Stir everything together and bring the mixture to a simmer. - Add chickpeas and simmer. Once it simmers, add one can of chickpeas that you have drained and rinsed. Season the soup with salt and pepper to your taste. Reduce the heat and let it simmer for about fifteen to twenty minutes. This step helps all the flavors mix together. - Blend for desired consistency. After simmering, you can blend the soup to your liking. Use an immersion blender directly in the pot for ease. If you want a smoother texture, you can carefully transfer it to a blender in batches. - Final touches with lemon juice and basil. Finally, stir in one tablespoon of lemon juice. Taste the soup and adjust the seasoning if needed. Serve it hot, garnished with fresh basil leaves for a lovely touch. - Using fresh herbs: Fresh basil brings a bright taste to your soup. Chop it just before serving. This keeps its flavor fresh and strong. You can also add parsley or cilantro for variety. - Adjusting spice levels: If you like heat, add more chili powder. For a milder soup, reduce the chili powder. Taste as you go to find your perfect level of spice. - Perfecting texture: For a smooth soup, blend it well. If you prefer a chunkier soup, blend only half. This keeps some chickpeas whole for a hearty bite. - One-pot method: This soup cooks in one pot. Start by sautéing the onion, then add everything else. It saves time and makes clean-up easy. - Time-saving tips for prep: Use canned chickpeas and diced tomatoes to cut down on prep time. Mince garlic and chop onion in advance. This makes cooking quick and easy on busy days. Pro Tips Use Fresh Ingredients: Whenever possible, opt for fresh garlic and onions for a more vibrant flavor in your soup. Customize the Consistency: Adjust the blending time based on your preferred soup texture—smooth or chunky! Add Extra Veggies: Feel free to toss in additional vegetables like carrots or spinach for added nutrition and flavor. Perfect Your Seasoning: Always taste your soup before serving and adjust the seasoning with more salt, pepper, or lemon juice as needed. {{image_2}} You can change the beans in this soup. Black beans or white beans work well. You can even try lentils for a twist. Each bean brings a unique taste and texture. You can also swap out the vegetables. Carrots or celery can add sweetness. Spinach or kale can boost the nutrition. Just chop them small and add them when you mix in the chickpeas. Want a creamier soup? Add a splash of cream or a dollop of yogurt. This will make the soup rich and smooth. You can also use coconut milk for a different flavor. Changing herbs and spices can create new tastes. Try adding thyme or oregano for a different twist. A pinch of red pepper flakes can add heat. Experiment with what you love best! Store your chickpea tomato soup in airtight containers. This keeps it fresh and flavorful. I recommend glass containers for easy reheating. If you use plastic, make sure it's BPA-free. The soup lasts about 3 to 4 days in the fridge. Always check for signs of spoilage before eating. If it smells off or looks strange, discard it. To freeze the soup, let it cool completely first. Then, pour it into freezer-safe bags or containers. Remove as much air as possible. This helps prevent freezer burn. The soup can last for up to 3 months in the freezer. When ready to eat, thaw it in the fridge overnight. Reheat on the stove over low heat. Stir often to keep the texture creamy and smooth. Avoid microwaving as it can change the soup's consistency. What can I serve with Chickpea Tomato Soup? You can serve this soup with crusty bread or a side salad. A grilled cheese sandwich pairs well too. Add a sprinkle of cheese for extra flavor! Can I make this soup vegan? Yes, this soup is vegan! The ingredients are all plant-based. Just use vegetable broth as shown in the recipe. How do I thicken the soup? To thicken the soup, blend more of it until smooth. You can also add a bit of cooked rice or quinoa. Another option is to simmer it longer to reduce the liquid. Is it possible to make this soup in a slow cooker? Yes, you can! Simply add all the ingredients to your slow cooker. Cook on low for 6 to 8 hours, or on high for 3 to 4 hours. Blend before serving for a smooth texture. What are the health benefits of chickpeas and tomatoes? Chickpeas are high in protein and fiber, which aid digestion. They help keep you full too. Tomatoes are rich in vitamins and antioxidants. They support heart health and skin health. Together, they make a tasty and nutritious meal! In this blog post, we covered how to make a delicious chickpea tomato soup. We explored key ingredients, step-by-step instructions, and tips for great flavor. You can swap ingredients and adapt the soup to your taste. Proper storage and freezing methods will help keep leftovers fresh. Remember, cooking can be fun and creative. Embrace your choices and enjoy crafting this tasty dish. With practice, you’ll make it just right every time.

Chickpea Tomato Soup Hearty and Nourishing Comfort

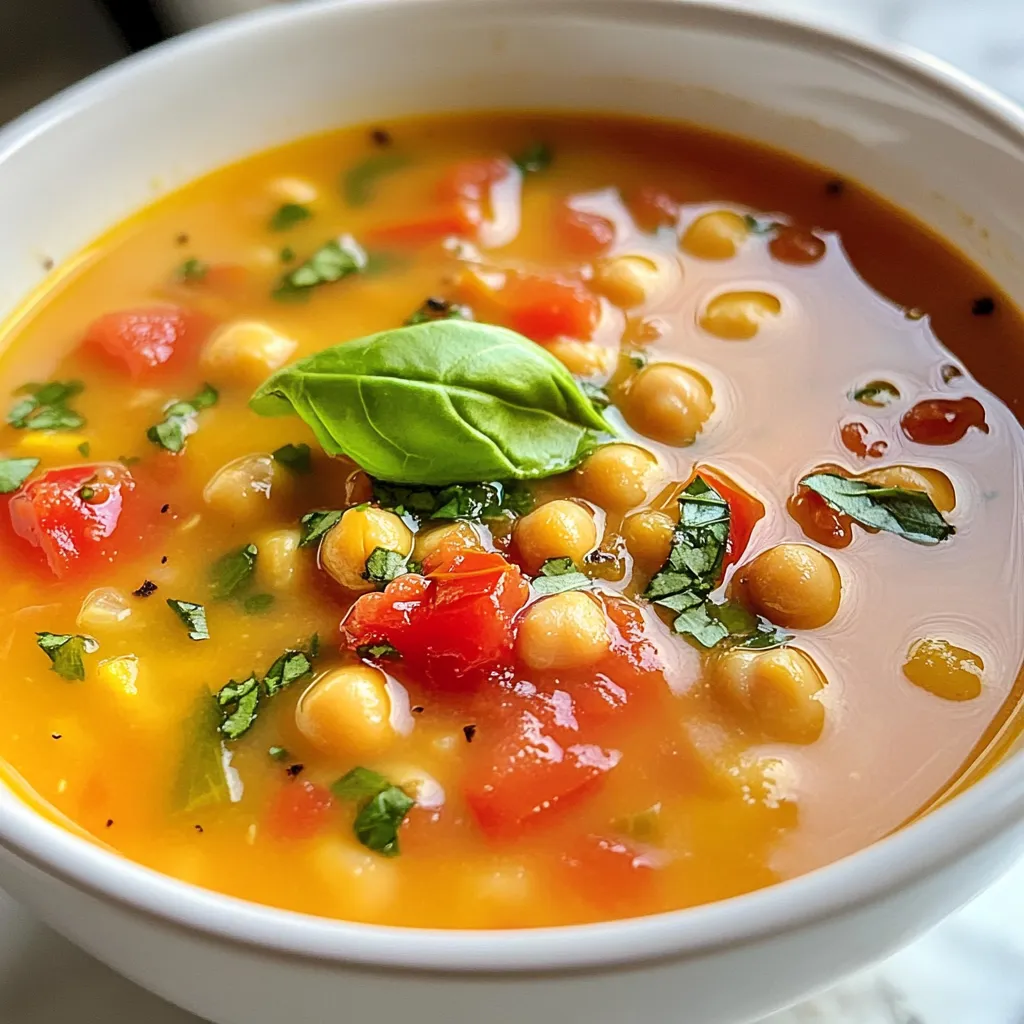
Craving warmth and comfort in a bowl? My Chickpea Tomato Soup is here to deliver. This hearty and nourishing recipe

To make No-Bake Pumpkin Cheesecake Balls, gather these key ingredients: - 1 cup pumpkin puree - 8 oz cream cheese, softened - 1/2 cup powdered sugar - 1 tsp vanilla extract - 1 tsp pumpkin pie spice - 1 cup crushed graham crackers - 1/2 cup chopped walnuts or pecans (optional) - 1/4 cup white chocolate chips (for coating, optional) You can add a few optional items to boost flavor: - Chopped nuts like walnuts or pecans add crunch. - White chocolate chips give a sweet coating, making them extra special. - A sprinkle of cinnamon or nutmeg on top can enhance the fall vibe. Choose your ingredients wisely for the best taste: - Look for fresh pumpkin puree for a rich flavor. Canned pumpkin works well, too. - Select full-fat cream cheese for a creamy texture. Lower fat options might not blend well. - Use pure vanilla extract for a stronger flavor. I avoid imitation vanilla when possible. - Choose finely crushed graham crackers for a smooth mix. Larger pieces can be hard to roll. - If using nuts, pick fresh ones without any bitterness. Check for a good crunch. These tips help ensure your No-Bake Pumpkin Cheesecake Balls taste amazing! {{ingredient_image_1}} First, grab a large mixing bowl. Add 1 cup of pumpkin puree. Next, add 8 ounces of softened cream cheese. Sprinkle in 1/2 cup of powdered sugar and pour in 1 teaspoon of vanilla extract. Don't forget the 1 teaspoon of pumpkin pie spice! Mix all these ingredients until they blend smoothly. You want a nice creamy texture. Now, take your 1 cup of crushed graham crackers. Gradually add them to the pumpkin mixture. Stir until it forms a thick dough-like consistency. If you want some extra crunch, fold in 1/2 cup of chopped walnuts or pecans. Once your mixture is ready, it’s time to shape the balls. Use your hands to scoop out small portions of the mixture. Roll them into bite-sized balls, about 1 inch in diameter. Place each ball on a parchment-lined baking sheet. This step is fun and easy! If you want to add a chocolate coating, grab 1/4 cup of white chocolate chips. Melt them in a microwave-safe bowl. Heat in 30-second increments, stirring in between, until smooth. Now, dip each pumpkin ball into the melted chocolate. Let any excess drip off before placing them back on the baking sheet. For a decorative touch, you can drizzle the chocolate over the balls. Once coated, pop the baking sheet in the fridge for at least 2 hours. Let them chill until firm. For a final touch, sprinkle some extra pumpkin pie spice or crushed graham crackers on top before serving. Enjoy your delightful treats! To get the right texture, you need to mix the ingredients well. Combine the pumpkin puree and cream cheese until smooth. Then, add the powdered sugar and spices gradually. The crushed graham crackers give it a nice thickness. If you want more crunch, fold in chopped nuts. Make sure to roll the balls tightly. This helps them hold their shape. You can save time with some simple tricks. First, use a hand mixer to blend the cream cheese and pumpkin. It speeds up the process. Next, crush the graham crackers in a zip-top bag with a rolling pin. This way, you avoid using a food processor. You can also prepare the mixture a day ahead. Just chill it in the fridge overnight for easier rolling. For a great look, use a clean platter. Arrange the cheesecake balls neatly. You can sprinkle some graham cracker crumbs or pumpkin pie spice on top. This adds color and texture. If you dip them in white chocolate, let the excess drip off. It creates a nice finish. Finally, use colorful napkins or small cups for serving. It makes the treats feel special. Pro Tips Chill the Mixture: For easier handling, chill the pumpkin mixture in the refrigerator for about 30 minutes before rolling it into balls. This helps it firm up and makes rolling easier. Customize the Coating: Experiment with different coatings like crushed nuts, cocoa powder, or coconut flakes instead of white chocolate for a unique twist on the flavor and texture. Storage Tips: Store the pumpkin cheesecake balls in an airtight container in the refrigerator. They can last up to a week, perfect for making ahead of time! Perfect Serving Size: To ensure uniformity, use a cookie scoop to portion the mixture. This helps in making all the balls the same size for even chilling and presentation. {{image_2}} You can switch up the nuts for different flavors and textures. While walnuts and pecans are great, try almonds or hazelnuts. These nuts add a nice crunch. If you want a softer bite, skip the nuts. This treat will still taste amazing without them. To make this recipe gluten-free, replace graham crackers with gluten-free cookies. You can use almond flour or gluten-free oats as a base too. Just ensure the other ingredients are also gluten-free. This way, everyone can enjoy these tasty treats without worry. Feel free to get creative with flavors! Add chocolate chips to the mix for a rich taste. You can even swirl in some caramel for a sweet twist. If you love spice, add extra cinnamon or nutmeg. Each variation brings unique flavors to your cheesecake balls. To keep your no-bake pumpkin cheesecake balls fresh, store them in an airtight container. Layer them with parchment paper between layers to avoid sticking. This helps maintain their shape and texture. Always label your container with the date you made them. In the fridge, these treats last about 5 to 7 days. If you want to store them longer, freeze them. They can stay fresh in the freezer for up to 3 months. Just make sure to wrap them well in plastic wrap before placing them in a freezer bag. These cheesecake balls are best enjoyed cold. If they freeze, let them sit at room temperature for about 15 minutes before eating. This softens them just enough for a perfect bite. Avoid using a microwave, as heat can change their texture and taste. Yes, you can make these cheesecake balls a day or two ahead. Just store them in an airtight container in the fridge. They taste even better when chilled. This is great for parties or gatherings. Just make sure to coat them with chocolate right before serving for the best look. If you want an alternative to cream cheese, try Greek yogurt. It gives a nice tangy flavor. Another option is mascarpone cheese, which is creamier and richer. Silken tofu works well too for a vegan option. Just make sure to adjust the sweetness if needed. These cheesecake balls can fit many diets. Use gluten-free graham crackers for gluten-free needs. For nut allergies, skip the walnuts or pecans. You can replace white chocolate with dairy-free chocolate for vegan diets. Always check labels to ensure all ingredients meet your needs. This blog post covered how to make delicious cheesecake balls. We explored key ingredients, tips for a smooth texture, and creative flavor variations. I shared my best storage tips to keep your goodies fresh. You can make these treats ahead of time and find great substitutes, too. With these steps, you can impress your friends and family. Enjoy making cheesecake balls and have fun with them in your kitchen!

No-Bake Pumpkin Cheesecake Balls Delightful Treats

Welcome to a world of flavor with my No-Bake Pumpkin Cheesecake Balls! If you love fall treats that are easy

For this roasted tomato ricotta pasta, gather these key items: - 12 oz pasta (your choice: penne, fusilli, or spaghetti) - 2 pints cherry tomatoes, halved - 1 cup ricotta cheese - 2 cloves garlic, minced - 3 tablespoons olive oil - 1 teaspoon dried oregano - 1 teaspoon salt - 1/2 teaspoon black pepper These ingredients create a simple yet tasty dish. The cherry tomatoes bring sweetness, while ricotta adds creaminess. I recommend using penne, fusilli, or spaghetti. These pasta shapes hold sauce well. Penne and fusilli trap bits of tomato and cheese. Spaghetti provides a classic feel. Choose what you love best! To make your dish even better, consider these toppings: - Fresh basil leaves for a burst of flavor - Grated Parmesan cheese for a savory touch These extras not only taste great but also add color to your plate. Enjoy your meal with these delightful garnishes! {{ingredient_image_1}} First, you need to preheat your oven to 400°F (200°C). This step is key for roasting. Next, take your two pints of cherry tomatoes and cut them in half. On a large baking sheet, spread the halved tomatoes. Drizzle them with two tablespoons of olive oil. Sprinkle on one teaspoon of dried oregano, one teaspoon of salt, and half a teaspoon of black pepper. Toss everything together. Ensure each tomato gets a good coating. Roast these tomatoes in the oven for 20 to 25 minutes. They should look caramelized and juicy when done. While the tomatoes roast, you can cook your pasta. Bring a large pot of salted water to a boil. Add 12 ounces of your favorite pasta, like penne or spaghetti. Cook the pasta according to the package instructions. Once it's al dente, drain it. Make sure to save about one cup of the pasta water. This water will help create a creamy sauce later. Now, grab a large mixing bowl. Add one cup of ricotta cheese and two minced garlic cloves. Pour in the last tablespoon of olive oil. Stir this mixture until it is smooth and creamy. If it's too thick, add a little of the reserved pasta water. Once your tomatoes are done roasting, add them to the bowl with the ricotta mix. Then, add the cooked pasta. Toss everything gently to combine. If the sauce seems dry, add more pasta water until it reaches your desired creaminess. Taste your dish and adjust the seasoning with more salt and pepper if needed. Serve your pasta warm, topped with fresh basil leaves and grated Parmesan cheese if you like. Enjoy! To get the best ricotta texture, start with room temperature cheese. This helps it mix well. If it feels too thick, add a splash of reserved pasta water. This will make it creamy and smooth. Stir until it feels light and fluffy. A perfect ricotta is key for a tasty sauce. Roasting tomatoes brings out their natural sweetness. Use fresh, ripe cherry tomatoes for the best flavor. Cut them in half and place them on a baking sheet. Drizzle with olive oil and sprinkle with oregano, salt, and pepper. Toss them well. Roast at 400°F for 20-25 minutes. They should caramelize and burst, packing in flavor. Seasoning pasta is simple but important. Start by adding salt to your boiling water. This enhances the pasta’s flavor. When you mix it with the ricotta and roasted tomatoes, taste it. Adjust with more salt or pepper if needed. Fresh basil adds a nice touch, so don’t skip it. It brightens up the dish! Pro Tips Use Fresh Tomatoes: For the best flavor, try using fresh heirloom tomatoes instead of cherry tomatoes. They will add a rich and sweet taste to your dish. Cook Pasta Al Dente: Make sure to cook your pasta al dente, as it will continue to cook slightly when mixed with the hot sauce, ensuring a perfect texture. Customize the Cheese: Feel free to mix different cheeses like feta or goat cheese with ricotta for a unique flavor profile. Make It a Meal: Add protein such as grilled chicken or shrimp to turn this dish into a hearty meal. {{image_2}} You can easily boost your Roasted Tomato Ricotta Pasta by adding protein. Chicken works great. Just grill or sauté it, then slice it into strips. For shrimp, sauté with a bit of olive oil and garlic. Add these proteins to the pasta for a hearty meal. You can enjoy this dish with your favorite protein choice. If you want to make it more veggie-packed, consider adding spinach or zucchini. Fresh spinach wilts nicely when mixed in with the hot pasta. Zucchini can add a nice crunch. Slice it thinly and sauté it until tender before mixing it with the pasta. Both options enhance flavor and nutrition. For a gluten-free version, choose gluten-free pasta. Many brands now offer options made from rice, quinoa, or chickpeas. These alternatives still provide a great texture. You can enjoy all the same flavors in a gluten-free way. Just follow the cooking instructions on the package for best results. To store your roasted tomato ricotta pasta, let it cool first. Use an airtight container for best results. This keeps the pasta fresh and tasty. It will last in the fridge for about 3 to 5 days. Make sure to label the container with the date. This way, you know when to eat it! Reheating your pasta needs care to keep it creamy. The best way is to use the stovetop. Add a splash of water or olive oil to the pan. Heat it on low, stirring often. This helps the pasta warm up without drying out. You can also use the microwave. Just cover it to keep moisture in. Heat in short bursts, stirring in between. If you want to freeze your pasta, it’s easy! Divide it into single servings. Use freezer-safe containers or bags. Squeeze out the air to prevent freezer burn. Your pasta can last up to 3 months in the freezer. When you’re ready to eat, thaw it overnight in the fridge. Reheat as mentioned earlier for a quick meal. Yes, you can use other cheeses! Try using goat cheese or cream cheese for a new taste. Both have smooth textures like ricotta. Each cheese brings a unique flavor. Goat cheese adds a tangy kick. Cream cheese makes it very creamy. You can also mix cheeses for more depth. Just make sure to adjust the salt since some cheeses are saltier. To make this dish vegan, swap ricotta for tofu. Blend firm tofu with lemon juice and nutritional yeast. This mix gives a creamy texture and a cheesy flavor. Use olive oil to keep it rich. You can also add non-dairy cheese if you prefer. For the pasta, choose a vegan option. Most dried pasta is vegan, but check the label. You can enjoy this dish while keeping it plant-based! A light red wine goes well with this pasta. Try a Pinot Noir or a Chianti. These wines have fruity notes that match the roasted tomatoes. If you prefer white wine, choose a Sauvignon Blanc. Its crispness balances the creaminess of the ricotta. Serve the wine chilled for a refreshing sip. Enjoy it with your meal for a perfect pairing! This blog post covered everything you need for delicious roasted tomato ricotta pasta. I shared the essential ingredients, cooking steps, and useful tips. You learned how to store leftovers and explore variations like adding proteins or keeping it vegetarian. Use this guide to create tasty meals that fit your needs. Cooking should be fun and easy. Now, go experiment, enjoy your dishes, and impress your family and friends!

Roasted Tomato Ricotta Pasta Easy and Flavorful Meal

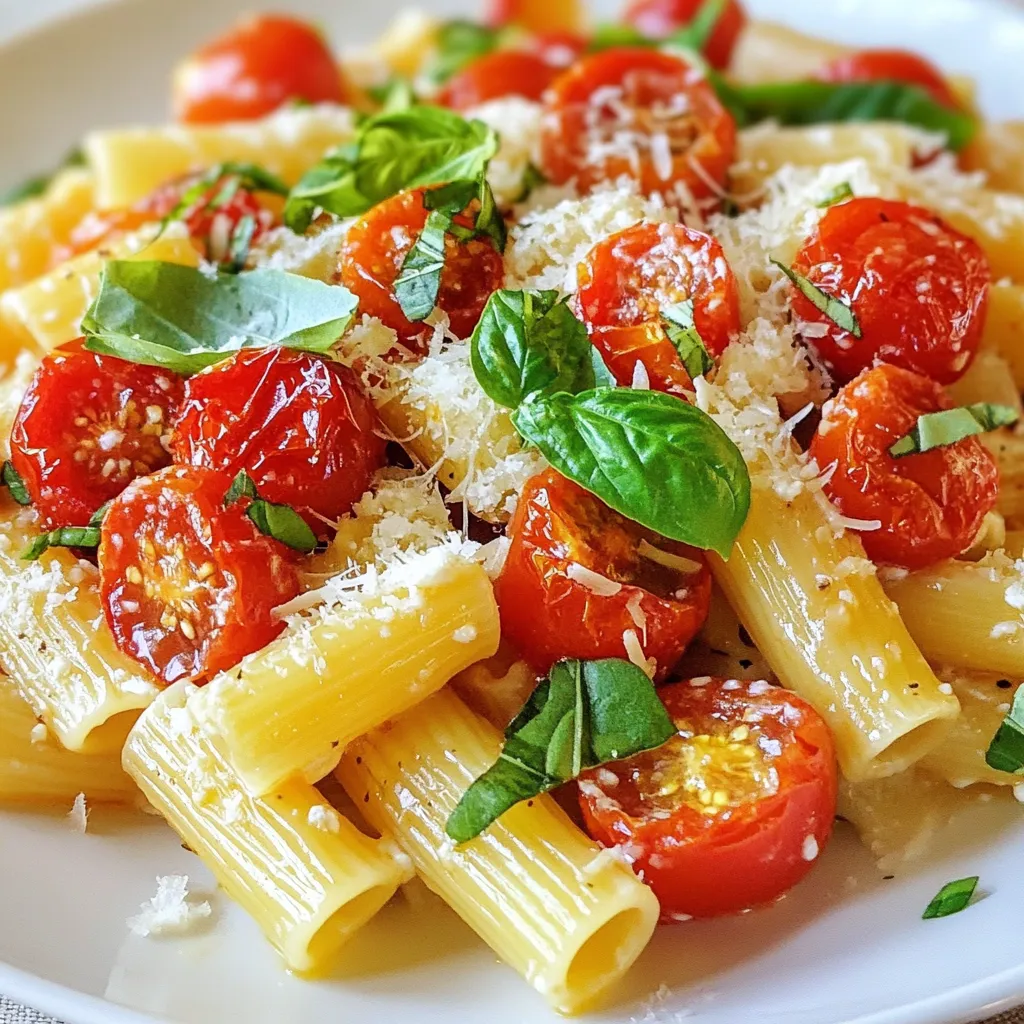
Looking for a quick and tasty meal? Roasted Tomato Ricotta Pasta is here to save the day! This easy dish

- 4 medium zucchinis - 2 cups cooked chicken, shredded - 1 cup marinara sauce (sugar-free) - 1 cup shredded mozzarella cheese - 1/2 cup grated Parmesan cheese - 1 teaspoon garlic powder - 1 teaspoon Italian seasoning - Salt and pepper to taste - Fresh basil leaves for garnish This dish is low in carbs and high in protein. Each serving offers a balanced mix of nutrients. You can enjoy a good amount of healthy fats from cheese. The zucchinis add fiber, which keeps you full. - Calories: About 350 per serving - Fat: 20g - Protein: 30g - Carbohydrates: 10g - Fiber: 3g You can easily swap some ingredients to fit your taste. Here are some ideas: - Zucchini: Try eggplant or bell peppers for a different base. - Chicken: Use turkey or cooked sausage for a new flavor. - Marinara Sauce: If you can’t find sugar-free, make your own with crushed tomatoes. - Cheese: Swap mozzarella for provolone or gouda for a richer taste. - Seasonings: Experiment with different herbs like thyme or oregano for variety. These substitutions can help you create a dish that suits your preferences while keeping it keto-friendly. {{ingredient_image_1}} 1. Start by preheating your oven to 375°F (190°C). 2. Take four medium zucchinis. Cut them in half lengthwise. 3. Use a spoon to scoop out the center of each zucchini. This makes room for the filling. 4. Set the scooped-out flesh aside for later. 5. In a mixing bowl, combine two cups of cooked chicken and one cup of sugar-free marinara sauce. 6. Add one teaspoon of garlic powder and one teaspoon of Italian seasoning. 7. Season with salt and pepper to taste. 8. Mix everything well until it’s fully combined. 9. Stir in half of the mozzarella cheese and half of the Parmesan cheese. 10. Now, spoon the chicken mixture into each zucchini boat. Make sure to pack it slightly. 11. Place the filled zucchini boats on a baking sheet lined with parchment paper. 12. Sprinkle the remaining mozzarella and Parmesan cheese on top of the boats. 13. Bake them in your preheated oven for 20 to 25 minutes. 14. Look for bubbly and golden brown cheese as a sign they are ready. 15. Once done, remove the zucchini boats from the oven. 16. Let them cool for a couple of minutes. 17. Garnish with fresh basil leaves before you serve. - Prep Time: 15 minutes - Bake Time: 20-25 minutes - Total Time: 40 minutes - Servings: This recipe makes four servings. To make the best chicken parmesan zucchini boats, follow these tips: - Choose firm zucchinis: Look for medium zucchinis that are smooth and firm. This gives you a sturdy base for your filling. - Don't overcook the zucchinis: When scooping the center, leave some flesh behind. This keeps them from getting too soft. - Mix well: Ensure the chicken and sauce blend evenly. This helps every bite pack a punch of flavor. - Layer the cheese: Adding half of the mozzarella and Parmesan cheese into the mix gives depth to the dish. Then, sprinkle the rest on top for a golden crust. Here are some common pitfalls to watch out for: - Using too much sauce: If you add too much marinara, the boats may become soggy. Keep it balanced for the best texture. - Skipping the seasoning: Salt and pepper are key! Don’t forget to season the chicken mixture for full flavor. - Not letting them cool: Allow the boats to cool for a few minutes after baking. This makes them easier to serve and eat. You can enjoy these zucchini boats in many ways: - Pair with a salad: A fresh garden salad with a light vinaigrette balances the meal. - Add garlic bread: For a crunchy side, serve with some keto-friendly garlic bread. - Try different toppings: Fresh basil adds a pop of color and flavor. You can also use parsley or crushed red pepper for some heat. Pro Tips Choose the Right Zucchini: Use firm, medium-sized zucchinis for the best texture and flavor. They should be slightly glossy and free of blemishes. Make Ahead: You can prepare the zucchini boats and the filling a day in advance. Just assemble and bake when ready to serve. Add More Veggies: Feel free to incorporate other vegetables like bell peppers or spinach into the chicken mixture for added nutrition and flavor. Control the Cheese: Adjust the amount of mozzarella and Parmesan cheese to your preference. For a lighter option, use less cheese or swap for a lower-fat version. {{image_2}} You can easily make this dish vegetarian. Use cooked mushrooms or lentils instead of chicken. They add great texture and flavor. Mix in your favorite veggies, like bell peppers or spinach. This way, you still get a hearty meal that feels satisfying. If you want to switch up the sauce, try pesto or Alfredo. A creamy sauce can change the whole dish. Look for low-carb options. This keeps the meal keto-friendly while adding new flavors. You can also make your own sauce with fresh tomatoes and herbs. For cheese, there are many tasty options. Use vegan cheese if you avoid dairy. Nutritional yeast is a great choice for a cheesy flavor without the fat. You can also try feta or goat cheese for a different taste. Whatever you choose, it should melt well and complement the dish. To store your Keto Chicken Parmesan Zucchini Boats, let them cool first. Place them in an airtight container. Make sure to keep them in the fridge. They will stay fresh for up to three days. Enjoy them for lunch or dinner later in the week. When you're ready to enjoy leftovers, preheat your oven to 350°F (175°C). Place the zucchini boats on a baking sheet. Cover them with foil to keep them moist. Heat for about 15 to 20 minutes. You can also microwave them for quick reheating. Just use a microwave-safe dish and cover it loosely. If you want to freeze the zucchini boats, wrap each one tightly in plastic wrap. Then, place them in a freezer bag or container. Make sure to remove as much air as possible. They will keep well for up to two months. When you are ready to eat, thaw them overnight in the fridge. Reheat them as mentioned above. This way, you'll have a tasty meal ready anytime! Yes, you can use regular zucchinis. Just make sure they are not too small. If they are large, you might need to adjust cooking time. Regular zucchinis can hold the filling well. However, the medium ones have a better shape for boats. Absolutely! You can prepare the filling a day before. Just store it in the fridge. Scoop out the zucchinis and fill them right before baking. This saves time on a busy day. You can also bake them, let them cool, and store leftovers for later. The zucchini boats are done when the cheese is bubbly and golden. You can also check the zucchini's tenderness with a fork. If the fork goes in easily, they are ready. Keep an eye on them to avoid overcooking. Enjoy your delicious meal! In this post, we covered how to make Chicken Parmesan Zucchini Boats. We explored the list of ingredients, their nutrients, and tips for substitutions. I guided you through each prep step, cooking hints, and timing tips. We also discussed common mistakes and how to serve the dish well. Don't forget the variations to try, like vegetarian options or different sauces. Lastly, I shared storage tips for leftovers and FAQs to answer your questions. Enjoy making and sharing this dish!

Keto Chicken Parmesan Zucchini Boats Flavorful Meal

Looking for a tasty meal that fits your keto diet? You’ll love these Keto Chicken Parmesan Zucchini Boats! They are

- 1 pound ground beef - 2 tablespoons hot honey - 1 tablespoon soy sauce - 1 tablespoon sesame oil - 1 teaspoon garlic powder - 1 teaspoon onion powder - 1 teaspoon ground ginger - 1 cup cooked rice (jasmine or brown) - 1 cup broccoli florets - 1 medium carrot, julienned - ½ red bell pepper, sliced - 2 green onions, sliced (for garnish) - Sesame seeds (for garnish) - Salt and pepper to taste These ingredients come together to create a bold and tasty dish. The hot honey adds just the right kick. The ground beef serves as a hearty base, making this meal filling and satisfying. - Sliced green onions - Sesame seeds Garnishing is key to adding flavor and texture. Green onions give a fresh crunch. Sesame seeds add an appealing look and nutty taste. These simple additions elevate your meal. - Sliced jalapeños for heat - Chopped cilantro for freshness - Lime wedges for a zesty kick Feel free to mix in these extras. Jalapeños can spice things up further. Cilantro offers a fresh touch, while lime brightens the dish. Customize it to match your taste buds! {{ingredient_image_1}} First, heat a large skillet over medium heat. Add 1 pound of ground beef into the skillet. Season the beef with salt, pepper, garlic powder, onion powder, and ground ginger. Cook the beef for about 8 to 10 minutes. Stir and break it apart with a spoon. Once browned, drain any excess fat if needed. Next, lower the heat slightly. Add 2 tablespoons of hot honey and 1 tablespoon of soy sauce to the beef. Stir well to coat the beef evenly. Let it simmer for about 2 to 3 minutes. This will help the sauce thicken and add flavor. In a separate pan, heat 1 tablespoon of sesame oil over medium heat. Add 1 cup of broccoli florets, 1 medium carrot (julienned), and ½ red bell pepper (sliced). Sauté the vegetables for about 5 to 7 minutes. They should be tender but still bright in color. Add a light sprinkle of salt and pepper to taste. Now, it's time to put everything together. In serving bowls, layer 1 cup of cooked rice as the base. Top the rice with the hot honey ground beef mixture. Then, add the sautéed vegetables on top. Finally, for the finishing touch, sprinkle sliced green onions and sesame seeds over the bowls. This adds a nice crunch and boosts the flavor. Your Hot Honey Ground Beef Bowls are now ready to serve! To cook ground beef well, start with a hot skillet. This helps the meat brown nicely. Use a wooden spoon to break it apart as it cooks. Season it with salt, pepper, garlic powder, onion powder, and ground ginger. This will make your beef tasty. Cook until it turns brown, about 8-10 minutes. Drain any extra fat. This step keeps your dish light. You can boost the flavor of your hot honey ground beef bowls. Try adding a splash of lime juice for a zesty twist. You can also mix in some chopped garlic or fresh ginger. These will bring out the dish's warmth. Consider adding some crushed red pepper flakes for extra heat. This will give your meal a nice kick. If you have allergies, there are easy swaps. Use ground turkey or chicken instead of beef for a lighter option. If soy sauce is a concern, try coconut aminos. For a gluten-free option, use tamari sauce. You can substitute hot honey with regular honey plus chili flakes. This keeps the sweet and spicy flavor. Always adjust according to your taste and needs. Pro Tips Balance the Heat: Adjust the amount of hot honey based on your spice tolerance. Start with less if you're unsure, and add more to taste. Perfectly Cooked Vegetables: Keep your vegetables crunchy by sautéing them just until bright and tender. Overcooking can lead to a mushy texture. Rice Variations: Experiment with different rice types like brown, jasmine, or even quinoa for a nutritious twist. Meal Prep Friendly: Prepare the ground beef and sautéed vegetables in advance for quick assembly during busy weeknights. {{image_2}} If you want a low-carb option, try using cauliflower rice. Cauliflower rice has a light, fluffy texture. It pairs well with the hot honey ground beef. To make it, simply pulse cauliflower florets in a food processor until they resemble rice. Sauté the cauliflower rice in a pan for about 5 minutes. Season with salt and pepper. This swap cuts carbs and boosts veggies. For a vegetarian twist, use meat alternatives like plant-based ground beef. Many brands offer tasty options that mimic ground beef well. Cook it just like regular ground beef. Add hot honey and soy sauce as usual. This way, you still enjoy the flavors without meat. You can also use lentils or chickpeas for added protein and texture. You can adjust the spice level to fit your taste. If you prefer milder flavors, reduce the hot honey. You can also mix in a bit of regular honey to balance the heat. For those who love spice, add more hot honey or some chili flakes. Experimenting with spice levels makes the dish fun and personal. To store your hot honey ground beef bowls, allow them to cool. Use airtight containers for leftovers. This helps keep the flavors fresh. You can store them in the fridge for up to three days. Make sure to separate the beef from the rice and veggies. This keeps everything from getting soggy. When you want to enjoy your leftovers, reheat them in the microwave. Place the beef, rice, and veggies in a microwave-safe dish. Heat on high for about 2-3 minutes, stirring halfway. You can also reheat in a skillet. Add a splash of water to keep it moist. Cook over medium heat until heated through. If you want to keep your hot honey ground beef bowls longer, freezing is a great option. Use freezer-safe containers or bags. Make sure to label them with the date. You can freeze them for up to three months. When ready to eat, thaw in the fridge overnight. Then, reheat as mentioned above. Enjoying this tasty meal later is easy! Hot honey is honey mixed with spices or peppers. It gives a sweet and spicy kick to dishes. You can find hot honey in many grocery stores or online. Look for brands that use natural ingredients. You can also check local specialty stores for unique flavors. Yes, you can use other proteins. Ground turkey, chicken, or pork work well. For a vegetarian option, try crumbled tofu or tempeh. Each choice brings its own flavor, so feel free to experiment. Making hot honey at home is easy and fun. Start with one cup of honey. Add 1-2 teaspoons of red pepper flakes or fresh chili peppers. Heat the mix in a saucepan until warm, then let it cool. The longer you let it sit, the spicier it gets. Absolutely! You can add any vegetables you like. Try bell peppers, snap peas, or spinach. Just remember to cut them thin for quick cooking. Adding different colors makes the bowl more appealing and nutritious. Hot honey ground beef bowls can last about 3-4 days in the fridge. Store them in an airtight container. When ready to eat, simply reheat in the microwave or on the stove. Enjoy your flavorful meal again! We covered a great recipe for hot honey ground beef bowls. You learned about key ingredients and tasty garnishes. I shared steps to prepare and assemble your dish easily. Tips help you cook the beef perfectly and add flavors. You can even try variations like low-carb or vegetarian options. Enjoy creating your bowls and feel free to make them your own. This dish is simple, delicious, and fun for everyone!

Hot Honey Ground Beef Bowls Savory Dinner Delight

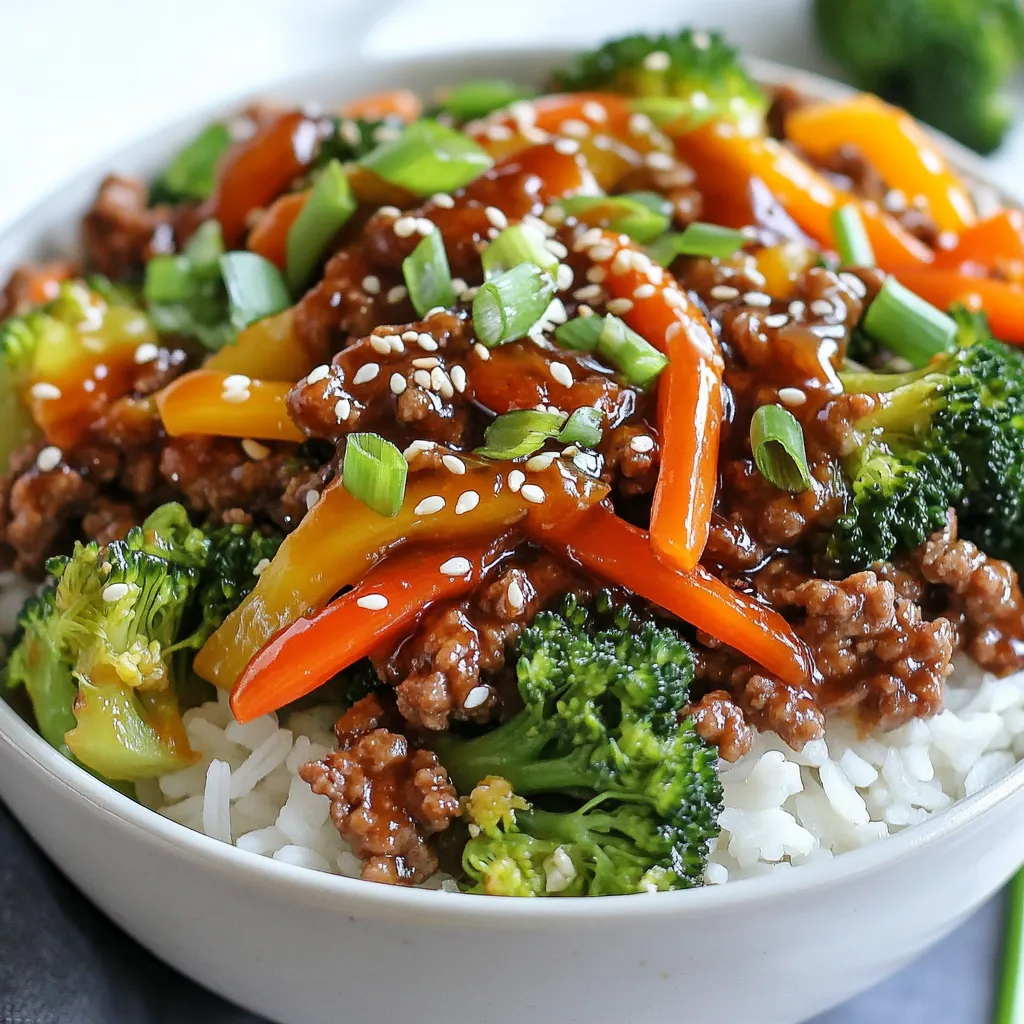
Looking for a tasty dinner that’s quick and easy? Try my Hot Honey Ground Beef Bowls! With a sweet and

- 1 cup cooked chicken, shredded - 2 large eggs - 2 tablespoons mayonnaise - 1 teaspoon Dijon mustard - 1 tablespoon fresh chives, chopped - 1 tablespoon olive oil - 4 slices of whole grain bread - 1 avocado, sliced - Salt and pepper to taste - Leafy greens (romaine or arugula) for garnish This sandwich serves two and is rich in protein. Each serving has about: - Calories: 450 - Protein: 25 grams - Carbohydrates: 40 grams - Fat: 22 grams - Fiber: 8 grams This Chicken Egg Sandwich packs a punch of nutrients. Here are some benefits: - Protein Power: Cooked chicken and eggs give you high-quality protein. This helps build muscles and keep you full. - Healthy Fats: Avocado adds good fats, which are great for your heart. - Fiber Boost: Whole grain bread and leafy greens add fiber. Fiber helps digestion and keeps your gut healthy. - Vitamins and Minerals: Chives and greens are full of vitamins like A and C. These support your immune system. This sandwich is not just tasty; it’s also good for your health! {{ingredient_image_1}} First, grab a bowl. Add 1 cup of shredded chicken. Then, mix in 2 tablespoons of mayonnaise. Next, add 1 teaspoon of Dijon mustard. Toss in 1 tablespoon of chopped chives. Season with salt and pepper to taste. Mix well until everything blends together. This chicken mixture adds great flavor to your sandwich. Now, heat 1 tablespoon of olive oil in a skillet over medium heat. While the oil warms, crack 2 large eggs into another bowl. Whisk them until they are smooth. Season the eggs with salt and pepper. Pour the eggs into the skillet. Stir gently as they cook. Keep stirring until they are soft and fully cooked. Set the scrambled eggs aside for now. Toast 4 slices of whole grain bread until they turn golden brown. Take 2 toasted slices and spread the chicken mixture evenly on top. Next, place a generous layer of scrambled eggs over the chicken. Add sliced avocado on top of the eggs. Finally, sprinkle a handful of leafy greens, like romaine or arugula. Cover the sandwich with the other slices of toasted bread. Press down gently. Slice the sandwiches in half diagonally and enjoy! To get fluffy scrambled eggs, start by whisking two large eggs in a bowl. Add a pinch of salt and pepper to taste. Heat a skillet over medium heat, and add olive oil. Pour in the eggs and stir gently with a spatula. Keep stirring until the eggs are just set. Remove them from heat while they are still slightly runny. This gives you perfect scrambled eggs every time. Whole grain bread works best for this sandwich. It adds texture and flavor. Look for bread that is fresh and soft. If you want a crunch, lightly toast it until golden brown. This adds a nice contrast to the creamy filling. You can also try sourdough or rye for a twist. After assembling your sandwich, serve it with a side of leafy greens. Romaine or arugula adds a nice crunch. You can also add a slice of tomato or cucumber for freshness. If you like spice, drizzle some hot sauce on top. Enjoy your savory chicken egg sandwich with a cool drink. Pro Tips Use Leftover Chicken: For a quicker preparation, utilize leftover roasted or grilled chicken from a previous meal to save time. Customize Your Spread: Experiment with different spreads like Greek yogurt or hummus for a unique flavor twist. Perfectly Scrambled Eggs: Keep the eggs on low heat and stir gently for fluffy, creamy scrambled eggs. Don't overcook them! Avocado Ripeness: Ensure your avocado is perfectly ripe for easy slicing and maximum creaminess in your sandwich. {{image_2}} You can change up your chicken egg sandwich by using other proteins. Try turkey or ham for a different taste. If you want more flavor, add bacon or sausage. For a lighter option, shredded rotisserie chicken works great. Each protein brings its own twist, making your sandwich exciting and new. Not a meat lover? No problem! You can easily make a vegetarian version. Replace the chicken with grilled veggies like zucchini or bell peppers. You can also use hummus for a creamy texture. Adding feta or mozzarella cheese can give the sandwich a nice flavor boost. Don't forget to load up on greens for extra crunch. Using seasonal ingredients can make your sandwich even better. In spring, add fresh herbs like basil or parsley. In summer, sliced tomatoes and cucumbers add freshness. In fall, roasted butternut squash can give a sweet touch. In winter, wilted spinach and hearty greens offer warmth and comfort. Seasonal choices keep your meal vibrant and tasty. To keep your chicken egg sandwich fresh, wrap it tightly in plastic wrap. You can also place it in an airtight container. Store it in the fridge. It will stay good for up to three days. When you're ready to enjoy your sandwich again, remove the wrap. Place it on a plate and heat in the microwave. Heat it for about 30 to 60 seconds. You can also reheat it in a skillet. Use low heat to warm it up without burning the bread. If you want to save your sandwich for later, freezing is a great option. Wrap each sandwich in plastic wrap, then place it in a freezer bag. Make sure to remove as much air as possible. Your sandwich can last up to three months in the freezer. When you're ready to eat it, thaw it in the fridge overnight. Then, reheat as usual. Yes, you can use different types of bread. Whole grain bread is great, but sourdough or ciabatta works well, too. Each type adds a unique taste and texture. Try a soft brioche for a richer flavor. Just ensure the bread can hold the filling without falling apart. You can get creative with your sandwich. Adding cheese like cheddar or pepper jack can give it a nice kick. You might also try adding tomatoes, spinach, or even bacon for extra flavor. Feel free to use a spicy sauce or fresh herbs like basil for a twist. You can prepare parts of the sandwich ahead. Make the chicken mixture and scrambled eggs, then store them in the fridge. Toast the bread right before serving for the best texture. However, I recommend assembling the sandwich just before eating to keep it fresh. This blog post showed you how to make a great chicken egg sandwich. We covered ingredients, cooking steps, and tips for success. You learned about healthy options and tasty variations too. In summary, this sandwich is tasty, easy, and full of nutrients. You can mix it up as you like. Enjoy making and sharing it with others!

Chicken Egg Sandwich Savory and Satisfying Meal

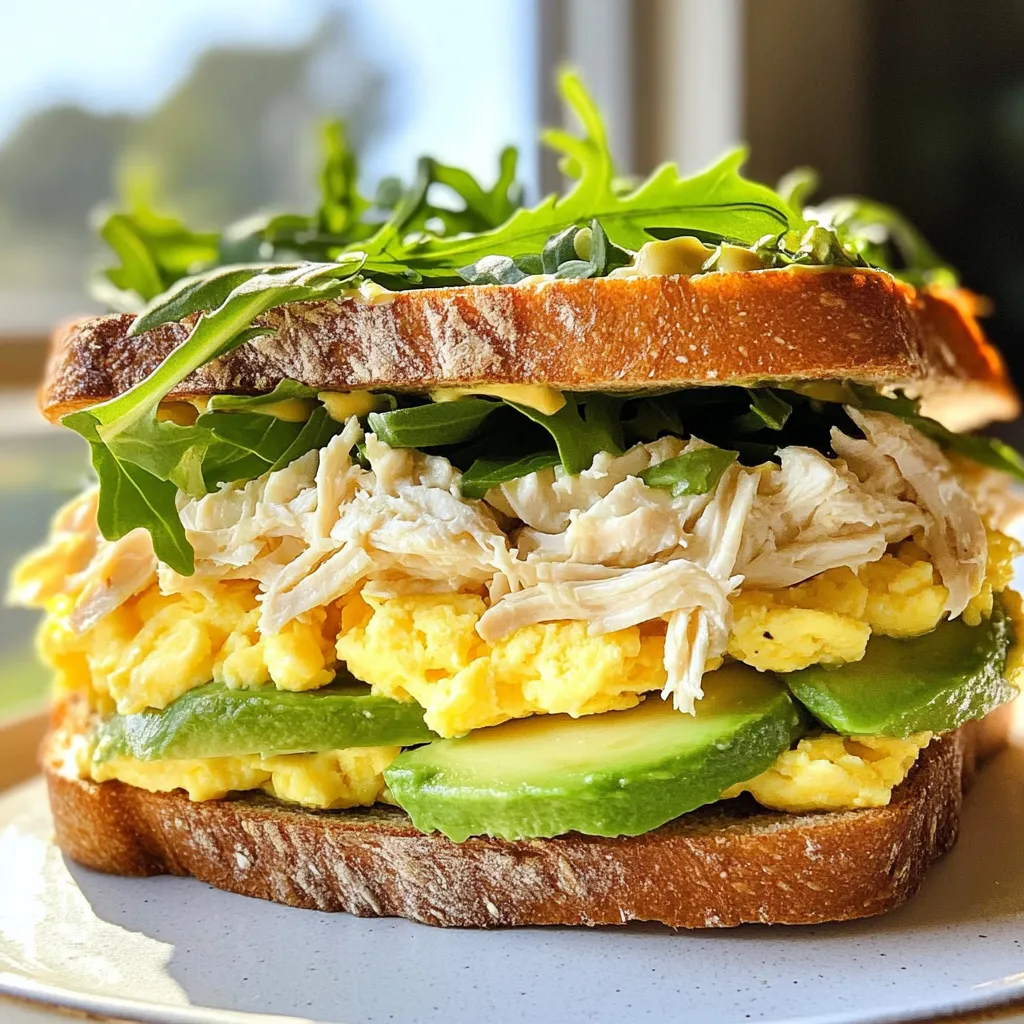
Are you ready to take your lunch to the next level? The Chicken Egg Sandwich is a quick, tasty meal

- 1 ½ cups all-purpose flour - ½ cup unsweetened cocoa powder - 1 teaspoon baking soda - ½ teaspoon salt - ½ cup unsalted butter, softened - 1 cup granulated sugar - 1 large egg - 1 teaspoon vanilla extract - ½ cup buttermilk - 1 cup mini chocolate chips - ½ cup sweetened shredded coconut - ½ cup chopped pecans - 1 cup powdered sugar - ½ cup cream cheese, softened - ¼ cup butter, softened - 1 teaspoon vanilla extract To make these German Chocolate Whoopie Pies, you need simple, tasty ingredients. The whoopie pie cookies start with flour, cocoa, baking soda, and salt. These give the cookies their rich chocolate flavor and perfect texture. Next, you'll need unsalted butter and sugar. Creaming these together makes the cookies light and fluffy. After that, add an egg and vanilla extract. These add moisture and sweetness. Buttermilk makes the cookies tender and soft. Finally, the mini chocolate chips bring extra chocolate goodness to each bite. For the filling, you will use sweetened shredded coconut and chopped pecans. These add a nice crunch and flavor. Cream cheese and butter make the filling rich and smooth. Powdered sugar sweetens the mix, while more vanilla gives it a lovely taste. Gather these ingredients, and you are ready for some fun baking! {{ingredient_image_1}} 1. Preheat the Oven and Prepare Baking Sheets: Set your oven to 350°F (175°C). Line your baking sheet with parchment paper. This helps the cookies not stick. 2. Mix the Dry Ingredients: In a bowl, whisk together 1 ½ cups of flour, ½ cup of cocoa powder, 1 teaspoon of baking soda, and ½ teaspoon of salt. This blend gives the cookies their rich taste. 3. Cream the Butter and Sugar: In a large bowl, beat ½ cup of softened butter and 1 cup of granulated sugar. Mix until the mixture is light and fluffy. This step adds air, making your cookies soft. 1. Add Egg and Vanilla Extract: Mix in 1 large egg and 1 teaspoon of vanilla extract. Stir until everything is well blended. 2. Alternate Adding Dry Mixture and Buttermilk: Add the dry mixture and ½ cup of buttermilk to the butter mixture. Start with the dry mix and end with it. Stir until just combined. This keeps the batter moist. 3. Fold in Chocolate Chips: Gently fold in 1 cup of mini chocolate chips. This adds a sweet surprise in each bite. 1. Scoop and Bake the Cookies: Use a cookie scoop or tablespoon to drop dollops of dough onto the baking sheet. Space them about 2 inches apart. Bake for 10-12 minutes. The edges should be set, but the centers may look soft. 2. Prepare the Coconut-Pecan Filling: In a medium bowl, beat together ½ cup of softened cream cheese and ¼ cup of softened butter. Add 1 cup of powdered sugar and 1 teaspoon of vanilla extract. Mix until smooth. Stir in ½ cup of shredded coconut and ½ cup of chopped pecans. 3. Assemble the Whoopie Pies: Once the cookies are cool, spread a good amount of filling on the flat side of one cookie. Top it with another cookie, creating a sandwich. This method gives you soft, delicious German Chocolate Whoopie Pies that you can enjoy or share. To make great German chocolate whoopie pies, you must measure your ingredients well. Accurate measurements lead to the right texture. Too much flour can make them dry, while too little can leave them flat. Use measuring cups for dry ingredients and a scale for precision. Cooling time is also key. After baking, let the cookies cool for five minutes on the baking sheet. Then, move them to a wire rack. Cooling prevents the cookies from getting soggy when you add the filling. Give them time to cool completely before you assemble them. This step ensures the whoopie pies stay firm and delicious. For the best flavor, chill your whoopie pies after you assemble them. I recommend a chilling time of at least 30 minutes. This time lets the flavors meld together. It makes each bite better than the last. Adjusting sweetness is another way to enhance flavor. If you find the filling too sweet, use less powdered sugar. You can also add a pinch of salt. This will balance the sweetness and make the filling taste richer. Pro Tips Chill the Batter: For thicker whoopie pies, chill the batter for 30 minutes before baking. This will help them hold their shape better. Use Room Temperature Ingredients: Ensure your butter and cream cheese are at room temperature for a smoother filling that blends easily. Experiment with Fillings: Feel free to customize the filling by adding crushed cookies or different nuts for a unique twist on flavor and texture. Storage Tips: Store whoopie pies in an airtight container in the refrigerator to keep them fresh and chewy for several days. {{image_2}} You can have fun with the filling for your German Chocolate Whoopie Pies. Cream cheese frosting adds a tangy twist. It balances the sweetness and gives a rich texture. You can also try flavored fillings like peanut butter or chocolate ganache. Each one changes the taste and keeps things exciting. Adding spices can also enhance the flavor. A pinch of cinnamon can warm up the cookies. Nutmeg adds a sweet and earthy note. These spices work well with chocolate and make your whoopie pies special. If you need to make gluten-free whoopie pies, swap the all-purpose flour for a gluten-free blend. Look for blends that include xanthan gum for better texture. This small change keeps your pies tasty and safe for those with gluten issues. For a dairy-free option, use coconut cream instead of cream cheese in the filling. Substitute almond milk for buttermilk and use dairy-free butter. These changes keep the flavor while making them suitable for everyone. Enjoy these tasty treats without worry! To keep your whoopie pies fresh, use airtight containers. A plastic container or a resealable bag works well. Place a piece of parchment paper between each pie to avoid sticking. This helps maintain their shape. For refrigeration, store them in the same airtight container. Make sure the container is sealed tight. The cold keeps the filling creamy and the cookies soft. Whoopie pies last about 2 days at room temperature. Keep them in a cool, dry place, away from sunlight. In the fridge, they can last up to a week. The chill helps keep the filling fresh and tasty. If you want the best flavor, eat them cold. The cold enhances the rich chocolate taste and creamy filling. Enjoy your delicious treats! A German Chocolate Whoopie Pie is a delightful treat. It combines soft chocolate cookies with a rich coconut-pecan filling. The name comes from German chocolate cake. This cake uses a special dark chocolate made in Germany. The whoopie pie takes that rich flavor and turns it into a sandwich cookie. This dessert is a fun twist on a classic. It’s perfect for parties, bake sales, or just a sweet snack at home. Yes, you can freeze Whoopie Pies! This is a great way to save leftovers. Start by letting them cool completely. Then, wrap each pie in plastic wrap. Place them in a freezer-safe bag or container. They can last up to three months in the freezer. When you are ready to eat them, let them thaw in the fridge. This keeps them fresh and tasty. To make the filling less sweet, try these tips: - Reduce the powdered sugar by half. This cuts down on the sweetness. - Add more cream cheese for a tangy flavor. This balances the sweetness. - Mix in a pinch of salt. Salt helps bring out other flavors and reduces sweetness. - Add unsweetened cocoa powder for a chocolatey taste. This also helps with sweetness. These tricks will give you a filling that is still delicious but not too sweet. You learned how to make delicious whoopie pie cookies. We covered the tasty ingredients for the cookies and filling. I gave step-by-step instructions for baking and assembling them. You also found tips to get the best texture and flavor. Lastly, we explored storage tips and variations for different diets. Now, enjoy making these treats with family and friends. Share your creations and have fun!

German Chocolate Whoopie Pies Irresistible Treat Recipe

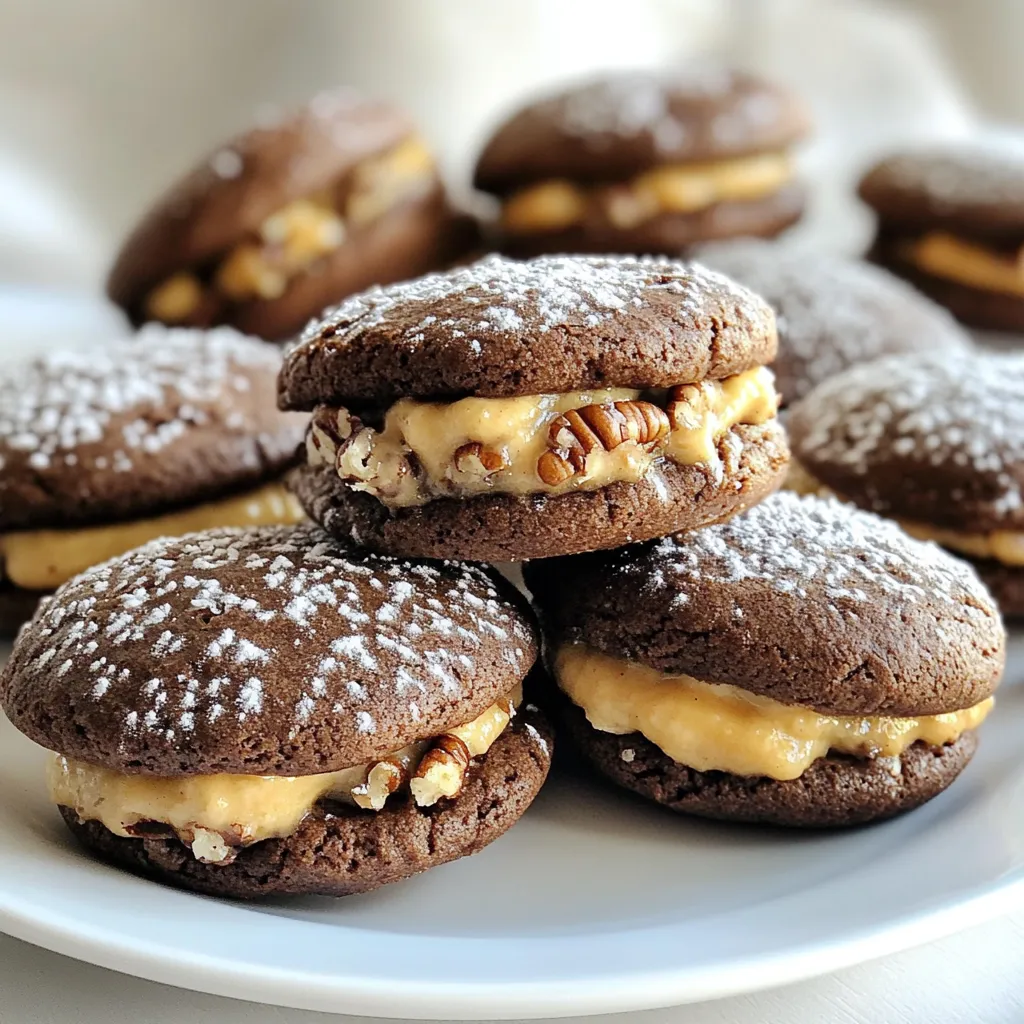
Get ready to indulge in a delightful treat with my German Chocolate Whoopie Pies! This recipe combines rich chocolate cookies

Older posts
Newer posts
← Previous Page1 … Page142 Page143 Page144 Next →

dsad

© 2025 So Yum Recipes • Built with GeneratePress

Our Policies

  • Copyright Policy
  • Cookie Policy
  • GDPR Policy
  • Privacy Policy
  • Disclaimer
  • Terms Of Use

More Information

  • Home
  • About
  • Contact
  • Appetizers
  • Dessert
  • Dinner
  • Drinks
©2025, So Yum Recipes About Back To Top