Skip to content
DisclaimerTerms Of UseGDPR PolicyCookie Policy

So Yum Recipes

  • Home
  • Drinks
  • Appetizers
  • Dinner
  • Dessert
  • About
  • Contact
  • Privacy Policy
DisclaimerTerms Of UseGDPR PolicyCookie Policy

Chloe

- 2 tablespoons olive oil - 1 medium onion, diced - 3 cloves garlic, minced - 1 bell pepper (any color), diced - 2 carrots, diced - 1 celery stalk, diced - 1 can (15 oz) white beans (cannellini or great northern), drained and rinsed - 4 cups vegetable broth - 1 cup corn kernels (fresh or frozen) - 1 teaspoon ground cumin - 1 teaspoon chili powder - 1/2 teaspoon smoked paprika - 1/4 teaspoon cayenne pepper (optional for heat) - 1 cup heavy cream or coconut milk for a vegan option - Salt and pepper to taste - Fresh cilantro or parsley, for garnish - Lime wedges, for serving I love using simple, fresh ingredients. Each one adds to the chili's flavor. Olive oil gives a rich base. Onion and garlic bring depth and aroma. Bell peppers add sweetness and color, while carrots and celery add crunch. White beans are the star of this dish. They are creamy and filling. You can use cannellini or great northern beans. Vegetable broth makes the chili hearty and adds a vegetable kick. Corn kernels bring a pop of sweetness. Spices like cumin and chili powder give warmth. Smoked paprika adds a nice, smoky touch, and cayenne pepper can give it a kick if you like heat. Finally, heavy cream or coconut milk makes it creamy. It rounds out the flavors and adds richness. Salt and pepper bring everything together. Garnish with cilantro or parsley for a fresh finish. Lime wedges add a zesty touch when serving. This combination creates a warm and comforting meal. {{ingredient_image_1}} 1. Heating the oil and sautéing the onion In a large pot, heat 2 tablespoons of olive oil over medium heat. Add 1 medium diced onion. Sauté the onion for about 3 to 4 minutes until it turns translucent. 2. Adding garlic and vegetables Next, add 3 minced garlic cloves, 1 diced bell pepper, 2 diced carrots, and 1 diced celery stalk to the pot. Stir frequently for 5 to 7 minutes, until all the vegetables soften. 3. Stirring in beans, broth, and spices Now, stir in 1 can of drained and rinsed white beans, 4 cups of vegetable broth, and 1 cup of corn kernels. Add 1 teaspoon of ground cumin, 1 teaspoon of chili powder, 1/2 teaspoon of smoked paprika, and 1/4 teaspoon of cayenne pepper if you want heat. Mix well. 1. Bringing to a boil and simmering Bring the mixture to a gentle boil. Once it starts bubbling, reduce the heat. Let it simmer for about 20 to 25 minutes. Stir occasionally to help the flavors meld. 2. Adding cream or coconut milk After it thickens slightly, stir in 1 cup of heavy cream or coconut milk for a vegan option. This adds a nice creaminess to the chili. 3. Final seasoning and serving instructions Season with salt and pepper to taste. Let the chili simmer for another 5 minutes to heat through. Remove from heat, ladle into bowls, and garnish with fresh cilantro or parsley. Serve with lime wedges for an extra zing. For a creamy chili, I love using cannellini or great northern beans. These beans blend well and create a rich texture. If you want a thicker chili, mash some beans with a fork. This adds body without changing the flavor. You can also adjust the chili's consistency by adding more broth or cream. If it's too thick, just add a splash of vegetable broth. You can always add more, but it's hard to take it out! Spices make all the difference in chili. I recommend using cumin, chili powder, and smoked paprika for a warm taste. If you like a kick, add cayenne pepper. For toppings, fresh cilantro or parsley brightens each bowl. Squeeze lime juice on top to add zest. You can even try avocado slices or shredded cheese for extra creaminess. Each of these choices adds a unique twist to your creamy white bean chili. Pro Tips Use Fresh Ingredients: Fresh vegetables and herbs elevate the flavor of your chili, making it more vibrant and delicious. Adjust the Spice Level: Customize the heat by varying the amount of cayenne pepper or adding diced jalapeños for an extra kick. Let It Rest: Allow the chili to sit for a few minutes after cooking to let the flavors meld together for a richer taste. Garnish Creatively: Experiment with different garnishes like avocado, sour cream, or shredded cheese to enhance the presentation and flavor. {{image_2}} To make this creamy white bean chili vegan, swap the heavy cream for coconut milk. This keeps it rich and tasty. For a dairy-free option, coconut milk works great as well. It adds a sweet flavor and creamy texture. If you need a gluten-free version, you’re in luck! All the ingredients in this chili are gluten-free. Just check your vegetable broth label to ensure it’s gluten-free. Enjoy this chili without worry! You can use fresh or frozen corn in this recipe. Fresh corn gives a sweet crunch, while frozen corn is convenient and just as tasty. If you choose frozen, add it in during the last 10 minutes of cooking for best results. When it comes to beans, feel free to switch things up! Cannellini beans are my favorite, but you can also try great northern beans or even chickpeas. Each type of bean adds its own unique flavor and texture. Don’t hesitate to experiment! To keep your creamy white bean chili fresh, use airtight containers. Glass containers work well since they don’t absorb odors. Plastic containers are also good if they seal tightly. Store the chili in the fridge for up to five days. If you want to keep it longer, freezing is a great option. When reheating, avoid the microwave if you can. Instead, warm the chili on the stove over low heat. Stir often to keep it from sticking. You can add a splash of broth or cream to restore its creamy texture. If you freeze it, let the chili cool completely before putting it in containers. It can last up to three months in the freezer. When ready to eat, thaw it in the fridge overnight. Then, reheat it slowly on the stove. This way, you keep all the great flavors intact. Can I use different types of beans? Yes, you can use different beans. Cannellini and great northern beans work best. You can also try navy beans or pinto beans. Each type adds a unique texture and taste. Mixing beans can make the chili even more interesting. How can I make it spicier or milder? To make it spicier, add more cayenne pepper or some hot sauce. You can also use jalapeños for a fresh kick. If you prefer it milder, skip the cayenne and reduce the chili powder. Taste as you go to find the right balance for you. What are some good sides to serve with chili? Chili pairs well with cornbread or crusty bread. A fresh salad can add a nice crunch. You might also enjoy tortilla chips or rice on the side. Lime wedges are great for squeezing over the dish for extra flavor. This blog post covered delicious chili ingredients and simple steps to cook it. You also learned tips to enhance flavor and texture. Experiment with variations for dietary needs and ingredient swaps. Storing and reheating are easy when done right. Feel excited to make this chili your own. Enjoy a warm bowl and share with friends!

Creamy White Bean Chili Hearty and Flavorful Meal

If you crave a hearty and flavorful meal, this Creamy White Bean Chili is perfect for you. Packed with fresh

- 4 boneless, skinless chicken breasts - 2 cups marinara sauce - 1 cup mozzarella cheese, shredded - 1 cup ricotta cheese - 1/2 cup grated Parmesan cheese - 2 cups cooked pasta (penne or rotini) - 1 cup spinach, chopped - 1 bell pepper, diced - 1 teaspoon Italian seasoning - 2 cloves garlic, minced - Salt and pepper to taste - Fresh basil leaves for garnish For this dish, you need specific amounts of each ingredient. Here’s a breakdown: - Chicken: 4 breasts - Marinara sauce: 2 cups - Mozzarella cheese: 1 cup, shredded - Ricotta cheese: 1 cup - Parmesan cheese: 1/2 cup, grated - Cooked pasta: 2 cups - Spinach: 1 cup, chopped - Bell pepper: 1, diced - Italian seasoning: 1 teaspoon - Garlic: 2 cloves, minced - Salt and pepper: to taste If you need substitutes: - Use ground turkey instead of chicken. - Swap ricotta with cottage cheese for a lighter option. To make this casserole, gather these tools: - A 9x13 inch baking dish - Large mixing bowls - Measuring cups and spoons - Cooking utensils like a spatula and knife These tools help you mix, layer, and bake your delicious Italian Chicken Casserole with ease. {{ingredient_image_1}} 1. First, set your oven to 375°F (190°C). This helps the casserole cook evenly. 2. Grab a large bowl. In it, mix the cooked pasta, marinara sauce, chopped spinach, diced bell pepper, minced garlic, and Italian seasoning. Stir well. 3. Add salt and pepper to taste. This adds flavor to the mix. 4. Grease a 9x13 inch baking dish. Spread half of the pasta mixture evenly on the bottom. 1. Now, place the seasoned chicken breasts on top of the pasta layer. This keeps the chicken moist. 2. Spoon the ricotta cheese evenly over the chicken. This adds creaminess. 3. Take the rest of the pasta mixture and layer it over the ricotta-covered chicken. This creates a hearty base. 4. Finally, sprinkle shredded mozzarella and grated Parmesan cheese evenly on top. This will melt beautifully. 1. Cover the baking dish with aluminum foil. This helps everything cook well. 2. Bake for 25 minutes. This allows the flavors to blend. 3. After 25 minutes, remove the foil. Bake for another 15 minutes. Keep an eye on it. The cheese should be bubbling and golden. 4. When done, let the casserole rest for 5 minutes before serving. This makes it easier to cut. Garnish with fresh basil leaves for a bright touch. To make the best Italian chicken casserole, pay attention to each layer. Start with a good mix of pasta and sauce. This mix is the base, so make it tasty. Use fresh garlic and quality marinara sauce for rich flavor. Resting time is key. After baking, let the casserole sit for five minutes. This helps the layers firm up. You’ll get cleaner slices and better flavor. Serve your casserole hot. Pair it with a crisp salad or garlic bread. These sides add crunch and balance to the meal. For presentation, use a nice dish. Garnish with fresh basil leaves. This makes the dish look fresh and bright. Want to spice it up? Add red pepper flakes or sliced jalapeños. These add heat without overpowering the dish. You can also explore different herbs. Fresh oregano or thyme can enhance the flavor. For a milder taste, skip the spicy add-ons and focus on the cheeses. Pro Tips Use Fresh Ingredients: Fresh spinach, high-quality marinara sauce, and freshly shredded cheeses can elevate the flavor of your casserole, making it taste homemade and delicious. Customize Your Veggies: Feel free to add or substitute other vegetables such as mushrooms, zucchini, or olives to suit your taste preferences and add more nutrients. Let It Rest: Allowing the casserole to rest for a few minutes after baking helps it set, making it easier to serve and enhancing the overall flavor. Make It Ahead: This casserole can be assembled ahead of time and stored in the fridge or freezer. Just add a few extra minutes to the baking time if baking straight from the refrigerator. {{image_2}} You can change the protein in your casserole. Try turkey or tofu instead of chicken. Both options work well and add unique flavors. You can also switch the cheese. Use goat cheese for a tangy twist or a mix of cheeses for depth. If you need a gluten-free dish, choose gluten-free pasta. Many brands offer delicious options that fit right in. For those on a low-carb diet, use zucchini noodles or cauliflower rice instead of pasta. These swaps keep the meal tasty and satisfying. To bring a local touch to your dish, use fresh, local ingredients. For example, add seasonal vegetables like zucchini or eggplant. You can also adapt your casserole based on different Italian regions. In Sicily, add capers and olives for a Mediterranean flair. In Northern Italy, try using creamy polenta instead of pasta. Each twist gives your casserole a fresh and exciting flavor. To store leftovers, let the casserole cool first. Place it in an airtight container. You can keep it in the fridge for up to three days. When you're ready to eat, reheat it in the oven. Set the oven to 350°F (175°C) and heat for about 20 minutes. Stir it halfway through for even warming. Yes, you can freeze the casserole. Make sure it cools down completely. Use a freezer-safe container or wrap it tightly in plastic wrap and foil. This way, it stays fresh for about three months. To thaw, move it to the fridge for a night. Then, reheat it in the oven at 350°F (175°C) until hot. In the fridge, the casserole lasts three days. In the freezer, it stays good for three months. Look for signs of spoilage like off smells or mold. If you see these, throw it away. Always trust your senses when it comes to food safety. Can I use frozen chicken? Yes, you can use frozen chicken. Just make sure to thaw it first. Thaw it in the fridge overnight for best results. This keeps the chicken safe and easy to cook. What pasta is best for casseroles? Penne or rotini works best for casseroles. These shapes hold sauce well and mix easily with other ingredients. You can also try other shapes, like fusilli or farfalle. How to know when the casserole is done? Check if the cheese is bubbly and golden. You can also use a meat thermometer. The chicken should reach 165°F (74°C) for safety. Can I make it ahead of time? Yes, you can prepare it ahead of time. Assemble the casserole and cover it. Store it in the fridge for up to 24 hours. Just add a few extra minutes to the baking time. How to make servings more appealing? Garnish with fresh basil leaves. You can also drizzle a bit of olive oil on top. This adds color and flavor to each serving. Can it be served cold? While it’s best served hot, you can enjoy it cold. It makes a great lunch idea. Just store the leftovers in the fridge before serving. Making the perfect casserole involves careful ingredient choice and preparation. You learned about essential ingredients like chicken and vegetables, mixing directions, and baking steps. Remember the tips to enhance flavors and store leftovers properly. You can change recipes to fit your tastes or dietary needs. With these steps, you can create a dish that satisfies everyone. Enjoy your cooking journey and have fun experimenting with flavors!

Italian Chicken Casserole Flavorful and Easy Recipe

Looking for a dish that combines rich flavors and ease? This Italian Chicken Casserole is your answer! It features tender

To make One-Pot Garlic Parmesan Orzo, gather these simple ingredients: - 1 cup orzo pasta - 3 tablespoons olive oil - 4 cloves garlic, minced - 4 cups vegetable broth - 1 cup heavy cream - 1 cup grated Parmesan cheese - 1 teaspoon Italian seasoning - 1/2 teaspoon red pepper flakes (optional) - Salt and pepper to taste - Fresh parsley for garnish Orzo is small, rice-shaped pasta that cooks quickly. I love using it in this dish because it absorbs flavors so well. The olive oil adds a nice richness. Fresh garlic gives a bold taste. Vegetable broth makes a great base for this creamy meal. Heavy cream creates the perfect velvety texture. Parmesan cheese adds a salty, nutty flavor that really stands out. Italian seasoning brings warmth and depth. Red pepper flakes give a little heat, but you can skip them if you prefer mild flavors. Salt and pepper balance the dish, while fresh parsley adds a bright touch at the end. These ingredients work together to create a creamy and comforting dish. Don't worry if you don't have everything; you can make swaps or adjust to your taste. Now that you have the ingredients, you're ready to dive into the cooking! {{ingredient_image_1}} - Mince the garlic into small pieces. This helps release its strong flavor. - Measure out the orzo pasta, vegetable broth, heavy cream, and Parmesan cheese. Keep everything ready to go. - Heat three tablespoons of olive oil in a large pot over medium heat. - Add the minced garlic and sauté for about 1-2 minutes. You want it fragrant but not browned. - Next, add one cup of orzo pasta to the pot. Stir it with the garlic for another minute. This toasts the orzo and adds flavor. - Pour in four cups of vegetable broth. Bring the mixture to a boil. Once boiling, reduce the heat to low. - Cover the pot and let it simmer for about 10-12 minutes. Stir occasionally to keep the orzo from sticking. - After the orzo is cooked, remove the pot from heat. - Stir in one cup of heavy cream and one cup of grated Parmesan cheese. Add one teaspoon of Italian seasoning and red pepper flakes if you want some heat. - Mix well until the cheese melts and the sauce becomes creamy. - Season with salt and pepper to taste. Let it sit for a couple of minutes. This allows it to thicken a bit. - Before serving, garnish with chopped fresh parsley. This adds color and freshness. To get the best orzo, aim for al dente. This means it should be firm but not hard. To do this, follow the cooking time closely. Stir the orzo while it simmers. This stops it from clumping together. To achieve the creamy texture, add the heavy cream after cooking. This keeps it rich and smooth. Mix in the grated Parmesan cheese while the pot is warm. The cheese melts better, making every bite delicious. To boost the flavor, add fresh herbs like basil or thyme. These herbs brighten the dish. You can also add a pinch of garlic powder for extra kick. Adjust the red pepper flakes based on your spice level. If you want it milder, skip them. For dietary needs, substitute heavy cream with a non-dairy option. Coconut milk works well and adds a hint of sweetness. You can use nutritional yeast instead of Parmesan for a cheesy flavor without dairy. A large pot is key for this dish. I recommend a heavy-bottomed pot. It heats evenly and prevents burning. Use a wooden spoon for stirring. This helps avoid scratches on your pot. Always use a lid while simmering. It keeps the heat in and cooks the orzo evenly. This step is crucial to avoid undercooked pasta. Plus, it saves energy since the pot stays hot. Pro Tips Toasting Orzo: Gently toasting orzo in olive oil enhances its nutty flavor and adds depth to the dish. Using Broth: For extra flavor, use homemade vegetable broth or a high-quality store-bought variety. Adjusting Creaminess: If you prefer a richer sauce, you can add more heavy cream or even a bit of cream cheese. Spice it Up: Customize the heat by adjusting the amount of red pepper flakes or adding a dash of hot sauce when serving. {{image_2}} If you need a gluten-free meal, swap the orzo for gluten-free pasta. Many brands make tasty options that cook well in this dish. For a dairy-free version, use coconut cream instead of heavy cream. Nutritional yeast can replace Parmesan cheese. This gives a cheesy flavor without dairy. You can change the cheese for a different flavor. Try feta or goat cheese for a tangy twist. Adding veggies can boost nutrition. Spinach, peas, or sun-dried tomatoes work nicely. Cook these with the garlic for extra flavor. If you want more protein, add cooked chicken or shrimp. Mix them in when you stir in the cream and cheese. Fresh herbs can change the taste of your dish. Basil and thyme add a nice touch. You can also use rosemary for a more earthy flavor. For a zesty kick, add lemon juice or zest at the end. This brightens the dish and makes it more refreshing. You could even use lime for a fun twist. To keep your One-Pot Garlic Parmesan Orzo fresh, place it in a sealed container. Use a glass or plastic container with a tight lid. This helps prevent air from getting in. Store it in the fridge within two hours of cooking. Proper refrigeration keeps the dish safe and tasty. It lasts for about 3 to 4 days in the fridge. Check for any signs of spoilage before eating. When it's time to eat your leftovers, reheating is easy. The best method is to use the stove. Pour the orzo into a pot and add a splash of water or cream. Heat it over low heat, stirring gently. This helps keep the creaminess intact. You can also use the microwave. Place the orzo in a microwave-safe bowl. Add a bit of water and cover it. Heat in short bursts, stirring in between. This stops it from drying out. Yes, you can freeze One-Pot Garlic Parmesan Orzo! To do this, let it cool completely first. Then, portion it into freezer-safe bags or containers. Squeeze out as much air as possible before sealing. It stays good in the freezer for up to 2 months. When you’re ready to eat, take it out of the freezer. Thaw it in the fridge overnight. To reheat, follow the stovetop method or microwave instructions above. Enjoy it just like fresh! Orzo is a type of pasta shaped like a grain of rice. It cooks quickly and has a soft texture, making it ideal for creamy dishes. Unlike larger pasta shapes, orzo blends well with sauces and acts like rice in some recipes. Yes, you can prepare One-Pot Garlic Parmesan Orzo in advance. Cook the orzo, then cool it before storing. Keep it in an airtight container in the fridge for up to three days. When ready to eat, reheat gently on the stove or microwave. Add extra cream if needed for creaminess. This dish pairs well with many sides. Consider serving it with roasted vegetables or a fresh salad. Grilled chicken or shrimp also make great add-ons. The creamy flavors of the orzo work well with zesty or savory dishes, making your meal balanced and satisfying. In summary, this blog covers a delicious recipe for One-Pot Garlic Parmesan Orzo. You learned about the key ingredients, from orzo and garlic to heavy cream and parsley. The step-by-step instructions ensure easy cooking for anyone. I shared tips for perfect texture and ways to adjust flavors. You can also explore dietary variations and storage techniques. This dish is not just tasty; it's also versatile to suit your needs. Enjoy making this comforting meal today!

One-Pot Garlic Parmesan Orzo Creamy Satisfaction

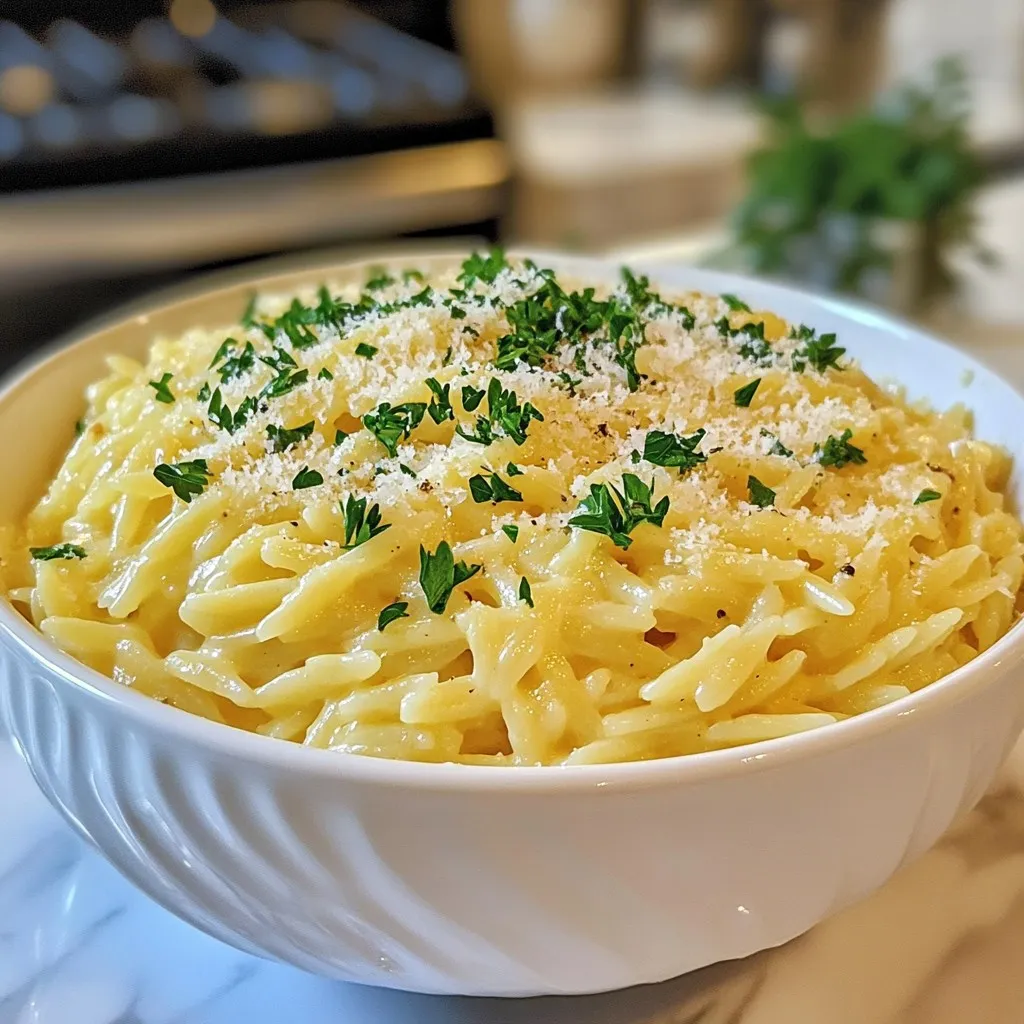
If you’re craving a warm, creamy dish that’s quick and easy, you’re in the right place! My One-Pot Garlic Parmesan

- 1 lb boneless, skinless chicken thighs - 3 tablespoons olive oil - 2 teaspoons ground cumin - 2 teaspoons ground coriander - 1 teaspoon ground turmeric - 1 teaspoon smoked paprika - 1 teaspoon cayenne pepper (adjust to taste) - 3 cloves garlic, minced - 1 tablespoon lemon juice - Salt and black pepper to taste - 4 pita breads - Fresh vegetables for serving (lettuce, tomatoes, cucumbers) - Fresh herbs (parsley, mint) for garnish I love using chicken thighs for shawarma. They stay juicy and tender. The spices bring so much flavor. Ground cumin and coriander are a must. Turmeric adds a lovely color. Smoked paprika gives it a warm, smoky taste. Cayenne pepper can kick up the heat. You can adjust it to your liking. I always add fresh garlic and a splash of lemon juice for zest. It really brightens the dish. When it comes to serving, pita bread is perfect. It holds all the goodness inside. I love adding fresh vegetables like lettuce, tomatoes, and cucumbers for crunch. They make every bite refreshing. A sprinkle of herbs like parsley or mint on top adds a burst of flavor. - 1/2 cup mayonnaise - 2 tablespoons plain yogurt - 3 cloves garlic, minced - 1 tablespoon lemon juice - Salt to taste Now, let’s talk about the garlic sauce. It’s creamy and full of flavor. I mix mayonnaise and yogurt to get the right texture. The garlic gives it a sharp bite. I always use fresh garlic for the best taste. Lemon juice adds a nice tang. Don’t forget to season with salt. This sauce brings everything together and makes each bite divine. Remember, the right ingredients make a big difference. Quality spices and fresh produce will elevate your shawarma. Enjoy the process and have fun with your cooking! {{ingredient_image_1}} To start, we need to make a tasty marinade. In a bowl, mix together: - 3 tablespoons olive oil - 2 teaspoons ground cumin - 2 teaspoons ground coriander - 1 teaspoon ground turmeric - 1 teaspoon smoked paprika - 1 teaspoon cayenne pepper (adjust to taste) - 3 cloves garlic, minced - 1 tablespoon lemon juice - Salt and black pepper to taste This blend brings out great flavor in the chicken. Now, take your 1 lb of boneless, skinless chicken thighs and add them to the bowl. Massage the marinade into the chicken. It helps the flavors soak in better. After that, cover the bowl and refrigerate. For the best taste, let it sit for at least 1 hour or overnight if you can wait. While the chicken marinates, let's whip up some garlic sauce. In a separate bowl, whisk together: - 1/2 cup mayonnaise - 2 tablespoons plain yogurt - 3 cloves garlic, minced - 1 tablespoon lemon juice - Salt to taste This sauce is creamy and full of flavor. Once mixed, set it aside in the fridge. Letting the sauce chill helps the flavors meld together. Trust me, your taste buds will thank you later! Now it's time to cook the chicken. Preheat a grill pan or skillet over medium-high heat. Add the marinated chicken thighs. Cook for about 5-7 minutes on each side. You want them to be nicely charred and fully cooked. To check doneness, use a meat thermometer. The internal temperature should reach 165°F (75°C). After cooking, remove the chicken from the heat and cover it with foil. Let it rest for about 5 minutes. This helps keep the juices inside. Next, warm up 4 pita breads on the grill or in a pan for a few seconds until soft. Now, fill each pita with sliced chicken, fresh vegetables like lettuce, tomatoes, and cucumbers, and a generous drizzle of that creamy garlic sauce. Don't forget to add some freshly chopped herbs like parsley or mint on top. Enjoy your chicken shawarma! Marinating chicken is key to great flavor. I suggest marinating the chicken thighs for at least one hour. For the best taste, let them soak overnight. This time allows the spices to seep deep into the meat. Fresh herbs and spices are very important. They add bright flavors that dried ones can't match. Always choose fresh garlic, parsley, and mint for the best results. To get those perfect grill marks, heat your pan well before adding the chicken. Cook the chicken for about 5 to 7 minutes on each side. If you do not have a grill, you can use your oven. Bake at 400°F (200°C) for about 25 minutes. Just make sure the chicken reaches an internal temperature of 165°F (75°C). Garnishing your shawarma makes it look even better! Sprinkle fresh herbs on top for color and taste. Serve your shawarma with a side of garlic sauce for dipping. For sides, consider a salad or some crispy fries. A refreshing drink like lemonade pairs well with this dish. Enjoy your meal with family and friends! Pro Tips Marinate Longer for Depth: Letting the chicken marinate overnight will enhance the flavors and make the meat more tender. Use a Meat Thermometer: To ensure the chicken is perfectly cooked, use a meat thermometer to check for an internal temperature of 165°F (75°C). Customize Your Heat: Adjust the cayenne pepper in the marinade to your preferred level of spiciness for a personalized touch. Fresh Ingredients Matter: Use fresh herbs and vegetables for garnish to elevate the dish's flavor and presentation. {{image_2}} If you want a vegetarian version of chicken shawarma, you can use mushrooms or tofu. Both options absorb flavors well. For mushrooms, I recommend portobello for a meaty texture. If using tofu, choose firm tofu. Press it to remove extra moisture. Adjust the spices and sauces to suit your new protein. For instance, keep using garlic and lemon to enhance flavor. You might add smoked paprika to boost taste. Enhancing the garlic sauce can create new tastes. You can mix in fresh herbs like dill or parsley. For a spicy kick, try adding a pinch of cayenne pepper. You can change toppings too. Consider adding pickled vegetables or a simple slaw. Fresh herbs like mint or cilantro can add brightness. Shawarma varies by region, and you can explore those flavors. In Lebanon, they often add tahini to the sauce. In Turkey, they serve shawarma with a yogurt sauce. Customize the dish based on your taste. If you love heat, add chili flakes or sriracha. Prefer a milder taste? Stick with classic garlic sauce. After enjoying your Chicken Shawarma, store leftovers safely. Place the chicken in an airtight container. Refrigerate it right away. It stays fresh for up to three days. If you want to keep it longer, freeze the chicken. Wrap it tightly in foil or freezer bags. It will last for about three months in the freezer. When reheating, thaw it in the fridge overnight. This keeps the meat juicy and tasty. Garlic sauce is best stored in the fridge. Keep it in a sealed jar or container. It can last for a week. If you have extra, you can freeze it too. Just make sure to use a freezer-safe container. To refresh flavors after storage, add a splash of lemon juice. This brightens the taste and makes it fresh again. When reheating chicken shawarma, the oven is a great choice. Preheat it to 350°F (175°C). Place the chicken on a baking sheet and cover it with foil. Heat for about 10-15 minutes. This keeps the chicken moist. For the garlic sauce, you can microwave it in short bursts. Stir in between to ensure even heating. This way, you enjoy the same great taste as when it was freshly made. Chicken Shawarma is a popular Middle Eastern dish. It features marinated chicken served in pita bread. The chicken is seasoned with spices like cumin and paprika. Shawarma has its roots in the Levant region. It became famous for its rich flavors and unique cooking style. The chicken cooks on a rotating spit, but you can grill it at home. It's typically served with fresh vegetables and garlic sauce. Yes, you can make Chicken Shawarma ahead of time. Marinate the chicken the night before for better flavor. You can also prepare the garlic sauce a day earlier. Just store them both in the fridge. When you're ready to eat, cook the chicken and assemble your shawarmas. This saves time during busy days and keeps meals stress-free. Chicken Shawarma can be healthy, depending on how you make it. It uses lean chicken thighs, which are rich in protein. You can add plenty of fresh vegetables, like lettuce and tomatoes. To make it healthier, use yogurt in the garlic sauce instead of mayonnaise. You can also skip the pita for a low-carb option. Balance is key, so enjoy it with a side of salad. You can serve Chicken Shawarma with a variety of sides. Fresh salads make a great match. Try a tabbouleh salad or a simple cucumber and tomato salad. You can also add roasted vegetables or fries for a heartier meal. If you love dips, serve it with hummus or baba ganoush. Don't forget extra garlic sauce for dipping! In this article, we explored the key ingredients for Chicken Shawarma, including tender chicken thighs and spices. I walked you through marinating, cooking, and creating a creamy garlic sauce. We covered tips for perfecting your dish and even suggested variations for different diets. Remember, making Chicken Shawarma at home is fun and rewarding. You can enjoy it fresh or save leftovers for later. Dive into this flavorful dish and get creative with your ingredients!

Chicken Shawarma with Garlic Sauce Simple and Tasty

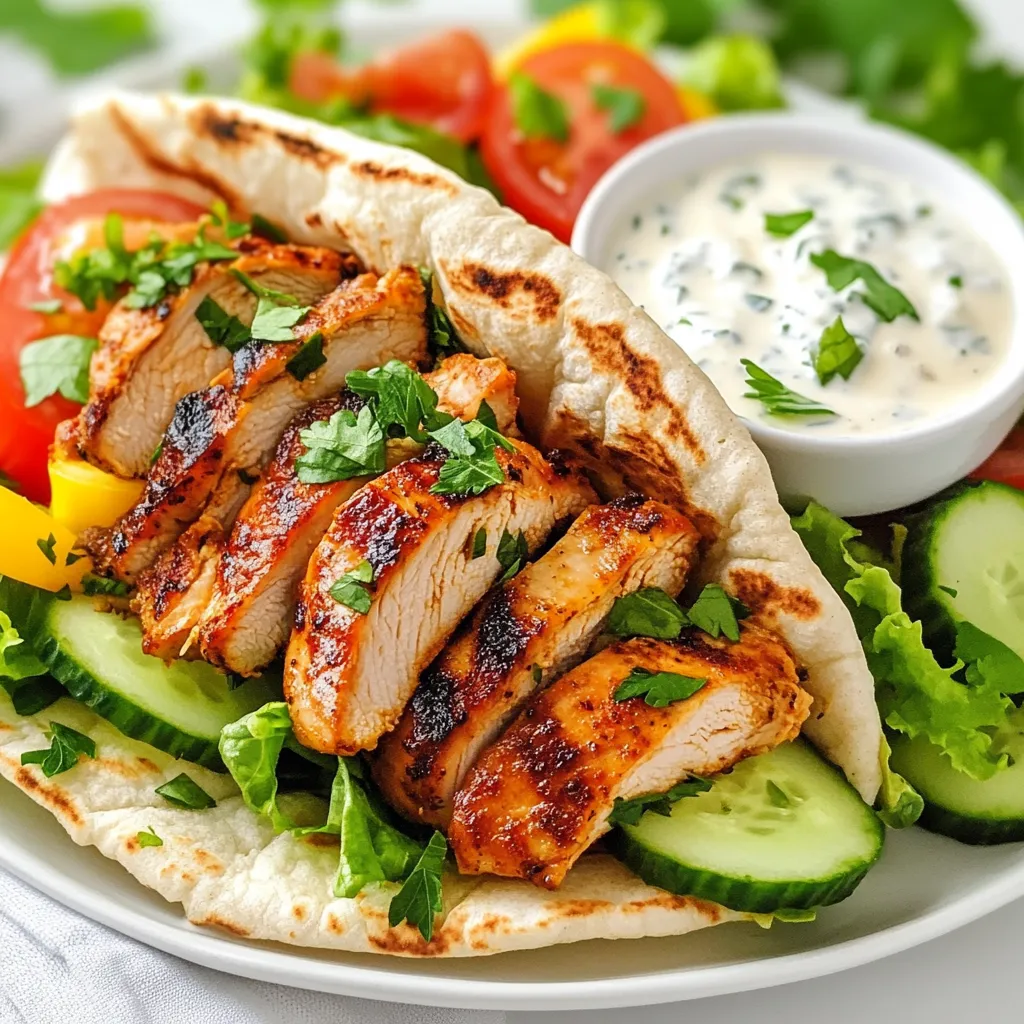
Are you ready to spice up your dinner routine? Discover how to make Chicken Shawarma with Garlic Sauce that’s not

- 4 large bell peppers (red, yellow, or green) - 1 cup cooked quinoa - 1 cup black beans, rinsed and drained - 1 cup corn kernels (fresh or frozen) - 1 cup diced tomatoes (canned or fresh) - 1 teaspoon cumin - 1 teaspoon smoked paprika - 1/2 teaspoon garlic powder - 1/2 teaspoon onion powder - Salt and pepper to taste - 1 cup shredded cheese (cheddar or Mexican blend) - Fresh cilantro, chopped (for garnish) Consider adding these fun garnishes to your stuffed peppers: - A drizzle of extra virgin olive oil - Slices of creamy avocado - A sprinkle of fresh lime juice - Diced green onions for a crunchy bite These stuffed peppers are not just tasty; they are nutritious too. Each serving offers: - Calories: 350 - Protein: 15g - Carbohydrates: 40g - Dietary Fiber: 10g - Fat: 15g - Vitamin C: 150% of daily value - Iron: 20% of daily value These ingredients blend well to create a dish that is colorful and packed with flavor. The quinoa, beans, and corn add great textures. Plus, the spices bring warmth to each bite. Enjoy creating this healthy meal that satisfies both your taste buds and your body! {{ingredient_image_1}} Start by preheating your oven to 375°F (190°C). Next, take your bell peppers and slice the tops off each one. Remove the seeds and membranes inside. This will make room for the tasty filling. Place the hollowed-out peppers upright in a baking dish. You can use red, yellow, or green peppers for a colorful look. In a large mixing bowl, add the cooked quinoa. Then, add the black beans, corn, and diced tomatoes. Sprinkle in the cumin, smoked paprika, garlic powder, and onion powder. Season with salt and pepper to your liking. Use a spoon to mix everything together well. Make sure every ingredient is evenly combined. Spoon the quinoa mixture into each bell pepper. Pack the filling down gently to fill them completely. Top each pepper with shredded cheese. Cover the baking dish with aluminum foil. Bake in the oven for 30 minutes. After that, remove the foil and bake for another 10 to 15 minutes. Look for tender peppers and bubbly, golden cheese. Once done, let them cool slightly. Garnish with freshly chopped cilantro for a bright finish. To cook quinoa well, start with rinsing it under cold water. This removes any bitter taste. Use a ratio of 2 parts water to 1 part quinoa. Bring the water to a boil, then add the quinoa. Lower the heat, cover, and simmer for about 15 minutes. Once done, let it sit for 5 minutes. Fluff it with a fork before using. Choose bell peppers that feel firm and heavy. Look for bright colors without blemishes. Red, yellow, and green peppers all work well. Red peppers are sweeter, while green ones have a more bitter taste. Pick the color that fits your dish best. Fresh peppers will add great flavor to your stuffed peppers. When packing your stuffing, press it down gently into each pepper. This helps to fill every space and keeps the stuffing in place. Make sure to leave some room at the top for cheese. A well-packed pepper holds its shape during baking and makes for a better presentation. Enjoy the process of filling them! Pro Tips Choose Colorful Peppers: Using a variety of colored bell peppers not only enhances the visual appeal but also adds subtle differences in flavor and nutrients. Make Ahead: Prepare the quinoa mixture and stuff the peppers a day in advance. Just cover and refrigerate, then bake when ready to serve. Cheese Variations: Experiment with different types of cheese like feta, pepper jack, or mozzarella for a unique twist on flavors. Add Heat: If you enjoy spice, consider adding jalapeños or a dash of hot sauce to the filling for an extra kick. {{image_2}} You can easily make vegetarian stuffed peppers. Replace meat with black beans or quinoa. Use a mix of veggies like spinach or zucchini. Add spices to enhance the flavors. You can also include cheese for a creamy touch. This way, you keep it healthy and filling. These stuffed peppers are naturally gluten-free. Use quinoa, black beans, or rice as your base. Check all labels for hidden gluten in canned goods. Fresh ingredients, like veggies and spices, are safe choices. Enjoy a tasty meal without worrying about gluten. If you prefer meat, ground turkey or chicken works well. You can also use beef or pork for a heartier dish. For grains, try brown rice or farro. Each option gives a unique flavor and texture. Feel free to mix and match to find your favorite! After enjoying your stuffed peppers, let them cool. Place any leftovers in a container. Use an airtight container to keep them fresh. Store the peppers in the fridge. They will stay good for up to three days. Make sure to label the container with the date. This helps you track how long they have been stored. To reheat your stuffed peppers, preheat your oven to 350°F (175°C). Place the peppers in a baking dish. If they seem dry, add a splash of water. Cover the dish with foil to keep moisture in. Heat for about 20 minutes or until warm. You can also use a microwave for a quicker option. Heat each pepper for about 2-3 minutes. Check that they are hot throughout before eating. You can freeze stuffed peppers for longer storage. First, let them cool completely. Wrap each pepper in plastic wrap. Then, place them in a freezer-safe bag. Remove as much air as possible before sealing. Label the bag with the date. Frozen stuffed peppers can last up to three months. When ready to eat, thaw in the fridge overnight. Reheat as mentioned earlier, and enjoy! Yes, you can prepare stuffed peppers ahead of time. You can stuff the peppers and keep them in the fridge for up to 24 hours. Just cover them with plastic wrap or foil. When ready to cook, bake them straight from the fridge. This saves time and makes dinner easier on busy days. If you do not have quinoa, you can use rice or couscous. Both work well in stuffed peppers. Cooked brown rice adds a nice texture. Couscous is soft and quick to cook. You can also use farro or barley for a different taste and bite. Stuffed peppers last about three to four days in the fridge. Make sure to store them in an airtight container. If you notice any off smells or colors, it is best to discard them. Always check for freshness before eating. Absolutely! You can add many vegetables to the stuffing. Chopped zucchini, mushrooms, or spinach work well. Just make sure to chop them small and cook them lightly. This way, they mix well with the other flavors in the filling. Get creative and use what you love! This blog post shared how to make classic stuffed peppers. We covered each ingredient and offered optional garnishes. I provided step-by-step instructions for prepping, mixing, and baking. You learned tips on choosing the best peppers and cooking quinoa. We explored delicious variations for different diets and how to store and reheat leftovers. Remember, stuffed peppers can be versatile and fun to make. I hope you feel inspired to try this dish and create your own tasty twists!

Classic Stuffed Peppers Flavorful and Easy Recipe

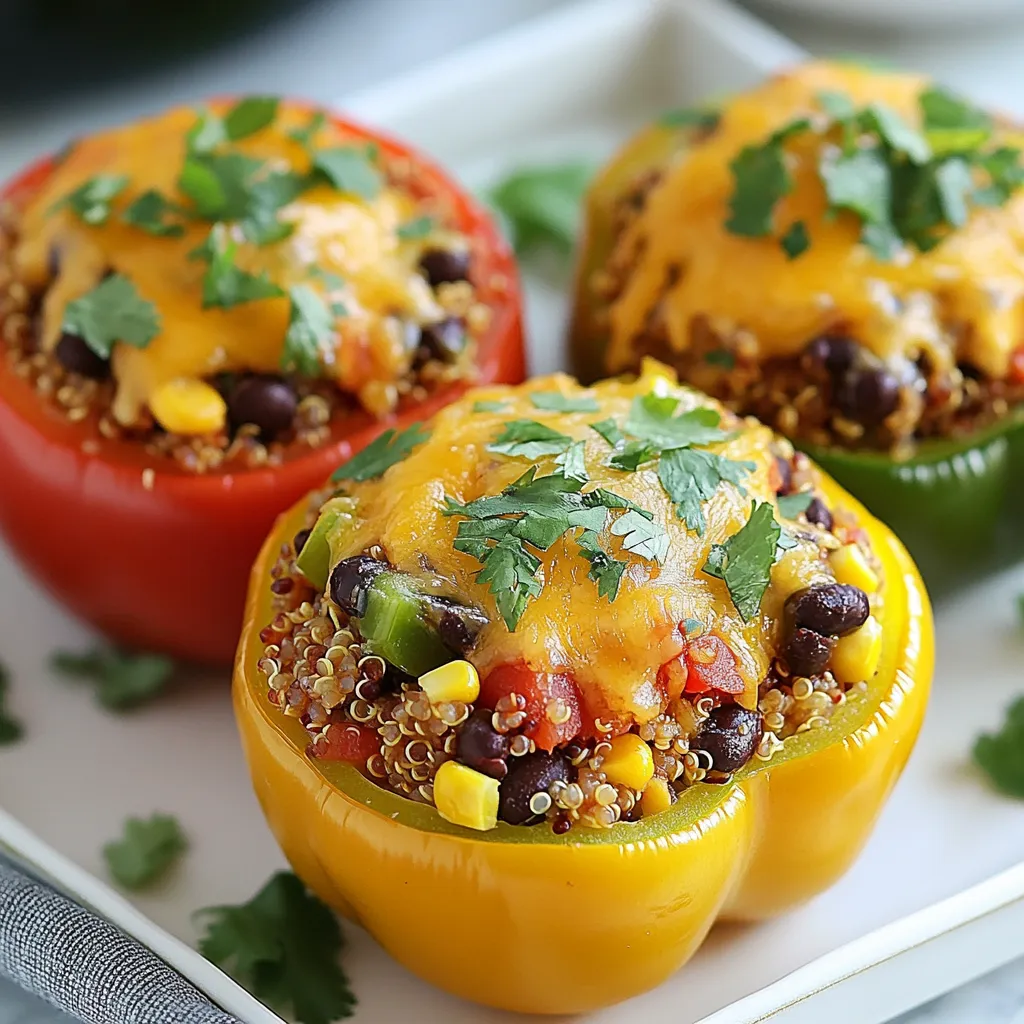
If you’re craving a delicious meal that’s both simple and satisfying, you’re in the right place! Classic stuffed peppers are

- 1 large sub roll or hoagie bread - 1 cup shredded lettuce - ½ cup diced tomatoes - ½ cup shredded carrots - ½ cup diced cucumber - ½ cup roasted red peppers, finely chopped - ½ cup sliced black olives - ½ cup sliced pepperoncini - 1 teaspoon Italian seasoning - ¼ cup mayonnaise - 2 tablespoons Dijon mustard - Salt and pepper to taste - Optional: French fries or potato chips for serving For this recipe, you can adjust the amounts based on your taste. If you want more crunch, add more carrots or cucumbers. If you love tomatoes, feel free to add another half cup. You can swap the sub roll for any bread you prefer, like a baguette or even pita. For a lighter option, use a lettuce wrap instead of bread. To jazz up your grinder salad sandwich, try adding some extras. Thinly sliced red onion gives a nice bite. You can also throw in some fresh herbs like basil or parsley for freshness. If you want a bit of heat, add jalapeños or spicy mustard. For a creamier taste, mix in some avocado or feta cheese. {{ingredient_image_1}} First, grab a large mixing bowl. Add 1 cup of shredded lettuce. Next, dice ½ cup of tomatoes and add them to the bowl. Now, shred ½ cup of carrots and toss them in. Slice ½ cup of cucumber and mix it in as well. Then, chop ½ cup of roasted red peppers and add those too. Toss in ½ cup of sliced black olives and ½ cup of sliced pepperoncini. Give everything a good stir. Make sure all the veggies mix well. This salad mixture will be the star of your sandwich. In a separate small bowl, mix together ¼ cup of mayonnaise and 2 tablespoons of Dijon mustard. Add 1 teaspoon of Italian seasoning to the mix. Season with a pinch of salt and pepper to taste. Whisk until smooth. This creamy dressing will tie all the flavors together. Take your sub roll or hoagie bread. Slice it open horizontally but don’t cut all the way through; leave a hinge. Spoon the salad mixture into the bottom half of the bread. Press it down lightly so it stays in place. Close the sandwich gently. If you want, slice it in half for easier eating. Serve your Grinder Salad Sandwich right away. Pair it with crispy French fries or potato chips for a tasty treat. Enjoy! To get the best texture in your Grinder Salad Sandwich, use fresh ingredients. Shredded lettuce gives a nice crunch. Dice your tomatoes and cucumbers small for easy bites. Roasted red peppers add a soft, sweet touch. Make sure to drain any excess moisture from veggies to keep the sandwich from getting soggy. - Use a sturdy sub roll or hoagie bread for support. - Aim for a balance of crisp and soft textures. The flavors in this sandwich are key. Use the right balance of spices for a tasty twist. Italian seasoning brings out the best in the veggies. The creamy dressing combines mayonnaise and Dijon mustard for a rich taste. Add salt and pepper to enhance all the flavors. - Consider adding a sprinkle of crushed red pepper for heat. - Try different dressings like ranch or vinaigrette for variety. Serve your Grinder Salad Sandwich with sides that complement its taste. Crispy French fries or potato chips add a nice crunch. You can also pair it with a fresh fruit salad for a sweet contrast. A cold drink, like lemonade or iced tea, goes well to balance the flavors. - For a fun twist, serve with pickles on the side. - Consider a side of soup for a warm, comforting meal. Pro Tips Fresh Ingredients: Use the freshest vegetables you can find for the best flavor and texture in your salad sandwich. Custom Dressings: Feel free to experiment with different dressings or add herbs to the mayonnaise for a unique flavor. Toasting the Bread: Lightly toasting the sub roll can add a nice crunch and prevent it from becoming soggy. Make Ahead: Prepare the salad mixture in advance and store it in the fridge for a quick assembly when you're ready to eat. {{image_2}} You can easily make a vegetarian or vegan Grinder Salad Sandwich. Simply skip the meat and focus on fresh veggies. Use ingredients like shredded lettuce, diced tomatoes, and roasted red peppers. For a vegan dressing, swap mayonnaise with a creamy plant-based alternative. You can also add avocado for creaminess. If you want more protein, add turkey, ham, or chicken. Sliced turkey adds a nice flavor and pairs well with the salad. Ham gives a salty kick, while chicken offers a hearty texture. Just layer your choice of protein on the bottom of the sandwich. Then, top it with the salad mixture for a balanced bite. Try adding international flavors to your Grinder Salad Sandwich. For a Mediterranean twist, use feta cheese and olives. You can also add tzatziki sauce for a cool touch. If you prefer an Asian flavor, add sesame oil and sliced radishes. These small changes can transform your sandwich into a world tour of taste! To store leftover grinder salad sandwiches, wrap them tightly in plastic wrap or foil. This keeps them fresh and prevents them from getting soggy. Place the wrapped sandwiches in an airtight container. You can also store the salad mix in a separate container to keep it crisp. If you want to enjoy your sandwich warm, remove the salad mix first. Wrap the bread in foil and heat it in an oven at 350°F for about 10 minutes. This makes the bread warm and soft. After heating, add the salad mix back in and enjoy! Most of the ingredients in this sandwich last well in the fridge. Here’s a quick breakdown: - Shredded lettuce: 3-5 days - Diced tomatoes: 2-3 days - Shredded carrots: 1 week - Diced cucumber: 3-5 days - Roasted red peppers: 1 week (if stored in liquid) - Sliced black olives: 1-2 weeks - Sliced pepperoncini: 1-2 weeks For the mayonnaise and mustard, check the labels for best-by dates. Use them within a few weeks after opening. Proper storage helps keep your sandwich tasty! A Grinder Salad Sandwich is a fun and tasty meal. It features fresh veggies in a soft roll. You mix ingredients like lettuce, tomatoes, and olives. Then, you add a creamy dressing with mayonnaise and Dijon mustard. This sandwich is crunchy, creamy, and full of flavor. It’s perfect for lunch or a snack. Yes, you can make this sandwich ahead of time. Just prepare the salad mixture and dressing first. Keep them in separate containers in the fridge. When ready to eat, assemble the sandwich. This way, the bread stays fresh and does not get soggy. It’s a great option for meal prep or picnics. You can easily customize your Grinder Salad Sandwich. Here are some ideas: - Add proteins like turkey, ham, or chicken for extra flavor. - Use different veggies like bell peppers or radishes for crunch. - Swap the dressing for your favorite sauce, like ranch or vinaigrette. - Try different types of bread, like ciabatta or baguette. Get creative and make it your own! In this blog post, we've explored how to make a delicious Grinder Salad Sandwich. We covered ingredients, including substitutions and optional flavors. You learned step-by-step instructions for mixing the salad and creating a rich dressing. We shared tips for texture and flavor, plus variations for different diets. I also explained how to store leftover sandwiches and answered common questions. Remember, this sandwich is easy to customize. Enjoy experimenting with flavors and ingredients. Your perfect lunch awaits!

Grinder Salad Sandwich Tasty and Simple Recipe

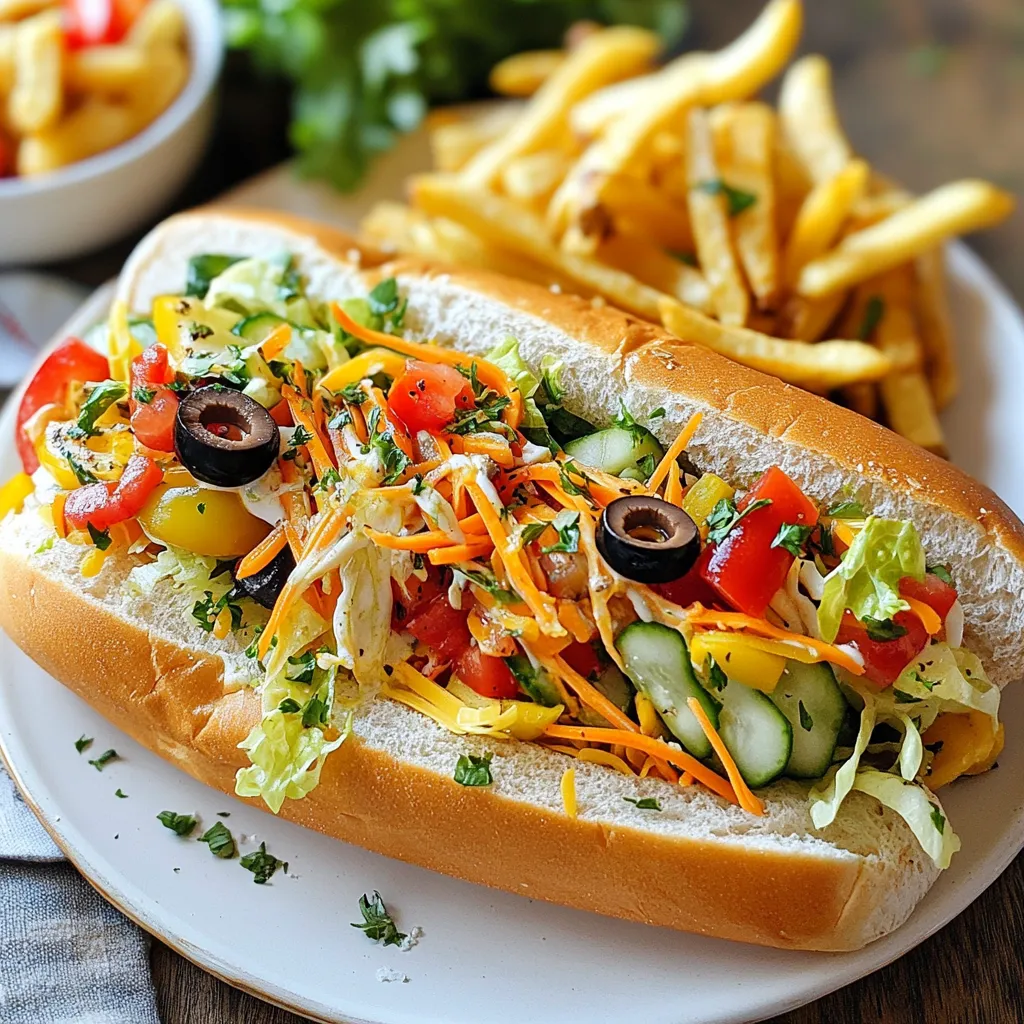
Are you ready to try a sandwich that’s both tasty and simple? The Grinder Salad Sandwich brings fresh flavors and

- 1 lb bavette steak - 1 tablespoon olive oil - Salt and pepper to taste - 1 head of garlic - 4 tablespoons unsalted butter - 1 tablespoon fresh thyme leaves - 1 tablespoon Dijon mustard - 1 tablespoon balsamic vinegar - 1/2 cup beef broth - Fresh parsley, chopped (for garnish) Gathering your ingredients is the first step to a great meal. The bavette steak is key. It has rich flavor and tenderness, making it a favorite for many. Olive oil adds moisture and helps the seasoning stick. Don’t forget the salt and pepper; they enhance the meat's taste. Next, garlic is a star in this dish. A head of garlic roasted brings out sweet, rich notes. Unsalted butter adds creaminess to your sauce. Fresh thyme gives a nice herbal touch. Dijon mustard and balsamic vinegar add zest and depth to the sauce. Finally, beef broth enriches the sauce with savory goodness, while fresh parsley makes a lovely garnish. With these ingredients, you are set for a delicious meal! {{ingredient_image_1}} Preheating the Oven Start by preheating your oven to 400°F (200°C). This step warms the oven for perfect roasting. Slicing the Garlic Take a head of garlic and slice the top off. This exposes the cloves, which will get sweet and soft. Roasting Process Wrap the garlic in aluminum foil. Place it in the oven for about 30-35 minutes. The cloves should turn soft and golden. Let it cool, then squeeze the roasted garlic into a bowl. Mash it into a paste for later use. Applying Olive Oil and Seasoning Rub the bavette steak with one tablespoon of olive oil. Sprinkle salt and pepper over it to taste. This helps add flavor to the meat. Resting the Steak for Flavor Allow the steak to rest at room temperature for about 20 minutes. This lets the flavors soak in, making the meat even tastier. Searing Techniques Heat a heavy skillet or grill pan over medium-high heat. Once hot, add the seasoned steak. Sear for about 4-5 minutes on each side for a medium-rare finish. Resting the Cooked Steak Remove the steak from the pan and cover it with foil. Let it rest for 5-10 minutes. This step keeps the juices inside, making the steak juicy and tender. Using the Same Pan In the same pan, reduce the heat to medium. Add 4 tablespoons of unsalted butter and let it melt. This will pick up the steak flavors left in the pan. Mixing Ingredients and Simmering Stir in the roasted garlic paste, one tablespoon of fresh thyme leaves, and one tablespoon of Dijon mustard. Pour in one tablespoon of balsamic vinegar and half a cup of beef broth. Scrape any browned bits from the bottom. Let it simmer for about 5 minutes until it thickens slightly. Slicing Against the Grain Slice the bavette steak against the grain into thin strips. This makes each bite tender and easy to chew. Plating Suggestions Place the sliced steak on a warm plate. Spoon the roasted garlic sauce over it. Garnish with fresh parsley for a lovely finish. Serve with roasted vegetables or a fresh salad to complete your meal. When choosing bavette steak, look for a few key traits. - Marbling: Good fat lines add flavor and tenderness. - Color: Choose a bright red color for freshness. You can buy quality bavette steak at local butcher shops. They often have better cuts than grocery stores. Whole foods markets may also offer great options. Online meat suppliers are a good choice too. They deliver fresh meat right to your door. Roasting garlic brings out its sweet flavor. Roast it at 400°F (200°C) for about 30-35 minutes. Check for soft, golden cloves. This means they are ready. You can store leftover roasted garlic in an airtight container. Keep it in the fridge for up to a week. You can also freeze it in small portions for later use. To cook steak perfectly, use a meat thermometer. Aim for 130°F (54°C) for medium-rare. Cooking times can vary by thickness. For a 1-inch steak, 4-5 minutes on each side works well. Let the steak rest after cooking. This helps the juices settle, making it juicy and tender. Pro Tips Rest the Steak: Allowing the bavette steak to rest after cooking helps the juices redistribute, resulting in a more tender and flavorful bite. Use a Meat Thermometer: For perfect doneness, a meat thermometer can help you achieve your desired level of cooking. Aim for 130°F (54°C) for medium-rare. Enhance with Acidity: A splash of lemon juice or additional balsamic vinegar just before serving can brighten the flavors of the dish. Pair with Sides: Consider serving with roasted vegetables or a crisp salad to balance the richness of the steak and sauce. {{image_2}} - Soy Sauce and Honey: Mix equal parts soy sauce and honey. This mix adds a sweet and salty punch to the steak. The umami from the soy sauce enhances the meat's flavor. Marinate the steak for at least 30 minutes. - Herb-Infused Oil: Use olive oil infused with herbs like rosemary or basil. Brush this oil on the steak before cooking. This adds a fresh taste and a lovely aroma to your meal. - Adding Red Wine: Pour in a splash of red wine while making the sauce. This adds depth and richness to the flavor. It pairs well with the beef broth and roasted garlic. Let the wine reduce slightly for a fuller taste. - Incorporating Other Herbs: Try adding herbs like oregano or rosemary to the sauce. These herbs bring a new twist and enhance the garlic's flavor. Mix and match based on your taste. - Partnering with Side Dishes: Serve the steak with roasted vegetables or a fresh salad. These sides balance the richness of the steak and sauce. Garlic mashed potatoes also make a great pairing. - Holiday or Special Occasion Modifications: For special occasions, consider serving the steak with a side of truffle oil mashed potatoes. You can also add a green bean almondine for a fancy touch. These additions can elevate the meal for guests. To keep your leftover bavette steak fresh, follow these tips: - Refrigeration Tips: Wrap the steak tightly in plastic wrap or foil. Store it in the fridge. Use it within 3 days for the best taste. - Freezing Instructions: For longer storage, place the wrapped steak in an airtight container. It will stay good for up to 3 months in the freezer. Thaw it in the fridge before reheating. Proper storage keeps your roasted garlic sauce tasty: - Proper Storage Techniques: Pour the sauce into a clean jar or airtight container. Let it cool before sealing. Store it in the fridge for up to 5 days. - Reheating Suggestions: When reheating, use a small pot over low heat. Stir gently until warmed through. Do not boil, as it can change the flavor. It’s important to know how long your food lasts: - Signs of Spoilage: If the steak or sauce develops an off smell or unusual color, it’s time to toss it. - Best Practices for Food Safety: Always label containers with the date. This helps you track freshness. When in doubt, throw it out! Bavette steak comes from the flank area of the cow. It has a rich, beefy flavor and a loose grain. This cut is tender and juicy when cooked right. Many chefs love it for its great taste and value. You can grill, pan-sear, or even braise it for a delicious meal. Yes, you can use several other cuts of steak. Flank steak or skirt steak works well as substitutes. Both have similar flavors and textures. Just remember, these cuts may need slight cooking time adjustments. Thicker cuts will need more time, while thinner cuts will cook faster. Check the color and firmness of the steak. For medium-rare, it should be warm pink inside. A meat thermometer is the best tool. Aim for 130°F for medium-rare and 145°F for medium. Let the steak rest after cooking; it helps keep the juices in. Yes, you can make the roasted garlic sauce ahead. Prepare it and let it cool before storing. Keep it in an airtight container in the fridge for up to three days. To reheat, warm it gently on the stove over low heat. Stir to keep it smooth and tasty. In this post, we explored how to prepare a flavorful Bavette Steak with roasted garlic sauce. We covered essential ingredients, cooking techniques, and smart tips to enhance your dish. Remember the importance of selecting quality meat and adjusting cooking times for doneness. You can also play with marinades and add flavors to the sauce. With proper storage, your leftovers can last and taste great. Enjoy cooking and sharing this delicious meal with friends and family!

Bavette Steak with Roasted Garlic Sauce Delight

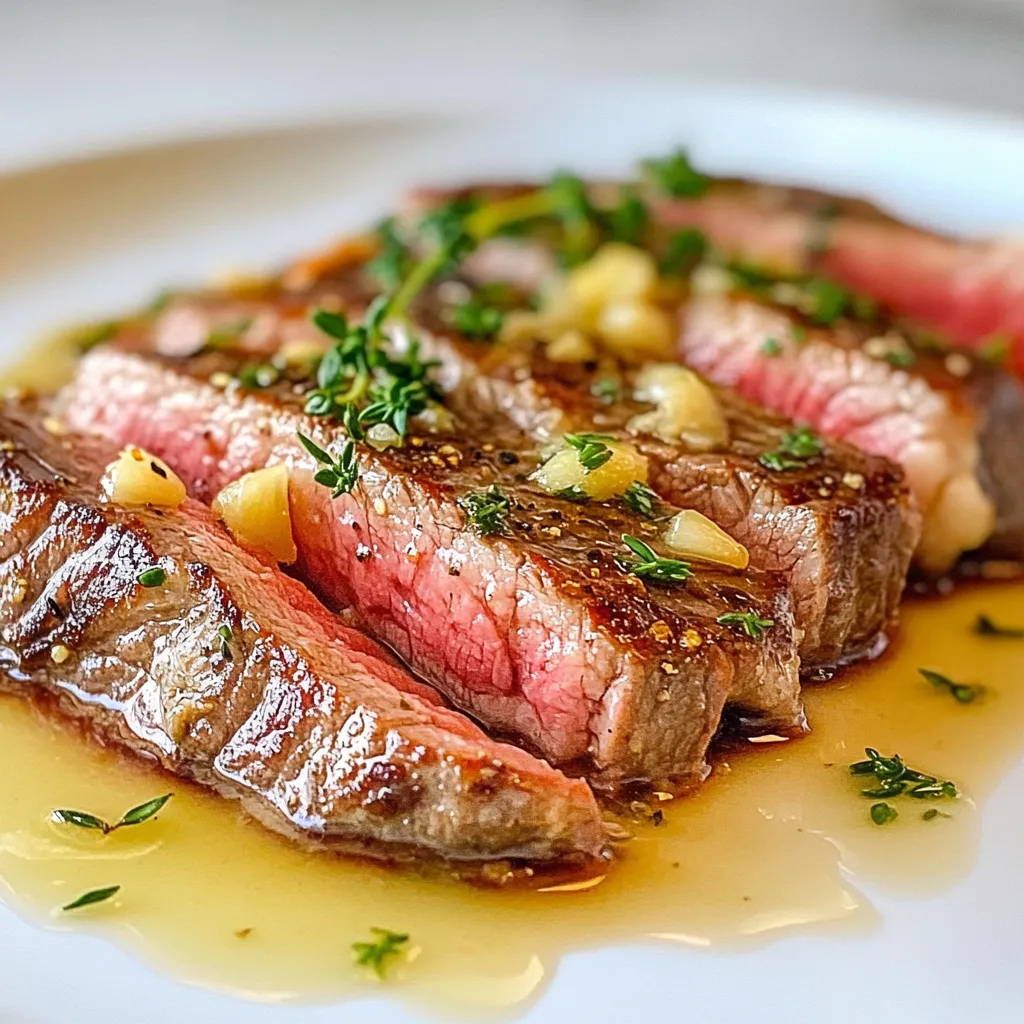
Ready to elevate your dinner game? Bavette steak, known for its rich flavor, pairs perfectly with a creamy roasted garlic

- 8 oz fusilli or rotini pasta - 1 pint cherry tomatoes, halved - 8 oz fresh mozzarella balls (bocconcini), halved - 1/4 cup fresh basil leaves, chopped - 1/4 cup red onion, finely diced - 1/4 cup black olives, sliced (optional) - 2 tablespoons balsamic vinegar - 3 tablespoons extra virgin olive oil - Salt and pepper to taste - 1 teaspoon Italian seasoning The key to a great Tomato Mozzarella Pasta Salad is using fresh ingredients. Start with 8 oz of fusilli or rotini pasta. This type of pasta holds the flavors well. I love using cherry tomatoes for their sweetness. Halving them releases their juicy goodness into the salad. Next, you need 8 oz of fresh mozzarella balls, known as bocconcini. Their creamy texture pairs perfectly with the tangy tomatoes. For a pop of color and flavor, add 1/4 cup of fresh basil leaves, chopped. I find that fresh basil adds a lovely aroma and taste. Don't forget the crunch! Use 1/4 cup of finely diced red onion. This gives the salad a nice bite. If you're a fan of olives, consider adding 1/4 cup of sliced black olives for extra flavor. Now, let's talk about the dressing. You will need 2 tablespoons of balsamic vinegar and 3 tablespoons of extra virgin olive oil. These ingredients give your salad a rich taste. Season it with salt and pepper to your liking. Lastly, add 1 teaspoon of Italian seasoning to enhance the flavors further. Gathering these ingredients will create a fresh and tasty delight that you will enjoy! {{ingredient_image_1}} - Start by cooking 8 oz of fusilli or rotini pasta. Follow the package instructions. - Cook until it is al dente. This means it should be firm when bitten. - Once done, drain the pasta and rinse it under cold water. This cools it quickly. - In a large bowl, combine 1 pint of halved cherry tomatoes, 8 oz of halved fresh mozzarella balls, 1/4 cup of chopped fresh basil, and 1/4 cup of finely diced red onion. - Next, add the cooled pasta to this mixture. Stir gently to mix everything well. - In a small bowl or jar, whisk together 2 tablespoons of balsamic vinegar, 3 tablespoons of extra virgin olive oil, 1 teaspoon of Italian seasoning, and salt and pepper to taste. - This dressing adds flavor and richness to your salad. - Pour the dressing over the salad and toss gently. Make sure each ingredient is well coated. - If you want, add 1/4 cup of sliced black olives. They bring a nice briny flavor. - Taste the salad and adjust the seasoning with more salt and pepper if needed. - Transfer the salad to the refrigerator. Let it chill for at least 30 minutes before serving. - Chilling helps the flavors blend together nicely, making each bite a delight. - Use al dente pasta for the best texture. This keeps your pasta firm and tasty. Overcooked pasta can turn mushy and ruin the dish. - Chill to enhance flavor melding. Letting your salad sit in the fridge helps the flavors mix together. Aim for at least 30 minutes. - Use fresh ingredients for the best taste. Fresh tomatoes, mozzarella, and basil make a world of difference. They bring bright flavors and lovely colors to your salad. - Substitute mozzarella with feta for a tangy twist. Feta adds a nice salty flavor that pairs well with the sweet tomatoes. - Garnish with fresh basil and a drizzle of balsamic reduction. This makes your salad look great and adds extra flavor. - Serve in a large bowl for easy sharing. A big bowl lets everyone scoop out their portion and enjoy together. Pro Tips Use Fresh Ingredients: Opt for the freshest cherry tomatoes and basil you can find to enhance the flavor of your salad. Chill for Flavor: Allow the pasta salad to chill in the refrigerator for at least 30 minutes. This helps the flavors meld beautifully. Customize Your Salad: Feel free to add other ingredients like grilled chicken, bell peppers, or artichoke hearts for extra flavor and texture. Perfect Pasta Cooking: Make sure to cook the pasta al dente to prevent it from becoming mushy when mixed with the dressing. {{image_2}} You can easily boost the protein in your Tomato Mozzarella Pasta Salad. Grilled chicken adds a hearty touch. Simply slice it and mix it in. Shrimp also works great. Just cook the shrimp until pink and toss them in. If you prefer a vegetarian option, add chickpeas. They are full of protein and add a nice texture. Just rinse a can of chickpeas and mix them into your salad. You will enjoy the extra flavor and nutrition. The dressing can change the whole vibe of your salad. Try a lemon vinaigrette for a fresh twist. Just mix lemon juice, olive oil, salt, and pepper. This brightens up the dish nicely. If you want something creamier, go for a creamy dressing. Ranch or a yogurt-based dressing adds a rich flavor. Just pour it over the salad and toss it well to coat all the ingredients. Make your salad even more exciting by adding seasonal vegetables. Bell peppers add color and crunch. Just chop them up and mix them in. Cucumbers also make a refreshing addition. Slice them thin and toss them in for extra crunch. For a different taste, use sun-dried tomatoes instead of fresh. They bring a sweet and tangy flavor that pairs well with mozzarella. To keep your Tomato Mozzarella Pasta Salad fresh, store it in an airtight container. This helps lock in flavors and moisture. If you plan to keep it for more than a day, I recommend storing the dressing separately. This way, your salad stays crisp and delicious. For the best taste, enjoy your pasta salad within 3-4 days. After that, the ingredients may lose their freshness. Keeping an eye on this ensures you get the best flavor with every bite. I don’t recommend freezing this salad. Freezing changes the pasta's texture, making it mushy when thawed. If you want to make it ahead, stick to the fridge for the best results. You can store Tomato Mozzarella Pasta Salad in the fridge for about 3 to 4 days. Use an airtight container to keep it fresh. Make sure to check for any signs of spoilage before eating. Yes, you can prepare this salad a day ahead. Just make sure to store it in the fridge. Adding the dressing right before serving helps keep the pasta from getting soggy. This way, the flavors will stay bright and fresh. If you want to switch out mozzarella, try using feta or goat cheese. Both add a nice creaminess. You can also use cheddar for a sharper taste. Each cheese will change the flavor but keep it delicious. To make this salad gluten-free, choose gluten-free pasta. Many brands offer good options made from rice or chickpeas. Just cook it like regular pasta, and you’ll have a tasty dish. Absolutely! You can add bell peppers, cucumbers, or even spinach. These veggies will add color and crunch. Feel free to mix and match what you have on hand for a fun twist. This pasta salad recipe combines fresh ingredients for a fantastic dish. You start with cooked fusilli or rotini, adding cherry tomatoes, mozzarella, and herbs. The balsamic dressing ties everything together. Remember to chill the salad for at least 30 minutes to enhance the flavor. You can also customize the dish with proteins or seasonal veggies. By following this guide, you'll create a tasty, shareable salad that's perfect for any occasion. Enjoy your delicious creation!

Tomato Mozzarella Pasta Salad Fresh and Tasty Delight

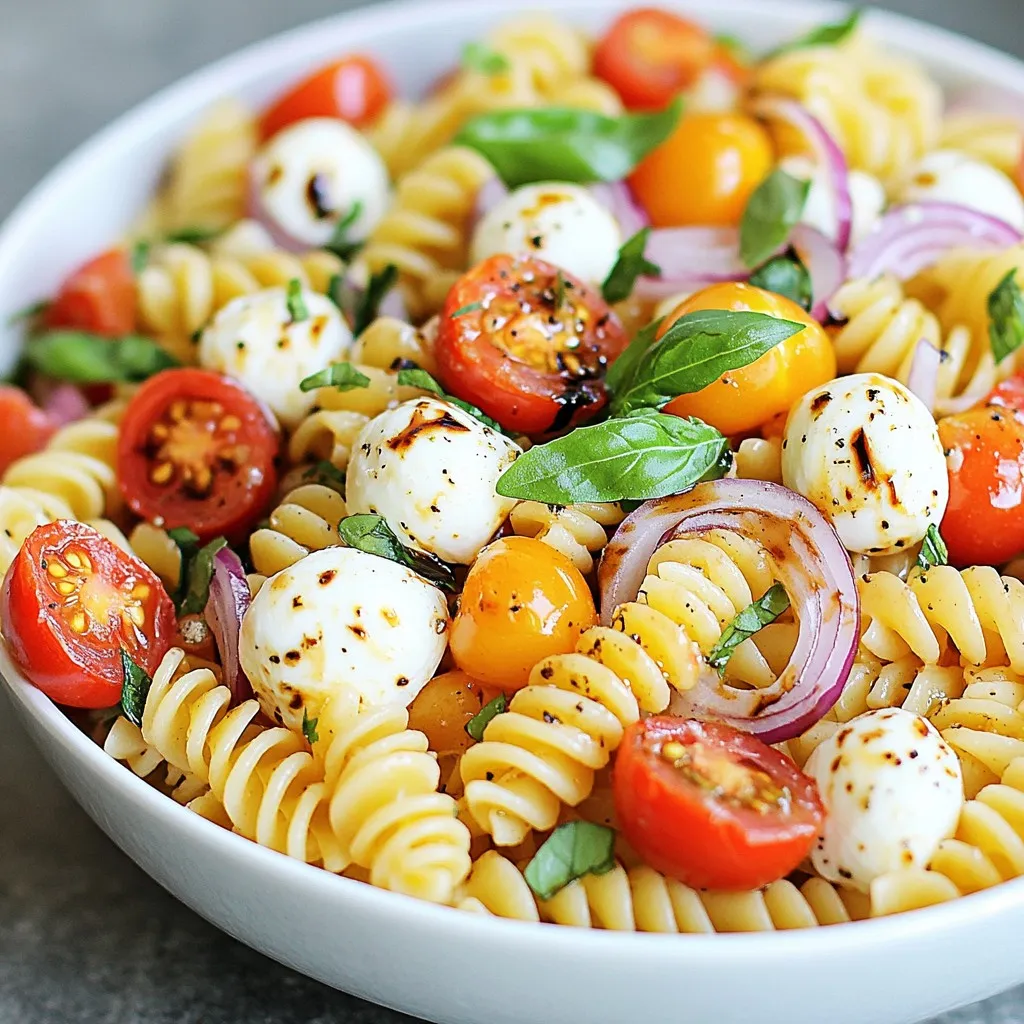
Are you ready for a fresh and tasty delight? This Tomato Mozzarella Pasta Salad is perfect for any meal or

- 1 medium zucchini, diced - 1 red bell pepper, diced - ½ cup cherry tomatoes, halved - 1 small red onion, diced - 1 cup cooked chicken breast, shredded (or use turkey for a twist) - 1 cup shredded mozzarella cheese - ½ cup marinara sauce - 1 teaspoon Italian seasoning - ½ teaspoon garlic powder - Olive oil, for drizzling - Fresh basil leaves, for garnish - Salt and pepper to taste You can make this crustless pizza bowl your own. Here are some ideas: - Swap the chicken for pepperoni or sausage. - Use different cheese, like cheddar or provolone. - Add mushrooms, olives, or spinach for extra flavor. - If you like heat, sprinkle in some red pepper flakes. This dish is not just tasty; it's also good for you. Each serving has: - Calories: Approximately 320 - Protein: 28g - Fat: 15g - Carbohydrates: 12g - Fiber: 3g - Sugar: 4g This dish packs a punch with protein and veggies while keeping carbs low. Enjoy this meal knowing it's both healthy and delicious! {{ingredient_image_1}} 1. Preheat your oven to 400°F (200°C). 2. Grab a large mixing bowl. Add diced zucchini, red bell pepper, halved cherry tomatoes, diced red onion, and shredded chicken. 3. Season the mix with salt, pepper, Italian seasoning, and garlic powder. Stir until all the veggies and chicken are well coated. 4. Drizzle some olive oil over the mix and toss it again to blend. 5. Spread the mixture in a lightly greased 9-inch baking dish. Make sure it is even. 6. Spoon marinara sauce over the top of the mixture. Spread it out nice and even. 7. Generously sprinkle shredded mozzarella cheese over the sauce, covering it fully. 8. Place the baking dish in the preheated oven. Bake for 25-30 minutes. 9. Keep an eye out for the cheese. It should be bubbly and golden brown. 10. Once done, remove it from the oven. Allow it to cool for a few minutes. - Use fresh mozzarella for the best melt. - Grate your own cheese for better texture. - If your cheese isn't melting well, try covering the dish with foil during baking. This helps trap heat. - For a nice golden color, finish with a quick broil for 1-2 minutes. Just watch it closely! To get a nice crispy texture, start with the vegetables. Make sure to dice the zucchini and bell pepper small. This helps them cook faster and become tender. After mixing, drizzle olive oil lightly over the top. This adds flavor and helps with crispness. Baking at 400°F (200°C) is key. It gives a golden finish to the cheese and veggies. If you want extra crunch, broil for the last few minutes. Adding the right herbs and spices can elevate this dish. Italian seasoning adds a classic pizza flavor. You can also use oregano or thyme for extra depth. Garlic powder gives a nice kick, too. If you like heat, add some red pepper flakes. Fresh basil is a must for garnish. It adds a burst of color and fresh taste. You can even mix in some fresh herbs before baking for a stronger flavor. Mixing is simple but very important. Start with a large bowl for easy mixing. Combine the diced veggies and shredded chicken first. Then, sprinkle in salt, pepper, and spices. Toss everything well to coat. Drizzle olive oil and mix again. This ensures each bite is packed with flavor. When you spread the mixture in the baking dish, make sure it is even. This helps everything cook at the same rate. Pro Tips Choose Fresh Vegetables: Opt for fresh zucchini, bell peppers, and tomatoes for the best flavor and texture in your pizza bowl. Customize Your Protein: Feel free to substitute the chicken with ground beef, sausage, or a plant-based protein for a different taste. Experiment with Cheese: Try using different cheeses like provolone, cheddar, or a blend for a unique twist on the classic mozzarella. Perfect Baking Time: Keep an eye on the cheese towards the end of baking to achieve your desired level of meltiness and browning. {{image_2}} You can easily make a vegetarian crustless pizza bowl. Just skip the chicken. Use extra veggies instead. Try adding mushrooms, spinach, or broccoli. These veggies add flavor and nutrients. You can also swap mozzarella for a plant-based cheese. This dish will still taste great! For a low-carb version, replace the zucchini with cauliflower rice. This will keep the dish light and healthy. You can also reduce the cheese to cut carbs. Add more spices and herbs for flavor. This version is perfect if you want to watch your carbs. Feel free to get creative with sauces and toppings. Instead of marinara, use pesto or Alfredo sauce. Each sauce gives a new taste to the dish. For toppings, try pepperoni, olives, or jalapeños. This allows you to customize your crustless pizza bowl to your liking! To keep your crustless pizza bowl fresh, let it cool first. Place leftovers in an airtight container. Store them in the fridge for up to three days. This helps keep the flavors intact and the texture nice. When you’re ready to enjoy your leftovers, preheat your oven to 350°F (175°C). Transfer the pizza bowl to an oven-safe dish. Cover it with foil to prevent it from drying out. Heat for about 15-20 minutes or until warm. You can also use a microwave for a quicker option. Just heat in 30-second bursts until hot. If you want to freeze your crustless pizza bowl, use a freezer-safe container. Make sure to leave some space at the top for expansion. Label the container with the date. You can freeze it for up to three months. To thaw, place it in the fridge overnight before reheating. This makes meal prep easy and tasty! Yes, you can make this dish gluten-free. Just check the marinara sauce for gluten. Use a gluten-free brand. This way, you keep it tasty and safe for all. It takes about 25 to 30 minutes to bake. Preheat your oven to 400°F (200°C) first. Bake until the cheese is bubbly and golden brown. Your kitchen will smell great! You can use turkey instead of chicken for a twist. If you want a veggie option, try mushrooms or extra veggies. Each choice adds a new flavor. Yes, you can prepare this dish ahead of time. Mix the ingredients and store them in the fridge. Just bake it when you’re ready to eat. It saves time on busy nights. Absolutely! This dish is very kid-friendly. Kids love cheese and colorful veggies. You can even let them help mix the ingredients. It makes cooking fun for everyone! This blog post covered how to make a tasty pizza bowl. We explored the ingredients, steps, and tips for great results. You learned how to customize with different toppings and sauces. Storage tips help you keep leftovers fresh, and the FAQ section answered common queries. In the end, making a pizza bowl is easy and fun. You can adjust it to fit your taste and dietary needs. Enjoy your cooking!

Crustless Pizza Bowl Tasty and Easy Weeknight Meal

Looking for a meal that’s both tasty and quick? The Crustless Pizza Bowl is your answer! This dish packs all

- 2 boneless, skinless chicken breasts - 1 cup Greek yogurt - 1/2 cup low-sodium chicken broth - 1 cup fresh spinach, chopped - 1/2 cup sun-dried tomatoes, chopped - 2 cloves garlic, minced - 1 teaspoon dried basil - 1 teaspoon oregano - Salt and pepper to taste - 1 tablespoon olive oil - 1/4 cup grated Parmesan cheese (optional for garnish) - Fresh parsley for garnish Gathering the right ingredients makes cooking easy and fun. Use fresh chicken breasts for the best flavor. Greek yogurt provides creaminess and adds protein. Low-sodium chicken broth keeps the dish light. Fresh spinach and sun-dried tomatoes bring color and taste. Garlic adds depth, while dried basil and oregano enhance the flavor. Don’t forget the olive oil for cooking and optional Parmesan cheese for a tasty finish. Fresh parsley makes the dish pop with color and freshness. Enjoy using these simple ingredients to create a delicious meal! {{ingredient_image_1}} Season your chicken breasts with salt, pepper, and dried basil. This mix adds great flavor. Make sure to coat both sides well. Heat olive oil in a large skillet over medium heat. When the oil is hot, add the chicken breasts. Cook for 6-7 minutes on each side. You want them golden brown and fully cooked. Once done, remove the chicken from the skillet and set it aside. This keeps it juicy and tender. In the same skillet, add minced garlic. Sauté it for 1 minute until it smells good. Be careful not to burn it. Next, add chopped sun-dried tomatoes and cook for 2 more minutes. Then, pour in the chicken broth and let it simmer gently. After that, lower the heat and stir in Greek yogurt. Mix well until it’s smooth. Let it simmer for 3 minutes, stirring often. Finally, add the chopped spinach. Cook until it wilts, which takes about 2-3 minutes. Return the cooked chicken to the skillet. Coat it well in the creamy sauce. Let it simmer for another 2 minutes to heat through. Taste the sauce and add more salt or pepper if needed. Serve your chicken topped with the creamy sauce. Garnish with grated Parmesan cheese and fresh parsley for a nice touch. This dish looks great and tastes even better! To cook juicy chicken, I recommend a few simple steps. First, season the chicken breasts well with salt, pepper, and dried basil. Cook them in a hot skillet with olive oil. Aim for 6-7 minutes on each side. The chicken should be golden brown and cooked through. Always let the chicken rest for a few minutes. This helps the juices settle, making every bite tender and flavorful. To keep your sauce creamy, prevent the Greek yogurt from curdling. Always stir it in on low heat. Start by adding the yogurt after the broth simmers. Stir slowly and gently to combine. This helps create a smooth sauce without lumps. If you notice any lumps, whisk the sauce until silky. Don't be afraid to adjust the seasonings to fit your taste. If you like it spicy, add a pinch of cayenne. For a fresh twist, try adding lemon juice or zest. Other spices like thyme or paprika can also enhance the flavors. Taste the sauce as you go. This way, you can make it just right for you. Pro Tips Marinate for Flavor: For an extra burst of flavor, consider marinating the chicken breasts in Greek yogurt with herbs and spices for a few hours before cooking. Use Fresh Ingredients: Opt for fresh spinach and high-quality sun-dried tomatoes for a more vibrant taste and better texture in your dish. Adjust Consistency: If the sauce is too thick, add a splash more chicken broth or a bit of water to reach your desired creamy consistency. Garnish Wisely: Fresh parsley not only adds color but also enhances the overall flavor. Don't skip it as a garnish! {{image_2}} You can switch chicken with turkey for a leaner protein option. Tofu works well too if you want a plant-based meal. For a dairy-free sauce, try using coconut yogurt or cashew cream. These options keep the dish creamy and rich without dairy. If you like heat, add cayenne or paprika to the sauce. These spices will give your dish a nice kick. You can also mix in bell peppers or mushrooms for extra flavor and nutrients. They add great texture and color to the meal. To make this dish ahead of time, cook the chicken and sauce. Store them in separate containers. This way, the chicken stays juicy and the sauce remains creamy. When you're ready to eat, just reheat in a skillet on low heat. Stir gently to keep the sauce smooth. Enjoy your tasty meal without the rush! To keep your High Protein Creamy Chicken fresh, store it in an airtight container. Place it in the fridge right after it cools down. This way, it stays tasty and safe to eat. The dish will stay fresh for about 3 days in the fridge. Always check for any off smells before eating. If you want to save some for later, freezing is a great option. First, let the dish cool completely. Then, place it in a freezer-safe container. Make sure to leave some space for expansion. The dish can last up to 3 months in the freezer. When you are ready to eat, thaw it in the fridge overnight. To reheat, warm it gently on the stove. This helps keep the creamy texture and flavor. Avoid using high heat, as this can affect the sauce. This dish is rich in protein. The main source comes from the chicken breasts. Each serving of chicken has about 26 grams of protein. Greek yogurt adds another 10 grams, making this meal a protein powerhouse. Spinach also adds a small amount. Together, you get a filling meal that helps build muscle. Yes, you can make this dish ahead. Cook the chicken and sauce, then let it cool. Store it in an airtight container in the fridge. It will stay fresh for up to three days. When you want to eat it, reheat it slowly on the stove. Add a splash of chicken broth if it seems thick. If you need a substitute, you have options. You can use sour cream for a similar taste and texture. For a dairy-free choice, try coconut yogurt. Silken tofu blended until smooth works too. Each option keeps the sauce creamy without losing flavor. Adjust the seasoning to your liking for the best results. In this blog post, we explored how to make a delicious high-protein creamy chicken dish. We covered essential ingredients, step-by-step instructions, and tips for the best flavor. You learned about variations and how to store leftovers. Cooking can feel hard, but this dish is easy and fun. Experiment with your favorite flavors and enjoy each bite. Try making this dish today to fuel your body with good taste and protein!

High Protein Creamy Chicken Simple and Flavorful Meal

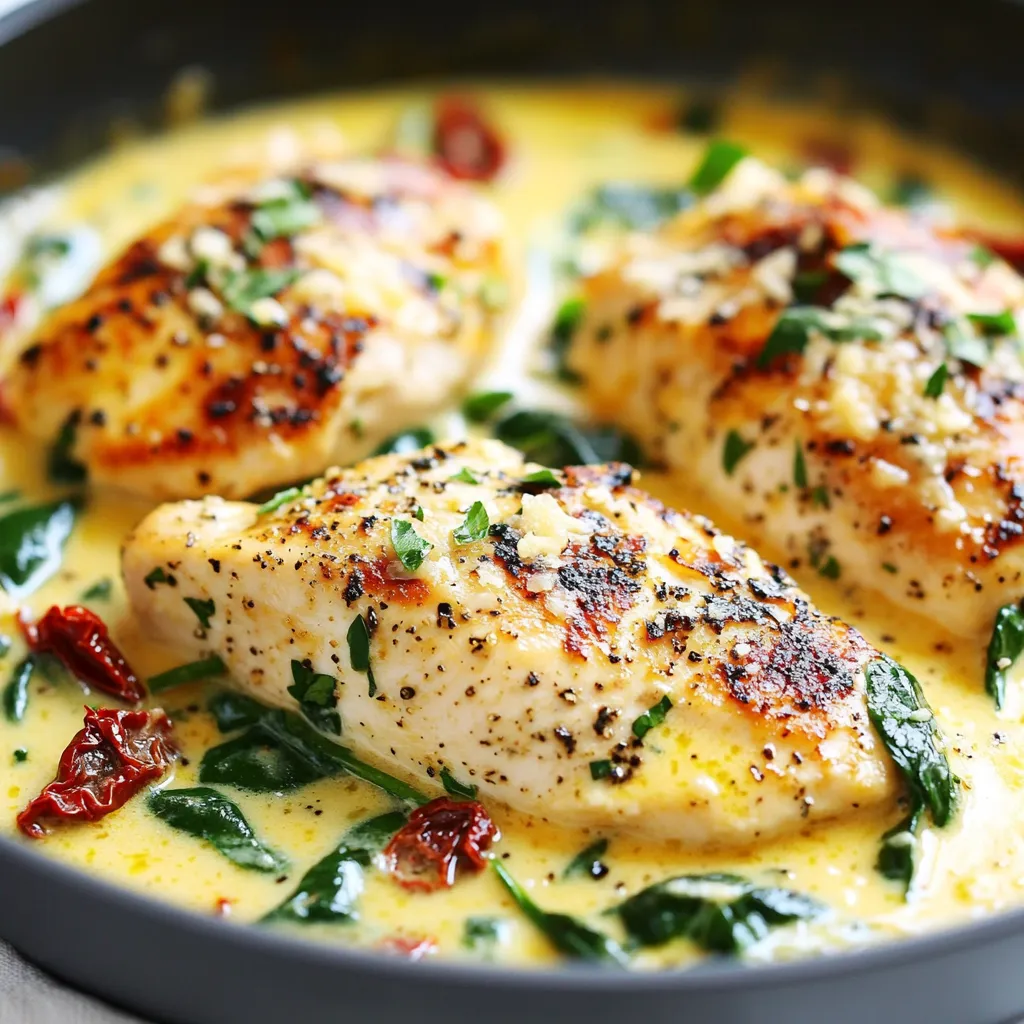
Are you searching for a delicious, high-protein meal that’s easy to make? Look no further! This High Protein Creamy Chicken

Older posts
Newer posts
← Previous Page1 … Page138 Page139 Page140 … Page144 Next →

dsad

© 2025 So Yum Recipes • Built with GeneratePress

Our Policies

  • Copyright Policy
  • Cookie Policy
  • GDPR Policy
  • Privacy Policy
  • Disclaimer
  • Terms Of Use

More Information

  • Home
  • About
  • Contact
  • Appetizers
  • Dessert
  • Dinner
  • Drinks
©2025, So Yum Recipes About Back To Top