Skip to content
DisclaimerTerms Of UseGDPR PolicyCookie Policy

So Yum Recipes

  • Home
  • Drinks
  • Appetizers
  • Dinner
  • Dessert
  • About
  • Contact
  • Privacy Policy
DisclaimerTerms Of UseGDPR PolicyCookie Policy

Chloe

To make your Bang Bang Chicken Sliders, gather these key ingredients: - 1 lb ground chicken - 1/2 cup panko breadcrumbs - 1/4 cup green onions, finely chopped - 1 teaspoon garlic powder - 1 teaspoon ginger powder - 1/2 teaspoon salt - 1/4 teaspoon black pepper - 1/2 teaspoon red pepper flakes (optional) - Slider buns (mini brioche or whole wheat) - Lettuce leaves for garnish - Pickles for topping These simple ingredients create a great flavor. The ground chicken keeps the sliders juicy. Panko breadcrumbs give them a nice crunch. Green onions add freshness, while garlic and ginger bring warmth. Feel free to customize your sliders with these optional ingredients: - Extra red pepper flakes for more heat - Avocado slices for creaminess - Cheese slices for added richness - Cilantro or parsley for fresh herbs These extras let you match the sliders to your taste. You can make them mild or spicy. Cheese can add creaminess, while herbs can offer brightness. To enhance your meal, consider these accompaniments: - Sweet potato fries for a tasty side - Coleslaw for a crunchy, refreshing bite - A side salad for a light option - Extra Bang Bang sauce for dipping Pairing your sliders with these sides makes for a fun meal. Sweet potato fries add a sweet crunch. Coleslaw brings a cool crunch, while a salad keeps it light. Enjoy the sliders with extra sauce for a flavor boost! {{ingredient_image_1}} To start, grab a large bowl. In it, combine 1 pound of ground chicken with 1/2 cup of panko breadcrumbs. Add 1/4 cup of finely chopped green onions, 1 teaspoon of garlic powder, and 1 teaspoon of ginger powder. Sprinkle in 1/2 teaspoon of salt and 1/4 teaspoon of black pepper. If you like heat, toss in 1/2 teaspoon of red pepper flakes. Mix all the ingredients gently. You want to blend them well, but don’t overwork the meat. This helps keep the sliders tender. Next, preheat your grill or a non-stick skillet over medium heat. While that heats up, form the chicken mixture into small patties. Aim for patties that match the size of your slider buns. This step is key for even cooking. Once your grill or skillet is hot, add the patties. Cook each side for about 4 to 5 minutes. Look for a nice golden color. Make sure they are cooked through to keep everyone safe. Now it's time to assemble your sliders! Start with the bottom half of each slider bun. Place a chicken patty on it. Drizzle your homemade Bang Bang sauce over the patty. To make this sauce, mix 1 tablespoon of mayonnaise, 1 tablespoon of sweet chili sauce, and 1 tablespoon of Sriracha in a small bowl. Feel free to adjust the spice level to your taste. Next, add a fresh lettuce leaf and some pickles on top. Finally, close your slider with the top half of the bun. Serve them warm, and enjoy your delicious Bang Bang Chicken Sliders! To keep your sliders juicy, don't overmix the chicken. Just combine the ingredients until they blend. Adding panko breadcrumbs helps too. They keep the chicken moist while cooking. Make sure you form your patties gently, not too tight. This way, they cook evenly and stay tender. You can easily change the heat level of your sliders. Start with the red pepper flakes. If you like it mild, skip them or use less. For more heat, add extra Sriracha to the Bang Bang sauce. Taste as you go to find your perfect spice level. These sliders go well with many sides. Try serving them with crispy sweet potato fries. A fresh salad also makes a great side. You can even serve them with some crunchy coleslaw. Don't forget a refreshing drink, like iced tea or lemonade, to balance the heat! Pro Tips Keep it Moist: To prevent the chicken sliders from drying out, avoid overmixing the chicken and breadcrumbs. Just mix until combined. Customizable Heat: Adjust the amount of Sriracha in the Bang Bang sauce to control the spiciness of your sliders. Start with a little and add more if desired. Grill Marks: For extra flavor and presentation, consider grilling the patties instead of pan-frying to achieve those beautiful grill marks. Fresh Garnish: Adding fresh herbs like cilantro or basil can elevate the flavor of your sliders. Experiment with different toppings to find your favorite combination! {{image_2}} You can change the Bang Bang sauce for a new twist. Try using barbecue sauce for a smoky flavor. You can also mix honey mustard for a sweet touch. For a tangy taste, ranch dressing works well too. Each sauce adds its own special kick, making the sliders fun to enjoy. If you want a meat-free version, use chickpeas or black beans. Mash them well and mix with breadcrumbs and spices. You can also try plant-based ground chicken as a substitute. This option is tasty and healthy for everyone. Remember to use a vegan mayo for the sauce to keep it plant-based. The type of bun can change your slider experience. Mini brioche buns are soft and slightly sweet. Whole wheat buns add a hearty flavor. You can even use lettuce wraps for a low-carb option. Experiment with different buns to find your favorite combination. Each choice changes the taste and texture of the sliders. After you enjoy your Bang Bang Chicken Sliders, you may have some left. Store them in an airtight container in the fridge. They will stay fresh for up to three days. Make sure to separate the sliders if you can. This keeps the buns from getting soggy. When you want to eat your leftovers, you can reheat them easily. Place the sliders in the microwave for about 30 seconds. If you prefer a crispy bun, heat them in a skillet. Cook for about 2-3 minutes on medium heat. This will bring back the crunch and warmth. If you want to make a batch ahead, freezing is a great option. Cook the chicken patties and let them cool. Wrap each patty in plastic wrap and place them in a freezer bag. You can freeze them for up to three months. When you’re ready, thaw them in the fridge before reheating. This makes meal prep easy and quick! You can use ground turkey as a good option. It has a similar taste and texture. If you want to try something different, ground pork works well too. For a plant-based choice, consider using crumbled tofu or tempeh. Just remember to adjust the seasonings for these options. Yes, you can prepare the chicken mixture in advance. Form the patties and store them in the fridge for up to a day. You can also make the Bang Bang sauce ahead of time. Just keep it in an airtight container in the fridge. Cook the patties right before serving for the best flavor. The spice level depends on the amount of Sriracha and red pepper flakes you use. With the recipe, they have a nice kick but are not overly spicy. If you want more heat, add more Sriracha or extra red pepper flakes. Adjust it to suit your taste! Bang Bang Chicken Sliders are a fun dish with many tasty options. We covered key ingredients like chicken, sauces, and buns, along with ways to customize them. I shared tips for making juicy sliders and pairing them right. You can store leftovers or even prep them for later. No need to worry if you're short on chicken or spice! These sliders are easy to adapt. Enjoy creating your version of this dish, and make mealtime exciting!

Bang Bang Chicken Sliders Tasty and Simple Recipe

Are you ready to take your slider game to a whole new level? My Bang Bang Chicken Sliders are not

- 1/2 cup unsalted butter - 8 ounces dark chocolate (60-70% cocoa), chopped - 3/4 cup granulated sugar - 1/4 cup packed brown sugar - 3 large eggs - 1 teaspoon vanilla extract - 1/2 cup all-purpose flour - 1/4 teaspoon salt - 1/2 cup heavy cream - 1 tablespoon cocoa powder (for garnish) - Optional: whipped cream or chocolate shavings for serving To make Chocolate Mousse Brownies, you need simple ingredients. Start with unsalted butter and dark chocolate. These two create a rich base. Use 60-70% cocoa for great flavor. Then, add granulated and brown sugar for sweetness. Eggs give structure, while vanilla adds a nice touch. Next, for the dry mix, you need all-purpose flour and salt. These help bind the brownies. Finally, heavy cream makes the mousse light and fluffy. The cocoa powder is for garnish, making your dessert look fancy. You can add whipped cream or chocolate shavings on top for extra flair. Each ingredient plays a key role. The butter and chocolate bring richness. The sugars sweeten, and the eggs help with texture. The flour provides structure, while the cream makes the mousse dreamy. Enjoy your cooking adventure with these ingredients! {{ingredient_image_1}} 1. Preheat your oven to 350°F (175°C). 2. Grease an 8x8-inch square baking pan. Line it with parchment paper. Leave some overhang for easy removal. 3. In a medium saucepan over low heat, melt 1/2 cup unsalted butter and 8 ounces of chopped dark chocolate together. Stir until smooth. Remove from heat and let it cool slightly. 4. In a mixing bowl, whisk together 3/4 cup granulated sugar, 1/4 cup packed brown sugar, and 3 large eggs. Mix until it looks frothy. Stir in the melted chocolate and butter mix. Add 1 teaspoon vanilla extract. 5. Sift in 1/2 cup all-purpose flour and 1/4 teaspoon salt. Fold gently with a spatula. Do not overmix. 1. Pour the brownie batter into the prepared pan. Spread it evenly. 2. Bake for 20-25 minutes. Test for doneness by inserting a toothpick. It should come out with a few moist crumbs, not wet batter. 1. In a medium bowl, whip 1/2 cup heavy cream to soft peaks. 2. Gently fold in a quarter of the whipped cream into the cooled melted chocolate. Mix until combined. Then fold in the remaining whipped cream until smooth and fluffy. 1. Once the brownies are done, remove them from the oven. Let them cool in the pan for about 10-15 minutes. Carefully lift them out using the parchment overhang. Cool completely on a wire rack. 2. Spread the chocolate mousse evenly over the top of the cooled brownies. 3. Chill in the refrigerator for at least 1 hour to set the mousse. 4. Dust the top with cocoa powder before cutting the brownies into squares. - Avoiding overmixing for fudgy texture: Mix the batter just until combined. Overmixing can make the brownies tough instead of fudgy. You want that rich, soft texture. I often fold the flour in gently with a spatula. This keeps the brownies moist and delicious. - Checking for doneness with a toothpick: Insert a toothpick into the center of the brownies. It should come out with a few moist crumbs, not wet batter. This means they are just right. If it comes out clean, they may be overcooked. - Importance of chilled tools for whipping cream: Cold tools help whip the cream faster and better. Place your mixing bowl and beaters in the fridge for about 10 minutes before whipping. This small step makes a big difference in the texture of the mousse. - How to fold ingredients properly: When mixing the whipped cream into the chocolate, use a gentle folding method. This keeps the air in the whipped cream, making your mousse light and fluffy. Start by adding a small amount of cream to the chocolate. Mix it to loosen the chocolate, then gently fold in the rest. - Serving suggestions with whipped cream or chocolate shavings: Serve each brownie square with a dollop of whipped cream on top. You can also sprinkle chocolate shavings for a fancy touch. This adds flavor and makes your dessert look stunning. - Garnishing with cocoa powder: Dust the top of the brownies with cocoa powder before serving. It adds a nice contrast and enhances the chocolate flavor. Just use a fine mesh sieve to keep it even. Pro Tips Use Quality Chocolate: The flavor of your brownies largely depends on the quality of chocolate used, so opt for high-quality dark chocolate (60-70% cocoa) for the best results. Don’t Overmix: When combining the flour and other ingredients, mix just until incorporated. Overmixing can lead to dense brownies, while gentle folding keeps them light and fudgy. Chill for Best Texture: Allow the mousse to chill in the refrigerator for at least an hour to ensure it sets properly, giving you a rich and creamy topping for your brownies. Garnish Creatively: For an elegant presentation, consider garnishing with a sprinkle of cocoa powder, chocolate shavings, or a dollop of whipped cream before serving. {{image_2}} You can add espresso powder to your brownies. This gives them a deeper, richer taste. Just one teaspoon can make a big difference. If you prefer a sweeter treat, you can swap the dark chocolate for milk or white chocolate. Each type of chocolate adds its own unique flavor. For those who want vegan options, you can replace butter with coconut oil. Use almond milk or cashew cream instead of heavy cream. This way, you keep the creamy texture without dairy. If you need gluten-free brownies, try using almond flour or coconut flour instead of all-purpose flour. Both options work well and keep the brownies moist. Serving these brownies with ice cream is a great idea. Vanilla or mint chocolate chip flavors work best. You can also add fresh fruit like strawberries or raspberries for a nice touch. For a fun twist, make a brownie sundae. Stack a brownie, a scoop of ice cream, and drizzle with chocolate sauce. Top it off with whipped cream and a cherry for a perfect dessert! To keep your brownies fresh, place them in an airtight container. This helps lock in moisture and keep them tasty. If you want to store them longer, place a piece of parchment paper between layers. This prevents sticking. For the mousse, keep it covered with plastic wrap. This helps it stay fluffy and fresh. If you leave it uncovered, it might dry out or form a crust. Can you freeze chocolate mousse brownies? Yes, you can! Freezing them keeps them fresh for a longer time. To properly freeze, first, cool the brownies completely. Then, cut them into squares. Wrap each square in plastic wrap. Place the wrapped brownies in a freezer bag. Be sure to remove as much air as possible before sealing. When you're ready to enjoy them, take the brownies out of the freezer. Leave them in the fridge overnight to thaw. This way, they stay soft and yummy. Enjoy your chocolate mousse brownies! What is the best chocolate to use for brownies? Use dark chocolate with 60-70% cocoa. This gives rich flavor and a nice texture. Brands like Ghirardelli or Callebaut work well. I enjoy using high-quality chocolate. It makes a big difference in taste. How do you know when brownies are done baking? Check the brownies at 20 minutes. Insert a toothpick into the center. If it comes out with a few moist crumbs, they are done. If it has wet batter, bake for a few more minutes. Overbaking can make them dry. Can I make the mousse ahead of time? Yes, you can prepare the mousse a day before. Store it in the fridge. Just make sure to cover it well. This helps keep the mousse fresh and tasty. My brownies turned out dry; what went wrong? Dry brownies often happen from overbaking. Always check for doneness early. Also, measure ingredients carefully. Too much flour can cause dry texture. Lastly, ensure your oven temperature is accurate. How to fix runny mousse? If your mousse is too runny, whip it again. Use chilled equipment to help. You can also add more whipped cream if needed. This can help thicken the mousse. How to serve chocolate mousse brownies for a party? Cut the brownies into small squares. Place them on a nice platter. Add a dollop of whipped cream or sprinkle chocolate shavings on top. This makes them look fancy and inviting. Are these brownies suitable for gluten-free diets? No, these brownies are not gluten-free. They contain all-purpose flour. To make them gluten-free, use almond or coconut flour instead. Adjust the recipe for best results. This blog post shared a tasty recipe for chocolate mousse brownies. You learned about the ingredients, the baking steps, and how to prepare the mousse. I also gave tips for perfecting your bake and presenting your dessert well. Remember, you can customize flavors and ingredients to fit your needs. With these easy instructions, you can impress anyone with this rich treat. Enjoy making and sharing these delicious brownies!

Chocolate Mousse Brownies Rich and Decadent Delight

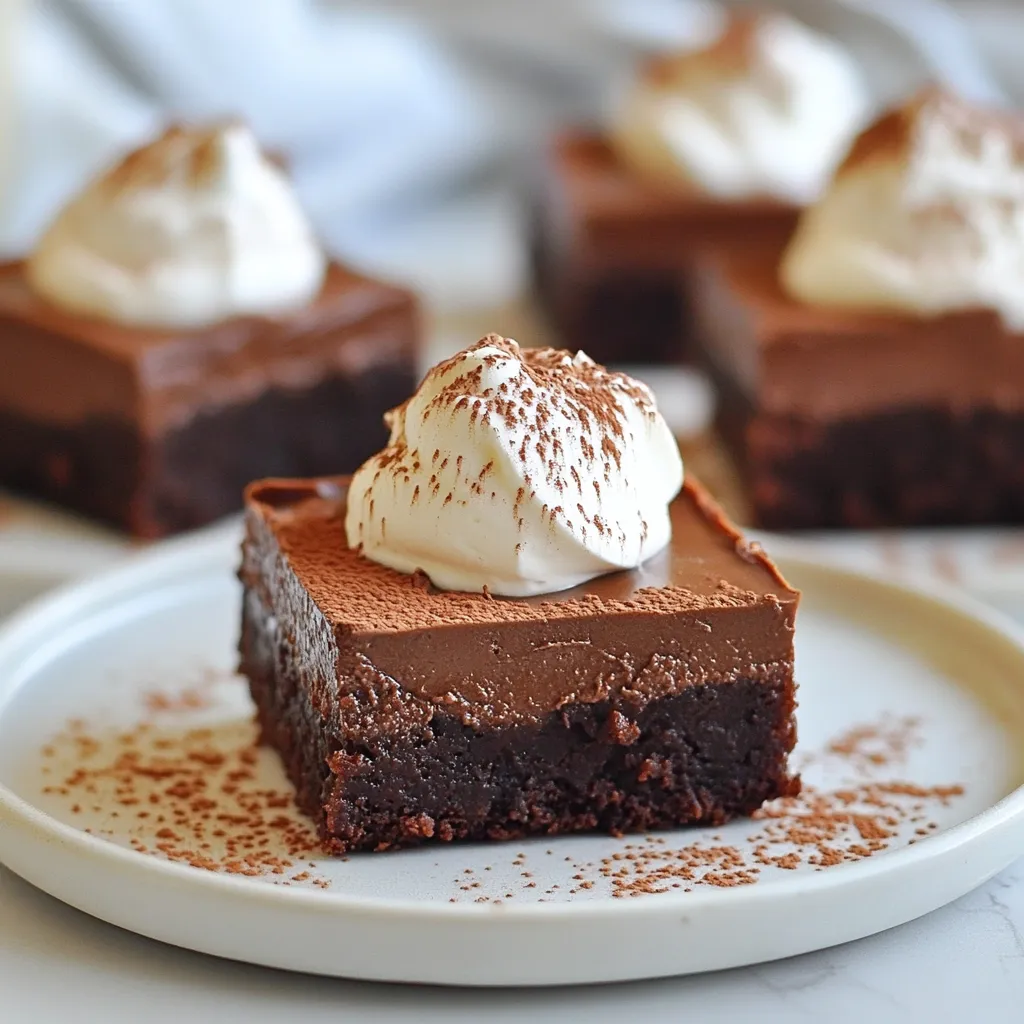
If you love rich desserts, you’re in for a treat! Chocolate Mousse Brownies are the perfect blend of fudgy brownies

- 2 boneless, skinless chicken breasts - 8 oz. fettuccine pasta - 2 cups fresh spinach - 1 cup cherry tomatoes, halved - 1 cup shredded mozzarella cheese - 2 tablespoons olive oil - 2 cloves garlic, minced - 1 teaspoon dried basil - 1 teaspoon dried oregano - Salt and pepper to taste - Fresh basil leaves for garnish These main ingredients create a tasty and comforting dish. The chicken provides protein, while the pasta gives you that satisfying base. Fresh spinach adds a nice crunch, and cherry tomatoes bring sweetness. Of course, mozzarella cheese ties everything together with its creamy goodness. - Red pepper flakes for heat - Parmesan cheese for extra flavor - Lemon juice for brightness Feel free to add red pepper flakes if you like some spice. A sprinkle of Parmesan cheese can enhance the flavor. A splash of lemon juice also brightens the dish nicely. These options let you customize your Chicken Mozzarella Pasta. - Large pot for boiling pasta - Large skillet for sautéing - Cutting board and knife for prep - Slotted spoon for serving You will need a large pot to boil the pasta. A large skillet is essential for cooking the chicken and veggies together. A cutting board and knife help with ingredient prep. A slotted spoon makes serving the dish easy. Having the right tools will make cooking more enjoyable. {{ingredient_image_1}} Start by boiling a pot of water. Make sure to add salt; this helps the pasta taste better. Once the water is boiling, add the fettuccine. Cook it according to the package instructions until it is al dente, which means it should still have a bit of bite. This usually takes about 8-10 minutes. After cooking, drain the pasta in a colander. Save about ½ cup of the pasta water; you might need it later. While the pasta cooks, get your chicken ready. Season both sides of the chicken breasts with salt, pepper, dried basil, and oregano. These spices add great flavor. In a large skillet, heat 2 tablespoons of olive oil over medium-high heat. When the oil is hot, place the chicken breasts in the skillet. Cook them for about 6-7 minutes on each side. You want them to be golden brown and cooked through. The chicken is done when it reaches an internal temperature of 165°F. Once cooked, remove the chicken from the skillet and let it rest on a plate. In the same skillet, add 2 cloves of minced garlic. Sauté it for about 30 seconds until you smell its lovely aroma. Next, add 1 cup of halved cherry tomatoes. Cook them for 2-3 minutes until they soften. Then, toss in 2 cups of fresh spinach. Stir until the spinach wilts down. Now, slice the cooked chicken into strips and return it to the skillet with the veggies. Add the drained pasta and mix everything well. If the mixture looks dry, pour in some of that reserved pasta water until you get a nice, smooth sauce. Finally, sprinkle 1 cup of shredded mozzarella cheese on top. Stir gently until the cheese melts and blends in. To cook chicken well, start with good quality meat. Choose fresh, boneless, skinless chicken breasts. Season them with salt, pepper, dried basil, and oregano. This adds flavor right away. Heat olive oil in a skillet over medium-high heat. Cook the chicken for about 6-7 minutes on each side. Look for a nice golden brown color. Check the internal temperature; it should reach 165°F. Let the chicken rest for a few minutes before slicing. This keeps it juicy and tender. When cooking pasta, always use a big pot of salted water. Salt helps bring out the pasta's flavor. Bring the water to a rolling boil before adding the fettuccine. Follow the package instructions for timing. Cook it until it's al dente, which means firm to the bite. After cooking, drain the pasta but keep some water. This water adds moisture later when mixing everything together. Cheese is key to making this dish creamy and rich. Use fresh mozzarella, as it melts beautifully. Add the shredded mozzarella last, after combining chicken and vegetables. Stir gently until the cheese melts into the pasta. This creates a wonderful texture. For an extra touch, garnish with fresh basil leaves. They add color and a fresh taste that brightens the dish. Pro Tips Cook Chicken Evenly: Make sure to pound the chicken breasts to an even thickness to ensure they cook uniformly and stay juicy. Reserve Pasta Water: Always reserve some pasta water before draining. This starchy water can be used to adjust the sauce's consistency, adding creaminess without thinning it out. Fresh Herbs Make a Difference: Using fresh basil as a garnish not only adds flavor but also enhances the presentation of the dish. Melt Cheese Thoroughly: After adding mozzarella, cover the skillet for a minute to trap heat and help the cheese melt evenly throughout the dish. {{image_2}} You can switch the chicken with other proteins. Try shrimp for a seafood twist. Cook the shrimp until pink, about 2-3 minutes per side. You can also use turkey or even diced pork. Just make sure to cook them until they are fully done. This keeps the dish tasty and fun. If you want a meat-free meal, replace the chicken with tofu or tempeh. Tofu absorbs flavors well and cooks quickly. Cut it into cubes and sauté until golden. You can also add more veggies. Consider bell peppers, zucchini, or mushrooms. They add texture and color, making your dish vibrant and healthy. Mozzarella is great, but many cheeses work well too. Try using gouda or provolone for a unique flavor. Cheddar gives a sharp taste that many love. For a creamy touch, use cream cheese or ricotta. Feel free to mix cheeses for a delicious blend. Just remember to adjust the amount to keep it cheesy and delightful! To store your Chicken Mozzarella Pasta, let it cool. Place it in an airtight container. Make sure the lid seals well. You can keep it in the fridge for about 3 to 4 days. If you want to keep it longer, freezing is a great option! When you are ready to eat your leftovers, take them out of the fridge. You can reheat them in the microwave. Use a microwave-safe dish and cover it loosely with a lid or wrap. Heat for about 1-2 minutes. Stir halfway to ensure even heating. You can also use a skillet. Heat it over medium-low heat. Add a splash of water to keep it moist. Stir often until hot. To freeze the pasta, store it in a freezer-safe container. Make sure to leave some space at the top. This allows for expansion. It keeps well in the freezer for up to 2 months. When you're ready to eat, thaw it in the fridge overnight. Reheat as mentioned before. Enjoy your cheesy delight even later! Yes, you can make Chicken Mozzarella Pasta ahead of time. Just follow the recipe and let it cool. Store it in an airtight container in the fridge. It will stay fresh for up to three days. When you are ready to eat, reheat it on the stove or in the microwave. Add a splash of water if it seems dry. If you don’t have fettuccine, you can use other pasta types. Penne, spaghetti, or even whole wheat pasta work well. Each type gives a different texture. Just make sure to cook it according to package directions. This way, your pasta stays al dente and delicious. To make this dish healthier, you can make a few simple swaps. Use whole grain pasta for more fiber. You can also add more vegetables like bell peppers or zucchini. Reducing the cheese can lower calories too. Lastly, grilled chicken can be a leaner option than pan-fried. This blog post shared the main ingredients and cooking steps for Chicken Mozzarella Pasta. I showed you how to cook pasta, chicken, and vegetables. You learned tips for perfect chicken and pasta flavor. I also offered variations and storage tips for leftovers. In conclusion, this dish is easy to make and very tasty. You can customize it to fit your taste. Enjoy your cooking!

Chicken Mozzarella Pasta Easy and Tasty Delight

Are you ready to whip up a simple, delicious dish your family will love? In this post, I’ll show you

Here are the simple ingredients you need to make Gigi Hadid’s spicy vodka pasta. This dish comes together quickly and is full of flavor. - 12 oz (340g) penne pasta - 2 tablespoons olive oil - 2 cloves garlic, minced - 1 small onion, finely chopped - 1 teaspoon red pepper flakes - 1 can (15 oz) crushed tomatoes - 1/2 cup heavy cream or coconut cream - 1/2 cup grated Parmesan cheese - Salt and pepper to taste - Fresh basil leaves for garnish Each ingredient plays a key role in building the taste. The penne pasta serves as a great base. Olive oil gives a rich flavor while garlic and onion add depth. Red pepper flakes bring the heat, and crushed tomatoes form the sauce. Heavy cream or coconut cream adds creaminess, while Parmesan gives it a cheesy finish. Fresh basil adds a nice touch on top. Gather these ingredients, and you will be ready to create a dish that is both simple and delicious. {{ingredient_image_1}} Start by filling a large pot with water. Add some salt and bring it to a boil. Once it boils, add 12 ounces of penne pasta. Cook the pasta according to the package directions until it is al dente. After cooking, reserve one cup of pasta water. Then, drain the pasta and set it aside. In the same pot, pour in 2 tablespoons of olive oil. Heat it over medium heat. Add 2 cloves of minced garlic and 1 small finely chopped onion. Sauté these for about 3 to 4 minutes. You want them soft and fragrant. Next, stir in 1 teaspoon of red pepper flakes. This adds a nice kick. Cook this mix for another minute. Then, pour in one can of crushed tomatoes. Bring it to a gentle simmer. Let it cook for 7 to 10 minutes. This thickens the sauce and blends the flavors. Now, lower the heat and add 1/2 cup of heavy cream. Stir it well until the sauce turns pink. If it’s too thick, use some reserved pasta water to reach the right consistency. Next, mix in 1/2 cup of grated Parmesan cheese. Stir until it melts and the sauce becomes creamy. Season with salt and pepper to taste. Finally, add the cooked pasta to the sauce. Toss gently to coat the penne evenly in the spicy tomato sauce. For the finishing touch, plate the pasta. Garnish with fresh basil leaves and extra Parmesan cheese on top. Enjoy your delicious dish! To make your sauce creamy, use heavy cream or coconut cream. Both options work well. If the sauce seems too thick, add reserved pasta water. This helps thin it out while keeping it rich. Stir well to create a smooth blend of flavors. Gigi’s pasta has a kick from red pepper flakes. Start with one teaspoon and taste as you go. If you want more heat, add more flakes. Remember, you can always add spice, but you can't take it away. Start small to find your perfect heat balance. Penne pasta is great for this dish. Its shape holds the sauce well. You can also use rigatoni or even fusilli. The key is to pick a pasta with ridges or holes. These shapes trap the sauce and enhance each bite. Cooking it to al dente gives the best texture. Pro Tips Adjust the Spice Level: If you prefer a milder dish, reduce the amount of red pepper flakes or omit them altogether. You can always add more spice later! Use Fresh Ingredients: Fresh garlic and onion significantly enhance the flavor of the sauce. Opt for fresh basil as a garnish for a pop of freshness. Pasta Water Magic: The reserved pasta water is a great way to adjust the sauce consistency without losing flavor. Add it gradually to achieve your desired creaminess. Vegetarian Option: For a vegetarian version, ensure the Parmesan cheese is vegetarian-friendly, or substitute with a plant-based cheese alternative. {{image_2}} To make this dish dairy-free, use coconut cream instead of heavy cream. Coconut cream gives a rich and creamy texture. You can also skip the cheese or use a dairy-free cheese. This keeps the flavor bright and delicious without dairy. You can add protein to make it heartier. Cook some diced chicken or shrimp in the pot after sautéing the garlic and onion. Make sure to season them well. This adds great flavor and makes the meal more filling. For a vegetarian twist, add vegetables like spinach, bell peppers, or mushrooms. Sauté them with the onions and garlic. This not only enhances the taste but also adds nutrients. You can enjoy a colorful and healthy dish without meat. Feel free to mix and match these variations. They keep the dish exciting and cater to different diets. To save leftovers, place the pasta in an airtight container. Let it cool before sealing. Store it in the fridge for up to three days. This will keep the flavors fresh. When ready to eat, reheat the pasta gently. You can use a microwave or a pot on low heat. If it seems dry, add a splash of water or cream. Stir well until it’s hot. This keeps it creamy and tasty. You can freeze this pasta for later. First, let it cool completely. Then, place it in a freezer-safe container. It can last up to three months in the freezer. To reheat, defrost in the fridge overnight. Then, heat it on the stove or microwave until hot. Enjoy the flavors again! Gigi Hadid’s Spicy Vodka Pasta stands out for its creamy, spicy flavor. The blend of crushed tomatoes and heavy cream gives it a rich taste. The red pepper flakes add a nice kick. This dish is simple yet elegant. It’s perfect for a cozy dinner or a gathering with friends. Yes, you can prepare this pasta in advance. Cook the pasta and sauce separately. Store them in airtight containers in the fridge. When you are ready to serve, heat the sauce and mix it with the pasta. This way, the pasta stays fresh and tasty. If you want a lighter option, you can use coconut cream. It gives a nice flavor and is dairy-free. Another option is using a mix of milk and butter. This will mimic the creaminess without being too heavy. Choose what fits your diet best. To increase the heat, add more red pepper flakes. You can also use fresh jalapeños or hot sauce. Taste the sauce as you go. Adjust the spice to match your preference. A little extra heat can make the dish even more exciting! Parmesan cheese adds a rich flavor to the sauce. It helps create a creamy texture. However, you can skip it if you want a dairy-free option. Nutritional yeast can be a good alternative for a cheesy taste without dairy. Choose what works best for you! This recipe for Gigi Hadid’s Spicy Vodka Pasta brings together simple ingredients for a big flavor. You learned how to cook the pasta, sauté aromatics, and create a spicy tomato sauce. I shared tips for creaminess and spice adjustments, plus tasty variations to suit your taste. Remember, you can store leftovers and reheat them easily. With this dish, you can impress friends and family. Enjoy cooking, and savor every bite of your creamy, spicy masterpiece!

Gigi Hadid Spicy Vodka Pasta Simple and Flavorful Dish

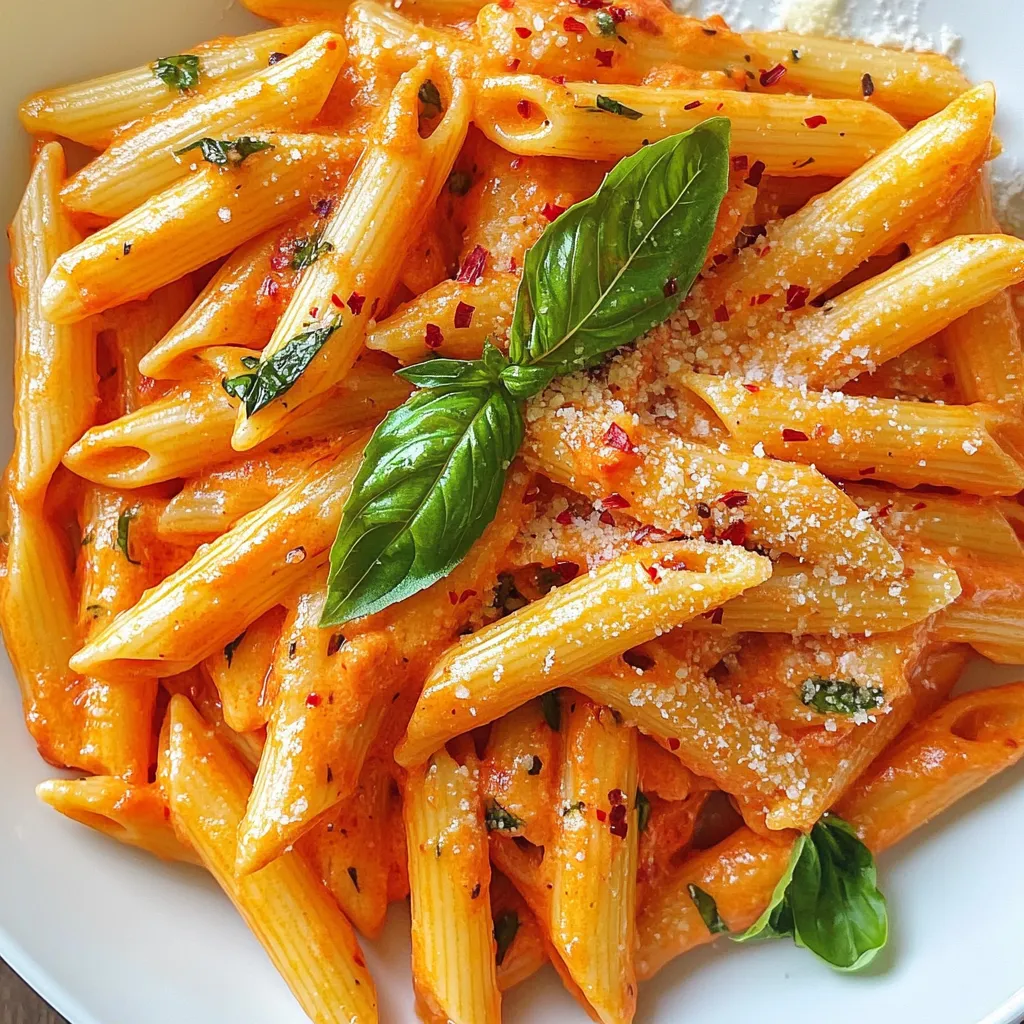
If you’re ready to spice up your dinner routine, you need to try Gigi Hadid’s Spicy Vodka Pasta. This dish

- 2 pounds chicken wings - 1/4 cup honey - 1/4 cup Sriracha sauce - 2 tablespoons soy sauce - 2 garlic cloves, minced - 1 tablespoon apple cider vinegar - 1 teaspoon ground ginger - 1/2 teaspoon black pepper - Garnish options: sesame seeds, sliced green onions Using these ingredients gives the wings a sweet and spicy flavor. The chicken wings are the main star of this dish. The honey adds sweetness, while the Sriracha brings heat. Together, they create a perfect balance. Next, we add soy sauce for depth. Minced garlic gives it a nice punch. Apple cider vinegar adds a tangy note. Ground ginger and black pepper enhance the overall taste. For garnish, sesame seeds and sliced green onions add crunch and color. They make the wings look pretty and taste even better. The mix of flavors makes these wings a hit at any gathering or dinner. {{ingredient_image_1}} - Prepare the marinade: In a large bowl, mix together 1/4 cup honey, 1/4 cup Sriracha sauce, 2 tablespoons soy sauce, 2 minced garlic cloves, 1 tablespoon apple cider vinegar, 1 teaspoon ground ginger, and 1/2 teaspoon black pepper. Whisk until combined. - Marinate the chicken wings: Add 2 pounds of chicken wings to the bowl. Toss the wings in the marinade to coat them evenly. Cover the bowl and refrigerate for at least 1 hour. For the best flavor, marinate overnight. - Preheat the oven and setup: Preheat your oven to 425°F (220°C). Line a baking sheet with aluminum foil for easy cleanup. Place a wire rack on top of the sheet. This helps the wings cook and crisp up nicely. - Arrange the wings on the wire rack: Take the wings from the marinade and let the excess drip off. Place the wings in a single layer on the wire rack. - Bake and monitor cooking time: Bake the wings for 25-30 minutes. Halfway through, flip the wings to ensure they cook evenly. Watch them closely during the last few minutes. They should turn golden brown and crispy. - Garnish after baking: When the wings are done, take them out of the oven and let them rest for a few minutes. Sprinkle sesame seeds and sliced green onions on top for added flavor and crunch. - Tips for serving: Serve your hot wings with your favorite dipping sauce or enjoy them as they are. The sweet and spicy blend makes them perfect for any occasion! To make your wings crispy, use a wire rack. This allows air to flow around the wings while they bake. It helps them cook evenly and get that golden brown color. Flipping the wings halfway through cooking is key. This step ensures both sides brown nicely. Don’t skip this! The best time to marinate your wings is at least one hour. However, if you have time, marinate them overnight. This longer soak makes the flavor stronger and deeper. The marinade coats the wings well, making each bite tasty. The garlic and Sriracha will work their magic overnight. You can grill the wings for a smoky flavor. Just preheat your grill and cook them over medium heat. Watch them closely so they don’t burn. If you prefer baking, stick to the oven method. It’s simple and effective! For air fryers, adjust the time and temperature. Cook at 375°F for about 25 minutes. This method gives you crispy wings with less oil. Enjoy experimenting with your preferred cooking style! Pro Tips Marinate Longer for More Flavor: For the best results, marinate the chicken wings overnight. This allows the flavors to penetrate deeper into the meat, resulting in a more flavorful wing. Use a Wire Rack: Placing the wings on a wire rack while baking helps air circulate around them, making them crispier. If you don’t have a wire rack, make sure to flip the wings halfway through baking to ensure even cooking. Adjust Spice Level: If you prefer less heat, reduce the Sriracha amount or mix in some mild hot sauce. For extra heat, add more Sriracha or sprinkle some crushed red pepper flakes before serving. Serve with a Cooling Dip: Balance the spiciness of the wings by serving them with a cooling dip like ranch or blue cheese dressing. This contrast enhances the overall flavor experience. {{image_2}} To make your Sriracha honey chicken wings just right, you can adjust the heat and sweetness. - Adjusting heat levels: If you love spice, add more Sriracha sauce. You can also try other hot sauces like cayenne or chipotle. For a milder taste, cut back on Sriracha. Adding a bit of ketchup can also help balance the heat. - Sweetness modifications: Want it sweeter? Increase the honey. Maple syrup or agave can also work as sweeteners. If you prefer less sweetness, reduce the honey and add a splash of vinegar for tang. Sometimes, you may want to change up the ingredients. - Alternative sauces or sweeteners: Instead of Sriracha, use BBQ sauce or a spicy teriyaki. For sweeteners, try brown sugar or coconut sugar in place of honey. - Gluten-free options: To make this recipe gluten-free, use tamari instead of soy sauce. Ensure all sauces are certified gluten-free. Pair your wings with tasty sides and dips to enhance your meal. - Pairing with sides: Serve your wings with crunchy celery sticks or carrot sticks for a fresh crunch. You can also add fries or a light salad for balance. - Best dipping sauces: Ranch or blue cheese dressing make excellent dips for these wings. A sweet chili sauce also pairs well for an extra kick. To store leftovers, first let the wings cool down. Place them in an airtight container. This keeps them fresh and tasty. You can also cover them tightly with plastic wrap. Try to eat the wings within three days for the best flavor. I recommend using glass or plastic containers with tight lids. These containers help keep moisture in and air out. If you have a lot of wings, use multiple containers. You can freeze cooked wings for a longer shelf life. First, let them cool completely. Then, place them in a freezer-safe bag or container. Try to remove as much air as possible to avoid freezer burn. They can last up to three months in the freezer. For reheating, preheat your oven to 350°F (175°C). Place the frozen wings on a baking sheet. Bake for about 20-25 minutes or until they are heated through. You can also use the microwave, but the oven keeps them crispy. In the fridge, cooked Sriracha honey chicken wings last about three days. If you freeze them, they can last up to three months. Always check for any off smells or changes in texture before eating. Yes, you can use frozen chicken wings. Just remember to thaw them first. Place the wings in the fridge overnight. If you're in a hurry, you can run them under cold water. After thawing, follow the marinating steps as usual. This ensures they soak up the flavors well. To make the wings less spicy, reduce the Sriracha sauce. You can use half the amount or add more honey. This adds sweetness and balances the heat. Another option is to mix in some ketchup or barbecue sauce. Both will give a nice flavor without too much spice. Some great dipping sauces include ranch, blue cheese, or honey mustard. Each adds a nice contrast to the spicy wings. If you want a kick, try a spicy mayo. It pairs well with the sweet and spicy flavors of the wings. Yes, you can grill the wings! Preheat your grill to medium heat. Marinate the wings as you would for baking. Place the wings on the grill and flip them often. Cook for about 20-25 minutes, or until they are crispy and cooked through. Enjoy that smoky flavor! You now have everything you need to make tasty Sriracha honey chicken wings. From marinating to baking, each step adds flavor to your wings. Remember, the wire rack helps achieve perfect crispiness. Feel free to swap ingredients to suit your taste. And don’t forget to try pairing them with delicious sides and dips. Enjoy the tasty journey of making your wings unique! Your next gathering can be a hit with these easy tips.

Sriracha Honey Chicken Wings Flavorful and Crispy Delight

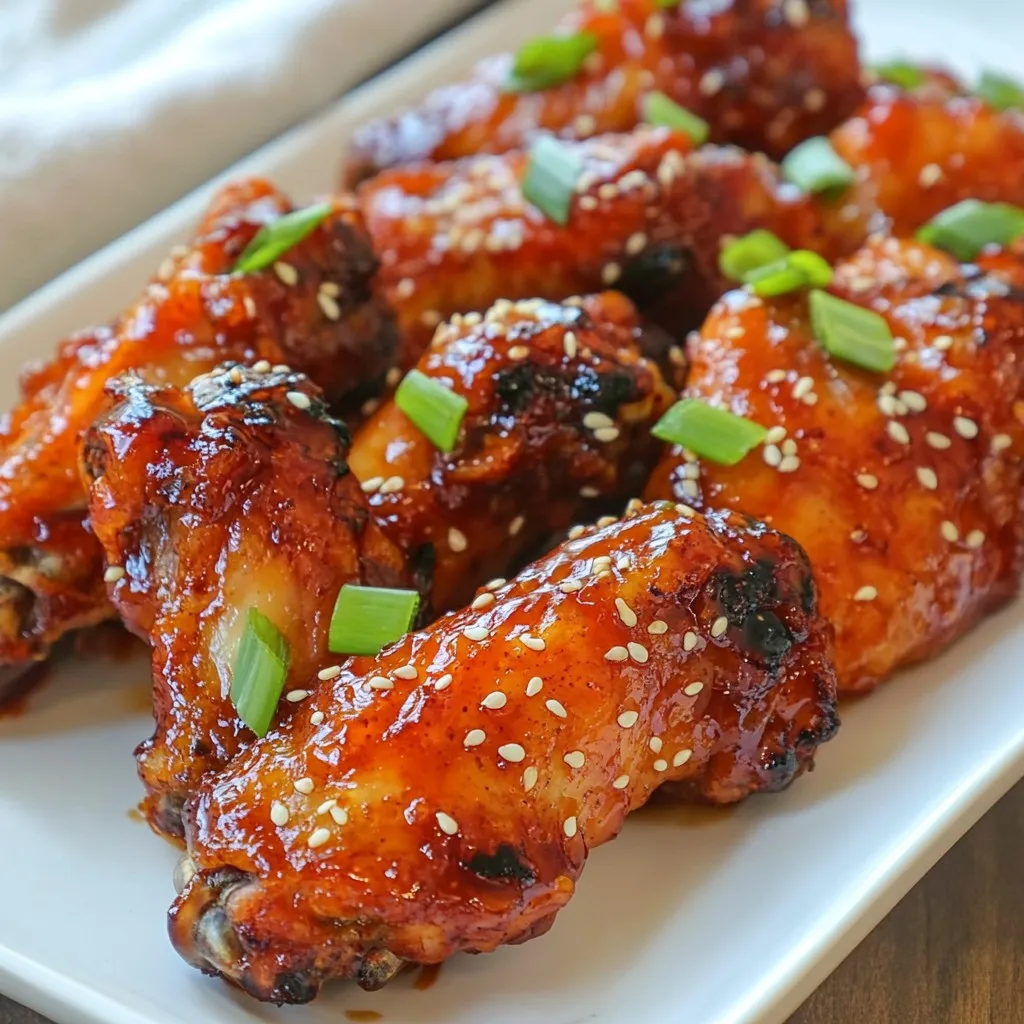
If you’re craving a tasty twist on chicken wings, look no further! My Sriracha Honey Chicken Wings recipe delivers a

- 4 bone-in, skin-on chicken thighs - 4 cloves garlic, minced - 1/2 cup grated Parmesan cheese - 1/4 cup unsalted butter, melted - 1 tablespoon olive oil - 1 tablespoon fresh parsley, chopped - 1 teaspoon paprika - Salt and pepper to taste For this dish, I love using chicken thighs. They stay juicy and have great flavor. The garlic adds a nice kick, while the Parmesan brings a rich, cheesy taste. Butter and olive oil help keep the chicken moist and add depth. I like to mix in fresh parsley for a pop of color. Paprika gives a hint of warmth and spice. Don't forget to season with salt and pepper. This simple mix of ingredients makes a delicious meal that everyone will enjoy. Gather these items before you start cooking. Having everything ready makes the process smooth and fun! {{ingredient_image_1}} 1. Preheating the oven Start by preheating your oven to 400°F (200°C). This ensures even cooking. 2. Mixing marinade ingredients In a mixing bowl, combine: - 1/4 cup unsalted butter, melted - 4 cloves garlic, minced - 1 tablespoon olive oil - 1 teaspoon paprika - Salt and pepper to taste Stir well until mixed. 3. Coating the chicken thighs Add 4 bone-in, skin-on chicken thighs to the bowl. Mix until they are well coated with the garlic butter mixture. 1. Arranging chicken in the dish Place the coated chicken thighs skin-side up in a baking dish. Make sure they are spaced out for even cooking. 2. Cheese application and baking time Sprinkle 1/2 cup grated Parmesan cheese generously over each chicken thigh. Bake in the oven for 35-40 minutes. The chicken should be golden brown and reach an internal temperature of 165°F (75°C). 3. Broiling for a crispy finish In the last 5 minutes, switch your oven to broil. This will give your chicken a crispy, golden crust. Keep an eye on it to prevent burning! Once done, you can add fresh parsley as a garnish before serving. Enjoy your savory garlic Parmesan chicken! To make sure your Garlic Parmesan Chicken cooks evenly, choose chicken thighs of similar size. This way, they will all cook at the same rate. Before baking, let the chicken sit at room temperature for about 15 minutes. This helps the meat cook more evenly. For a crispy skin, pat the chicken dry with a paper towel. This removes extra moisture. When you coat the chicken with the garlic butter mixture, be sure to get under the skin. This adds flavor and helps the skin crisp up. In the last five minutes of baking, switch your oven to broil. This gives your chicken a nice golden crust. Keep an eye on it so it doesn't burn! Garnishing your dish makes it look special. Once your chicken is done, sprinkle fresh parsley on top. This adds a pop of color and fresh taste. You can also drizzle leftover garlic butter from the baking dish over the chicken. It adds more flavor and makes it shine. For side dishes, serve your Garlic Parmesan Chicken with a fresh green salad. Steamed vegetables like broccoli or green beans also go well. You could even serve it with roasted potatoes for a hearty meal. Each side adds a nice touch to your plate! Pro Tips Marinate for Extra Flavor: For an even richer flavor, consider marinating the chicken thighs in the garlic butter mixture for a few hours or overnight before baking. Use Fresh Ingredients: Fresh garlic and parsley will enhance the flavor profile of this dish, making it more aromatic and vibrant. Check Internal Temperature: Always use a meat thermometer to ensure the chicken is cooked through, reaching an internal temperature of 165°F (75°C) for safety and juiciness. Rest Before Serving: Allow the chicken to rest for about 5 minutes after removing it from the oven. This helps the juices redistribute, making the meat more tender and flavorful. {{image_2}} You can change the taste of Garlic Parmesan Chicken by trying different cheeses. Here are some great options: - Mozzarella: It melts well and adds a creamy texture. - Cheddar: It gives a sharp flavor that pairs nicely with garlic. - Feta: It brings a tangy taste that can brighten the dish. You can also add spices to bring some heat. Consider using: - Cayenne pepper: A little can go a long way. - Crushed red pepper flakes: They add a nice kick. Mix these into your garlic butter for a spicy twist! You can cook Garlic Parmesan Chicken in different ways. Grilling is one option. It gives the chicken a smoky flavor. To grill: 1. Preheat your grill to medium heat. 2. Coat the chicken thighs with the garlic butter mix. 3. Place them on the grill for about 25-30 minutes. Turn them halfway. Baking is the classic method. However, if you want a quick option, try an Instant Pot. To use an Instant Pot: 1. Add the chicken and garlic butter mix to the pot. 2. Seal the lid and cook on high for about 10 minutes. 3. Quick-release the steam and check for doneness. Each method offers a unique taste and texture, so feel free to experiment! To store leftovers, let the chicken cool first. Place it in an airtight container. This keeps the flavors fresh. You can store it in the fridge for up to three days. Always check for any signs of spoilage before eating. For freezing, wrap each piece of chicken tightly in plastic wrap. Then, place them in a freezer bag. This helps prevent freezer burn. You can freeze the chicken for up to three months. When you want to eat it, thaw it in the fridge overnight. To reheat, place the chicken in a preheated oven at 350°F (175°C). Heat until warm, about 20-25 minutes. This way, the chicken stays juicy and tasty. Enjoy your Garlic Parmesan Chicken even days later! Yes, you can use chicken breasts. They will cook faster than thighs. Adjust the baking time to around 25-30 minutes. Always check the internal temperature. It should reach 165°F (75°C). This recipe is already gluten-free! The ingredients do not include any gluten. Just ensure your Parmesan cheese and butter are gluten-free, too. Always read labels to be sure. You can serve this chicken with many sides. A fresh green salad pairs well. Steamed vegetables or rice are also great options. For a hearty meal, try garlic bread or mashed potatoes. You now have a clear path to making garlic Parmesan chicken. We covered the key ingredients, easy steps, and helpful tips. You learned about storage and even variations to try. Now, you can enjoy this dish your way. Cooking should be fun and tasty. Keep experimenting with flavors and techniques. I'm excited to see your version of this meal shine!

Savory Garlic Parmesan Chicken Quick and Easy Recipe

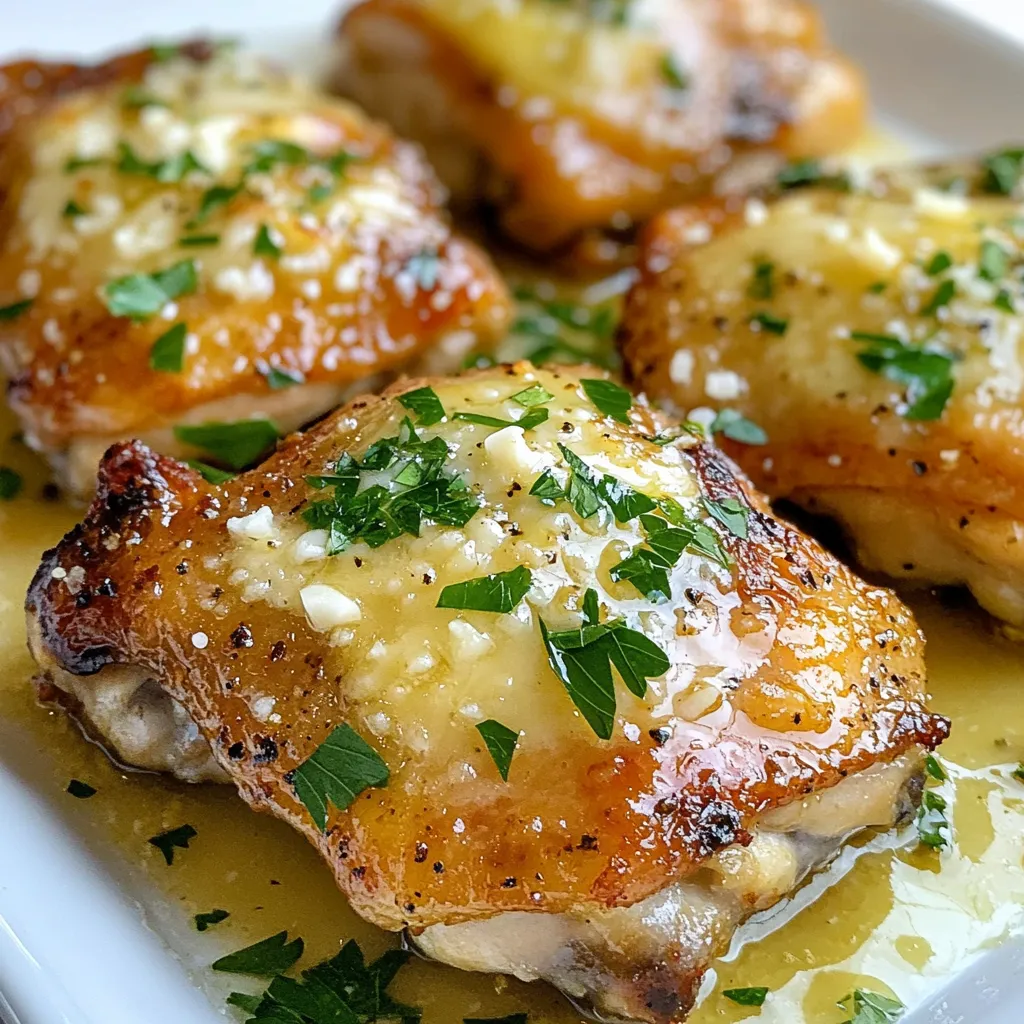
Are you ready to savor a meal that will make your taste buds dance? My Savory Garlic Parmesan Chicken is

- 1 lb ground beef - 1 small onion, diced - 2 cloves garlic, minced - 1 can (15 oz) black beans, rinsed and drained - 1 can (10 oz) diced tomatoes with green chilies - 1 cup cooked rice (white or brown) - 2 cups shredded cheddar cheese - 1 tablespoon taco seasoning - 8 large flour tortillas - 1/2 cup sour cream - Fresh cilantro, for garnish (optional) - Salt and pepper to taste To make this cheesy beef burrito bake, you will need: - Large skillet - 9x13 inch baking dish - Cutting board - Knife - Mixing spoon - Aluminum foil You can swap some ingredients based on your taste or pantry. Here are some ideas: - Use ground turkey or chicken instead of beef for a leaner option. - Swap black beans for pinto beans or kidney beans if you prefer. - Use brown rice for added fiber, or skip the rice for a low-carb version. - Try pepper jack cheese in place of cheddar for a spicy kick. - Substitute Greek yogurt for sour cream for a healthier choice. - Fresh parsley can replace cilantro if you want a different flavor. {{ingredient_image_1}} 1. Preheat the Oven: Set your oven to 375°F (190°C). This ensures a good bake. 2. Prep the Ingredients: Dice your onion and mince the garlic. This saves time later. 3. Cook the Rice: If you haven't done so, cook your rice, either white or brown. 1. Brown the Beef: In a large skillet, cook 1 lb of ground beef over medium heat. Stir it often until it's brown. 2. Add Onion and Garlic: Toss in the diced onion and minced garlic. Cook for 3-4 minutes until the onion turns clear. 3. Mix in Other Ingredients: Add 1 can of black beans, 1 can of diced tomatoes with green chilies, and the cooked rice. Stir well. 4. Season: Sprinkle in 1 tablespoon of taco seasoning. Taste and add salt and pepper if needed. Let it simmer for 5 minutes. 1. Layer the Tortillas: Grease a 9x13 inch baking dish. Lay 4 flour tortillas across the bottom, overlapping them. 2. Add Beef Mixture: Spread half of your beef mix over the tortillas. Top with 1 cup of shredded cheddar cheese. 3. Repeat Layers: Place the other 4 tortillas on top, followed by the rest of the beef mixture. Finish with the remaining cheese. 4. Cover and Bake: Cover the dish with aluminum foil. Bake for 20 minutes. 5. Remove Foil: Take off the foil and bake for another 10-15 minutes. Look for bubbly, golden cheese. 6. Garnish: Let it cool for a few minutes. Drizzle sour cream on top and add fresh cilantro if you like. To make the beef mixture taste great, always start with fresh ingredients. Use good ground beef and add strong flavors. I like to use diced onions and minced garlic. They add depth and aroma. Add taco seasoning for that classic taste. Mix in black beans and diced tomatoes for texture and flavor. Taste the mixture before using it. Adjust with salt and pepper as needed. A hint of lime juice can also brighten the flavors. To cook the beef evenly, heat the skillet over medium heat. This helps to brown the meat without burning it. Break the meat into small pieces as it cooks. This ensures it cooks through and absorbs flavors well. Stir often, especially after adding the onions and garlic. This prevents sticking and allows for even cooking. When you layer the tortillas, make sure they overlap slightly. This helps to keep the filling in place. For a beautiful presentation, let the bake cool slightly before serving. Drizzle sour cream on top in a zig-zag pattern. This adds a nice touch and balances the flavors. Fresh cilantro can add a pop of color and freshness. Serve the Cheesy Beef Burrito Bake in squares on a plate. You can pair it with a side salad or guacamole for added crunch. Enjoy it with tortilla chips for a fun twist. Pro Tips Use Lean Ground Beef: Opt for lean ground beef (like 90% or 93% lean) to reduce excess fat and make your dish healthier without sacrificing flavor. Customize Your Cheese: While cheddar cheese is delicious, feel free to mix in other cheeses such as Monterey Jack or pepper jack for an extra kick. Make Ahead: This dish can be assembled in advance and stored in the fridge. Just cover it tightly with foil and bake it when you're ready to enjoy! Add Veggies: Consider adding chopped bell peppers or zucchini to the beef mixture for extra nutrition and flavor. They will blend nicely with the other ingredients. {{image_2}} You can make a tasty vegetarian version of this dish. Start by swapping the ground beef for a mix of vegetables. Use options like bell peppers, zucchini, or mushrooms. You can also add more black beans for protein. Replace the taco seasoning with a spice mix made from cumin, paprika, and chili powder. This will keep the flavor bold and exciting. If you like heat, add some spice to the mix. You can stir in diced jalapeños or add a dash of hot sauce when cooking. For a milder version, skip the green chilies in the tomatoes. You can also use mild taco seasoning. This way, everyone can enjoy the dish at their preferred heat level. Cheese can change the whole dish. Instead of cheddar, try Monterey Jack for a creamier taste. Pepper Jack adds a spicy kick. For a unique twist, use a blend of cheeses like mozzarella and queso fresco. Each cheese option gives your dish a new flavor and texture. Choose what you love best! After you enjoy your Cheesy Beef Burrito Bake, let it cool. Once cool, cover it tightly with plastic wrap or foil. You can store it in the fridge for up to three days. This way, it stays fresh and tasty for your next meal. If you want to keep it longer, freezing is a great option. First, let the dish cool completely. Then, cut it into portions for easy use later. Wrap each portion in plastic wrap, then place them in a freezer-safe bag. You can freeze it for up to three months. Just remember to label the bag with the date! When you're ready to enjoy the leftovers, take a portion out of the fridge or freezer. If frozen, let it thaw overnight in the fridge. To reheat, place it in an oven-safe dish. Heat in the oven at 350°F (175°C) for about 20-25 minutes. If it's from the fridge, it may take less time, around 15 minutes. Check that the cheese is melted and bubbly before serving. Enjoy your warm and cheesy meal! Yes, you can make Cheesy Beef Burrito Bake ahead of time. Prepare the dish up to the baking step. Then, cover it and store it in the fridge. This way, you can bake it later. It will save you time on busy days. Just remember to bake it fresh so the cheese is melty and delicious. You can serve many tasty sides with Cheesy Beef Burrito Bake. Here are a few great options: - Mexican rice: This pairs well and adds flavor. - Guacamole: A creamy dip that brings freshness. - Corn salad: It adds crunch and color to your meal. - Salsa: A zesty sauce that complements the bake. - Chips: Crispy tortilla chips make a fun side. These sides will enhance your meal and make it more exciting. To make Cheesy Beef Burrito Bake gluten-free, use gluten-free tortillas. There are many brands available that taste great. Ensure any canned goods, like beans and tomatoes, are gluten-free too. You can also check the taco seasoning for gluten ingredients. This way, everyone can enjoy this tasty dish without worry. You learned about making Cheesy Beef Burrito Bake. We covered ingredients, required tools, and easy swaps. Step-by-step, I shared prep and cooking methods. Tips helped enhance flavor and serve it well. I offered tasty variations and storage info, so your dish stays fresh. In the end, you now have all the tools to create a crowd-pleasing meal. Enjoy the cooking process and impress your friends and family with your delicious dish!

Cheesy Beef Burrito Bake Tasty and Simple Recipe

Looking for an easy dinner that packs a flavor punch? You’ve found it! This Cheesy Beef Burrito Bake is tasty

To make Maple Pecan Roasted Brussels Sprouts, you will need: - 1 lb Brussels sprouts, trimmed and halved - 1/4 cup pecans, chopped - 1/4 cup pure maple syrup - 3 tablespoons olive oil - 2 tablespoons balsamic vinegar - 1 teaspoon garlic powder - 1 teaspoon salt - 1/2 teaspoon black pepper - 1/4 teaspoon cayenne pepper (optional) - 2 tablespoons fresh parsley, chopped (for garnish) If you want to change things up, here are some options: - You can swap pecans for walnuts or almonds. - Use honey or agave syrup instead of maple syrup. - If you are out of balsamic vinegar, try apple cider vinegar. - Garlic powder can be replaced with minced fresh garlic. - For a nut-free dish, leave out the nuts entirely. This dish serves about four people. Each serving has: - Calories: 220 - Protein: 3g - Fat: 12g - Carbohydrates: 28g - Fiber: 4g - Sugar: 10g These numbers can vary based on your ingredient choices. {{ingredient_image_1}} 1. Start by preheating your oven to 400°F (200°C). This helps the Brussels sprouts roast well. 2. Next, take 1 pound of Brussels sprouts and trim the ends. Then, cut them in half. 3. In a large bowl, combine the halved Brussels sprouts with 1/4 cup of chopped pecans. 4. Add 3 tablespoons of olive oil, 1/4 cup of pure maple syrup, and 2 tablespoons of balsamic vinegar. 5. Sprinkle in 1 teaspoon of garlic powder, 1 teaspoon of salt, 1/2 teaspoon of black pepper, and 1/4 teaspoon of cayenne pepper, if you want some heat. 6. Toss everything together until the Brussels sprouts are fully coated. 1. Spread the Brussels sprouts and pecans on a baking sheet lined with parchment paper. Make sure they are in a single layer. 2. Roast them in the preheated oven for 25 to 30 minutes. Halfway through, toss them to ensure even cooking. 3. You’ll know they are done when they look golden brown and crispy on the edges. 4. Take them out of the oven and let them cool for a few minutes. 5. Transfer the Brussels sprouts to a serving platter. Drizzle any leftover maple syrup from the baking sheet on top. 6. Finally, garnish with 2 tablespoons of chopped fresh parsley for a pop of color. - Make sure not to overcrowd the baking sheet. This helps them roast better. - For extra crunch, use fresh pecans and chop them just before adding. - If you like them even crispier, roast for an extra 5 minutes. Watch closely to avoid burning. - Use high-quality maple syrup for the best flavor. It makes a big difference! To make your Maple Pecan Roasted Brussels Sprouts shine, think about adding more depth. A dash of lemon juice brightens the dish. You can also try using smoked paprika for a fun twist. If you love heat, sprinkle in more cayenne pepper. Fresh herbs like thyme or rosemary can give a lovely aroma. Remember, the key is to balance the sweet maple syrup with savory and spicy notes. Many people rush through the roasting part. Do not skip tossing the sprouts halfway. This step helps them brown and crisp up evenly. Another mistake is overcrowding the baking sheet. If you pile them too high, they will steam instead of roast. Lastly, forget not to check for seasoning. Taste your mix before cooking to ensure it has enough salt and spice. For this recipe, you need a few simple tools. A large mixing bowl helps combine all the ingredients well. A baking sheet lined with parchment paper is a must. This prevents sticking and makes clean-up easier. Use a sharp knife for halving the Brussels sprouts. A sturdy spatula helps in tossing them around when roasting. If you want to get fancy, a digital thermometer can help check if they are done perfectly. Pro Tips Freshness Matters: Use fresh Brussels sprouts for the best flavor and texture. Look for bright green sprouts with tight leaves. Customize Your Nuts: Feel free to substitute pecans with walnuts or almonds for a different nutty flavor. Perfectly Roasted: Ensure the Brussels sprouts are spread out in a single layer on the baking sheet to achieve maximum crispiness. Garnish for Flair: Adding a sprinkle of lemon zest along with the parsley enhances the dish's freshness and adds a pop of color. {{image_2}} You can switch up the pecans for other nuts. Walnuts or almonds work well too. They add a nice crunch and flavor. You can also toss in dried fruits, like cranberries or raisins. These add sweetness and chewiness. If you want a savory twist, add cooked bacon bits. The saltiness balances the sweet maple syrup perfectly. This dish is naturally vegan and gluten-free. Just make sure your maple syrup is pure. Some brands add extra ingredients that may contain gluten. You can also use a different sweetener if you prefer. Agave syrup or coconut sugar can be good choices. Both will give a nice flavor without the need for honey. Maple pecan roasted Brussels sprouts fit well with many meals. Serve them alongside roasted chicken or turkey for a hearty dinner. They also pair nicely with quinoa or rice for a vegetarian option. For a light lunch, add them to a salad with mixed greens and goat cheese. Drizzle with balsamic dressing for extra flavor. These sprouts can even shine on their own as a snack! Store your leftover Maple Pecan Roasted Brussels sprouts in an airtight container. They will stay fresh for up to three days in the fridge. Be sure to let them cool before sealing. This helps keep them crispy and tasty. To reheat, place your sprouts on a baking sheet. Preheat your oven to 350°F (175°C). Roast them for about 10 to 15 minutes until warmed through. This method keeps them crispy. You can also use a microwave, but they may lose some crunch. If you want to freeze your Brussels sprouts, spread them on a baking sheet first. Freeze them for about an hour until solid. Then, place them in a freezer bag. They will last for about three months. When ready to eat, thaw them overnight in the fridge before reheating. Yes, you can use frozen Brussels sprouts. However, fresh sprouts taste best. Frozen sprouts may have more water. Be sure to thaw and drain them well before cooking. This step helps avoid a soggy dish. To add heat, use cayenne pepper. Start with a small amount, like 1/4 teaspoon. You can also add red pepper flakes for extra spice. For a bold flavor, try mixing in diced jalapeños. Taste as you go to find the right heat level. If you don't have maple syrup, use honey or agave nectar. Both add sweetness but change the flavor slightly. You can also use brown sugar mixed with a bit of water. This mix gives a caramel-like taste that works well in this dish. This post covered all you need to know about Brussels sprouts. We discussed ingredients, preparation, and cooking steps. I shared tips for roasting and how to avoid common mistakes. You also saw variations for different diets and creative serving ideas. Don't forget to store leftovers well for later use. Brussels sprouts can be simple yet tasty. With the right methods and tips, you can impress anyone at the table. Enjoy your cooking adventure!

Maple Pecan Roasted Brussels Sprouts Delightful Dish

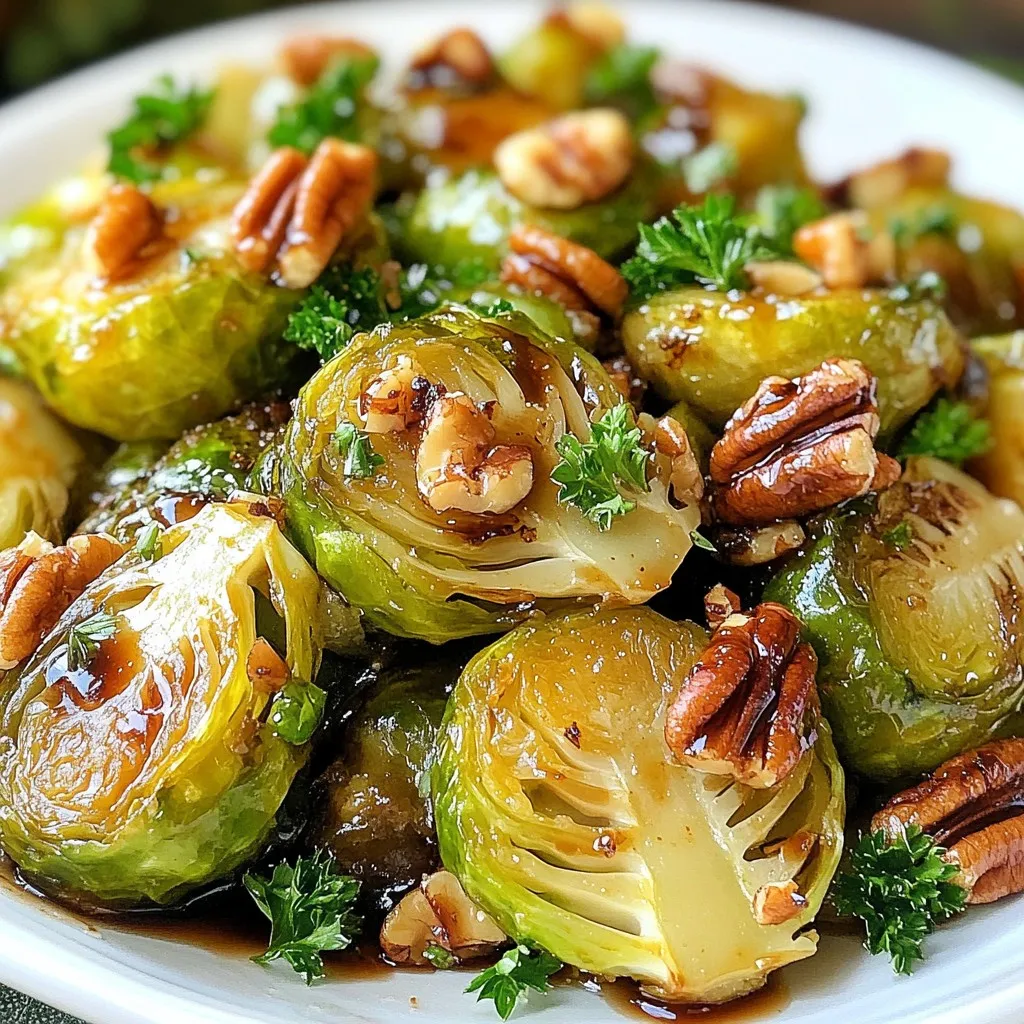
Looking for a tasty side dish that impresses? Maple Pecan Roasted Brussels Sprouts are your answer. They combine the sweet

- 2 large cucumbers, thinly sliced - 1/4 cup sesame oil - 2 tablespoons fresh ginger, grated - 3 tablespoons rice vinegar - 1 tablespoon soy sauce (or tamari for gluten-free) - 1 tablespoon honey or maple syrup - 1/4 cup sesame seeds, toasted - 2 green onions, finely chopped - Salt and pepper to taste - Fresh cilantro leaves for garnish (optional) You can swap honey for agave syrup if needed. Use lime juice instead of rice vinegar for a zesty twist. If you want more crunch, add sliced bell peppers or radishes. For an extra kick, include a pinch of red pepper flakes. You can also garnish with chopped peanuts for added texture. This salad is low in calories yet full of flavor. Each serving contains about 120 calories. It has healthy fats from sesame oil and is rich in fiber from cucumbers. The ginger adds health benefits, like aiding digestion. You can enjoy this salad guilt-free while getting your daily veggies in a fun way. {{ingredient_image_1}} First, take two large cucumbers. Slice them thinly. You can use a sharp knife or a mandoline. Place the slices in a big mixing bowl. This step is key for a nice crunch in your salad. In another bowl, mix the dressing. Start with 1/4 cup of sesame oil. Add 2 tablespoons of fresh, grated ginger. Then, pour in 3 tablespoons of rice vinegar. Don’t forget 1 tablespoon of soy sauce or tamari. Add 1 tablespoon of honey or maple syrup for sweetness. Whisk it all together until smooth. Now, pour the dressing over the cucumbers. Toss them gently until all slices are coated. Next, add in 1/4 cup of toasted sesame seeds and 2 chopped green onions. Fold them into the cucumber mix. Season it with salt and pepper to taste. If you want it sweeter or tangier, adjust honey or vinegar. Let the salad sit for 10-15 minutes. This helps the flavors mix well. Enjoy your vibrant salad! To make the dressing pop, use fresh ginger. Grate it finely so it mixes well. The sesame oil gives a rich flavor. Be sure to whisk it well with rice vinegar and soy sauce. This mix brings a nice balance of sweet and tangy. If you want it sweeter, add more honey or maple syrup. For a tangier taste, just include more rice vinegar. Adjust the dressing to your liking for the best result. For extra crunch, use toasted sesame seeds. They add a nutty flavor and delightful texture. You can also add sliced radishes for a peppery kick. If you want more greens, toss in some shredded carrots. This salad is all about layers of flavor and texture. Mixing different veggies helps keep every bite exciting. Serve this salad in a clear glass bowl. This way, the bright greens and seeds shine. Before serving, sprinkle more sesame seeds on top. It gives a nice look and a bit more crunch. Don’t forget to garnish with fresh cilantro. It can brighten the dish and add fresh flavor. Enjoy your colorful, tasty salad that looks as good as it tastes! Pro Tips Use Fresh Ingredients: Always opt for fresh cucumbers and ginger to enhance the flavor of your salad. Fresh ingredients will make a noticeable difference in taste. Adjust to Your Taste: Feel free to tweak the sweetness or tanginess of the dressing to match your preference. Add more honey or vinegar as needed for a personalized flavor. Let It Marinate: Allowing the salad to sit for at least 10-15 minutes before serving helps the flavors meld together beautifully, resulting in a more delicious dish. Presentation Matters: Serve the salad in a clear bowl to showcase its vibrant colors, and consider garnishing with extra cilantro or sesame seeds for visual appeal. {{image_2}} You can easily make this salad your own. Here are some fun ideas: - Add protein: Toss in cooked shrimp or grilled chicken for a heartier meal. - Include nuts: Chopped peanuts or almonds add crunch and flavor. - Incorporate other veggies: Try bell peppers, carrots, or radishes for more color. - Spice it up: Add some sliced jalapeños or a pinch of red pepper flakes for heat. While the sesame ginger dressing is tasty, you can switch it up. Here are a few options: - Peanut dressing: Mix peanut butter, lime juice, and a touch of soy sauce. - Miso dressing: Use miso paste, rice vinegar, and sesame oil for a unique twist. - Citrus vinaigrette: Combine orange juice, honey, and olive oil for a fresh flavor. You can change ingredients based on the season. This keeps your salad fresh and exciting: - Summer: Add fresh tomatoes or corn for a juicy touch. - Fall: Try adding roasted butternut squash for warmth and sweetness. - Winter: Include sliced radishes or citrus fruits for brightness on dull days. Feel free to explore these variations to suit your taste! Store any leftover sesame ginger cucumber salad in an airtight container. Keep it in the fridge. The salad stays fresh for about two days. The cucumbers may lose some crunch over time. To keep the salad fresh, it's best to store the dressing separately. Mix the dressing with the cucumbers just before serving. This helps maintain the texture and taste. If you notice excess moisture, drain it before serving. I do not recommend freezing this salad. The cucumbers will become mushy when thawed. If you want to enjoy it later, prepare the dressing and store it in the freezer. You can use it with fresh cucumbers when you are ready to eat. Yes, you can make this salad ahead of time. Prepare it up to an hour before serving. The flavors get better as they mix. Just store it in the fridge until you are ready to serve. If you plan to store it longer, wait to add the sesame seeds. They stay crunchy this way. To make this salad gluten-free, use tamari instead of soy sauce. Tamari is a great substitute that keeps the flavor. It works well with this dish and is safe for those with gluten issues. Check all your other ingredients too. Some rice vinegars may have gluten, so read the labels. This salad pairs well with many dishes. Try it with grilled chicken or fish for a light meal. It also goes great with rice or noodle dishes. For a full meal, serve it with spring rolls or a veggie stir-fry. The fresh taste of the salad complements these flavors nicely. This post covered the key steps to make a tasty Sesame Ginger Cucumber Salad. You learned about the ingredients, preparation, and even storage tips. Customizing with different dressings and toppings can elevate your salad. Remember to store leftovers properly to keep them fresh. With these insights, you can enjoy a delicious salad any time you want. Happy cooking!

Sesame Ginger Cucumber Salad Refreshing and Easy Dish

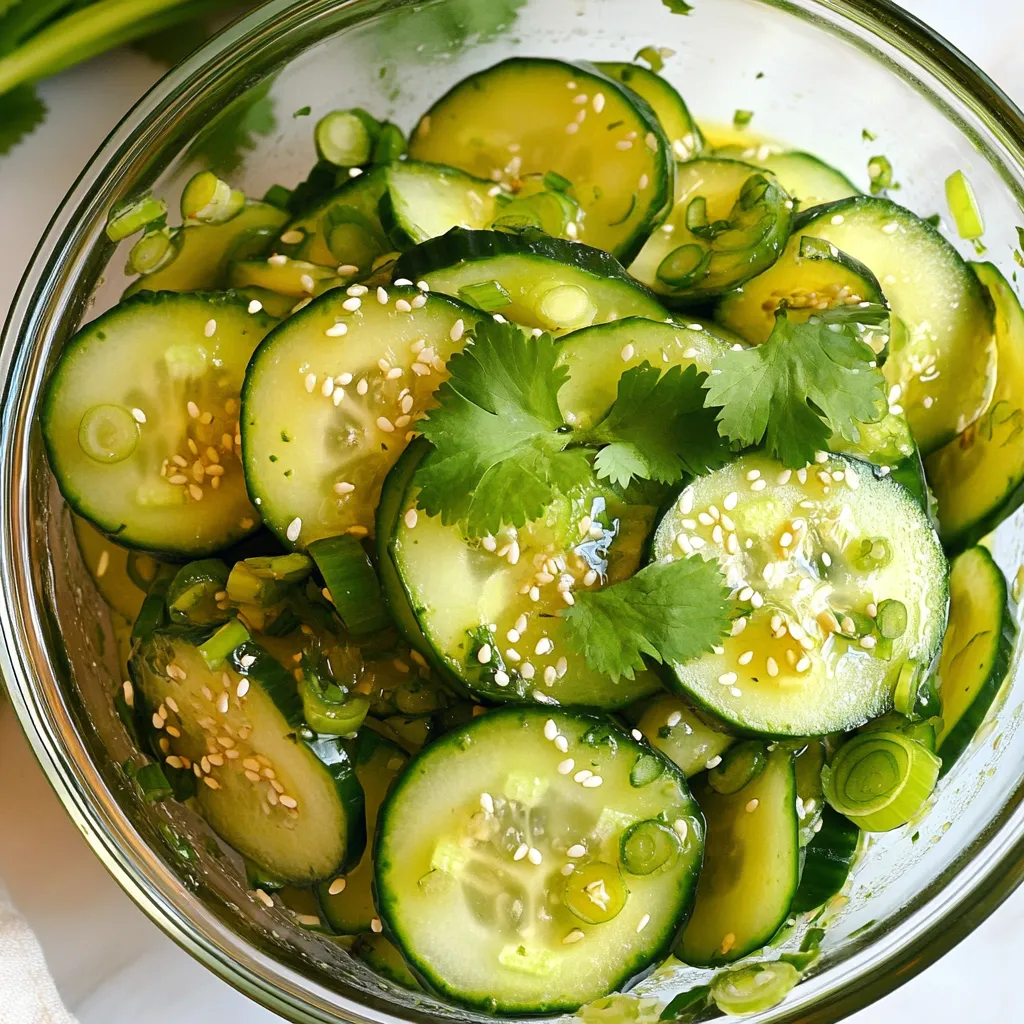
Looking for a light and tasty dish? My Sesame Ginger Cucumber Salad is both refreshing and easy to make! This

For this vibrant salad, you will need: - 1 head of iceberg lettuce, chopped - 1 cup cherry tomatoes, halved - 1 cup cucumbers, diced - 1 cup carrots, grated - 1 cup red bell pepper, diced - 1 cup sweet corn (canned or frozen) - 1 cup cooked green peas (fresh or frozen) These fresh vegetables make the salad colorful and crunchy. Each layer adds its own taste and texture. The bright colors make it appealing. To dress this salad, mix: - 1 cup mayonnaise - 2 tablespoons apple cider vinegar - 1 tablespoon honey - Salt and pepper to taste This dressing is creamy and tangy. The honey adds a hint of sweetness. Adjust salt and pepper to your liking. Feel free to customize your salad! Here are some fun options: - 1 cup shredded cheddar cheese - 1 cup cooked and crumbled quinoa - 1/2 cup red onion, finely chopped - Fresh parsley for garnish Cheddar cheese adds richness. Quinoa boosts protein and makes it filling. Red onion gives a nice bite. Fresh parsley adds a pop of green on top. {{ingredient_image_1}} Start with a large, clear glass bowl. This helps show off the beautiful layers. First, chop one head of iceberg lettuce. Spread it evenly at the bottom of the bowl. Next, slice one cup of cherry tomatoes in half. Add them on top of the lettuce. Then, dice one cup of cucumbers. Layer these over the tomatoes. After that, grate one cup of carrots. Place the grated carrots as your next layer. Now, take one cup of diced red bell pepper. Add this on top of the carrots. Next, open a can of sweet corn or use frozen corn. Spread one cup of corn over the peppers. Then, take one cup of cooked green peas. You can use fresh or frozen peas. Layer these on top of the corn. Finally, sprinkle one cup of cooked and crumbled quinoa over the peas. This adds a nice texture and flavor. In a separate bowl, mix the dressing. Start with one cup of mayonnaise. Add two tablespoons of apple cider vinegar for tanginess. Then, include one tablespoon of honey for a touch of sweetness. Don't forget to season with salt and pepper to taste. Whisk these ingredients together until smooth. This dressing will tie all the layers together. Now, it’s time to put everything together. Pour the dressing over the salad layers. Make sure it covers everything evenly. Then, add one cup of shredded cheddar cheese on top. Follow this with half a cup of finely chopped red onion. This will add a nice crunch and flavor. Cover the bowl with plastic wrap. Place it in the fridge for at least one hour. This allows the flavors to blend well. Before serving, garnish your salad with fresh parsley for a pop of color. Layering is key to a lovely seven layer salad. Start with chopped iceberg lettuce at the bottom. This adds crunch and keeps all the other layers fresh. Next, add cherry tomatoes for a pop of color and sweetness. Then, layer diced cucumbers for crunch. Grate the carrots next to add color and sweetness. After that, add diced red bell peppers for a sweet taste. Sweet corn follows for a nice touch of sweetness. Finally, finish with cooked green peas and crumbled quinoa. This helps to keep the salad healthy and filling. To make your salad shine, don’t forget the dressing! Mix mayonnaise, apple cider vinegar, honey, salt, and pepper in a bowl. This will give flavor and creaminess. Pour the dressing evenly over the layers. It helps blend the flavors together. You can also add herbs like dill or basil for a fresh twist. A sprinkle of paprika can add a nice kick. Taste as you go to find the perfect balance. Presentation matters! Use a clear glass bowl to show off the layers. A trifle dish works great too. For serving, use a long spoon. This makes it easy to scoop out layers. You can also serve in small salad cups. This way, each cup shows off the colorful layers. Before serving, add fresh parsley on top. It adds a bright finish and a lovely aroma. Enjoy the beauty of your salad as much as the taste! Pro Tips Fresh Ingredients: Use the freshest vegetables possible for the best flavor and texture in your salad. Layering Technique: To maintain the salad's beautiful layers, add the heavier ingredients like quinoa and cheese last. Chill Time: Allowing the salad to chill for at least an hour helps the flavors meld together, enhancing the overall taste. Custom Dressing: Feel free to customize the dressing by adding herbs or spices to suit your taste preferences. {{image_2}} You can make this salad even healthier. Try using Greek yogurt instead of mayonnaise. It gives a nice tang and adds protein. Swap out the cheddar cheese for a low-fat cheese. You could also add more veggies, like spinach or kale, for extra nutrients. Use fresh corn instead of canned for better flavor and crunch. Making this salad vegetarian or vegan is easy. Skip the cheese and use a dairy-free dressing. You can blend silken tofu with herbs for a creamy texture. Use chickpeas instead of quinoa for added protein. This keeps the salad filling and tasty without any animal products. Change the salad with the seasons. In summer, add fresh basil or mint for a refreshing twist. In fall, consider roasted squash or apples for a sweet touch. Winter is great for using hearty veggies like Brussels sprouts. This keeps the salad exciting and full of new flavors all year round. To keep your seven layer salad fresh, cover it tightly. Use plastic wrap or a lid. Store it in the fridge. This helps keep the layers nice and crisp. If you have dressing left, store it separately. This prevents the salad from getting soggy. For meal prep, you can cut veggies a day ahead. Store them in separate bags or containers. When you are ready, layer them in your serving dish. This keeps them fresh and crunchy. You can also prepare the dressing in advance. Just mix it and store it in the fridge. Choose a clear glass bowl for best results. A trifle dish works great too. It shows off the colorful layers. If you need something more portable, use a large plastic container. Make sure it has a good seal. This helps keep everything fresh and prevents spills. Yes, you can make Seven Layer Salad in advance. This dish tastes even better after sitting for a few hours. If you prep it a day before, the flavors mix well. Just cover it and chill in the fridge. Keep the cheese and fresh veggies on top until serving. This keeps them crisp and fresh. If you want a mayo swap, try Greek yogurt. It adds creaminess and is healthier. You can also use avocado for a rich taste. Another option is a vinaigrette made with olive oil and vinegar. These swaps keep the salad tasty and fun. Seven Layer Salad lasts about three to five days in the fridge. Make sure to store it in an airtight container. If you see any signs of spoilage, it’s best to toss it. Enjoy this fresh and colorful dish within a few days for the best taste! The seven-layer salad is easy to make and fun to share. We covered fresh veggies, dressings, and tasty toppings. I shared steps for preparing, mixing, and assembling your salad. Plus, you learned tips for layering and serving beautifully. You can also explore variations for healthy or seasonal twists. Enjoying this salad can be a breeze with all the storage info we discussed. Keeping leftovers fresh is simple, too. Now, you’re ready to create your own version. Get creative with flavors and have fun making this dish your own!

Savory Seven Layer Salad Tasty and Colorful Dish

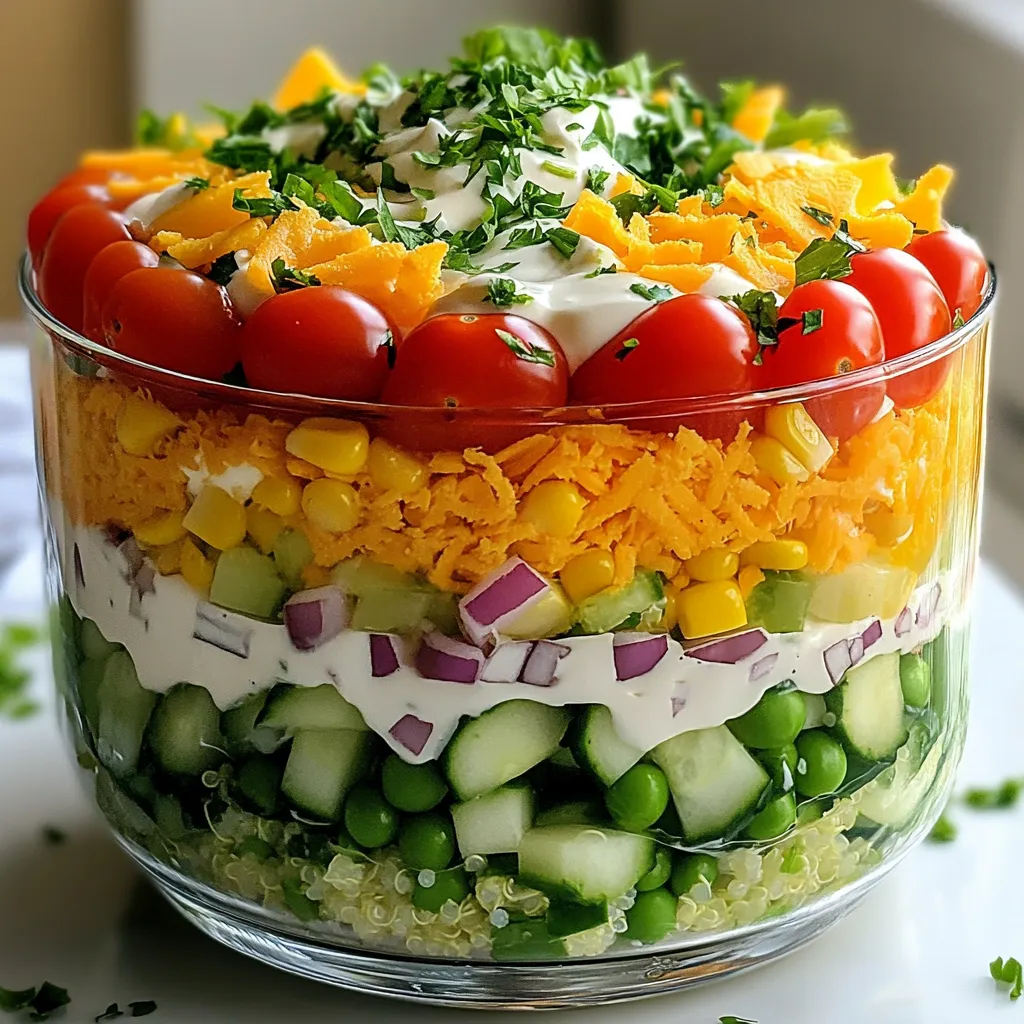
Looking for a dish that’s both tasty and colorful? Try my Savory Seven Layer Salad! This vibrant meal bursts with

Older posts
Newer posts
← Previous Page1 … Page134 Page135 Page136 … Page144 Next →

dsad

© 2025 So Yum Recipes • Built with GeneratePress

Our Policies

  • Copyright Policy
  • Cookie Policy
  • GDPR Policy
  • Privacy Policy
  • Disclaimer
  • Terms Of Use

More Information

  • Home
  • About
  • Contact
  • Appetizers
  • Dessert
  • Dinner
  • Drinks
©2025, So Yum Recipes About Back To Top