Skip to content
DisclaimerTerms Of UseGDPR PolicyCookie Policy

So Yum Recipes

  • Home
  • Drinks
  • Appetizers
  • Dinner
  • Dessert
  • About
  • Contact
  • Privacy Policy
DisclaimerTerms Of UseGDPR PolicyCookie Policy

Chloe

- 8 ounces penne pasta - 1 pound kielbasa sausage, sliced - 1 tablespoon olive oil - 1 medium onion, diced - 3 cloves garlic, minced - 1 cup heavy cream - 1 cup chicken broth - 1 cup frozen peas - 1 tablespoon Dijon mustard - 1 teaspoon garlic powder - 1 teaspoon Italian seasoning - Salt and pepper to taste - 1/2 cup grated parmesan cheese - Fresh parsley, chopped (for garnish) When I prepare creamy kielbasa pasta, I gather all my ingredients first. This way, I can work smoothly and enjoy the cooking process. I always use penne pasta because its shape holds the creamy sauce well. The kielbasa sausage adds a rich, smoky flavor. You want slices that are not too thick, so they cook evenly. Having olive oil on hand helps in browning the sausage. I love using onion and garlic as my base. They add so much flavor and aroma to the dish. The heavy cream and chicken broth create that luscious creamy sauce. I like to add Dijon mustard for a hint of tang. The garlic powder and Italian seasoning enhance the flavor profile. Don’t forget to season with salt and pepper to taste. For the final touch, I often sprinkle grated parmesan cheese on top. It melts beautifully into the sauce. I finish with fresh parsley for a pop of color and freshness. These ingredients work together to make a delightful dish. You’ll find creamy kielbasa pasta perfect for any weeknight dinner. {{ingredient_image_1}} Start by boiling 8 ounces of penne pasta in a large pot of salted water. This step is key for great flavor. Cook the pasta according to the package instructions, usually about 10-12 minutes. You want it to be al dente, which means it should have a slight bite. To check, taste a piece a minute or two before the time is up. When it's done, drain the pasta and set it aside. Next, heat 1 tablespoon of olive oil in a large skillet over medium heat. Add 1 pound of sliced kielbasa sausage. Cook it for about 5-7 minutes until it turns golden brown. This adds a nice flavor to the dish. You can use a non-stick skillet for even cooking. After the kielbasa is browned, toss in 1 medium diced onion and 3 cloves of minced garlic. Sauté these for an additional 3-4 minutes. The onion should be soft and fragrant before you move on. Now, let’s make the sauce. Pour in 1 cup of chicken broth into the skillet, bringing it to a gentle simmer. Then, stir in 1 cup of heavy cream. Add 1 tablespoon of Dijon mustard, 1 teaspoon of garlic powder, and 1 teaspoon of Italian seasoning. Season with salt and pepper to taste. Let the sauce simmer for about 5 minutes. This step allows all the flavors to blend nicely. Stir occasionally to keep the sauce smooth. Add 1 cup of frozen peas to the sauce and stir until they are warmed through. Then, toss the drained pasta into the skillet. Mix it all well so the pasta is fully coated with the creamy sauce. Remove the skillet from heat and stir in 1/2 cup of grated parmesan cheese. This cheese adds creaminess and a rich flavor. Serve immediately and enjoy your creamy kielbasa pasta! To get the right creamy sauce, start with the heavy cream. If your sauce feels too thick, add some chicken broth. This will help thin it out. If you want more flavor, try adding spices. A pinch of smoked paprika or a dash of red pepper flakes can really boost the taste. When it comes to kielbasa, I prefer using brands like Hillshire Farm or Johnsonville. They have great flavor and quality. Cook the kielbasa until it gets nice and brown, about 5 to 7 minutes. This brings out the best taste and texture. For side dishes, a simple salad or garlic bread pairs well with creamy kielbasa pasta. You could also serve steamed broccoli for some crunch. For drinks, a chilled white wine or sparkling water complements the creamy dish perfectly. Pro Tips Use High-Quality Kielbasa: Choosing a good quality kielbasa will enhance the flavor of your dish significantly. Look for natural casings and minimal additives for the best taste. Customize Your Veggies: Feel free to add more vegetables like bell peppers or spinach to the dish for added nutrition and flavor. Just sauté them alongside the onion. Adjust the Creaminess: If you prefer a lighter dish, you can reduce the amount of heavy cream and substitute with half-and-half or even milk for a lower-fat option. Leftover Tips: This pasta dish stores well in the fridge for up to 3 days. Reheat gently on the stove, adding a splash of chicken broth to loosen the sauce. {{image_2}} You can swap kielbasa with other meats or plant-based options. Chicken or turkey works well if you prefer leaner meats. For a vegetarian dish, try using meat alternatives like tempeh or seitan. If you're looking for a lighter option, consider low-calorie cream. You can use unsweetened almond milk or light coconut milk. These swaps keep the dish tasty while making it healthier. To boost flavor, add vegetables. Bell peppers bring a sweet crunch, while spinach adds a nice touch of color and nutrition. Simply sauté them with the onion and garlic for a few minutes. For a flavor kick, try smoked paprika or chili flakes. A pinch of smoked paprika adds depth, while chili flakes give it a nice heat. Adjust the amounts to fit your taste. You don’t need to stick with penne. Fusilli, rigatoni, or farfalle can change the dish's look and feel. Each shape holds the sauce differently and offers a unique texture. Keep in mind that cooking times can change. Smaller shapes like fusilli cook faster, while larger ones like rigatoni need a bit more time. Always check the package for exact cooking instructions. To keep creamy kielbasa pasta fresh, store it in an airtight container. This method helps prevent drying out or picking up other food odors. Place the container in the fridge. When stored this way, the dish stays good for about three to four days. After that, the flavors may fade, and the texture may change. Always check for any off smells or changes before eating. If you want to freeze creamy kielbasa pasta, start by letting it cool completely. Then, transfer it to a freezer-safe container or bag. Be sure to remove as much air as possible to prevent freezer burn. This dish can be frozen for up to three months. When you're ready to eat, thaw it in the fridge overnight. To reheat, warm it gently on the stove over low heat. Add a splash of chicken broth or cream if it seems too thick. Stir well until heated through, and enjoy your delicious meal again! Yes, you can make creamy kielbasa pasta ahead of time. Store it in an airtight container. It stays fresh in the fridge for up to three days. When you are ready to eat, reheat it on the stove over low heat. Add a splash of chicken broth to help revive the creaminess. Stir gently until heated through. To add heat to your creamy kielbasa pasta, consider these options: - Add red pepper flakes while cooking the onions and garlic. - Stir in diced jalapeños or other hot peppers. - Use spicy kielbasa for an extra kick. These tweaks can make your dish more exciting and flavorful. Creamy kielbasa pasta pairs well with several side dishes: - A simple green salad with a light vinaigrette. - Garlic bread for a crunchy texture. - Steamed broccoli or green beans for added nutrition. These sides balance the richness of the pasta and enhance your meal. You can make a vegetarian version by replacing kielbasa with: - Sliced mushrooms for a meaty texture. - Plant-based sausage for a similar taste. To maintain creaminess, use a non-dairy cream or cashew cream. This way, you keep the rich flavor while making it plant-based. This blog post covered creamy kielbasa pasta, highlighting key ingredients and steps. You learned how to cook penne and kielbasa, create a creamy sauce, and assemble the dish. I shared tips to enhance flavors and offered variations to fit your tastes. In closing, this recipe is simple and versatile. Whether you use kielbasa, chicken, or veggies, you can enjoy a delicious meal. Don’t hesitate to try different shapes of pasta or add extra spices. Enjoy your cooking journey!

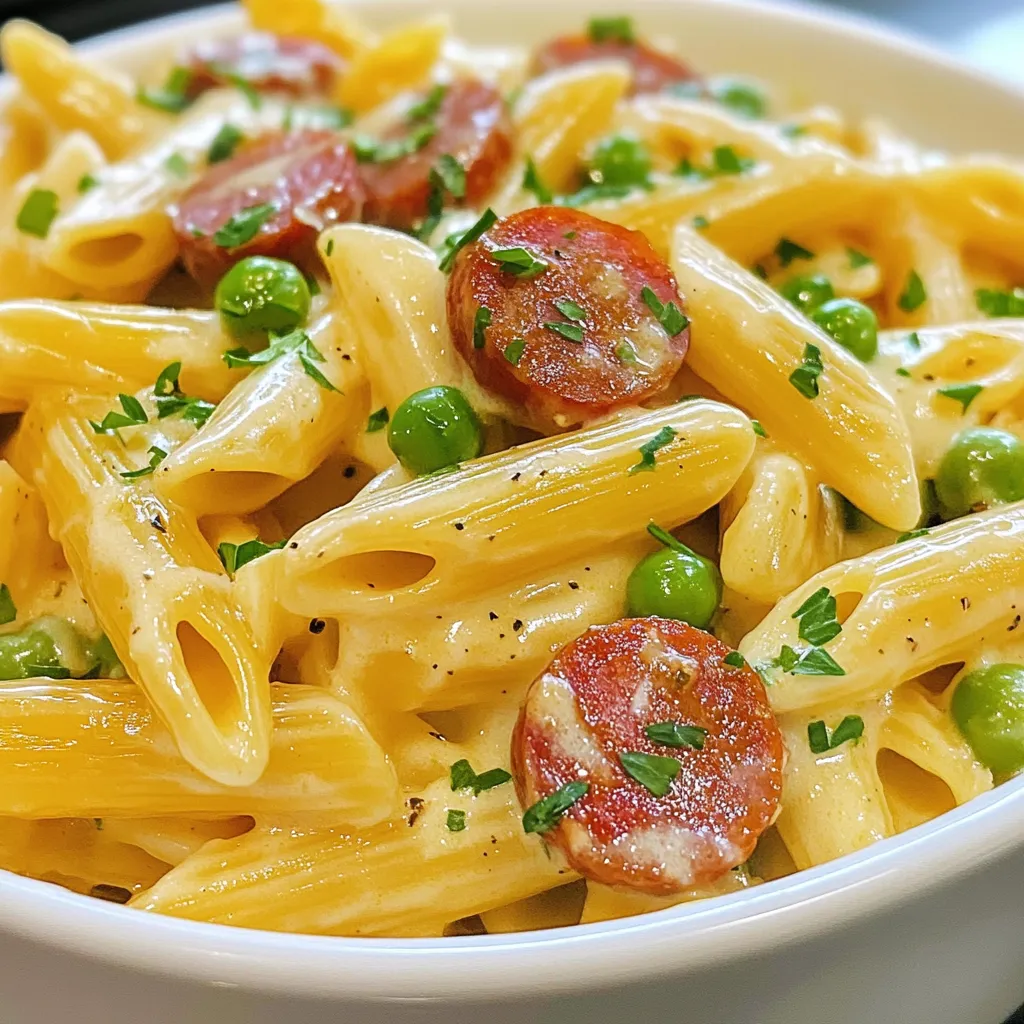
Creamy Kielbasa Pasta Irresistible Dinner Delight

Craving a dinner that’s both quick and mouthwatering? Look no further! My Creamy Kielbasa Pasta is the answer. It’s rich,

- 1 ½ cups grated zucchini - 1 cup all-purpose flour - ½ cup whole wheat flour - 1 teaspoon baking soda - ½ teaspoon baking powder - ½ teaspoon salt - 1 teaspoon ground cinnamon - ½ teaspoon ground nutmeg - ½ cup brown sugar - ½ cup granulated sugar - 2 large eggs - ½ cup vegetable oil or melted coconut oil - 1 teaspoon vanilla extract - 1 cup semi-sweet chocolate chips - ½ cup chopped walnuts (optional) This chocolate chip zucchini bread recipe uses simple ingredients. You start with zucchini, which makes the bread moist. Grating it is easy and quick. I recommend using about one medium zucchini. You will need both all-purpose and whole wheat flour. This mix gives a nice texture. Baking soda and baking powder help the bread rise. Salt and spices like cinnamon and nutmeg add flavor. Brown sugar and granulated sugar sweeten the bread. The combination gives it a rich taste. Eggs help bind the mixture. Choose vegetable oil or melted coconut oil for a moist crumb. Vanilla extract brings warmth to the flavor. Finally, don’t forget the semi-sweet chocolate chips. They melt beautifully and add a sweet touch. If you like, walnuts can add a nice crunch. Gather all these ingredients to make your bread both simple and tasty! Preheat your oven to 350°F (175°C). This temperature makes the bread rise well. Next, prepare your loaf pan. Grease it with butter or oil, then dust it with flour. Alternatively, line it with parchment paper. This will help you remove the bread easily later. In a large bowl, combine the all-purpose flour, whole wheat flour, baking soda, baking powder, salt, cinnamon, and nutmeg. Whisk these ingredients together until they are well blended. The mixture should look light and fluffy. This step adds great flavor and structure to your bread. In another bowl, mix the brown sugar and granulated sugar together. Add the eggs, oil, and vanilla extract to the sugar. Whisk until the mixture is smooth. It should be creamy and slightly thick. Next, fold in the grated zucchini gently. This keeps the zucchini from breaking apart too much. Gradually add the dry mixture to the wet mixture. Stir gently until you no longer see any dry flour. Be careful not to overmix, as this can make the bread tough. Mixing should take just a few strokes. You want a slightly lumpy batter for the best texture. Now, gently fold in the chocolate chips and chopped walnuts if you are using them. Make sure they are evenly spread throughout the batter. This ensures each slice has a nice balance of flavors. Pour the batter into your prepared loaf pan. Smooth the top with a spatula. Bake in the preheated oven for 50 to 60 minutes. To check for doneness, insert a toothpick into the center. If it comes out clean, the bread is ready. Let it cool in the pan for 10 minutes before moving it to a wire rack. Zucchini adds moisture to your bread. When you grate it, squeeze out excess water. This step keeps your bread from being too wet. If you want to use less oil, try applesauce. It adds moisture without extra fat. Spices make your bread special. You can add a pinch of ginger or a dash of vanilla. These flavors blend well with chocolate. Speaking of chocolate, try dark chocolate chips for a richer taste. You can even mix in white chocolate chips for fun. Keep an eye on your baking time. Ovens can vary, so start checking at 50 minutes. Use a toothpick to test the center. If it comes out clean, your bread is ready. Let it cool in the pan for 10 minutes. Then, move it to a wire rack. This keeps the bottom from getting soggy. Slicing too soon can make a mess, so be patient! {{image_2}} You can make this bread gluten-free. Use a gluten-free all-purpose flour blend instead of regular flour. Almond flour or coconut flour can also work well. Make sure the blend has xanthan gum for better texture. Replace the whole wheat flour with more gluten-free flour. This keeps the structure light and fluffy. For a dairy-free version, switch to plant-based milk. Almond milk or oat milk is great. Instead of butter, use coconut oil or a dairy-free butter substitute. Both options keep the bread moist and tasty. You won’t lose any flavor with these swaps. You can get creative with flavors. Add fruits like blueberries or cranberries for a fruity twist. Try nuts like pecans or almonds for extra crunch. Adding spices like ginger or cardamom can also give new depth to the flavor. You can even mix in a swirl of peanut butter or Nutella for a fun surprise. To keep your chocolate chip zucchini bread fresh at room temperature, wrap it tightly in plastic wrap. This helps lock in moisture and flavor. Place it in a bread box or on a countertop. It stays good for about three days. For long-term storage, freezing works great. First, let the bread cool completely. Then, wrap it in plastic wrap and aluminum foil. This double layer prevents freezer burn. It can last up to three months in the freezer. To thaw, move it to the fridge overnight. You can also thaw it at room temperature for a few hours. When you’re ready to serve leftovers, slice them as needed. For a warm treat, pop slices in the microwave for about 15-20 seconds. You can also toast them lightly in a toaster oven. Serve with a dusting of powdered sugar or a dollop of whipped cream for extra fun! Enjoy with your favorite drink for the best experience. Yes, you can use frozen zucchini. To prepare it, first, thaw the zucchini in a bowl. Then, squeeze out any extra water using a clean kitchen towel. This step helps keep the bread from getting too wet. Once it's dry, you can add it to your batter just like fresh zucchini. Absolutely! You can make this recipe vegan by substituting the eggs. Use 1/4 cup of unsweetened applesauce for each egg. For the dairy, replace the vegetable oil with melted coconut oil. Ensure that the chocolate chips are dairy-free too. You have many options! Here are a few ideas: - Make zucchini fritters by grating the zucchini and mixing it with flour and spices. - Add it to salads for extra crunch and nutrients. - Use it in smoothies for a healthy boost. - Bake zucchini muffins for a quick snack. To check if your bread is done, insert a toothpick into the center. If it comes out clean or with a few crumbs, it's done. You can also look for a golden-brown top. The sides of the bread should pull away slightly from the pan. If it’s still wet, bake for a few more minutes. In this post, we covered a tasty zucchini bread recipe and its key steps. You learned about essential ingredients, mixing methods, and baking tips. I shared variations for gluten-free and dairy-free options, plus storage ideas. Remember, fresh zucchini adds moisture and flavor. With these tips, you can enjoy warm, delicious bread in no time. Try different spices or mix-ins to make it your own. Happy baking!

Chocolate Chip Zucchini Bread Simple and Tasty Recipe

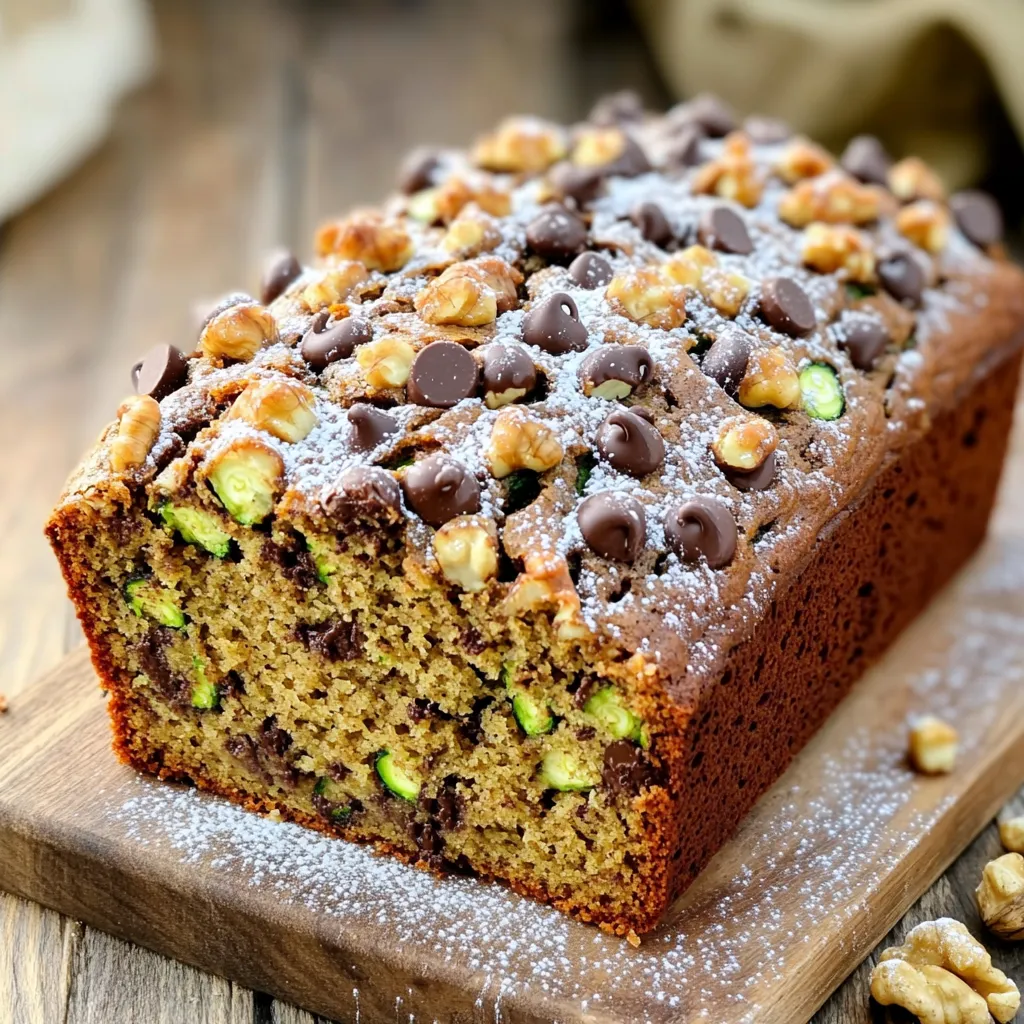
Are you ready to bake something that balances sweet and healthy? This Chocolate Chip Zucchini Bread is a fun way

- 2 cups cooked chicken, shredded (preferably rotisserie) - 1 can (15 oz) white kidney beans, drained and rinsed - 1 can (4 oz) diced green chiles - 1 medium onion, finely chopped - 2 cloves garlic, minced - 1 teaspoon ground cumin - 1 teaspoon chili powder - 1/2 teaspoon smoked paprika - 4 cups chicken broth - 1 cup heavy cream - 1 tablespoon olive oil - Salt and pepper to taste - 1/4 cup fresh cilantro, chopped (for garnish) - Sliced jalapeños (for garnish, optional) - Crushed tortilla chips (for serving, optional) This creamy white chicken chili is full of flavors and warmth. The key ingredients work together to make each bite comforting. First, I use cooked chicken. Rotisserie chicken is my go-to because it saves time and adds great flavor. Next, I add white kidney beans. They bring a nice texture and protein. Diced green chiles give the chili a mild heat. I love the onion and garlic for their savory aroma. Spices are crucial. I use ground cumin for its earthy taste. Chili powder adds a little warmth, while smoked paprika gives a nice depth. For the base, I rely on chicken broth and heavy cream. The broth adds richness and helps the flavors blend. Heavy cream makes the chili creamy and smooth. Finally, the garnishes elevate the dish. Fresh cilantro adds brightness. Sliced jalapeños can spice things up. Crushed tortilla chips bring crunch. Each ingredient plays its part in making this hearty dish a winner. 1. Sautéing the onion and garlic Heat 1 tablespoon of olive oil in a large pot over medium heat. Add 1 finely chopped onion. Cook for about 5 minutes. The onion should turn soft and clear. Next, add 2 minced garlic cloves. Stir often for 1 minute. This step brings out rich flavors. 2. Toasting the spices Stir in 1 teaspoon of ground cumin, 1 teaspoon of chili powder, and 1/2 teaspoon of smoked paprika. Cook for another minute. Toasting spices adds depth to the chili. 1. Mixing in chicken and beans Add 2 cups of shredded cooked chicken, 1 can of white kidney beans, and 1 can of diced green chiles into the pot. Mix everything well. This mix gives your chili a hearty base. 2. Simmering the chili Pour in 4 cups of chicken broth. Bring the mixture to a simmer. Lower the heat and let it cook for about 15 minutes. This allows all the flavors to blend nicely. 1. Adding heavy cream and seasoning Slowly pour in 1 cup of heavy cream while stirring. Simmer for an additional 5 minutes. This makes the chili rich and creamy. Season with salt and pepper to taste. 2. Serving suggestions Serve the chili hot. Garnish with 1/4 cup of chopped fresh cilantro. If desired, add sliced jalapeños and crushed tortilla chips on top. These toppings add texture and flavor. - Best practices for shredding chicken: I prefer using rotisserie chicken. It's already cooked and very tender. Use two forks to pull apart the meat. This makes nice, even shreds. If you have leftover chicken, that works too! - How to enhance flavor with spices: Spices are key to great chili. Toasting them in oil brings out their full taste. Add cumin, chili powder, and smoked paprika early. This step wakes up the flavors. Don't be shy with seasoning! Taste as you cook. - Best accompaniments for chili: Creamy white chicken chili pairs well with warm tortilla chips. You can also serve it with cornbread or rice. These sides soak up the delicious broth. - Garnishing techniques: Garnishes make the dish pop! I like to sprinkle fresh cilantro on top. Add sliced jalapeños for a kick, if you like heat. Crushed tortilla chips add crunch too. Play around with your toppings! {{image_2}} If you want a low-carb or keto-friendly version, skip the beans. Use cauliflower instead. It gives you a similar texture without the carbs. You can also add zucchini or bell peppers for more veggies. For a vegetarian or vegan twist, swap the chicken for jackfruit or mushrooms. Use vegetable broth in place of chicken broth. Replace heavy cream with coconut cream or a cashew cream for creaminess. Want to spice things up? Add more jalapeños or some diced serrano peppers. This will give your chili a nice kick. You can also toss in some chipotle peppers for a smoky flavor. If you want to change your beans, black beans or pinto beans work well too. For protein, try using turkey or tofu. Both will add great taste and texture. To store leftovers, let the chili cool to room temperature. Then, transfer it to an airtight container. This keeps the chili fresh and tasty. You can store it in the fridge for up to three days. If you want to enjoy it later, make sure to label the container with the date. Freezing is a great way to save chili for later. First, cool the chili completely. Then, pour it into a freezer-safe container or bag. Be sure to leave some space for expansion. You can freeze it for up to three months. When ready to eat, thaw the chili in the fridge overnight. To reheat, warm it on the stove over low heat, stirring frequently. You can also use a microwave, but stir often for even heating. Enjoy your creamy white chicken chili anytime! Can I use canned chicken instead of cooked? Yes, you can use canned chicken. It saves time and is convenient. Just drain and rinse the chicken. Add it to the pot with the other ingredients. What can I substitute for heavy cream? You can use half-and-half or coconut milk. These options will still give you a creamy texture. If you want a lighter version, try using milk and a little flour. How can I make it spicier? To add heat, include chopped jalapeños or a dash of cayenne pepper. You can also use hot sauce for a kick. Adjust the spice to fit your taste. How long should I simmer the chili? Simmer the chili for about 15-20 minutes. This time allows the flavors to blend nicely. You want it heated through but not overcooked. What sides pair well with creamy white chicken chili? Serve the chili with cornbread or tortilla chips. A fresh salad or avocado slices also work well. These sides balance the rich flavors of the chili. This article covered how to make a tasty white chicken chili. I shared the main ingredients, step-by-step instructions, and helpful tips. You can also explore variations for different diets. Storing leftovers and reheating are easy with the right methods. In the end, this chili is perfect for any meal. You can make it spicy or mild, and it’s great with friends or family. Enjoy cooking and sharing this flavorful dish!

Creamy White Chicken Chili Hearty and Comforting Dish

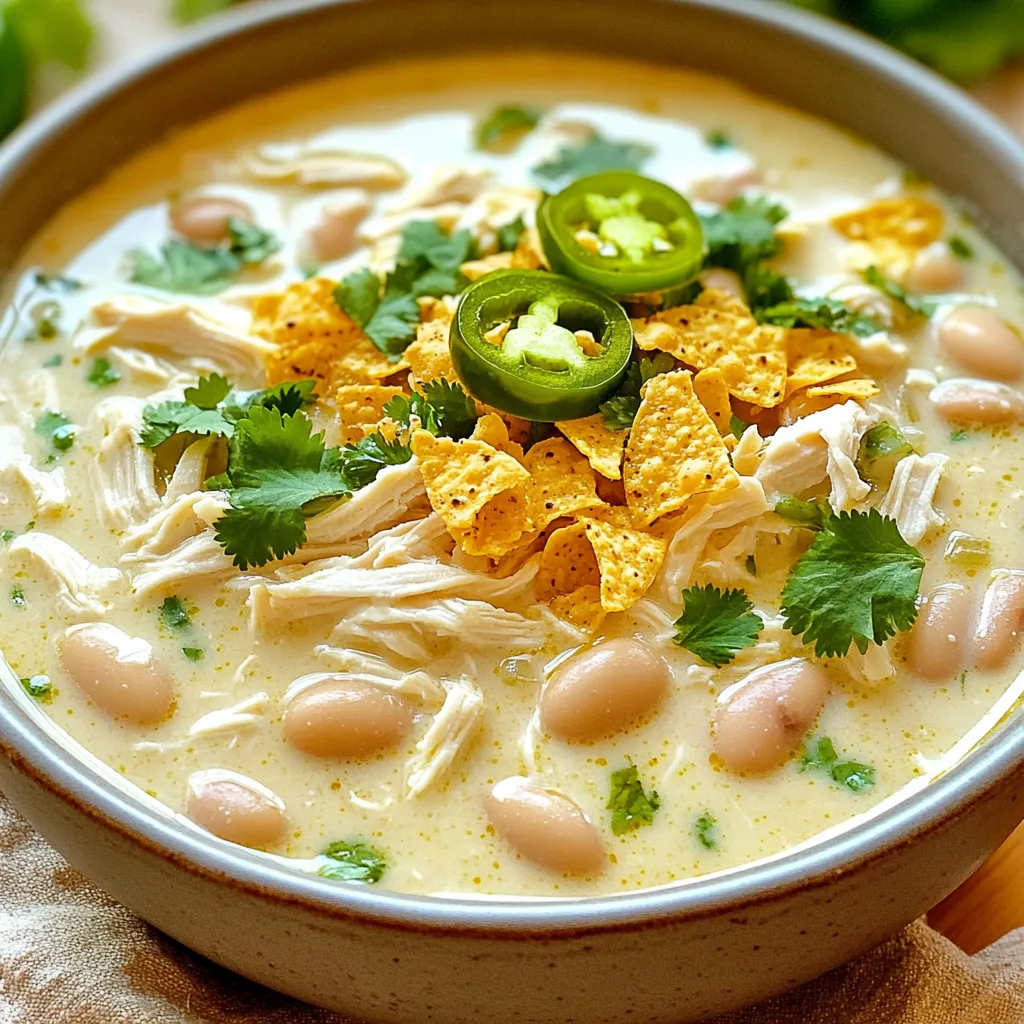
If you’re craving a cozy meal that warms the soul, look no further. My creamy white chicken chili is a

- 1 cup dried chickpeas (soaked overnight) - 1 small onion, roughly chopped - 3 cloves garlic, minced - 1/4 cup fresh parsley, chopped - 1/4 cup fresh cilantro, chopped - 1 teaspoon ground cumin - 1 teaspoon ground coriander - 1/2 teaspoon baking powder - 1-2 tablespoons flour (chickpea or regular all-purpose) - Salt and pepper to taste - Cooking spray or olive oil for air frying Gathering the right ingredients makes a big difference. Start with dried chickpeas. They need soaking overnight. This helps them soften and blend well. You can use canned chickpeas if you’re short on time, but the texture may change. Onion and garlic add flavor. Chop them roughly. Fresh herbs like parsley and cilantro bring brightness to the falafel. They make it taste fresh and vibrant. The spices, cumin and coriander, are key. They give that unique falafel taste. Baking powder helps the falafel rise and stay light. Flour helps bind everything together. You can use chickpea flour for extra flavor or regular flour. Don’t forget salt and pepper for seasoning. Finally, cooking spray or olive oil is essential for that crispy texture. A light coat will work wonders in the air fryer. These ingredients come together to create crispy, tasty falafel. - Drain and rinse the soaked chickpeas. - Transfer chickpeas to the food processor. First, you need dried chickpeas. Soak them overnight in water. This softens them. The next day, drain and rinse the chickpeas well. This step is key. It removes extra starch and makes your falafel better. Then, place the chickpeas in a food processor. This is where the magic begins! - Add onion, garlic, herbs, spices, and baking powder. - Pulse until a coarse, textured dough forms. Next, add the chopped onion, minced garlic, fresh parsley, and cilantro. Don't forget the spices! Add cumin, coriander, baking powder, salt, and pepper. Pulse the mixture until it becomes a coarse dough. You want some texture. If it feels too wet, add flour a little at a time. This will help it stick together. - Shape mixture into balls or patties. - Preheat air fryer and prepare falafel for cooking. - Air fry and achieve desired crispiness. Now, shape the dough into small balls or patties, about 1-2 inches wide. Preheat your air fryer to 375°F (190°C) for about five minutes. Lightly coat your falafel with cooking spray or olive oil. This helps them become crispy. Place the falafel in a single layer in the air fryer basket. Cook them for 12-15 minutes, flipping halfway, until golden brown and crispy. Enjoy the aroma as they cook! To get that perfect crispy falafel, oil coating is key. I lightly spray or brush each falafel with olive oil before cooking. This helps them brown nicely and adds flavor. Cooking in batches is also essential. If you overcrowd the air fryer, your falafel may steam instead of crisp. Cook them in smaller groups to ensure that they cook evenly. If you find your mixture is too wet, you can adjust the flour. Start with one tablespoon, then add more as needed. The right consistency should hold together without falling apart. For more flavor, try adding spices like paprika or cayenne pepper. You can also experiment with fresh herbs like dill or mint for a unique twist. Falafel pairs great with dips like tahini sauce or yogurt sauce. You can also add fresh veggies on the side. For a beautiful presentation, serve falafel on a colorful platter. Add lemon wedges and sprinkle with fresh herbs for a vibrant touch. {{image_2}} You can use canned chickpeas in place of dried ones. Canned chickpeas save time. Just rinse and drain them well before using. This change makes the recipe quicker without losing flavor. You can also switch up the herbs and spices. Try adding dill or mint for a fresh twist. Smoked paprika can add a nice kick too. Experimenting with flavors can make your falafel unique. For a gluten-free option, use chickpea flour instead of regular flour. Chickpea flour holds the falafel together and adds great taste. This makes it safe for those with gluten allergies. Falafel is naturally vegan, so it fits many diets. It's packed with protein and flavor. You can enjoy it guilt-free, knowing it’s healthy and delicious. If you want to bake falafel instead of air frying, preheat your oven to 400°F (200°C). Place the falafel on a baking sheet lined with parchment paper. Bake for 20-25 minutes, flipping halfway through. This method gives you a different texture but is still tasty. You can also pan-fry falafel for a classic texture. Heat oil in a skillet over medium heat. Fry the falafel for about 3-4 minutes on each side. This method gives a crunchy outside and soft inside. To keep your falafel fresh, store them in an airtight container. Place parchment paper between layers to avoid sticking. Cooked falafel stays good in the fridge for about 3 to 5 days. Always check for any signs of spoilage before eating. To freeze falafel, let them cool completely. Then, arrange them in a single layer on a baking sheet. Once frozen, transfer them to a freezer bag. This way, you can take out what you need. When ready to eat, thaw falafel in the fridge overnight. Reheat in the air fryer for 5 to 7 minutes at 375°F (190°C) to restore their crispiness. Prepare falafel in advance for busy days. You can make a large batch and freeze them. Pair falafel with sauces like tahini or yogurt. Store these sauces separately to keep flavors fresh. This method makes it easy to grab a quick meal when needed. Yes, you can use canned chickpeas. They save time since they are already cooked. However, using canned chickpeas may change the texture. Freshly soaked chickpeas give a firmer and better result. If you use canned, be sure to drain and rinse them well. This helps remove extra salt and improves the flavor. You will know your falafel is done when they are golden brown and crispy. Look for a nice crunchy outside. You can also check the inside for doneness. It should be warm and hold its shape. If they are too soft or mushy, they need more time. Yes, you can make falafel without a food processor. You can use a box grater or mash the chickpeas by hand. For a coarser texture, chop the herbs and onions finely. This method takes more time but still works well. Just mix everything in a bowl until combined. This blog post provided a detailed guide on making falafel, from ingredient lists to cooking tips. You learned how to prepare chickpeas and mix flavors for a great dough. The post also shared ways to cook falafel in an air fryer and offered serving suggestions. Remember, you can adjust recipes and storage ideas to fit your needs. Enjoy crafting your falafel dish with fresh ingredients. Keep experimenting, and share your tasty results with friends!

Crispy Air Fryer Falafel Easy and Flavorful Recipe

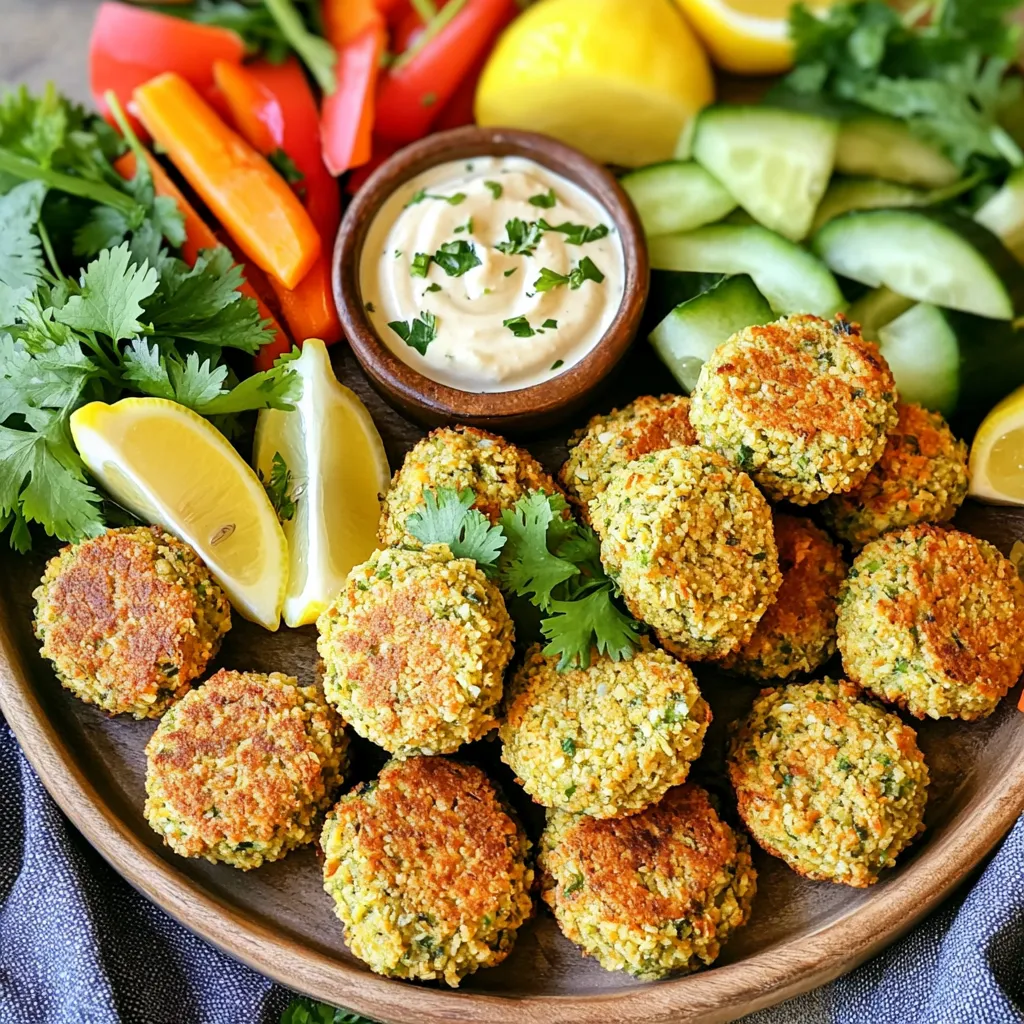
Looking for a tasty and easy snack? You’ve come to the right place! My Crispy Air Fryer Falafel recipe is

- 1 cup pumpkin puree (canned or freshly made) - 1 banana, frozen - 1/2 cup Greek yogurt (or dairy-free alternative) - 1/2 cup almond milk (or any milk of choice) - 1 teaspoon pumpkin pie spice - 1 tablespoon maple syrup (adjust based on sweetness preference) - 1/4 cup rolled oats - Toppings: granola, chopped nuts, chia seeds, coconut flakes, slices of banana, and a sprinkle of cinnamon This smoothie bowl combines flavors and health. Pumpkin puree is rich in fiber and vitamin A. One cup gives you about 200% of your daily vitamin A needs. The frozen banana adds potassium, which helps your muscles. Greek yogurt offers protein, which keeps you full longer. Almond milk is low in calories, making it a great choice. Rolled oats provide complex carbs, which give you energy. Maple syrup adds sweetness while being less processed than white sugar. You can make this recipe fit your tastes. If you don’t have pumpkin puree, try sweet potato puree. For the yogurt, use any dairy-free yogurt if you prefer. Almond milk can be swapped with oat milk or coconut milk. If you want less sugar, skip the maple syrup or use honey. You can also use any nuts or seeds you have on hand. Get creative with the toppings! Use whatever fruits or crunchy items you enjoy. To make your Pumpkin Pie Smoothie Bowl, start by gathering all your ingredients. You will need: - 1 cup pumpkin puree (canned or freshly made) - 1 banana, frozen - 1/2 cup Greek yogurt (or dairy-free alternative) - 1/2 cup almond milk (or any milk of choice) - 1 teaspoon pumpkin pie spice - 1 tablespoon maple syrup (adjust based on sweetness preference) - 1/4 cup rolled oats Now, in a blender, add the pumpkin puree, frozen banana, Greek yogurt, almond milk, pumpkin pie spice, maple syrup, and rolled oats. Blend on high until the mix is smooth and creamy. If it is too thick, pour in a bit more almond milk. Taste the mix and add more maple syrup if you want it sweeter. Once ready, pour it into a bowl and smooth the top with a spatula. To get the best texture, use a powerful blender. Make sure the banana is frozen. This helps make your smoothie bowl thick and cold. If you find your mix is too thick, just add a splash of almond milk. Blend again until you reach your desired smoothness. You want it creamy but not runny. Presentation is key! Use a bright and colorful bowl to contrast with the orange of the pumpkin. Pour the smoothie into the bowl and take your time with the toppings. Arrange the toppings in sections to create a pretty design. Use granola for crunch, sliced banana for freshness, and sprinkle chia seeds or coconut flakes for added texture. Finally, dust with a touch of cinnamon for that cozy fall vibe. Serve with a spoon, and enjoy! You can easily change the sweetness and spice levels in your smoothie bowl. Start with one tablespoon of maple syrup. Taste the mix after blending. If you want it sweeter, add more syrup. For spice, pumpkin pie spice adds warmth. If you like it spicier, add a pinch of cinnamon or nutmeg. Always adjust to your taste. One common mistake is blending too long. Over-blending can make your smoothie too thin. Blend until smooth, then stop. If it’s too thick, add a little almond milk. Another mistake is not tasting before serving. Always taste first. It helps you catch any flavor gaps. Finally, don’t skip the toppings. They add fun texture and flavor. For a creamy texture, use frozen bananas. They make your smoothie thick and smooth. Also, the oats help too. They add body and fiber. If your mix is too thin, add more oats or a bit more pumpkin puree. Always ensure your ingredients are cold for the best texture. {{image_2}} For a vegan twist, swap Greek yogurt for coconut yogurt. This keeps the creaminess while adding a tropical flavor. Use almond milk or any plant-based milk. The sweet maple syrup works well to add sweetness. This bowl still tastes like fall! Want to mix it up? Try adding a scoop of nut butter. Almond or peanut butter adds richness. You can also add a dash of vanilla extract to brighten the flavors. For a protein boost, toss in some protein powder. Each add-in brings new taste and benefits. Make this bowl festive! Add crushed ginger snaps for a spicy crunch. Top with pomegranate seeds for a pop of color. You can use warm spices like nutmeg or cloves for a holiday feel. These twists make your smoothie bowl even more exciting and seasonal. If you have leftover smoothie bowl, store it in an airtight container. Make sure to cover it well to keep it fresh. It will stay good in the fridge for up to two days. When you want to eat it, stir well to mix it up again. You can freeze the smoothie base if you want to save it for later. Pour the smoothie into ice cube trays or silicone molds. Once frozen, pop the cubes into a freezer bag. These cubes can last for up to three months. When you're ready to enjoy, blend the cubes with a bit of milk until smooth. To serve, simply pour the smoothie into a bowl. If you like it warm, you can microwave it for a few seconds. Add your favorite toppings right before serving. Some great options include granola, nuts, and chia seeds. This way, you keep the crunch and flavor fresh! If you want a dairy-free option, use coconut yogurt or almond yogurt. Both add creaminess. Silken tofu is another great choice. It blends smoothly and gives a nice protein boost. You can also try a nut-based yogurt for a different flavor. Yes, you can use fresh pumpkin! Just cook and puree it first. Make sure to remove the skin and seeds. Then, steam or roast the pumpkin until soft. This gives you a fresh taste in your smoothie bowl. Just remember that fresh pumpkin can be more watery than canned. Adjust the liquid in your recipe as needed. A smoothie bowl stays fresh for about one day in the fridge. Store it in an airtight container. If you wait longer, the texture may change. The toppings, especially, may get soggy. To enjoy the bowl at its best, eat it soon after making it. We explored the key ingredients of a smooth, tasty bowl and its health benefits. You learned how to make it, customize it, and avoid mistakes for a perfect texture. We also looked at delicious variations and how to store leftovers properly. With this knowledge, you can create your own unique smoothie bowl. Enjoy trying new flavors and ingredients. Remember, the fun is in experimenting and finding what you love!

Pumpkin Pie Smoothie Bowl Delicious and Nutritious Treat

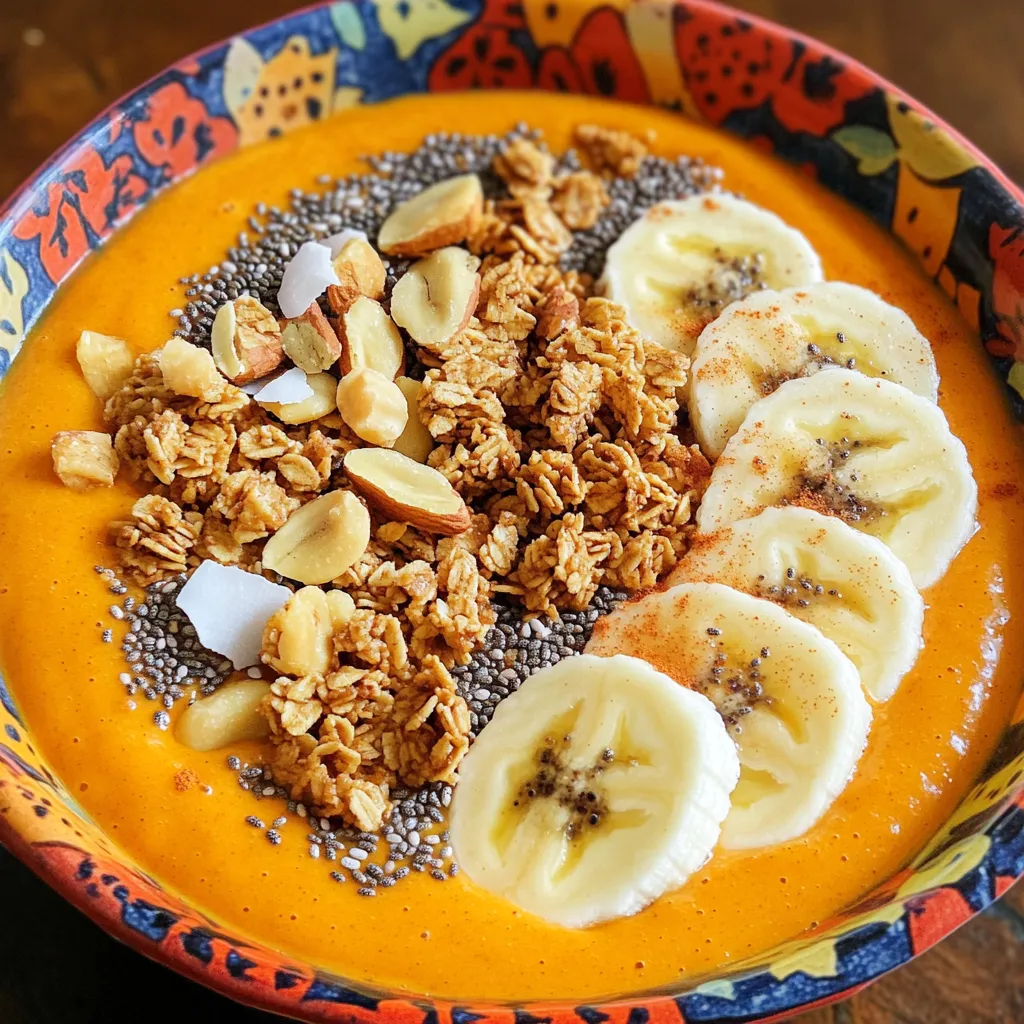
Get ready to enjoy a tasty treat that’s both yummy and good for you! The Pumpkin Pie Smoothie Bowl combines

The right ingredients make all the difference in Garlic Herb Roasted Rainbow Carrots. Here's what you'll need: - 1 lb rainbow carrots (baby or cut into sticks if large) - 3 tablespoons olive oil - 4 cloves garlic, minced - 2 teaspoons fresh thyme, chopped (or 1 teaspoon dried thyme) - 2 teaspoons fresh rosemary, chopped (or 1 teaspoon dried rosemary) - Salt and pepper to taste - 1 tablespoon honey (optional, for sweetness) - Zest of 1 lemon - 1 tablespoon fresh parsley, chopped (for garnish) These ingredients create a bright and tasty dish. The rainbow carrots bring color and sweetness. Garlic and herbs add depth to the flavor. Olive oil helps everything roast nicely. Honey gives a touch of sweetness, balancing the herbs. Fresh parsley on top makes it look great. When you gather these ingredients, think about freshness. Fresh herbs make a big difference. If you can, choose organic carrots. They often taste better. Also, try to pick carrots of different colors. This adds a fun twist to your meal. With these ingredients, you’re ready to create a vibrant and healthy dish. Let's get cooking! Set your oven to 425°F (220°C). This high heat helps the carrots roast well. Wash the rainbow carrots thoroughly. You can peel them if you like. I often keep the skins on for color. If your carrots are large, cut them into sticks or halves. This ensures they cook evenly. In a large bowl, combine these ingredients: - 3 tablespoons olive oil - 4 cloves garlic, minced - 2 teaspoons fresh thyme, chopped (or 1 teaspoon dried thyme) - 2 teaspoons fresh rosemary, chopped (or 1 teaspoon dried rosemary) - Salt and pepper to taste - 1 tablespoon honey (optional, for sweetness) - Zest of 1 lemon Mix all these items together. You will create a fragrant marinade that lifts the flavor. Add the prepared carrots to the bowl. Toss the carrots gently. Make sure they are evenly coated with the herb and garlic mixture. Spread the carrots out in a single layer on a baking sheet lined with parchment paper. This makes for easy cleanup. Roast the carrots for 25-30 minutes. Toss them halfway through to ensure even roasting. They should become tender and golden brown. Once done, take the carrots out of the oven. Let them cool for a few minutes. Then transfer them to a serving dish. Sprinkle with freshly chopped parsley for color and flavor. Enjoy the beautiful presentation! To get the best flavor and texture, choose carrots that are similar in size. This ensures that they cook evenly. If some are larger, cut them into sticks or halves. For perfect roasting, set your oven to 425°F (220°C). Roast the carrots for 25 to 30 minutes. Toss them halfway to help them brown evenly. Add more flavor by using herbs like dill or tarragon. A pinch of paprika or cumin can also brighten the dish. If you want sweetness, try different types of honey. You could also use maple syrup for a new twist. Adjust the amount based on your taste. For a stunning look, serve the carrots on a colorful platter or a rustic wooden board. Arrange them in a rainbow pattern to highlight their colors. Drizzle a bit of olive oil on top and sprinkle some sea salt before serving. This adds both flair and flavor to your dish. {{image_2}} You can change up the herbs in this recipe. Try using dill or tarragon for a fresh twist. Both add a unique flavor that pairs well with carrots. You can also add spices like paprika or cumin. Paprika gives a nice smoky taste, while cumin adds warmth. Experimenting with different herbs and spices can make this dish yours. Feel free to roast the rainbow carrots with other colorful veggies. Bell peppers, zucchini, or red onions can add more color and taste. If you can't find rainbow carrots, use regular carrots or parsnips instead. They will still taste great and look lovely on your plate. Mixing different vegetables can create a vibrant and tasty medley. If you want to adjust the sweetness, play with the honey. You can add more or less depending on your taste. Maple syrup is a great alternative if you want a different flavor. For a zesty kick, incorporate citrus like orange zest. This adds brightness and balances the sweetness. These simple changes can elevate your roasted carrots to a new level. To keep your garlic herb roasted rainbow carrots fresh, place them in the fridge. Use an airtight container to seal in the flavor. This method helps preserve the taste and texture. The carrots can last up to three days in the fridge. When you're ready to enjoy leftovers, there are a few great ways to reheat them. The oven is the best option. Preheat it to 350°F (175°C) and bake the carrots for about 10-15 minutes. This keeps them crispy and warm. You can also use a microwave, but they may lose some crunch. If using the microwave, heat in short bursts to keep them from getting mushy. If you want to save some carrots for later, freezing works well. Allow the cooked carrots to cool completely. Spread them out on a baking sheet and freeze for about an hour. After they are frozen, transfer them to a freezer-safe bag. This way, they won’t stick together. When you’re ready to eat them, thaw the carrots overnight in the fridge. Reheat them in the oven for the best results. Yes, you can use regular carrots. They taste good, too. Regular carrots are sweet and crunchy. Rainbow carrots add color and a bit of earthiness. Each type offers a unique flavor. If you use regular carrots, cut them into sticks like the rainbow ones. This helps them roast evenly. Look for a few signs. The carrots should be tender and slightly browned. You can poke them with a fork. If they slide off easily, they are done. Toss them halfway through roasting to help with even cooking. This ensures all sides turn golden and tasty. These carrots go well with many dishes. Try serving them with grilled chicken or fish. They also pair nicely with quinoa or rice. For a plant-based option, serve with lentils or chickpeas. The sweet flavors of the carrots balance well with savory proteins. Yes, you can make it vegan. Just skip the honey or replace it with maple syrup. This keeps the sweetness without using animal products. The rest of the recipe is already vegan-friendly. The herbs and garlic add lots of flavor, making it tasty. To avoid burning, cut the carrots into similar sizes. This helps them cook evenly. Spread them out on the baking sheet without crowding. If they touch, they may steam instead of roast. Toss them halfway through to check for even cooking and prevent charring. This blog detailed how to make delicious garlic herb roasted rainbow carrots. We covered ingredients, step-by-step instructions, and tips for great results. Roasting emphasizes the natural sweetness of the carrots and the fresh herbs add vibrant flavor. You can also try new herbs or pair these carrots with various dishes. Enjoy this dish as a colorful and healthy addition to any meal!

Garlic Herb Roasted Rainbow Carrots Tasty Delight

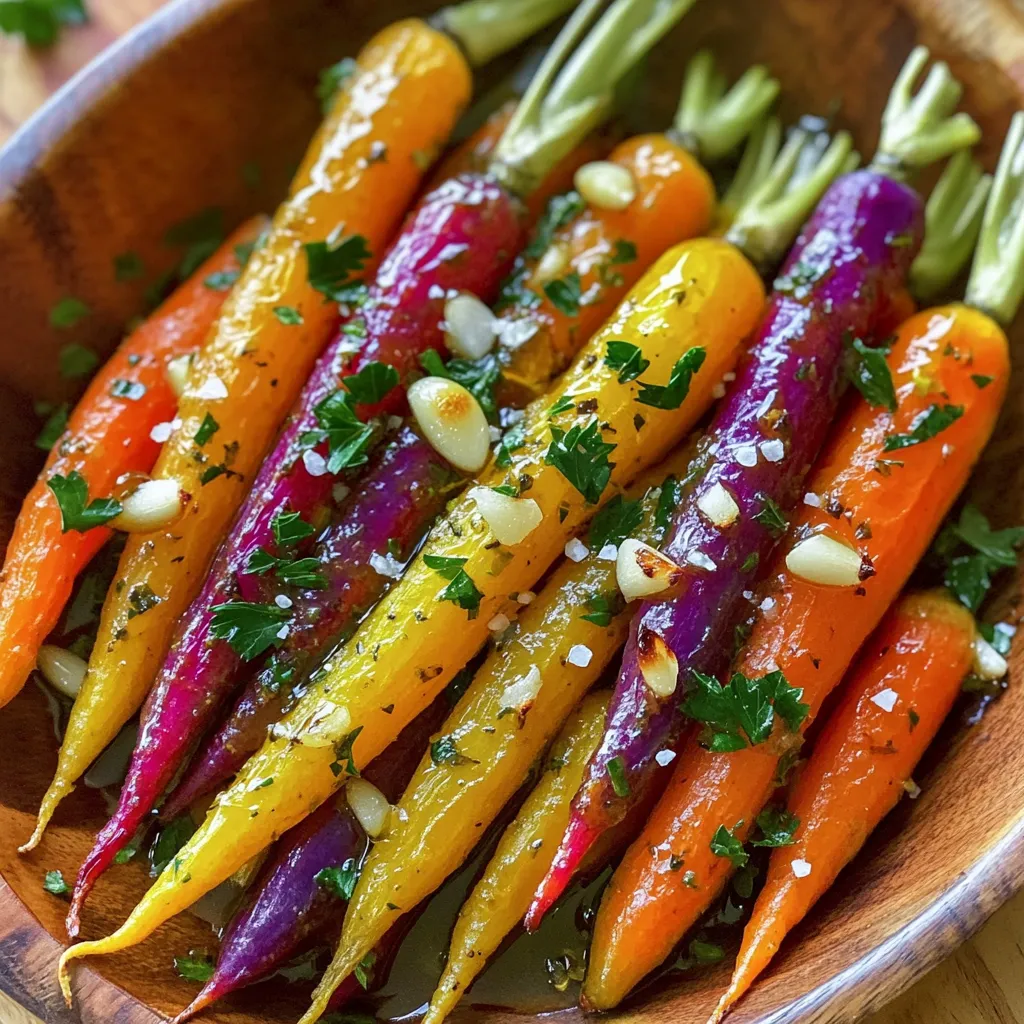
Are you ready to elevate your side dish game? Garlic Herb Roasted Rainbow Carrots are not only vibrant but also

- 8 slices of thick brioche bread, cut into cubes - 2 cups fresh blueberries (or frozen, thawed) - 8 oz cream cheese, softened - 4 large eggs - 1 cup milk (whole or 2%) - 1/2 cup granulated sugar - 1 teaspoon vanilla extract - 1/2 teaspoon ground cinnamon - 1/4 teaspoon salt - Optional toppings: powdered sugar, maple syrup To make a great Blueberry Cheesecake French Toast Casserole, you need simple ingredients. First, brioche bread adds a nice texture. I love using thick slices because they soak up the mixture well. Next, fresh blueberries bring sweetness and color. You can use frozen blueberries if fresh ones aren't available. Just make sure to thaw them first. Cream cheese gives a rich, creamy taste that mimics cheesecake. You will also need eggs to bind everything together. Milk adds moisture, making the dish extra soft. Granulated sugar sweetens the mix. Vanilla extract adds a wonderful aroma. Ground cinnamon lends warmth and spice, while salt balances the flavors. Finally, optional powdered sugar and maple syrup can elevate your dish. Dusting with powdered sugar makes it look fancy, while maple syrup adds sweetness when serving. These ingredients come together to create a delicious breakfast treat you won't forget! 1. Preheat the oven to 350°F (175°C). This step is key for even baking. A hot oven helps create a nice golden crust. 2. Prepare the bread and blueberries. Take 8 slices of thick brioche bread and cut them into cubes. In a large bowl, add the cubed bread along with 1 cup of blueberries. Gently fold them together. Be careful not to mash the berries. This keeps the blueberries whole and juicy. 1. Beat cream cheese and sugar until smooth. In another bowl, take 8 oz of softened cream cheese and 1/2 cup of granulated sugar. Use a mixer or a whisk to combine until it is creamy and free of lumps. 2. Incorporate eggs and mix well. Add 4 large eggs to the cream cheese mixture, one at a time. Mix well after each addition. This ensures that the eggs blend smoothly into the mixture. 1. Combine all ingredients and transfer to baking dish. Pour the creamy mixture over the bread and blueberry cubes. Gently fold everything together to coat the bread well. Grease a 9x13 inch baking dish and pour the mixture in. Spread it evenly. 2. Cover and bake, then uncover and finish baking. Cover the dish with aluminum foil and bake for 30 minutes. After that, remove the foil. Bake for another 15-20 minutes, until the top is golden and the casserole is set. This step helps the casserole rise and become fluffy. After baking, let it cool for a bit before serving. Enjoy every delicious bite! Choosing the right bread I love using thick brioche bread for this dish. It soaks up the mix well. You can also try challah or sourdough for a different taste. How to prevent sogginess To avoid sogginess, don't soak the bread for too long. Mix it gently with the cream cheese mix. Make sure the cubes stay firm. Adding spices or extracts You can boost flavor by adding a pinch of nutmeg or almond extract. These small touches add depth to your casserole. Tips for adding extra blueberries To make it fruitier, add more blueberries. Just toss in about half a cup more. They will burst and add sweetness. Best served warm This casserole is best right out of the oven. It is warm, gooey, and perfect for breakfast. Suggestions for complementary sides Serve it with crispy bacon or a light fruit salad. This gives a nice balance and makes a complete meal. {{image_2}} You can change the bread to suit your taste. Using challah adds a rich flavor. Sourdough gives a slightly tangy touch. Both options make the casserole unique. They also hold up well when soaked. Choose your favorite to try something new. If you want to change the fruit, try strawberries or raspberries. Strawberries bring a sweet taste. Raspberries add a nice tartness. You can mix and match your fruits. This keeps the dish fresh and exciting. Play with flavors to find your favorite combo. Making this casserole gluten-free is easy. Use gluten-free bread instead of brioche. Check the labels to ensure all ingredients fit your diet. For a vegan version, swap eggs with flax eggs. Use plant-based cream cheese and milk. These changes keep the dish tasty and inclusive. Enjoy the same great flavors while meeting dietary needs. To store your Blueberry Cheesecake French Toast Casserole, let it cool first. Place it in an airtight container. This keeps it fresh for later. If you have a lot of leftovers, you can freeze it. Cut the casserole into smaller pieces. Wrap each piece tightly in plastic wrap. Then, place them in a freezer bag. This method helps prevent freezer burn. When you are ready to eat the leftovers, reheat them gently. Preheat your oven to 350°F (175°C). Place the casserole in an oven-safe dish. Cover it with foil to keep it moist. Bake for about 15-20 minutes. You can also use the microwave. Heat it in short bursts of 30 seconds. Check to see if it's warm all the way through. This casserole lasts for about 3-4 days in the fridge. Make sure to keep it tightly sealed. If you freeze it, it can last for about 2-3 months. However, for the best taste and texture, enjoy it sooner rather than later. Yes, you can prepare this casserole the night before. Just follow these steps: - Make the mixture and layer it in the dish. - Cover it well with plastic wrap or foil. - Store it in the fridge overnight. This saves time in the morning and lets the flavors blend. You will know the casserole is done when: - The top is golden brown. - A toothpick comes out clean from the center. - The edges pull away from the dish slightly. This usually takes about 45-50 minutes of baking. If you need a cream cheese substitute, try these: - Mascarpone cheese for a rich flavor. - Greek yogurt for a lighter option. - Silken tofu for a dairy-free choice. Choose based on what you have at home or your dietary needs. Yes, you can use frozen blueberries without thawing. Just add them straight to the bread mixture. This keeps them from getting mushy and helps the casserole stay firm. Make sure to mix gently to avoid breaking the berries. This blog post covered a delightful blueberry cream cheese casserole recipe. You learned about the key ingredients, easy steps to prepare, and smart tips to get great results. I shared different bread and fruit options to suit your taste. Remember to store leftovers properly for the best flavor. In the end, this dish is fun to make and share. Enjoy your cooking and have fun experimenting with variations!

Blueberry Cheesecake French Toast Casserole Delight

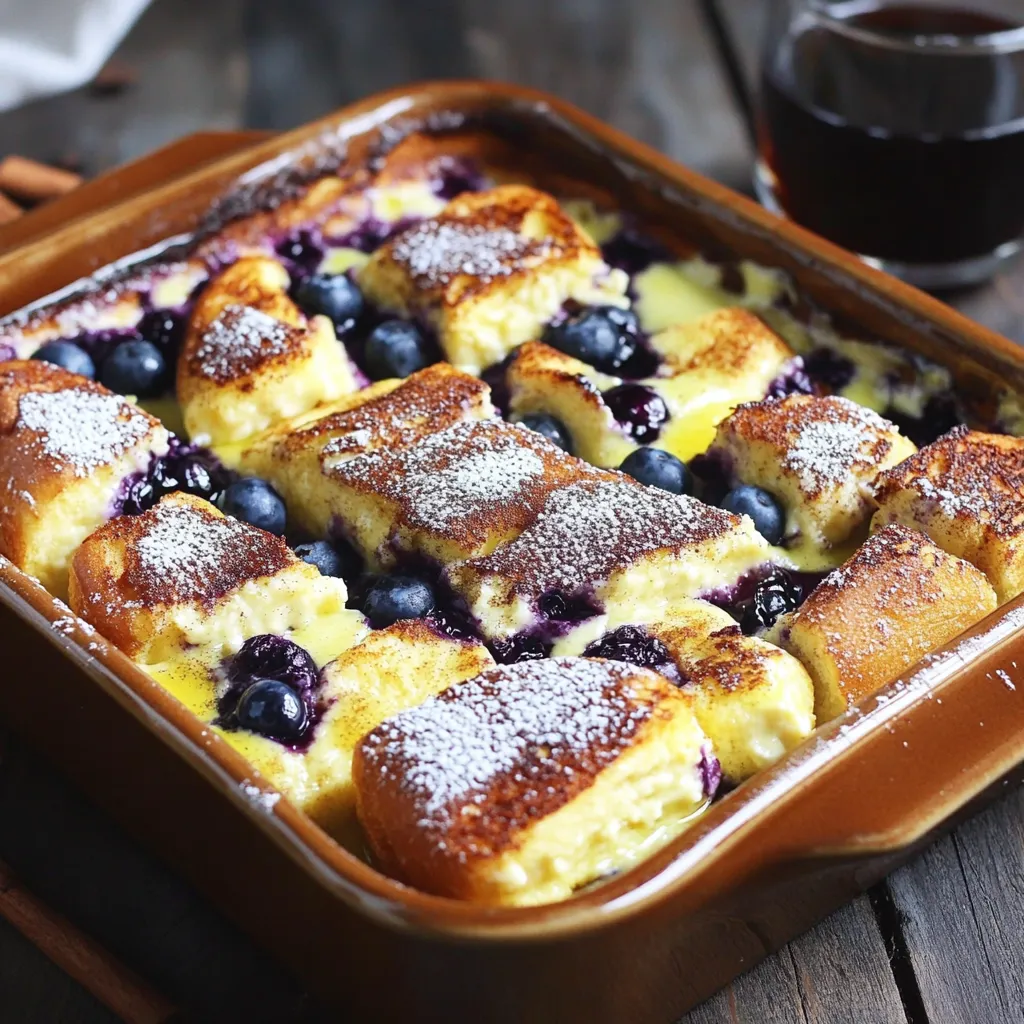
You’re in for a treat with this Blueberry Cheesecake French Toast Casserole Delight! Imagine waking up to layers of sweet,

- 4 medium zucchinis - 1 cup carrots, julienned - 1 red bell pepper, thinly sliced - 1/2 cup green onions, chopped - 1/2 cup roasted peanuts, roughly chopped - 1/4 cup cilantro, chopped (for garnish) - 2 tablespoons sesame oil - 1/3 cup creamy peanut butter - 3 tablespoons soy sauce (low sodium) - 2 tablespoons lime juice - 1 tablespoon honey or maple syrup - 1 tablespoon ginger, grated - 2 garlic cloves, minced - 1-2 tablespoons water (to thin sauce as needed) To make Thai Peanut Zucchini Noodles, you need fresh, simple ingredients. Zucchini serves as the star of this dish. Its mild taste blends well with the peanut sauce. Carrots add crunch and color. Red bell peppers give a sweet note. Green onions add freshness and a nice bite. Roasted peanuts bring a satisfying crunch. Finally, cilantro gives a bright flavor. Now, let’s dive into the peanut sauce. Creamy peanut butter creates a rich base. Low sodium soy sauce adds a salty kick. Lime juice brightens it up, balancing the flavors. Honey or maple syrup gives a touch of sweetness. Grated ginger and minced garlic add depth. Lastly, water helps adjust the sauce's thickness to your liking. With these ingredients on hand, you are ready to create a delightful meal! To start, you can turn zucchinis into noodles in two ways. A spiralizer makes great, curly noodles. A vegetable peeler creates long, flat ribbons. Both methods work well, so choose what you like best. After making your noodles, set them aside in a large bowl. If you want to store them, keep them in a paper towel. This helps absorb excess moisture. Place them in a sealed container in the fridge and use them within two days. Next, we make the peanut sauce. In a medium bowl, whisk together the peanut butter, soy sauce, lime juice, honey or maple syrup, grated ginger, and minced garlic. Use a steady hand to mix until smooth. If the sauce is too thick, add one to two tablespoons of water. This will help it pour easily over your noodles. Now it’s time to sauté the veggies. Heat sesame oil in a large skillet over medium heat. Add the julienned carrots and sliced red bell pepper. Sauté them for about three to four minutes. You want them to become slightly tender but still crisp. This keeps the texture nice and fresh. Once the veggies are ready, it’s time to combine everything. Add the zucchini noodles to the skillet with the sautéed vegetables. Pour the peanut sauce over everything. Toss gently to coat all the ingredients evenly. Cook for another two to three minutes. This warms the dish while keeping the zucchini al dente. For a beautiful presentation, serve your dish in shallow bowls. Drizzle extra peanut sauce on top. Add chopped peanuts and fresh cilantro for garnish. This not only looks great but also adds extra flavor. Enjoy your colorful, tasty meal! - Alternatives for peanut butter: If you cannot use peanut butter, try almond butter or sunflower seed butter. Both provide a nice creaminess and flavor. - Other vegetable options: You can use bell peppers, snap peas, or broccoli instead of carrots. These add crunch and color to the dish. - Best practices for sautéing: Heat your skillet well before adding the oil. This helps the veggies cook evenly. Stir them often to prevent burning. - Keeping zucchini al dente: Cook zucchini noodles only for a short time. You want them slightly firm, so they hold their shape and don’t get mushy. - Suggestions for adding spice: For heat, add red pepper flakes or sriracha to the peanut sauce. This will give your dish a nice kick. - Other dressings or sauces to explore: If you want a twist, try sesame dressing or a drizzle of coconut aminos. These can change the flavor profile while keeping it fresh. {{image_2}} You can add protein to your Thai peanut zucchini noodles for a heartier meal. Here are some great options: - Tofu: Use firm tofu, cubed and sautéed until golden. - Chicken: Grilled or pan-seared chicken slices work well. - Shrimp: Quick-cook shrimp adds a nice touch. You can also mix proteins. For example, try chicken and shrimp together for more flavor. Each protein brings its own unique taste and texture. If you need a gluten-free meal, there are simple swaps. Use gluten-free soy sauce instead of regular soy sauce. Brands like Tamari or coconut aminos work great. You can also check other ingredients for gluten. Make sure your peanut butter is gluten-free. Most brands are, but it’s always smart to read labels. To make this dish fully plant-based, you can easily swap out a few ingredients. Replace honey with maple syrup for a vegan-friendly sweetener. For a dairy-free garnish, skip traditional toppings and stick with more peanuts and cilantro. You can even add sliced avocado for creaminess. This keeps the meal vegan and still very tasty. To keep your Thai Peanut Zucchini Noodles fresh, use an airtight container. This will keep the flavors locked in and prevent drying out. The dish stays good in the fridge for about 3 days. After that, the noodles may become soggy and lose their taste. When reheating, use a skillet over low heat. This helps prevent the noodles from getting soggy. Add a splash of water to keep it moist while you heat. Stir gently to keep the flavors intact. You want to enjoy every bite just as you did when it was fresh! You can freeze zucchini noodles, but they may lose some texture. If you plan to freeze them, do so before cooking. For the peanut sauce, freeze it in a separate container. This way, you can enjoy it later without losing its rich flavor. Just thaw everything in the fridge overnight before using. To make zucchini noodles, you need a spiralizer or a vegetable peeler. A spiralizer creates long, curly noodles. If you use a peeler, you can make flat ribbons. First, wash the zucchinis. Cut off the ends. Then, either spiralize or peel the zucchinis into your desired shape. Place the noodles in a large bowl. You can store them in the fridge until you are ready to use them. This keeps them fresh and crisp. Yes, you can use other nut butters. Almond butter or cashew butter can work well. Almond butter has a nutty flavor. Cashew butter is creamier and sweet. Each nut butter changes the taste and texture. But the creamy texture of peanut butter is hard to beat. Try different nut butters to see which one you like best. These noodles pair well with many side dishes. You can serve them with a fresh salad or spring rolls. A light soup can also be a great match. For drinks, try iced tea or coconut water. These options enhance the meal and keep it light. Yes, zucchini noodles are very healthy. They are low in calories and high in fiber. Zucchini also provides vitamins A and C. The carrots add more nutrients and a splash of color. Peanuts give protein and healthy fats. Overall, this dish is a great option for a healthy meal. This dish is a tasty blend of fresh veggies and creamy sauce. You learned how to make zucchini noodles and a rich peanut sauce. I shared tips for sautéing veggies and keeping noodles firm. We covered storage ideas, reheating methods, and great variations. This recipe is not just healthy but also versatile. Experiment with proteins or dressings to fit your taste. Enjoy making this dish and impressing others with your skills!

Thai Peanut Zucchini Noodles Flavorful and Easy Recipe

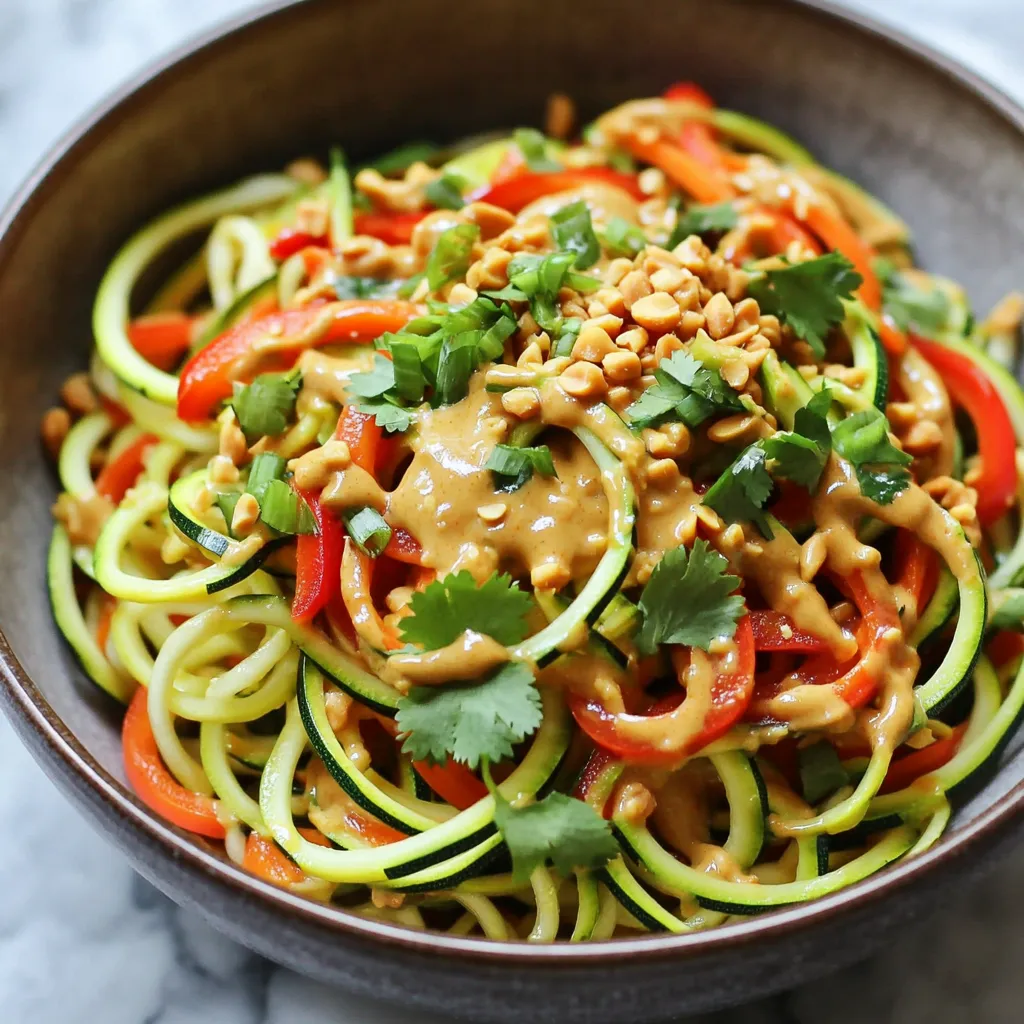
Craving a fresh, vibrant dish that’s super easy to make? Look no further! My Thai Peanut Zucchini Noodles are packed

- 1 can (15 oz) chickpeas, drained and rinsed - 1 cup cherry tomatoes, halved - 1 cucumber, diced - 1 bell pepper (red or yellow), diced - 1/2 red onion, finely chopped - 1/4 cup pitted Kalamata olives, halved - 1/4 cup feta cheese, crumbled - 2 tablespoons fresh parsley, chopped Chickpeas are the star of this dish. They add protein and fiber. The fresh vegetables bring color and crunch. Use ripe cherry tomatoes for sweetness. A crisp cucumber adds a refreshing bite. Bell peppers add a nice, sweet flavor. The olives give a briny taste, while feta cheese adds a creamy texture. Fresh parsley brings a hint of brightness. - 3 tablespoons olive oil - 2 tablespoons lemon juice - 1 teaspoon dried oregano - Salt and pepper to taste The dressing is simple yet vibrant. Olive oil is rich and smooth. Lemon juice adds brightness and tang. Dried oregano offers a hint of earthiness. Adding salt and pepper enhances all the flavors. This dressing ties all the ingredients together in a delightful way. - Key vitamins and minerals: Vitamin C, Vitamin A, Iron, and Calcium - Caloric breakdown per serving: About 200 calories This salad is packed with nutrients. The fresh vegetables give you Vitamin C and A. Chickpeas provide iron and protein. Feta cheese adds calcium. With about 200 calories per serving, it’s a healthy choice. Enjoy this salad as a light meal or a side dish. Mixing the base ingredients Start by gathering your main items. In a large mixing bowl, add: - 1 can (15 oz) chickpeas, drained and rinsed - 1 cup cherry tomatoes, halved - 1 cucumber, diced - 1 bell pepper (red or yellow), diced - 1/2 red onion, finely chopped - 1/4 cup pitted Kalamata olives, halved - 1/4 cup feta cheese, crumbled - 2 tablespoons fresh parsley, chopped Gently mix all these fresh ingredients. Ensure they blend well to create a vibrant base for your salad. Preparing the dressing In a small bowl, whisk together: - 3 tablespoons olive oil - 2 tablespoons lemon juice - 1 teaspoon dried oregano - Salt and pepper to taste This dressing will add a bright, zesty flavor. Whisk until it combines smoothly. Drizzling and tossing technique Now, drizzle the dressing over your mixed salad ingredients. Use a gentle tossing motion to coat everything evenly. Be careful not to mash the ingredients. You want to keep that fresh look and feel. Adjusting seasoning After tossing, it's time to taste. If you think it needs more flavor, add a pinch of salt or pepper. This step ensures every bite bursts with flavor. Presentation tips Serve your salad in a large bowl for a family-style meal. For individual servings, use small plates. Garnish with extra parsley and a lemon wedge. This adds a lovely touch of color and freshness. Suggested pairings This salad pairs well with grilled chicken or fish. You can also serve it with pita bread or hummus for a complete meal. Enjoy the mix of flavors and textures! You can easily change this salad to fit your taste. - Adding proteins: Try grilled chicken or tuna for extra protein. They make the salad heartier. - Alternative vegetables and herbs: Swap in bell peppers or cucumbers. You can also use fresh dill or mint for a twist. To make the salad even tastier, consider these tips. - Marinating time: Let the salad sit for at least 30 minutes. This helps all the flavors blend well. - Recommended dressing variations: For a kick, try adding a splash of balsamic vinegar or a dash of hot sauce. These add depth and a lively taste. {{image_2}} You can try many fun ways to make Mediterranean Chickpea Salad. For a Greek twist, add some diced cucumber and Kalamata olives. You can also use crumbled feta cheese. This adds a nice salty taste. Fresh herbs like dill or mint can really brighten the salad. Middle Eastern styles use sumac or tahini in the dressing. These flavors add depth and a touch of spice. You can also include diced bell peppers for color and crunch. This brings a new layer of flavor that is very enjoyable. If you want a vegan version, skip the feta cheese. You can replace it with avocado for creaminess. Another option is to use vegan cheese. This keeps the salad rich without dairy. For low-carb options, swap chickpeas for cauliflower. This change keeps the crunch while lowering carbs. You can also add more leafy greens like spinach or kale. These options keep the salad fresh and light while still being filling. To store leftovers, place the salad in a clean, airtight container. This keeps it fresh longer. Use glass or plastic containers with tight-fitting lids. Avoid using metal containers, as they can react with the dressing. If you have extra dressing, store it separately. This helps keep the salad crisp and tasty. The salad stays fresh for about three days in the fridge. Check for signs of spoilage. If you see wilting vegetables or an off smell, it’s time to toss it. A good rule is to use your senses. If it doesn’t look or smell right, it’s best to throw it away. Mediterranean Chickpea Salad has roots in the Mediterranean region. This area includes countries like Greece, Italy, and Turkey. Chickpeas are a staple in many dishes here. They have been used for centuries due to their taste and health benefits. This salad shows how people combine fresh veggies, herbs, and grains. It reflects the region's focus on fresh, wholesome food. Yes, you can make this salad ahead of time! I recommend prepping it a few hours before serving. This allows the flavors to blend well. Just keep it in the fridge until you are ready to eat. If you want, you can prepare the dressing and mix it in right before serving. This keeps everything fresh and crispy. If you cannot find chickpeas, don't worry! You can use other legumes like black beans or kidney beans. These will add protein and good flavor. You can also try using diced vegetables, like zucchini or cooked quinoa. These options give you a tasty twist on the dish. This blog post covered how to make a delicious Mediterranean Chickpea Salad. We discussed key ingredients like chickpeas, fresh veggies, and olives. We also shared tips on the dressing and serving ideas. Customizing your salad with proteins or new flavors can make it exciting. Remember to store leftovers properly to ensure freshness. Making this salad ahead saves time and adds convenience to your meals. Embrace the mix of flavors and enjoy a healthy dish that suits your taste!

Mediterranean Chickpea Salad Fresh and Flavorful Dish

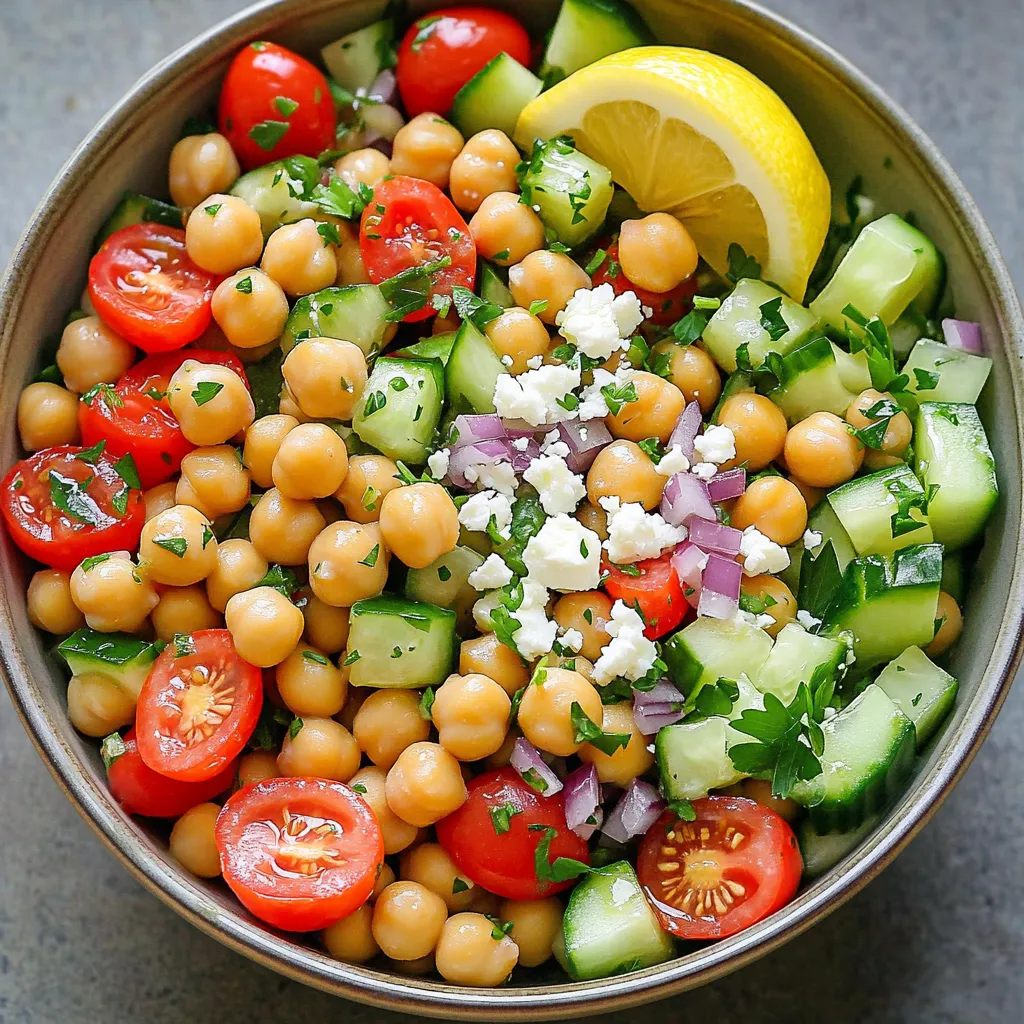
Are you ready to enjoy a fresh, flavorful dish that’s both simple and nutritious? My Mediterranean Chickpea Salad brings vibrant

The key to making delicious Chocolate Almond Butter Bars lies in the right ingredients. Each one plays a role in flavor and texture. Here’s what you need: - 1 cup almond butter - 1/2 cup honey or maple syrup - 1/4 cup coconut oil, melted - 1/2 cup cocoa powder - 1 teaspoon vanilla extract - 1/2 teaspoon sea salt - 1 cup rolled oats - 1/2 cup dark chocolate chips - Optional: chopped almonds for topping Let’s break down why these ingredients matter. Almond butter gives the bars creaminess and a nutty taste. Honey or maple syrup adds sweetness and binds everything together. Coconut oil helps with texture and adds a light coconut flavor. Cocoa powder brings rich chocolate notes, making these bars a true treat. The vanilla extract enhances all the flavors, while sea salt balances the sweetness. Rolled oats add chewiness and nutrition, making the bars filling. Dark chocolate chips are the cherry on top, adding extra chocolate goodness. If you want a crunch, sprinkle chopped almonds on the top! This combination creates a rich, decadent treat you will love. 1. In a mixing bowl, combine the almond butter, honey, and melted coconut oil. Stir until smooth. This creates a rich base for our bars. 2. Next, add in the cocoa powder, vanilla extract, and sea salt. Mix well until the mixture is creamy and uniform. This step adds depth and flavor. 3. Now, stir in the rolled oats. Make sure each oat is coated with the chocolate mixture. This gives the bars a nice chewy texture. 4. Finally, fold in the dark chocolate chips. They will melt slightly, adding delightful pockets of chocolate throughout the bars. 1. Line an 8x8 inch baking pan with parchment paper. Leave some overhang for easy removal later. This makes it simple to lift the bars out. 2. Pour the chocolate almond butter mixture into the prepared pan. Press down firmly to create an even layer. This helps the bars hold their shape when cut. 1. Place the pan in the refrigerator for at least 2 hours. This allows the bars to set firmly. You can also leave them overnight for best results. 2. Once set, lift the bars out using the parchment overhang. Cut into squares or rectangles for serving. Each piece is a rich treat to enjoy! To make your bars smooth, mix the wet ingredients well. Start by combining the almond butter, honey (or maple syrup), and melted coconut oil. Stir until everything blends perfectly. This smooth base helps the bars feel creamy. Adjust sweetness to your taste. If you like a sweeter bar, add more honey or maple syrup. Start with a little extra, then taste and mix. You can always add more, but you can't take it out! To evenly distribute toppings, sprinkle chopped almonds on the mixture. Then, gently press them in. This helps keep them from sliding off later. When you pour the mixture into the pan, press down evenly. Use a spatula or your hands to flatten the top. This makes sure every bite has the same great taste. Avoid over-mixing the batter. Too much mixing can make the bars tough. Mix just until the oats and chocolate chips are well combined. Letting the bars set is key. If you skip the chilling time, your bars may fall apart. Refrigerate for at least 2 hours. This helps them hold their shape when you cut them. {{image_2}} You can spice up your chocolate almond butter bars easily. Try using different nut butters, like cashew or peanut butter. Each nut brings a new taste and texture. You may also add dried fruits, like cranberries or raisins. These fruits add natural sweetness and chewiness. Seeds, such as chia or sunflower, can also give a nice crunch. If you're looking for vegan options, swap honey for maple syrup. Maple syrup gives the bars a great taste and keeps them plant-based. For gluten-free needs, use gluten-free oats instead of regular oats. This way, everyone can enjoy these yummy treats without worry. Serve your bars with yogurt or fresh fruit for a tasty snack. The creaminess of yogurt pairs well with the chocolate flavor. You can also drizzle extra melted chocolate on top for a rich touch. This makes each bite even more decadent and fun! To keep your chocolate almond butter bars fresh, store them in an airtight container. They will last up to a week in the refrigerator. Make sure to place a piece of parchment paper between layers if you stack them. This helps prevent sticking. Keep them in a cool, dark spot. Avoid direct sunlight or heat, as this can change the texture. Freezing is a great option if you want to keep these bars longer. Wrap each bar in plastic wrap or foil before placing them in a freezer-safe container. They can last for up to three months in the freezer. When you want to eat one, take it out and let it thaw in the refrigerator for a few hours. You can also leave it out at room temperature for about 30 minutes. It’s easy to tell if your bars have gone bad. Look for any mold or off smells. If they feel sticky or have an unusual texture, it’s best to throw them away. Always trust your senses when it comes to food safety. Enjoy your treats while they are fresh! These chocolate almond butter bars last about a week in an airtight container. Store them in the fridge to keep them fresh. You can also freeze them for longer storage. They can last up to three months in the freezer. Just remember to wrap them well! Yes, you can use different sweeteners. Honey and maple syrup work well, but you can try agave or brown rice syrup. Just keep the amount the same. Each sweetener may change the taste a bit, but they will all be tasty! Absolutely! These bars are great for kids. They are packed with healthy ingredients and taste like a treat. They have a rich chocolate flavor that kids love. Plus, they are easy to make together, making it a fun kitchen activity! If you need a substitute for almond butter, you can use peanut butter or sunflower seed butter. Each will give a different flavor, but they work well. Just make sure the substitute is smooth for the best texture. Yes, you can make these bars nut-free! Use sunflower seed butter instead of almond butter. Make sure to check other ingredients too, like chocolate chips. Look for nut-free options to keep it safe for everyone. You now know how to make chocolate almond butter bars from scratch. We covered the ingredients, preparation steps, and essential tips for the best results. You learned about variations to fit different diets and preferences. Storing your bars properly ensures they stay fresh longer. Remember, making these treats is fun and easy. Enjoy experimenting, and share your creations! Happy snacking!

Chocolate Almond Butter Bars Rich and Decadent Treat

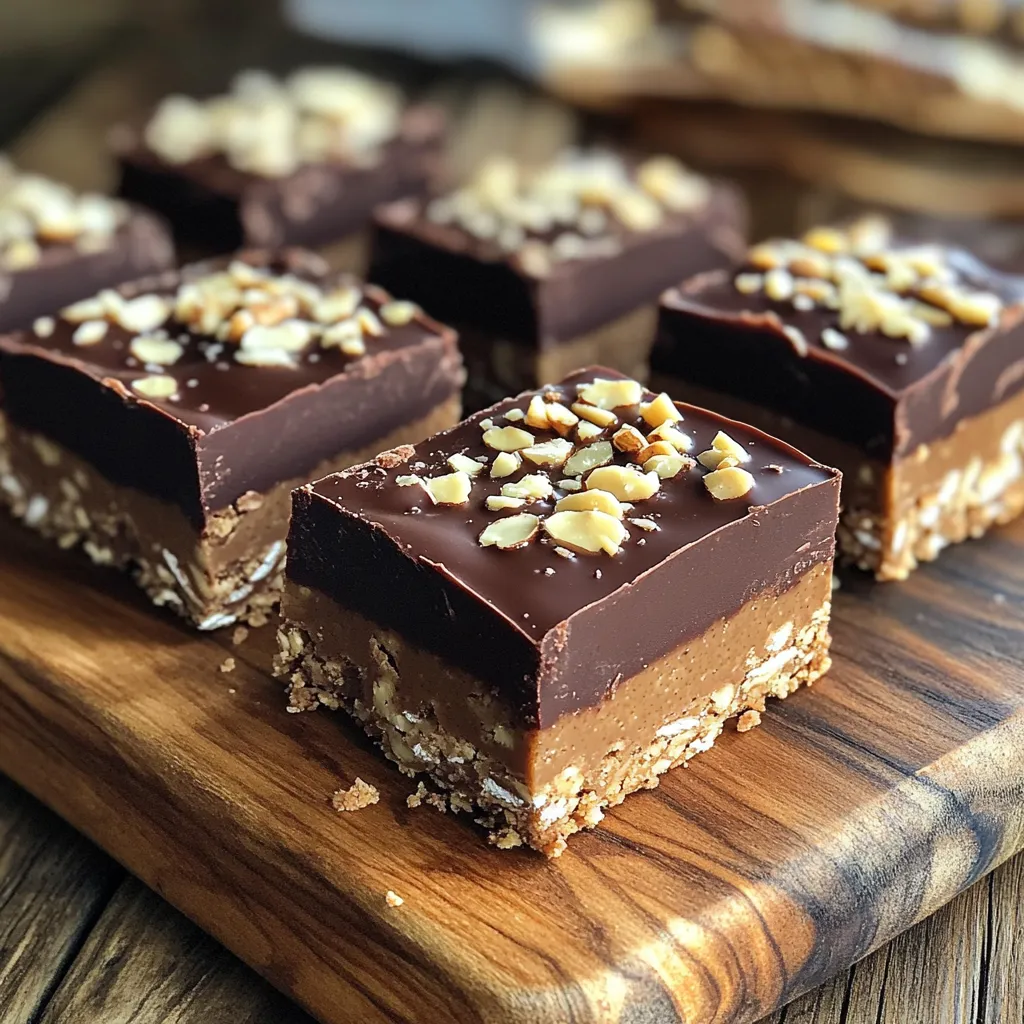
Are you ready to indulge in a tasty treat that’s both rich and healthy? These Chocolate Almond Butter Bars blend

Older posts
Newer posts
← Previous Page1 … Page10 Page11 Page12 … Page144 Next →

dsad

© 2025 So Yum Recipes • Built with GeneratePress

Our Policies

  • Copyright Policy
  • Cookie Policy
  • GDPR Policy
  • Privacy Policy
  • Disclaimer
  • Terms Of Use

More Information

  • Home
  • About
  • Contact
  • Appetizers
  • Dessert
  • Dinner
  • Drinks
©2025, So Yum Recipes About Back To Top