Skip to content
DisclaimerTerms Of UseGDPR PolicyCookie Policy

So Yum Recipes

  • Home
  • Drinks
  • Appetizers
  • Dinner
  • Dessert
  • About
  • Contact
  • Privacy Policy
DisclaimerTerms Of UseGDPR PolicyCookie Policy

Chloe

- 1.5 lbs boneless, skinless chicken thighs (or breasts) - 1/2 cup low sodium soy sauce - 1/4 cup honey - 1/4 cup rice vinegar - 2 tablespoons fresh ginger, grated - 2 tablespoons garlic, minced - 1 tablespoon sesame oil - 1 tablespoon cornstarch mixed with 2 tablespoons water - 1 tablespoon sesame seeds - 2 green onions, chopped - 1 cup broccoli florets (optional) The main ingredients bring the classic teriyaki taste. Chicken thighs or breasts work well. Soy sauce adds saltiness, while honey gives a touch of sweetness. Rice vinegar balances flavors with a bit of tang. Next, we have the additional ingredients. Fresh ginger and minced garlic add depth and warmth. Sesame oil brings a nutty taste that makes the dish shine. The cornstarch mixed with water is a simple trick to thicken the sauce at the end. Finally, don’t forget about the garnishes! Sesame seeds and green onions add a nice crunch and color. Broccoli florets are great too, adding fiber and nutrients. You can mix them in for a complete meal. This simple list of ingredients makes for a fun cooking experience. Enjoy your time in the kitchen! {{ingredient_image_1}} To begin, gather your ingredients. In a bowl, combine the following: - 1/2 cup low sodium soy sauce - 1/4 cup honey - 1/4 cup rice vinegar - 2 tablespoons grated fresh ginger - 2 tablespoons minced garlic - 1 tablespoon sesame oil Stir these ingredients well until they blend into a smooth mixture. This marinade gives your chicken that tasty teriyaki flavor. Now, take 1.5 pounds of boneless, skinless chicken thighs or breasts. Place them in the Instant Pot. Pour the marinade over the chicken. Make sure each piece is evenly coated. This step is key for flavor. Next, close the Instant Pot lid tightly. Set the pressure valve to the sealing position. Cook on manual high pressure for 10 minutes. This short cooking time ensures the chicken stays juicy and tender. Once the cooking time is done, perform a quick release of the pressure. Carefully open the lid when the valve drops. Remove the chicken and set it aside on a plate. Turn the Instant Pot to sauté mode. Now, stir in 1 tablespoon of cornstarch mixed with 2 tablespoons of water. Let the sauce bubble and thicken for about 2-3 minutes. Return the chicken to the pot, making sure it is coated in the thickened sauce. If you want, add 1 cup of broccoli florets now. Let them cook for 2 minutes with the heat. Your dish is almost ready! To avoid mistakes with your Instant Pot, follow these tips: - Always check the sealing ring. Ensure it’s clean and fitted well. - Don’t overfill the pot. Leave space for steam to build up. - Wait for a natural release if you want tender meat. Quick release can toughen it. Teriyaki sauce is all about balance. Here’s how to adjust it: - To make it sweeter, add more honey. Start with a teaspoon at a time. - If it’s too salty, add a splash of rice vinegar. This helps balance the flavors. - Taste the sauce before serving. Adjust to your liking for the best meal. To ensure your chicken is fully cooked, follow these tips: - Always use a meat thermometer. The chicken should reach 165°F (75°C). - Let the chicken marinate for at least 15 minutes. This helps the flavors soak in. - Serve with rice or noodles. Add some broccoli for extra veggies. Garnish with sesame seeds and green onions for a lovely finish. Pro Tips Marinade Time: For deeper flavor, let the chicken marinate in the sauce for at least 30 minutes before cooking, or overnight in the refrigerator if time allows. Use Fresh Ingredients: Fresh ginger and garlic will enhance the flavor profile significantly compared to powdered alternatives. Always opt for fresh when possible. Consistent Cooking: Ensure the chicken pieces are of uniform size to promote even cooking. This helps prevent some pieces from being overcooked while others are undercooked. Thickening Sauce: If you prefer a thicker sauce, allow it to simmer longer after adding the cornstarch slurry until you reach your desired consistency. {{image_2}} You can swap chicken for other proteins. Tofu works great for a plant-based meal. It absorbs the flavors well. Shrimp is another tasty option. Cook shrimp for a shorter time to keep them tender. Both choices add unique tastes to the dish. Adding vegetables boosts nutrition and flavor. Try bell peppers, snap peas, or carrots. They cook well in the Instant Pot. You can add broccoli like in the recipe. Just toss them in during the last minutes of cooking. This way, they stay crisp and colorful. You can change the teriyaki flavor with fruit juices. Pineapple juice adds sweetness and a tropical touch. Orange juice gives a zesty kick. Mix these juices with the soy sauce for fun twists. Experiment with your favorite flavors to make it your own! To keep your teriyaki chicken fresh, store it in an airtight container. Let it cool down first. Place it in the fridge within two hours of cooking. This helps keep bacteria away. Your leftover chicken will last for about three to four days in the fridge. If you want to enjoy it later, freezing is a great option. If you want to freeze your teriyaki chicken, make sure it is fully cooled. Place it in a freezer-safe bag. Squeeze out as much air as you can. This helps prevent freezer burn. You can freeze it for up to three months. When you’re ready to eat, thaw it overnight in the fridge. Reheat in the microwave or on the stove until hot. There are many fun ways to enjoy leftover teriyaki chicken. You can slice it and add it to a salad. It gives a nice flavor boost. You can also toss it into a stir-fry with veggies. If you want something easy, make a teriyaki chicken wrap with tortillas. Don’t forget to drizzle some extra sauce on top! Cooking teriyaki chicken in the Instant Pot takes about 30 minutes. This includes 10 minutes of cooking time under high pressure. You should also add time for the quick release of steam. It's a quick meal for busy days. Yes, you can use frozen chicken thighs or breasts. Just add a few extra minutes to the cooking time. I recommend cooking for 12 to 15 minutes if the chicken is frozen. This way, you still get tender and juicy chicken. You can serve this dish with many sides. Here are some great options: - Steamed rice - Quinoa - Stir-fried vegetables - Noodles - Salad with sesame dressing These sides will complement the sweet and savory flavors of the teriyaki chicken. This blog post covered how to make easy Instant Pot teriyaki chicken. We discussed the essential ingredients and step-by-step cooking tips. I shared variations for proteins and veggies along with storage methods for leftovers. Remember, you can adjust flavors to suit your taste. This dish is quick, tasty, and perfect for busy nights. Enjoy your cooking and share your results!

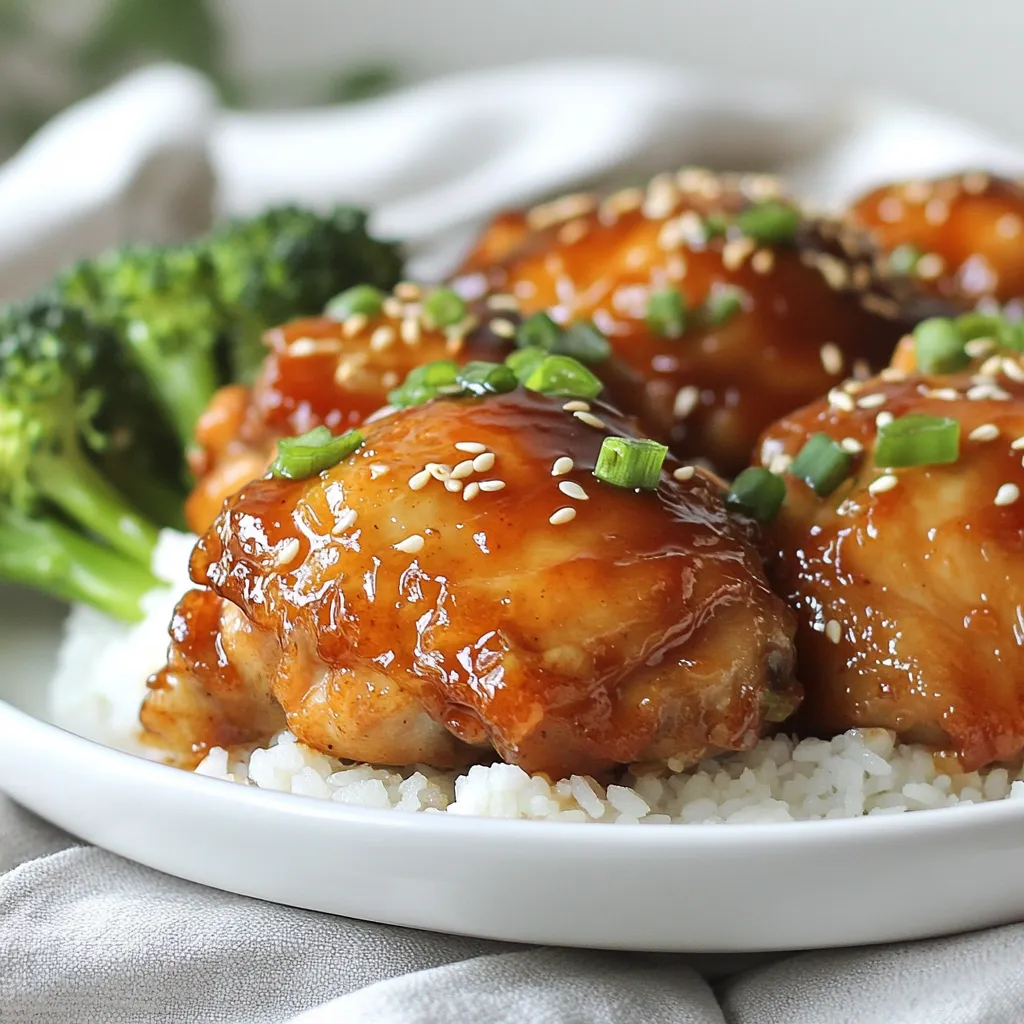
Instant Pot Teriyaki Chicken Simple and Quick Meal

Looking for a quick and tasty dinner idea? You’re in the right spot! My Instant Pot Teriyaki Chicken recipe combines

To make these No-Bake Cookie Butter Cheesecake Bars, you need the following ingredients: - 1 ½ cups graham cracker crumbs - ½ cup unsalted butter, melted - 1 cup cookie butter - 1 package (8 oz) cream cheese, softened - 1 cup powdered sugar - 1 teaspoon vanilla extract - 1 cup heavy cream - ½ cup crushed cookies (for topping, optional) These ingredients come together to create a rich and creamy dessert. The graham cracker crumbs form a crunchy base, while the cookie butter adds a sweet, spiced flavor. The cream cheese and heavy cream make the filling smooth and luscious. You can personalize the topping with crushed cookies for extra texture and sweetness. Each component plays a vital role in making these bars a delight for your taste buds. First, grab a medium bowl. Mix 1 ½ cups of graham cracker crumbs with ½ cup of melted butter. Stir until it looks like wet sand. Next, take an 8x8 inch baking dish and line it with parchment paper. Press the crumb mixture firmly into the bottom of the dish. Make sure it’s even. Now, chill the crust in the refrigerator while you make the cheesecake filling. This helps it firm up nicely. In a large bowl, combine 1 package of softened cream cheese, 1 cup of cookie butter, 1 cup of powdered sugar, and 1 teaspoon of vanilla extract. Beat this mixture using an electric mixer until it turns smooth and creamy. You want to ensure there are no lumps. This will create a rich and tasty filling. Now, take another bowl and pour in 1 cup of heavy cream. Use a mixer to whip it until stiff peaks form. This will take a few minutes. Once done, gently fold the whipped cream into the cheesecake mixture. Be careful not to deflate it. This step adds lightness to your cheesecake bars. Pour the cheesecake mixture over the chilled crust. Spread it out evenly with a spatula. For a fun touch, sprinkle ½ cup of crushed cookies on top. This adds a great crunch. Cover the dish and place it in the refrigerator. Let it chill for at least 4 hours, or until it sets. Once it’s firm, you can lift the bars out using the parchment paper. Cut them into squares, and they’re ready to enjoy! To get the best cheesecake bars, mix until smooth. You want no lumps in the filling. When the cream cheese, cookie butter, and sugar blend well, you know it’s ready. This smoothness makes each bite creamy. The chilling time matters too. Let the cheesecake set for at least 4 hours. This helps the bars hold their shape when cut. Serving your cheesecake bars nicely makes them even more fun! Use a white platter to show off the colors. Drizzle some cookie butter on top for extra flavor. You can also add whipped cream on the side. A sprinkle of crushed cookies looks great too. These small touches make your dessert stand out. You don’t need fancy tools for this recipe. Here’s what I suggest: - A medium bowl for mixing the crust - A large bowl for the filling - A hand mixer or stand mixer for whipping - An 8x8 inch square baking dish - Parchment paper to line the dish These tools make the process easy and fun. With the right items, you’ll enjoy making this treat! {{image_2}} You can make these cheesecake bars even more fun by adding flavors. Try mixing in chocolate or peanut butter for a twist. Just blend in ½ cup of your choice when you mix the cream cheese and cookie butter. This step adds depth and richness to the bars. You can also play with different cookie flavors. Instead of cookie butter, use flavors like gingerbread or even oreo. These changes let you create unique bars that suit your taste. If you need a gluten-free option, swap the graham cracker crumbs for almond flour or gluten-free cookies. Mix these with melted butter just like the original recipe. This keeps the crust tasty and safe for those with gluten issues. For a vegan version, use vegan cream cheese and coconut whipped cream. Replace the butter with coconut oil, and you will have a delicious dairy-free treat. Just follow the same steps, and you will get a creamy filling everyone can enjoy. To keep your cheesecake bars fresh, refrigerate them right away. Use an airtight container to prevent drying. You can also cover the dish with plastic wrap if you don’t have a container. Make sure to keep them chilled at all times. They taste best within a week, but they can last up to ten days. Freezing these cheesecake bars is easy and helps you save some for later. First, cut the bars into squares. Then, wrap each piece in plastic wrap. Place the wrapped bars in a freezer-safe bag or container. This helps keep the flavor and texture. When you're ready to enjoy them, thaw the bars in the fridge overnight. Freezing may change the texture slightly, but they will still taste delicious! Yes, you can make these cheesecake bars ahead of time. I recommend preparing them at least one day before serving. This wait allows the flavors to blend well. Plus, the bars set perfectly in the fridge. Just cover them with plastic wrap to keep them fresh. If you want a change from cream cheese, you have some options. You can use Greek yogurt for a lighter choice. Mascarpone cheese also works well and adds a rich flavor. For a dairy-free option, try a vegan cream cheese substitute. Each of these swaps will give you a tasty result. These cheesecake bars can last in the fridge for about five days. Make sure to store them in an airtight container. This keeps them fresh and tasty. If you notice any changes in smell or texture, it's best to discard them. Enjoy them while they're at their best! This no-bake cheesecake is easy and fun to make. You learned how to create a perfect crust, mix a creamy filling, and assemble everything. You also discovered tips for presentation and variations to try. Lastly, you know how to store leftovers and keep them fresh. I encourage you to explore your creativity. Enjoy making these cheesecake bars as a delicious treat for friends and family!

No-Bake Cookie Butter Cheesecake Bars Delight

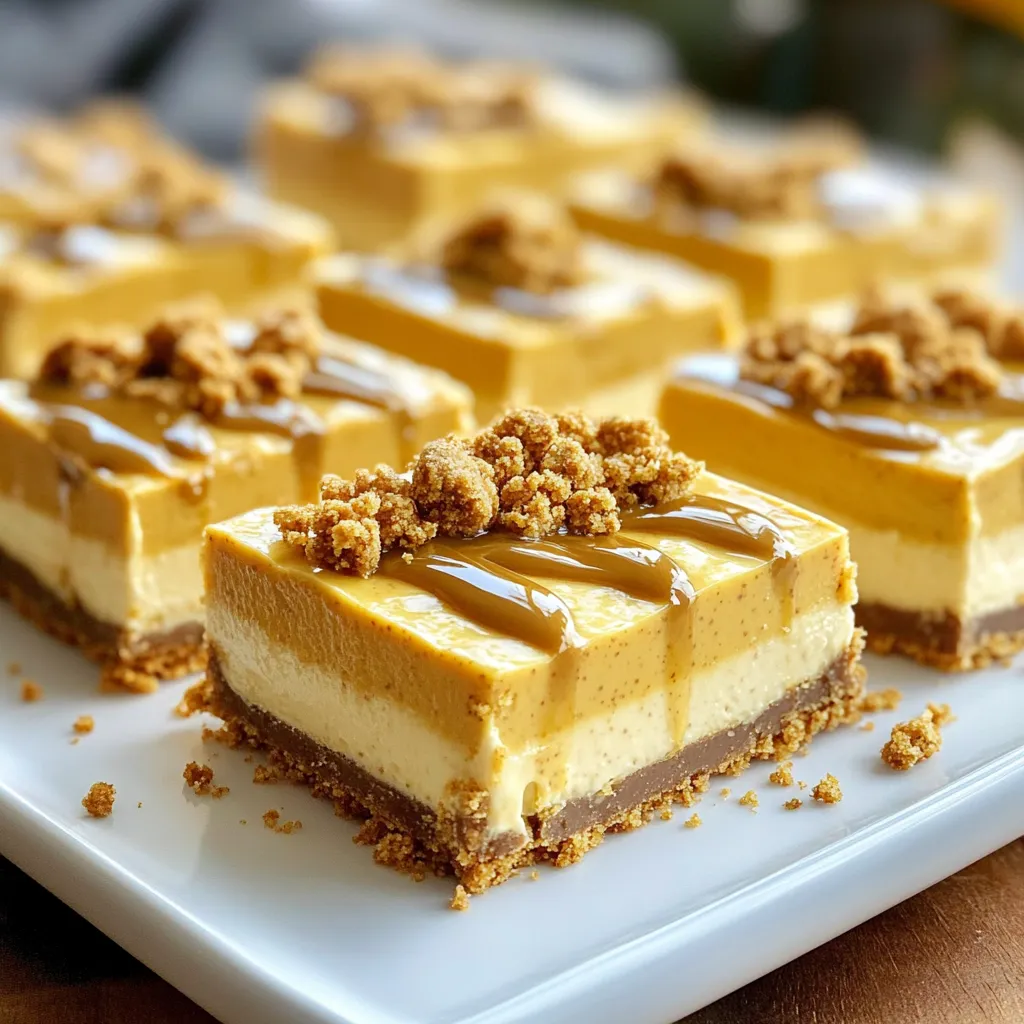
Craving something sweet and easy? You’re in for a treat with these No-Bake Cookie Butter Cheesecake Bars! With a buttery

- 300g beef sirloin, thinly sliced - 200g egg noodles - 1/4 cup honey - 3 tablespoons soy sauce - 3 cloves garlic, minced - 1 tablespoon ginger, grated - Salt and pepper to taste - 1 bell pepper, thinly sliced - 1 cup broccoli florets - 2 green onions, chopped - Sesame seeds for garnish Gathering the right ingredients is key. For this dish, start with 300g of beef sirloin. Slice it thinly for quick cooking. You will also need 200g of egg noodles. They add a nice texture and soak up the sauce well. Next, reach for 1/4 cup of honey. It gives a sweet touch that balances the savory soy sauce. Speaking of soy sauce, grab 3 tablespoons. This will deepen the flavor of your dish. Now for the aromatics. You need 3 cloves of garlic, minced, and 1 tablespoon of grated ginger. These will add a fragrant punch. Don't forget to season with salt and pepper to your taste. For the veggies, use 1 bell pepper, thinly sliced. You can choose any color you like. Add 1 cup of broccoli florets for a healthy crunch. Lastly, have 2 green onions, chopped, ready for garnish, along with sesame seeds. These ingredients come together to make a delightful meal. The balance of sweet and savory flavors will impress anyone. To cook the egg noodles, start by boiling water in a large pot. Add a pinch of salt to the water. Once it boils, add the noodles and stir. Cook them for about 4-5 minutes until they are al dente. Drain the noodles and set them aside. In a small bowl, mix honey, soy sauce, minced garlic, and grated ginger. Whisk them together until combined well. This sauce will bring sweet and savory notes to the dish. Set the sauce aside as you prepare the rest of the meal. Use a large skillet or wok for this part. Heat vegetable oil over medium-high heat. Add the thinly sliced beef, seasoning it with salt and pepper. Stir-fry for 2-3 minutes until the beef is browned. Next, add sliced bell pepper and broccoli florets. Stir-fry these for 3-4 minutes until the veggies are tender but still crisp. Pour the honey garlic sauce over the beef and vegetable mixture. Stir well to coat everything in the sauce. Cook for a couple more minutes until the sauce thickens slightly. Finally, add the cooked egg noodles to the skillet. Toss everything together until the noodles are hot and well mixed with the sauce. To stir-fry beef well, start with a hot pan. Heat your vegetable oil until it shimmers. Add beef slices in a single layer. This helps them brown evenly. Cook for just 2-3 minutes. Do not overcrowd the pan. If needed, cook in batches. This will keep the beef tender and juicy. You can add extra seasonings for more depth. Try a splash of rice vinegar or a pinch of red pepper flakes. These additions can boost the dish’s taste. Fresh herbs like cilantro or basil also work well. For a nice crunch, add crushed peanuts or cashews as a garnish. They bring a delightful texture to the meal. Timing is key for a smooth cooking process. While your noodles cook, prepare the sauce. This saves time and keeps everything fresh. Once your beef is done, add veggies right away. Stir-fry until they are tender-crisp. This keeps them bright and flavorful. Work efficiently to have all elements ready at the same time. This way, your meal will be hot and delicious when served. {{image_2}} You can switch up the beef for other proteins. Chicken works well and cooks quickly. Tofu is a great option for a meat-free meal. You can slice it and stir-fry just like beef. For veggies, feel free to mix it up. Carrots add sweetness and color. Snap peas give a nice crunch and fresh taste. Want some heat? Add chili flakes or a dash of sriracha to the sauce. This will wake up the dish and add a kick. If you prefer it sweeter, you can use more honey. Just taste as you go to find your perfect balance. For a less sweet version, cut back on the honey. If you need a gluten-free option, swap out egg noodles for rice noodles. They cook fast and have a great texture. Use tamari instead of soy sauce for a gluten-free soy flavor. These small changes keep the dish tasty while meeting your dietary needs. To keep honey garlic beef noodles fresh, store them in an airtight container. This helps prevent the noodles from drying out. Make sure to cool the dish to room temperature first. Once cooled, you can store it in the fridge for up to three days. If you want them to last longer, consider freezing them. When reheating, I recommend using a skillet. Heat it on medium-low and add a splash of water. This helps keep the noodles moist. Stir often to ensure even heating. You can also use a microwave, but cover the dish with a damp paper towel. This will trap steam and keep the noodles soft. To freeze honey garlic beef noodles, portion them into smaller containers. This makes it easy to thaw only what you need. Make sure to label each container with the date. To thaw, place the container in the fridge overnight. You can reheat it directly from frozen, but it will take longer to warm up. Making Honey Garlic Beef Noodles is quick. You need about 10 minutes to prep. Cooking takes around 15 minutes. In total, it takes just 25 minutes to make this dish. Yes, you can use different noodles! Try rice noodles for a gluten-free option. You can also use udon or soba noodles for a unique twist. Each type will bring its own flavor and texture. To complement your dish, serve a simple green salad. You can also add spring rolls for a crunchy side. Another great option is steamed dumplings, which pair well with the sweet sauce. In this blog post, we explored how to create delicious Honey Garlic Beef Noodles. We covered the main ingredients, cooking steps, and provided tips for perfecting your dish. Remember to adjust flavors and try new ingredients to keep it fresh. Store any leftovers correctly and reheat them well. Cooking should be fun and tasty. Enjoy sharing this meal with family and friends for a satisfying experience. You have the tools now to make a wonderful dish!

Honey Garlic Beef Noodles Flavorful and Simple Meal

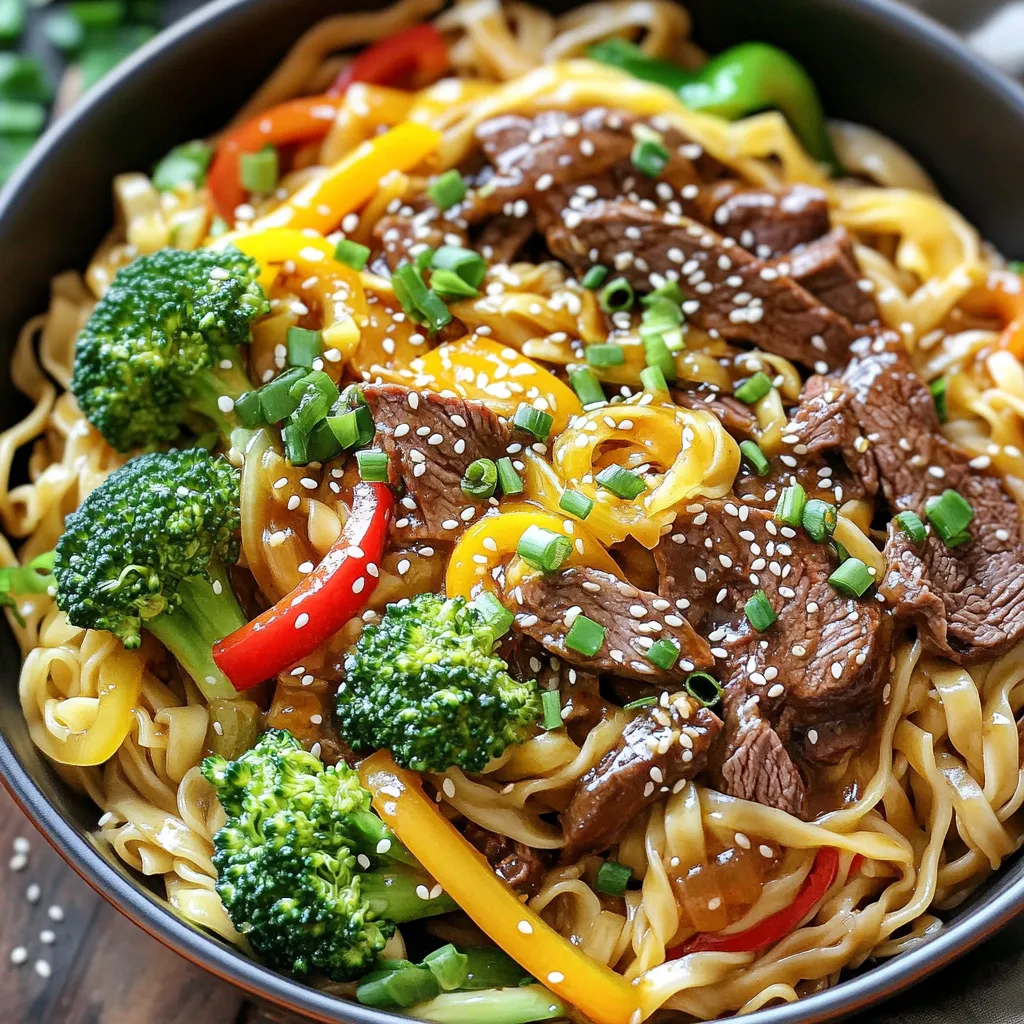
Are you ready to dive into a delicious meal? Honey Garlic Beef Noodles are simple to make and packed with

- 2 boneless, skinless chicken breasts - 1 cup roasted red peppers (jarred or homemade) - 2 tablespoons olive oil - 1 teaspoon garlic powder - 1 teaspoon onion powder - Salt and pepper to taste - 8 ounces pasta (penne or your choice) - 1 cup heavy cream or coconut cream for a lighter option - ½ cup grated Parmesan cheese - Fresh basil leaves for garnish You can use jarred roasted red peppers for quick prep. If you prefer, make your own by roasting fresh peppers. Use boneless chicken thighs for more flavor. If you want to skip dairy, coconut cream works well instead of heavy cream. For a lighter dish, try reducing the cheese or using nutritional yeast. This meal serves four and provides a balanced mix of protein, carbs, and fats. Each serving has about 500 calories. The chicken adds lean protein, while the pasta gives you carbs for energy. The cream and cheese give richness and flavor. Fresh basil adds vitamins and a fresh taste. Start by seasoning the chicken breasts. Use garlic powder, onion powder, salt, and pepper. Rub the spices well on both sides. This makes the chicken tasty. Next, bring a pot of salted water to a boil. Add your pasta and cook it until al dente. This usually takes about 8 to 10 minutes. Remember to reserve half a cup of pasta water before draining the pasta. Set the pasta aside after draining. In the same skillet you used for the chicken, heat one tablespoon of olive oil. Add your roasted red peppers to the skillet. Warm them for about two minutes. This helps release their flavor. Transfer the peppers to a blender. Add the heavy cream and blend until you have a smooth sauce. For a little heat, add red pepper flakes if you like. Return the blended sauce to the skillet over medium heat. Add the cooked pasta and sliced chicken. Stir everything well to combine. If the sauce seems too thick, add some reserved pasta water. This helps make it creamy. Stir in the grated Parmesan cheese until it melts. Taste and adjust the seasoning as needed. Plate your pasta and garnish it with fresh basil leaves. Enjoy your tasty dish! To cook chicken well, start with even pieces. This helps them cook evenly. Season the chicken breasts with garlic powder, onion powder, salt, and pepper. Heat olive oil in a skillet over medium heat. Add the chicken and cook for 7-8 minutes on each side. Look for a golden color. Use a meat thermometer; it should read 165°F. Let the chicken rest before slicing. This keeps it juicy. For this dish, penne works great. Its shape holds sauce well. You can also use fusilli or farfalle if you prefer. Choose a pasta that you like. Always cook it until al dente. This gives a nice bite. Remember to save some pasta water. It helps to adjust the sauce later. Seasoning is key to a tasty meal. Besides the garlic and onion powder, consider adding fresh herbs. Basil and parsley add freshness. A pinch of red pepper flakes gives heat. Taste as you go. Adjust salt and pepper to your liking. You can even add a splash of lemon juice for brightness. {{image_2}} You can easily make this dish vegetarian. Just skip the chicken. Use the same spices and pasta. The roasted red peppers bring a rich flavor. Add the creamy sauce, and you have a tasty meal. This version is just as satisfying! You can boost nutrition by adding veggies. Spinach works great and adds color. Just toss it in the pan with the sauce until it wilts. Zucchini is another good choice. Slice it thin and sauté it with the chicken. This adds texture and flavor to your dish. If you need gluten-free options, many brands make great pasta. Look for rice or corn-based pasta. They cook well and taste good. Just follow the cooking instructions on the package. Your dish will still be creamy and delicious! To store leftovers, let the pasta cool to room temperature. Place it in an airtight container. Be sure to keep the chicken and sauce mixed with the pasta. This helps keep the flavors fresh. You can store it in the fridge for up to three days. When you are ready to eat, reheat the pasta on the stove. Add a splash of water or cream to help it heat evenly. Stir it often over low heat until warm. You can also microwave it in a safe dish. Heat it in 30-second bursts, stirring in between. If you want to freeze the dish, first cool it completely. Transfer it to a freezer-safe container. Be sure to leave some space at the top for expansion. It can be frozen for up to three months. To use, thaw it overnight in the fridge before reheating. Yes, you can use store-bought roasted red peppers. They save time and taste great. Look for those packed in water or oil for the best flavor. You can use coconut cream for a lighter option. You might also try Greek yogurt or a mix of milk and butter. Each gives a unique taste and texture. To add some heat, try red pepper flakes or diced jalapeños. You can also use a spicy sauce like Sriracha. Start with a little, then adjust to your taste. Yes, you can prepare the chicken and sauce in advance. Store them in the fridge for up to two days. Cook the pasta fresh before serving for the best texture. This post covered all you need for a tasty meal. We discussed key ingredients, cooking steps, and tips. I offered ways to make the dish your own and how to store it. Remember, you can swap ingredients based on your needs. Cooking should be fun, so feel free to experiment. Enjoy making this dish, and don’t hesitate to try new flavors!

Roasted Red Pepper Chicken Pasta Quick and Tasty Meal

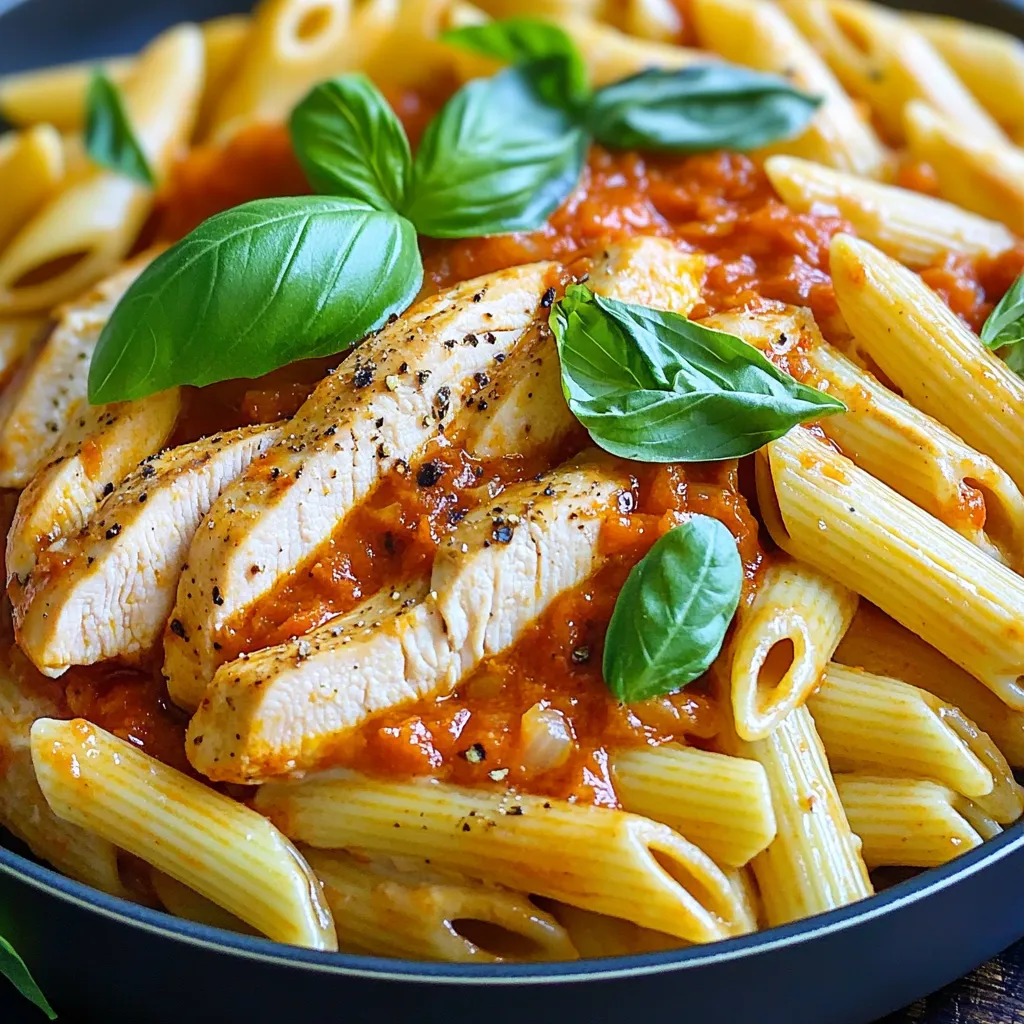
Are you ready to whip up a quick and tasty dinner? This Roasted Red Pepper Chicken Pasta is your go-to

To make Minute Creamy Cajun Shrimp Tacos, you need these main items: - 1 lb shrimp, peeled and deveined - 1 tablespoon Cajun seasoning - 2 tablespoons olive oil - 1/2 cup sour cream - 2 tablespoons mayonnaise - 1 tablespoon lime juice - 1 teaspoon garlic powder - Salt and pepper to taste - 8 small corn or flour tortillas You can add more flavor and texture with these optional items: - Diced avocado for creaminess - Shredded cheese for a cheesy twist - Sliced jalapeños for extra heat - Corn for a sweet crunch Garnishes make your tacos pop. Try these: - 1 cup shredded lettuce - 1/2 cup diced tomatoes - 1/4 cup sliced green onions - Fresh cilantro for a fresh touch These ingredients and add-ins boost flavor and make your tacos fun to eat! Enjoy mixing and matching to find your favorites! Start by tossing 1 pound of peeled shrimp in Cajun seasoning. Make sure each piece gets a good coat. This step packs the shrimp with flavor. Next, heat 2 tablespoons of olive oil in a large skillet over medium-high heat. Once the oil is hot, add the shrimp. Cook for about 2-3 minutes on each side. The shrimp should turn pink and opaque. When done, remove the shrimp from the heat and set them aside. In a separate bowl, combine 1/2 cup of sour cream and 2 tablespoons of mayonnaise. Add 1 tablespoon of lime juice and 1 teaspoon of garlic powder. Sprinkle in some salt and pepper to taste. Whisk everything together until the sauce is smooth. This creamy sauce adds richness and balances the spice from the shrimp. Warm 8 small corn or flour tortillas on a skillet or in the microwave. This makes them soft and easy to fold. Place a scoop of the cooked shrimp onto each tortilla. Drizzle the creamy sauce over the shrimp. Top with a handful of shredded lettuce, some diced tomatoes, and sliced green onions. Finish by garnishing with fresh cilantro. Now, your tacos are ready to enjoy! When you buy shrimp, look for bright shells. Fresh shrimp should smell like the ocean, not fishy. Check for firm texture and no black spots. If you can, buy shrimp that is wild-caught. This often means better flavor and quality. I prefer pan-searing shrimp for this recipe. It cooks quickly and gives a nice crust. You can also grill shrimp for a smoky taste. Boiling is fine but may be less tasty. Always cook shrimp until they are pink and opaque. This means they are done! To boost flavor, add garlic or lime juice when cooking shrimp. A squeeze of lime on the tacos makes them bright and fresh. You can also sprinkle some extra Cajun seasoning for more heat. Fresh herbs like cilantro add a nice touch, too! {{image_2}} You can swap shrimp for other proteins. Chicken works well and cooks fast. Just cut chicken into small pieces. Season it with Cajun spice like you do with shrimp. Cook until it’s no longer pink. Fish is another great option. Use firm fish like tilapia or cod. They flake nicely and soak up flavor. If you want a veggie taco, try using mushrooms. They have a meaty texture. Simply slice them and sauté with Cajun spices. You can also use tofu. Press it to get rid of water, then cube it. Toss it in the same seasoning mix and cook until golden. Another tasty choice is black beans. They add protein and fiber. Mix them with some corn for extra crunch. Tortillas can change the taco vibe. Corn tortillas are classic and gluten-free. They add a nice corn flavor. Flour tortillas are soft and chewy. They hold more filling, making them great for hearty tacos. Try lettuce wraps for a low-carb option. They are fresh and crisp. You can even use pita bread for a fun twist. Each type brings its own taste and texture. To store your leftover tacos, place them in an airtight container. Cover the tacos tightly. This keeps the shrimp fresh and the tortillas soft. You can keep them in the fridge for up to two days. You can freeze the shrimp and sauce separately. Wrap the shrimp in plastic wrap or a freezer bag. Be sure to remove as much air as possible. The creamy sauce can go in a sealed container. Use within three months for the best taste. Do not freeze the tortillas. They do not hold up well in the freezer. When you are ready to eat, thaw the shrimp and sauce in the fridge overnight. Heat the shrimp in a pan over medium heat. Stir until warm, about five minutes. You can reheat the sauce in the microwave for about 30 seconds. Warm the tortillas on a skillet until soft. Then, assemble your tacos again for a tasty meal. Yes, you can make these tacos ahead of time. Prepare the shrimp and creamy sauce in advance. Store them in separate containers in the fridge. You can warm the tortillas just before serving. This way, you can enjoy fresh, tasty tacos without much fuss. Cajun seasoning has a mild to moderate heat. It adds flavor without overwhelming your taste buds. The spice level can vary by brand. If you are sensitive to spice, use less seasoning at first. You can always add more if you want extra heat. If you need a sour cream substitute, try Greek yogurt. It has a similar texture and tangy flavor. You can also use cream cheese or even avocado for a creamy touch. Each option gives your tacos a unique twist while keeping them rich and delicious. In this blog post, I covered how to make delicious shrimp tacos. We talked about the main ingredients and tasty garnishes. Then, I shared easy steps to prepare the shrimp and sauce. I also gave tips for choosing fresh shrimp and cooking them well. You learned about different protein options and how to store leftovers. These tacos are fun to make and enjoy. Try exploring your own variations for added fun!

Minute Creamy Cajun Shrimp Tacos Quick and Tasty

Craving a quick and tasty meal? You’ve come to the right place! These Minute Creamy Cajun Shrimp Tacos are easy

- 1 ¾ cups all-purpose flour - 1 ½ teaspoons baking powder - ½ teaspoon baking soda - ¼ teaspoon salt - ½ cup unsalted butter, softened - 1 cup granulated sugar - 2 large eggs - 1 teaspoon vanilla extract - 1 tablespoon lemon zest - ¼ cup fresh lemon juice - ½ cup buttermilk - 1 cup fresh raspberries - ¼ cup powdered sugar (for glaze) - 1 tablespoon lemon juice (for glaze) To make this lemon raspberry loaf cake, you need simple ingredients. Each plays a big role. The flour gives the cake structure. The baking powder and baking soda help it rise. Salt adds flavor and balances sweetness. Butter makes the cake rich and moist. Sugar sweetens the cake and helps it brown. Eggs add moisture and help bind everything together. They also give the cake a nice texture. Vanilla extract adds warmth. Lemon zest and juice bring bright, fresh flavors. Buttermilk makes the cake tender and adds a slight tang. Raspberries add a burst of flavor. They make each slice special. For the glaze, powdered sugar and lemon juice create a sweet, tart finish. Gather these ingredients, and you are ready to bake! - Preheat the Oven: Start by preheating your oven to 350°F (175°C). Grease a 9x5 inch loaf pan or line it with parchment paper. - Mix Dry Ingredients: In a medium bowl, whisk together 1 ¾ cups of all-purpose flour, 1 ½ teaspoons of baking powder, ½ teaspoon of baking soda, and ¼ teaspoon of salt. This mix is key for the cake’s rise. - Cream Butter and Sugar: In a large bowl, use an electric mixer to cream together ½ cup of softened unsalted butter and 1 cup of granulated sugar. Mix until it looks light and fluffy. This step takes about 3 to 4 minutes. - Add Eggs and Flavorings: Beat in 2 large eggs, one at a time. Make sure each egg mixes in fully. Then, add 1 teaspoon of vanilla extract, 1 tablespoon of lemon zest, and ¼ cup of fresh lemon juice. Mix until everything looks smooth. - Combine Wet and Dry Mixtures: Gradually add your dry mixture to the wet ingredients. Alternate this with ½ cup of buttermilk. Start and end with the dry mix. Mix just until combined; overmixing can make the cake tough. - Fold in Raspberries: Gently fold in 1 cup of fresh raspberries. Be careful not to crush them. They add a nice burst of flavor. - Bake Loaf: Pour your batter into the prepared loaf pan. Smooth the top with a spatula. Bake it for 55-65 minutes. Check if it’s done by inserting a toothpick in the center. It should come out clean. - Cool the Cake: Once baked, let the loaf cool in the pan for 10 minutes. Then transfer it to a wire rack to cool completely. - Make the Glaze: In a small bowl, whisk together ¼ cup of powdered sugar and 1 tablespoon of lemon juice. Make sure it’s smooth. - Serving Suggestions: Once cooled, slice the cake and drizzle the glaze over each slice. Enjoy its zesty flavor with a cup of tea or coffee! Importance of Room Temperature Ingredients Using room temperature ingredients is key for a fluffy loaf. Cold butter or eggs can make the batter dense. Let your butter and eggs sit out for about 30 minutes before you start. This helps them blend evenly. Avoiding Overmixing Mix just until combined. Overmixing can lead to a tough cake. When you fold in the raspberries, do it gently. You want to keep them whole for bursts of flavor. Checking Cake for Doneness To check if your cake is done, insert a toothpick into the center. It should come out clean or with a few crumbs. If it has wet batter, bake it a bit longer. Keep an eye on the cake as it bakes. Pairing with Beverages This loaf pairs well with tea or coffee. The tartness of the lemon and raspberries matches nicely with hot drinks. You can also serve it with a scoop of vanilla ice cream for a sweet treat. Creative Serving Ideas Serve slices with a dusting of powdered sugar. Add a dollop of whipped cream or yogurt on top. You can also create a fruit salad on the side for extra color and flavor. Decorating the Cake A simple glaze adds shine and sweetness. Drizzle the glaze over the cooled loaf before serving. You can also add lemon zest on top for a pop of color. Using Fresh Raspberries Garnish the cake with fresh raspberries. Scatter them around the base or place a few on top. This not only looks pretty but also enhances the flavor. Fresh fruit always makes a dish more appealing. {{image_2}} You can switch out buttermilk for Greek yogurt. Greek yogurt will still keep the cake moist. It adds a nice tang to the flavor. If you want to change the berries, you can use blueberries or blackberries. They will give a different taste and color. Just make sure to adjust the amount based on the berry size. Adding nuts or seeds can enhance the texture. Chopped walnuts or almonds bring a nice crunch. You can also sprinkle them on top before baking. If you want to try something new, infuse flavors like lavender. Just add a small amount of dried lavender to the batter. It will add a floral note that pairs well with lemon. For a gluten-free option, use a gluten-free flour blend. This will work well in the same amount as regular flour. Just make sure it contains a binding agent, like xanthan gum. If you need a vegan adaptation, replace eggs with flax eggs. Mix one tablespoon of ground flaxseed with three tablespoons of water for each egg. Use plant-based butter and a non-dairy milk instead of buttermilk. To keep your lemon raspberry loaf cake fresh, wrap it in plastic wrap or foil. Place it in an airtight container. This helps keep the cake moist and tasty. You can store the cake at room temperature for up to three days. If you want it to last longer, the fridge is a good choice. In the fridge, it can last up to a week. If you want to freeze the cake, first let it cool completely. Then, wrap it tightly in plastic wrap. After that, place it in a freezer-safe bag or container. This will keep it fresh for up to three months. When you're ready to enjoy it, take it out and let it thaw at room temperature for several hours. You can also speed up the thawing by placing it in the fridge overnight. To maintain the flavor and texture of your loaf cake, store it properly. Keep it away from heat and moisture. Slicing the cake can also help with freshness. Just wrap each slice in plastic wrap. This way, you can enjoy a piece whenever you want without losing quality. For an extra burst of flavor, drizzle on more glaze just before serving. How to ensure the cake is moist? To keep the cake moist, use fresh ingredients. Buttermilk adds a rich texture. Don't overbake. Check with a toothpick. If it comes out clean, it's done. Can I use frozen raspberries? Yes, you can use frozen raspberries. Just thaw and drain them first. This helps prevent extra moisture in your batter. How long does the cake last at room temperature? The cake stays fresh for about 3 days at room temperature. Store it in an airtight container to keep it soft. Can I reduce the sugar content? You can lower the sugar by up to ¼ cup. This will still keep the flavor nice. Just remember, less sugar may change the cake's texture. What if the cake sinks in the middle? If the cake sinks, it might be underbaked. Make sure to follow the baking time. Also, avoid opening the oven too often while baking. What to do if the cake burns? If the cake burns, check your oven temperature. You can cover it with foil to stop further burning. Slice off the burnt part if needed. Why did my cake not rise? A cake may not rise if the baking powder is old. Make sure it’s fresh. Also, don’t overmix the batter. This can prevent proper rising. This blog post covers a delightful raspberry lemon loaf cake, from ingredients to storage tips. I shared how to mix, bake, and glaze your cake perfectly. Remember, using room temperature ingredients and avoiding overmixing can make a big difference. Don’t forget to experiment with flavors and storage methods for best results. Each step can lead to a tasty treat you’ll love. Embrace these tips and enjoy baking a delicious loaf that impresses friends and family. Your newfound skills will shine through in every bite. Happy baking!

Lemon Raspberry Loaf Cake Delightfully Simple Recipe

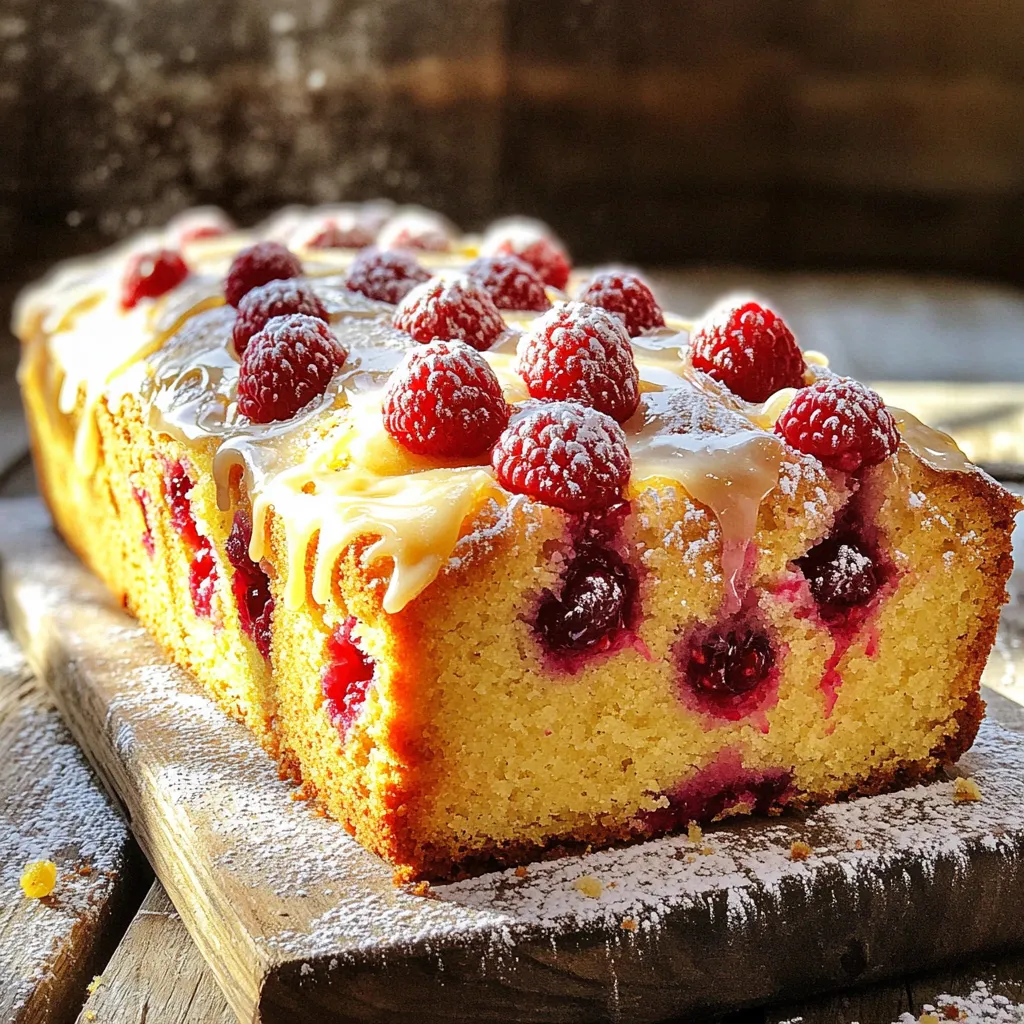
If you crave a tasty treat that’s both zesty and sweet, you’ll love this Lemon Raspberry Loaf Cake. With a

- 2 lbs beef brisket - 1 cup barbecue sauce - 1 large onion, sliced - 4 cloves garlic, minced - 1 tablespoon smoked paprika - 1 teaspoon cumin - 1 teaspoon black pepper - 1 teaspoon salt - 1 tablespoon brown sugar - 1 cup beef broth - 12 slider buns - Coleslaw (optional topping) - Pickles (for serving) The main star here is the beef brisket. Choose a good quality cut. It should weigh about 2 lbs. This will give you tender, juicy meat. The barbecue sauce you pick adds a lot of flavor. I suggest using your favorite brand. Next, slice one large onion and mince four garlic cloves. These will create a sweet base that enhances the brisket. For seasoning, you’ll need smoked paprika, cumin, black pepper, salt, and brown sugar. Each spice brings its own charm. Smoked paprika gives a lovely depth, while cumin adds warmth. The black pepper and salt balance the dish. The brown sugar brings a hint of sweetness. Lastly, you will need 1 cup of beef broth. This keeps the brisket moist while cooking. When it comes to assembling the sliders, grab 12 slider buns. You can choose any type you like. Coleslaw is optional but adds a nice crunch. Pickles are also a great addition for a tangy bite. These ingredients come together to create a delicious meal you will love to share. Start with a clean brisket. Pat it dry with paper towels. This helps the seasonings stick. Next, season the brisket with salt, black pepper, smoked paprika, cumin, and brown sugar. Rub the seasonings into the meat well. This step adds flavor. You can sear the brisket for extra taste. Heat a large skillet over medium-high heat. Place the brisket in the skillet and sear it for about 3-4 minutes on each side. Look for a nice brown color. This searing is optional but gives great flavor. Now, transfer the brisket to the slow cooker. In the same skillet, add sliced onion and minced garlic. Sauté them for 2-3 minutes until they smell great. Pour in beef broth and scrape any brown bits from the skillet. This adds depth to the dish. Mix in barbecue sauce and stir well. Pour this onion and BBQ sauce mixture over the brisket. Cover the slow cooker. Cook on low for 8 hours or on high for 4 hours. The brisket should be tender and easy to shred when done. Once cooked, take the brisket out of the slow cooker. Let it rest for 10-15 minutes. This helps keep the juices in. Use two forks to shred the brisket. It will fall apart easily. Stir the shredded brisket back into the sauce in the slow cooker. Make sure it is fully coated. To assemble the sliders, take each slider bun. Place a scoop of shredded brisket on the bottom half. Add coleslaw and pickles if you like. Close the sliders with the top halves of the buns. Serve them warm for the best taste. Searing the brisket adds a nice crust. It locks in juices and gives more flavor. When you sear, you create a Maillard reaction. This reaction makes the meat taste richer and deeper. Choosing the best barbecue sauce is key. Look for a sauce you love. Sweet, tangy, or smoky—pick what excites your taste buds. You can even mix sauces for a unique flavor. For different brisket sizes, adjust cooking time. A small brisket (1-1.5 lbs) needs about 6 hours on low. A larger one (3-4 lbs) may take up to 10 hours. Always check for tenderness. To check brisket tenderness, use a fork. If it pulls apart easily, it’s ready. If not, cook longer and check again. Pair the sliders with sides like chips or fries. These crunchy sides balance the soft texture of the sliders. You can also serve with a fresh salad for a lighter option. For presentation, arrange sliders on a large platter. Drizzle some extra BBQ sauce on top. This adds a nice touch and makes them look appealing. You can also add fresh herbs for color. {{image_2}} You can change up the sauce for your BBQ brisket sliders. Different sauces bring unique flavors. You might try a tangy mustard sauce or a sweet honey sauce. Each sauce gives a new twist to your meal. For seasonings, think about adding a spicy kick. You can use cayenne pepper or chili powder for heat. If you like sweetness, try a mix of brown sugar and cinnamon. These simple swaps can make this dish your own. The type of bun you use can also change your sliders. Gluten-free buns are great for those with allergies. Whole wheat buns add a touch of healthiness. You can even try pretzel buns for a fun twist! Toppings can take your sliders to the next level. Try adding jalapeños for spice. You might also like avocado slices or fried onions for extra flavor. Coleslaw adds crunch and freshness too. Mix and match to find your favorite combo! If you want to speed things up, use an Instant Pot. It cooks the brisket quickly while still keeping it tender. Just follow the same steps but set it to pressure cook. Oven braising is another option. You can cook the brisket covered in a roasting pan. Set the oven to 300°F and cook for about 3-4 hours. This method also gives great results and a delicious flavor. Each method and ingredient choice offers a chance to explore new tastes. Enjoy your cooking adventure! To keep your brisket fresh, place it in an airtight container. You want to avoid air exposure, which can cause spoilage. Store your brisket in the fridge right after it cools down. Leftovers can last 3 to 4 days. Always check for signs of spoilage before using. Freezing brisket is easy! First, let it cool fully. Then, slice or shred it for easier use later. Wrap it tightly in plastic wrap, or use a freezer bag. Make sure to remove all air to prevent freezer burn. BBQ brisket can last up to 3 months in the freezer. When you want to use it, thaw it overnight in the fridge. To reheat brisket without drying it out, use the oven or stovetop. For the oven, preheat to 250°F. Wrap the brisket in foil to keep it moist. Heat for about 30-40 minutes until warm. On the stovetop, add some BBQ sauce in a pan and stir in the brisket. Cook over low heat until hot. Serve your reheated sliders with fresh coleslaw and pickles. This adds crunch and flavor! You can tell the brisket is done when it feels very tender. The meat should pull apart easily with a fork. Check the temperature; it should reach at least 195°F for best results. Another sign is the juices; they should run clear when you poke it. If you see pink juices, it needs more time. Yes, you can make this recipe ahead of time. Prepare the brisket as per the recipe, then store it in the fridge after cooking. Let it cool before placing it in an airtight container. This way, you can enjoy it later. Reheat it in the slow cooker or on the stove. Just add a splash of beef broth to keep it moist. Pair your sliders with delicious sides like coleslaw, potato chips, or fries. These add crunch and balance to the meal. For drinks, try iced tea or lemonade for a refreshing touch. You can also serve pickles on the side to enhance flavors. You now have the tools to make delicious BBQ brisket sliders. We covered the key ingredients, like brisket, spices, and buns. You learned how to prepare, cook, and assemble your sliders. Remember the tips for enhancing flavor and adjusting cooking times. Try out different sauces and toppings to make it your own. Store leftovers properly and enjoy them later. With these steps, you can impress your family and friends. Get grilling and savor the tasty rewards!

Slow Cooker BBQ Brisket Sliders Flavorful Delight

Craving a melt-in-your-mouth treat? Look no further. These Slow Cooker BBQ Brisket Sliders are your answer! With tender brisket and

- 4 medium-sized russet potatoes - 3 tablespoons olive oil - 4 cloves garlic, minced - 1 teaspoon onion powder - 1 teaspoon paprika - 1 teaspoon dried oregano - ½ teaspoon salt - ¼ teaspoon black pepper - ½ cup grated Parmesan cheese - Fresh parsley, chopped (for garnish) The main ingredients for this recipe start with four medium-sized russet potatoes. They are perfect for wedges because they hold their shape well. You will also need three tablespoons of olive oil. This oil adds flavor and helps the wedges crisp up nicely. Finally, we use four cloves of minced garlic for a bold taste. Next, let's talk about the seasonings. First, one teaspoon of onion powder adds depth. Then, one teaspoon of paprika brings a mild smokiness. One teaspoon of dried oregano adds a hint of earthiness. For balance, we use half a teaspoon of salt and a quarter teaspoon of black pepper. These seasonings enhance the potato flavor. Don't forget the star of the show: half a cup of grated Parmesan cheese. This cheese gives a wonderful salty crunch. Finally, we sprinkle fresh parsley on top for a pop of color and freshness. This simple ingredient list packs a punch, making your air fryer garlic Parmesan potato wedges a crispy delight! First, wash and scrub the potatoes well. This step is key to removing dirt. After cleaning, cut each potato into even wedges. Keeping them similar in size helps them cook evenly. In a large bowl, toss the wedges with three tablespoons of olive oil. Add minced garlic, onion powder, paprika, oregano, salt, and black pepper. Mix until the wedges are well coated. Next, sprinkle in the grated Parmesan cheese and toss again. This cheese gives a nice flavor and crunch. Preheat your air fryer to 400°F (200°C) for about five minutes. Arrange the potato wedges in a single layer in the air fryer basket. If your fryer is small, cook in batches. Cook the wedges for 12-15 minutes. Shake the basket halfway through to ensure they cook evenly. When they turn golden brown and crispy, they are ready to enjoy! To get those perfect, crispy potato wedges, size matters. Cut your potatoes into even wedges. This helps them cook at the same rate. If some are bigger, they may end up soggy. Aim for about 1-inch thick wedges for best results. Shaking the basket during cooking also makes a big difference. Halfway through, pull out the basket and give it a good shake. This allows hot air to circulate around the wedges. It helps them crisp up all around. Trust me; it’s worth the extra step! Want to kick up the flavor a notch? Add some extra spices! A pinch of cayenne pepper brings heat. You can also try smoked paprika for a smoky taste. Feel free to mix and match your favorites. Now, let’s talk herbs. Fresh herbs add a lovely brightness. If you have fresh oregano or parsley, use them! Dried herbs can work too, but fresh usually packs more flavor. Just remember, fresh herbs should be added after cooking for the best taste. {{image_2}} Adding hot sauce gives your potato wedges a spicy kick. You can mix it in with the olive oil before tossing the wedges. This adds heat and makes each bite exciting. You can also use different cheese types for unique flavors. Try cheddar, feta, or even a spicy pepper jack. Each cheese brings its own taste. Experiment with different combinations to find your favorite. If you prefer, you can make an oven-baked version of garlic Parmesan wedges. Preheat your oven to 425°F (220°C). Spread the seasoned wedges on a baking sheet in a single layer. Bake for about 25-30 minutes, flipping halfway through. This method creates a crispy outside and soft inside. Cooking in a traditional deep fryer is another option. Heat oil to 350°F (175°C). Fry the potato wedges in small batches until golden brown. This method gives you a crunchy texture. Just be careful with the hot oil! After you enjoy your Air Fryer Garlic Parmesan Potato Wedges, store any leftovers in an airtight container. This keeps them fresh and prevents them from getting soggy. You can store them in the fridge for up to 3 days. If you want to keep them longer, consider freezing them. Just place the wedges in a freezer-safe bag. Remove as much air as you can before sealing. To bring back the crispiness of your potato wedges, the air fryer is the best choice. Preheat your air fryer to 375°F (190°C). Place the wedges in a single layer and heat for about 5 to 7 minutes. If you don’t have an air fryer, you can use an oven. Spread the wedges on a baking sheet and bake at 400°F (200°C) for about 10-12 minutes. This way, you’ll enjoy that crunch again! For the best potato wedges, I recommend using russet potatoes. They have a high starch content, which makes them fluffy inside and crispy outside. Other good choices include Yukon Gold and red potatoes. These varieties hold their shape well during cooking and provide great flavor. You can tell the potato wedges are done when they turn golden brown and crisp. The edges should look crunchy, and a fork should slide easily into the flesh. If you want extra crispiness, check for a nice, golden color all around. Yes, you can freeze garlic Parmesan potato wedges. First, let them cool completely. Then, place them in a single layer on a baking sheet and freeze until solid. After that, transfer them to an airtight container or freezer bag. To reheat, bake them in the oven or air fryer for best results. This blog covered how to make tasty garlic Parmesan potato wedges. We discussed the main ingredients like russet potatoes, olive oil, and garlic. You learned step-by-step instructions, tips for crispiness, and fun variations. I hope you feel ready to try these simple recipes. Remember, cooking is about enjoyment and creativity. Have fun in the kitchen and enjoy your tasty creations!

Air Fryer Garlic Parmesan Potato Wedges Crispy Delight

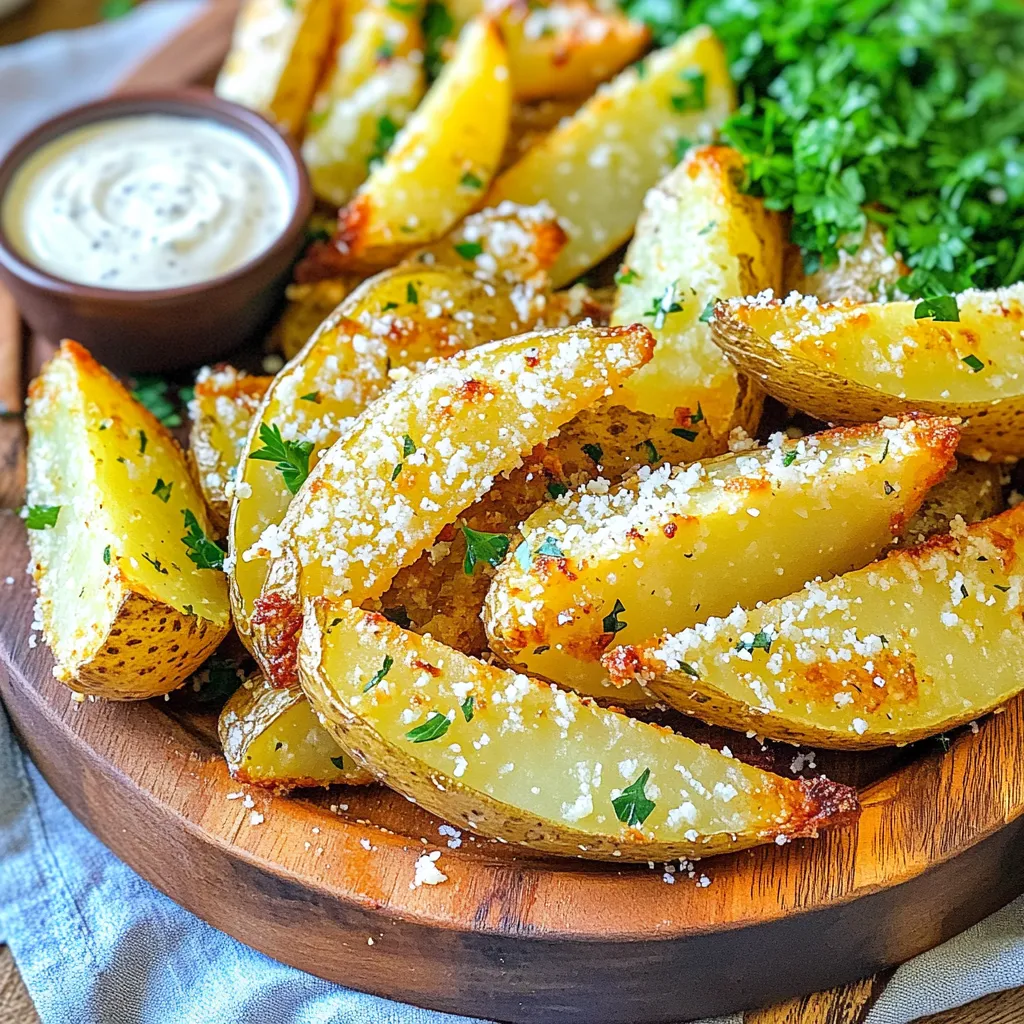
Craving a snack that’s both tasty and simple? Look no further! My Air Fryer Garlic Parmesan Potato Wedges are the

- 1 cup rolled oats - 1 cup unsweetened almond milk - ½ cup pure pumpkin puree - 2 tablespoons maple syrup - 1 teaspoon pumpkin pie spice - ¼ teaspoon salt - ½ teaspoon vanilla extract - ⅓ cup chopped pecans (toasted for extra flavor) These key ingredients make this dish special. Rolled oats provide a hearty base. Almond milk adds creaminess without dairy. Pumpkin puree gives a rich, autumn flavor. Maple syrup brings sweetness, while pumpkin pie spice adds warmth. Salt enhances the taste, and vanilla extract gives a hint of sweetness. Finally, pecans add a nice crunch! - Whipped coconut cream - Additional pecans - A sprinkle of cinnamon You can customize your oats with these toppings. Whipped coconut cream adds a light, fluffy texture. Extra pecans boost the crunch factor. A sprinkle of cinnamon deepens the flavor and adds warmth. You can mix and match these toppings to suit your taste. Each serving contains about: - Calories: 350 - Protein: 8 grams - Carbohydrates: 45 grams - Fiber: 7 grams - Sugar: 10 grams - Fat: 15 grams This dish is not only tasty but also healthy. It's a good source of fiber and protein. The healthy fats from pecans keep you full longer. Enjoying Pumpkin Pecan Pie Overnight Oats is a smart choice for breakfast! To make the oat mixture, start with a medium bowl. Add 1 cup of rolled oats and 1 cup of unsweetened almond milk. Next, mix in ½ cup of pure pumpkin puree. Then, add 2 tablespoons of maple syrup for sweetness. Sprinkle in 1 teaspoon of pumpkin pie spice. Don’t forget a ¼ teaspoon of salt and ½ teaspoon of vanilla extract. Stir everything together. Make sure the oats are well coated with the wet mix. Finally, fold in ⅓ cup of chopped pecans. This adds a nice crunch. Once you prepare the oat mixture, divide it into two jars. Use airtight containers for easy storage. Seal the jars tightly. Place them in the fridge overnight. This allows the oats to soak up the liquid. It also helps the flavors blend well. If you plan to eat them later, store them for up to five days in the fridge. For the best overnight oats, use fresh ingredients. Make sure your pumpkin puree is pure and not a mix. Adjust the maple syrup to suit your taste. If you want a thicker texture, add more oats. For a creamier texture, use more almond milk. In the morning, stir the oats well. Add a splash of almond milk if they are too thick. Top with whipped coconut cream and extra pecans. A sprinkle of cinnamon adds a nice touch. Enjoy your delicious pumpkin pecan pie overnight oats! To boost the flavor, consider toasting the pecans before adding them. This small step adds a nice crunch and a warm flavor. You can also add a dash of nutmeg for a deeper spice profile. If you want a creamier texture, mix in a little more almond milk in the morning. This makes the oats softer and more enjoyable to eat. One common mistake is not mixing the ingredients well. If you skip this step, some oats may not absorb the flavors. Be sure to stir until everything is combined. Another mistake is not letting the oats soak long enough. They need at least four hours, but overnight is best. This allows the oats to soften and absorb all the goodness. When it's time to serve, give the oats a good stir. This helps to mix in any settled ingredients. Top with whipped coconut cream for a sweet touch. You can also add more chopped pecans or a sprinkle of cinnamon. This adds flavor and makes your dish look great. Serve it in a clear jar to show off those lovely layers. {{image_2}} You can easily make this recipe dairy-free and vegan. Just use almond milk, as I listed. It already fits the bill. You can also swap maple syrup for agave syrup for a different sweet taste. If you want a creamier texture, try adding coconut cream instead of dairy cream. This keeps it vegan and rich! Want to change up the flavor? You can add things like cocoa powder or even peanut butter for a twist. If you love spices, add a pinch of nutmeg or a dash of ginger. You can also mix in dried fruits like cranberries or raisins. These swaps make your oats unique and fun every time! If you want to try different grains, use quinoa or buckwheat instead of oats. Both add a nice texture. For nut options, swap pecans for walnuts or almonds. Toast them for extra crunch and flavor. This way, you keep the dish exciting and customize it to your taste! Overnight oats can last up to five days in the fridge. Keep them in airtight containers. This way, they stay fresh and tasty. After a few days, the oats may lose some texture. If you notice any off smells, it’s best to toss them. You can freeze overnight oats for up to three months. To freeze, use freezer-safe containers. Leave some space at the top for expansion. When you’re ready to eat, move them to the fridge overnight. This helps them thaw gently for the next day. If you prefer warm oats, you can reheat them. Place the oats in a bowl. Add a splash of almond milk for moisture. Microwave them for about 30 seconds. Stir and check the temperature. Heat more if needed, but don’t overcook. Enjoy your warm pumpkin pecan pie oats! Yes, you can use quick oats. They will make the oats softer and creamier. Quick oats absorb liquid faster than rolled oats. This change may alter the texture slightly. If you prefer a thicker mix, stick with rolled oats. To make this recipe gluten-free, choose certified gluten-free oats. Regular oats may have gluten due to cross-contamination. Check the labels when buying your ingredients. All other ingredients in this recipe are naturally gluten-free. You can serve these oats both ways. They taste great cold after refrigeration. If you prefer them warm, just heat them up in the microwave. Add a splash of almond milk for extra creaminess if needed. Enjoy them however you like! In this post, we explored how to make pumpkin pecan pie overnight oats. We covered key ingredients and tasty toppings. I provided clear steps to prepare and store your oats. You learned tips to enhance flavor and avoid common mistakes. Options for dairy-free and vegan diets were also shared. Lastly, I discussed how to store and reheat your oats. These oats are easy, delicious, and great for any day. Enjoy making them!

Pumpkin Pecan Pie Overnight Oats Healthy Breakfast Delight

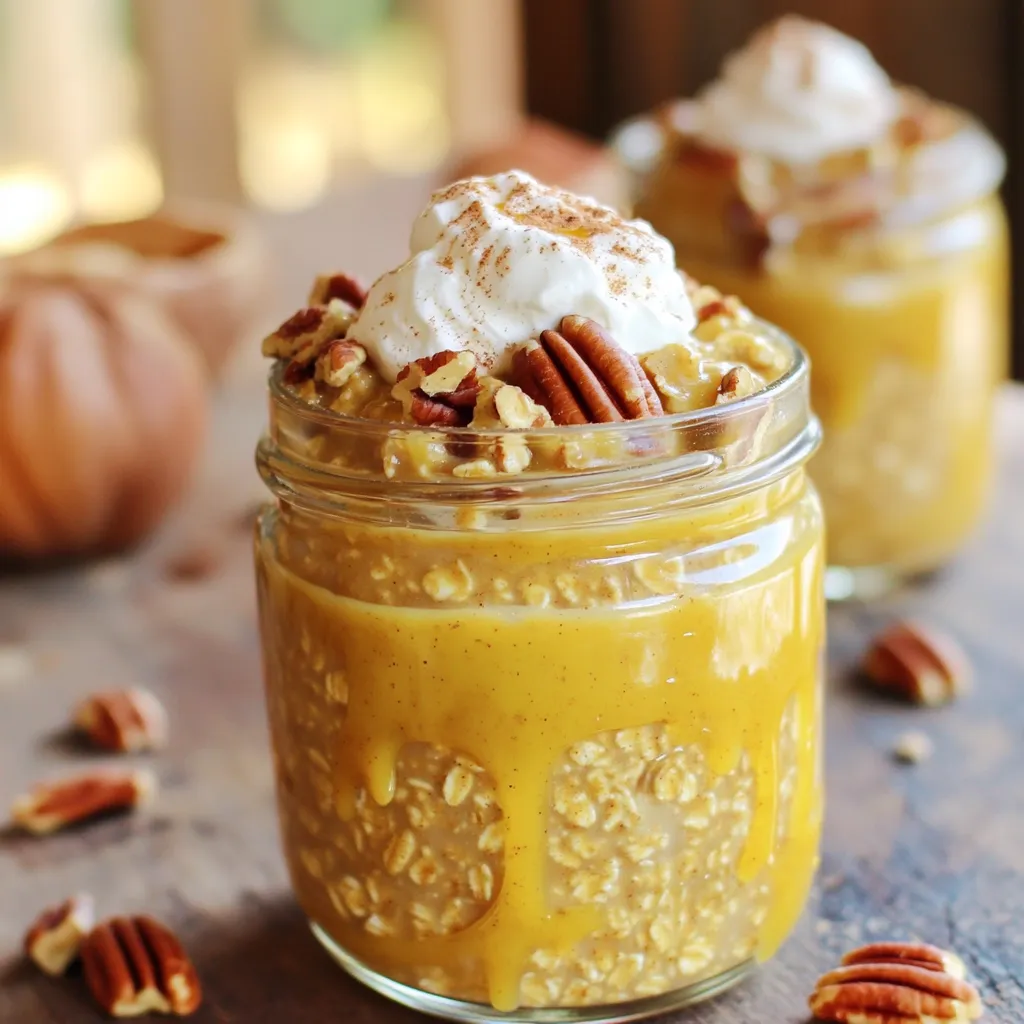
Start your day deliciously with my Pumpkin Pecan Pie Overnight Oats! This healthy breakfast delight packs all the warm spices

Here is what you need for the No-Bake Peppermint Bark Oreo Cheesecake: - 24 Oreo cookies, crushed - ½ cup unsalted butter, melted - 16 oz cream cheese, softened - ½ cup powdered sugar - 1 tsp vanilla extract - 1 cup heavy whipping cream - ½ cup crushed peppermint candies or candy canes - 1 cup semi-sweet chocolate chips - ½ cup white chocolate chips - Pinch of sea salt Each ingredient plays a key role in making this cheesecake a delight. The Oreo cookies create a rich crust, giving a great chocolate flavor. Unsalted butter helps bind the crust together. Cream cheese makes the filling creamy and smooth. Powdered sugar adds sweetness, while vanilla extract gives a nice aroma. Heavy whipping cream adds fluffiness to the cheesecake. Crushed peppermint candies give it that holiday cheer. The semi-sweet and white chocolate chips add layers of flavor. Finally, sea salt balances the sweetness, making each bite memorable. Gather these ingredients and get ready to create a festive treat! 1. Mix the crushed cookies with melted butter. Take 24 crushed Oreo cookies and ½ cup of melted unsalted butter. Stir them together in a medium bowl until combined. The mixture should look like wet sand. 2. Press the mixture into the pan. Take a 9-inch springform pan and press the mixture firmly into the bottom. Make sure it is even. This helps form a strong base. 3. Chill the crust. Place the pan in the refrigerator for about 15 minutes. This helps the crust to set and become firm. 1. Beat cream cheese with sugar and vanilla. In a large bowl, take 16 oz of softened cream cheese, ½ cup of powdered sugar, and 1 tsp of vanilla extract. Beat them together until smooth and creamy. This will be the base of your cheesecake. 2. Whip heavy cream to stiff peaks. In another bowl, pour in 1 cup of heavy whipping cream. Whip it with a mixer until stiff peaks form. This should take about 3 to 5 minutes. 3. Fold cream into the cheese mixture. Carefully fold the whipped cream into the cream cheese mixture. Use a spatula and mix gently. This keeps the filling light and fluffy. 1. Stir in crushed peppermint. Take ½ cup of crushed peppermint candies or candy canes and stir them into the cheesecake filling. Set some aside for later. 2. Pour filling over crust. Remove the crust from the fridge and pour the cheesecake filling over it. Smooth the top with a spatula for an even layer. 3. Drizzle melted chocolate layers. Melt 1 cup of semi-sweet chocolate chips in a microwave-safe bowl. Do this in 30-second bursts, stirring in between. After cooling slightly, drizzle it over the cheesecake. Repeat with ½ cup of white chocolate chips for a nice marbled look. 4. Add reserved peppermint. Sprinkle the reserved crushed peppermint on top for a festive finish. 5. Chill to set. Cover the cheesecake with plastic wrap and let it set in the fridge for at least 4 hours or overnight for best results. To whip cream well, chill your bowl and beaters. Start on low speed, then increase. This helps form stiff peaks. For a smooth cream cheese mixture, make sure the cream cheese is soft. Beat it with powdered sugar and vanilla until creamy. No lumps should remain. Garnish each slice with a dollop of whipped cream. Add a sprinkle of crushed peppermint on top. Use festive serving dishes to enhance the holiday feel. A red or green plate can make the dessert pop. Do not overmix your ingredients. This can make the cheesecake dense. Mix just until combined. Also, chill your cheesecake long enough. It needs at least four hours to set. For best results, let it chill overnight. {{image_2}} You can change the cookies in the crust. Try using chocolate graham crackers or mint cookies. These options add new tastes and textures. You can also jazz up the cheesecake itself. Mixing in coffee or melted chocolate gives it a rich twist. This can make each bite exciting and unique. For a gluten-free version, swap out the Oreos for gluten-free cookies. Many brands offer tasty options that work well. If you want a vegan cheesecake, use dairy-free cream cheese. You can also replace heavy cream with coconut cream. This keeps the flavor rich and creamy while making it dairy-free. Seasonal flavors can make this cheesecake even more fun. In the fall, use pumpkin spice for a cozy vibe. For winter holidays, try adding eggnog flavor. You can also use gingerbread spices for a festive touch. These twists keep the recipe fresh and exciting every time you make it. To keep your no-bake peppermint bark Oreo cheesecake fresh, store it in the fridge. Place it in an airtight container. This helps prevent the cheesecake from absorbing other odors. If you do not have a container, cover it tightly with plastic wrap. This way, it stays fresh and tasty. You can freeze cheesecake if you want to save some for later. First, make sure it is fully set. Once it's ready, wrap it well in plastic wrap. Then, place it in a freezer-safe container. This keeps it safe from freezer burn. When you want to eat it, take it out and let it thaw in the fridge. This usually takes about 4-6 hours. For quicker thawing, you can leave it at room temperature for about an hour. In the fridge, your cheesecake lasts about 5 days. If you freeze it, it can last up to 2 months. Just remember to check for any signs of freezer burn before you serve it. Enjoy your cheesecake at its best! Yes, you can make this cheesecake ahead of time. It stores well in the fridge. I recommend making it a day before you plan to serve it. This allows the flavors to blend nicely. To store, cover it with plastic wrap or foil. Keep it in an airtight container to keep it fresh. If you want a dairy-free option, use a vegan cream cheese. Brands like Tofutti or Kite Hill work well. You can also try using silken tofu. Blend it until smooth. This gives you a nice creamy texture. The cheesecake needs at least 4 hours to set. For best results, let it chill overnight. This helps it firm up nicely. It makes slicing easier and gives you a better texture. This blog post covered how to make a delicious Oreo cheesecake. We discussed all the ingredients you'll need and guided you through each step. You learned some tips for perfecting the texture and preventing common mistakes. We also explored variations, storage tips, and answered your questions about this treat. With this knowledge, you can create a cheesecake that's both tasty and impressive. Enjoy baking and sharing your creation with family and friends. Happy cheesecake making!

No-Bake Peppermint Bark Oreo Cheesecake Delight

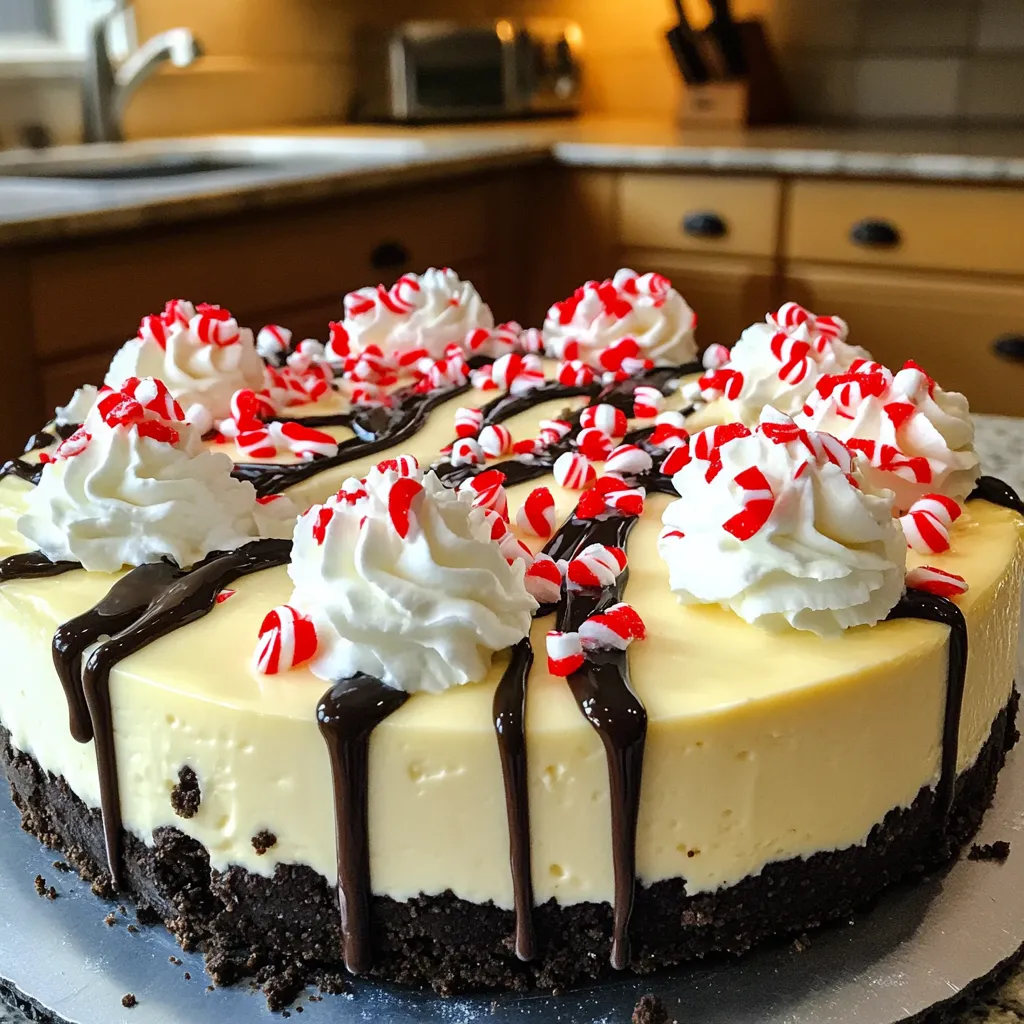
Looking to impress your friends this holiday season? Try making my No-Bake Peppermint Bark Oreo Cheesecake Delight! It’s easy and

Older posts
Newer posts
← Previous Page1 … Page9 Page10 Page11 … Page144 Next →

dsad

© 2025 So Yum Recipes • Built with GeneratePress

Our Policies

  • Copyright Policy
  • Cookie Policy
  • GDPR Policy
  • Privacy Policy
  • Disclaimer
  • Terms Of Use

More Information

  • Home
  • About
  • Contact
  • Appetizers
  • Dessert
  • Dinner
  • Drinks
©2025, So Yum Recipes About Back To Top