Craving something sweet? Look no further than these Caramel Apple Cheesecake Bars! With a creamy filling and crunchy crust, they are the perfect treat for any occasion. I’ll guide you through simple steps, ingredient notes, and tasty variations. Whether you want to impress guests or indulge yourself, these bars deliver. Let’s dive into this delightful recipe that combines classic flavors for a dessert everyone will love!
Ingredients
Complete List of Ingredients
– 2 cups graham cracker crumbs
– 1/2 cup unsalted butter, melted
– 1/4 cup granulated sugar
– 16 oz cream cheese, softened
– 3/4 cup brown sugar, packed
– 2 large eggs
– 1 teaspoon vanilla extract
– 2 medium apples, peeled, cored, and diced (preferably Granny Smith)
– 1 teaspoon cinnamon
– 1/2 teaspoon nutmeg
– 1 cup caramel sauce (store-bought or homemade)
Ingredient Notes
You can swap granulated sugar for coconut sugar for a healthier option. For a gluten-free treat, use gluten-free graham cracker crumbs. If you want to cut sugar, use a sugar substitute. You can also use honey or maple syrup in place of brown sugar. For a richer taste, consider adding cream cheese with a flavor, like vanilla or caramel.
Recommended Tools for Preparation
To make these bars, gather these tools:
– 9×13-inch baking pan
– Parchment paper
– Mixing bowls
– Electric mixer
– Spatula
– Measuring cups and spoons
– Peeler and knife for apples
These tools make the process easier and more enjoyable. Happy baking!
Step-by-Step Instructions
Preparation of Ingredients
Gather all your ingredients before starting. This makes the process smoother. You will need:
– 2 cups graham cracker crumbs
– 1/2 cup unsalted butter, melted
– 1/4 cup granulated sugar
– 16 oz cream cheese, softened
– 3/4 cup brown sugar, packed
– 2 large eggs
– 1 teaspoon vanilla extract
– 2 medium apples, peeled, cored, and diced
– 1 teaspoon cinnamon
– 1/2 teaspoon nutmeg
– 1 cup caramel sauce
Make sure your cream cheese is soft. It helps in mixing and makes the filling creamy.
Creating the Graham Cracker Crust
In a medium bowl, mix graham cracker crumbs, melted butter, and sugar. Stir until the crumbs look wet and sandy.
Next, press the mixture firmly into the bottom of a 9×13-inch baking pan. Make sure it’s even and packed well. This crust will hold all the yummy filling.
Bake the crust in a preheated oven at 325°F (160°C) for 10 minutes. When it’s done, let it cool slightly.
Preparing the Cheesecake Filling
In a large bowl, beat the softened cream cheese with an electric mixer. Mix until it is smooth and fluffy. Add brown sugar gradually, mixing well each time.
Next, add the eggs one at a time, mixing after each one. Then, stir in vanilla extract, cinnamon, and nutmeg. Mix until everything is smooth.
Now, gently fold in the diced apples. This adds a nice texture and flavor to your filling.
Baking and Cooling Instructions
Pour the cheesecake filling over your cooled crust. Spread it evenly with a spatula.
Bake it again for 30-35 minutes. You want the center to be set but still jiggle a bit when you shake it.
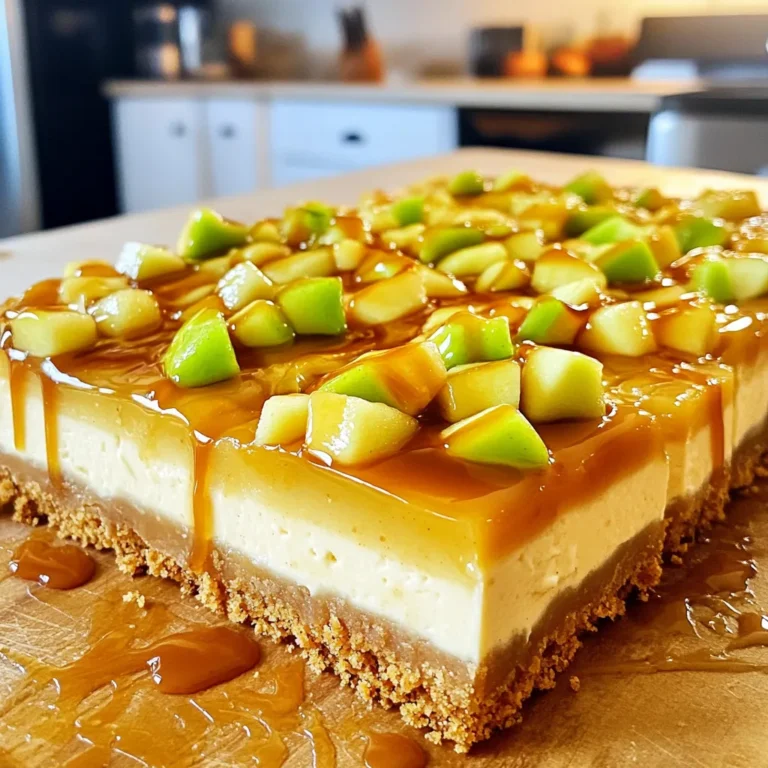
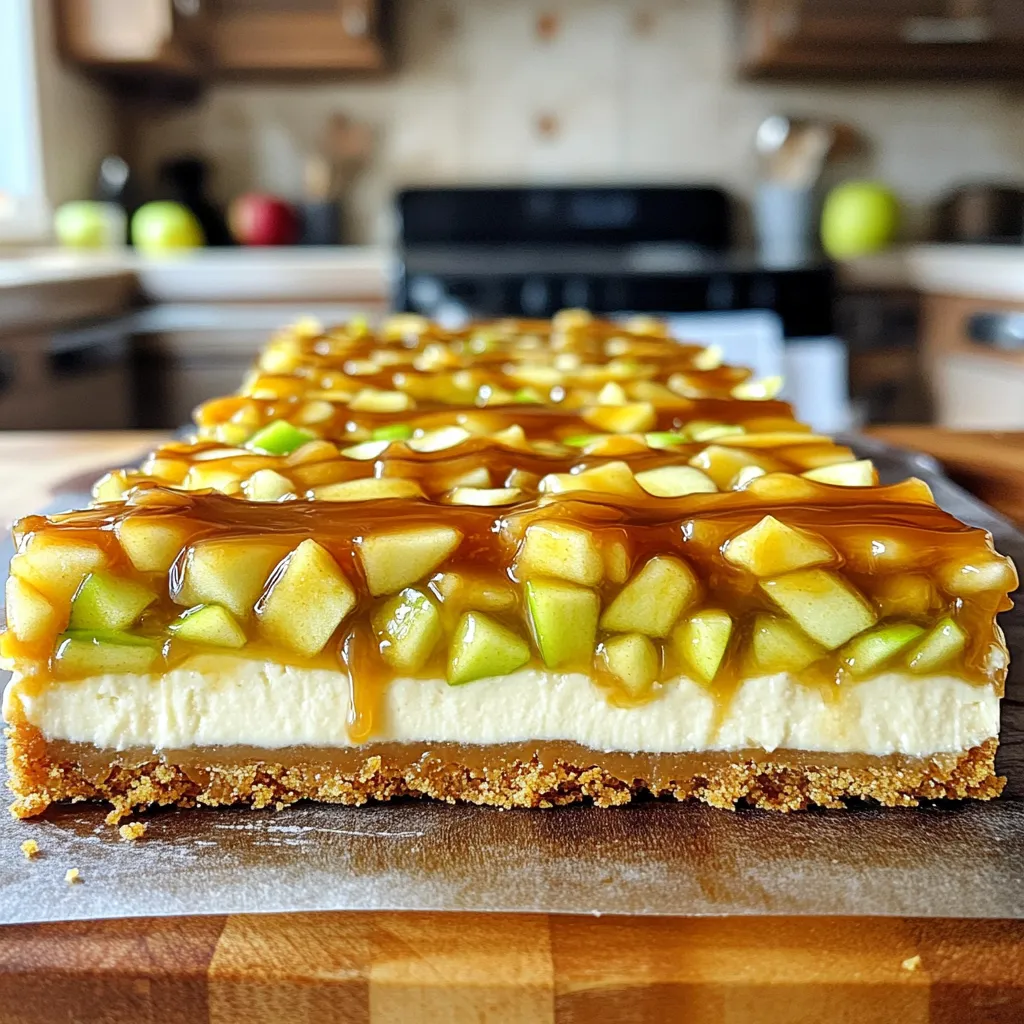
After baking, let it cool to room temperature. Drizzle caramel sauce over the top. Then, chill it in the fridge for at least 2 hours. This helps the bars set nicely.
Once chilled, lift the bars out of the pan using the parchment paper. Slice them into squares and enjoy!
Tips & Tricks
How to Achieve the Perfect Cheesecake Texture
To get a smooth and creamy cheesecake, use softened cream cheese. Let it sit at room temperature before mixing. This helps avoid lumps. Beat the cream cheese until it’s silky. Add sugar gradually to mix well. Also, add eggs one at a time. This method keeps the texture light. Avoid overmixing to prevent air bubbles. Air bubbles can cause cracks when baking.
Common Mistakes to Avoid
One common mistake is not measuring ingredients correctly. Use a kitchen scale for precise amounts. Another mistake is baking at too high a temperature. This can lead to burnt edges and a raw center. Always pre-bake the crust; skipping this step makes the base soggy. Lastly, don’t rush the cooling process. Letting it cool in the pan helps set the bars perfectly.
Presentation and Serving Suggestions
For a beautiful presentation, cut the bars into even squares. Drizzle caramel sauce on top for a sweet touch. Add a sprinkle of cinnamon for extra flair. You can serve these bars on a colorful platter. Garnish with apple slices for decoration. Serve chilled or at room temperature for the best taste. Pair with whipped cream or vanilla ice cream for a delightful treat.
Variations
Gluten-Free Caramel Apple Cheesecake Bars
To make gluten-free caramel apple cheesecake bars, swap the graham crackers. Use gluten-free cookie crumbs or almond flour instead. Combine these with melted butter and sugar just like the original recipe. This change keeps the bars tasty while meeting gluten-free needs.
Flavor Variations
You can add different flavors to the cheesecake. Try adding chopped nuts like walnuts or pecans for crunch. They will give a nice texture. You can also mix in chocolate chips for a sweet twist. For spices, consider using pumpkin spice or ginger for a warm flavor. These variations keep the recipe fresh and exciting.
Alternative Toppings and Serving Ideas
While caramel sauce is a must, you can try other toppings too. A sprinkle of sea salt can enhance the caramel flavor. Whipped cream on top adds a light touch. Fresh apple slices make a lovely garnish. You could also serve these bars with vanilla ice cream for extra creaminess. Each of these ideas makes the dessert even better!
Storage Info
Best Practices for Storing Cheesecake Bars
To keep your caramel apple cheesecake bars fresh, store them in the fridge. Use an airtight container to prevent drying out. If you cut the bars, cover the exposed edges well. This helps keep the flavor strong and the texture nice. They will stay fresh for about five days in the fridge.
How to Freeze for Later Use
You can freeze these cheesecake bars for future treats. First, let the bars cool completely. Then, slice them into individual pieces. Wrap each piece tightly in plastic wrap. Place the wrapped bars in a freezer-safe bag or container. They will stay good in the freezer for up to three months. When you want one, just thaw it in the fridge overnight.
Storing Leftovers
If you have any leftovers, store them properly. Place the remaining bars in an airtight container. Keep them in the fridge. If you do not plan to eat them soon, consider freezing. This way, you can enjoy them later without losing flavor or texture.
FAQs
Can I make these cheesecake bars in advance?
Yes, you can make these cheesecake bars a day ahead. This helps the flavors blend well. After cooling, store them in the fridge. Cover them tightly with plastic wrap. This way, they stay fresh and tasty.
What type of apples are best for this recipe?
Granny Smith apples work best for this recipe. They add a nice tartness that balances the sweetness. You can also use Honeycrisp apples for a sweeter option. Just make sure the apples are firm and crisp. This ensures they hold their shape when baked.
How do I make homemade caramel sauce?
To make homemade caramel sauce, start by heating 1 cup of sugar in a pot over medium heat. Stir the sugar until it melts and turns a golden brown. Then, add 1/2 cup of heavy cream slowly. Stir until smooth. Finally, add a pinch of salt for flavor. Let it cool before using.
How long do caramel apple cheesecake bars last?
These cheesecake bars last up to five days in the fridge. Keep them in an airtight container for best results. If you want to enjoy them longer, consider freezing them. They can last up to three months in the freezer.
Can I use flavored cream cheese for extra taste?
Yes, you can use flavored cream cheese. Options like cinnamon or caramel cream cheese can enhance the flavor. Just keep the same amount as the recipe states. This little change adds a fun twist to your bars.
This blog post covered how to make delicious caramel apple cheesecake bars. We explored all the ingredients, including options for sweeteners and gluten-free choices. I shared step-by-step instructions and tips for perfecting your cheesecake. You learned about variations and how to store these treats for later.
Now, you’re ready to create your own yummy bars. Don’t hesitate to experiment with flavors and toppings. Enjoy the process, and share your tasty results!

