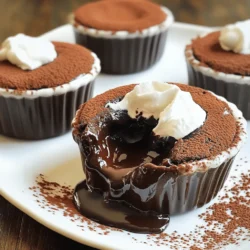
Craving something sweet and rich? Chocolate lava cakes are the answer! With their gooey, molten center, these treats are sure to please any chocolate lover. In this simple guide, I’ll share my easy recipe, must-have ingredients, and helpful tips for perfect results every time. Whether you’re making them for a special occasion or just a cozy night at home, let’s dive into the delicious world of chocolate lava cakes!
Ingredients
Main Ingredients for Chocolate Lava Cakes
To make these rich chocolate lava cakes, gather these key ingredients:
– 1/2 cup unsalted butter (plus extra for greasing)
– 1 cup semi-sweet chocolate chips
– 2 large eggs
– 2 large egg yolks
– 1/4 cup granulated sugar
– 2 tablespoons all-purpose flour
– 1 teaspoon vanilla extract
– A pinch of sea salt
– Cocoa powder (for dusting)
These ingredients create a delightful cake with a gooey center. The butter and chocolate form the base, while eggs add structure. The sugar sweetens it up, and flour helps it rise.
Optional Toppings and Garnishes
You can make your lava cakes even better with these toppings:
– Whipped cream
– Vanilla ice cream
– Fresh berries
– Chocolate sauce
These extras add flavor and texture. A scoop of ice cream contrasts the warm cake, while berries add freshness.
Recommended Tools and Equipment
For this recipe, you will need:
– Ramekins (4, for baking)
– Baking sheet
– Microwave-safe bowl
– Whisk
– Spatula
– Knife
These tools help you prepare and bake the cakes. Ramekins hold the batter, while the baking sheet catches any spills. A whisk mixes the batter smoothly, and a knife helps you serve the cakes.
For the full recipe, refer to the detailed instructions above.
Step-by-Step Instructions
Prepping Your Ingredients
To start, gather all your ingredients. You will need:
– 1/2 cup unsalted butter (plus extra for greasing)
– 1 cup semi-sweet chocolate chips
– 2 large eggs
– 2 large egg yolks
– 1/4 cup granulated sugar
– 2 tablespoons all-purpose flour
– 1 teaspoon vanilla extract
– A pinch of sea salt
– Cocoa powder (for dusting)
– Optional: Whipped cream or vanilla ice cream for serving
Grease four ramekins with butter. Dust them with cocoa powder to prevent sticking.
Mixing the Batter
Now, let’s mix the batter. In a microwave-safe bowl, add the butter and chocolate chips. Heat this in the microwave. Do this in 30-second bursts. Stir after each burst. Keep going until it’s smooth.
In another bowl, whisk the eggs, egg yolks, and sugar. Whisk until it looks pale and thick. Add the vanilla and sea salt, then mix well. Slowly add the melted chocolate to this egg mixture. Be gentle; we want to keep it fluffy.
Next, sift the flour over the chocolate mix. Fold it in gently until everything is combined.
Baking the Lava Cakes
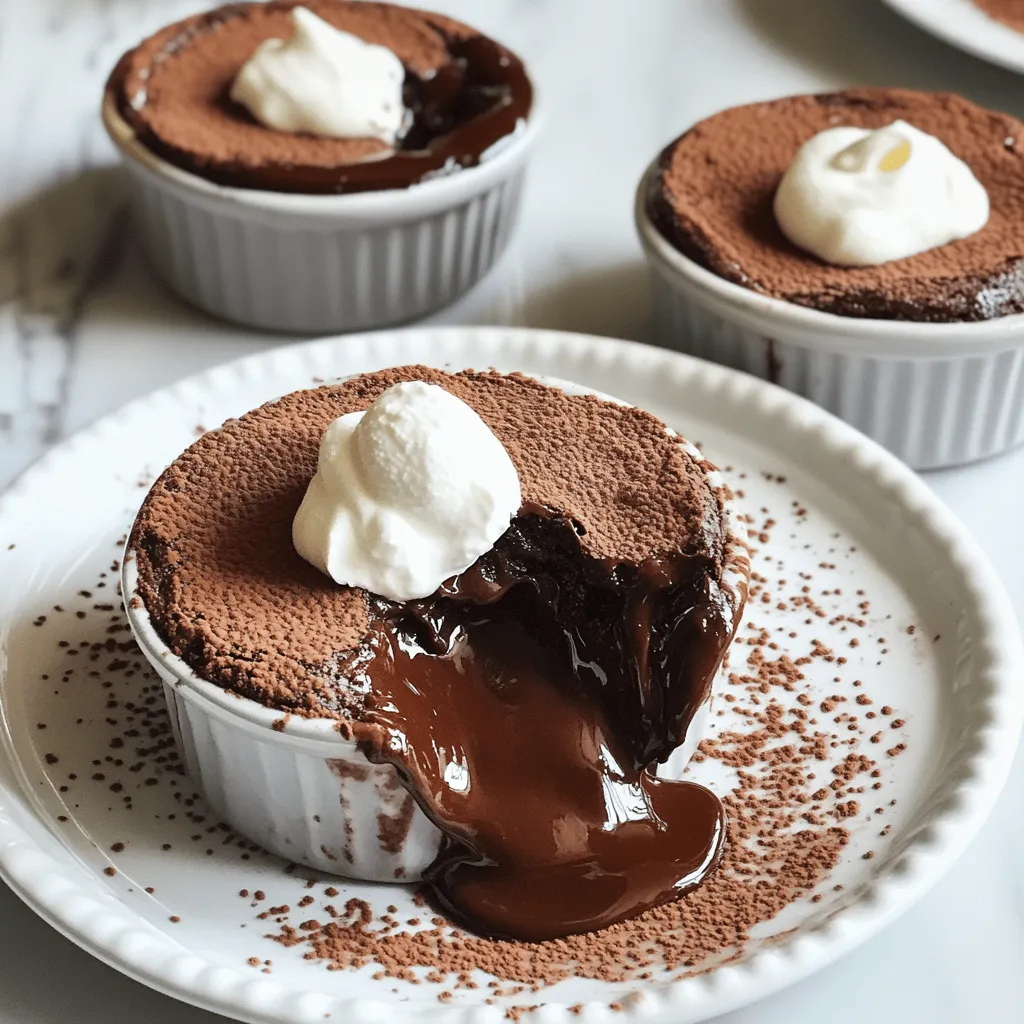
Now, it’s time to bake. Divide the batter among the ramekins. Fill them about three-quarters full. Place the ramekins on a baking sheet. Bake in your preheated oven at 425°F (220°C) for 12-14 minutes. The edges should be firm, but the center must stay soft.
After baking, let them sit for one minute. Carefully run a knife around the edges to loosen each cake. Invert each ramekin onto a plate. Wait a few seconds before lifting the ramekin.
Serve warm, and feel free to add whipped cream or vanilla ice cream on top. Enjoy your delicious creation! For the complete recipe, check out the Full Recipe section.
Tips & Tricks
How to Achieve the Perfect Lava Center
To get the best lava center, watch your bake time. Bake for 12 to 14 minutes. The edges should set, but the middle must stay soft. Use a timer to avoid overbaking. Let the cakes cool for just one minute before serving. This helps keep the center runny. If you want more lava, bake less. A little practice helps perfect your timing.
Common Mistakes to Avoid
One common mistake is not greasing the ramekins well. If the cakes stick, they won’t come out right. Dusting with cocoa powder helps too. Another mistake is mixing too much. Fold gently to keep air in the batter. This creates a light texture. Lastly, don’t skip the preheating step. A hot oven ensures even baking.
Serving Suggestions for Chocolate Lava Cakes
Serve these cakes warm for the best taste. Top with a scoop of vanilla ice cream for a creamy contrast. You can also add a dollop of whipped cream. Fresh berries like strawberries or raspberries add a nice touch. Dust with powdered sugar for a pretty finish. For a twist, pair with a shot of espresso or a rich chocolate sauce. Check out the Full Recipe for more ideas!
Variations
Gluten-Free Chocolate Lava Cakes
You can make a gluten-free version easily. Just swap all-purpose flour for gluten-free flour. Use a blend that works well in baking. The taste remains rich and chocolaty. You’ll still enjoy that gooey center. Follow the same steps in the Full Recipe. It’s a great option for those who need it.
Different Flavor Profiles (e.g., Raspberry, Espresso)
Want to mix things up? Try adding flavors like raspberry or espresso. For raspberry, fold in fresh or frozen berries. They add a nice tartness that pairs well with chocolate. For espresso, add a teaspoon of instant coffee to the melted chocolate. It deepens the flavor and gives it a kick. Each variation offers a new taste adventure.
Chocolate Lava Cake Muffins
How about turning your lava cakes into muffins? Pour the batter into a muffin tin instead of ramekins. Bake for about 10-12 minutes. They won’t have the same molten center, but they’ll still be delicious. Top with a dusting of powdered sugar or a drizzle of chocolate. These muffins are perfect for a treat on the go!
Storage Info
How to Store Leftover Lava Cakes
To store leftover lava cakes, let them cool first. Place them in an airtight container. Keep the container in the fridge for up to three days. If you want to keep them longer, freezing is best.
Reheating Instructions
When you are ready to enjoy your leftover cakes, reheat them gently. Preheat your oven to 350°F (175°C). Place the cakes on a baking sheet. Heat for about 10 minutes, or until warm. You can also use a microwave. Heat for 15 to 30 seconds until warm.
Freezing Chocolate Lava Cakes
To freeze your lava cakes, wrap each one tightly in plastic wrap. Then, place them in a freezer-safe bag or container. They can stay frozen for up to three months. When you want to eat one, let it thaw in the fridge overnight. Then, reheat as mentioned above. Enjoy your delicious chocolate lava cakes anytime with these easy storage methods! For the full recipe, check out the earlier section.
FAQs
How do you know when chocolate lava cakes are done?
You can tell lava cakes are done by checking the edges. They should be firm, while the center remains soft. Look for a slight dome on top. If you insert a toothpick, it should come out with some gooey chocolate. Bake them for 12-14 minutes at 425°F (220°C). If you bake too long, they will not have that oozy center.
Can I make chocolate lava cakes ahead of time?
Yes, you can prepare lava cakes ahead of time. Mix the batter and pour it into greased ramekins. Cover them and store in the fridge for up to 24 hours. When you are ready, bake them straight from the fridge. Just add a couple of extra minutes to the baking time. This way, you can enjoy fresh cakes without much hassle!
What can I substitute for eggs in chocolate lava cakes?
You can use several egg substitutes. For each egg, use 1/4 cup of unsweetened applesauce or 1/4 cup of silken tofu. Another option is to mix 1 tablespoon of ground flaxseed with 2.5 tablespoons of water. Let the mixture sit until it thickens. This will help bind the ingredients for the lava cakes. Remember, the texture may be slightly different, but they will still be tasty!
For the full recipe, check out the complete guide.
In this post, we explored making chocolate lava cakes. We covered key ingredients, steps for perfect baking, and tips to avoid mistakes. Remember, a gooey center is the goal. Try different flavors and keep it simple. Store your leftovers properly to enjoy later. Making these cakes can bring joy to your table. With practice, you’ll master this treat. Enjoy impressing your friends and family with your tasty creations.